Category Archives: blog

Who doesn’t love the beach!?

Hey Guys!,

Who Doesn’t love the beach!? Today I am sharing with you a couple of cards featuring the Stamp set Friends Are Like Seashells from Stampin’ Up! As soon as I saw this set in the catalog, I knew I had to get it! I absolutely love the beach, sand, sea shells and listening to the waves! Sitting in a chair with an umbrella with a book is my favorite thing! Of course, if there were a man bringing me drinks I would be in heaven! LOL

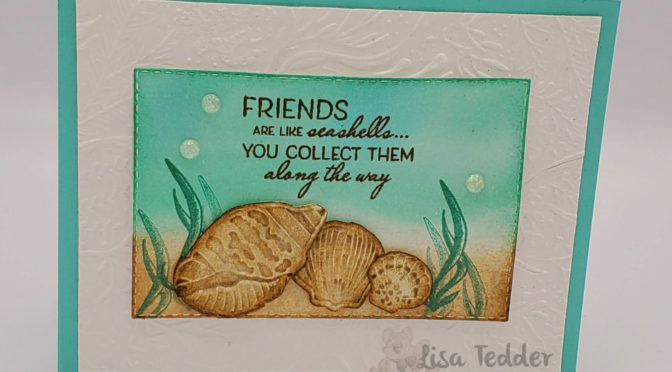
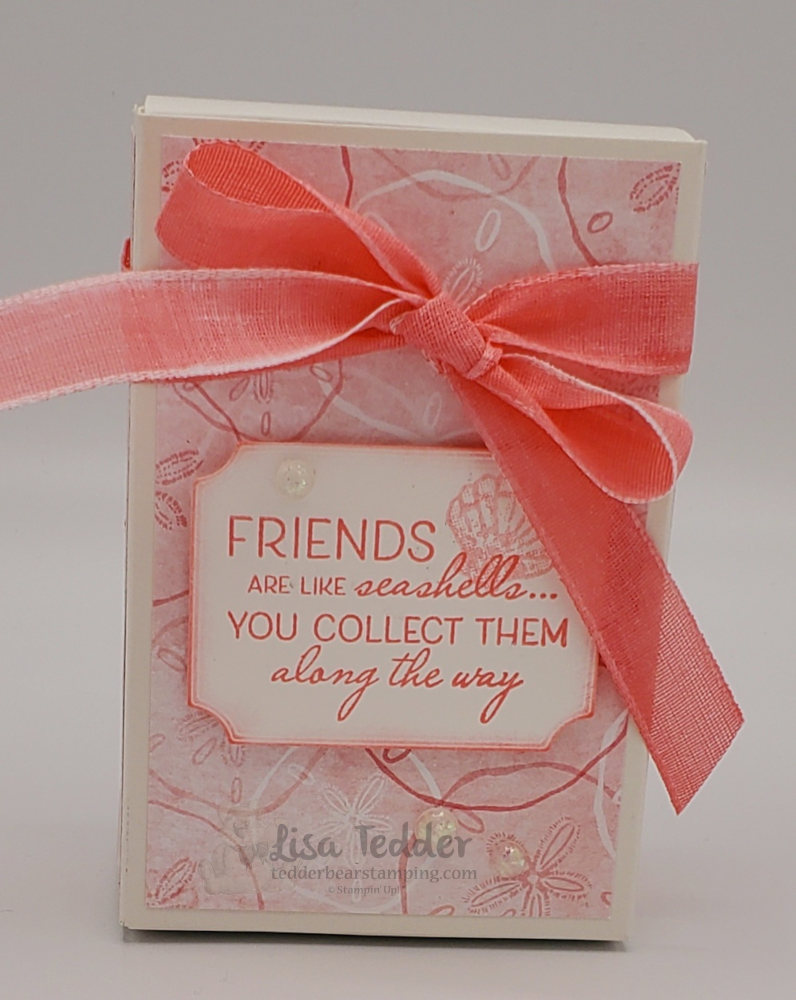
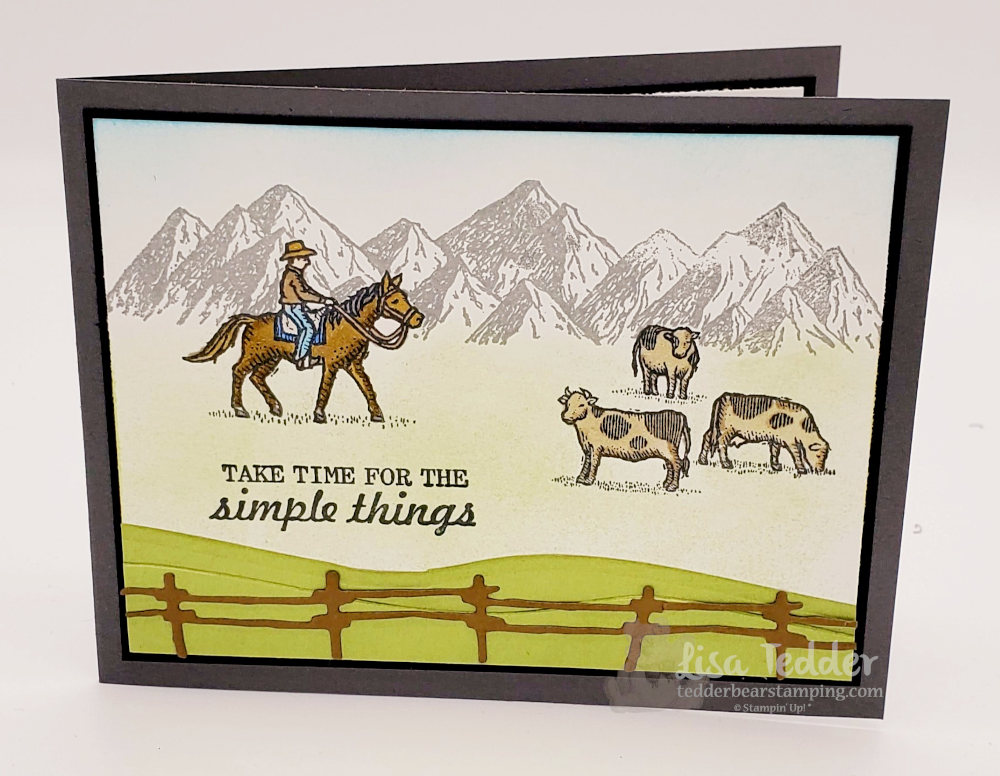
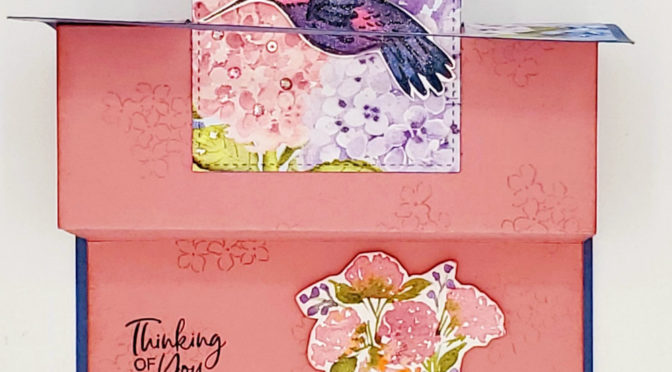
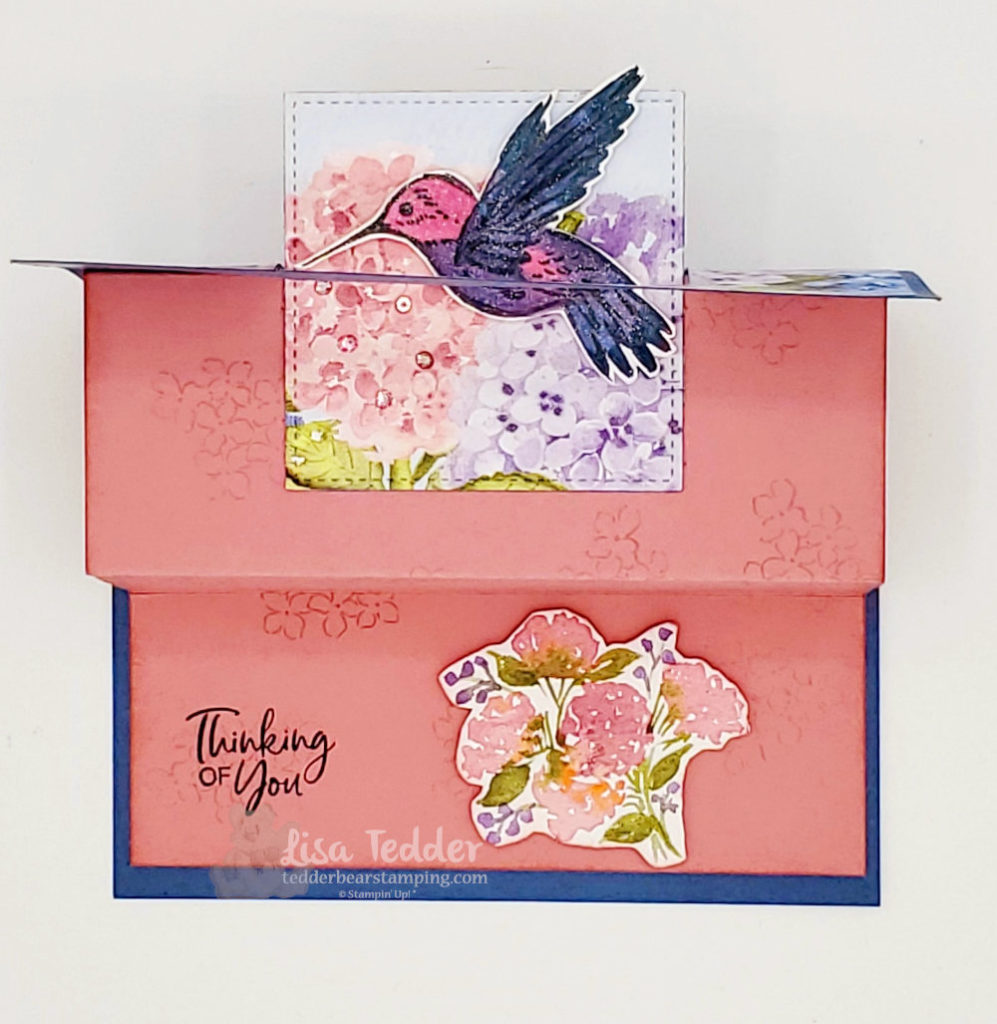
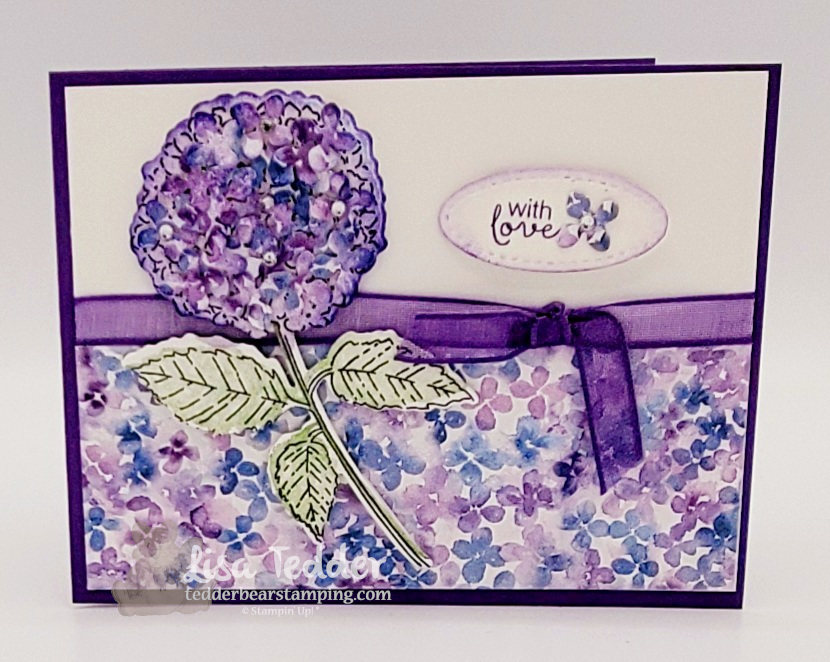
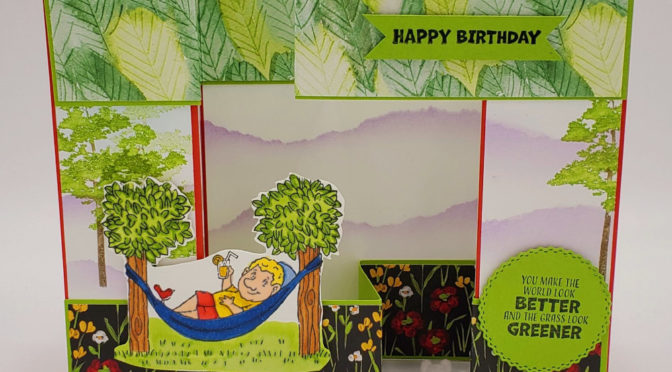
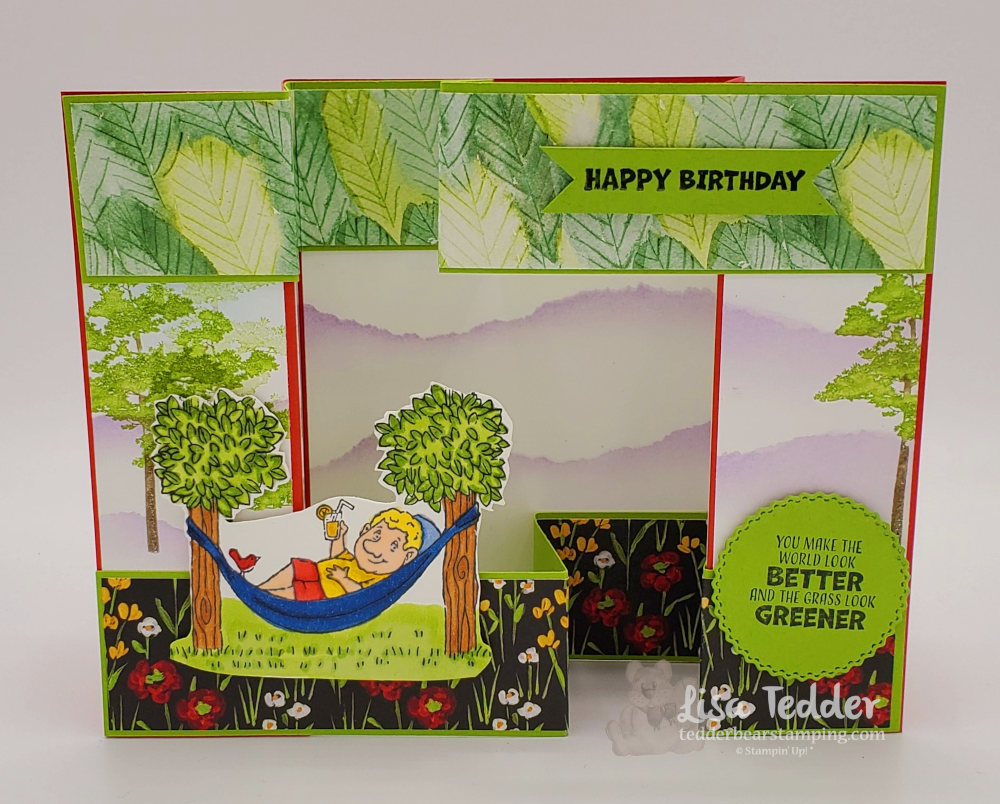
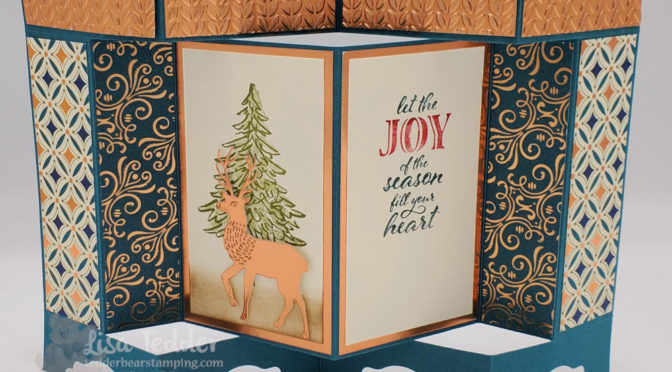
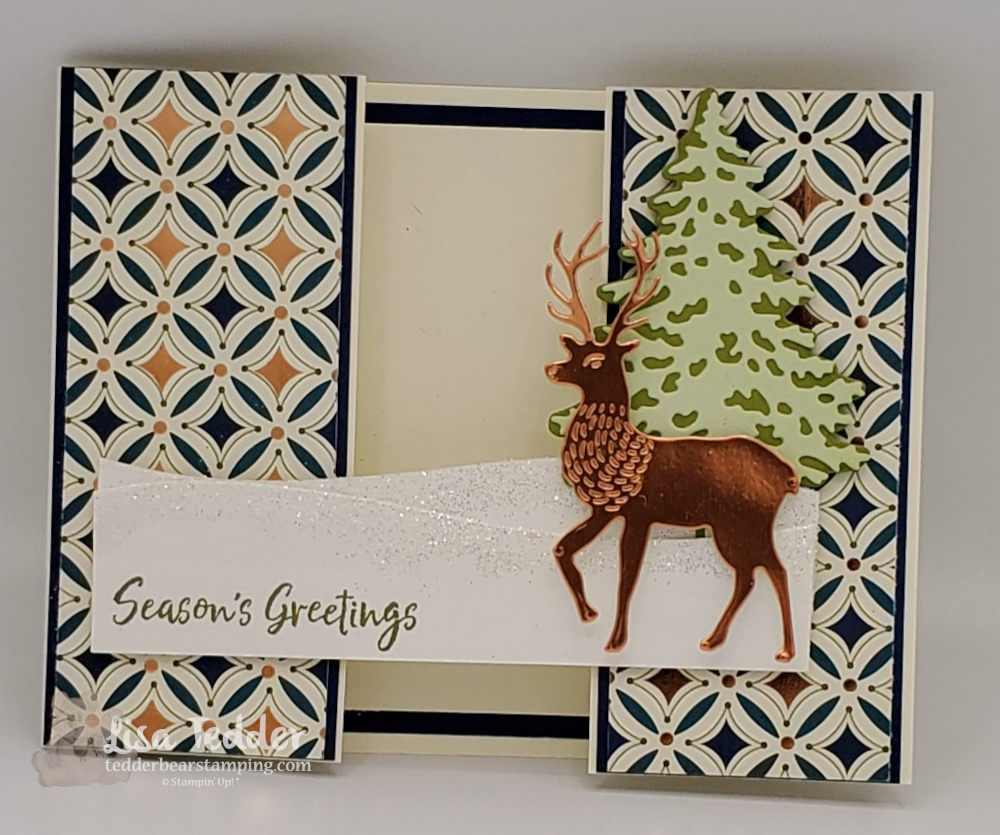
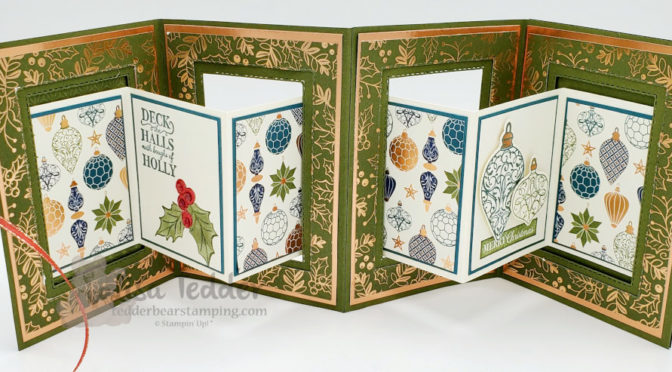
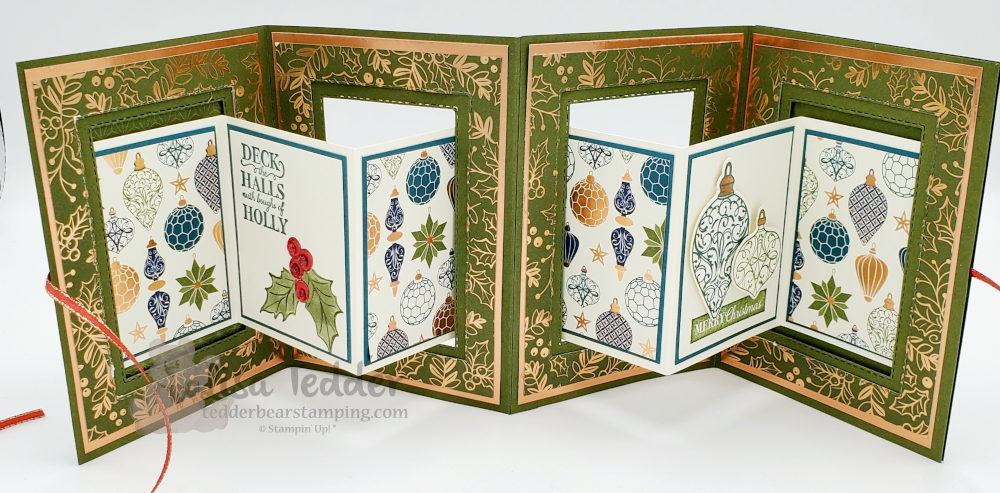
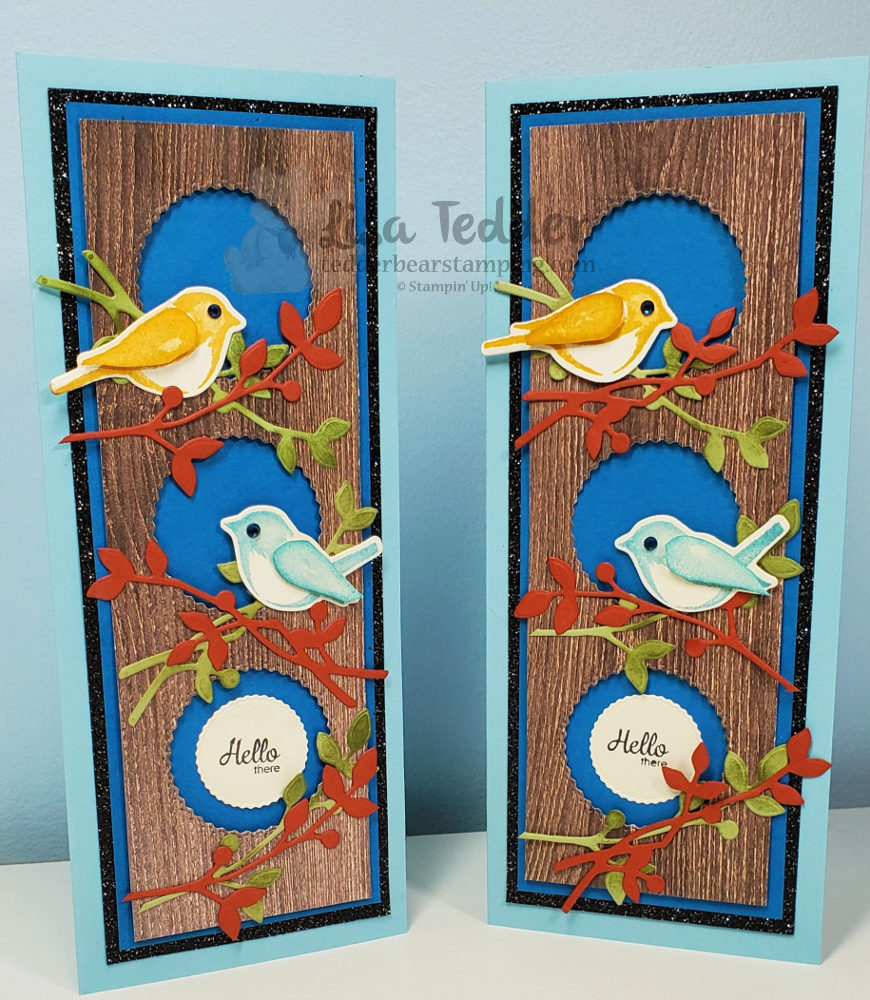
Now I will share with you the card I started my YouTube Live video with:

Who Doesn’t love the beach!?

Inspiration for this card comes from Jan Clothier in NZ! I changed it up a little, but her design was so good I decided to keep most of it! Thanks Jan!

inside card 1

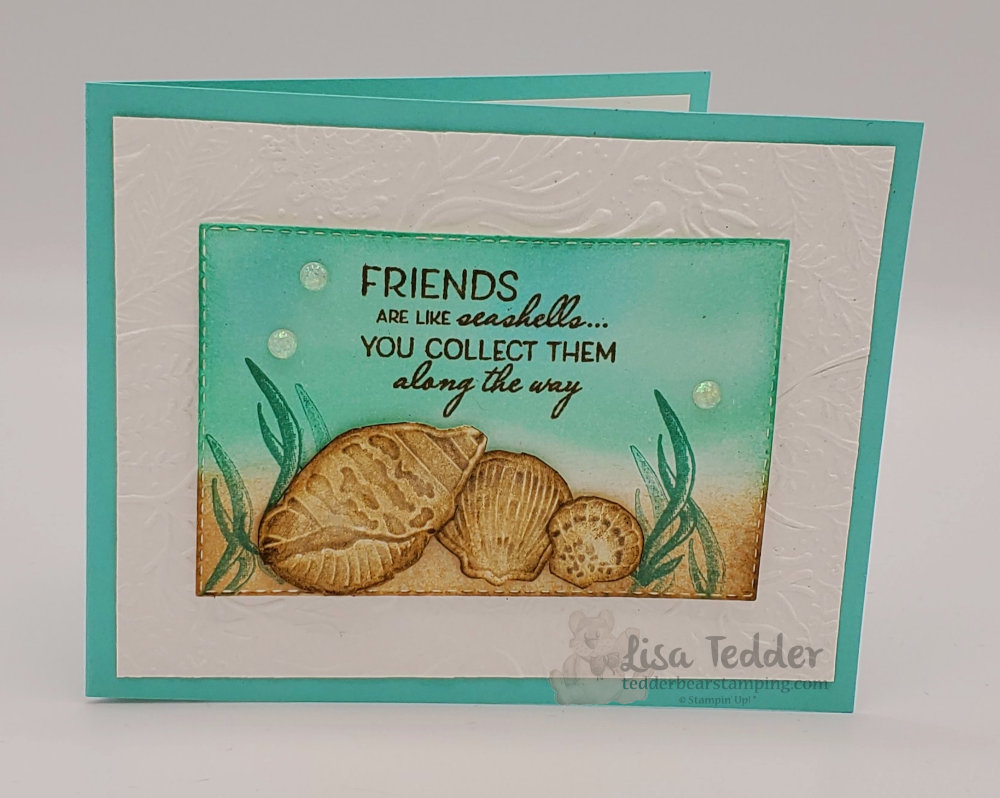
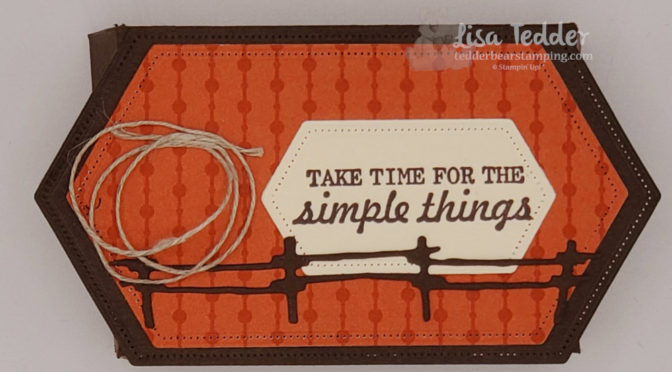
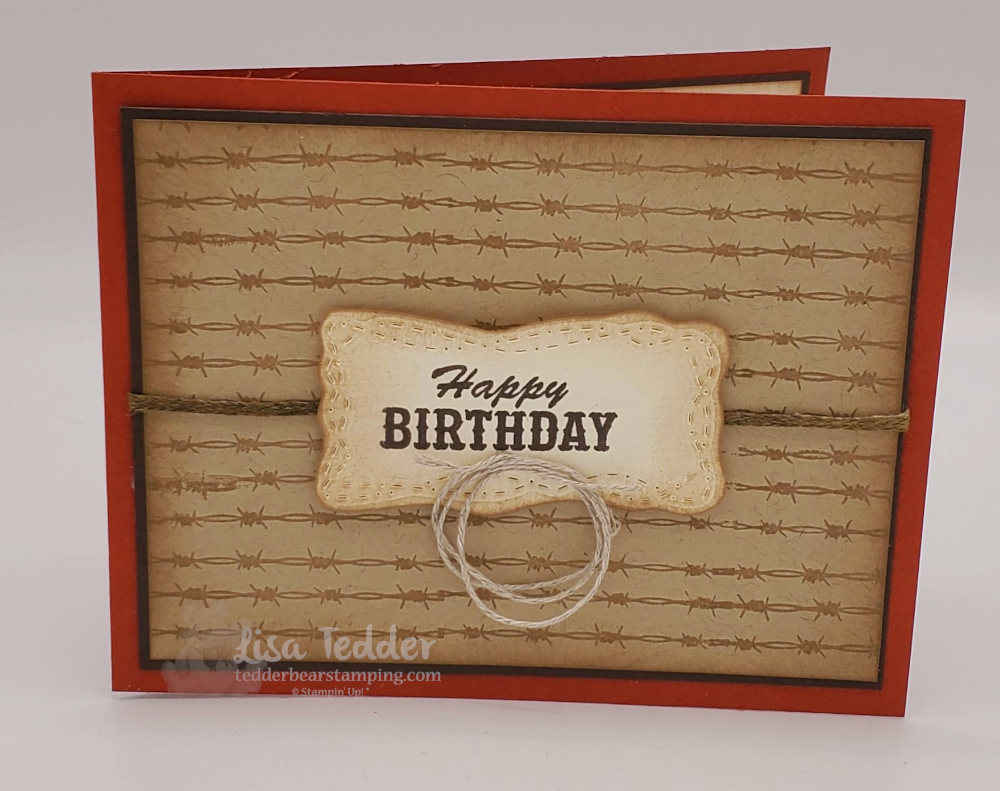
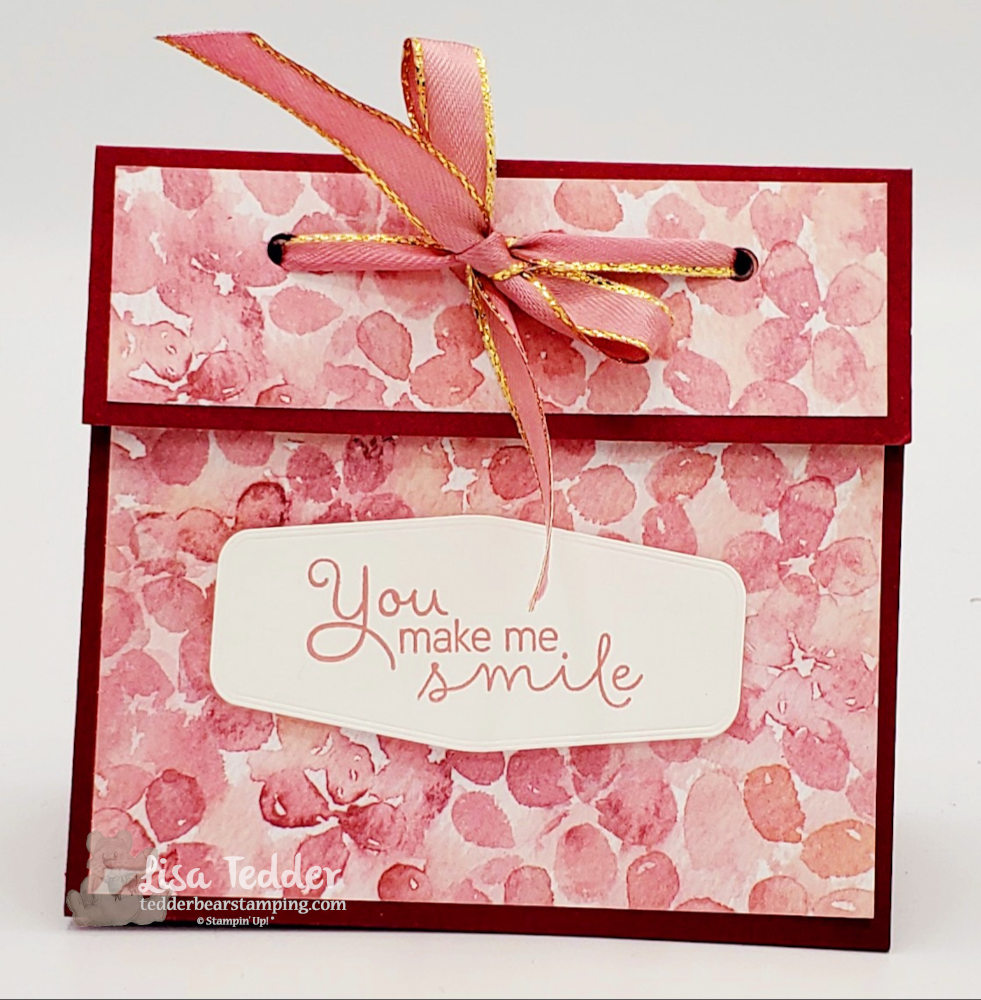
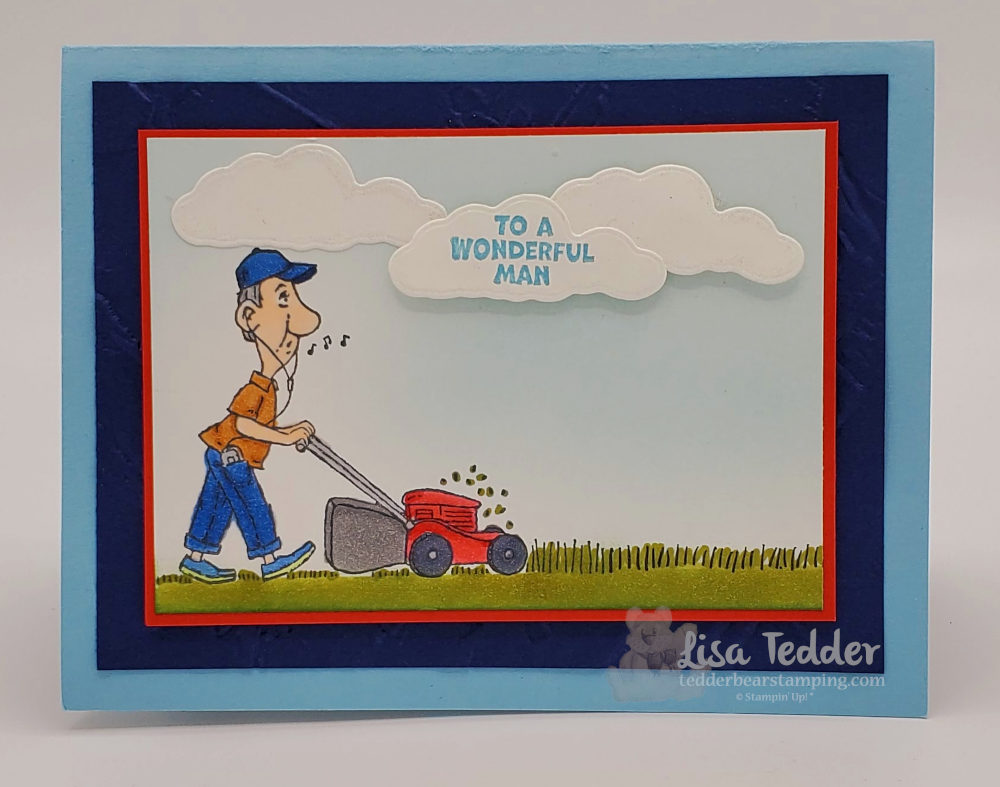
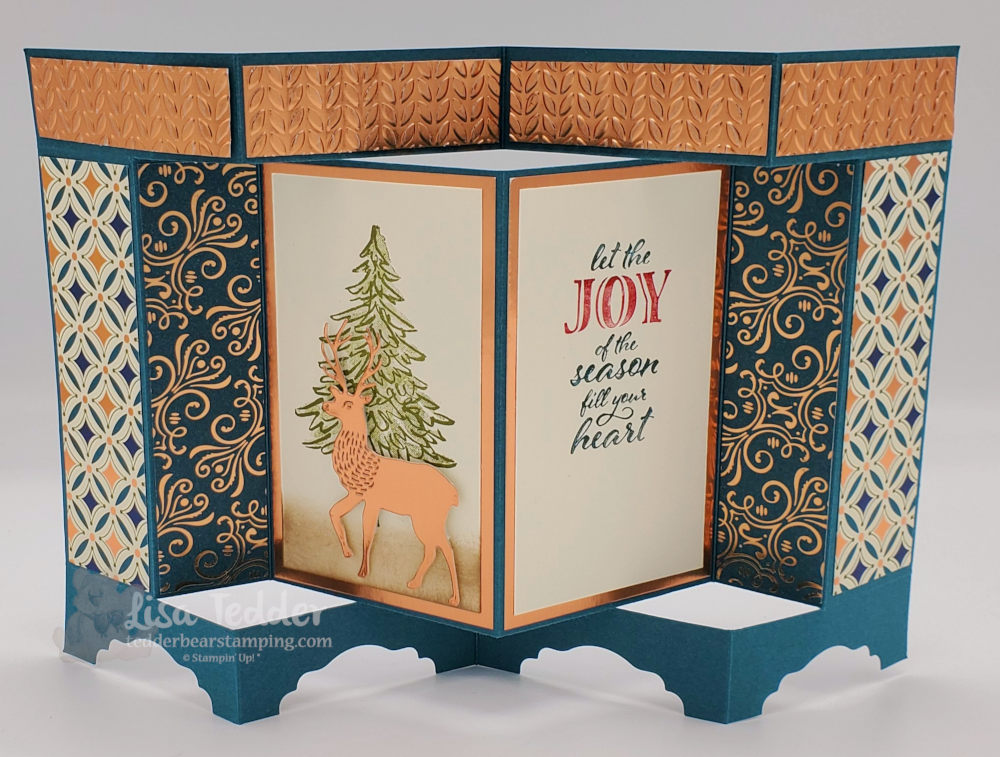
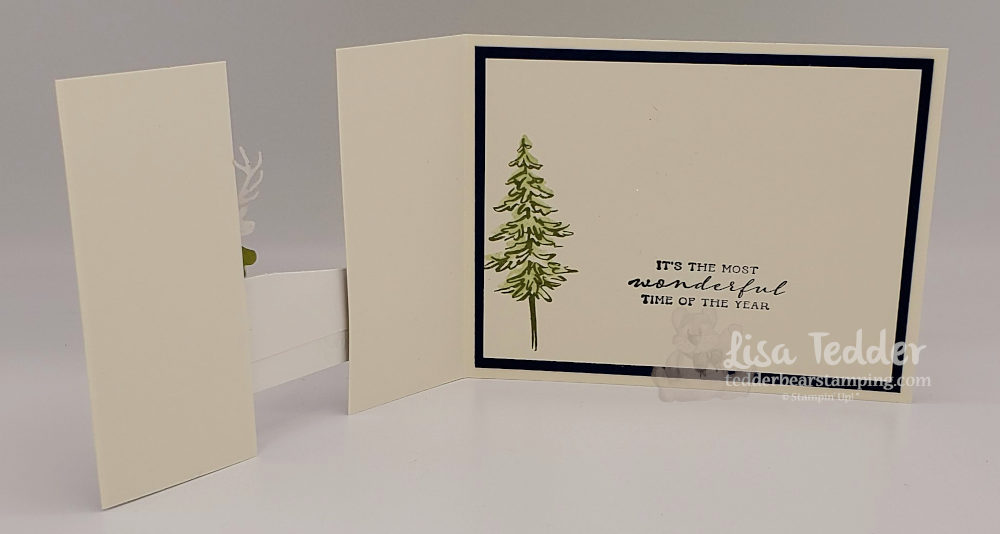
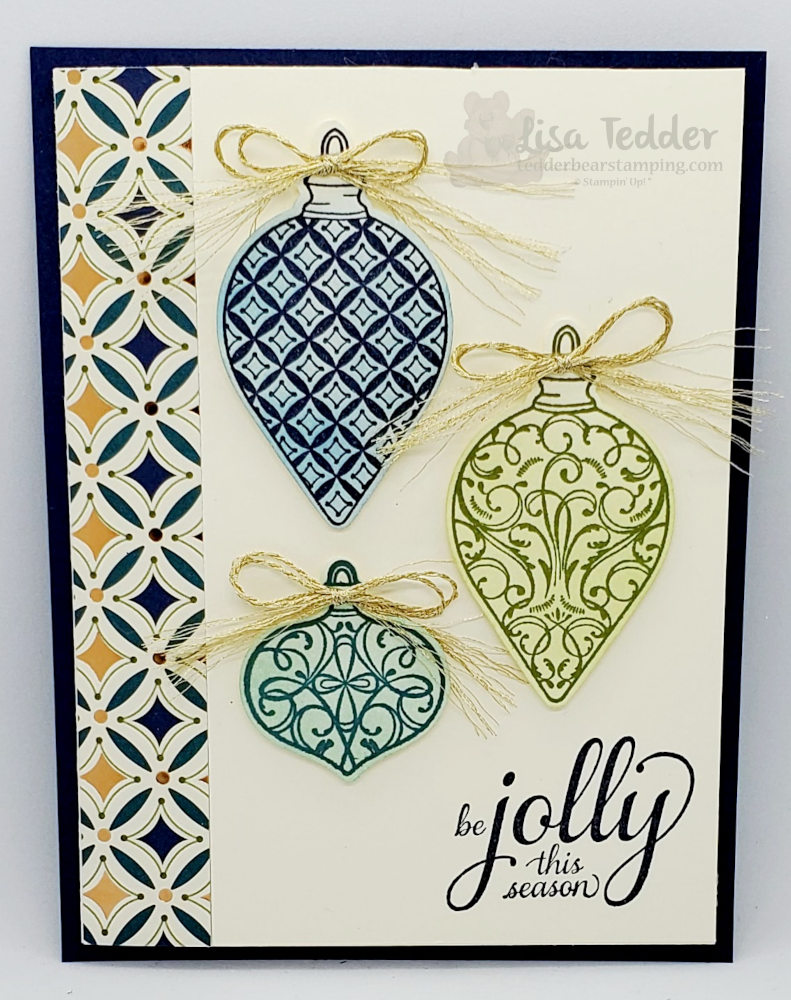
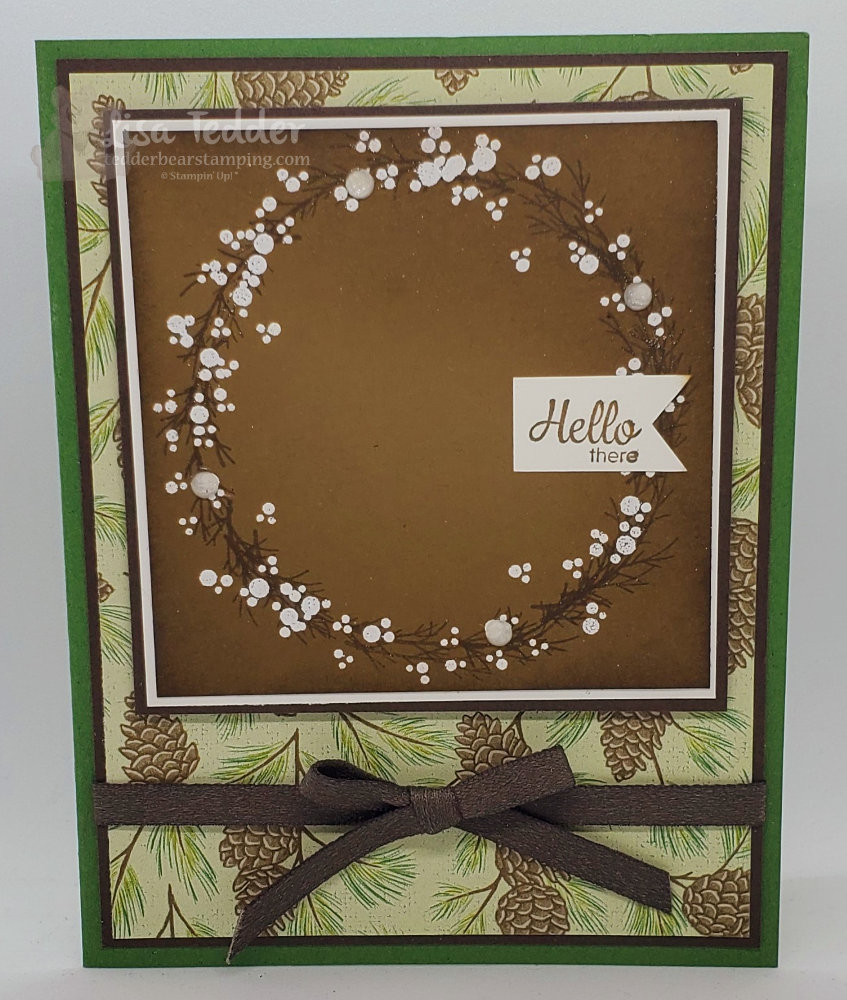
For my 2nd card I showed how to make on my video, I added some foil to really make the image pop!

Again, who doesn’t love the beach!?

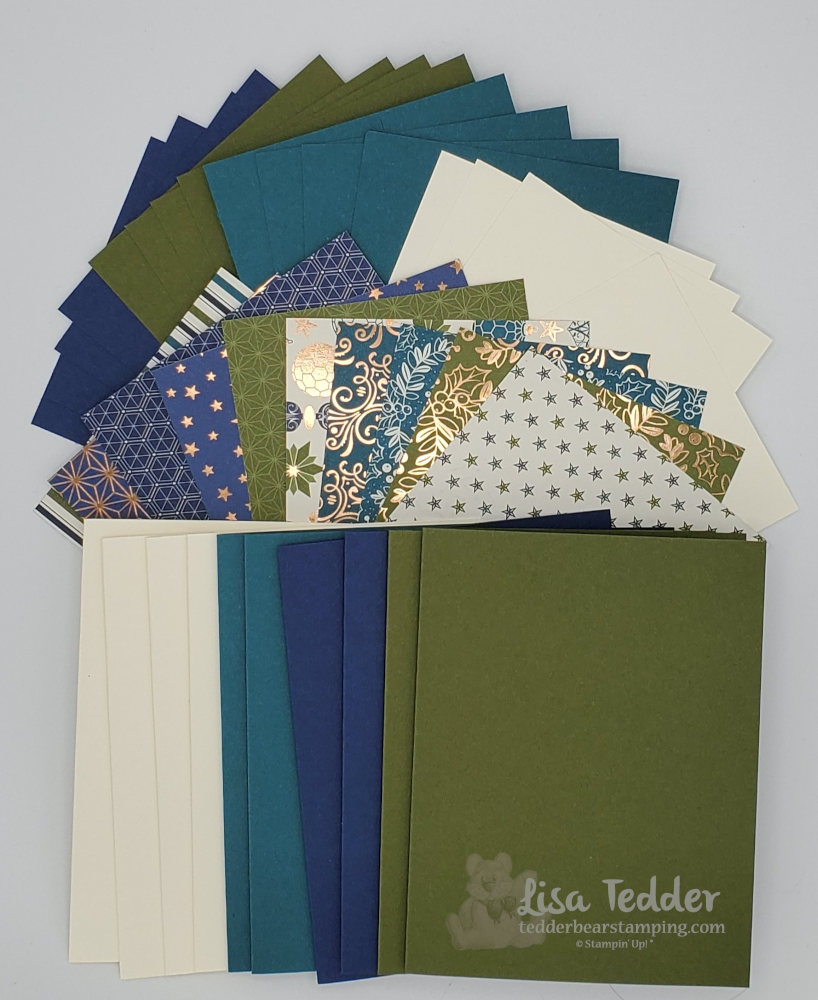
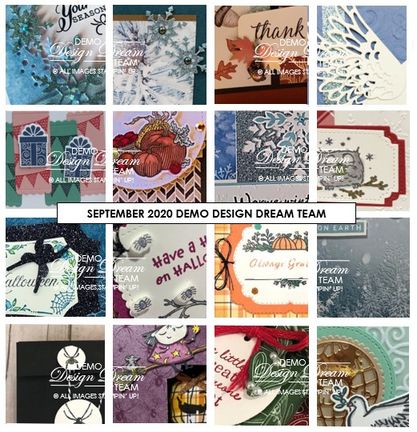
As always, below you will see the materials used to make these two cards, you will also see them in picture form, click on any of the pictures and you will be taken to my OnLine store where you can buy them! When you spend $35 or more you get the materials for both cards AND a pillow gift! You will also get a pdf of 16 projects with step by step instructions that includes pictures! For the fixin’s for these two cards, you will need to order before Tuesday of the following week (Feb 2nd this time).

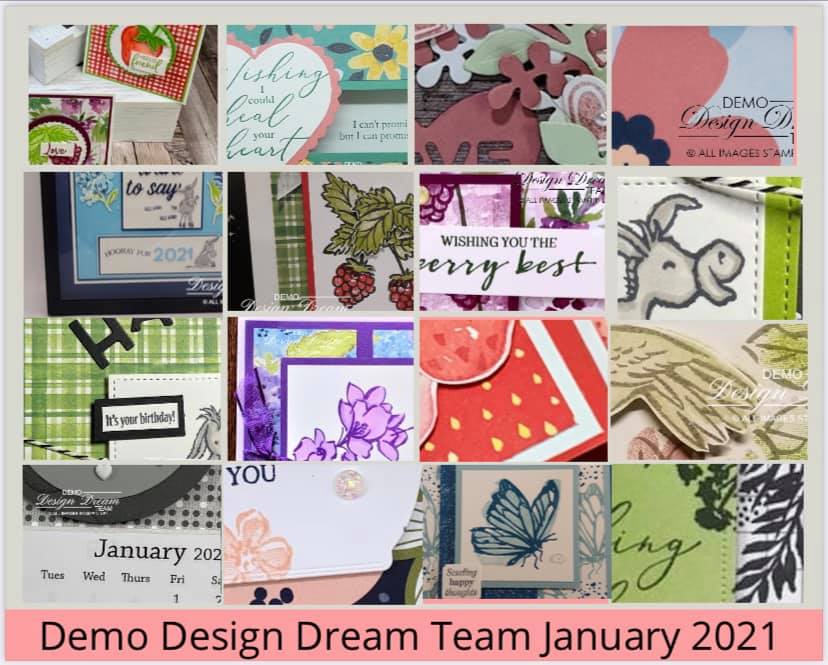
Each week you will have 5 days to order between projects. I do a LIVE mini Class every Thursday at 4:00 p.m. (eastern) on my YouTube Channel! I hope you can join me, if you watch live you will be in the drawing to win one of the cards shown! If you missed last weeks blog post, check it out!

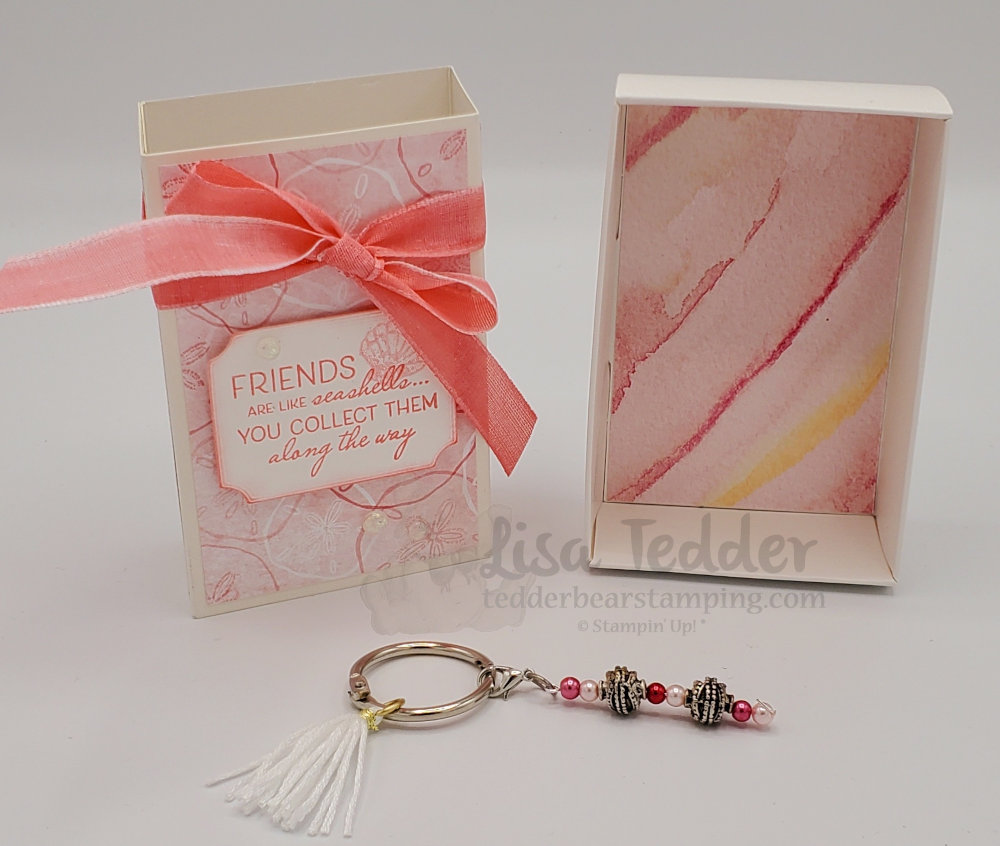
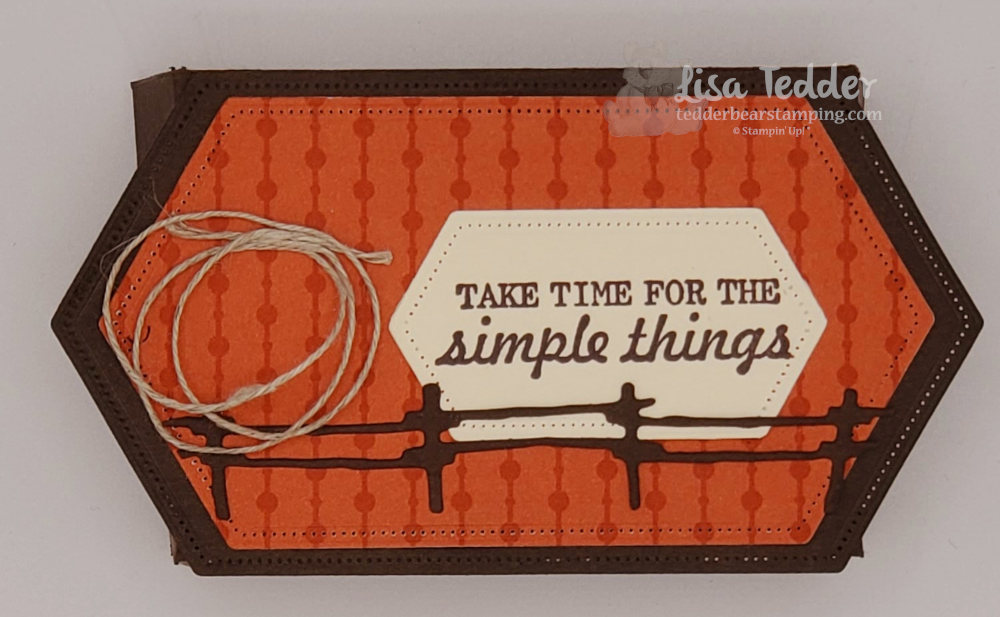
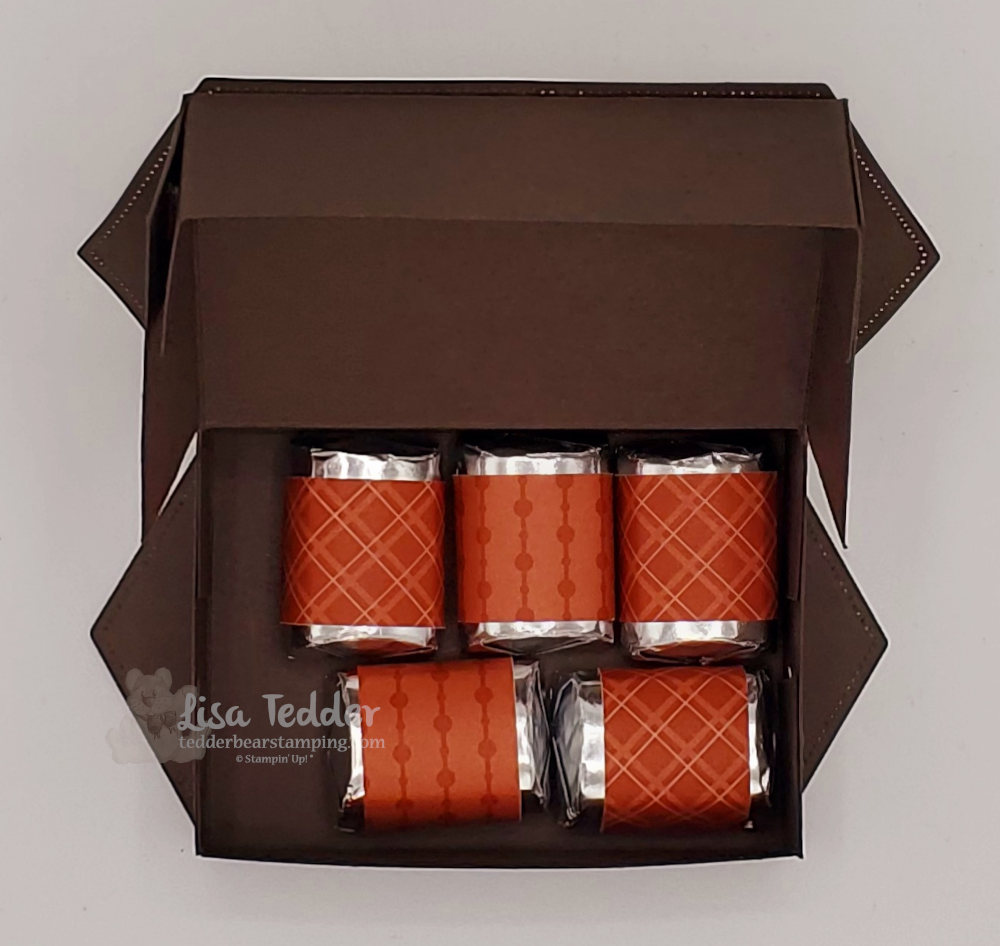
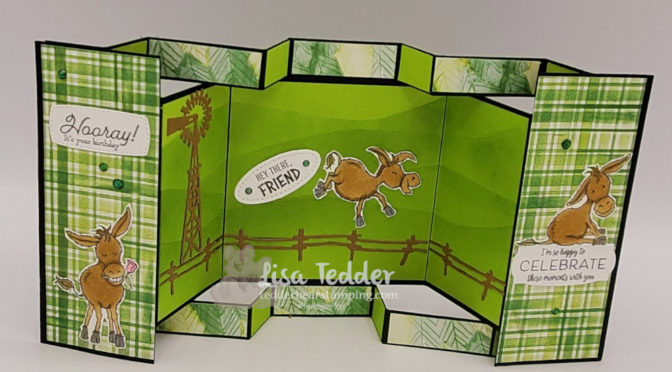
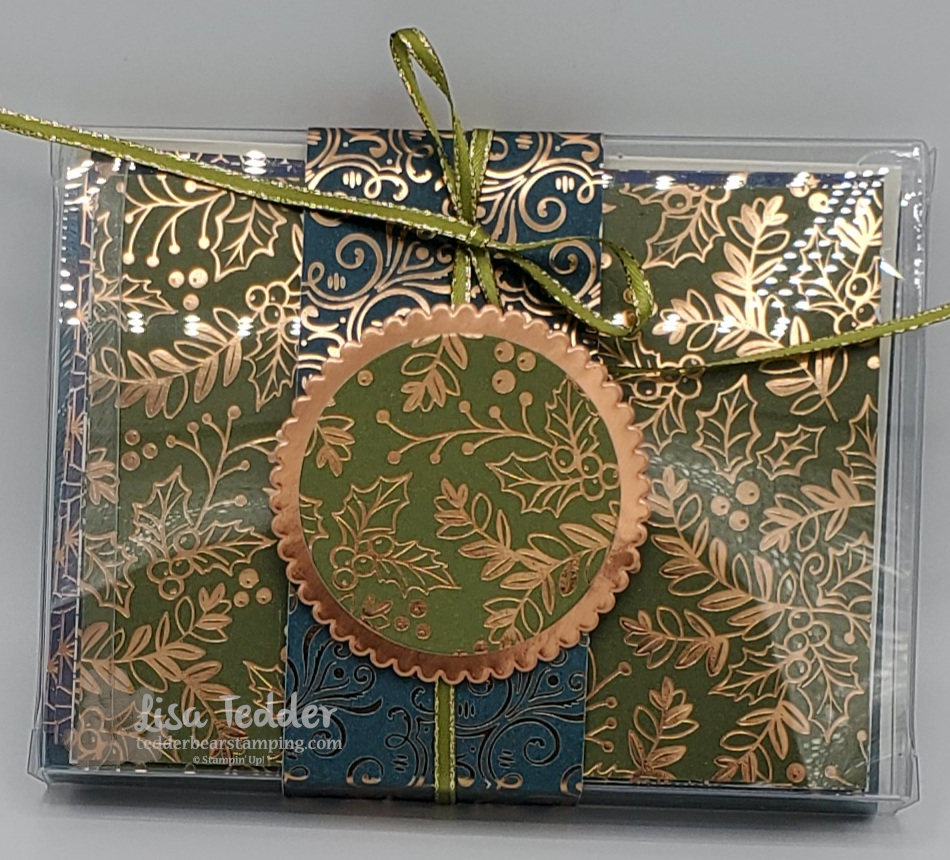
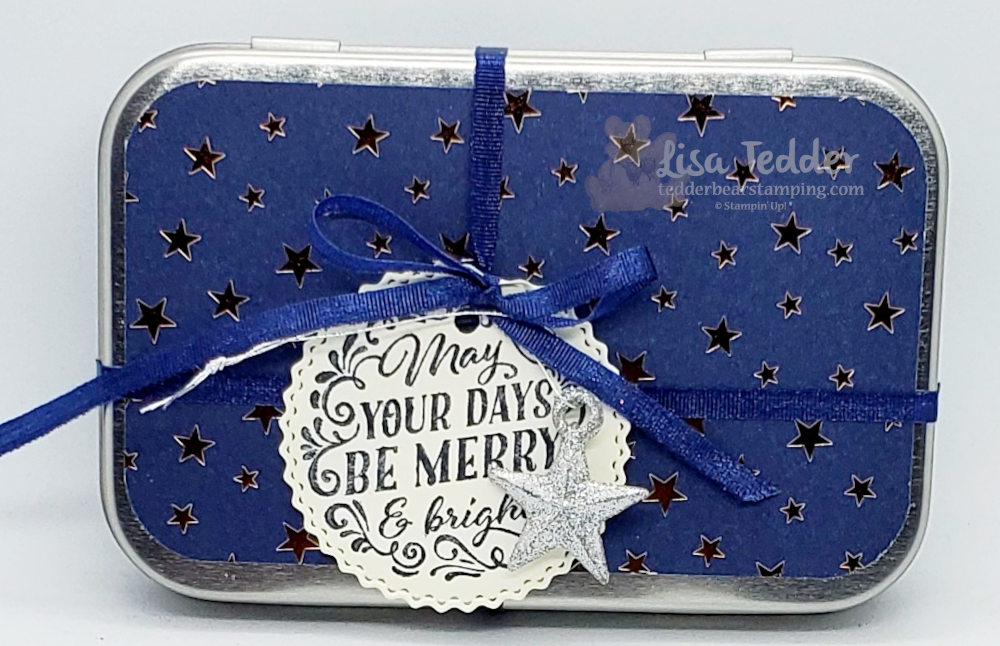
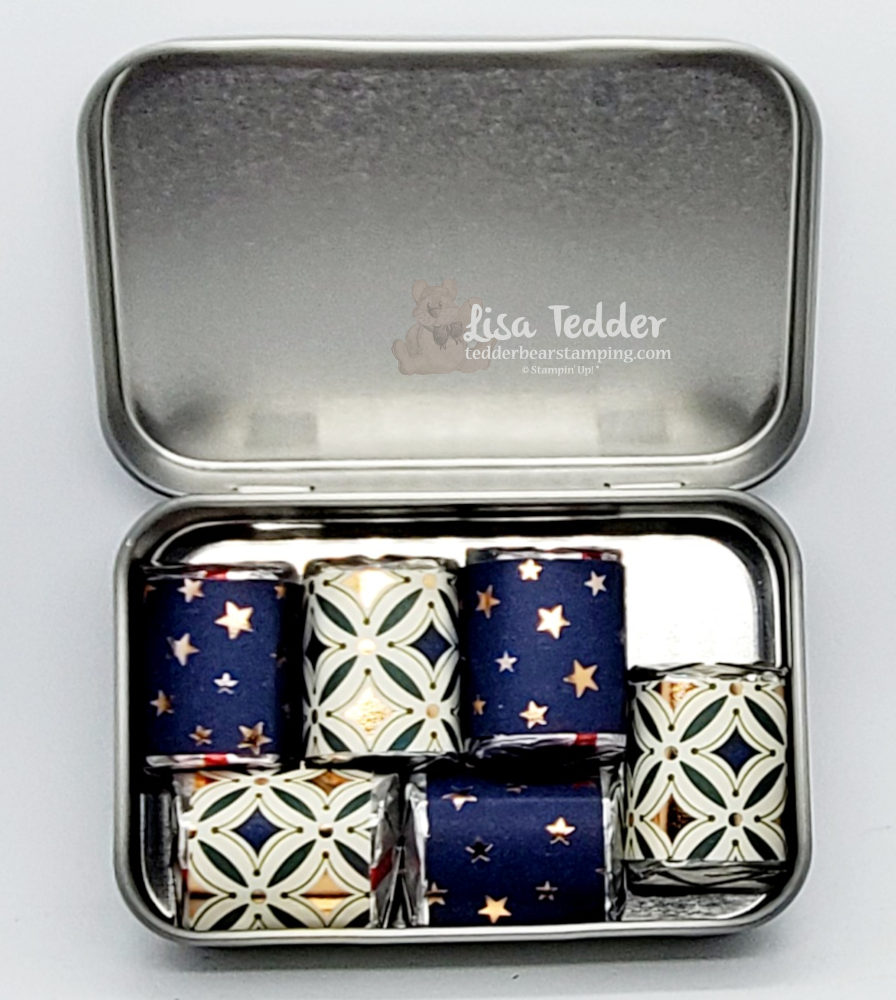
Here is the pillow gift for this week:

Pillow Gift for Jan 28th Live video
Inside Pillow Gift, you can put this on your scissors so everyone will know they are yours!
Sneak Peek of Pdf for the orders $35 or more!

Materials for my projects:

  • Stamps:
  • Friends are Like Seashells
  • Inks:
  • Misty Moonlight
  • Bermuda Bay
  • Flirty Flamingo
  • Coastal Cabana
  • Just Jade
  • Soft Suede
  • Soft Sea Foam
  • Paper:
  • Coastal Cabana: 11″ x 4 1/4″ scored at 5 1/2″ (card 1)
  • Basic White: 5 1/8″ x 3 7/8″ (x2), 4 1/4″ x 3″, scraps for shells (card 1), 5″ x 3 3/4″ (card 2)
  • Bermuda Bay 8 1/2″ x 5 1/2″ scored at 4 1/4″ (card 2)
  • Flirty Flamingo 5 1/4″ x 4″ (x2) (card 2)
  • Soft Sea Foam 5″ x 3 3/4″ (card 2)
  • Pearlescent Specialty Paper 5 1/4″ x 4″ (card 2) for shells
  • Love You Always Foil Sheets (Blushing Bride color) scraps for seaweed
  • Misc:
  • Opal Rounds
  • Dimensionals
  • Champagne Mist (mix with alcohol, 4 drops)
  • Spritzer
  • Seashells 3D Folder
  • Seabed 3D Folder
  • Stampin’ Sponges
  • Daubers
  • Stampin’ Cut & Emboss machine
  • Stampin’ Trimmer

Thank you so much for visiting me! If you live in the US and are in need of a Demonstrator I would be honored to be yours! Also, if there is anything you would like me to highlight on my weekly videos please let me know and if I own it (or have to have it) I will do a class around it!

Lisa Tedder
A Former California girl living in North Carolina

Product List

Ride the Range

Hey Guys!

Guess what today is…..it’s my YouTube Live day! For my stamps today I am going to use Stampin’ Up!’s Ride the Range and Mountain Air. I am always looking for something for a guy or a non girly girl. If you enjoy my cards I would love it if you would join me for one of my LIVE videos! Every time I do a Live if you are there with me, all you need to do is comment and you will be put in a drawing to win one of the cards I make! Of course, you can access all of my videos at my YouTube channel!

Lately, I make sure that not only do I make a video for my classes, but I also do a post giving all the measurements and links to what I used. If you missed my post from last week, you can catch it here!

Here is my first card:

Ride the Range
Ride the Range inside
Ride the Range 2nd card
Ride the Range card 2 inside

As always, here are the specifics for these cards:

  • Stamps:
  • Ride the Range
  • Mountain Air
  • Inks:
  • Early Espresso
  • Memento Black
  • Crumb Cake
  • Crushed Curry
  • Balmy Blue
  • Smoky Slate
  • Pear Pizzazz for sponging
  • Versamark
  • Blends:
  • Soft Suede
  • Balmy Blue
  • Crumb Cake
  • Smoky Slate
  • Cinnamon Cider
  • Paper:
  • Cajun Craze 11″ x 4 1/4″, scored @ 5 1/2″
  • Early Espresso 5 1/8″ x 3 7/8″ (x2)
  • Crumb Cake 5″ x 3 3/4″
  • Very Vanilla 5″ x 3 3/4″, scrap for sentiment
  • Basic Gray 11″ x 4 1/4″ scored @ 5 1/2″
  • Basic Black 5 1/8″ x 3 7/8″ (x2)
  • Basic White 5″ x 3 3/4″ (x2)
  • Soft Suede scrap for fence
  • Pear Pizzazz scrap for grass
  • Misc:
  • Linen Thread
  • Braided Linen Thread
  • Stamping Sponges
  • Dimensionals
  • Stitched with Whimsy
  • Paper snips
  • Liquid Glue

Again, I will let you know that everything listed above will be in picture form below, click on any of them to be taken to my OnLine Store. I would love to have you choose my small business to buy your stamping supplies. For every $35 or more you will earn a PDF that has 16 projects with pictures! Below you can get a sneak peek of the projects. But, that isn’t all you get for supporting me, I will send you the ‘fixin’s’ for these cards if you order before Wed of the following week, you will need to spend $35 or more for that too, but you will get BOTH for the $35!

EVERY Thursday I am Live on YouTube showing you another class for certain stamp sets, that you can earn that week’s card class fixin’s. If you would like to see a stamp set used, send me an email or post your comment here and I will try and do that for you!!

Sneak Peek of the PDF projects
Your Pillow Gift for placing a Qualifying order!
Num!! Chocolate!

If you need to see how I made the cards, be sure and check out my video!!

Thank you so much for stopping by!! Please come back!

Lisa Tedder
A former California girl living in North Carolina

Product List

Fancy Fold WOW handmade card

Hey Guys!

Today I am showing you a Fancy Fold WOW card! We will be using two stamp sets from Stampin’ Up! called Hydrangea Haven and A Touch of Ink (this set you can get if you spend $100 on an order for FREE!). This set from Sale-a-Bration is a 2 step stamp, though today we colored it with blends. If you missed my Post from last weeks Fancy Fold you can catch it here.

First card I made on my video:

Fancy Fold WOW, handmade card top view
Fancy Fold WOW handmade card side view

Second card I made on my Live was really fun for me!! I debated getting this set, but liked what I saw online, so decided to get it, boy I’m so glad I did!! Here is my 2nd card:

Hydrangea Haven card

As always, here are the ingredients for both my cards:

  • Stamp sets:
  • Hydrangea Haven Bundle
  • A Touch of Ink
  • Inks:
  • Memento black
  • Gorgeous Grape
  • Rococo Rose
  • Highland Heather
  • Granny Apple Green
  • Blends:
  • Rococo Rose
  • Misty Moonlight
  • Paper:
  • Misty Moonlight 8 1/2″ x 5 1/2″
  • Rococo Rose 8″ x 5 1/4″, score landscape @ 2″, 4″ & 6″ fold as shown on video
  • Hydrangea Hill Designer Series Paper (DSP) 5 1/4″ x 4″ for 1st card, 5 1/4″ x 2″ for 2nd card, and cut out image for 1st card inside
  • Gorgeous Grape 11″ x 4 1/4″
  • Basic White 5 1/4″ x 4″ (x2), scraps for stamping all images on both cards
  • Misc:
  • Stitched Shapes Dies
  • Tasteful Labels Dies
  • Dimensionals
  • Paper snips
  • Rhinestones
  • Stampin’ Cut & Emboss machine
  • Gorgeous Grape 3/8″ Sheer Ribbon
  • Wink of Stella

Aren’t those so pretty!!? I keep looking at them and LOVE them! Below you will see pictures with the same product I listed above, click on any of them to be taken to my OnLine store! For $35 or more (if you buy over $150 do NOT use the Host code I will provide) you will receive the class packet for doing these cards, which includes all the cardstock, die cut images (square cut out of front of card, flowers die cut that are on top of flower, and colored rhinestones), you will NOT get the stamps unless you order them. Also, for your order you will get this pillow gift!!

This has Chocolate inside!!

Also, with your Qualifying order you will get a PDF of SIXTEEN projects! Each project has step by step instructions and pictures! Every month I have a brand new PDF for you! On last weeks video I shared my project that is in the PDF for purchases in the month of January along with other ideas using other product from the SAB catalog!

I hope you have enjoyed my post today! If you missed any of my videos you can go to my YouTube Channel and get all kinds of ideas!!

Thank you so much for supporting me and my small business! I hope you enjoy my blog AND videos!

Lisa Tedder
A former CA girl living in North Carolina

Product List

Donkey Fancy Fold

Hey Guys!

Yesterday I posted a Live YouTube video doing a Fancy Fold using the Darling Donkey stamp set! You can get this set FREE with a $50 purchase! Love, Love, Love this set!! I have been using it a lot ’cause I love it so much! If you missed my last Live you can catch it here! Also, I did a Blog post and that can be found here!

Free Donkey set Fancy Fold!

Of course I did a SECOND card for my Mini Class! And I also used the Free Donkey set!

Free Donkey stamp set on Memories & More gift card

First off, I wanted to tell you that I also used, along with the Donkey, the dies from the Bundle Ride the Range. I will be using this bundle for my next YouTube Live on Thursday January 14th! I hope you can join me. Also, I used some Free Designer Series Paper that comes in the Sale-a-Bration catalog as a bundle itself called Berry Blessings Stamp set + Berry Delightful Stamp set.

Secondly, as usual I am providing all the details needed to make BOTH projects:

  • Stamp sets:
  • Darling Donkeys
  • Many Messages
  • Inks:
  • Memento Black
  • Garden Green
  • Granny Apple Green
  • Blends:
  • Soft Suede
  • Smoky Slate
  • Color Lifter
  • Paper:
  • Basic Black: 12″ x 5 1/2″ (base), 5 1/2″ x 2 18″ (for panels) For Base you will lay it on your cutter/trimmer portrait and place the edge along the 3/4″ line and cut from the 1″ to 5″, pick up cutter and cut from 7″ to 11″, repeat for other side. Then place on trimmer Landscape and you will SCORE only on the outside edge (between the cut and edge), score on 1″, 5″, 7″ & 11″. Keep in Landscape and score ALL THE WAY across on 2″, 4″ 8″ & 10″. You will fold them on the outside edges mountain, valley, mountain valley (this is the same on both sides working towards the middle) Do both top and bottom. Inside flap gets folded mountain, valley, valley, mountain.
  • Granny Apple Green: 3 7/8″ sq. (back panel), 8″ x 3 7/8″ for middle scene, 5/8″ x 7/8″ (x8) for bottom and top small edges, 4 1/8″ x 3 1/8″ (for gift card)
  • Berry Delightful Designer Series Paper: cut 4″ x 5 3/8″ (turn and cut @ 2″ in half so they will line up), 4″ x 5 3/8″ for front panels when card is closed. 5/8″ x 1 7/8″ for adding to the tip and bottom small panels. And 4 1/4″ x 2″ for envelope flap
  • Memories & More Cards & Envelopes: I used a gift card/Envelope for small Donkey card.
  • White: 4″ x 3″ inside the Gift card
  • Misc:
  • Open Range Dies
  • Many Messages Dies
  • Layering Circle Dies
  • Stitched Shapes Dies (for sentiment donkey is kicking)
  • Holiday Rhinestones
  • Liquid Glue
  • Paper Trimmer

As you already know if you follow me and my blog, all the supplies will be listed below, click on any of the pictures and you will be taken to my OnLine Store! For any purchase of $35 or more you will receive from me the class packet for the class I am detailing today, which will include all the cardstock, die cuts (not the sentiments since that is not allowed per SU!) but I can send you the one die cut for the sentiment that the donkey is kicking since that is stamped with the stamp set and not the Many Messages. Also, you will get the Rhinestones and I will pre cut/score for the main card and die cut the circle for the gift card! The one thing I can not do is stamp anything.

BUT the great thing is it’s Sale-a-Bration now and you can get MORE than you would normally! Spend $50 and you can pick out that CUTE Darling Donkey set for FREE! This is while supplies last, so don’t wait! Furthermore, you will get the 16 project ideas in a PDF that has step by step instructions and pictures….hint, my Home decor item is what I made!! So you will have the measurements for that too!

Thank you for all your support! I so appreciate you joining me on my Live classes and for those who can’t watch live I appreciate you watching it later!

If you are in need of a catalog, let me know and I will get one right out to you!

Love ya!

Lisa Tedder
Formerly a CA girl now living in North Carolina

Product List

Sneak Peek Fancy Fold Card

Hey Guys,

Today I am sharing with you two Masculine cards that I did on my Live Video on December 17th. One is a Fancy Fold, and I am giving you a sneak Peek into the New upcoming catalogs by SU! Of course, I want to give you all the details so you can refer back to here if needed. Big thanks to Frenchie and Jan B for the idea!!

Sneak Peek into upcoming catalog!
Sneak Peek into upcoming catalog top view!

As always, here are the specifics for this card:

  • Stamps:
  • A Cut Above
  • Rooted in Nature
  • Inks:
  • Memento
  • Highland Heather
  • Markers: Soft Suede & Granny Apple Green
  • Blends: Cinnamon Cider, Granny Apple Green, Daffodil Delight, Poppy Parade, Night of Navy, Petal Pink
  • Paper:
  • Poppy Parade 11″ x 5½” score at 1¾”, 3½”, 7½”, 9¼” 
  • Granny Apple Green 11″ x 1½”. (x2) score bottom @ 4″, 5 3/4″, 7 1/2″, 9 1/4″ score top @ 1 3/4″, 3 1/2″,5 1/4″, 7″ (if you are using the SAME DSP or other cardstock for the layer you can score both the same, turn them upside down and they are the same. I had mine two different and they were directional so I had to do it this way. You will also need scraps for the 2 sentiments.
  • Whisper White 10-7/8 x 1-3/8, stamp image first and then you will cut 5 panels….cut @ 1-5/8″, 1-5/8″, 3-7/8″, 1-5/8″, 1-5/8″, keep them in the same order you cut them so they line up on card. You will also need a piece to stamp the handsome guy in hammock 3 1/2″ x 3″ (I think he looks like my hubby, so of course he is stinkin’ handsome!!)
  • Berry Delightful Designer Series Paper 10 7/8″ x 1 3/8″
  • Flower & Field DSP 10 7/8″ x 1 3/8″
  • White 5 1/4″ x 4″ (for back to add signature)
  • Misc:
  • Tasteful Labels Dies
  • paper snips
  • Paper trimmer
  • Dimensionals
  • Stampin’ Cut & Emboss Machine
  • Stamparatus (I like to use it to be sure I have sentiment straight, Especially while on Video)!
  • Blending Brushes

Moving onto my 2nd card, this one is much simpler so if you don’t like to spend a lot of time on your cards this one will be perfect! Plus, it’s a masculine card and if you are like me manly cards are a little more challenging! Here is another Masculine card that I did, that you might like!

Sneak Peek into New upcoming catalog!
inside of my Sneak Peek card 2!

As always here is the info on this card:

  • Stamps:
  • A Cut Above
  • Rooted in Nature
  • Inks:
  • Memento
  • Balmy Blue
  • Markers: Balmy Blue, Granny Apple Green, Soft Suede
  • Blends: Real Red, Smoky Slate, Cinnamon Cider, Night of Navy, Old Olive, Basic Black, Granny Apple Green
  • Paper:
  • Balmy Blue 8 1/2″ x 5 1/2″ scored at 4 1/4″
  • Night of Navy 5″ x 3 3/4″ (x2)
  • Poppy Parade 4 3/8″ x 3 1/8″ (x2)
  • Whisper White 4 1/4″ x 3″ (x2), scraps for clouds
  • Misc:
  • Majestic Mountain Dies
  • Dimensionals
  • Wink of Stella
  • Painted Texture 3D folder
  • Treasured Tags Pick a Punch

Below you will see all these supplies in picture form, click on any of them to be taken to my OnLine Store! When you place a Qualifying order with me you will also receive from me the fixin’s for these two cards (sans Stamps) plus a Pillow Gift! Wanna See what it is?!!

Pillow Gift for any order $35 or above, while Supplies Last!!

Plus, I am offering you a PDF full of 16 project ideas with Step by Step instructions and pictures!! All of that for a Qualifying order! Yes! You need only to place an order of $35 or above with me to get all that!! This is my way of thanking you for choosing me out of all the other Demonstrators! I appreciate you! Here is a sneak peek for the PDF!

If you missed last week’s live, you can catch it here!

Thank you for stopping by! I am going to take the next 2 weeks off, but I’ll be back doing a Live Video on YouTube on January 7th and every Thursday after that! Let’s hope and pray that 2021 is a better year! Have a great Christmas and New Year!

Lisa Tedder
A former CA girl living in North Carolina

Product List

TWO Fancy Fold Christmas Cards

Hey Guys!

On my YouTube live video from today the 10th of December, I showed you two Christmas Cards that have a Fancy Fold! I LOVE cards that have something added to them that makes them more interesting and different folds definitely make them interesting!

First, I am going to show you the one that I am absolutely over the moon happy with!!

One of my Two Christmas cards with a Fancy Fold

Did you notice that other than the fold, this card isn’t all that detailed? Furthermore you only have to stamp Two images! Even though it doesn’t take a lot of stamps, it is STUNNING! Sitting here in my stamp room, I love to look at this card! Subsequently this will have to go to someone special who will really appreciate it!

As always here are the ingredients to make this card:

  • Stamps:
  • In The Pines
  • Wrapped in Christmas
  • Inks:
  • Old Olive
  • Crumb Cake
  • Markers: Pretty Peacock & Real Red
  • Paper:
  • Pretty Peacock: 11″ x 6 1/2″, scored @ 2 3/4″, 5 1/2″ & 8 1/4″ (Landscape), Turn to portrait: Score @ 1″ on BOTH sides. Cut while in portrait Place on 1″ mark then cut from 1 1/2″ to 9 1/2″, do this cut on BOTH sides!! Place back in so it is Landscape place cardstock to 1 1/2″ and score BETWEEN the cuts, flip and do the same on other side.
  • Copper: 2 1/2″ x 7/8″ (x4), 4 3/8″ x 2 5/8″ (x2), scrap for Deer
  • Brightly Gleaming Specialty DSP: 4 3/8″ x 1 3/8″ (x4….2 designs)
  • Very Vanilla 4 1/8″ x 2 3/8″ (x2)
  • Misc:
  • North Pole Wonder Dies
  • Dimensionals
  • Greenery folder
  • Paper Trimmer
  • Label Me Lovely punch

Now onto the Second card in my Live YouTube video! Incidentally this one is a peek-a-boo card. As with the first card this one also uses minimal stamps. Furthermore, this card is very striking even though it doesn’t have the folds the first card has.

2nd of my Two Fancy Fold cards

Who doesn’t love a good Die?! This card uses 2 of them and they really make this card Pop! Obviously you can tell that I LOVE the Designer Series Paper Brightly Gleaming, for the last two weeks for my Live’s I have used this awesome paper! It is selling out so be sure to get it before it’s gone! All of the stamp sets are retiring this year and if you go to my OnLine Store you can get them before they are gone & they may be at a discount!!

Here are the particulars for this card:

  • Stamps:
  • In The Pines
  • Wrapped in Christmas
  • Inks:
  • Old Olive
  • Night of Navy
  • Soft Sea Foam
  • Paper:
  • Very Vanilla Thick: 7 1/2″ x 4 1/4″, scored @ 5 1/2″, 4 1/4″ x 2 (x3), 5″ x 3 3/4″
  • Night of Navy: 4 1/4″ x 1 7/8″ (x2), 5 1/4″ x 4″ (inside)
  • Brightly Gleaming Designer Series Paper (DSP): 4 1/4″ x 1 3/4″ (x2)
  • Copper Foil: scrap for Deer
  • Soft Seam Foam: scrap for tree
  • Old Olive: scrap for tree
  • Window Sheet: 5 1/2″ x 4 1/4″
  • Whisper White 4 1/2″ x 2″ (for snow)
  • Misc:
  • North Pole Wonder Dies
  • Pine Woods Dies (or you can get the Bundle and save 10%)
  • Multipurpose Liquid Glue
  • Dazzling Diamonds (or any type of glitter)
  • Sponge & Silicone Craft sheet
  • Dimensionals

Besides showing you the two cards I am making, I also have a Pillow Gift to share with anyone who buys from my OnLine Store $35 or more! Want to see it?! AND if you place that order you also get the cardstock (cut and scored!) and anything I used (Sans Stamps) along with that Pillow Gift in the mail to your house! All orders must be in by Dec 15th, I mail them out to you on the 16th!

Isn’t it cute!?
Yummy Chocolate just for you!

For those of you who want to watch my Live video you can see it here: https://youtu.be/yAJ9eM_xTlU

Lastly, I also offer a PDF of 16 projects if you place a minimum order of $35 and that has Instructions for each project plus pictures! Here is a sneak Peek of the 16 projects:

16 projects with step by step instructions PLUS pictures! With minimum order.

I hope you have enjoyed your time on my Blog today! If you missed my Live last week, you can see it here. And you can see my post about last weeks video!

All the products listed above are in picture form below, just click on any image and you will be taken to my OnLine Store!

Please come back next week, I will be showcasing some NEW products from the Upcoming Catalog! If you would like one, or really two since I would send you the Mini plus the Sale-a-Bration catalog, just let me know!

Lisa Tedder
A former CA girl now living in North Carolina

Product List

Over the Top Christmas Card

Hey Guys!,

Today I am sharing with you a YouTube Live project that featured an Over the Top Christmas card. Of course, since this is part of a Mini Class, I am also showing you another Christmas card! One more thing, if you purchase $35 or more at my Online Store you will receive a Pillow Gift that you will really love!! Here is a link for you to use.

So, are you ready to see the Over the Top card?! I got this idea from Sara Levin, but used my own design!

Over the Top Christmas card!
Closed Over the Top Christmas card

As always, here are the specifics for this card:

  • Stamps:
  • Christmas Gleaming
  • Inks:
  • Pretty Peacock
  • Old Olive
  • Mossy Meadow
  • Real Red Marker
  • Mossy Meadow Marker
  • Blends:
  • Real Red Dk
  • Cinnamon Cider Dk
  • Mossy Meadow Lt
  • Paper:
  • Mossy Meadow 5 1/2″ x 8, 5 1/2″ x 8 1/2″ Score at 1/2″ on the 8 1/2″ piece landscape, watch video to see how to put together, then score @ 4″ & 12″
  • Very Vanilla 8 1/2″ x 3 1/4″, 9″ x 3 1/4″ Score @ 1/2″ on the 9″ piece landscape, watch video to see how to put together, then score @ 2 3/4″, 5 1/2″, 11 1/2″, 14 1/4″
  • Very Vanilla 5 1/4″ x 3 3/4″ (for back side), 2 7/8″ x 2 3/8″ (x2), scraps for stamping
  • Pretty Peacock 3″ x 2 1/2″ (x6)
  • Brightly Gleaming Specialty Designer Paper 2 1/8″ x 2 3/8″ (x4), 5″ x 3 1/2″
  • Copper Foil 5 1/4″ x 3 3/4″ (x5)
  • Misc:
  • Rectangle Stitched Dies sizes: #4 & #5 from biggest
  • Detailed Bands Dies
  • Wonderful Gems
  • All the Trimmings ribbon 27″ of either red or green
  • Dimensionals
  • Foam Adhesive Strips
  • Stampin’ Cut & Emboss Machine
  • Tear & Tape
  • Stampin’ Seal+
  • Gleaming Ornaments Punch Pack

Now, for the 2nd project! This one also uses Christmas Gleaming stamp set from Stampin’ Up!, because I want you to have as many choices for your stamp sets so you can get more for your money!

This one isn’t Over the Top but it’s so pretty!
Inside

Again, here are the specifics for THIS card:

  • Stamps:
  • Christmas Gleaming
  • Wrapped in Christmas
  • Inks:
  • Night of Navy
  • Balmy Blue
  • Old Olive
  • Soft Sea Foam
  • Pretty Peacock
  • Pool Party
  • Mossy Meadow Marker
  • Real Red Marker
  • Paper:
  • Night of Navy 5 1/2″ x 4 1/4″, 5″ x 3 3/4″
  • Very Vanilla 8″ x 5 1/4″ scored at 4″, 4 3/4″ x 3 1/2″, scraps for ornaments
  • Brightly Gleaming Specialty Designer Series Paper 5 1/4″ x 3/4″
  • Misc:
  • Gleaming Ornaments Punch Pack
  • Forever Greenery Trim Combo Pack
  • Dimensionals
  • Glue Dots

NOW onto the Very Pretty Pillow Gift that I featured on my video!

Pillow Gift for all Qualified Orders
Pillow Gift inside

Incidentally, to get the Pillow Gift and All the supplies (sans stamps) to make both cards, you only need to purchase a *Qualifying order to get it all, while supplies last! Of course there is a time limit for this, you must purchase by next Tuesday (December 8th) so I can mail it out on Wednesday!

But wait, there’s more! heehee LOVE saying that! If you purchase the *Qualifying order amount you also get 16 project ideas with step by step instructions plus pictures! Here is a sneak peek to the projects:

If you tuned into my Over the Top Live today you will get to see my project for this!

Finally, all supplies are listed below in picture form, click on any of the pictures and you will be taken to my OnLine Store, remember to get all of the above you will need to purchase a *Qualifying order of $35 or more!

Thank you so much for stopping by! Consequently, when I go Live next time, every Thursday at 4:00 eastern, I hope you can join me! I really love talking to you during my Live.

Lisa Tedder
A North Carolina girl who still loves California

*Qualifying purchase is $35 or more

Product List

Christmas Mini Stamp Class!

Hey Guys!

For the last 5 weeks I have been doing LIVE YouTube mini classes, if you missed them be sure and check them out! To begin with, I have 2 projects using the same stamp set and a Pillow Gift I give away if you spend the Qualifying amount* on product that week. Every week I come up with things I would like to see (hence they are a little more than ink, paper & stamps). My joy is doing things that have more substance to them, I hope you agree!

Here is a link to my last LIVE class, I used Tag Buffet to make 3 projects absolutely FREE to you! Besides getting the free video you can also get the Class Packet that has all the ‘fixin’s’ to make the cards I made, and like I said above you also will get the Pillow Gift…..all that if you purchase * $35.00 or more! Now, if you want to make exactly like I have them, you will need to get the stamp set too, otherwise you can use whatever stamp set you have on hand.

Yes, it’s been a while since I posted. I’m sorry about that! The reason is, that I started something NEW, and I had to get in the groove before adding in the blogging. As a result, I feel I am ready to blog my YouTube Live videos! Ordinarily I would post about every video and from here on out I plan to, thank you for your patience!

So, now I can show you my projects:

This is the FREE class using Tag Buffet!
Here is the Front of the Pillow Gift, you can get this in your mailbox!
This is the inside of the Pillow Gift, it is a Gift Card Holder, get this for free!*

As for the Pillow Gift, I got the idea from Carol Hickman, the design is mine though. By the way, do you see that I used our Pattern Play Dies to say ‘JOY’?

Here are the specifics for this card:

  • Stamps:
    Tag Buffet
  • Inks:
    Mossy Meadow
    Memento Black
    Real Red
  • Blends:
    Real Read Combo
    Granny Apple Green Combo
  • Markers:
    Real Red
    Granny Apple Green
  • Paper:
    Granny Apple Green project 2: 9″ x 4 1/8″, 8 1/2″ x 2″
    Real Red project 1: 8 1/2″ x 3 3/4″, Project 2: 5 1/4″ x 4″ scrap for die
    Whisper White Project 1: 8 1/4″ x 3 1/2″, scraps for all three windows. Project 2: 5″ x 3 3/4″, scrap for stocking
    Heartwarming Hugs Project 1: 8 1/2″ x 5 3/4″ (score at 1/2″ on BOTH long ends), Project 2: 4″ x 3 3/8″, 2″ x 1 7/8″ (x4 SAME pattern) but you’ll turn two to the opposite side.
  • Misc:
    Dimensionals, Tasteful Labels Dies, Stitched Rectangles Dies, Stitched Nested Dies (project 2), Playful Alphabet Dies, All The Trimmings Ribbon Pack project 1, Red Rhinestones BOTH projects, Jingle Bells, sponge

Lastly, don’t forget that if you buy $35 or more from me that you ALSO get a 16 project pdf, which has pictures and step by step instructions! Wow, you get quite a bit for your money! I really appreciate you and want you to know that, thank you for supporting me and my business!

As always, pictures of the supplies used are also shown below, click on any of them to be taken directly to my OnLine Store!

Lisa Tedder
Formerly from CA, but now a North Carolina girl!

Product List

Check out my FIRST Slim Line Card!

Hey Guys,

Today, I am sharing with you a Slim Line card I made using the Birds & Branches bundle! Oh my goodness, why haven’t I done one of these before!? First off, go see my video, I’m super proud of how this card came out!

Before we go further, let’s take a look:

My first slim line card!

Of course, I had to make if look like Fall so the leaves have both green and Cajun Craze. In addition, I used the Black Glitter paper from the Holiday mini, and wow that sure adds to the beauty of this slim line card! So, how did I do with my FIRST Slim Line Card using the Birds & Branches bundle?!

As always here are the specifics for this card:

  • Stamps:
  • Birds & Branches Bundle
  • Here’s a Card
  • Inks:
  • Bumble Bee
  • Balmy Blue
  • Memento black
  • Garden Green
  • Cajun Craze
  • Paper:
  • Balmy Blue 8 1/2″ x 7″ scored @ 3 1/2″
  • Basic Black 8″ x 3″
  • Black Glitter paper 8″ x 3″
  • Pacific Point 7 3/4″ x 2 3/4″ (x2)
  • Very Vanilla 7 1/2″ x 2 1/2″, scraps for birds and sentiment
  • In Good Taste DSP 7 1/2″ x 2 1/2″
  • Cajun Craze scrap for stem
  • Pear Pizzazz scrap for stem
  • Misc:
  • Dimensionals
  • Stampin’ Seal +
  • MultiPurpose Liquid Glue
  • Tasteful Labels Dies
  • Stampin’ Cut & Emboss Machine
  • Magnetic Plate

In addition to telling you about all the supplies, I also want to share with you that I am doing YouTube Lives every Thursday at 4:00 pm Eastern time! Of course, I want you to come and support me! Consequently, for every order that is $35 or above you will receive from me the ‘fixin’s’ for that weeks Live! PLUS, you’ll get the PDF of 16 other projects with pictures and step by step instructions……ALL for your ONE $35 purchase! Here is a sneak peek of what you’ll get in the PDF:

Sneak Peek for any order of $35

In conclusion, I want to thank you so much for supporting me by coming here! I appreciate you! Please come back next week and see what I have for you! Also, be sure to catch my YouTube Live tomorrow at 4:00 eastern!

Lisa Tedder
A California girl living in North Carolina

Product List

How much fun can one card be!?

Hey Guys!

The card I am showing you today is so much fun to make! Have you ever said: How much fun can one card be!? This stamp set (Ornamental Envelopes) has SO MANY ways to use it! Versatile is just ONE way to describe it! This set has ornaments, corner pieces, dies that let you decorate your envelope, and so much more! For today I am showing off the wreath I made. You can watch my video here to see how I did it.

One card = Too much fun!

By the way, I also shared on my video how to use the Stamparatus to get your stamps straight! Don’t you hate it when you finish a card and go to stamp the sentiment and it is crooked! Then you have to get creative to cover it up or start over! Well, I show you how to never deal with that again!

As always here is the list of things I used to make this card:

  • Stamps
  • Ornamental Envelopes
  • For Unto Us (inside greeting)
  • Here’s a card (front sentiment)
  • Inks
  • Soft Suede
  • Versamark
  • Paper
  • Garden Green 8 1/2″ x 5 1/2″ scored at 4 1/4″
  • Early Espresso 5 1/4″ x 4″ (x2), 3 1/2″ sq.
  • Poinsettia Place Designer Series Paper (DSP) 5 1/8″ x 3 7/8″
  • Whisper White 5 1/8″ x 3 7/8″ (inside), 3 3/8″ sq. (for under wreath), scrap
  • Soft Suede 3 1/4″ sq.
  • Misc.
  • 1/4″ Faux Suede Trim – Early Espresso
  • Dimensionals
  • Elegant Faceted Gems
  • Stamping sponges
  • White Embossing powder
  • Heat tool
  • Stampin’ Seal +

As you saw (hopefully) last week, I love using Make-up brushes to blend in my colors, check out the blog post if you missed it.

Below you will see the same supplies listed above in picture form, if you click on any of them you will be taken to my OnLine Store! Did you know, that I have started doing YouTube Lives?! AND if you purchase $35 from me using this Hostess Code (RTCTACK) between now and Tuesday the 6th of October you will get my Mini Class packet supplies! I will mail out the packets on Thursday the 7th! Check out my Live, but be prepared it was my FIRST and I can only do better, Thank the Lord!! LOL PLUS a pillow gift!! Now, I feel like a tv announcer……BUT that’s not all!! You will also get a pdf of SIXTEEN projects with step by step instructions! Here is a sneak peek:

Sneak peek!!

Thank you for stopping by!! I really appreciate it! Please leave a comment, subscribe to my Newsletter/blog/YouTube channel!! Or all of them! LOL

Come back next week when I have my next video/blog post!

Lisa Tedder
A California girl living in North Carolina

Product List