Category Archives: blog

Handmade Card with tear off bookmark

Hey Guys!,

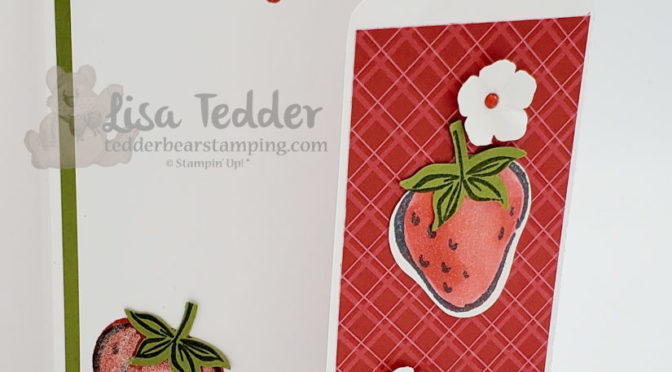
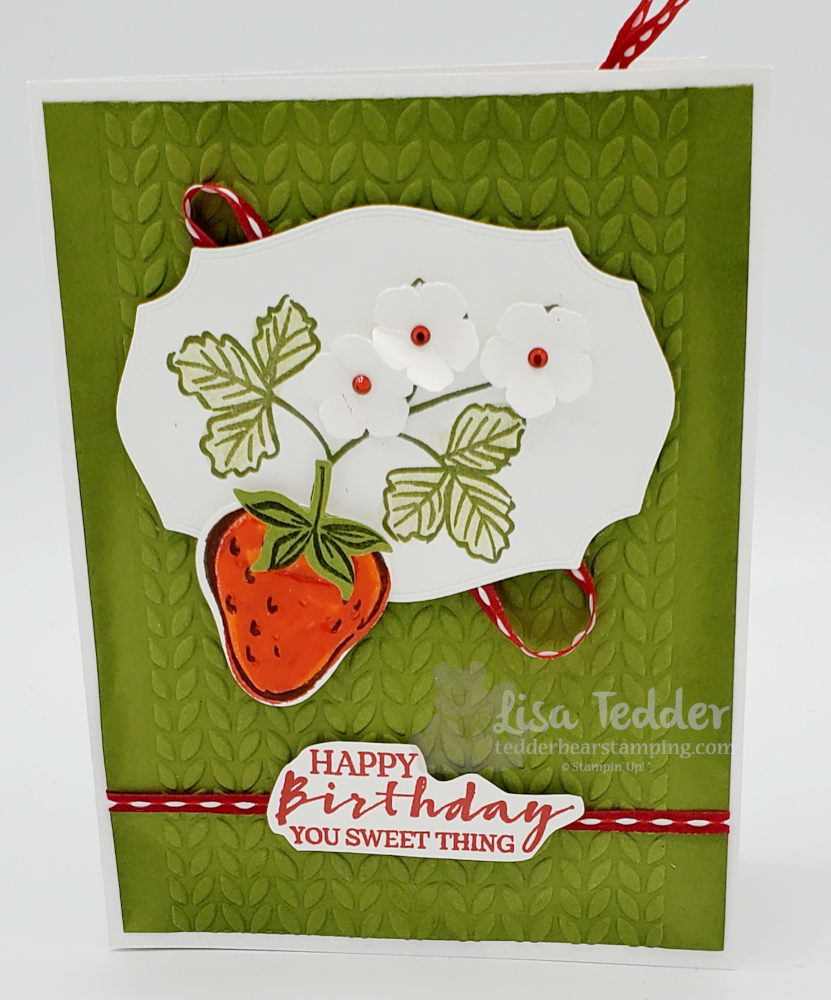
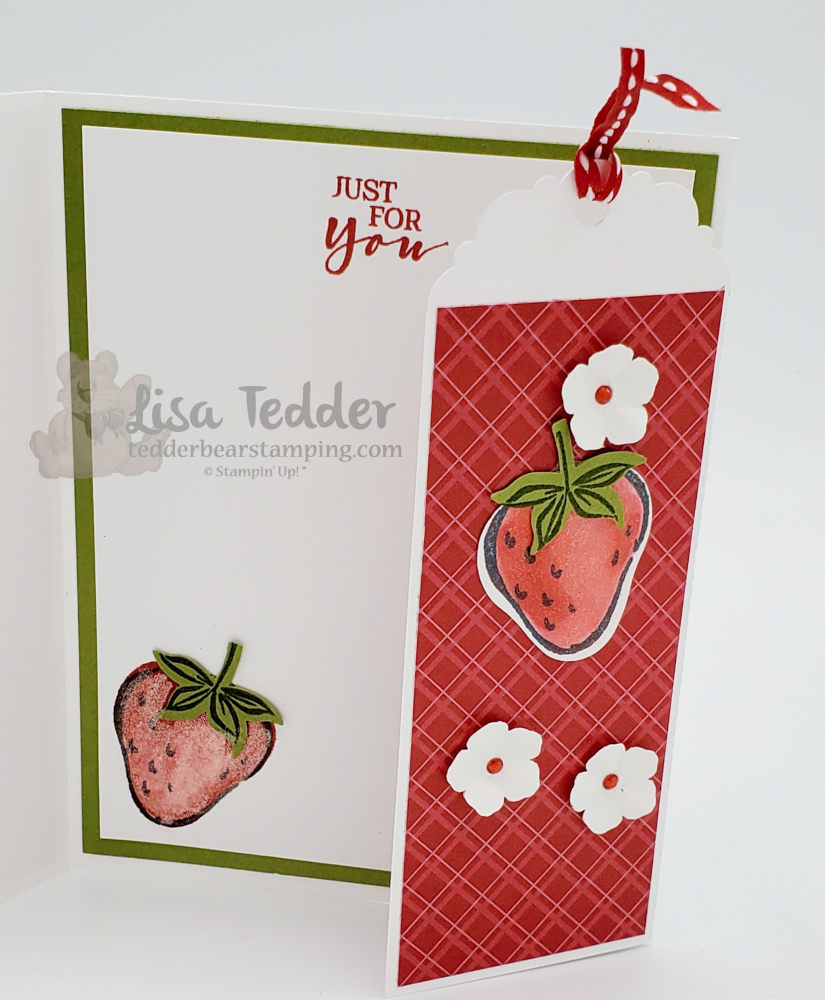
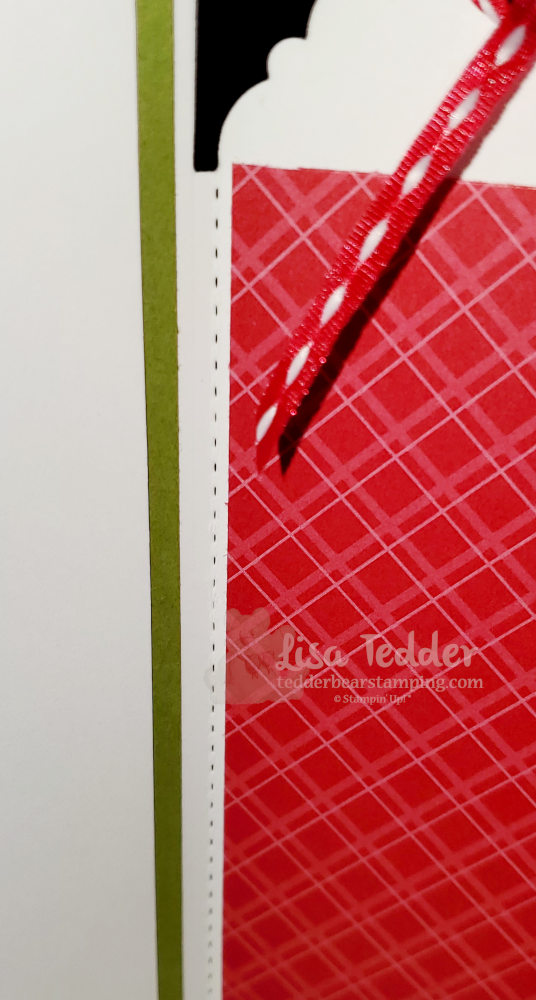
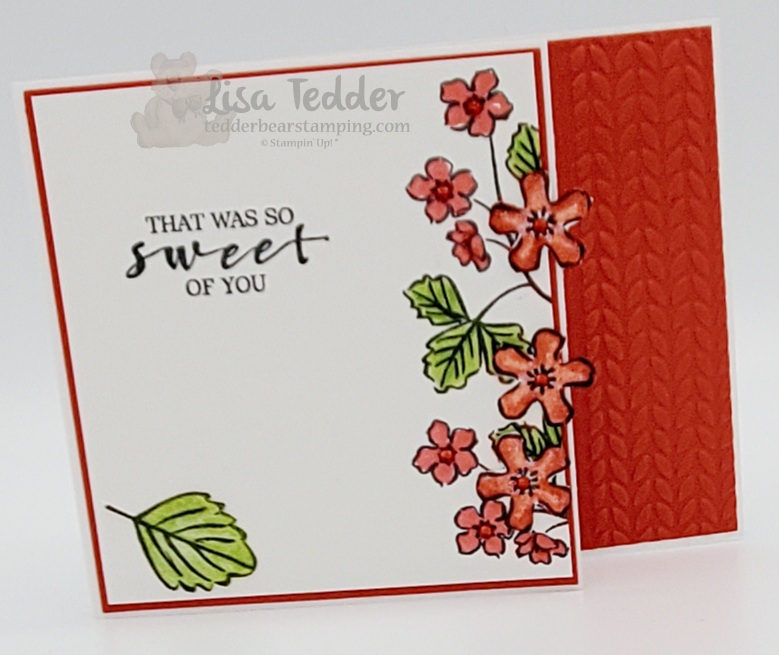
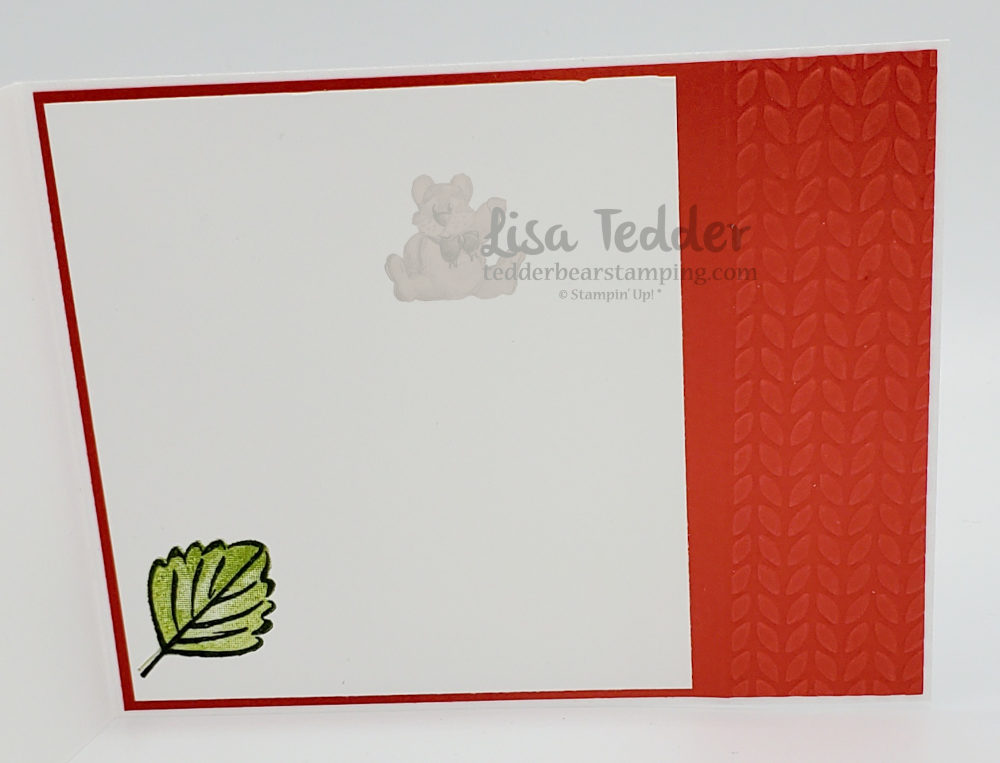
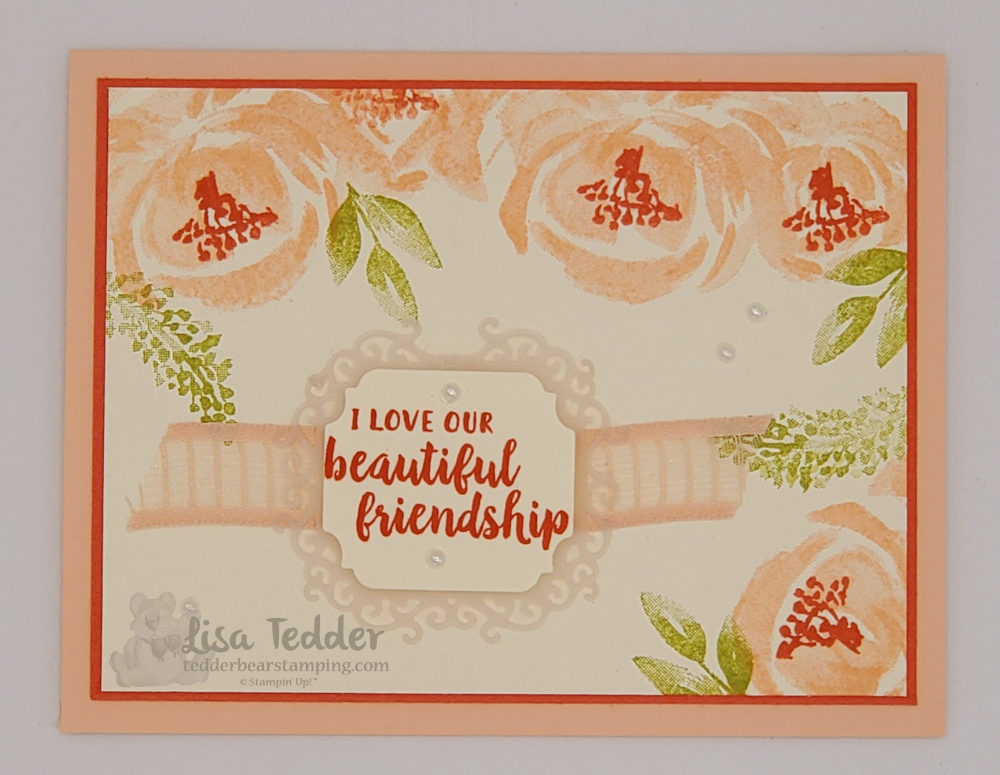
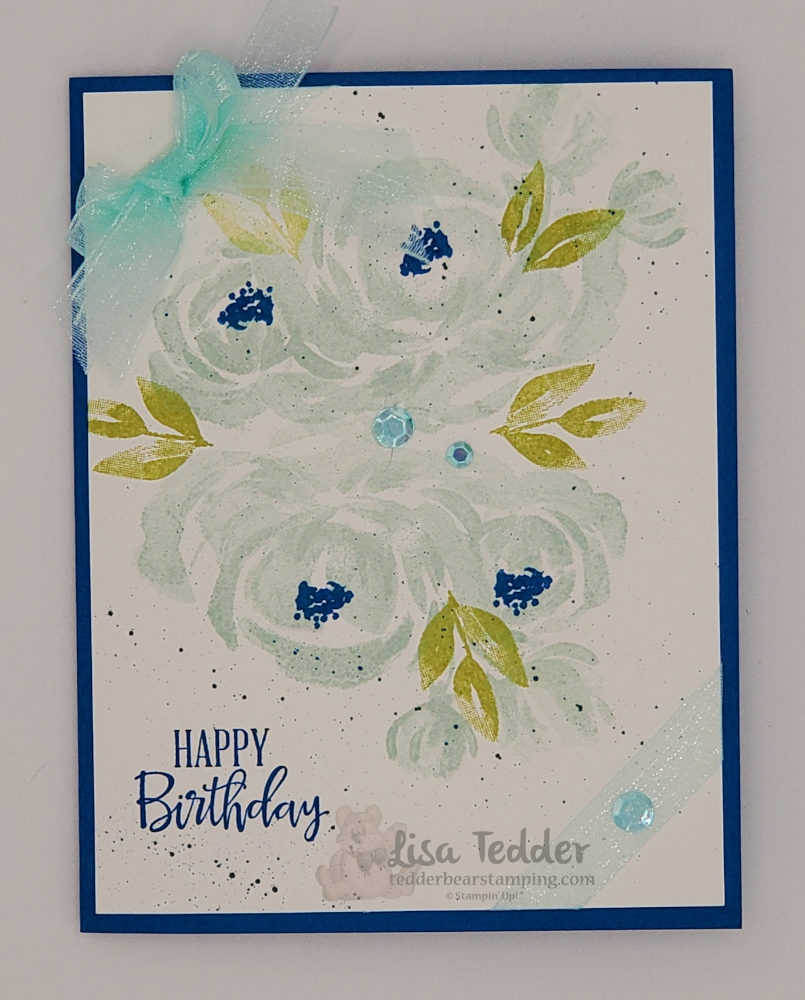
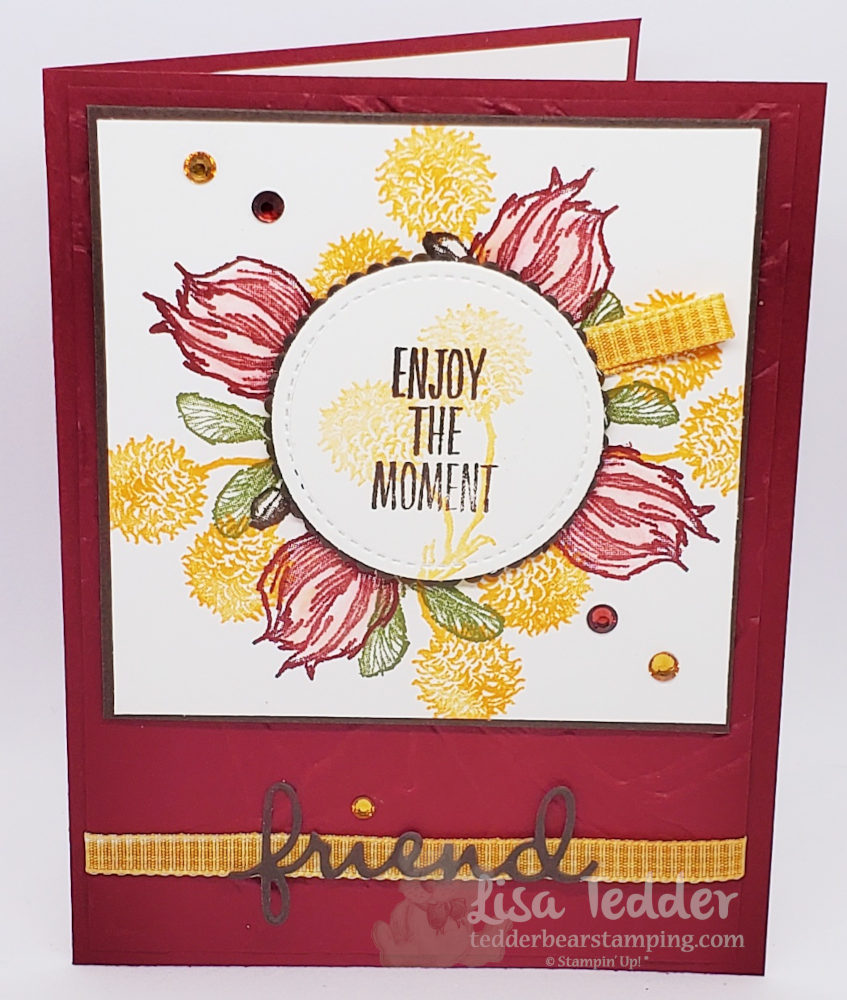
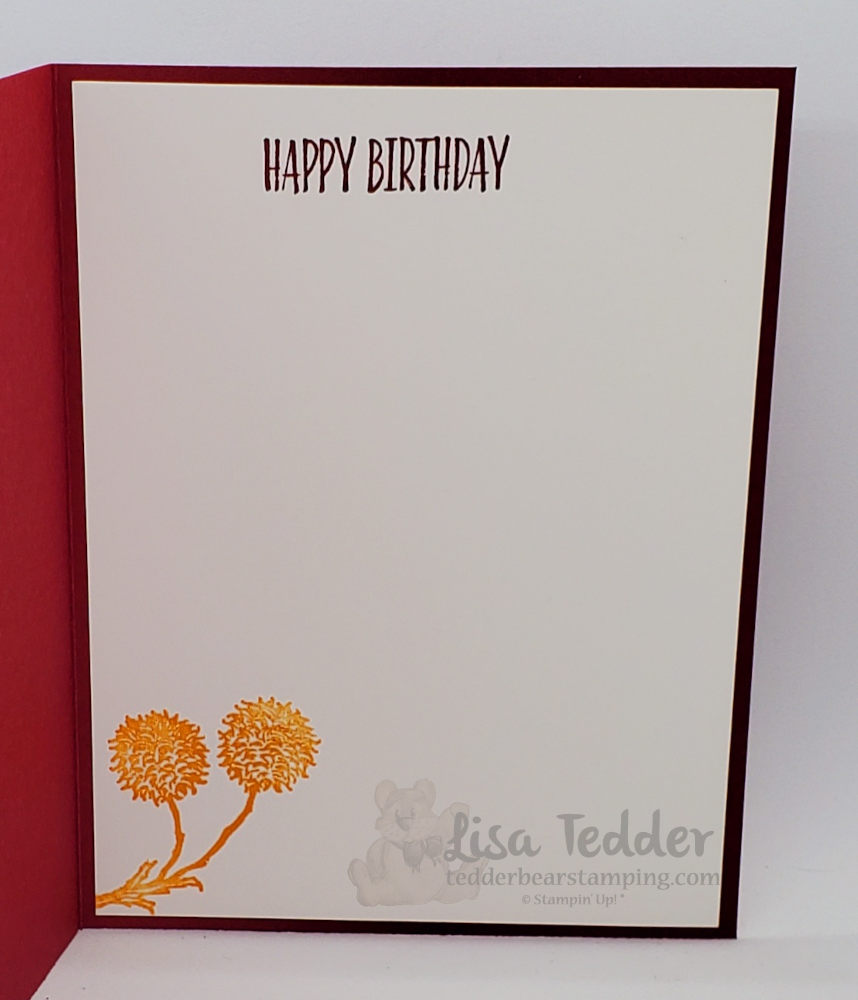
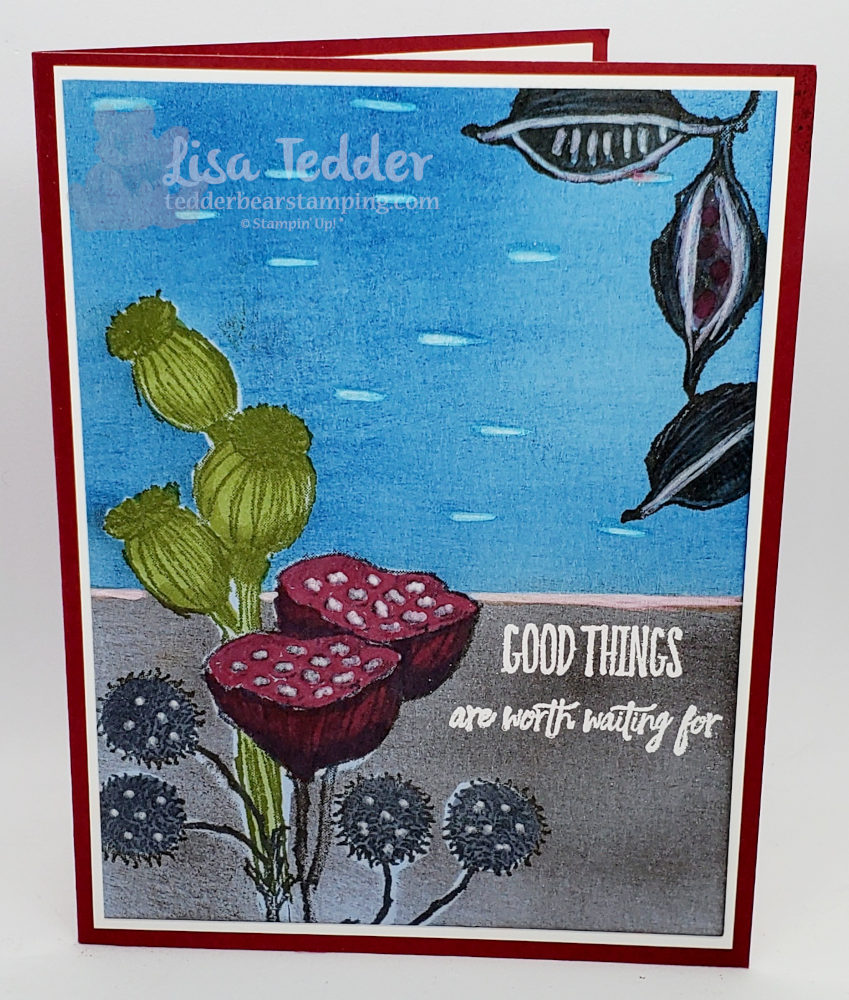
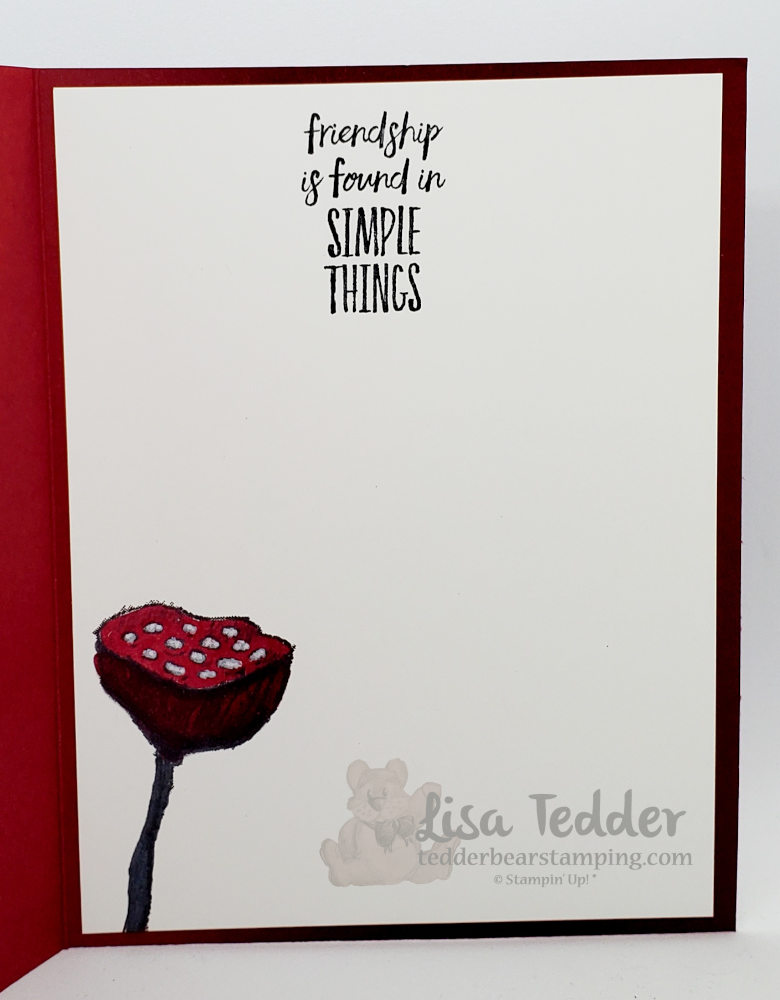
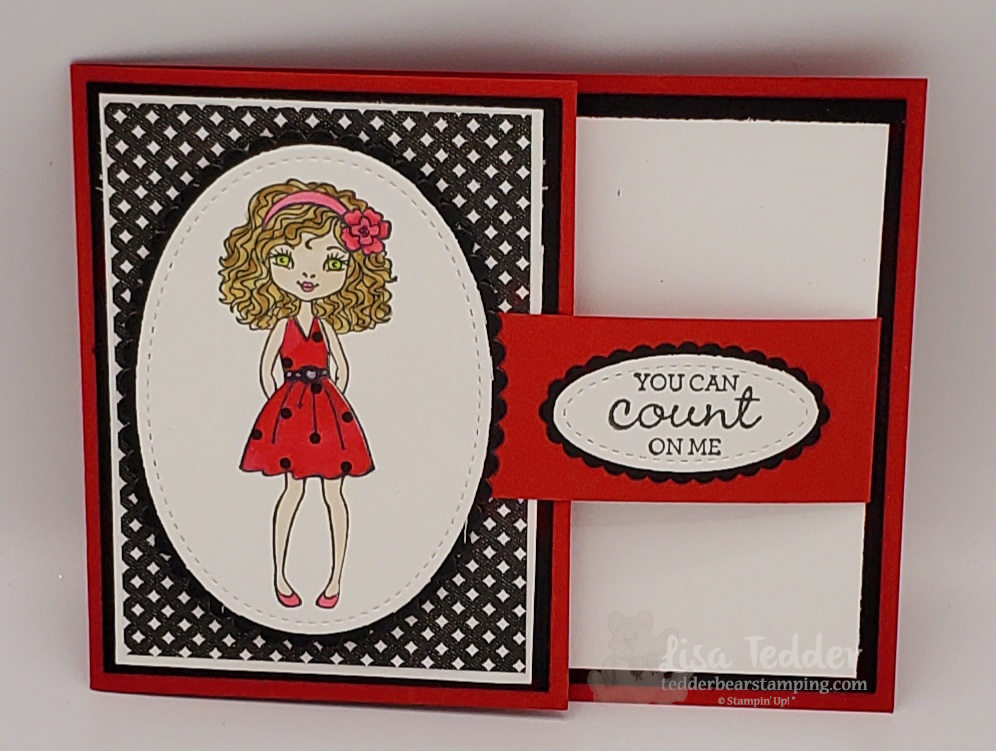
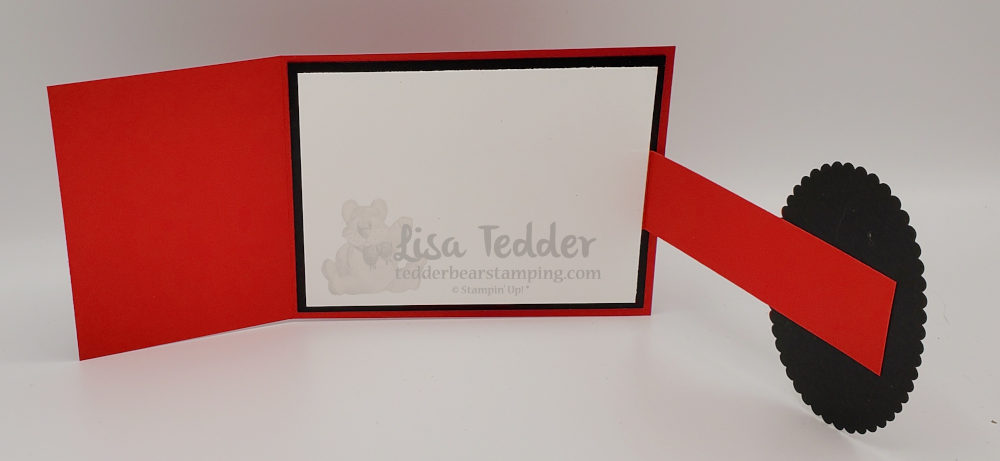
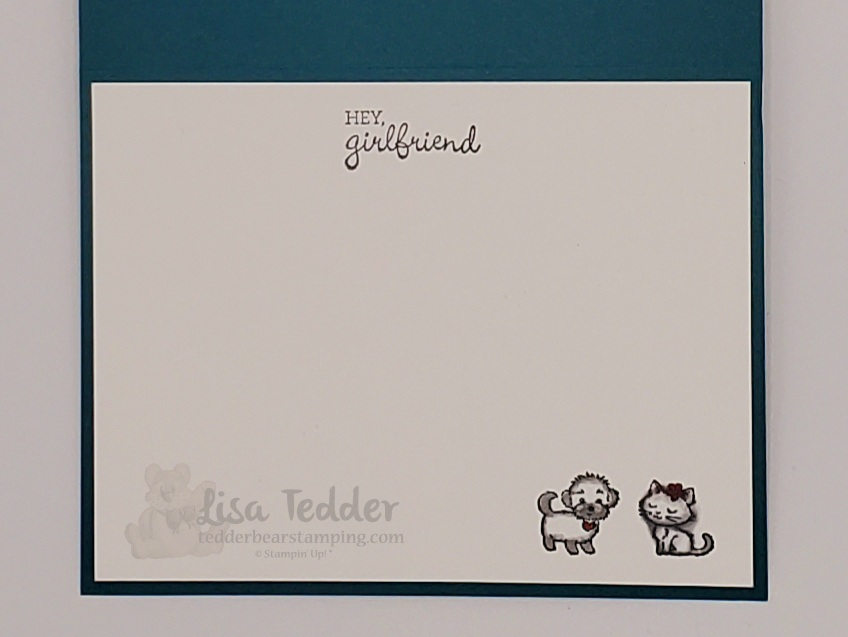
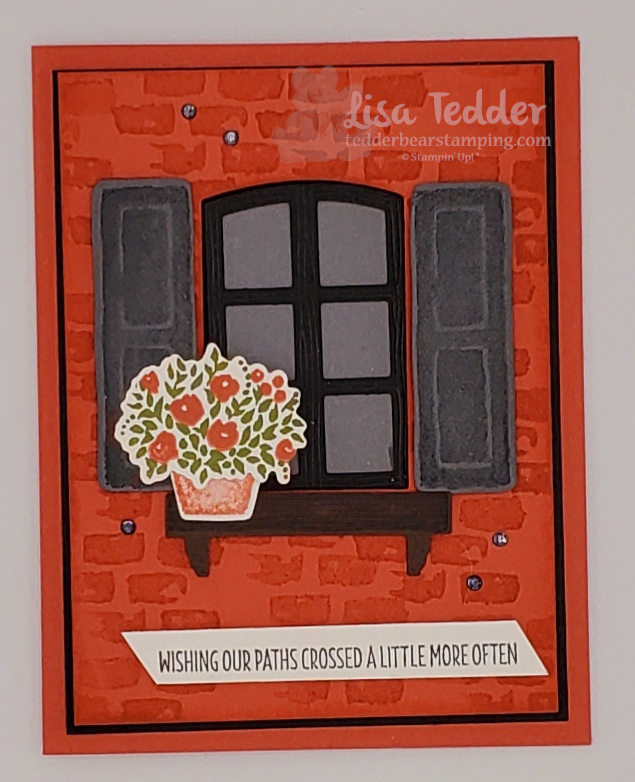
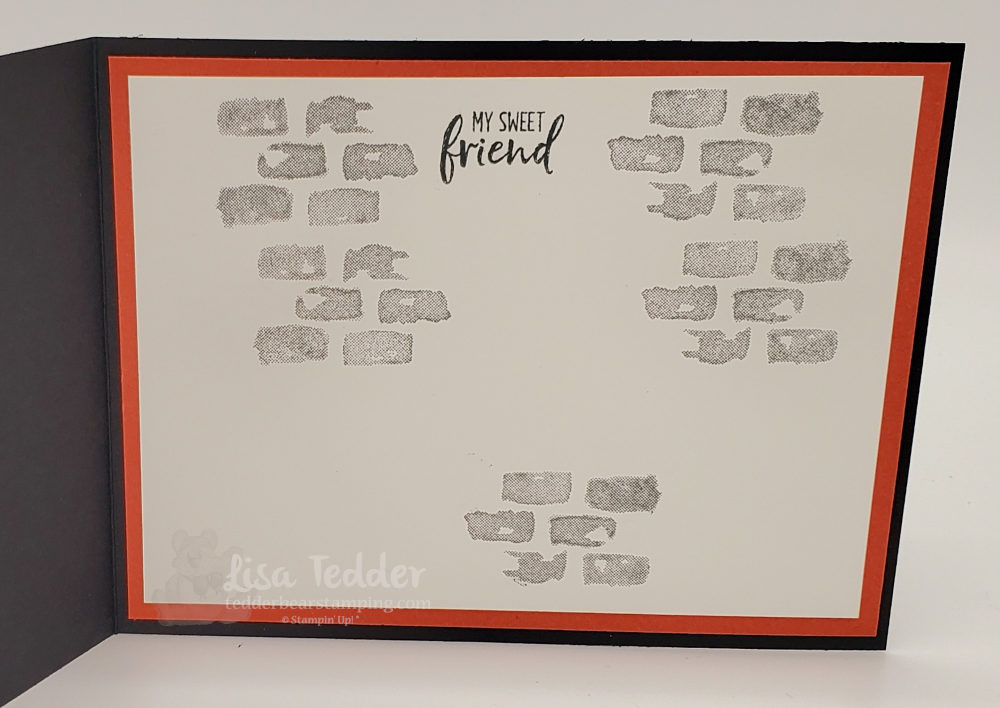
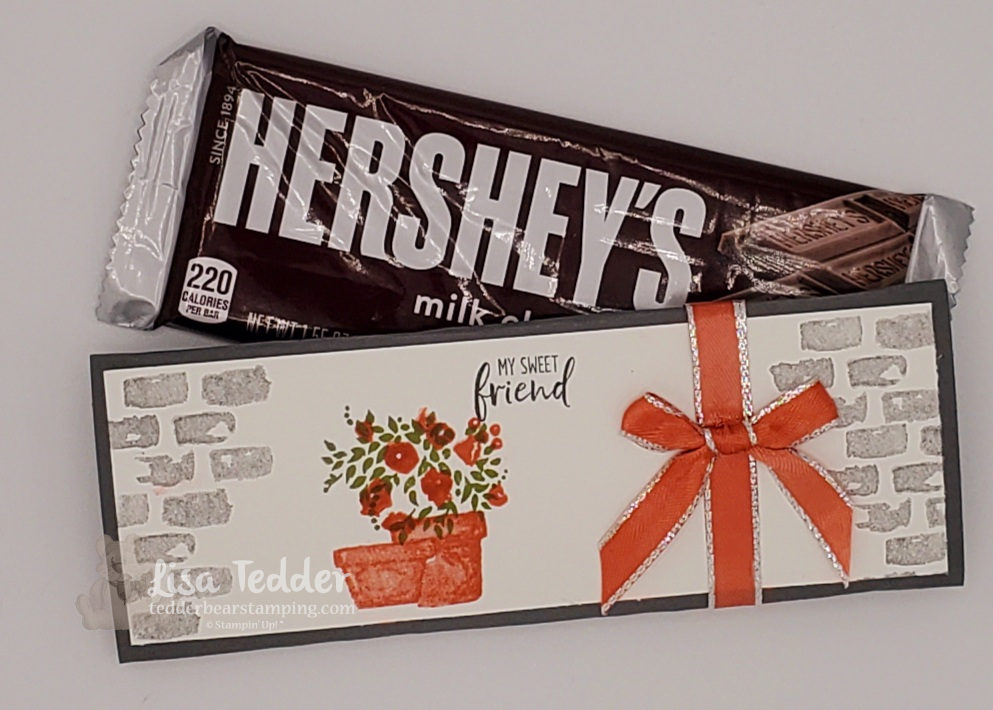
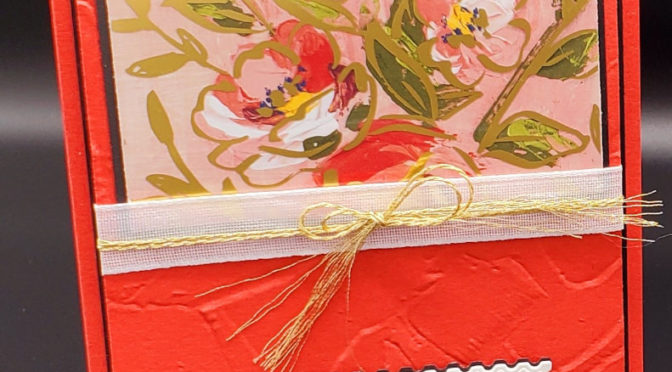
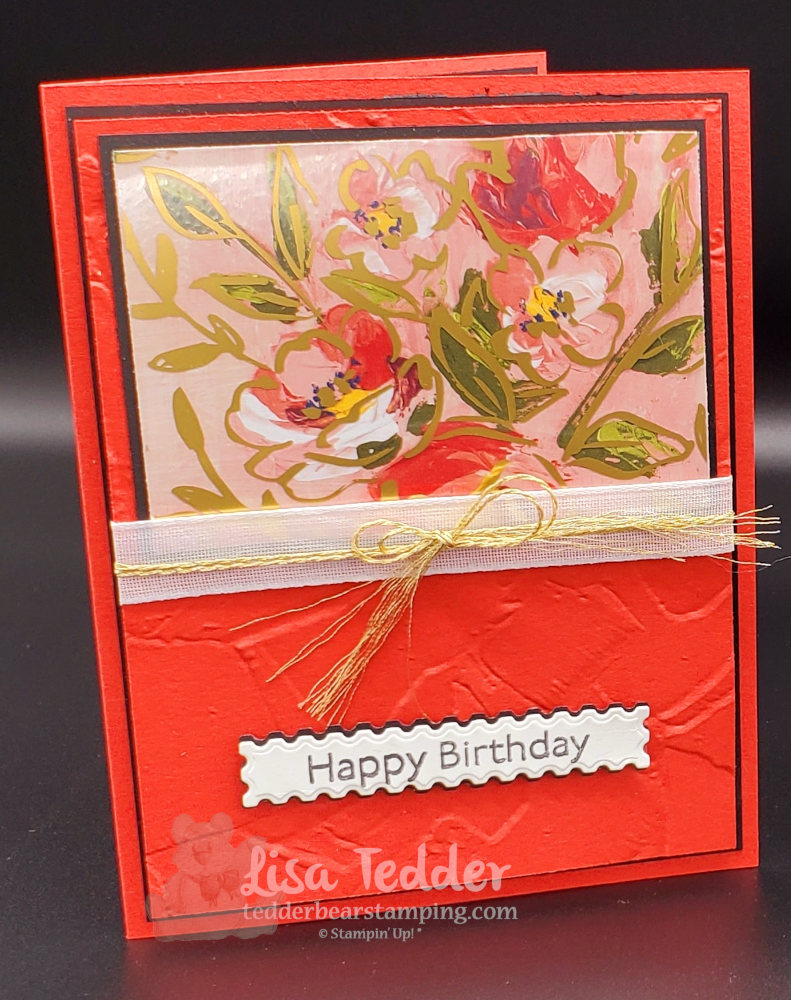
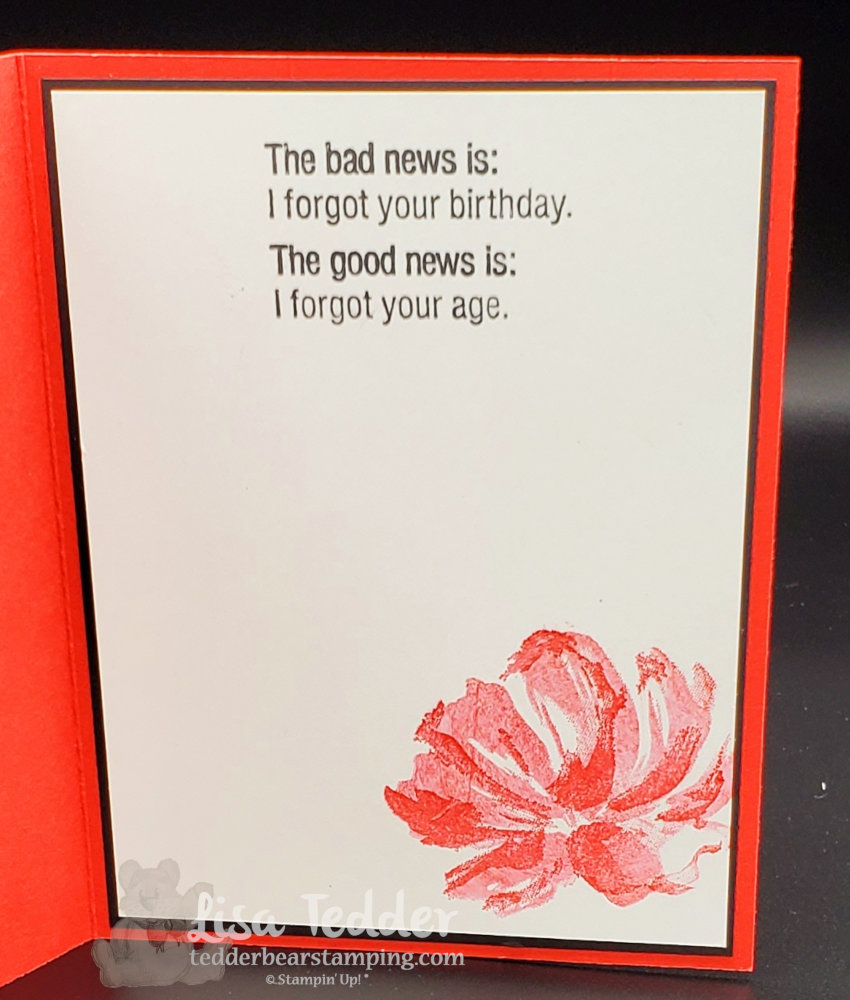
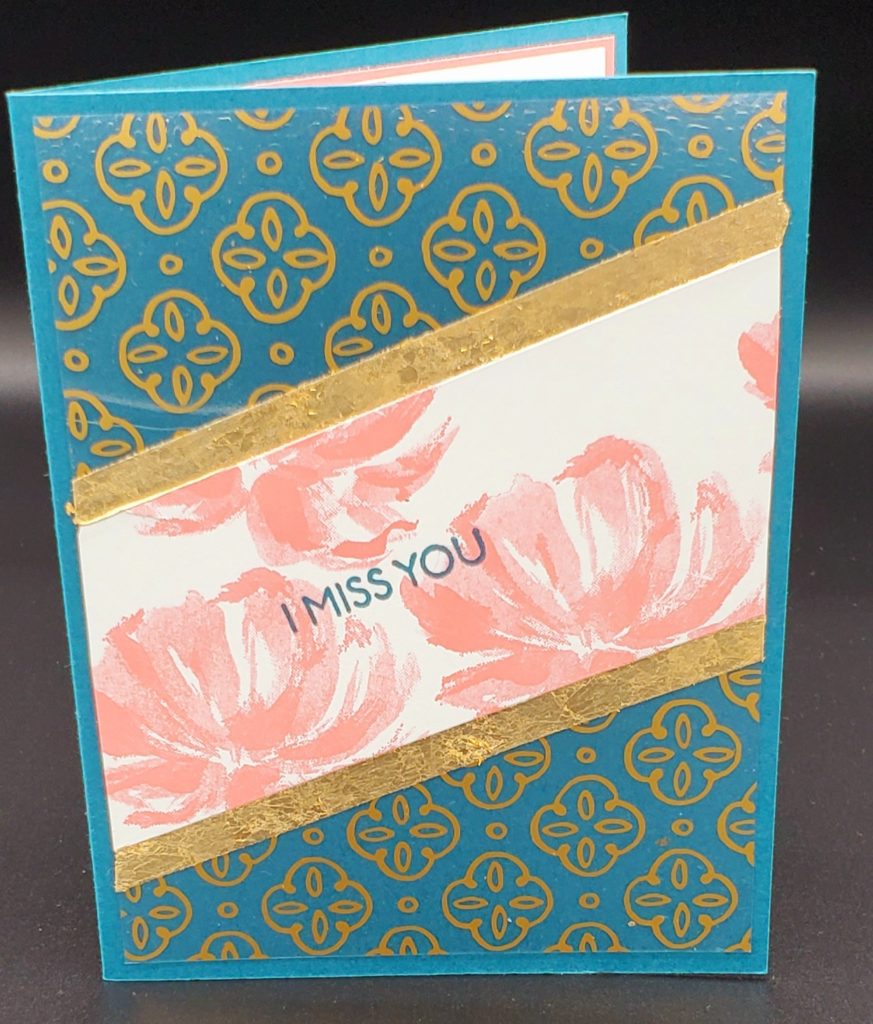
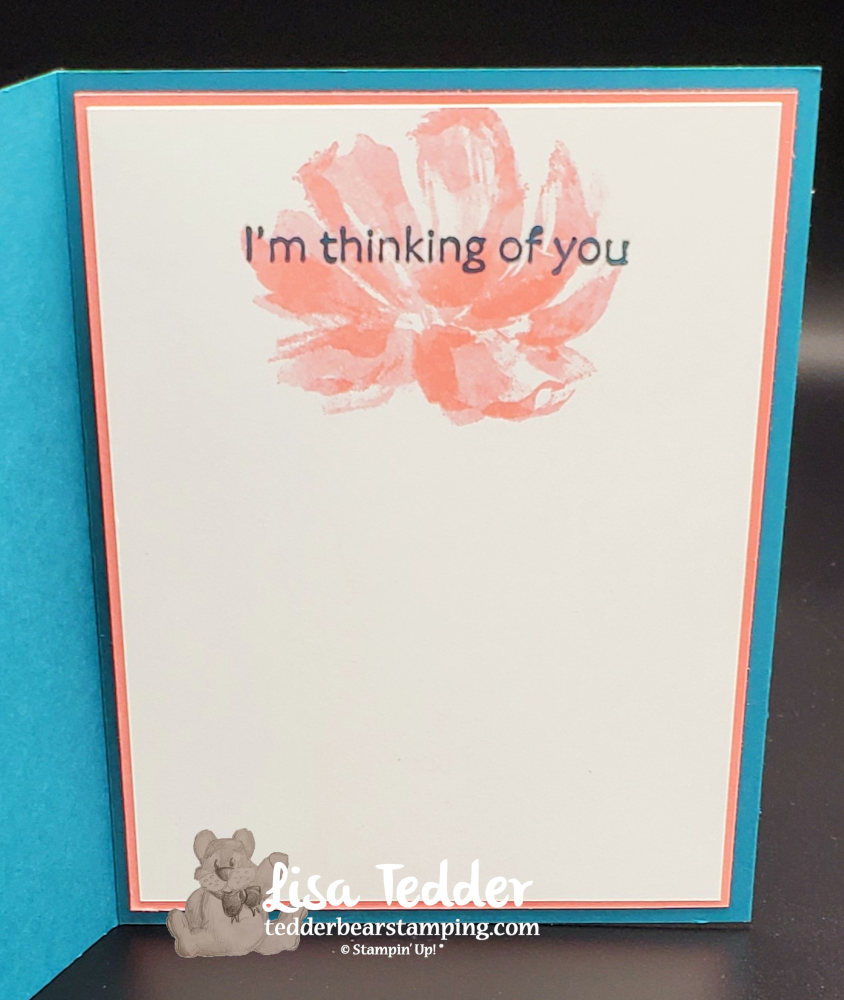
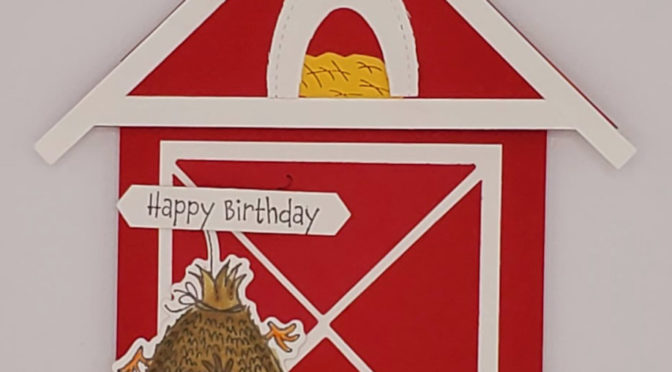
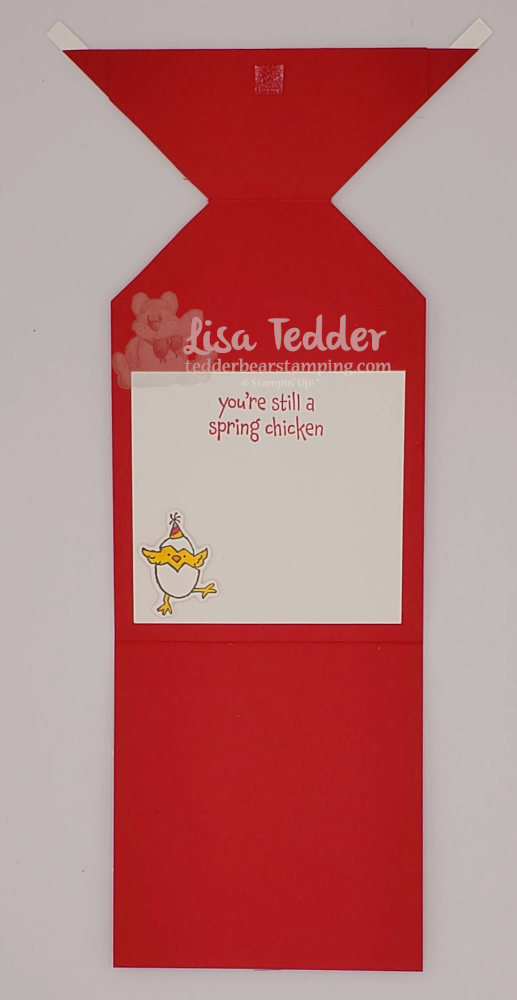
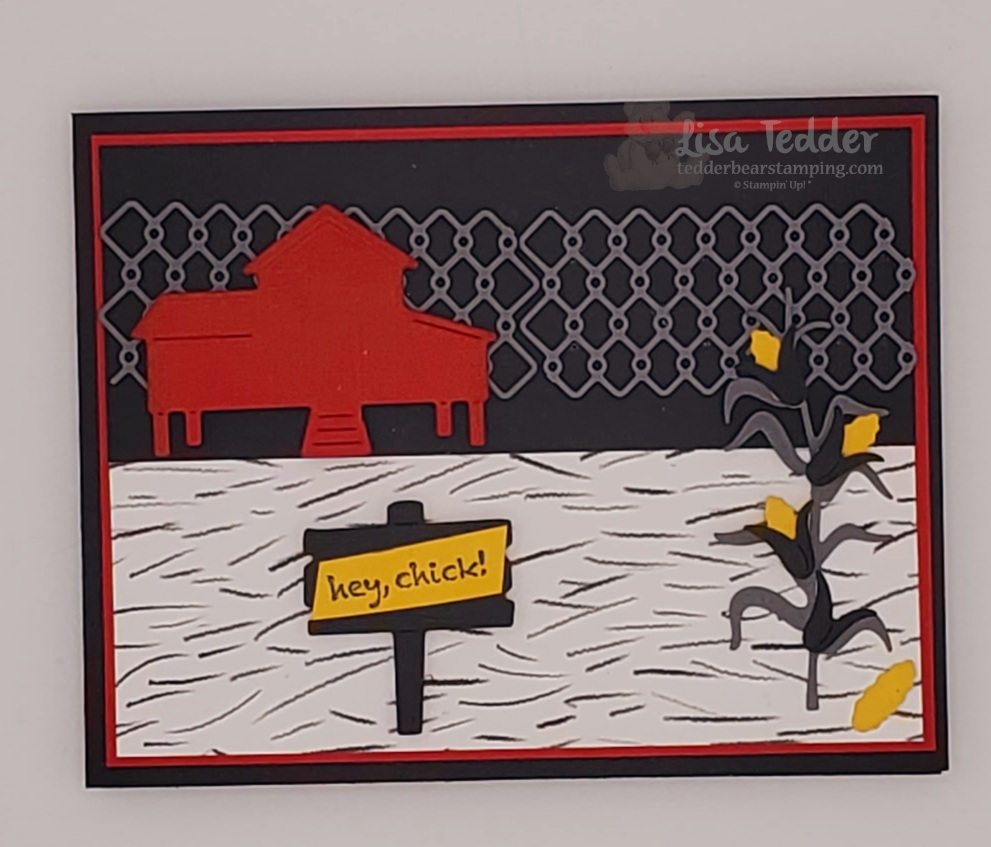
For my card class today I made a card with a tear off bookmark plus another card that is so pretty! Both use the Sweet Strawberry stamp set from SU! This was a LIVE class on YouTube, which you can see here. Here is my first card:

Handmade Card with tear off bookmark
Handmade Card with tear off bookmark – partially open
Card with tear off bookmark – open
Showing the perforated edge to tear off

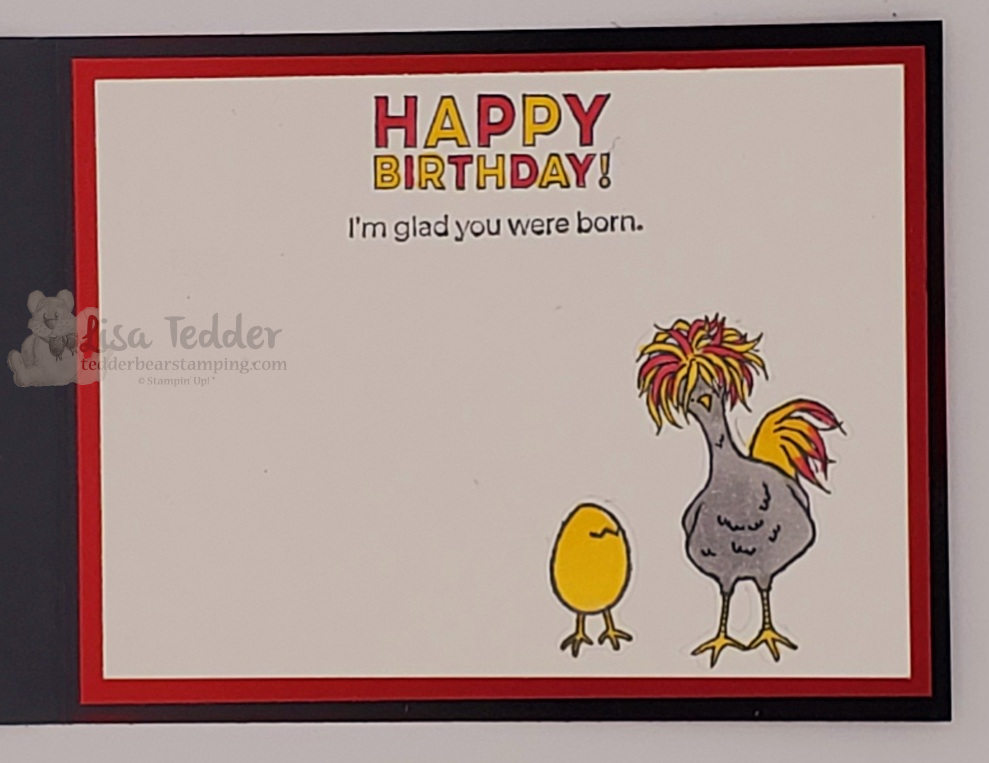
As always, here are the specifics for these cards:

  • Stamps:
  • Sweet Strawberry Bundle
  • Inks:
  • Poppy Parade card 2
  • Granny Apple Green card 2
  • Old Olive card 1
  • Memento black
  • Real Red card 1
  • Paper:
  • Card 1:
  • Thick Basic White 5 1/2″ x 10 1/2″, 5″ x 3 3/4″, scraps for sentiments
  • Old Olive 5 1/4″ x 4″ (x2), scraps for stems on strawberry
  • Regals 6″ x 6″ DSP (Real Red) 4 1/2″ x 1 7/8″ (x2)
  • Card 2:
  • Thick Basic White 9 1/2″ x 4 1/4″ (scored @ 4″)
  • Basic White 4″ sq. (x2), 3 3/4″ x 4″, scraps for flowers for BOTH cards
  • Poppy Parade 5 3/8″ x 4 1/8″, 3 7/8″ sq.
  • Misc:
  • Red Rhinestones
  • Wink of Stella
  • Greenery Embossing folder
  • Playful Pets Trim Combo Pack
  • Stampin’ Cut & Emboss machine
  • Dimensionals
  • Penned Flowers Dies
  • Take Your Pick tool

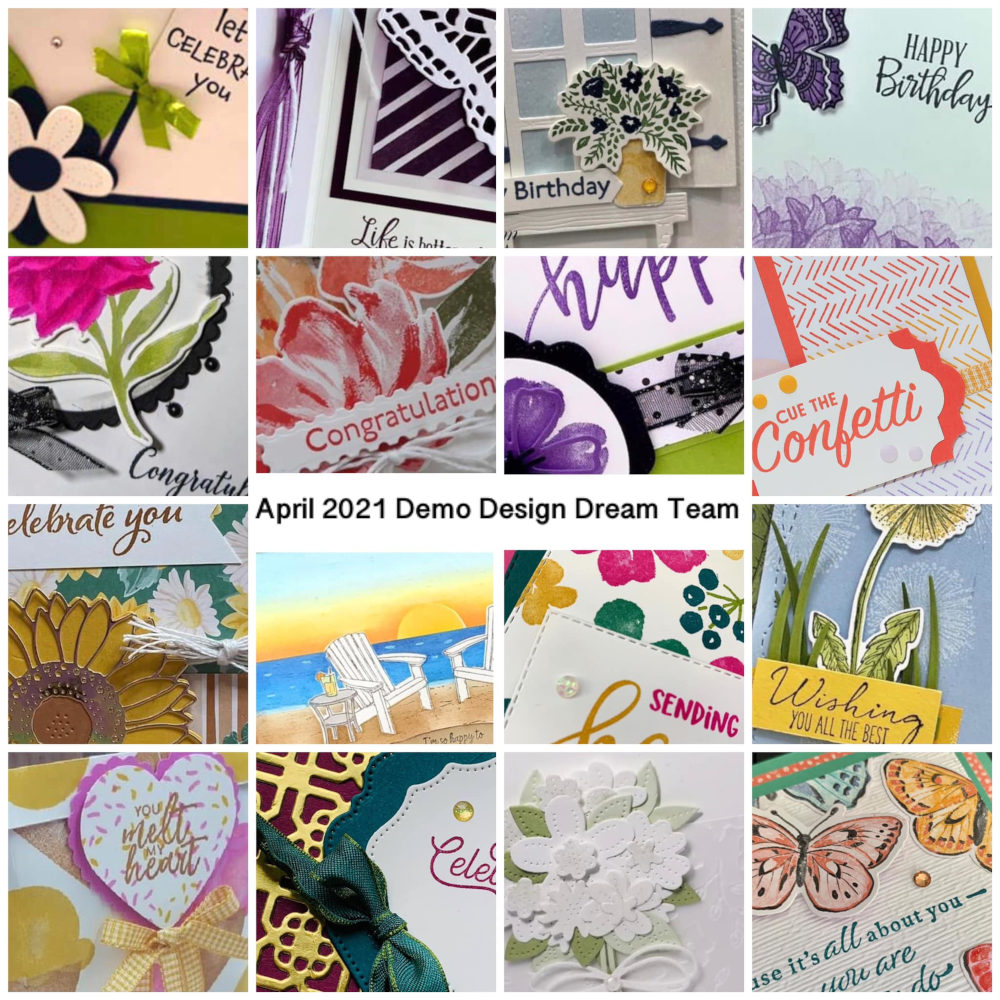
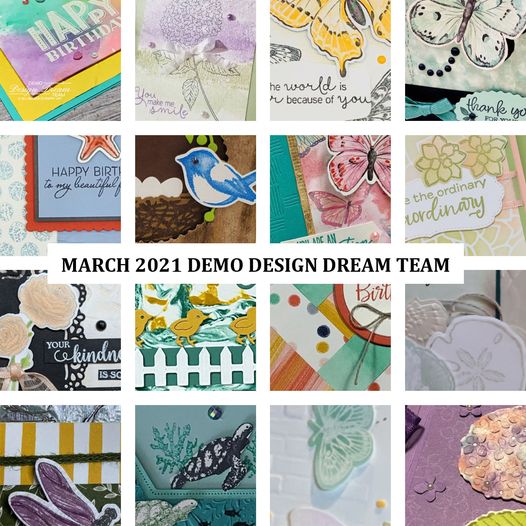
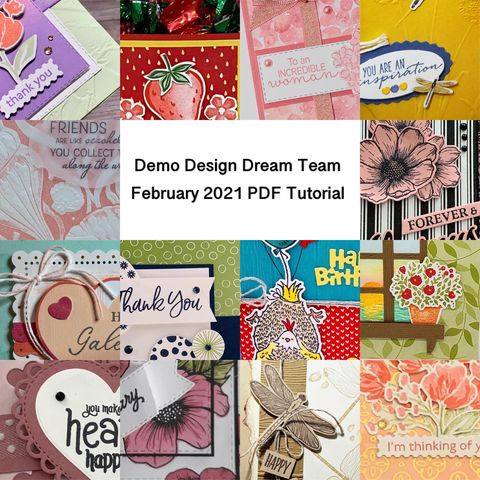
These cards were so much fun to make! Again, if you missed the video go see so you too can make a card with a bookmark that you can tear off! Every Thursday I have my Live mini class on YouTube, I would love it if you would join me! It’s absolutely free, BUT if you purchase a Qualifying order of $35 or more you will receive the class packet with all the fixin’s to make the cards! You can use your own stamps or purchase those from me to make it just like mine! Also, if you make a Qualifying order you will get a PDF of 16 projects with written instructions and pictures! Here is a sneak peek of what you will get:

All these projects for a Qualifying order!!

Thank you again, for stopping by! I hope if you missed this week’s Mini class, you will catch the next one! Every Thursday at 4:00 (eastern)! Finally, thank you so much for supporting me and my small business!

Lisa Tedder
A former California girl living in North Carolina

Product List

Wanna see a Rocker Card?

Hey Guys!,

My question is: Wanna see a Rocker Card? I have wanted to tackle this design for quite a while, so today I am showing you how on this Live YouTube video! Also, the stamp set I am using is called Back on Your Feet by Stampin’ Up! Did you know that I have 3 favorite animals……and YES they are ALL in this set!

Giraffes are super cool, I got to feed one and it’s a memory I’ll cherish! Turtles aren’t REALLY animals, but I love them none the less! Every time we see one crossing a road we stop wherever we are and move them so they won’t get hit by a car! Last but not least is the Sloth. I have a great family memory involving a Sloth and it makes me smile whenever I see a picture of one! So, of course I HAD to get this set! Here is my first fun card:

This card was sooooo much fun!

Isn’t this cute?!

Wanna see a rocker card is not my usual way of starting off my blog posts, but this was so much fun I wanted to share!

As always, the details for these cards:

  • Stamps:
  • Back on Your Feet
  • Inks:
  • Old Olive
  • Mossy Meadow
  • Balmy Blue
  • Memento Black
  • Card 1
  • Paper:
  • Basic Black 8 1/2″ x 5 1/2″
  • Basic White 5 1/4″ x 4″ (x2),
  • Blends card 1
  • Daffodil Delight
  • Pumpkin Pie
  • Old Olive
  • Misc:
  • Scalloped Contours
  • Genial Gems
  • Dimensionals
  • Many Messages Die
  • Blending Brushes
  • Card 2
  • Paper:
  • Mossy Meadow 5 1/2″ circle, scrap for Label
  • Beauty of the Earth DSP 5 1/4″ circle (cut in half)
  • Basic White 5 1/4″ circle (cut in half), scrap for turtle and the sentiments
  • Blends:
  • Old Olive
  • Ivory
  • Soft Suede
  • Misc:
  • Shimmery Crystal Effects
  • Dimensionals
  • Bumblebee Trinkets
  • Window Sheets
  • Blending Brushes
  • Glue Dots

Usually I always tell you that the pic’s below are the same as listed above, just click on them and you will be taken to my OnLine Store! Since I just told you that, I’ll also let you know that if you purchase $35 or more you will receive from me a PDF of 16 projects that have pictures and step by step instructions, see pic below. Also, you will get the card packet of my latest class, so if you want me to cut for you these two cards (including the circles!), get your order in before Wed April 14th and I will mail it out to on the 14th! That’s a great deal! I love doing this for you guys!

SIXTEEN projects, plus a class packet, all for a $35 or more order!!

Thank you for checking out my blog! I really appreciate you supporting me and my small business! IF you are in need of a catalog, let me know and I will mail one to you for $10, PLUS a $10 gift certificate for your first order!

Lisa Tedder
A former California girl living in North Carolina

Product List

Thank God Forever Fern isn’t retiring!

Hey Guys!,

Thank God Forever Fern isn’t retiring! I hope this week has been good for you, I am excited to share with you a Stamp set from Stampin’ Up! that is staying in the new catalog! I am making 3 cards for my Mini Stamp Class that was Live on YouTube today! If you missed it, go check it out!

Did you know that next month Stampin’ Up!’s new catalog is coming out? If you are wanting one sent to you, just let me know! I haven’t received mine yet BUT I have seen it! If you are like me and want to get sneak peeks and be able to order from the catalog early, you can join my team and you too can be on the inside, plus get a discount!!

Here is one of the cards I am showing you today:

Thank God Forever Fern is not retiring!
inside view
Thank God you’re staying!
inside card 2
Thank God you’re staying!
inside card 3

As always here are the specifics for these cards:

  • Stamps:
  • Beautiful Friendship
  • Butterfly Wishes
  • Inks: Card 1
  • Petal Pink
  • Pear Pizzazz
  • Calypso Coral
  • Card 2:
  • Pool Party
  • Pacific Point
  • Pear Pizzazz
  • Card 3:
  • Mango Melody
  • Gorgeous Grape
  • Granny Apple Green
  • Smoky Slate
  • Memento Black
  • Paper:
  • Card 1:
  • Petal Pink 8 1/2″ x 11″scored at 4 1/4″
  • Calypso Coral 5 1/8″ x 3 7/8″ (x2)
  • Very Vanilla 5″ x 3 3/4″ (x2), scrap for sentiment
  • Vellum 2 1/2″ sq.
  • Card 2:
  • Pacific Point 8 1/2″ x 5 1/2″ scored at 4 1/4″
  • Basic White 5 1/4″ x 4″ (x2)
  • Card 3:
  • Gorgeous Grape 8 1/2″ x 5 1/2 scored at 4 1/4″
  • Mango Melody 5 1/4″ x 4″ (x2)
  • Basic White 5″ x 3 3/4″ (x2)
  • Misc:
  • Card 1
  • 5/8″ Organdy Striped Ribbon
  • Pearls
  • Dimensionals
  • Card 2
  • 3/8″ Sheer Ribbon Pool Party
  • Artistry Blooms Sequins
  • Pacific Point marker to make splatter
  • Card 3
  • 3/8″ Gorgeous Grape sheer ribbon
  • Artistry Blooms
  • Basic Black Marker for dotted pathway for butterfly

As a rule all the supplies are listed below in picture form. Click on any of them to be taken to my OnLine store. If you purchase from me, you will receive the class packet to do these cards (if you order within 5 days of the video) otherwise you will receive the class packet of that weeks video. You will also receive the PDF of 16 cards with step by step instructions with pictures! Here is a sneak peek of that!

April’s isn’t quite done yet, but this will give you an idea what you get.

Thank you for supporting me and my small business! It really makes me happy to know that you like what I do!

Lisa Tedder
A Former California girl living in North Carolina

Product List

TWO techniques ONE class!

Hey Guys!

Today I am sharing with you TWO techniques ONE class! I really do love techniques, and one of these I’ve done in the past and the other one is new to me! Consequently I love them both! Hope you got to watch my YouTube live today, if not you can catch it here. And if you missed last weeks post you can go here. Here is the first card:

Here is one technique, isn’t it pretty with the tealight?!
Another technique, so much fun!

As always, all the supplies will be listed below in both word and picture form. Click on any of the pictures to be taken to my OnLine store! If you make a Qualifying purchase ($35 or more) you will receive the class packet for both of these cards! Also, you will receive a PDF with SIXTEEN project ideas, one of them is the Faux Bark that is above! For this month we did all techniques, so not only will you learn how to make my Faux Bark there are all kinds! Here is a sneak peek:

This month it is all Techniques!
  • Stamps:
  • Birds & Branches Bundle
  • Many Messages Bundle
  • Inks:
  • Soft Suede
  • Early Espresso
  • Memento Black
  • Pacific Point
  • Versamark
  • Blends:
  • Old Olive
  • Soft Suede
  • Paper:
  • Soft Suede 11″ x 4 1/4″, 5 1/4″ x 4″, scrap for nest
  • Early Espresso 8 1/2″ x 5 1/2″
  • Gold Foil 5 1/4″ x 4″ (cut out middle)
  • Crumb Cake 5″ x 3 3/4″ (x2), scrap for nest
  • Granny Apple Green 3 1/4″ sq. (card 2)
  • Vellum 3 1/4″ sq. (Card 1)
  • Scrap of Balmy Blue
  • Very Vanilla 5 1/4″ x 4″
  • Basic White 5 1/4″ x 4″, scraps for eggs (card 2)
  • Misc:
  • Foam adhesive strips
  • Gold Embossing powder
  • Heat tool
  • Dimensionals
  • Stampin’ Seal +
  • Champagne Rhinestones
  • Holiday Rhinestones
  • Basic Rhinestones
  • Tealight (battery)
  • Wink of Stella

So, which one do you like more?! I gave you TWO techniques in one class! I LOVE the Faux Bark, but the tealight card came out so pretty!! Especially when the tealight is on!

Thank you so much for visiting! I appreciate you watching/reading and all your purchases! You help support my small business!

Lisa Tedder
A former California Girl living in North Carolina

Product List

Mini Class – Enjoy the Moment

Hey Guys!

Today I am sharing with you my Mini Class – Enjoy the Moment stamp set from Stampin’ Up! If you were a demonstrator and signed up for the ‘convention’ from SU! you would have received this stamp for FREE! I LOVE being a demo, the perks are so awesome, not only do I get 25% off whatever I buy, but when I go to the get togethers that are done throughout the year, I get freebies! Also, I get to order a month before any catalog goes Live! The best part of all is all the people I have met through Stampin’ Up! If you have any questions about joining my team, let me know! I would love to have you as part of my SU! family!

So, today I am sharing two cards I did with this stamp set! If you missed my Live video, you can catch the repeat here. These cards were a lot of fun! Here is the first one:

Mini Class Enjoy the Moment-Inspired by Narello Fasulo
Mini Class Enjoy the Moment inside
Mini class Enjoy the Moment-Inspired by Cheryl Miller
Enjoy the Moment inside

As Always, I am listing the supplies used for both of these cards below, they will also be listed in picture form at the bottom, click on any of the pictures to be taken to my online store! When shopping with me, if you order $35 or more you will receive the card kit for that week plus a pillow gift!! And you will also get a pdf of 16 cards with step by step instructions with pictures!

  • Stamps:
  • Enjoy the Moment
  • Inks:
  • Old Olive
  • Mango Melody
  • Cherry Cobbler
  • Pacific Point
  • Memento Black
  • Versamark
  • Blends:
  • Mango Melody
  • Old Olive
  • Cherry Cobbler
  • Basic Black
  • Paper:
  • Basic Black 3 3/4″ sq ( 2nd card), scrap for ‘friend’, and scrap for scalloped circle behind sentiment on card 1
  • Cherry Cobbler 8 1/2″ x 5 1/2″ (for both cards), 5 1/4″ x 4″ (card 1)
  • Basic White 5 1/4″ x 4″ (x2) for card 2, 5 1/4″ x 4″ for card 2, 5″ x 3 3/4″ (card 2), 3 5/8″ sq (card 1), scrap for sentiment on card 1
  • Misc:
  • Dimensionals
  • White embossing powder
  • heat tool
  • Stitched shapes dies
  • Layering circles dies
  • Stamparatus
  • Wink of Stella
  • White Chalk Marker
  • Holiday Rhinestones
  • Well Written dies (for ‘friend’)
  • Painted Texture Folder
  • Bumblebee Gingham ribbon

Here is a sneak peek of the pdf that you will get when you spend $35 or more:

I hope you enjoyed the cards today! If you missed last weeks video/class you can catch it here. I have been really loving my weekly mini classes, I hope you have been too! Come back next week to see the two cards I make!

Lisa Tedder
A former California girl living in North Carolina

Product List

Two Techniques in one Class

Hey Guys!

For today’s post I am sharing with you a mini class that I am doing on YouTube that has two techniques! One of the techniques I’m doing for the first time! I really hope you joined me on my Live, but if not you can always catch it here.

One of Two Techniques
Inside
Technique two, one mini class
Inside card 2

As always, here are the supplies for both of these cards:

  • Stamps:
  • Hey, Girlfriend
  • Inks:
  • Memento Black
  • Blends:
  • Real Red
  • Basic Black
  • Mango Melody
  • Cinnamon Cider
  • Ivory
  • Petal Pink
  • Soft Suede
  • Granny Apple Green
  • Smoky Slate
  • Paper:
  • Pretty Peacock 8 1/2″ x 11″ card 2
  • Fine Art Floral Designer Series Paper 5 1/4″ x 4″ card 2
  • True Love Designer Series Paper 3 3/4″ x 2 3/4″, scrap for dress. card 1
  • Real Red 8 3/4″ x 4 1/4″ scored @ 3 1/4″, 5″ x 1 1/4″ scored @ 1/2″. card 1
  • Basic Black 5 1/4″ x 4″, 4″ x 3″, 3 3/4″ x 2 3/4″ (for scalloped piece behind girl), 2 1/4″ x 1 1/4″ (for scalloped piece behind sentiment) card 1
  • Basic White 5″ x 3 3/4″, 3 7/8″ x 2 7/8″ (front flap card 1), 3 1/2″ x 2 1/2″ (for stitched shape of girl) , 2″ x 1″ for sentiment, 5 1/4″ x 4″ for card 2, scraps for circles for card 2
  • Misc:
  • Layering Ovals dies
  • Stitched shapes dies
  • Foam Adhesive Strips
  • Woven Threads Sequin Assortment
  • White Chalk Marker
  • Magnet
  • Stampin’ Cut & Emboss Machine
  • Stampin’ Seal +

As a rule, I have the same supplies listed in picture form below, click on any of them to be taken to my OnLine Store! Likewise, for every $35 purchase you will receive from me the class packet from this class (excluding stamps/inks) and a PDF of 16 projects with step by step instructions. Sneak Peek:

Subsequently, I hope you enjoyed my Two Techniques in one Mini Class, if you missed my class from last week, you can go here. Likewise, if you missed my last blog post about that video you can see it here. That class was one of my very favorites, I hope you like it as much as I do!

Again, I want to share with you my Stampin’ Bestie Club! You can find all the info about it here, and you can join at any time! Though, you DID miss our inaugural class you can always be there next time! For those who join, Hetty, Carol and I would love to let you in on one of our favorite traditions: getting a charm for a bracelet every time we get together! We supply the bracelet too! Hence you will LOVE being apart of our club, we will have so much fun and each month you will receive between $19 – $22 of fun product!

In Conclusion, thank you so much for joining me today! I appreciate you supporting my small business and hope to see you on one of my Live videos so I can say hi!

Lisa Tedder
A former California girl living in North Carolina

Product List

Stunning Welcoming Windows

Hey Guys!,

For today’s class I am using the stunning Welcoming Windows stamp set from Stampin’ Up! Every Thursday at 4:00 p.m. (eastern) I have a mini stamp class that I do on YouTube Live! If you missed my blog post sharing last weeks class, you can click here. Of course, if you missed it you can always watch me live the next time, I really love being able to talk to someone OTHER than my husband!! LOL

Stunning Welcoming Window
Stunning Welcoming Windows – card inside
Stunning Welcoming Windows – card 2
Welcoming Windows card 2 inside

Aren’t those so pretty!! Hence the reason I titled this Stunning Welcoming Windows! I LOVE the bricks and the window! Don’t you!?

As usual, here are the specifics for these cards:

  • Stamps:
  • Welcoming Window Bundle
  • Approaching Perfection
  • Inks:
  • Terracotta Tile
  • Old Olive
  • Basic Gray
  • Memento black
  • Markers:
  • Terracotta Tile
  • Old Olive
  • Stampin’ Write black marker
  • Paper:
  • Terracotta Tile: 8 1/2″ x 5 1/2″, 5″ x 3 3/4″ (x2) (card 1), 5 1/4″ x 4″ (x2) card 2
  • Basic Black 5 1/8″ x 3 7/8″ (x2), scrap for window card 1, 11″ x 5 1/2″ (card 2)
  • Basic Gray scrap for card 1
  • Basic White scraps for BOTH cards, 5″ x 3 3/4″ (x2 card 2), 5″ x 3 3/4″ (inside card 1)
  • Early Espresso scrap card 1
  • Vellum 2 3/8″ x 1 5/8″ (behind the window on card 1)
  • Misc:
  • Basic Rhinestones
  • Matte Black Dots
  • Dimensionals
  • MultiPurpose Liquid Glue

Again, all the product is listed above, but you can also see them in picture form below! Click on any of them to be taken to My OnLine Store! For purchases that qualify ($35 or more) you will get the class packet of the week (you will have a class packet for the 6 days following that video), so if you see something you want to remake on your own, place a Qualifying order and you will get that packet PLUS a PDF of 16 projects with pictures and step by step instruction! Here is a sneak peek of the PDF:

NEXT month you will get a different pdf!

Of course I always have a Pillow Gift to give you on top of the PDF and class packet! What am I giving away this week? Here ya go!

Your Pillow Gift for the next 6 days! YUM!!

Don’t you LOVE this Bundle?! The stunning Welcoming window set is so much fun to play with! I keep looking at card 1 and am so tickled that it is so pretty! And card 2 is a little out of my comfort zone, it has less layers, but I love it too! LOL I am challenged when it comes to doing things simply.

If you missed my announcement about my Stampin’ Bestie Club, be sure and check it out, you will LOVE it!!

Thank you for stopping by! I hope to ‘see’ you while doing my live videos! See you next week!

Lisa Tedder
A former California girl living in North Carolina

Product List

One stamp set – TWO different looks!

Hey Guys!

For this weeks Live video I used one stamp set, but got two very different looks! One is cute and simple something you might want to give the ‘kid’ in your life. The second card is very elegant and you wouldn’t think it came from the SAME stamp set! Don’t you love it when you can get more options when you buy something?!

One way of using this stamp set
Inside
One stamp set – Two very different looks!

As usual, here are the supplies needed for both of these cards:

  • Stamp sets:
  • Oh Snap
  • Inks:
  • Old Olive
  • Pacific Point
  • Mossy Meadow
  • Poppy Parade
  • Versamark
  • Blends:
  • Poppy Parade
  • Old Olive
  • Black
  • Paper:
  • Mossy Meadow 11″ x 4 1/4″ scored @ 5 1/2″
  • Basic Black 5 1/4″ x 4″ (x2) first card, 8 1/2″ x 5 1/2″ scored at 5 1/2″ second card, 5 1/4″ x 1 5/8″ second card, scraps for 2nd card
  • Basic White 5″ x 3 3/4″ (x2) 1st card, 5 1/4″ x 1 1/2″ second card, scraps for BOTH cards
  • Poppy Parade 5 1/4″ x 4″ (x2), scraps for ‘happy’ in 2nd card
  • Misc:
  • Dimensionals
  • Wink of Stella
  • Adhesive sheets
  • basic rhinestones
  • White Embossing powder
  • silver edged ribbon
  • Stampin’ Cut & Emboss Machine
  • paper snips
  • Heat tool
  • Blending brushes
  • Stitched Shapes Dies

I have been having so much fun doing my weekly YouTube Live videos! If you missed them you can always check them out at my YouTube Page! I would love it if you would join me at one of my Live Classes, you could be put in the drawing for one of the cards I make! You can also comment on one of my videos after they are live and I will put you in a drawing for that!

Like I say each week, each of the supplies that are listed above can be found below in picture form. Click on any of them and you will taken to my OnLine Store! If your purchase totals over $35, you will receive from me the class card pack that has everything except for stamps/ink that you will need to reproduce my cards…..or make them into similar cards with stamps you own.

If you missed my post on last weeks classes, you can go to this page and catch up! I made a HUGE announcement last week! You’ll want to check it out! I’m so excited!

Thank you for stopping by! I really appreciate you supporting my small business! Come back next week to see my next Mini Class!

Lisa Tedder
A Former California girl living in North Carolina

Product List

Art Gallery with Gilded Leafing!

Hey Guys,

For my Mini class this week I am using Art Gallery with Gilded Leafing! I hadn’t used it up until this card, and I have to tell you I LOVE it! Here is my first card:

Isn’t this gorgeous!?
Inside
Card 2, Art Gallery with Gilded Leafing
inside

Here are the specifics for both cards:

  • Stamps:
  • Art Gallery Bundle
  • Approaching Perfection
  • Inks:
  • Poppy Parade
  • Memento Black
  • Flirty Flamingo
  • Paper:
  • Poppy Parade 8 1/2″ x 5 1/2″, 5 1/8″ x 3 7/8″ (Card 1)
  • Basic Black 5 1/4″ x 4″ (x2), 3 5/8″ x 2 5/8″, scrap (Card 1)
  • Basic White 5 1/8″ x 3 7/8″ (Card 1), 5″ x 2″ (Card 2), 5 1/8″ x 3 7/8″ (Card 2)
  • Golden Garden Designer Specialty Acetate 3 1/2″ x 2 1/2″ (Card 1), 5 1/4″ x 4″ (Card 2)
  • Fine Art Floral Designer Series Paper (DSP) 3 1/2″ x 2 1/2″ (Card 1)
  • Flirty Flamingo 5 1/4″ x 4″ (Card 2)
  • Misc:
  • Tear & Tape
  • Gilded Leafing Embellishment
  • Stamping Sponge
  • Flowers for every Season ribbon combo Pack (I used the white)
  • Forever Greenery Trim Combo Pack ( I used the gold trim
  • Painted Texture 3D Folder
  • Dimensionals

As always, the list of supplies I have above can be seen below in picture form. Click on any of them and you will be taken directly to my OnLine Store! Any order of $35 or more you will receive 1 PDF of 16 projects with pictures and step by step instructions! Here is a sneak peek:

You get each of these in a detailed pdf

Also you will receive for your $35 order is all the class supplies for that weeks video: (cardstock cut, DSP, ribbon, die cuts) along with a Pillow Gift from me!! For each video I do, you have the Thursday I do my Live up until Wednesday of the following week to place an order for that video ‘fixin’s’…..I live in the South, so might as well talk like it! 🙂

Also, I have some exciting news to share!! EEEEEE! It has been a dream of mine since I began in Stampin’ Up! And it is now a reality!! I have teamed up with my two Besties that I have met through SU!, we have been getting together for 10 years and having so much fun together! Carol Hickman is from AZ (other side of the states from me) and Hetty Jones lives in BC Canada. WE are starting a club that you can join for monthly fun and be a part of the Bestie experience! If you would like to learn more, click on this link and you can be as excited as I am!!

As you hopefully know I also do weekly YouTube Lives on Thursdays at 4:00 p.m. (eastern), if you can watch live you will be put in a drawing to possibly win one of the cards I make on my Live! All you have to do is comment so we know you are there! I will mail it to you even if you live out of the States! Hope to see you there! Today I worked on these cards, you can re-watch it here.

Thank you for supporting my Small Business! I really appreciate it!

Lisa Tedder
A former CA girl living in North Carolina

Product List

Hey, Chick Special release

Hey Guys!

Special Release of Hey Chick and Hey Birthday Chick, are out now from Stampin’ Up! Hey Chick is a stamp set that is brought back from a Sale-a-Bration a couple of years back and it was darling! Now, they have a die set that goes with it that’s even CUTER!! Is that even possible? Also there is a coordinating set that goes along with it called Hey Birthday Chick.

I did a YouTube Live in my weekly mini class! You’ll have to go see it, they are super cute!! If you missed last weeks Mini Class, you can still catch it here!

Here are a couple cards I made using the Hey Chick Bundles!

Hey Birthday Chick front
Inside Hey Birthday Chick barn card

I got the idea for the Barn card from Lauren’s Scrap Lot. Thank you Lauren!

Hey Chick front
Hey Chick inside, LOVE that chicken!!

Don’t you LOVE these cards? I did an online Live on my YouTube channel if you want to see how it’s done! I hope you can join me sometime so we can at least get together online!!

Here are the specifics for both cards:

  • Stamps:
  • Hey Chick
  • Hey Birthday Chick
  • Inks:
  • Real Red
  • Memento Black
  • Blends:
  • Real Red
  • Daffodil Delight
  • Smoky Slate
  • Crumb Cake
  • Pumpkin Pie
  • Paper:
  • Real Red 11″ x 3 3/4″ scored at 7″ & 1 3/4″ these will fold up with the top slightly going over the bottom bigger piece. 3 1/2″ sq. (you will cut this in half (corner to corner) for top of barn. 1 7/8″ sq, cut in half from corner to corner (see video) for inside of door. 5 1/4″ x 4″ (x2) for 2nd card, scrap for die cut of barn on 2nd card
  • Basic Black 8 1/2″ x 5 1/2″, 5 1/8″ x 2″, scrap for 2nd card & corn husks
  • Basic White 2 strips of 3 3/4″ x 1/4″ (x2), 4 1/4″ x 1/4″, 3 1/4″ x 3″ (x2) 1st card, scraps to stamp on, card 2- 5″ x 3 3/4″ (for inside)
  • Bumble Bee Scraps for both cards
  • Basic Gray scrap for corn stalk
  • Playful Pets DSP (for front of 2nd card) 1 7/8″ x 5 1/8″
  • Misc:
  • Stampin’ Cut & Emboss machine

As always the list of supplies will again be below in picture form, click on any of them and you will be taken to my Online Store!!

For a purchase of $35 or more you will receive the class packet with everything (but stamps) to make these cards. If you want to recreate them exactly you can purchase the stamps through my store, get a SAB item and get a pillow gift along with the class packet!

I have REALLY BIG NEWS to share with you next week! Be sure to come back, you will love it!! I’m so excited to share it with you, just need to iron out all the details first!!

Please remember to watch one of my Lives on Youtube, it is every Thursday at 4:00 eastern! I look forward to chatting with you!

Lisa Tedder
A former California girl living in North Carolina

Product List