Tag Archives: Old Olive 8-1/2" X 11" Cardstock

TWO Fancy Fold Christmas Cards

Hey Guys!

On my YouTube live video from today the 10th of December, I showed you two Christmas Cards that have a Fancy Fold! I LOVE cards that have something added to them that makes them more interesting and different folds definitely make them interesting!

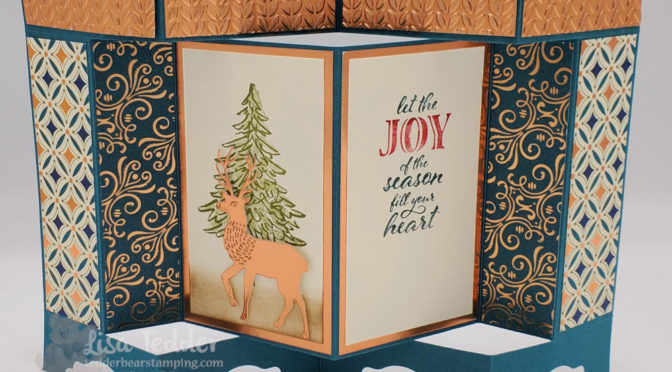
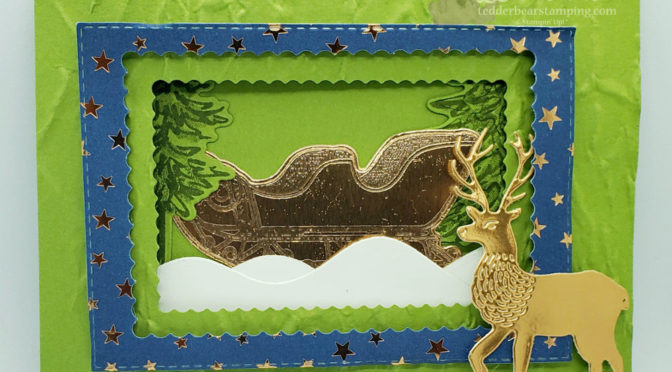
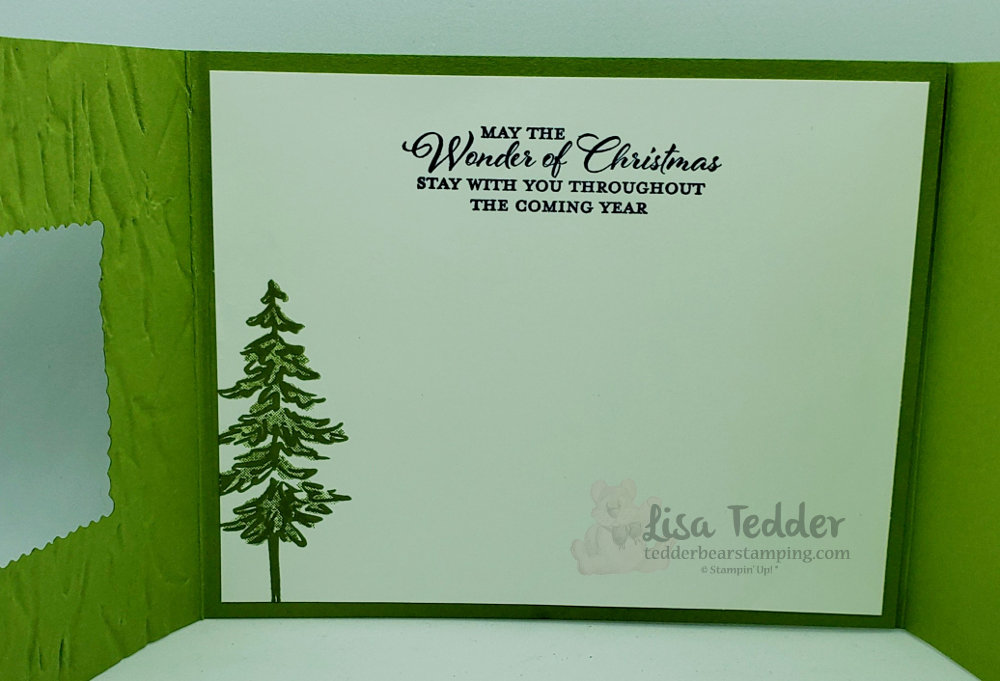
First, I am going to show you the one that I am absolutely over the moon happy with!!

One of my Two Christmas cards with a Fancy Fold

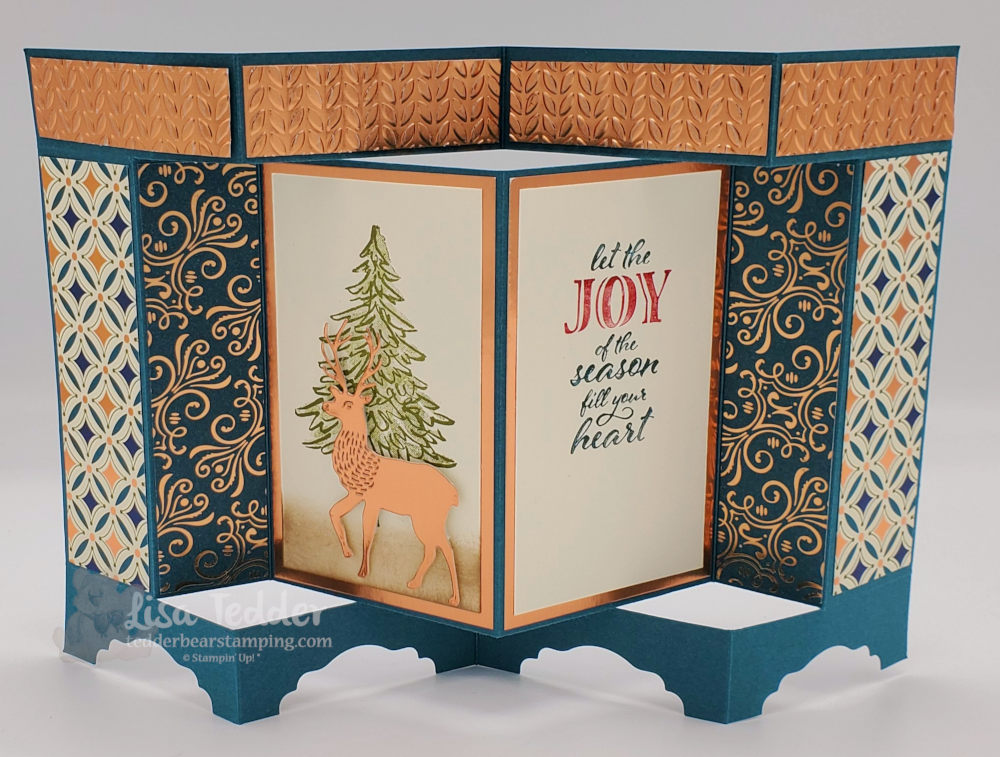
Did you notice that other than the fold, this card isn’t all that detailed? Furthermore you only have to stamp Two images! Even though it doesn’t take a lot of stamps, it is STUNNING! Sitting here in my stamp room, I love to look at this card! Subsequently this will have to go to someone special who will really appreciate it!

As always here are the ingredients to make this card:

  • Stamps:
  • In The Pines
  • Wrapped in Christmas
  • Inks:
  • Old Olive
  • Crumb Cake
  • Markers: Pretty Peacock & Real Red
  • Paper:
  • Pretty Peacock: 11″ x 6 1/2″, scored @ 2 3/4″, 5 1/2″ & 8 1/4″ (Landscape), Turn to portrait: Score @ 1″ on BOTH sides. Cut while in portrait Place on 1″ mark then cut from 1 1/2″ to 9 1/2″, do this cut on BOTH sides!! Place back in so it is Landscape place cardstock to 1 1/2″ and score BETWEEN the cuts, flip and do the same on other side.
  • Copper: 2 1/2″ x 7/8″ (x4), 4 3/8″ x 2 5/8″ (x2), scrap for Deer
  • Brightly Gleaming Specialty DSP: 4 3/8″ x 1 3/8″ (x4….2 designs)
  • Very Vanilla 4 1/8″ x 2 3/8″ (x2)
  • Misc:
  • North Pole Wonder Dies
  • Dimensionals
  • Greenery folder
  • Paper Trimmer
  • Label Me Lovely punch

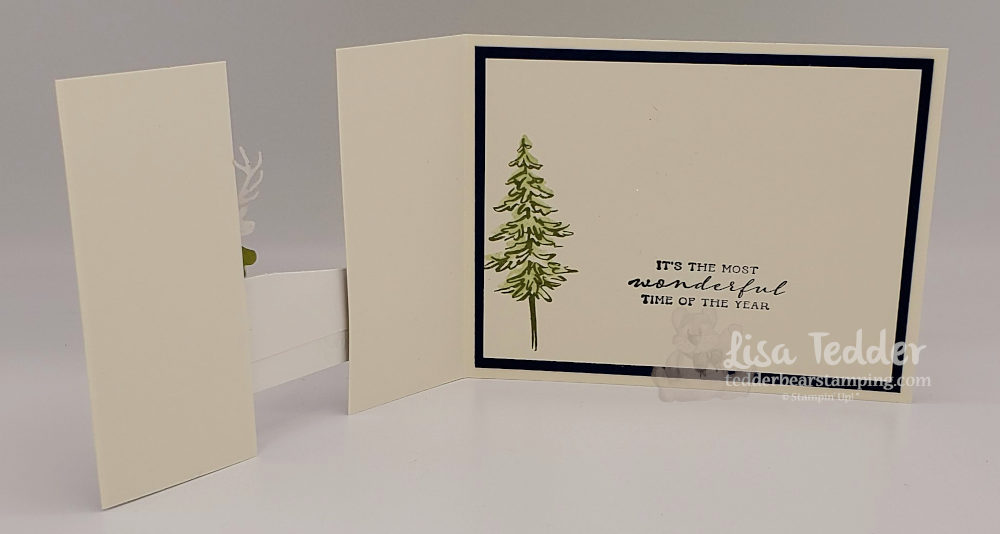
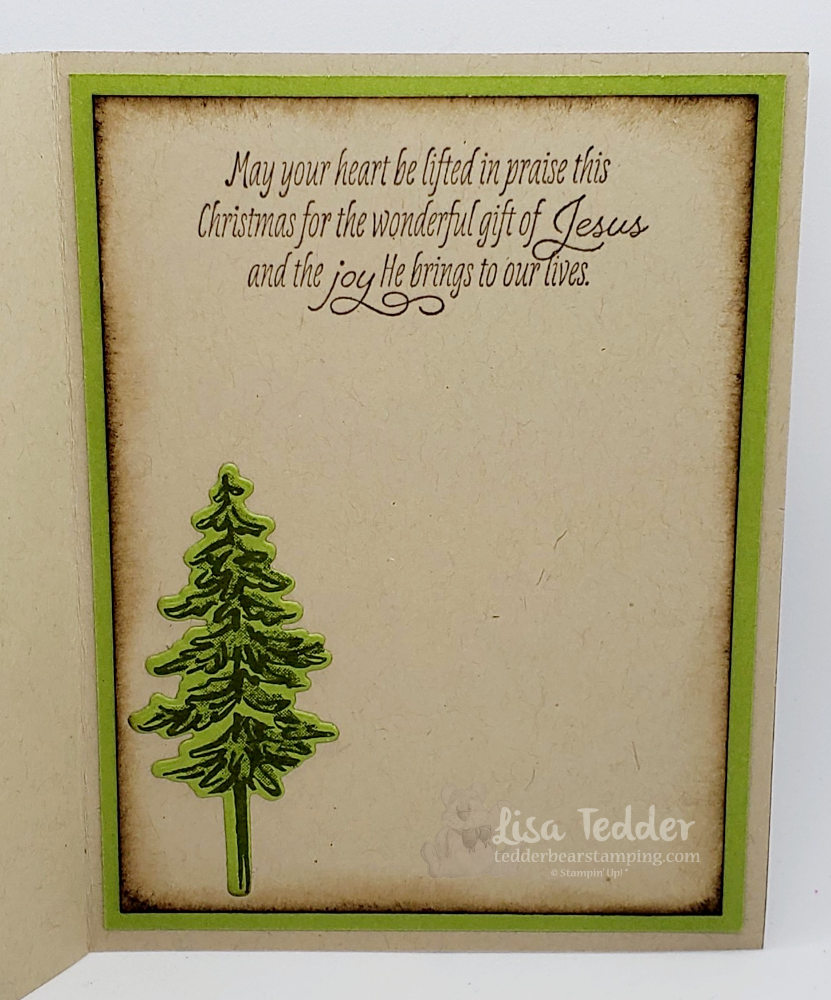
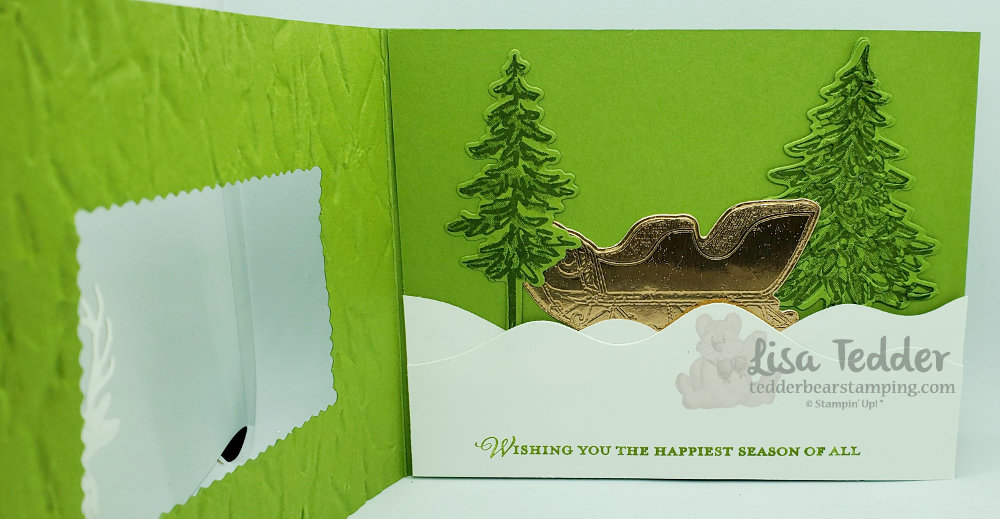
Now onto the Second card in my Live YouTube video! Incidentally this one is a peek-a-boo card. As with the first card this one also uses minimal stamps. Furthermore, this card is very striking even though it doesn’t have the folds the first card has.

2nd of my Two Fancy Fold cards

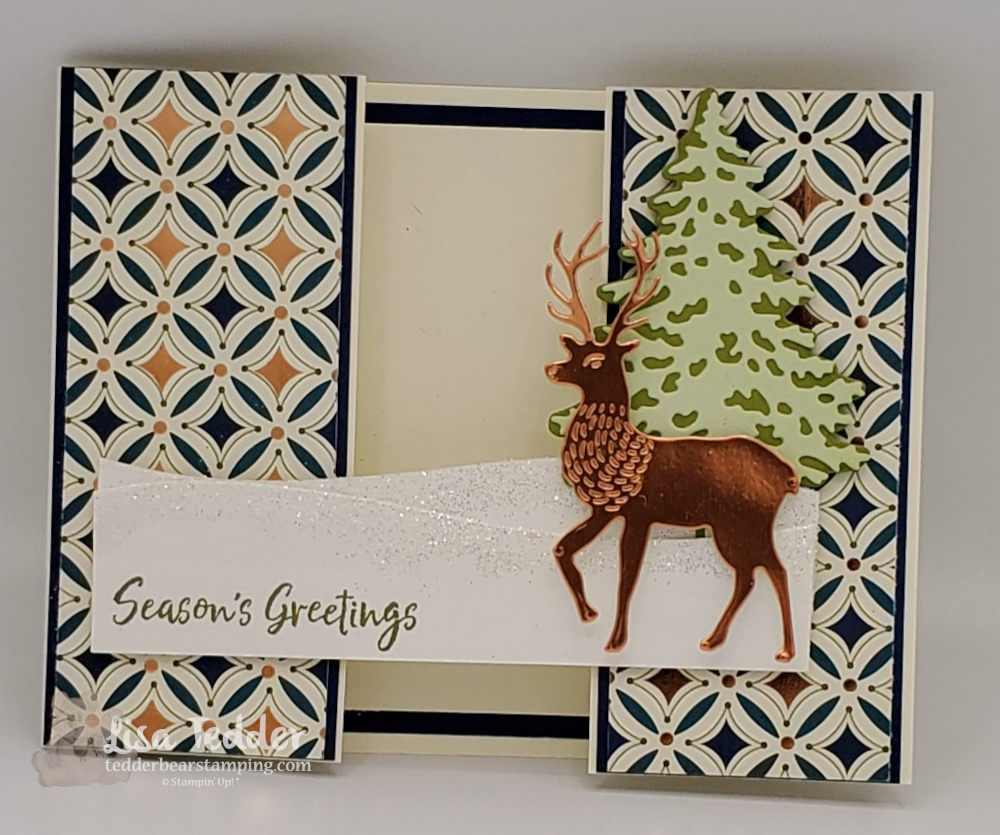
Who doesn’t love a good Die?! This card uses 2 of them and they really make this card Pop! Obviously you can tell that I LOVE the Designer Series Paper Brightly Gleaming, for the last two weeks for my Live’s I have used this awesome paper! It is selling out so be sure to get it before it’s gone! All of the stamp sets are retiring this year and if you go to my OnLine Store you can get them before they are gone & they may be at a discount!!

Here are the particulars for this card:

  • Stamps:
  • In The Pines
  • Wrapped in Christmas
  • Inks:
  • Old Olive
  • Night of Navy
  • Soft Sea Foam
  • Paper:
  • Very Vanilla Thick: 7 1/2″ x 4 1/4″, scored @ 5 1/2″, 4 1/4″ x 2 (x3), 5″ x 3 3/4″
  • Night of Navy: 4 1/4″ x 1 7/8″ (x2), 5 1/4″ x 4″ (inside)
  • Brightly Gleaming Designer Series Paper (DSP): 4 1/4″ x 1 3/4″ (x2)
  • Copper Foil: scrap for Deer
  • Soft Seam Foam: scrap for tree
  • Old Olive: scrap for tree
  • Window Sheet: 5 1/2″ x 4 1/4″
  • Whisper White 4 1/2″ x 2″ (for snow)
  • Misc:
  • North Pole Wonder Dies
  • Pine Woods Dies (or you can get the Bundle and save 10%)
  • Multipurpose Liquid Glue
  • Dazzling Diamonds (or any type of glitter)
  • Sponge & Silicone Craft sheet
  • Dimensionals

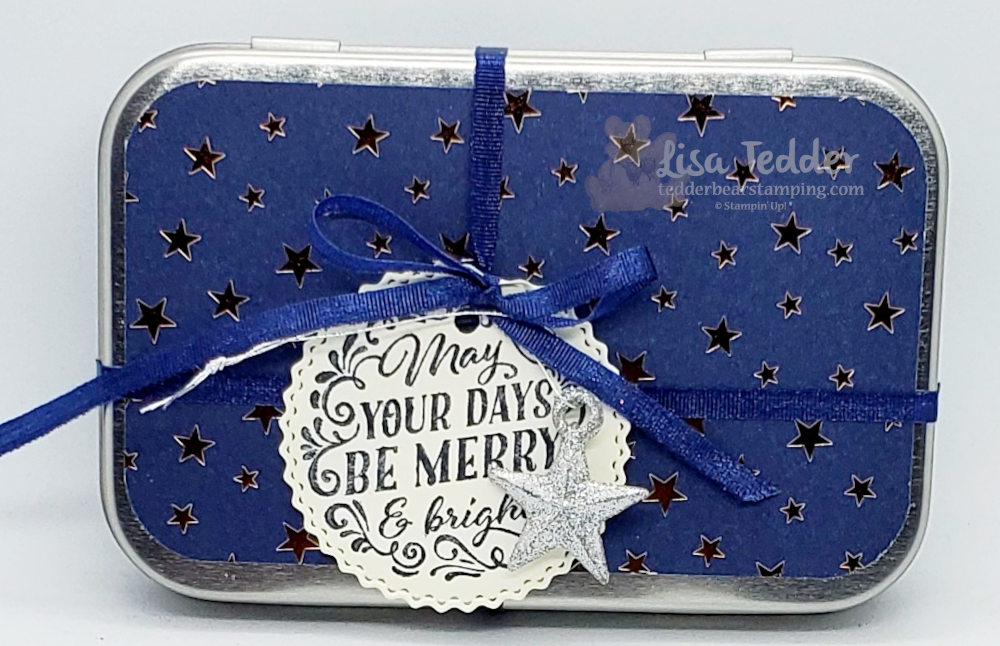
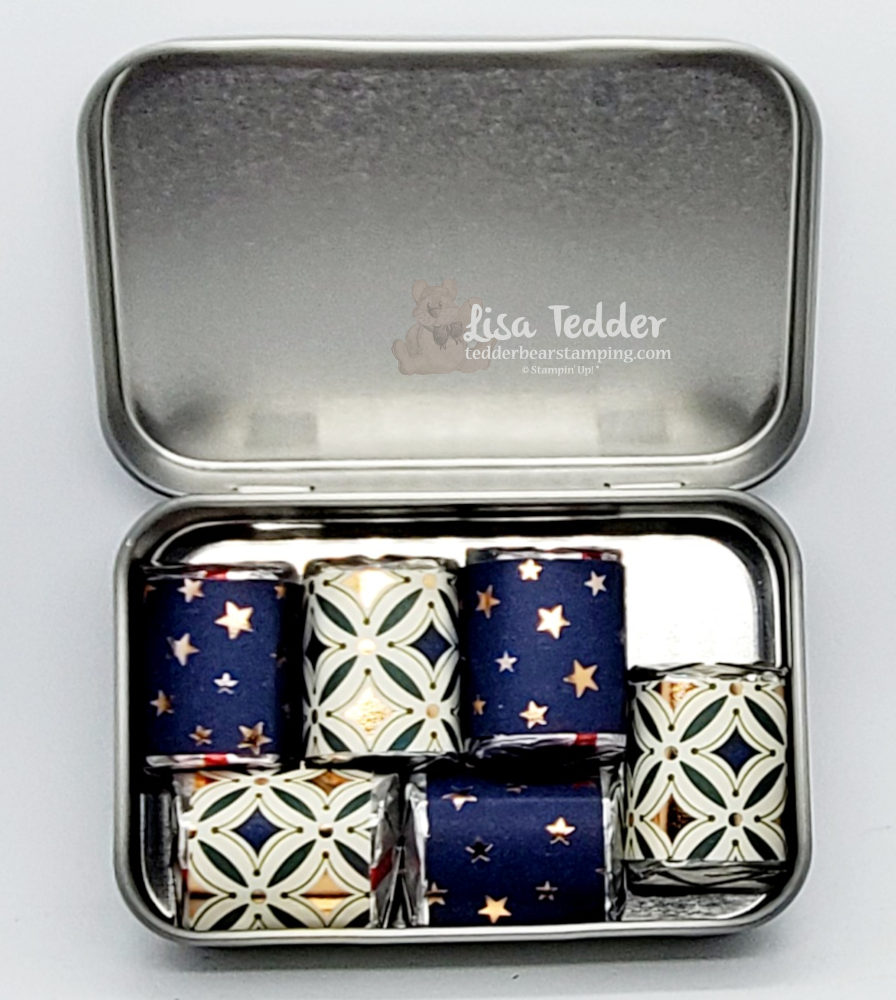
Besides showing you the two cards I am making, I also have a Pillow Gift to share with anyone who buys from my OnLine Store $35 or more! Want to see it?! AND if you place that order you also get the cardstock (cut and scored!) and anything I used (Sans Stamps) along with that Pillow Gift in the mail to your house! All orders must be in by Dec 15th, I mail them out to you on the 16th!

Isn’t it cute!?
Yummy Chocolate just for you!

For those of you who want to watch my Live video you can see it here: https://youtu.be/yAJ9eM_xTlU

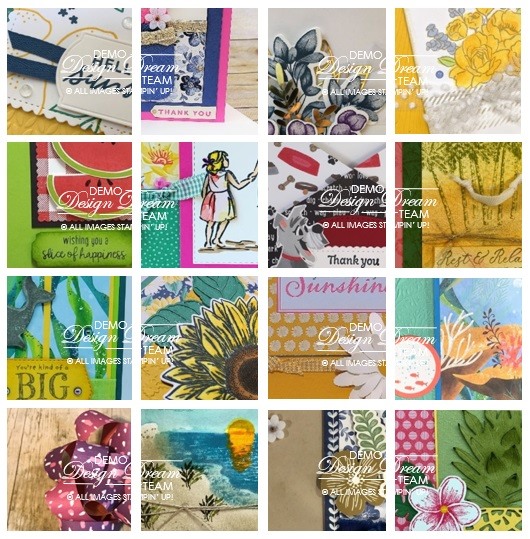
Lastly, I also offer a PDF of 16 projects if you place a minimum order of $35 and that has Instructions for each project plus pictures! Here is a sneak Peek of the 16 projects:

16 projects with step by step instructions PLUS pictures! With minimum order.

I hope you have enjoyed your time on my Blog today! If you missed my Live last week, you can see it here. And you can see my post about last weeks video!

All the products listed above are in picture form below, just click on any image and you will be taken to my OnLine Store!

Please come back next week, I will be showcasing some NEW products from the Upcoming Catalog! If you would like one, or really two since I would send you the Mini plus the Sale-a-Bration catalog, just let me know!

Lisa Tedder
A former CA girl now living in North Carolina

Product List

How to copy a card and make it your own.

Hey Guys!,

First off, I got this idea from the Holiday Catalog from Stampin’ Up! I like to get ideas and then change them up to make them my own design. Next, we will take a walk through my thought process! As usual, here is a video showing you how to make this card. Finally, this card on page 43 is the card I wanted to make my own:

The card on the right is the one I am going to make into my own design!

Generally, when looking for a project to do, I first look in Pinterest, but this time I looked at the SU! catalog! Consequently it ended up being an awesome place to get an idea! Furthermore, I wanted to use the In The Pines Bundle and this would work with an idea I had in my head. Unfortunately, I didn’t have the circle that is on the card above. However, I did have the die from the Painted Labels that let me cut out a circle design that would take it’s place! Also, I wanted to use the trees singularly from the stamp set but die cut to have more detail. Likewise, instead of the ribbon that comes out the side of the circle I used gold foil cut into two strips. By the way, I DID use the acorns for my card, here is what I made:

I replaced some things to make this design my own creation!

Usually, I like to have layers on my cards and this time is no exception! Likewise, I love to sponge the edges of my cards and I did that with Crumb Cake and then Early Espresso to add a dark edge that makes the card pop! As a rule, I like to have my insides go with the front using the same layers, this (to me) seems to make the card look more professional.

Notice how the inside mirrors the front?

Finally, here are the details for this card:

Stamps:
In the Pines Bundle
For Unto Us
Inks:
Crumb Cake
Early Espresso
Old Olive
Paper:
Crumb Cake 8 1/2" x 5 1/2", 5" x 3 3/4" (x2)
Old Olive 5 1/4" x 4" (x2), scraps for trees
Gold Foil
Misc: 
Wonder of The Season OR Forever Greenery combo
Jingle Bells OR Acorn Trinkets
Glue Dots
MultiPurpose Liquid Glue
Mini Dimensionals
Painted Labels Dies
Banners Pick a Punch

As always, below will be the same supplies listed in picture form, click on any of them to be taken to my On Line Store! Subsequently, any purchase over $35 you will get from me a PDF with 16 project ideas that include pictures and step by step instructions! So then, this is a thank you from me!

Before I go, I wanted to tell you that I have another card that you can see here that I took from the catalog and made it my own (see page 38). As you can see I like to get ideas and then change them up to make them my own design.

In Conclusion, thank you so much for coming to visit me! Together, we can make things we see into our creations!

Lisa Tedder
A California girl living in North Carolina

Product List

In The Pines Bundle


Gold Foil Sheets


Jingle Bells


Acorn Trinkets


Mini Glue Dots


Multipurpose Liquid Glue


Banners Pick A Punch


Painted Labels Dies


Stamping Sponges


Three Panel Christmas Card your friends & Family will cherish

Hey Guys!

Today I am sharing with you a Christmas in July Card that has three pages! Make a Christmas card this year that your family and friends will cherish forever!

I LOVE cards that make you want to pick them up and check them out! Since there aren’t very many ideas on Pinterest yet for the New Holiday Catalog from Stampin’ Up!, I had to come up with something on my own. I always say that I like CASE’ing (Copy and Share Everything) because then I don’t have to be intimidated by starting from zero. BUT when I do come up with something, I’m usually happy that it’s my own design. You can catch my Youtube video and see how I made this card!

Here is the front of my card:

Doesn’t this make you want to pick it up and turn to the next page?! Your friends and family will cherish getting this card for Christmas!

Middle page:

Middle page of my 3 page Christmas card

And now for the inside:

Inside of my 3 page Christmas card!

I would love to get a card like this in the mail! Wouldn’t you?!

Here are the specifics for this card:

Stamps:
In the Pines Bundle
Wishes & Wonder Bundle

Inks:
Versamark
Night of Navy
Old Olive

Paper:
Old Olive 4 1/4″ x 11″, 6″ x 4 1/4″ (scored @ 5 1/2″), 5 1/2″ x 3 5/8″ (for trees)
Whisper White 5 1/4″ x 4″ (inside), 3″ x 5 1/2″ (for snow)
Copper scraps for deer and sleigh
Brightly Gleaming Designer Series Paper (DSP) 4 1/2″ x 3 1/4″

Misc:
Foam Adhesive Strips
Stitched so Sweetly Die
Stitched Rectangles Dies
Old World Paper 3D folder
Clear embossing powder
Heat tool

As always, below you will see these supplies in picture form. Click on any of them and you will be taken to my OnLine Store. ****NOTE: My OnLine Store is changing as of the 1st of August, the links on my blog before that date will not take you to the exact item after (for the posts I’ve made before then). So, any time after August 3rd if you click on a link (from an earlier post) it will take you to my store, just not to the exact item.

If you decide to shop with me, you will receive a pdf with 16 project ideas with pictures and step by step instructions (you just need to spend $35). Here is a sneak peek of what you will get in the month of August!

Sneak Peek for any purchase of $35 or more.

If you missed my last post doing a Christmas in July card, click here and you can go see what else I made for my class! It’s a Blog Hop so you won’t want to miss out! Like I said your friends and family will cherish getting a handmade Christmas card forever!

Thank you for stopping by! I love it that you take time to check out what I’m doing! Don’t forget to go check out my YouTube Channel to catch up on all my designs!

Lisa Tedder
A California girl living in North Carolina

Product List

Celebrate Sunflowers & Watercolor Pencils

Hey Guys!

So, I was on Facebook the other day and this card from Amanda Charlesworth made me put down everything I was doing and make it! I had to make this card! I LOVE when that happens.

Using Watercolor Pencils, makes this image pop!

Not only was I inspired by Amanda, but I made the card exactly like she did because I wanted to see if I could color it as well as she did. I think it came out really well! What do you think?

Don’t you love it when you see something that stops you in your tracks and you want to try your hand at it? That’s what happened with this card.

Here are the specifics for this card:

Stamps:
Celebrate Sunflowers

Inks:
Crushed Curry
Old Olive
StazOn Saddle Brown
Memento Black

Cardstock:
Whisper White Thick 8 1/2″ x 5 1/2″
Whisper White 5″ x 3 3/4″ (x2) one for sunflower and leaves
Cinnamon Cider 3 3/4″ x 3/4″, 5 1/4″ x 4″
Old Olive scrap

Misc:
Champagne Rhinestones
Dimensionals
Lovely Labels Pick a Punch
Watercolor Pencils (Daffodil Delight, Early Espresso, Old Olive, Pumpkin Pie)
Watercolor Pencils Assortment 2 (Granny Apple Green)
Sponges
Blender Pen

Below are the same supplies listed in Picture form, click on any of them and you will be taken to my OnLine Store. Any purchase you make over $35 you will receive 16 step by step tutorials with Pictures! Here is a sneak Peek:

All these tutorials for purchase of $35!


This stamp set was the first one I HAD to have! So pretty!! I have offered a class using Celebrate Sunflowers where I made 5 cards and I loved everyone of them! You can see that post here. Doesn’t everyone love a Sunflower? We always had some growing, but it was very hard to keep the squirrels from jumping on them and knocking them over.

Thank you for stopping by! Please leave a comment to let me know that you are liking what I post, it also makes me happy!

Lisa Tedder
A California girl living in North Carolina

Product List

Day of Service

Hey Guys!

Yesterday we had a Day of Service with Stampin’ Up! Our CEO Sara Douglass was online and she sent out the pdf that will help us make Beautiful handmade cards fast and easy!

THIS was extremely helpful and made my cardmaking go quickly!

I mailed out all the cards today, wanna see what I sent? Keep in mind that I used retiring product, but YOU still have time to get that DSP, Noble Peacock Rhinestones & Ribbon if they are still available go to my OnLine Store now!

Below I am showing you each one!

Card 1

Sorry the Sentiment is light, it says “I changed out of my NIGHT Pajamas into my DAY pajamas to send you this card” All the insides say “Sending you a paper hug”.
Card 2, Sending Hugs
Card 3, sentiment is the same on most of them…Wanted to get a lot done!
Card 4, Smile! LOVE this one!
Card 5, same sentiment about pajamas
Card 6
Card 7
Card 8

So, I made 20 cards, multiples of the ones above. I am NOT a ‘go quick’ crafting kind of girl! But, this was eye opening for me!! Not only are these beautiful, but I got them done and out in 1 day! THAT is unheard of for me! I also used the Spread Sunshine pdf available here, that you can download, print out and make your own cards! ALL proceeds go to helping with Covid 19!

Below you can see the supplies used in picture form. to get the measurements for the cards see the first picture. The only thing I added was a piece of Old Olive at 5 1/4″ x 4″. Do a card without layers?! Not me! My eyes are wide open, and know this about myself. But I really love how these came out, what do you think?

Thanks for stopping by, give this a try!!

Lisa Tedder
A California girl living in North Carolina

Product List

Ornate Garden Quilt Card

Hey Guys!

Today I am sharing with you a card where I have used the Ornate Garden Designer Series Paper (DSP), cutting it up with Square dies to make a Quilt card! Also included in the Quilt part is Gold Foil!

Hard to see, but I have ruffled ribbon on the bottom of the focal piece.

Starting out, I cut the Ornate Garden DSP and Gold Foil using the Stitched Shapes Dies (Squares). Then, I cut each square in half, lay them opposite each other until I had a pattern that made me happy. Once I had that done, I cut a piece of Whisper White to fit under and glued them into the desired Quilt shape I wanted. There are so many ways to manipulate the squares, but this is the way I liked it the most.

For the border on the top and bottom, I used the Ornate Borders Dies also using the Gold Foil. But first, I layered the quilt pattern onto Old Olive, to make it pop! Once I had all that done, I used some Polka Dot Tulle Ribbon along the bottom and ‘scalloped’ it so it had a ruffled edge. This turned out so pretty!! It’s very subtle in the picture but in real life it stands out!

After more white cardstock and Gold Foil, my Quilt card is almost done! I needed a sentiment to add to the front so I used ‘my friend’ from the Stamp set Ornate Thanks from Stampin’ Up! NOT sure if you have noticed by now but I LOVE SU! This company has added so much fun/creativity and Friends to my life, not sure what I would do if I didn’t have Stampin’ Up! in my life!

Of course I had to top off my card with some bling! I chose Gilded Gems to add that final touch. So? What do you think? Could it be for a wedding, birthday, pick me up or all of the above!?

As usual, here are all the specifics for this card:

Stamps:
Ornate Thanks

Inks:
Versamark

Paper:
Whisper White Thick 8 1/2″ x 5 1/2″
Whisper White 5 1/8″ x 3 3/4″, 4 3/4″ x 2 3/8″ (for under Quilt)
Gold Foil 5 1/4″ x 4″, 5″ x 3/4″ (x2) for border, scraps for squares
Ornate Garden DSP scraps for squares

Misc:
Ornate Borders Dies
Ornate Frames Dies
Polka Dot Tulle Ribbon (white)
Gilded Gems
Dimensionals
Gold Embossing Powder
Embossing Buddy
Heat tool
Subtle 3D Folder

Also as usual, all the supplies will be listed below in picture form. Click on any of them to be taken to my OnLine Store. If you purchase $35 or more from me, you will receive from me two different tutorial bundles that will have step by step instructions PLUS pictures! Here is a sneak peek of one of the bundles:

One Bundle you will get if you purchase $35

Hope you are doing well! I’m still eating birthday cake from yesterday so of course I am doing well! LOL

Please come back and see me again soon! Don’t forget to sign up for my Newsletter, if you have done it in the past do it again, all the info was deleted! :-O I will be sending out the Newsletter around the 10th of each month.

Lisa Tedder
A California girl living in North Carolina

Product List