Tag Archives: White Stampin’ Emboss Powder

Mini Class – Enjoy the Moment

Hey Guys!

Today I am sharing with you my Mini Class – Enjoy the Moment stamp set from Stampin’ Up! If you were a demonstrator and signed up for the ‘convention’ from SU! you would have received this stamp for FREE! I LOVE being a demo, the perks are so awesome, not only do I get 25% off whatever I buy, but when I go to the get togethers that are done throughout the year, I get freebies! Also, I get to order a month before any catalog goes Live! The best part of all is all the people I have met through Stampin’ Up! If you have any questions about joining my team, let me know! I would love to have you as part of my SU! family!

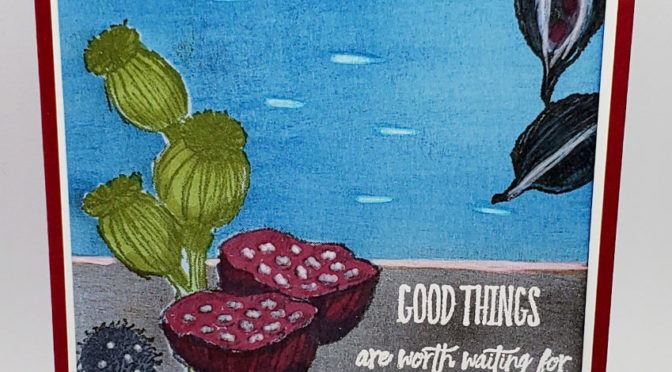
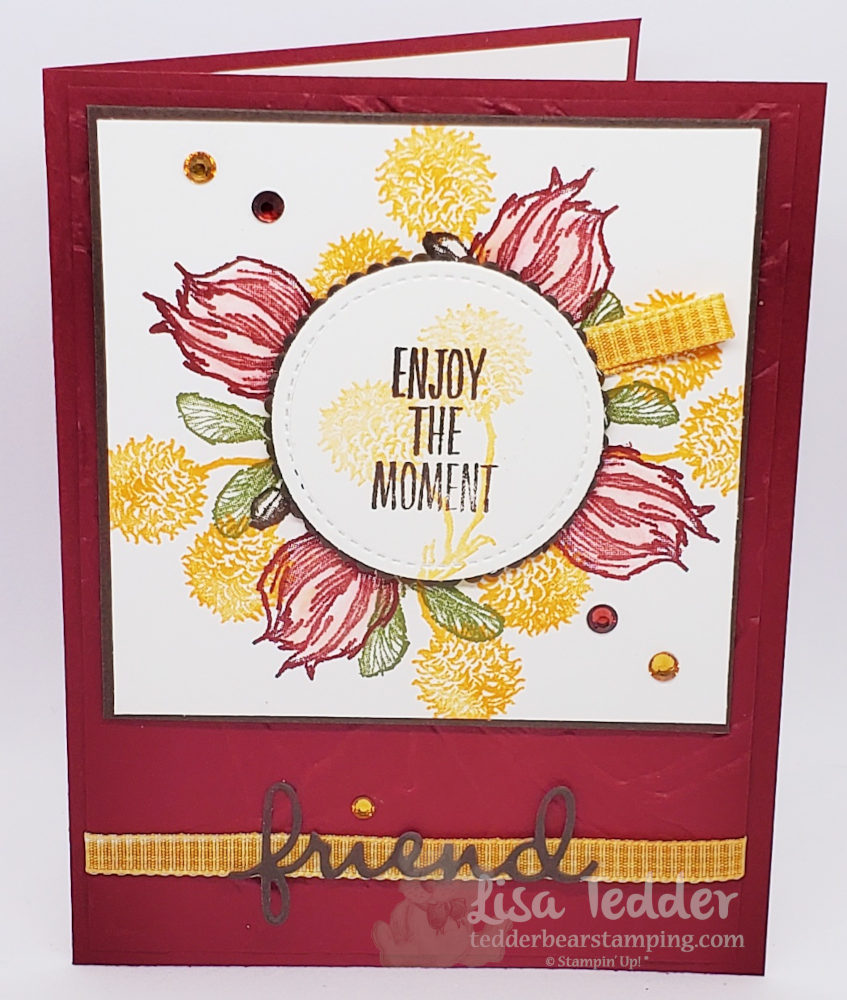
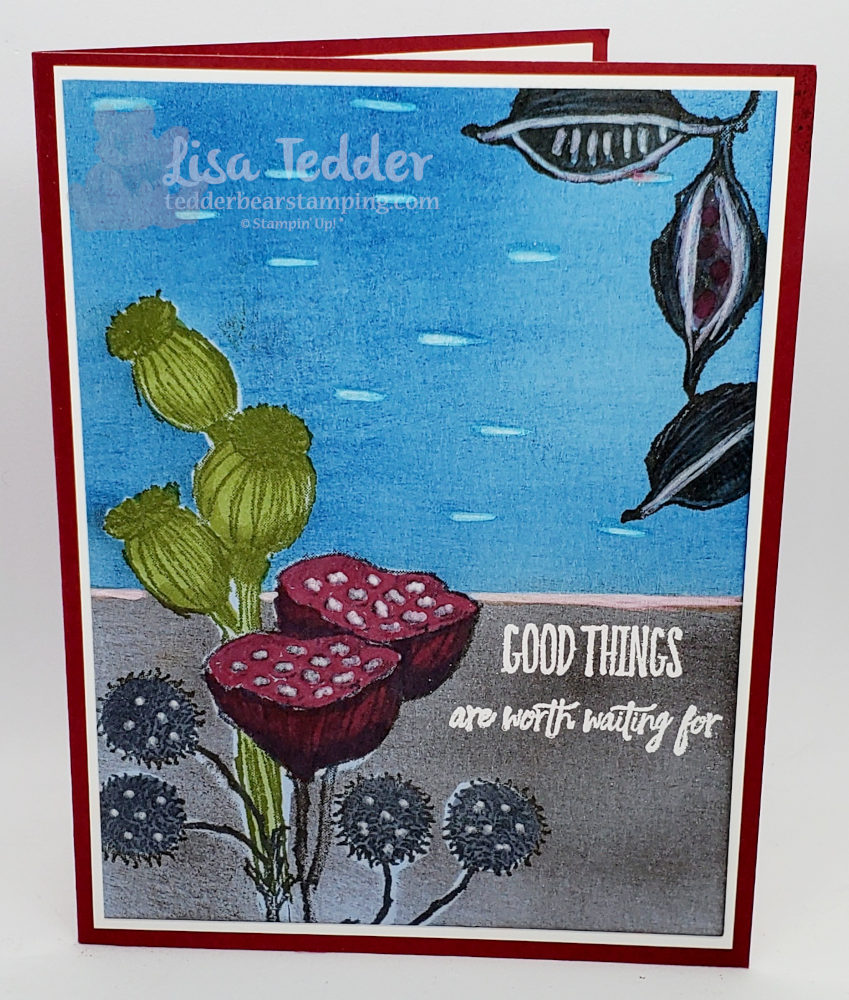
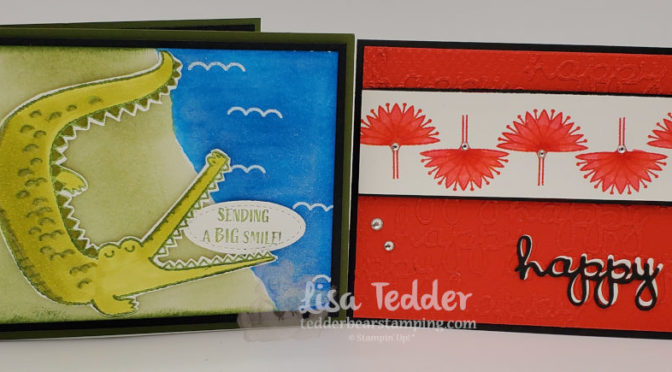
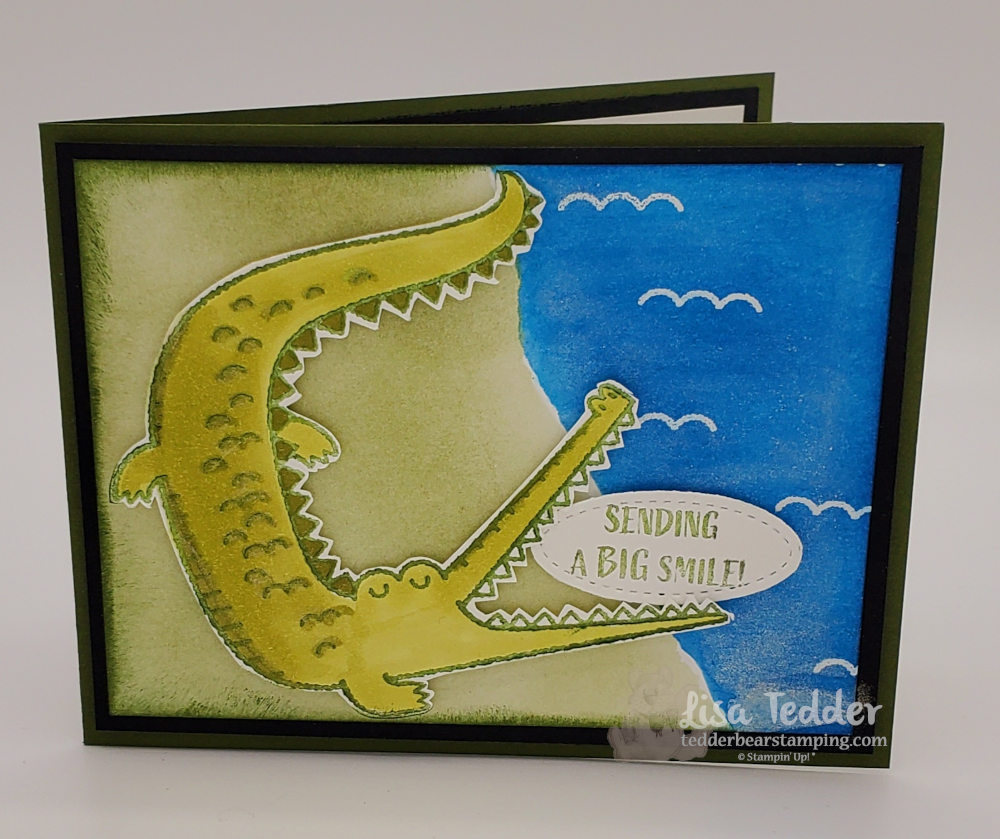
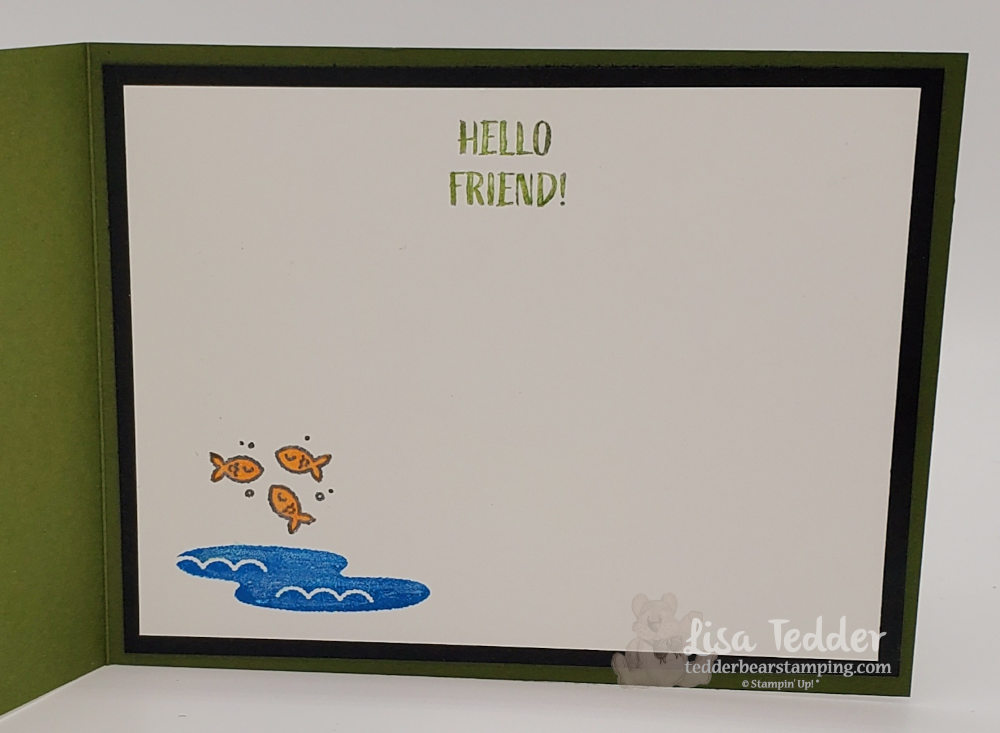
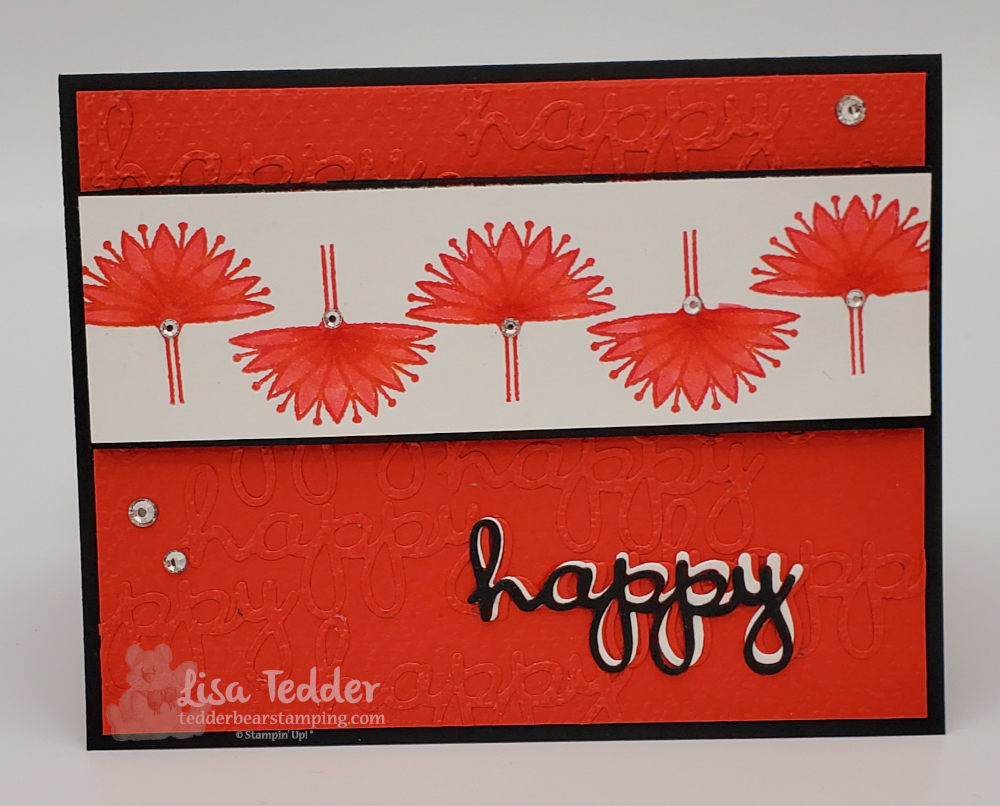
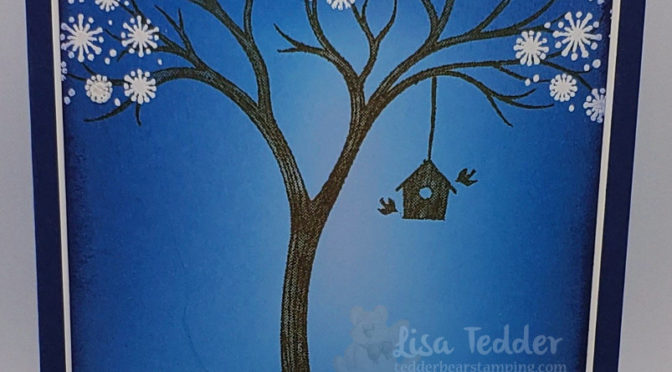
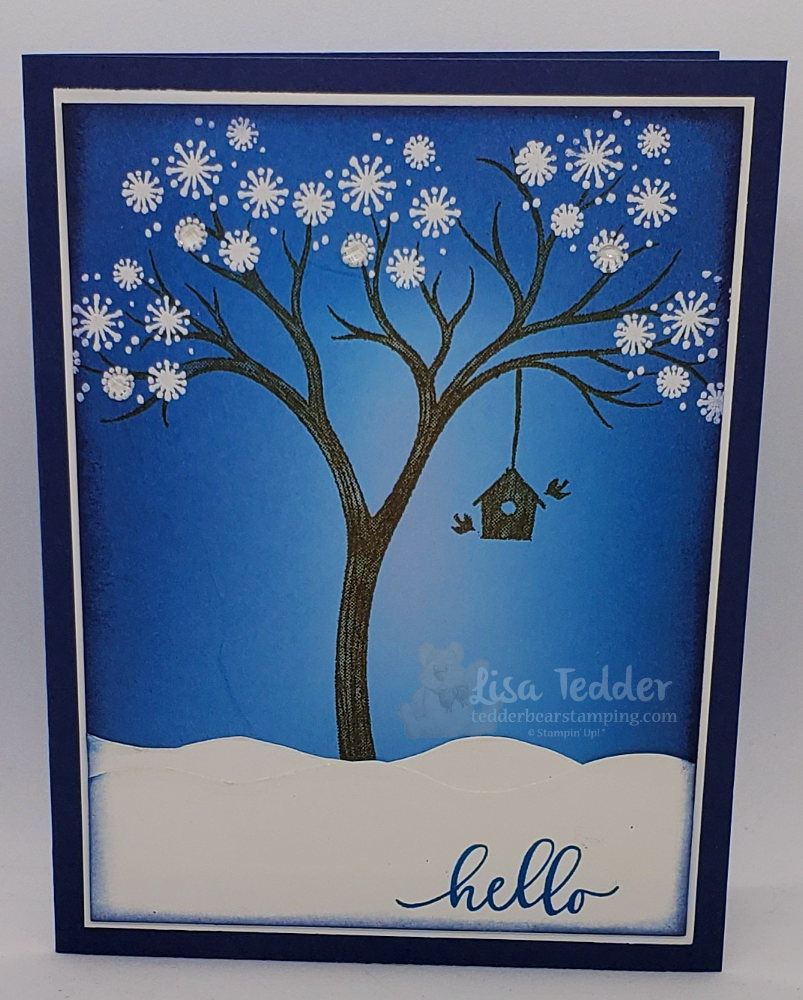
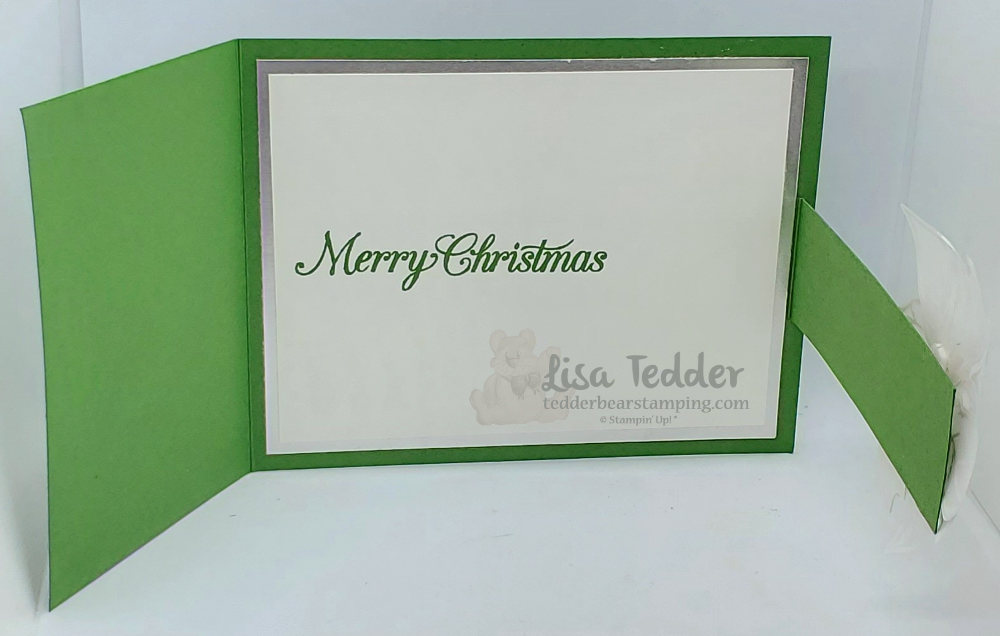
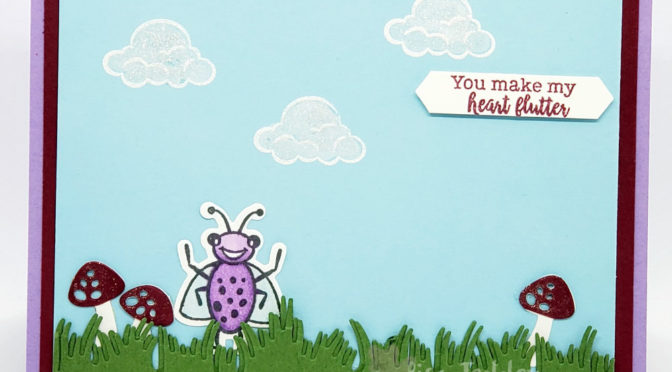
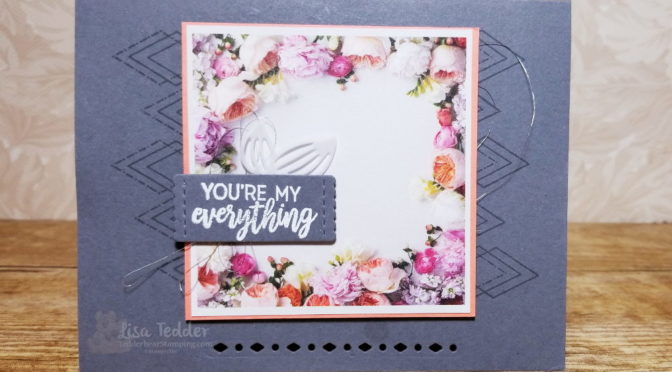
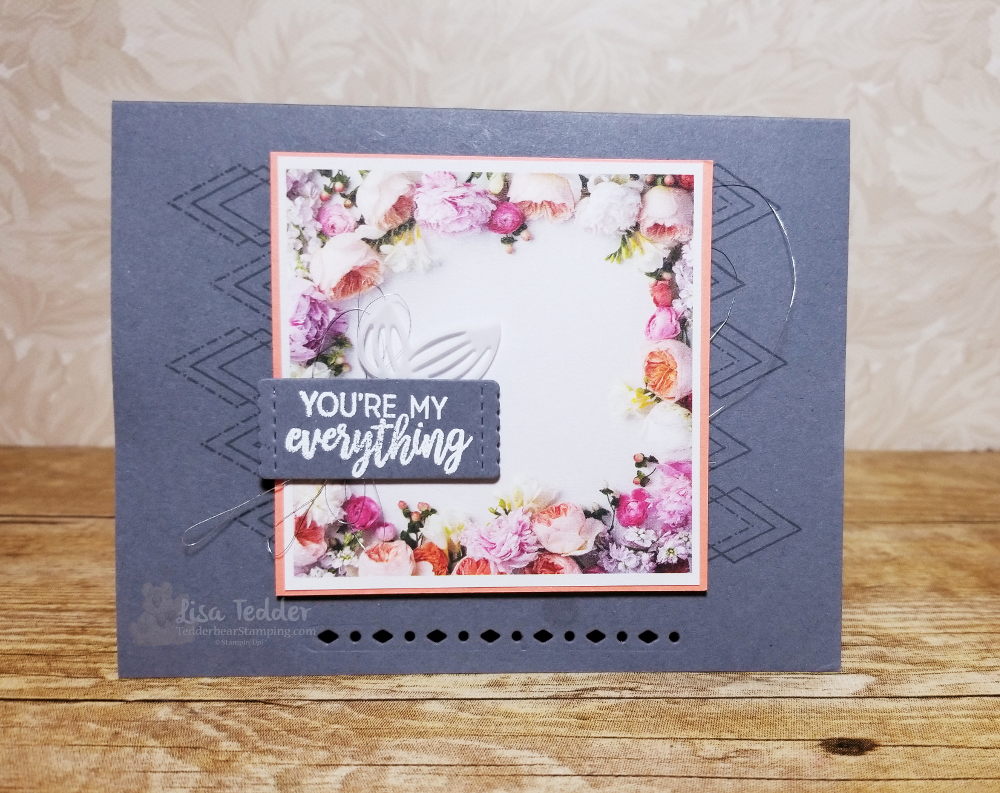
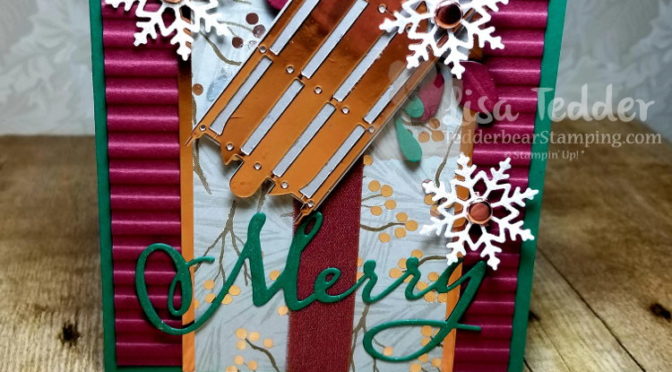
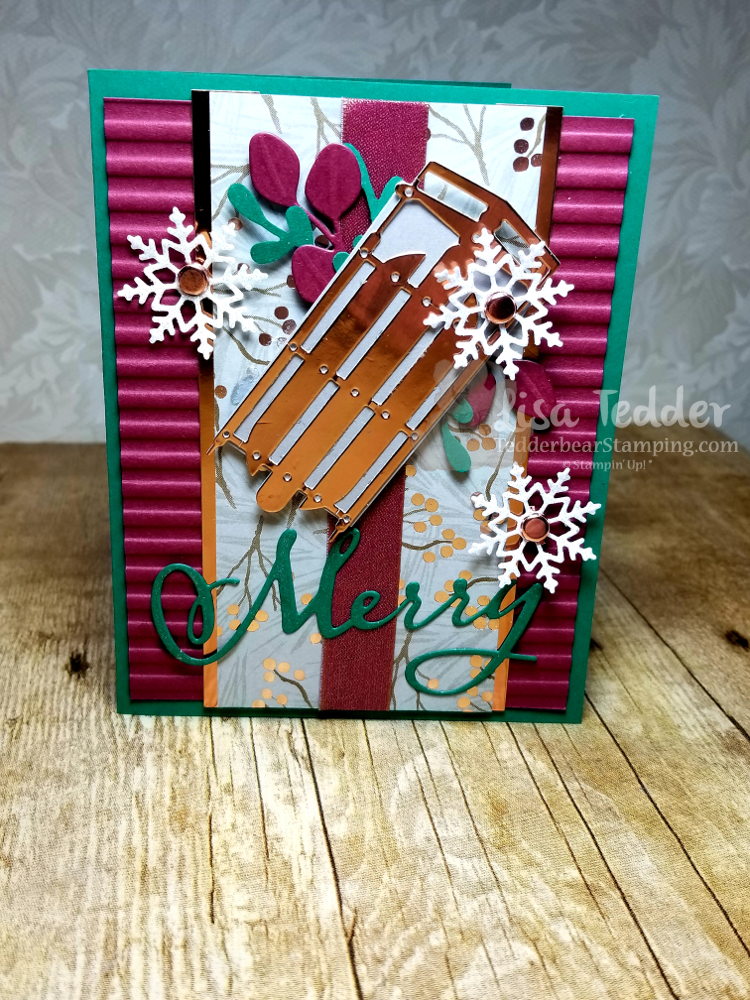
So, today I am sharing two cards I did with this stamp set! If you missed my Live video, you can catch the repeat here. These cards were a lot of fun! Here is the first one:

Mini Class Enjoy the Moment-Inspired by Narello Fasulo
Mini Class Enjoy the Moment inside
Mini class Enjoy the Moment-Inspired by Cheryl Miller
Enjoy the Moment inside

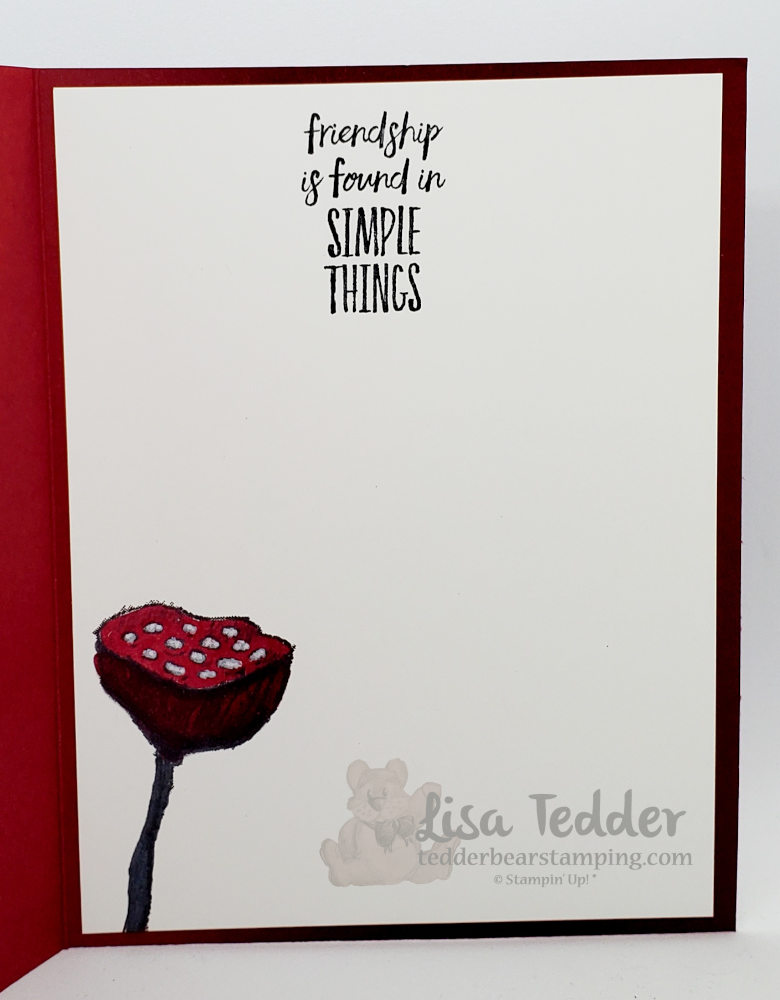
As Always, I am listing the supplies used for both of these cards below, they will also be listed in picture form at the bottom, click on any of the pictures to be taken to my online store! When shopping with me, if you order $35 or more you will receive the card kit for that week plus a pillow gift!! And you will also get a pdf of 16 cards with step by step instructions with pictures!

  • Stamps:
  • Enjoy the Moment
  • Inks:
  • Old Olive
  • Mango Melody
  • Cherry Cobbler
  • Pacific Point
  • Memento Black
  • Versamark
  • Blends:
  • Mango Melody
  • Old Olive
  • Cherry Cobbler
  • Basic Black
  • Paper:
  • Basic Black 3 3/4″ sq ( 2nd card), scrap for ‘friend’, and scrap for scalloped circle behind sentiment on card 1
  • Cherry Cobbler 8 1/2″ x 5 1/2″ (for both cards), 5 1/4″ x 4″ (card 1)
  • Basic White 5 1/4″ x 4″ (x2) for card 2, 5 1/4″ x 4″ for card 2, 5″ x 3 3/4″ (card 2), 3 5/8″ sq (card 1), scrap for sentiment on card 1
  • Misc:
  • Dimensionals
  • White embossing powder
  • heat tool
  • Stitched shapes dies
  • Layering circles dies
  • Stamparatus
  • Wink of Stella
  • White Chalk Marker
  • Holiday Rhinestones
  • Well Written dies (for ‘friend’)
  • Painted Texture Folder
  • Bumblebee Gingham ribbon

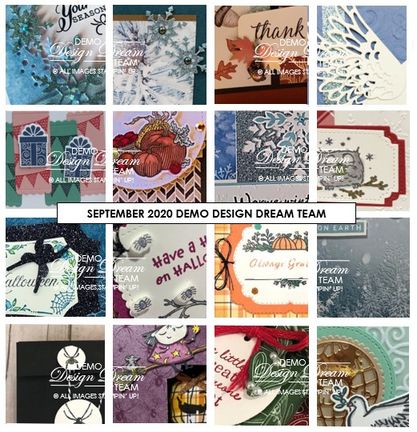
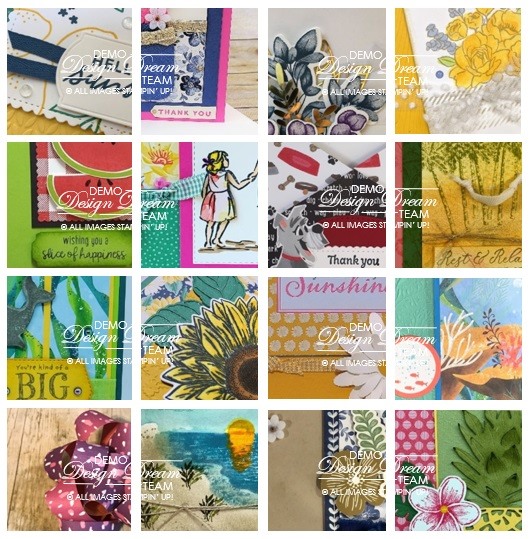
Here is a sneak peek of the pdf that you will get when you spend $35 or more:

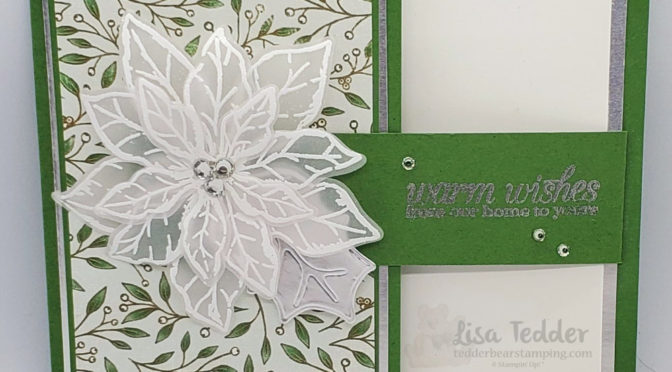
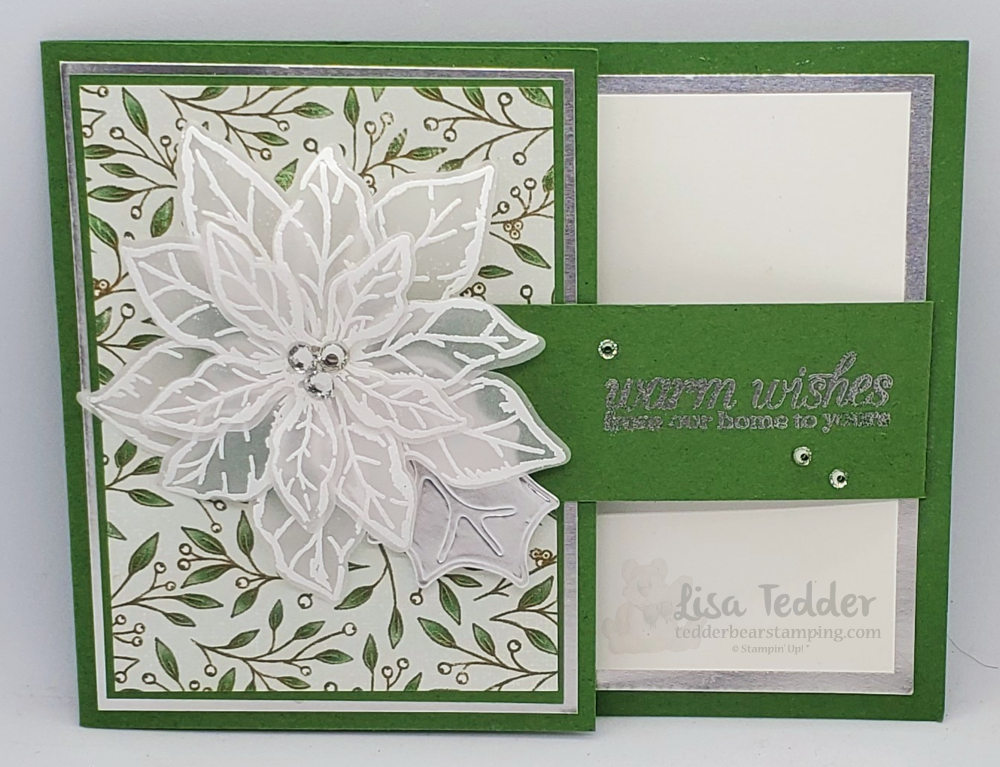
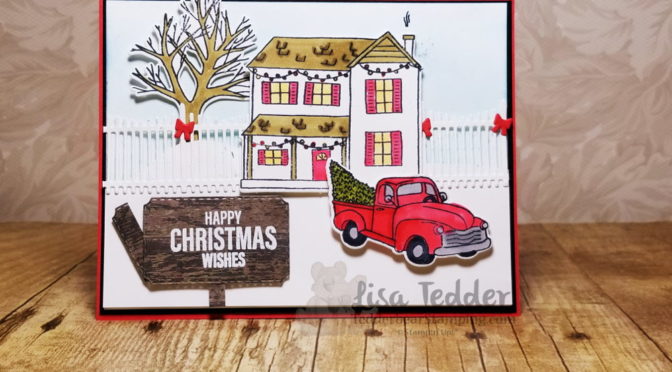
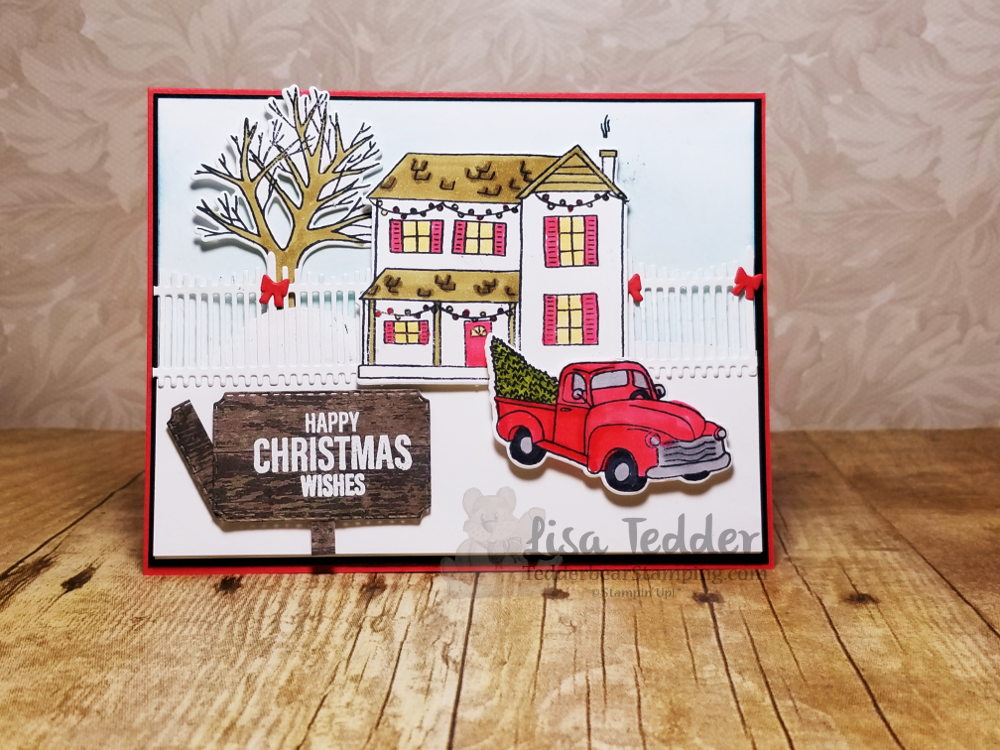
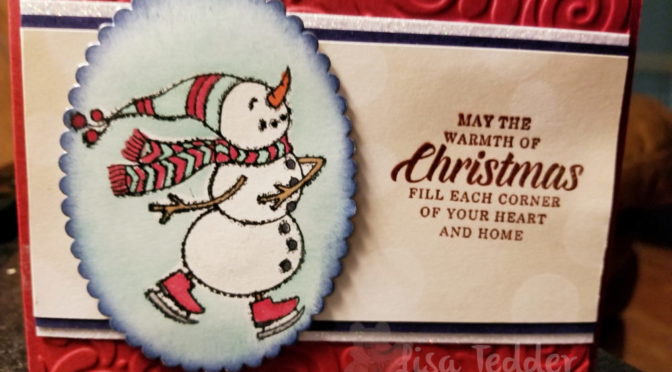
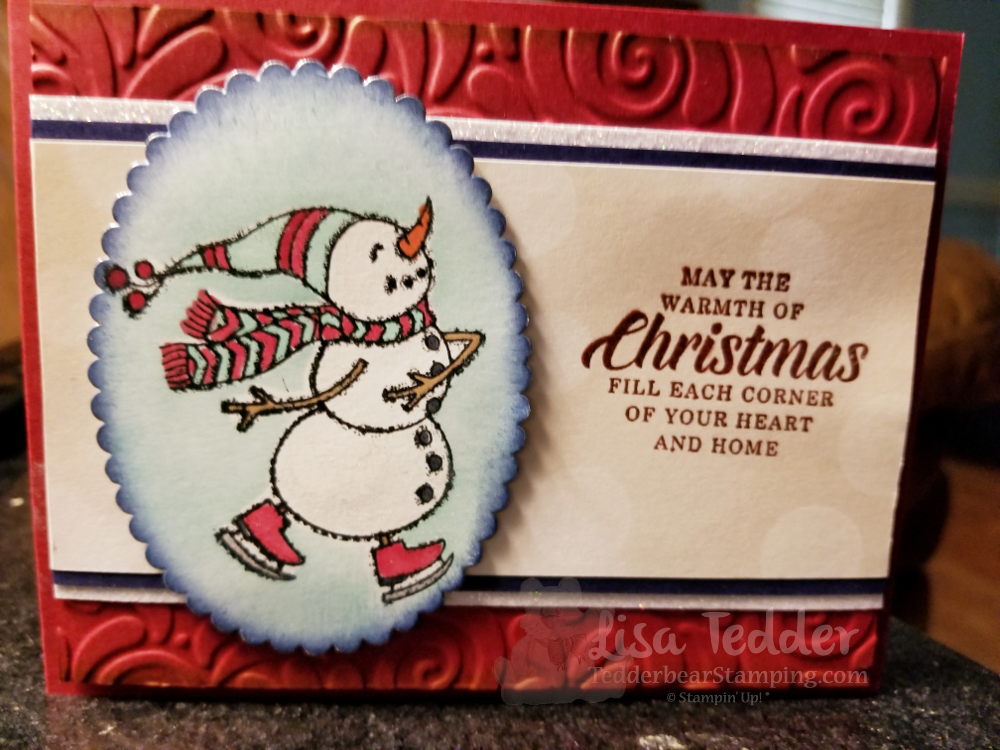
I hope you enjoyed the cards today! If you missed last weeks video/class you can catch it here. I have been really loving my weekly mini classes, I hope you have been too! Come back next week to see the two cards I make!

Lisa Tedder
A former California girl living in North Carolina

Product List

One stamp set – TWO different looks!

Hey Guys!

For this weeks Live video I used one stamp set, but got two very different looks! One is cute and simple something you might want to give the ‘kid’ in your life. The second card is very elegant and you wouldn’t think it came from the SAME stamp set! Don’t you love it when you can get more options when you buy something?!

One way of using this stamp set
Inside
One stamp set – Two very different looks!

As usual, here are the supplies needed for both of these cards:

  • Stamp sets:
  • Oh Snap
  • Inks:
  • Old Olive
  • Pacific Point
  • Mossy Meadow
  • Poppy Parade
  • Versamark
  • Blends:
  • Poppy Parade
  • Old Olive
  • Black
  • Paper:
  • Mossy Meadow 11″ x 4 1/4″ scored @ 5 1/2″
  • Basic Black 5 1/4″ x 4″ (x2) first card, 8 1/2″ x 5 1/2″ scored at 5 1/2″ second card, 5 1/4″ x 1 5/8″ second card, scraps for 2nd card
  • Basic White 5″ x 3 3/4″ (x2) 1st card, 5 1/4″ x 1 1/2″ second card, scraps for BOTH cards
  • Poppy Parade 5 1/4″ x 4″ (x2), scraps for ‘happy’ in 2nd card
  • Misc:
  • Dimensionals
  • Wink of Stella
  • Adhesive sheets
  • basic rhinestones
  • White Embossing powder
  • silver edged ribbon
  • Stampin’ Cut & Emboss Machine
  • paper snips
  • Heat tool
  • Blending brushes
  • Stitched Shapes Dies

I have been having so much fun doing my weekly YouTube Live videos! If you missed them you can always check them out at my YouTube Page! I would love it if you would join me at one of my Live Classes, you could be put in the drawing for one of the cards I make! You can also comment on one of my videos after they are live and I will put you in a drawing for that!

Like I say each week, each of the supplies that are listed above can be found below in picture form. Click on any of them and you will taken to my OnLine Store! If your purchase totals over $35, you will receive from me the class card pack that has everything except for stamps/ink that you will need to reproduce my cards…..or make them into similar cards with stamps you own.

If you missed my post on last weeks classes, you can go to this page and catch up! I made a HUGE announcement last week! You’ll want to check it out! I’m so excited!

Thank you for stopping by! I really appreciate you supporting my small business! Come back next week to see my next Mini Class!

Lisa Tedder
A Former California girl living in North Carolina

Product List

How much fun can one card be!?

Hey Guys!

The card I am showing you today is so much fun to make! Have you ever said: How much fun can one card be!? This stamp set (Ornamental Envelopes) has SO MANY ways to use it! Versatile is just ONE way to describe it! This set has ornaments, corner pieces, dies that let you decorate your envelope, and so much more! For today I am showing off the wreath I made. You can watch my video here to see how I did it.

One card = Too much fun!

By the way, I also shared on my video how to use the Stamparatus to get your stamps straight! Don’t you hate it when you finish a card and go to stamp the sentiment and it is crooked! Then you have to get creative to cover it up or start over! Well, I show you how to never deal with that again!

As always here is the list of things I used to make this card:

  • Stamps
  • Ornamental Envelopes
  • For Unto Us (inside greeting)
  • Here’s a card (front sentiment)
  • Inks
  • Soft Suede
  • Versamark
  • Paper
  • Garden Green 8 1/2″ x 5 1/2″ scored at 4 1/4″
  • Early Espresso 5 1/4″ x 4″ (x2), 3 1/2″ sq.
  • Poinsettia Place Designer Series Paper (DSP) 5 1/8″ x 3 7/8″
  • Whisper White 5 1/8″ x 3 7/8″ (inside), 3 3/8″ sq. (for under wreath), scrap
  • Soft Suede 3 1/4″ sq.
  • Misc.
  • 1/4″ Faux Suede Trim – Early Espresso
  • Dimensionals
  • Elegant Faceted Gems
  • Stamping sponges
  • White Embossing powder
  • Heat tool
  • Stampin’ Seal +

As you saw (hopefully) last week, I love using Make-up brushes to blend in my colors, check out the blog post if you missed it.

Below you will see the same supplies listed above in picture form, if you click on any of them you will be taken to my OnLine Store! Did you know, that I have started doing YouTube Lives?! AND if you purchase $35 from me using this Hostess Code (RTCTACK) between now and Tuesday the 6th of October you will get my Mini Class packet supplies! I will mail out the packets on Thursday the 7th! Check out my Live, but be prepared it was my FIRST and I can only do better, Thank the Lord!! LOL PLUS a pillow gift!! Now, I feel like a tv announcer……BUT that’s not all!! You will also get a pdf of SIXTEEN projects with step by step instructions! Here is a sneak peek:

Sneak peek!!

Thank you for stopping by!! I really appreciate it! Please leave a comment, subscribe to my Newsletter/blog/YouTube channel!! Or all of them! LOL

Come back next week when I have my next video/blog post!

Lisa Tedder
A California girl living in North Carolina

Product List


Seamless Blending of colors that draw your eye

Hey Guys!

Oh my Gosh you guys I LOVE how this card came out! Especially since I sent them out to my direct Team members, they loved them and wanted me to make a video so they could learn how to make it! Namely, how to Seamlessly blend the colors to draw your eye to the center. Subsequently you can find the video here. As you will see in the video it’s pretty simple if you follow one rule: Start OFF your paper first! It also helps if you rub either your sponge or brush, a little after inking up on a scratch paper before touching your project. First off, take a look at my card, can you see that I have 2 different ink colors PLUS the color of the cardstock?

See how you can blend colors to create a scene that draws your eye to the subject, seamlessly!?

To start with I began with a piece of Seaside Spray cardstock, I then sponged with a make-up brush Pacific Point around the edges leaving the middle un-inked. Second, I came in on top of the Pacific Point and went over the cardstock with Night of Navy, not quite going as far as I did with the Pacific Point. Thirdly, I stamped the tree from Life Is Beautiful in the center using Soft Suede ink. Lastly I sponged the sides with Night of Navy to make it really dark on the edges and fade to the light color in the middle. Can you see how seamless the blending is and how it really draws your eye in towards the tree in the center? Now, I DID emboss the snowflakes before I sponged the edges but it doesn’t matter if you do the sponging first.

As always here are the specifics for my card:

  • Stamps: Life is Beautiful
  • Inks: Night of Navy, Pacific Point, Soft Suede, Versamark
  • Paper: Night of Navy 8 1/2″ x 5 1/2″ (scored @ 4 1/4″), Whisper White 5 1/8″ x 3 7/8″ (x2) & 2″ x 3 3/4″, Seaside Spray 5″ x 3 3/8″
  • Misc: Elegant Faceted Gems, Paper Trimmer, Take your Pick tool, stamping sponges & make-up brushes

For the most part EVERYTHING listed above, excluding the make-up brushes, can be found on my OnLine Store. As a result of you ordering $35 or more from my Store you will receive from me SIXTEEN project designs with step by step instructions WITH pictures, in a pdf! Finally, you can click on any of the supplies in picture form below to be taken to my site so you can Shop with me!

Incidentally, I have another sponged scene that I did in the past, but for that one I only used sponges, you can see it here. Therefore, sponging doesn’t HAVE to be done using the make-up brushes, it makes it easier, but sponging can get the same result.

Lastly, I hope you know how much you mean to me! Just the fact that you come here and read what I wrote and watch my video means a lot to me. In brief, please come back again, and leave comments even if it’s to say you enjoyed my post.

Lisa Tedder
A California girl living in North Carolina

Product List

Elegant Christmas Card with Magnetic Closure!

Hey Guys!

To begin with, I am showing you a really elegant and pretty Christmas card, that has a magnetic closure, you can see it on YouTube here!

First, have you seen projects using the Poinsettia Petals bundle on Pinterest?! As usual, I get my inspiration from there, but then I branch out on my own.
Second, I LOVE stamping on Vellum using White embossing powder, it makes any project look elegant! Such as my card (at least I think so!):

Christmas card with a magnetic closure, it’s behind the flower
Christmas card with a magnetic closure, the magnet is hidden!
  • As always here are the specifics for this card:
  • Stamps:
  • Poinsettia Petals Bundle
  • Inks:
  • Garden Green
  • Versamark
  • Paper:
  • Garden Green 8 3/4″ x 4 1/4″, 1 1/4″ x 5″ (scored @ 1/2″), 2 7/8″ x 3 7/8″
  • Silver Foil 5 1/8″ x 3 7/8″, 3″ x 4″, scrap for leaf
  • Poinsettia Place Designer Series Paper 2 3/4″ x 3 3/4″
  • Whisper White 4 7/8″ x 3 5/8″
  • Vellum enough to stamp the three layers of flower
  • Misc:
  • Stampin’ Cut & Emboss Machine
  • Magnetic Plate
  • White Embossing Powder
  • Silver Embossing Powder
  • Heat tool
  • Rhinestones
  • Dimensions
  • Stampin’ Seal +
  • Magnets (click to see which ones)

Similarly, as above you will see all the supplies in picture form below, click on any of them to be taken to my OnLine Store!

Therefore, if you purchase $35 or more you will be sent a PDF that has 16 tutorials with pictures and step by step instructions! Subsequently, this is my gift for you! In particular, I appreciate you being here and supporting me! Thus, here is a sneak peek of what you will get:

Sneak peek for purchases $35

Incidentally, last week, like this year…..was a bad one for me! Namely, I had to deal with Migraines and reactions to some new medicine, I didn’t get ANYTHING done.
So, I am off and running this week! Yes, I know it is Friday, but I have been VERY busy all week!

To Summarize, thank you for stopping by! Come back next week I have a great project planned! In addition to this card, if you would like to see another Fancy Fold Christmas Card, click here.

In conclusion, be sure and subscribe to my blog AND sign up for my Newsletter (I send out other project ideas!) one click and you will be added!

Lisa Tedder
A California girl living in North Carolina

Product List

Cutest kid card EVER!

Hey Guys!

Are kid cards hard for you to make? I am challenged with kid and masculine cards……not sure why, Stampin’ Up! makes it easy, I guess it’s because I am not drawn to kid stamps. But, the Wiggle Worm bundle really called to me! They are just so stinkin’ cute! Don’t you think?

With this in mind, looking at the stamp set and dies, the Bugs are super cute, add in the grass and mushrooms and this card practically made itself! Don’t you love the clouds too?! There is ONE problem that I have with this card, the bare space towards the bottom right is bugging me! Ha! Pun not intended! Would you add something more? For the inside I used the little flying bugs, and thought of adding one to that space, but am afraid that I will over do it.

Speaking of the inside here it is!

For the class on the 3rd Wednesday (of every month at 1:00) at our local Senior Enrichment Center, the subject is ‘kids’, so I decided to do this one! Would you add one of the little bugs to the front? Or are you like me and say ‘less is more’ and let it shine on it’s own? Please let me know what you think!

As always, here are the specifics for this card:

Stamps:
Wiggle Worm

Inks:
Memento Black
Versamark
Merry Merlot
Blends: Highland Heather combo, Balmy Blue Lt

Paper:
Highland Heather 8 1/2″ x 5 1/2″
Merry Merlot 5 1/4″ x 4″ scraps for mushrooms
Balmy Blue 5″ x 3 3/4″
Whisper White 5″ x 3 3/4″, scraps for sentiment
Garden Green scraps for grass

Misc:
Chalk Marker
White Embossing Powder
Heat tool
Wink of Stella
Dimensionals

So, what do you think? Do you agree with me? That these bugs are just too cute!? My favorite part is the Mushrooms! They just make me smile.

I hope you enjoyed this post. Come back later in week to see what ELSE I am making in the Kid class! Keep in mind that I’m not always talking about ‘little’ kids! My Granddaughter will LOVE the one I’ll show you later! Am I a stinker trying to entice you to come back?! 🙂

Thanks for stopping by! If you are looking for a Demo in the United States, I will do whatever I can do to help you make your own creations! Below you will see all the supplies in picture form, click on any of them to be taken to my OnLine Store! For every order you make from $35 + you will receive from me 2 sets of Tutorials of over 45 just as my thank you!

Lisa Tedder
A California girl living in North Carolina

Product List

Vellum, Roses and Silver Oh My!

Hey Guys!

Here is another beautiful yet simple card!

This card is inspired by one I saw on Pinterest by Kristine McNickle.  I LOVE Basic Gray and Grapefruit Grove  together!  It is a great pairing, don’t you think?  See that cut out at the bottom? When the card is closed you can see the Grapefruit Grove peeking through.  It is a pretty design element.  The square floral paper is Designer Series Paper!  Such a pretty and easy way to bring elegance to a card.  I stamped the sentiment with Versamark and embossed with White Embossing powder.

The Beautiful Promenade stamp set, has a thinlit that goes with it called Beautiful Layers.  This is where I got the feature at the base of the card.  You can get 10% off the Bundle when you purchase both the stamp set and the thinlits.  My next post will have another thinlit from this set, so check back in!!

Here are the particulars for this card:

Stamp Sets
Beautiful Promenade Bundle
Paper
Basic Gray 8 1/2″ x 5 1/2″, 2 5/8″ x 3 5/8″, scrap
Grapefruit Grove 3 1/4″ sq, 5 1/4″ x 4″
Whisper White 3 1/2″ x 2 1/2″
Petal Promenade DSP 3 1/8″ sq
Vellum scrap
Inks
Basic Gray
Versamark
Accessories
White EP/ Embossing Buddy/ Heat tool
Stitched Labels Framelits
Silver Thread
Dimensionals
Big Shot

Below are the supplies used in picture form, click on any of them and you will be taken to my OnLine Store.  Any Online order will receive a gift from me!

If you are in search of a Demonstrator, I would be honored for you to pick me!  Also, it would be to my utter delight to have you join my Team if you are considering joining SU!

Thank you for stopping by, hope you enjoyed your stay and that you will stop by again!

Lisa Tedder
A California Girl living in North Carolina

Product List

Beautiful Promenade Photopolymer Bundle

Stitched Labels Framelits Dies

Basic Gray 8-1/2" X 11" Card Stock

Grapefruit Grove 8-1/2" X 11" Cardstock

Petal Promenade Designer Series Paper

Vellum 8-1/2" X 11" Card Stock

Versamark Pad

Basic Gray Classic Stampin' Pad

White Stampin' Emboss Powder

Embossing Buddy

Heat Tool

Silver Metallic Thread

Stampin' Dimensionals

Big Shot

Christmas Card #15 Farmhouse Christmas

Hey Guys!

This card was made after looking at two different cards using this set on Pinterest by two different people.  I loved the idea of having snow in the backyard and the truck in the front, plus using the die as a mailbox.  I added the ‘door’ on the mailbox, which made me so tickled with myself!  LOL


I uses a LOT of blends, which are listed below.  If you would like the dimensions and particulars for this card here they are:

Supplies
Stamp sets:
Farmhouse Christmas Bundle, Merry Christmas to all
Cardstock: Poppy Parade 5 ½” x 8 ½”, scraps for bows, Basic Black 5 3/8” x 4 1/8”, Whisper White 5 ¼” x 4 (x2),
5 ¼” x 2 ¾” (trimmed for snow), 1 ¾” x 4 ½”, 5 ¼” x 4 for stamping house, tree, truck, Wood Textures DSP 3” x 1 ½”
Inks: Memento Black, Versamark, Balmy Blue, Old Olive, Poppy Parade, Blends: Poppy Parade combo, Light Mango Melody, Old Olive combo, Soft Suede combo, Black Lt, Smoky Slate combo
Misc: White EP, Embossing Buddy, Dimensionals, Foam Adhesive strips, Fine tip Glue pen, Big Shot, Wink of Stella

This card is layered, the snow in the back only go on the bottom half of card, and if you look the fence is popped away from the base of the card.

I hope you like this card as much as I do!  We made this in my Christmas card class at the beginning of October!  Everyone loved making it, and I look forward to my other classes.

If you click on any of the pictures below (supplies used for this card), you will be taken to my OnLine Store! I would love to be your Demonstrator if you live in the US!

Check back with me, so you can see what I’ve been up to!

Lisa Tedder
A California Girl living in North Carolina
Product List

<!——– TAMS End ———-

Christmas Card #9 Merry Christmas to All stamp set

Hey Guys!,

If you follow me on Facebook at all, you will have seen SEVERAL versions of this card.  I kept changing it until I finally got it to where I was happy with it!  Here is the FINAL one I landed on and I’m happy with it!:

This sled was what sold me on this stamp set.  Isn’t it pretty?!

Here are the specifics for this card:

Supplies
Stamp Sets:
Merry Christmas to All Bundle, Alpine Adventure Bundle
Ink: Versamark
Cardstock: Shaded Spruce 8 ½” x 5 ½”, 4” x 2”, scraps, Merry Merlot 5 ¼” x 4”, scraps, Copper Foil 3 ½” x 1 ¾”, ½” x 5 ¼”, Gray Granite 2 ½” x 1 3/8”, Sparkle Glimmer Paper scraps, Joyous Noel DSP 5 ¼” x 2 ½”
Misc: Metallic Brads, Merry Merlot & Copper 5/8” reversible ribbon 6 ¼”, Dimensionals Mini/Reg, Sprig Punch, In the Woods Framelits, Corrugated Dynamic Folder, Embossing Buddy, White EP, Copper EP, heat tool

My stamping group will be making this and 5 other cards in October.  We spend all day making 16 cards 3 each of 5 designs and this is the special  card that they will make 1 of.  Each Christmas card class everyone gets 1 special card that is a little more work/effort/cardstock which means that is the one that is a Bonus Card. I like these cards to be special.  Kind of like a thank you to all my girls who sign up for my class.

Below you will see pictures of the supplies used for this card, click on any of the pictures and you will be taken to my OnLine Store!  If you don’t already have a Stampin’ Up! Demonstrator and you live in the US, I would love to be that person!

Hope you enjoyed this card!

Lisa Tedder
A California girl living in North Carolina
Product List

<!——– TAMS End –

Christmas card #7 Spirited Snowmen

Hey Guys!,

I am having so much fun making Christmas Cards for my local girls.  The class is in October, and we spend all day eating, stamping and having fun!  Everyone brings a dish to share, I have everything cut and ready for everyone to stamp and use the Big Shot.  16 cards are what all attendees take home with them!  3 each of 5 designs and 1 Special card.  Stampin’ Up! has the BEST Christmas stamps!

Here is the card I am sharing today:

Isn’t this snowman the cutest!?   This card is easy but still a lot of fun to make!  I stamped the snowman on white, then put a mask of the snowman on top of him so I could sponge Pool Party behind the snowman and not get him blue.  I then colored him with Blends.

All the supplies used on this card are listed below, just click on any picture and you will be taken to my OnLine Store!  I would love to be your SU! Demonstrator!

Here are the particulars for this card:

Stamp Sets: Spirited Snowmen, Timeless Tidings
Cardstock: Cherry Cobbler 8 ½” x 5 ½”, 5 ¼” x 4”, All Is Bright DSP 2 ½” x 5 ¼”, Night of Navy 5 ¼” x ½” (x2), Sparkle Glimmer paper 5 ¼” x ½” (x2), Whisper White 4” x 3” (for oval), Crumb cake 5” x 3 ¾”
Inks: Memento Black, Cherry Cobbler, Pool Party, Night of Navy, Versamark, Blends: Cherry Cobbler combo, Pool Party combo, Soft Suede light, Black lt, Calypso Coral dk
Misc: Layering Oval Framelits, Wink of Stella, Swirls & Curls Folder, Embossing Buddy, White EP, Heat tool, Big Shot

This card makes me smile!  I hope you like it!

Lisa Tedder
A California girl living in North Carolina
Product List