Tag Archives: crafts

Fancy Fold WOW handmade card

Hey Guys!

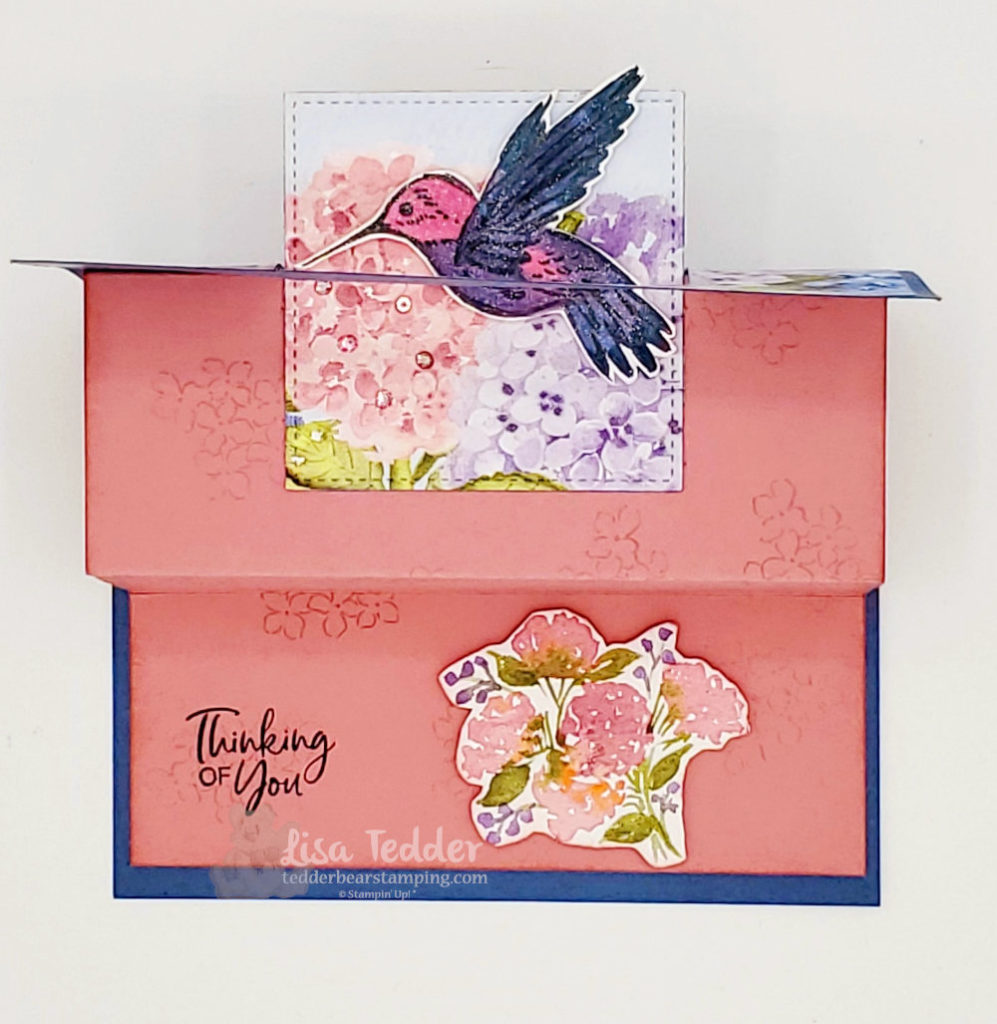
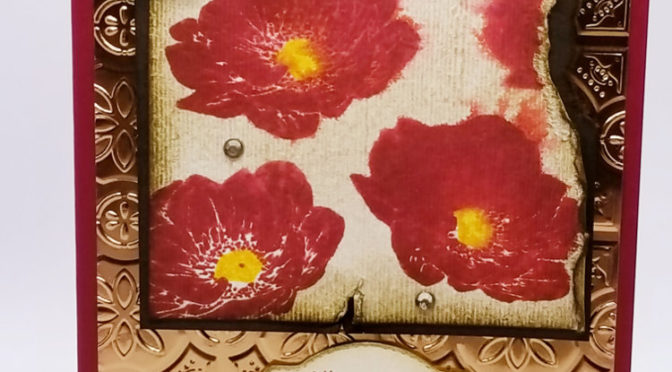
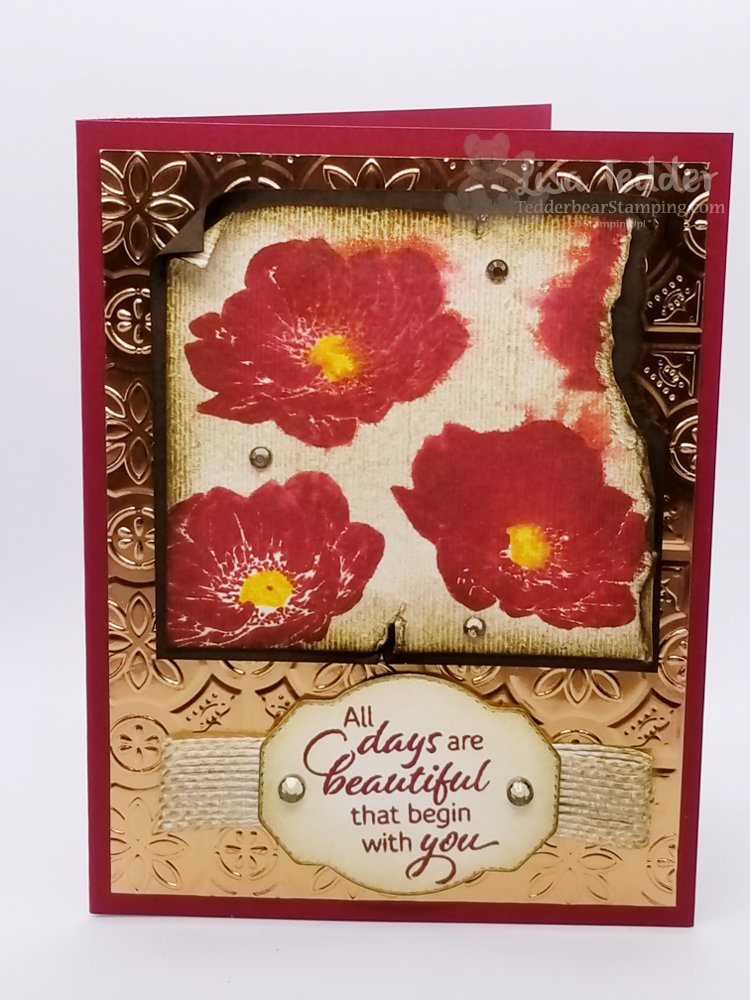
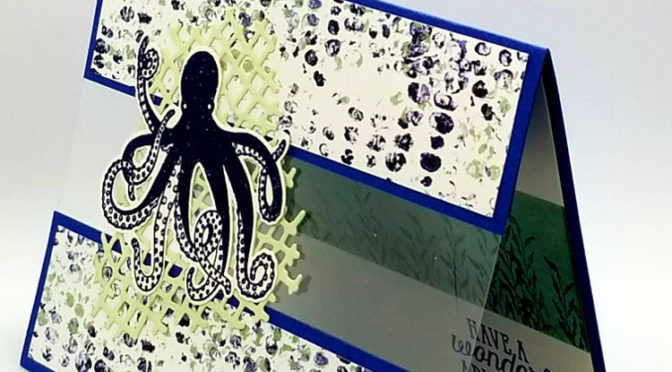
Today I am showing you a Fancy Fold WOW card! We will be using two stamp sets from Stampin’ Up! called Hydrangea Haven and A Touch of Ink (this set you can get if you spend $100 on an order for FREE!). This set from Sale-a-Bration is a 2 step stamp, though today we colored it with blends. If you missed my Post from last weeks Fancy Fold you can catch it here.

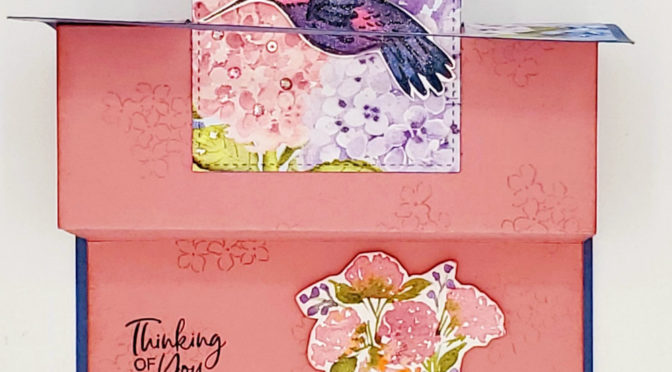
First card I made on my video:

Fancy Fold WOW, handmade card top view
Fancy Fold WOW handmade card side view

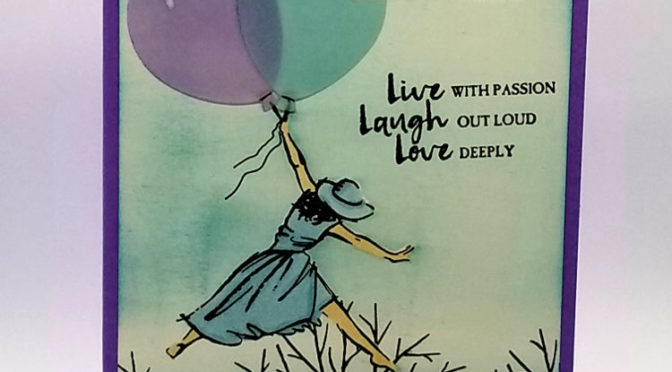
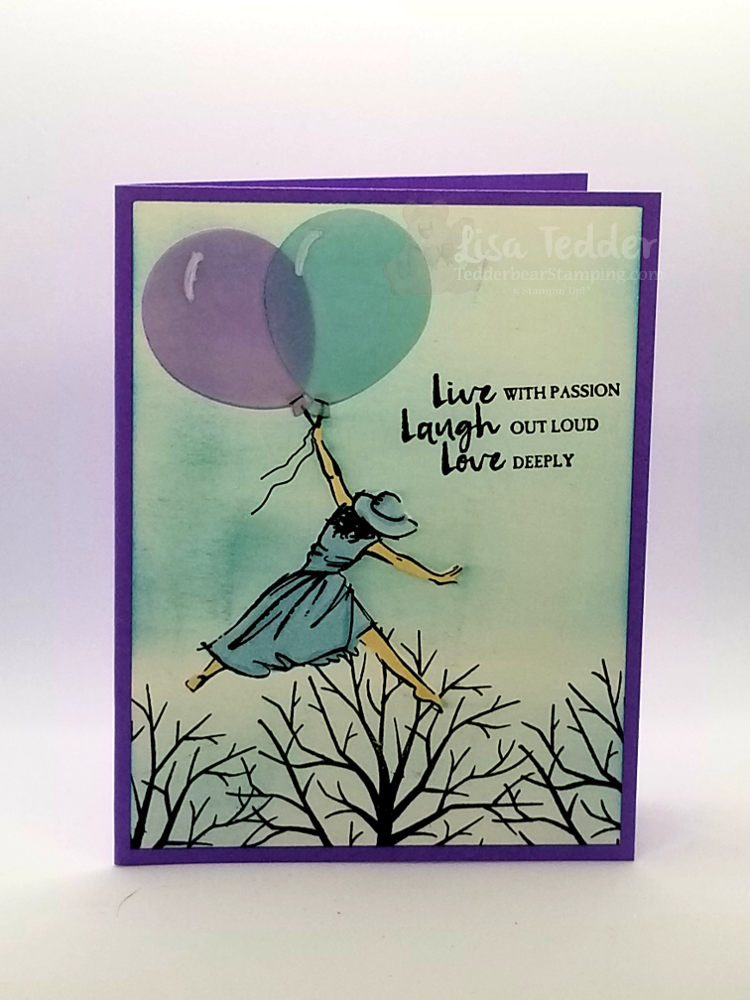
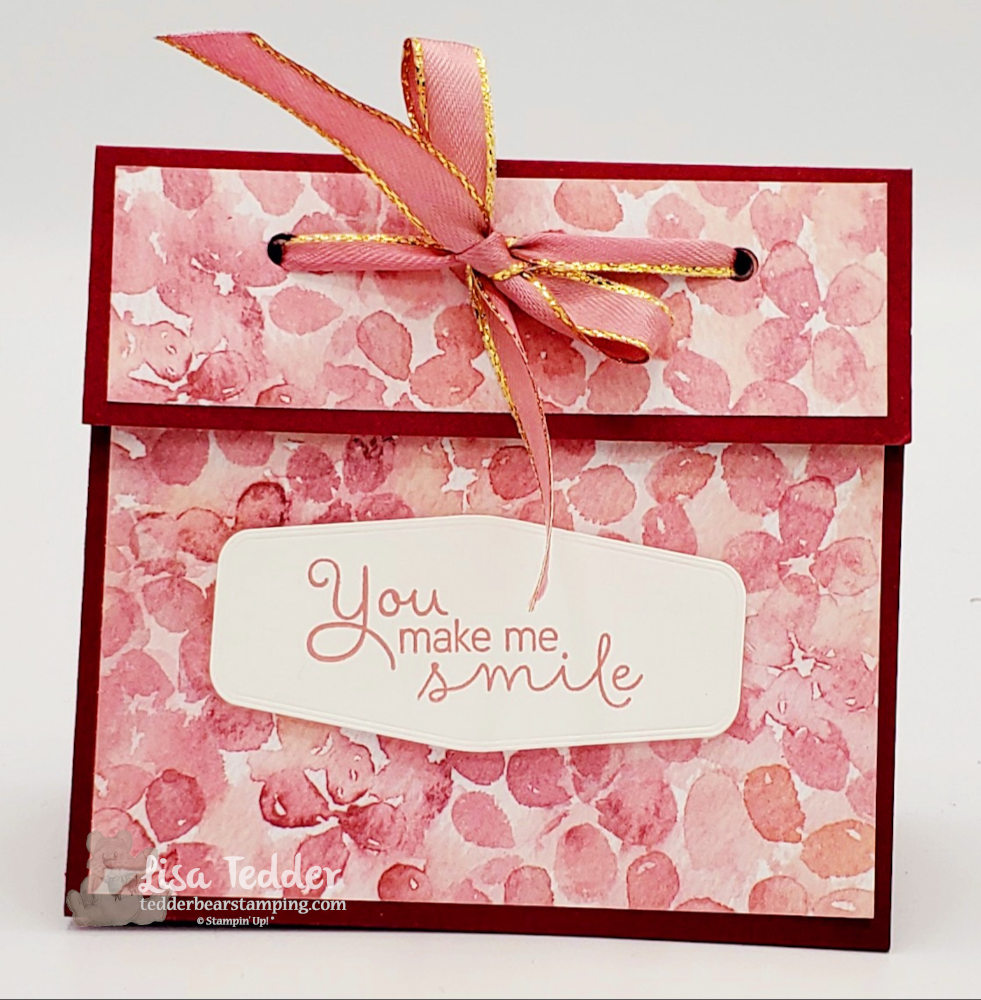
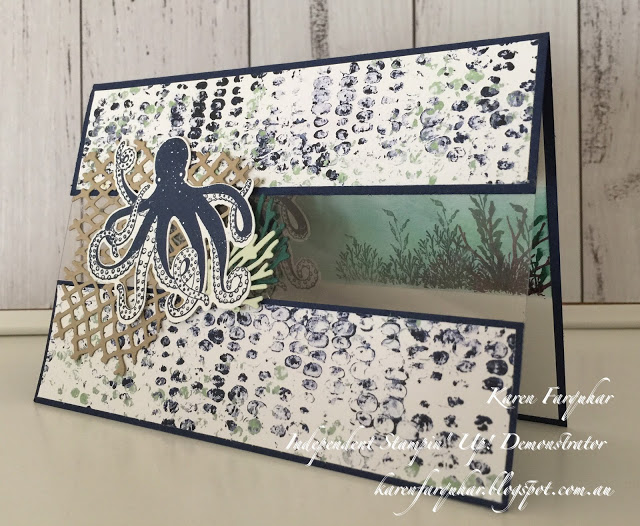
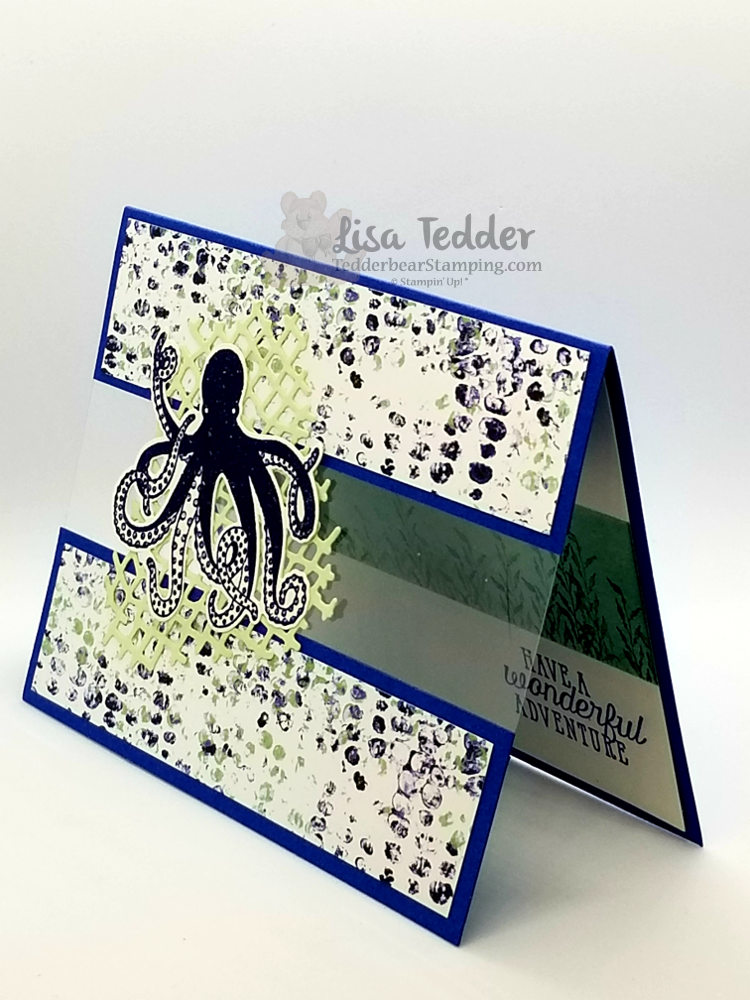
Second card I made on my Live was really fun for me!! I debated getting this set, but liked what I saw online, so decided to get it, boy I’m so glad I did!! Here is my 2nd card:

Hydrangea Haven card

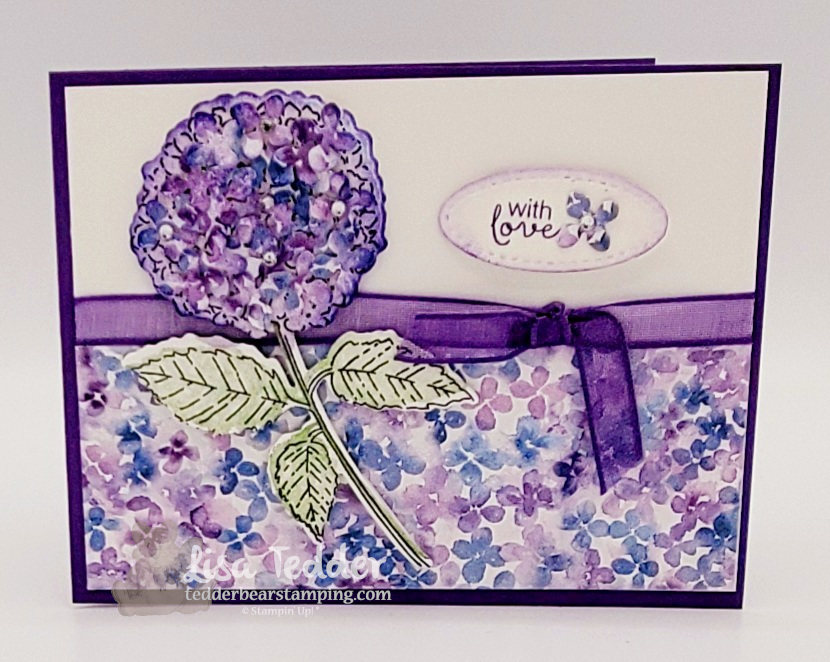
As always, here are the ingredients for both my cards:

  • Stamp sets:
  • Hydrangea Haven Bundle
  • A Touch of Ink
  • Inks:
  • Memento black
  • Gorgeous Grape
  • Rococo Rose
  • Highland Heather
  • Granny Apple Green
  • Blends:
  • Rococo Rose
  • Misty Moonlight
  • Paper:
  • Misty Moonlight 8 1/2″ x 5 1/2″
  • Rococo Rose 8″ x 5 1/4″, score landscape @ 2″, 4″ & 6″ fold as shown on video
  • Hydrangea Hill Designer Series Paper (DSP) 5 1/4″ x 4″ for 1st card, 5 1/4″ x 2″ for 2nd card, and cut out image for 1st card inside
  • Gorgeous Grape 11″ x 4 1/4″
  • Basic White 5 1/4″ x 4″ (x2), scraps for stamping all images on both cards
  • Misc:
  • Stitched Shapes Dies
  • Tasteful Labels Dies
  • Dimensionals
  • Paper snips
  • Rhinestones
  • Stampin’ Cut & Emboss machine
  • Gorgeous Grape 3/8″ Sheer Ribbon
  • Wink of Stella

Aren’t those so pretty!!? I keep looking at them and LOVE them! Below you will see pictures with the same product I listed above, click on any of them to be taken to my OnLine store! For $35 or more (if you buy over $150 do NOT use the Host code I will provide) you will receive the class packet for doing these cards, which includes all the cardstock, die cut images (square cut out of front of card, flowers die cut that are on top of flower, and colored rhinestones), you will NOT get the stamps unless you order them. Also, for your order you will get this pillow gift!!

This has Chocolate inside!!

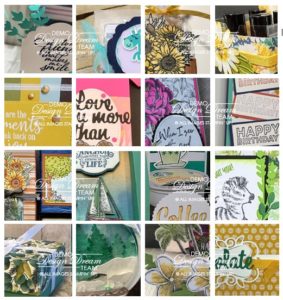
Also, with your Qualifying order you will get a PDF of SIXTEEN projects! Each project has step by step instructions and pictures! Every month I have a brand new PDF for you! On last weeks video I shared my project that is in the PDF for purchases in the month of January along with other ideas using other product from the SAB catalog!

I hope you have enjoyed my post today! If you missed any of my videos you can go to my YouTube Channel and get all kinds of ideas!!

Thank you so much for supporting me and my small business! I hope you enjoy my blog AND videos!

Lisa Tedder
A former CA girl living in North Carolina

Product List

How to copy a card and make it your own.

Hey Guys!,

First off, I got this idea from the Holiday Catalog from Stampin’ Up! I like to get ideas and then change them up to make them my own design. Next, we will take a walk through my thought process! As usual, here is a video showing you how to make this card. Finally, this card on page 43 is the card I wanted to make my own:

The card on the right is the one I am going to make into my own design!

Generally, when looking for a project to do, I first look in Pinterest, but this time I looked at the SU! catalog! Consequently it ended up being an awesome place to get an idea! Furthermore, I wanted to use the In The Pines Bundle and this would work with an idea I had in my head. Unfortunately, I didn’t have the circle that is on the card above. However, I did have the die from the Painted Labels that let me cut out a circle design that would take it’s place! Also, I wanted to use the trees singularly from the stamp set but die cut to have more detail. Likewise, instead of the ribbon that comes out the side of the circle I used gold foil cut into two strips. By the way, I DID use the acorns for my card, here is what I made:

I replaced some things to make this design my own creation!

Usually, I like to have layers on my cards and this time is no exception! Likewise, I love to sponge the edges of my cards and I did that with Crumb Cake and then Early Espresso to add a dark edge that makes the card pop! As a rule, I like to have my insides go with the front using the same layers, this (to me) seems to make the card look more professional.

Notice how the inside mirrors the front?

Finally, here are the details for this card:

Stamps:
In the Pines Bundle
For Unto Us
Inks:
Crumb Cake
Early Espresso
Old Olive
Paper:
Crumb Cake 8 1/2" x 5 1/2", 5" x 3 3/4" (x2)
Old Olive 5 1/4" x 4" (x2), scraps for trees
Gold Foil
Misc: 
Wonder of The Season OR Forever Greenery combo
Jingle Bells OR Acorn Trinkets
Glue Dots
MultiPurpose Liquid Glue
Mini Dimensionals
Painted Labels Dies
Banners Pick a Punch

As always, below will be the same supplies listed in picture form, click on any of them to be taken to my On Line Store! Subsequently, any purchase over $35 you will get from me a PDF with 16 project ideas that include pictures and step by step instructions! So then, this is a thank you from me!

Before I go, I wanted to tell you that I have another card that you can see here that I took from the catalog and made it my own (see page 38). As you can see I like to get ideas and then change them up to make them my own design.

In Conclusion, thank you so much for coming to visit me! Together, we can make things we see into our creations!

Lisa Tedder
A California girl living in North Carolina

Product List

Christmas in July Blog Hop!

Hey Guys!,

It’s July! You know what that means! I usually do Christmas in July. This year is no different. Today I am participating in a blog hop! I don’t usually do this, so you’ll have to let me know if you enjoy it!

Today I am sharing with you a card I did using Stampin’ Up!’s Bundle Snowflake Wishes! I LOVE this Suite to be honest! I bought the whole thing! The Glimmer Balmy Blue paper is sooooo pretty! There are only two things in the Suite I didn’t use on this and that is the Snowflake Splendor 1/4″ ribbon and the Winter Snow embossing folder. I’m adding it to the pictures below so if YOU want to use it for this card you can!

Here is my card:

Snowflake Wishes Christmas in July
Snowflake Wishes Suite Christmas in July

Doesn’t the Highland Heather just make this pop! I love all the sparkle this card has in person! It’s too bad you can’t see it, oh!, wait! you can! I made a video showing this card! You can see the video here!

For another Christmas card in July using this same Suite you can see it here. I also made a video doing that card which you can catch here.

Here is the inside to my card:

Christmas in July Blog hop inside

As usual, here are the specifics for this card.

Stamps:
Snowflake Wishes Bundle

Inks:
Highland Heather

Paper:
Pacific Point 8 1/2″ x 5 1/2″
Highland Heather 5 1/4″ x 4″ (x2), scrap 7/8″ x 3 3/4″, 1 3/4″ x 2 3/4″ (for inside)
Snowflake Splendor DSP 5 1/8″ x 3 7/8″
Whisper White 5 1/8″ x 3 7/8″, scraps for the snowflakes
Balmy Blue 5 1/8″ x 3 7/8″
Balmy Blue Glimmer Paper scraps for snowflakes

Misc:
Dimensionals
Simply Scored
Blue Adhesive-backed Gems
Wink of Stella
Everyday Label Punch
Banners pick a punch

You will also see the supplies in picture form below, click on any of them to be taken to my OnLine Store. If you purchase $35 or more from me you will receive a pdf that has 16 projects with pictures and step by step instructions!

For the scores on the sides of the white cardstock (can’t see in the picture, but it really makes this card) I started at 3/8″ and then did three lines in a row, turned the cardstock and did the same on the opposite side. It really adds some interest, don’t you think? I also popped up this layer since it makes the DSP underneath really shine! Of course I had to add the Blue Adhesive backed Gems!

I hope you have enjoyed this post! Please stop back in, I will be posting regularly now! Don’t forget to sign up for my Newsletter! I send out good ideas!

Lisa Tedder
A California girl living in North Carolina

Powered by Linky Tools

Click here to enter your link and view this Linky Tools list…

Product List

You Can Emboss with that?!

Hey Guys!

Did you know that you can emboss with water?! What!? I didn’t think it was possible, but I accidentally dripped water on a project I was Gold embossing, as I poured the powder, the water took it too and it embossed along with the Versamark!

So, of course I HAD to try it with JUST water, and you guessed it……it embossed! You can see the video of this card here. Here is a picture of my project:

The Gold spots are where I embossed with WATER!
The inside of my Water embossed card!

To get the ‘silver’ look on the background, I used a Sponge Brayer and the Frost White Shimmer Paint and applied it to the Birch Background stamp from Stampin’ Up! On black the ‘white’ looks more silver, therefore this card has both Silver & Gold! Every time I say that, I want to break into song singing “Silver & Gold, Silver & Gold”! I ‘think’ it’s from Rudolph the cartoon, do you know?

I also embossed the tag with Gold and used the Banners Pick a Punch to get the tag perfect! For the Stamp set, I used the Beautiful World Bundle. LOVE this set!

If you would like to see another embossing technique you can check it out here!

As always, here are the specifics for this card:

Stamps:
Beautiful World Bundle
Birch

Inks:
Versamark
Misty Moonlight
Blends: Misty Moonlight (light)

Paper:
Misty Moonlight 8 1/2″ x 5 1/2″, scrap for behind the map
Gold Foil 5 1/8″ x 3 7/8″
Silver Foil
Basic Black 5″ x 3 3/4″ (x2), scrap for map, 2 strips for behind sentiment & behind cut out on the inside
Whisper White 4 3/4″ x 3 1/2″

Misc:
Frost White Shimmer Paint
Dimensionals
Banners Pick a Punch
Sponge Brayer
Gold Embossing Powder
3/8″ Metallic Edge Ribbon (Gold)
Heat Tool

You can click on any of the supplies in picture form below and you will be taken to my OnLine Store! If you decide to purchase from me, any time you spend $35 or more you will receive from me a pdf of 16 projects with pictures and step by step instructions! Here is a sample of what you will get in July:

Any purchase from my Store for $35 you get a PDF with these projects!

Finally, what do you think? Did you know that you can emboss with WATER? I sure didn’t! I hope you liked learning something new. Please be sure and come back (subscribe to my blog & Newsletter) so you can see my next project! Thank you for supporting me by visiting! I appreciate you!

Lisa Tedder
A California girl living in North Carolina

Product List

Star Wars Birthday card-Punch Art

Hey Guys!

Ever year I make a Star Wars Themed Birthday card, you can see one here, here and here. So, after MUCH thought and stress……(I am NOT a Star War fan myself) this is the card I made this year:

And the inside:

To make this card I used only current supplies from Stampin’ Up!, I took a picture of all the dies all ready to go (except for one triangle that I had to fussy cut to get it the right way).


Funny how this goes each and every year……
I think for MONTHS trying to think which Character I can make, then it gets down to the wire. So, after a lot of research, I finally pick which one I’ll do. It’s trial and error, but it ends up a labor of love. My daughter is going to frame all of them at some point, so I want them to be worthy!
Of course, when Isaac goes to open the card, he BARELY pays attention to the card at all! He is just too excited about the $5.00 I always put inside. Then, my daughter calls him back after he runs off with the cash, and makes him look at the card! hahahaha Eventually, I figure that he will appreciate the effort taken for the cards, but for now I know that MY baby girl loves them! 🙂
Any ideas for me for NEXT year? It’s never too early to start planning!

As usual, here are the specifics for this card:

Stamps:
Wiggle Worm (for Happy Birthday)

Inks:
Memento Black
White Craft

Paper:
Basic Black 8 1/2″ x 5 1/2″, scraps for all the pieces
Silver Foil 5 1/4″ x 4″, 5 1/8″ x 3 7/8″
Vellum scrap for lined piece on face (black behind it)
Whisper White scraps (I printed the sayings), 3 1/2″ x 4 3/4″

Misc:
Layering Circle Dies – 2nd from Biggest
Layering Square Dies – 4th smallest
Layering Oval Dies – 2nd from Biggest
Lakeside Dies
3/4″ circle punch
Detailed Trio Punch
Coastal Weave 3D Embossing Folder
Metallic Brads
Dimensionals
Sponges

Below you will see these same supplies in picture form, click on any of them and you will be taken to my OnLine Store. IF you purchase $35 or more from me, you will get a special treat from me!! Not only will I mail you a handmade card, BUT you will get not 1 but 2 sets of Tutorials for making over 60 cards!! Can’t beat a deal like that!! Every month is the same deal, the tutorials change every month! Here is a sneak peek of just ONE of the tutorials:

16 Tutorials!

I really hope you are staying healthy and safe! Sheltering in place is a great opportunity to get your crafting in! Also, if you want me to send you a NEW Catalog from Stampin’ Up! come June, please let me know! I would love to help you find your creative outlet!

Lisa Tedder
A California girl living in North Carolina

Product List

NEW Floral Essence Shabby Chic

Hey Guys!,

Today I am sharing with you a BRAND NEW stamp set from Stampin’ Up! called Floral Essence.  I wanted to come up with something on my own, since there weren’t many samples out yet.

I haven’t done Shabby Chic in SOOOOO long I am hoping I got it right.

Here is my card:

The Tin Tile Folder on Copper really makes this look aged.

Here are the specifics for this card:

PROJECT 2: Shabby Chic
Stamp Sets Pg #
Floral Essence 108
Paper
Cherry Cobbler 8 1/2″ x 5 1/2″
Copper Foil 5 1/4″ x 4″
Early Espresso 3 3/8″ x 3 1/4″
Watercolor paper 3″ x 3 1/2″
Very Vanilla 5 1/4″ x 4″, 2 1/2″ x 2″
Inks
Cherry Cobbler
Mango Melody
Soft Suede
Accessories
Rhinestones 178
Bronze blend 179
Shimmer Paint Champagne Mist w/alcohol 180
Tin Tile Folder 199
5/8″ Flax Ribbon 174
Smooth Sailing Die for sentiment 195

After I was done I spritzed the entire card with Champagne Mist (4 drops in Alcohol), to give it a shimmery sparkly look.

All the supplies are listed below in picture form, click on any of them to be taken to my OnLine Store.  If you buy from me, I will send you a free gift as a token of my gratitude for you choosing me to be your Stampin’ Up! Demonstrator.

Thank you for stopping by!

Lisa Tedder
A California girl living in North Carolina
Product List

Brand NEW Stamp set Sailing Home

Hey Guys!,

I LOVE when the new CAtalog comes out by Stampin’ Up!!  I was drawn to the set Sailing Home as soon as I saw it!  If I had my way, I would go visit every Lighthouse!  Since I can’t do that I will stick to making cards using them!

Here is a card I did NOT CASE, I came up with it!  Hope you like it!  Here it is:

I did a video showing how I made this card, you can find it here.   I made my own cloud template and am offering it to those who order from me!  This uses a LOT of new goodies!  Sailing Home comes in a Bundle (which if you buy you will get 10% off!!).  The rope knot is a die, the die the Thanks is stamped on is included, plus the sailboat is cut out with a die.  There IS a die for the Lighthouse but I stamped and masked it.  Go check out the video to see how I got the texture on the sand.

Here are the specifics for this card:

PROJECT 1: Lighthouse
Stamp Sets Pg #
Sailing home Bundle
Paper
Seaside Spray 8 1/2″ x 5 1/2″
Pretty Peacock 5 1/4″ x 4″
White 5″ x 3 3/4″, scrap for sailboat and sentiment
Inks
Crumb Cake
Soft Suede
Pretty Peacock
Balmy Blue
Memento
Accessories
Big Shot
Wink of Stella
Dimensionals
window sheets for clouds

I hope you like my card!  I always get so excited when I make something without CASE’ing it.  I know the reason I don’t do it more often is that I am swamped with classes and don’t have the time.  The nice thing is that YOU don’t have to come up with anything either.  There are so many ways to get ideas that we don’t NEED to try and do it alone.

Below are the supplies used for this card in picture form, click on any of them to be taken to my OnLine Store!  If you purchase from me OnLine, you can get the cloud template that I used for this card for a thank you!  Or you can pick a card you like, I will add a little something from my favorites to send you also!  It’s like a Grab Bag!!  🙂

Thank you for stopping by!

Lisa Tedder
A California girl living in North Carolina
Product List

Sea of Texture see through card

Hey Guys!,

The card I am sharing with you today is another CASE’d card from Pinterest by Karen Farquhar.  Here is her card:

I made my inside a bit different, and didn’t add the coral die cut to the front.  When doing a class, I need to cut down on what I use since it will make the class too long otherwise.

Here is my card:

Side view:

Inside:

Here are the specifics for this card:

PROJECT 1: Octopus
Stamp Sets Pg #
Sea of Texture Bundle
Paper
Blueberry Bushel 5 1/2″ x 5 3/4″ scored @ 4 1/4″
blueberry Bushel 1 1/2″ x 5 1/2″ (x 3)
Whisper white 5 1/4″ x 4″, 3″ x 2 3/4″
DSP Tranquil Textures 1 1/4″ x 5 1/4″ (x2)
Soft Sea Foam 3 1/4″ x 3″/ Window Sheet 2″ x 5 1/2″
Inks
Blueberry Bushel
Tranquil Tide
Accessories
Clear EP/embossing buddy/heat tool
Big Shot
sponges

Below are the supplies in picture form, click on any of them to be taken to my OnLine Store.  If you need a demonstrator and you live in the U.S. I would love to be her!  If you purchase from me OnLine, I will send you a small gift……I know you will love it!

Thank you for stopping by!

Lisa Tedder
A California Girl living in North Carolina
Product List

Rooted in Nature beach scene

Hey Guys!

I love my Job!  I get to make beautiful handmade cards AND show others how to do it! After my classes everyone is so happy with what they have made!

I got this idea from Cindy Elam, I found it on Pinterest and changed up a little, here is her card:

I LOVE layers, I wanted to add to this beautiful card.  Here is what I came up with:

Here are the specifics for this card:

PROJECT 3: Watercolor trees
Stamp Sets Pg #
Rooted in Nature
Waterfront
Paper
Soft Suede 8 1/2″ x 5 1/2″
Early Espresso 3 1/8″ x 4 1/8″
Watercolor paper 3″ x 4″
Very Vanilla 5 1/4″ x 4″, 2″ x 4 3/4″
Inks
Crushed Curry
Soft Suede
Early Espresso
Mossy Meadow
Pool Party
Accessories
Spritzer
Braided Linen Trim
Layered Leaves folder
Sponges
Big Shot

I spritzed the stamp after inking it then stamped it on Watercolor paper. It really has a great effect.  I love how the trees look different each and every time!  I also love to use the Aqua Painter to make a background.  I taped off a straight line then using the Aqua Painter to make the water.

Below are all the supplies used to make this card.  Click on any picture and you will be taken to my OnLine Store.  I would love if you would choose me as your Stampin’ Up! Demonstrator!

Thanks for stopping by!

Lisa Tedder
A California girl living in North Carolina
Product List

Beautiful You is Flying High

Hey Guys,

Today I am sharing with you a card I found on Pinterest and I CASE’d it.  I can’t find it to show you, if you have seen it and know where I got this idea I would love if you would let me know.

Here is my card:

I masked the Lady after stamping her, then sponged the sky and stamped the trees.  I then colored her, this makes it look like she is in front of the trees.  The balloons were punched out with the balloon punch using Vellum which I then sponged with the color I wanted.  I put the white line in the balloon with the Chalk Marker, I placed a glue dot behind this chalk line to attach.  You can’t see it!  Of course I put another glue dot behind the black line for the ‘string’.  It’s a challenge to find spots to put your adhesive with Vellum because you don’t want it to be seen.

This was a really fun card, and my class loved it!

Here are the specifics for this card:

Stamp Sets
Beautiful You
Sheltering Tree
Colorful Seasons
Paper
Highland Heather 8 1/2″ x 5 1/2″
Whisper White 5 1/4″ x 4″ (x2)
Vellum
Inks
Highland heather
Memento
Balmy Blue
Blends: Balmy Blue, Ivory
Black marker
Accessories
Glue dots
Chalk marker
Balloon Bouquet punch

Below are pictures showing these supplies, click on any of them to be taken to my OnLine Store.  If you don’t have a Stampin’ Up! Demonstrator, I would love if you would choose me to help you with your creative needs!

I send those who order OnLine a small gift to say thank you.  If you’ve been following my blog you know that I offer a LOT of different goodies!

Thank you for stopping by!

Lisa Tedder
A California girl living in North Carolina
Product List