Tag Archives: Layering Ovals Framelits Dies

Luke and Leia- My Annual Star Wars Birthday Card for my Grandson

Hey Guys!

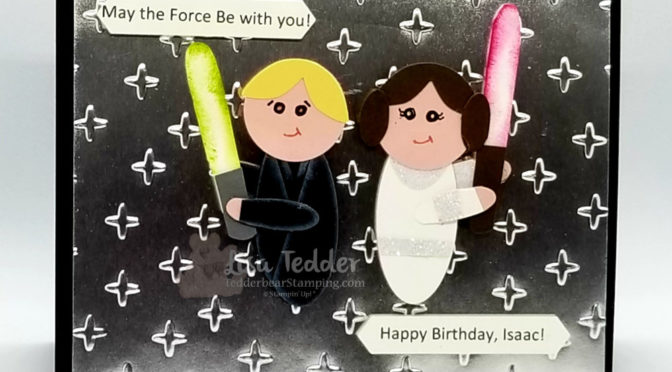
Every year I stress trying to think of  a Star Wars card that I can make for Isaac, my Grandson.  This year I found a card on Pinterest by Carolina Evans, I changed it up quite a bit, but the characters are close to the same.
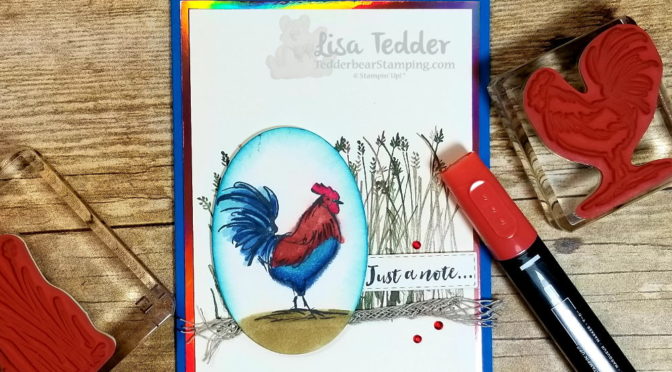
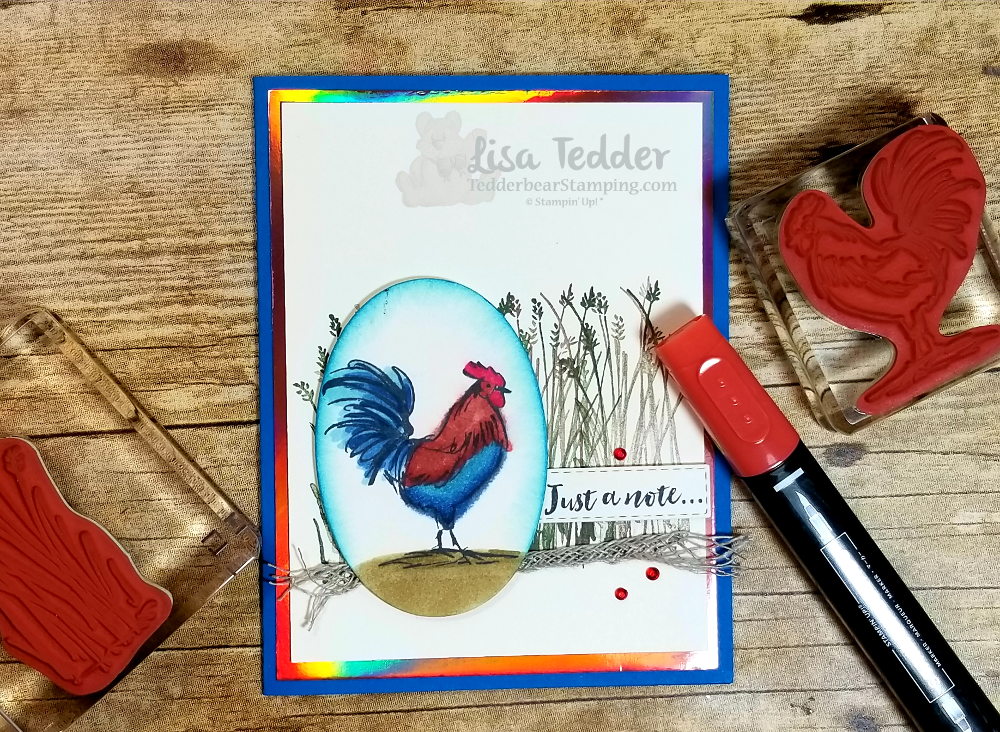
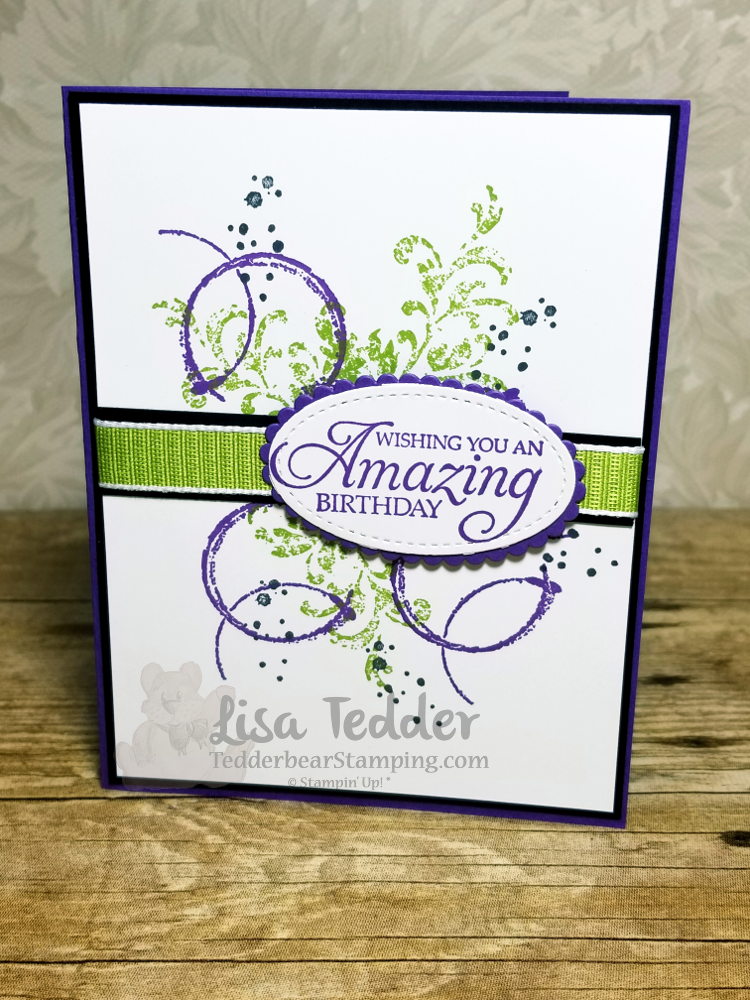
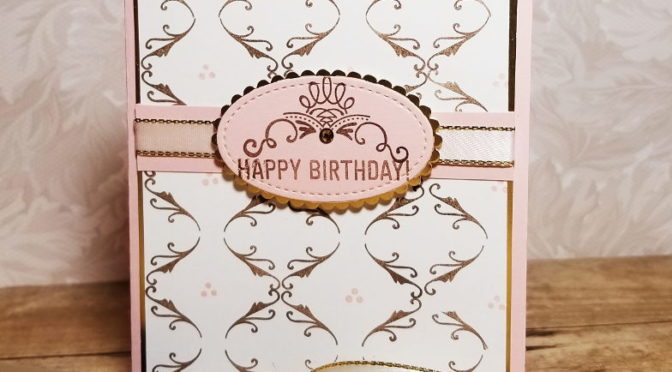
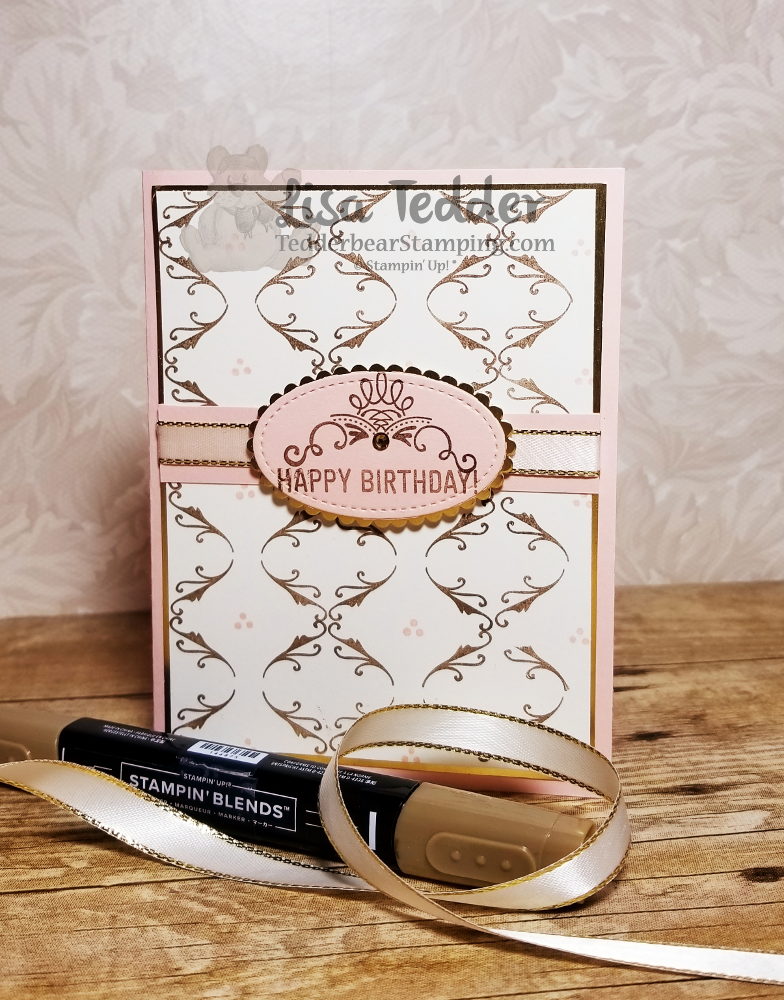
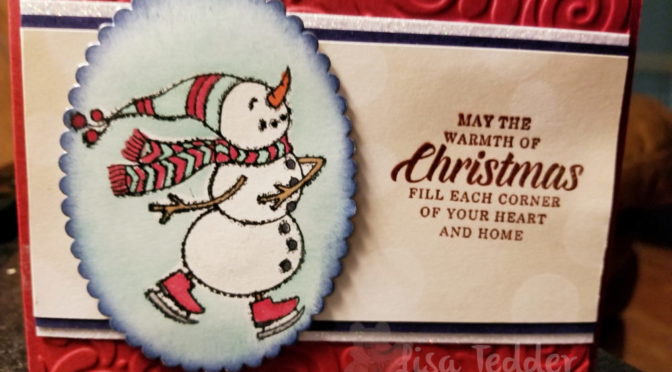
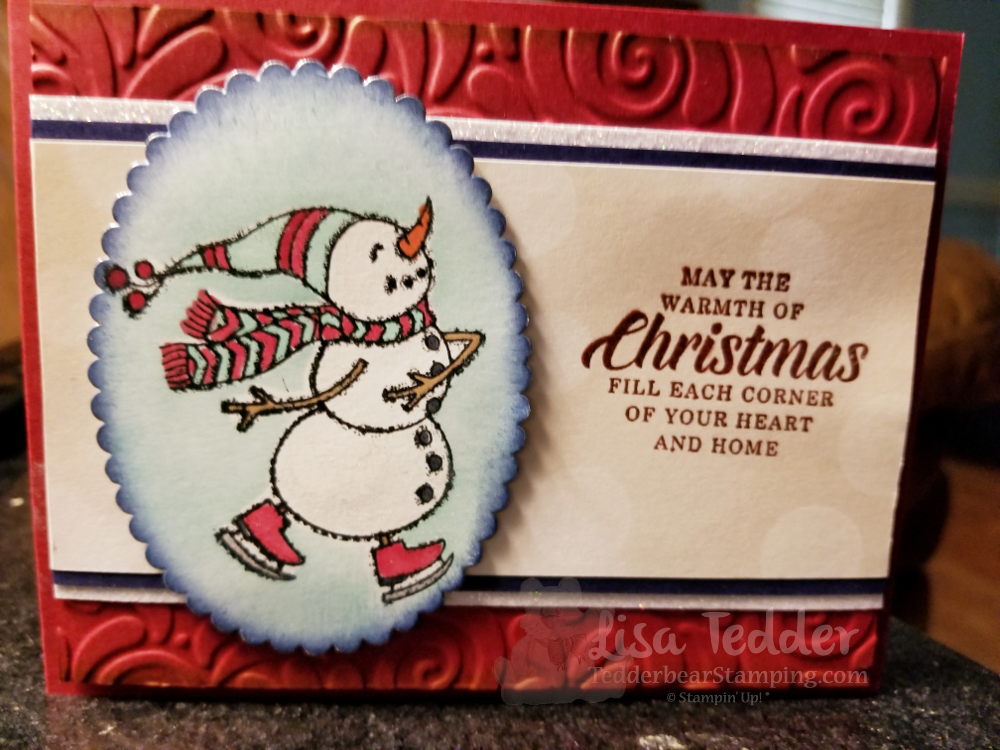
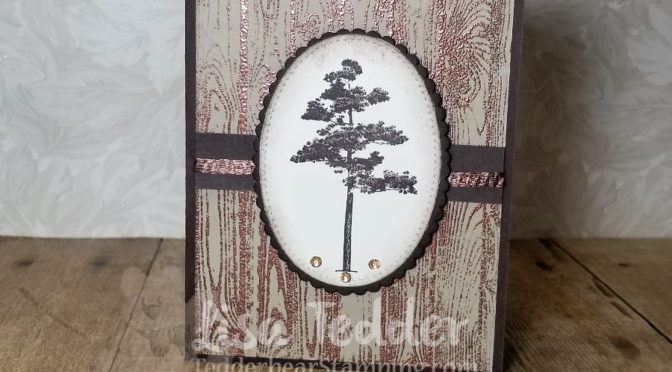
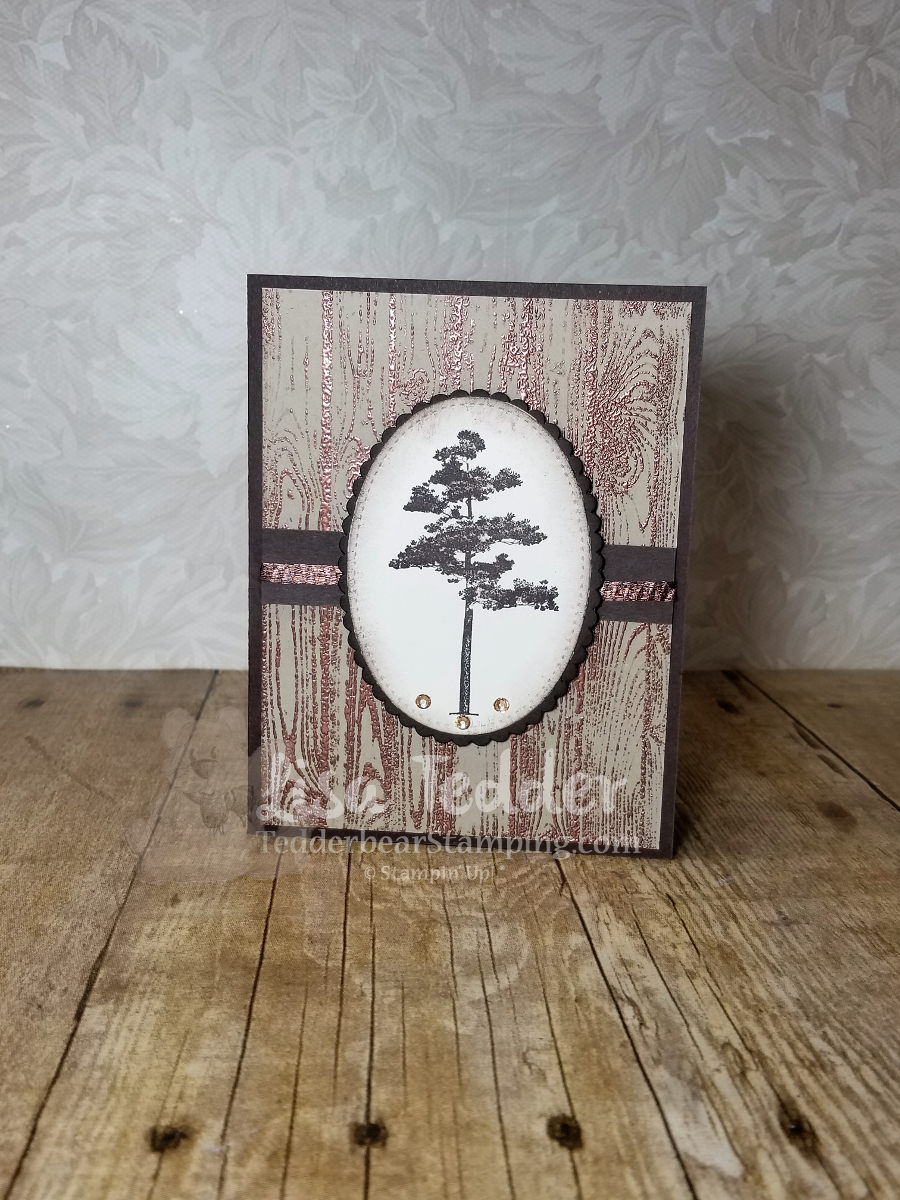
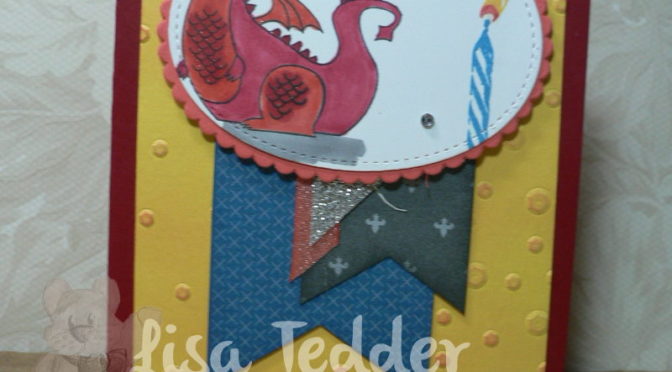
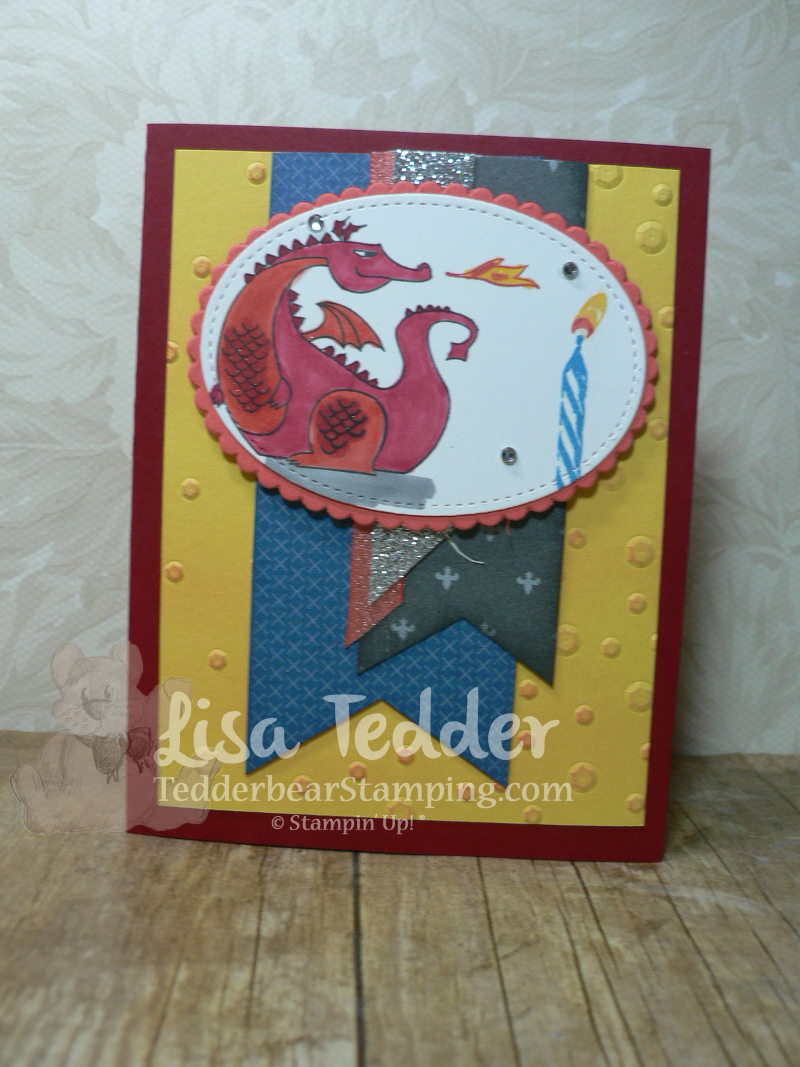
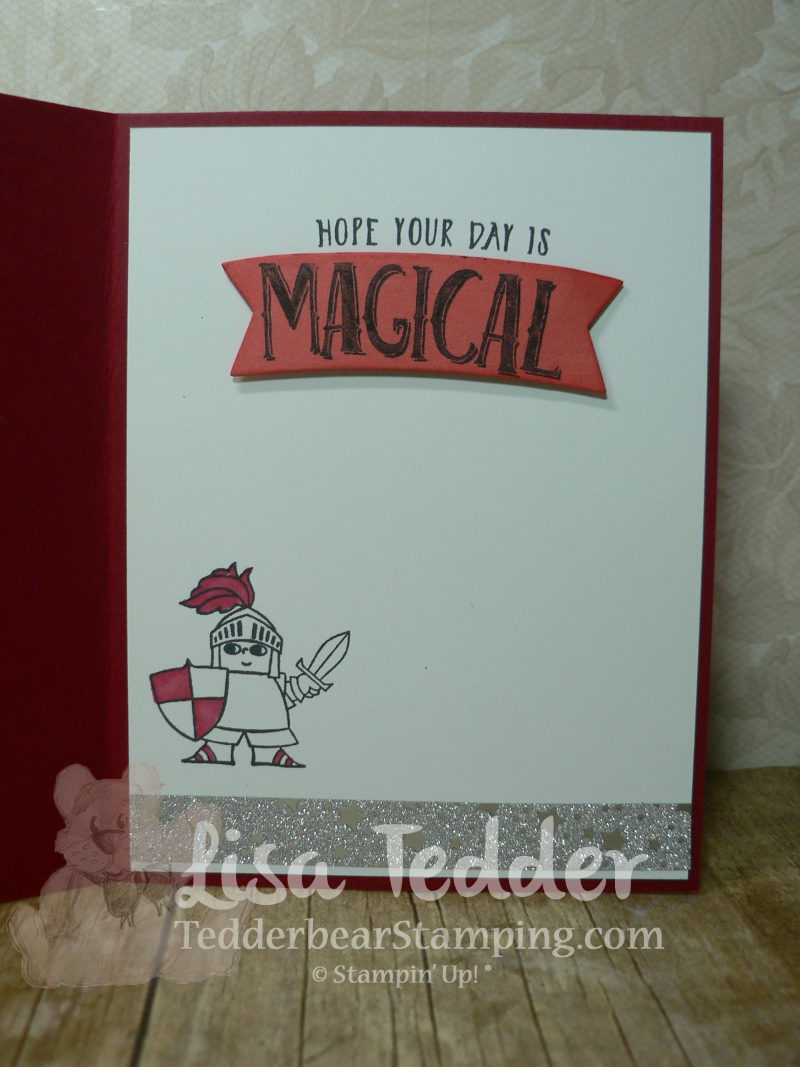
Here is my card:

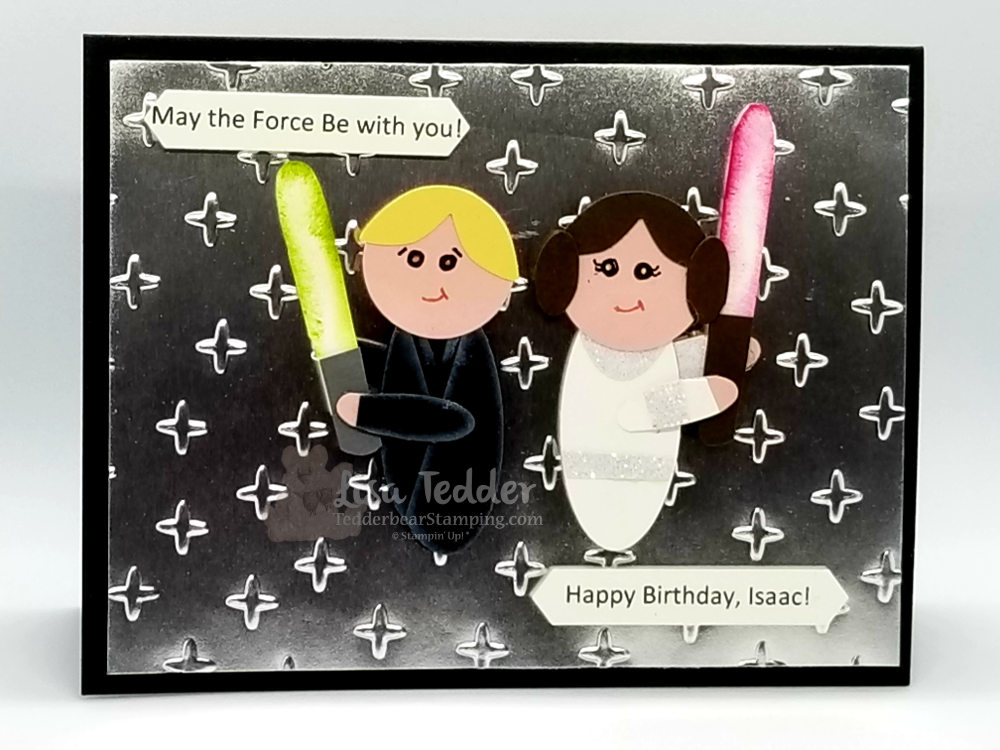
The dies and punches I used are: Daisy Punch, Layering Oval Dies, Fox Builder, Classic Label and the Sparkle Folder….all by Stampin’ Up!

I got to Skype with Isaac when he opened his card!  He liked the card, but LOVED the $5.00 I put in there!  My daughter LOVED it and plans on framing ALL my cards for him.  Isaac is only 6, so I know that he really doesn’t think ‘ My Mimi spent a lot of time making this card for me’, he was happy to get the $$!!  LOL

So, I have a year to come up with another Star Wars card that uses Stampin’ Up! product!  That is my challenge every year.  I really want to do one with Kylo Ren, that is his favorite character.

Hope you enjoyed my Star Wars card, do a search in my blog to find the others I did!

To purchase any of the product, click on any of the pictures below and you will be taken to my OnLine Store!  I would love it if you would choose me as your Stampin’ Up! Demonstrator.

Thanks for stopping by!

Lisa Tedder
A California girl living in North Carolina
Product List

Make N Takes for Sale-a-Bration part 2

Hey Guys!

Today I am sharing with you my Second card that I had for my SAB Celebration attendees!

I cased this from Lyssa Zwolanek, you can see her post here.  I switched the colors a little, but I loved hers so much that I kept it close to how hers was.

Here are the specifics for this card:

PROJECT 2: lilypad lake
Stamp Sets Pg #
Lilypad Lake
Beautiful Promenade
Paper
Basic Gray 8 1/2″ x 5 1/2″
Balmy Blue 5″ x 3 3/4″
Pacific Point 2 3/4″ x 3 3/4″
White 2 3/4″ x 3 3/4″, 5 1/4″ x 4″ scraps
Old Olive scraps
Inks
Balmy Blue
Blends: Rich Razzleberry, Smoky Slate, Old Olive
Color Lifter
Pacific Point
Basic Gray / Momento
Accessories
Stitched Shapes
Oval Layering dies
Lakeside framelits
Pinewood planks
dimensionals

My group loved this card, thanks Lyssa for the  idea!

All the supplies for this card are in picture form below, click on any of them to be taken to my OnLine Store!  If you live in the U.S. I would LOVE to be your demo! Every OnLine purchase gets a special token of appreciation from me! Look through my blog and let me know if anything catches your eye and I will try to send it to you!

Thanks for stopping by!

Lisa Tedder
A California girl living in North Carolina
Product List

<!——– TAMS End ———-

Home to Roost

Hey Guys!

I saw this picture on Pinterest by Stesha Bloodhart using the Home to Roost stamp set by Stampin’ Up! and had to Case it for a class I was having!

Here is my card:

When coloring with the Stampin’ Blends I used the Color Lifter to give it a watercolor look.  This Rooster is so stinkin’ cute!  I think I will use him for a framed piece for my kitchen!  Did you know that you can Earn this stamp set for FREE!?  Spend $50 on goodies from SU! and you can get this for free.  But, don’t wait!  These are only as supplies last and only until Sale a Bration is over at the end of March, whichever comes first.

Here are the specifics for this card:

Stamp Sets Pg #
Home to Roost SAB FREE
Paper
Pacific Point 5 1/2″ x 8 1/2″
Very Vanilla 5″ x 3 3/4″ (x2)
Grapefruit Grove foil 5 1/4″ x 4″
Black 5 1/4″ x 4″
Inks
Memento Black
Blends: Night of Navy cmb, Cajun Craze cmb,
Blends: Soft Suede cmb, Balmy Blue cmb, Real Red Dk
Color Lifter
Mossy Meadow, Pacific Point and Soft Suede ink pads
Accessories
Braided Linen Trim
Red Rhinestones
Rectangle Framelits
Layering Ovals
Dimensionals & Glue Dots


The supplies are in picture form below, click on any of them and you will be taken to my OnLine Store.  I would love if you choose me as your Stampin’ Up! Demo! When you purchase from me I will send you a small token of my appreciation.

Thanks for stopping by!

Lisa Tedder
A California girl living in North Carolina

Product List

Stain your Wood Textures paper to get a Rustic Look!

Hey Guys!

Hope you are all well today!  I am sharing with you today a technique I learned when I went to a meeting by North Carolina Demos.  We are from all over the state, and we have Quarterly Meetings where we get together, for an all day event.  We learn new techniques, meet up with friends and most of the time we start on Friday night and continue on Saturday!  LOVE this group!

While at the meeting one of the projects was staining the 6″ x 6″ 1DSP Wood Textures with Reinkers and sponges.  The result is stunning!  I am doing this in my class this month, hope they love it as much as I did!

Here are the specifics for this card:

PROJECT 1: Rooster
Stamp Sets Pg #
Home to Roost
Paper
Old Olive 8 1/2″ x 5 1/2″
Black 3 7/8″ x 5 1/8″ (x2), scrap, 2 1/4″ x 3 1/4″
Vanilla 5″ x 3 3/4″ (x2), 2 1/4″ x 3 1/4″
Wood Textures 6 x 6
Inks
Blends: Real Red dk, Cajun Craze, Pool party, Old Olive
Memento
Reinkers: Blushing Bride, Soft Sea Foam, Pear Pizzazz
Calypso Coral, Highland Heather, So Saffron, Balmy Blue
Accessories
Copper Thread
Layering Ovals
Stitched Framelits
Well Written framelits
Sequins
Dimensionals

Below are pictures of the supplies used, click on any of them and you will be taken to my OnLine Store!  I would love it if you would choose me as your Demonstrator! If you purchase from my OnLine Store, you will be sent a gift from me!

Thanks for stopping by!

Lisa Tedder
A California Girl living in North Carolina

Product List

Simple bright and cheery card

Hey Guys!

The card I am sharing today is an easy, elegant card.  It uses the stamp set from SU! called Timeless Textures.  I also introduced a NEW stamp set from the soon to be available Occasions Catalog called Humming Along.

You wouldn’t have to do as many layers as I did, but you know that I LOVE layers!

This card was inspired by a card I saw on Pinterest by Wanda Pettijohn .

Don’t Gorgeous Grape and Granny Apple Green look great together?  That is my favorite color combo!

If you would like to receive the NEW catalog, let me know and I will mail you one!

Here are the particulars for this card:

Stamp Sets
NEW Sneak Peak Humming Along
Timeless Textures
Paper
Gorgeous Grape 8 1/2″ x 5 1/2″, scraps
Basic Black 5 3/8″ x 4 1/8″, 5/8″ x 4″
Whisper White 5 1/4″ x 4″ (x2)
Inks
Gorgeous Grape
Granny Apple Green
Memento Black
Accessories
1/2″ Textured Weave Granny Apple Green Ribbon
Dimensionals
Stitched Shapes
Layering Oval Framelits

I hope you like this card as much as I do!

Below are all the supplies used in picture form, click on any of them to be taken to my OnLine Store! If you are in search of a Demonstrator from Stampin’ Up!, I would love to become yours!  All Online orders receive a gift from me!

Thank you for stopping by!  I hope you return again soon!

Lisa Tedder
A California Girl living in North Carolina

Product List

Sneak Peek!! Amazing Life

Hey Guys!

Sorry it’s been a couple weeks, ok maybe longer…… I went to Orlando to attend the Stampin’ Up! ON Stage get together that SU! Demo’s attend.  I had such a great time! It was great rooming with my ‘SU! Besties’ (my girl friends and I only meet up at SU! functions) and learning/seeing all the new things coming out in January!!  I then spent a week with my Husband in Orlando for our 30th Anniversary!  The bummer is that I got sick the day after he got there. 🙁  I am STILL sick, and it’s been a MONTH!  Hence the reason why I haven’t been posting!

The card I am sharing with you today is from a stamp (Amazing Life) that we got for FREE while at OnStage!   I came up with this all on my own!!  I LOVE making my own designs, but time allowances don’t always make it to where I can do it.

I used this stamp from the set:

Doesn’t look like much right?

Well, I stamped it along the bottom with the two swirls going down, in Soft Suede ink. Repeated it along the bottom, lining up the swirls so they touched, then flipped the stamp over and lined up the two lines that are in the middle of the stamp.  I repeated this on top of the ones I stamped along the bottom and then flipped the stamp so the swirls were on the bottom again, and started all over to make a pattern!

After making the pattern, I stamped the 3 dot stamp in Petal Pink between the stamped pattern.  Don’t you LOVE how it came out!?  I was so tickled to see the beautiful pattern that this stamp made!!  If you watch the video I made you can see how It was done, if this doesn’t make sense.  I used other stamps for other designs, so be sure and check it out!

Here are the particulars for this card:

Paper
Petal Pink 8 1/2″ x 5 1/2″, 3/4″ x 3 7/8″, scrap
Gold Foil 4″ x 5 1/4″ (x2), scrap
Vanilla 5 1/8″ x 3 7/8″ (x2)
Inks
Soft Suede
Petal Pink
Versamark
Blend: Soft Suede dk, Petal Pink light
Accessories
Big Shot
Layering Ovals
Stitched Shapes
3/8″ Gold edged ribbon
Rhinestones
Gold EP/ embossing buddy/heat tool

If you live in the US and are in need of a Demonstrator with Stampin’ Up! I would love to be yours!  If you are looking into joining SU!, join my team!  We have a lot of fun and I would love to have you be part of my SU! family!

I hope you enjoyed this post, please leave me a comment below and let me know what you thought!

Check back, now that I am getting better I will be posting more!

Below are pictures of everything I used in the card, click on any of the pictures and you will be taken to my OnLine Store!

Lisa Tedder
A California Girl living in North Carolina

Product List

Christmas card #7 Spirited Snowmen

Hey Guys!,

I am having so much fun making Christmas Cards for my local girls.  The class is in October, and we spend all day eating, stamping and having fun!  Everyone brings a dish to share, I have everything cut and ready for everyone to stamp and use the Big Shot.  16 cards are what all attendees take home with them!  3 each of 5 designs and 1 Special card.  Stampin’ Up! has the BEST Christmas stamps!

Here is the card I am sharing today:

Isn’t this snowman the cutest!?   This card is easy but still a lot of fun to make!  I stamped the snowman on white, then put a mask of the snowman on top of him so I could sponge Pool Party behind the snowman and not get him blue.  I then colored him with Blends.

All the supplies used on this card are listed below, just click on any picture and you will be taken to my OnLine Store!  I would love to be your SU! Demonstrator!

Here are the particulars for this card:

Stamp Sets: Spirited Snowmen, Timeless Tidings
Cardstock: Cherry Cobbler 8 ½” x 5 ½”, 5 ¼” x 4”, All Is Bright DSP 2 ½” x 5 ¼”, Night of Navy 5 ¼” x ½” (x2), Sparkle Glimmer paper 5 ¼” x ½” (x2), Whisper White 4” x 3” (for oval), Crumb cake 5” x 3 ¾”
Inks: Memento Black, Cherry Cobbler, Pool Party, Night of Navy, Versamark, Blends: Cherry Cobbler combo, Pool Party combo, Soft Suede light, Black lt, Calypso Coral dk
Misc: Layering Oval Framelits, Wink of Stella, Swirls & Curls Folder, Embossing Buddy, White EP, Heat tool, Big Shot

This card makes me smile!  I hope you like it!

Lisa Tedder
A California girl living in North Carolina
Product List

Sneak Peek Animal Outing

Hey guys!

I’m not sure that I’ve told you before, but I LOVE Giraffe!  They fascinate me.  I got to feed one by hand when I visited my daughter in MN!  NOW when I go to  visit we’ll HAVE to go feed them again!

Here is a card I made by creating a second giraffe facing the other way.

To get the image to face the other way, stamp onto the Silicone Craft Sheet and then immediately turn over and ‘stamp’ the image onto your cardstock.  This works really well, since the image doesn’t dry as fast on the mat.  Then color as usual!  Now, you have two Giraffe facing each other!

Dimensions:

Soft Sky 8 1/2″ x 5 1/2″
Daffodil Delight 3 7/8″ x 5 1/8″ (x2 for inside also)
Cajun Craze 5″ x 3 3/4″
Very Vanilla 5″ x 3 3/4″
Scraps of Garden Green and Very Vanilla

I embossed the Cajun Craze with the Layered Leaves Embossing folder, then ran the Versamark over the images GENTLY to have it only on the raised areas.  Then embossed with Copper embossing powder.

The Stitched framelits is a MUST for any stamper, I use it all the time!

If you would like to choose me as your demonstrator, I would love to have you purchase from me!  Just click on any image below to be taken to my Online Store!

Lisa Tedder
A California girl living in North Carolina
Product List

Sneak Peek Rooted in Nature

Hey Guys!

While at OnStage, an event that demonstrators attend to learn and get product early, I saw a card that made me make this card.  I don’t know about you, but if I get an idea in my head it is very hard to wait to try and make it!  I have a class that is at the Senior Center here in Kernersville that I bring elegant cards for the participants to make, this is one of the cards that we will be making soon.

I used the background stamp set Hardwood from SU!  I stamped it with Versamark and then poured copper Embossing powder on it and heat set to make this dynamic background!  Very easy (and still fun to do even after 17 years…….I LOVE to watch the magic of embossing!) yet this is a Stunner!  The tree is from the NEW catalog from Stampin’ Up! called Rooted in Nature, that will be coming out in June 2018.

I got this set FOR FREE while at On Stage along with 4 other stamp sets!  If you want a job where you get freebies, get to play every day and meet FANTASTIC people, join my team and become a Demonstrator!

I  colored the Rhinestones using the Bronze Blends so it would all coordinate!  THAT is the reason I decided to join SU!, I don’t have to guess which colors coordinate!  Plus, I got the discount!  hahahaha

Thanks for stopping by, if you like what you see and want to buy from me, just click on any pic below and you will be taken to my OnLine Store!

Lisa Tedder
A California girl living in North Carolina
Product List

Another Fun Swap using the Magical Day Stamp set from Stampin’ Up!


Hey Guys!

I was perusing Pinterest the other day and saw this really cute card that had the ‘wind’ from the Christmas Stamp set “Star of Light”  blowing out a candle.  Well, my mind went immediately to the Dragon in the SU! set Magical Day and how cute would it be if he was Lighting a candle!?   This is how my mind works sometimes so I went with the idea!

Here is the card:

As I’ve said before ‘I just love this dragon’!  I love how I colored him this time using Calypso Coral Blends and Cherry Cobbler Blends.  NEVER would I have put these colors together but, again, I saw it done on Pinterest.  It really makes him stand out, doesn’t it?

Here is the inside:

This Stamp set from SU! also has thinlits that cut out not only the characters, but the Banner seen above!  Waves, that I will be using soon, and lots of other goodies!!

For the flags in the front, I used the Myths & Magic Specialty Designer Series Paper.  I sponged the edges with the color that was on the DSP, and also made a banner out of the Silver Glimmer paper and the FREE Shimmer Ribbon pack from the Sale-A-Bration catalog!  This ribbon is so pretty!!  And it comes in THREE colors and sizes!  I also used Rhinestones and the Scattered Sequins Embossing folder.

The Dimensions are as follows:

Cherry Cobbler 8 1/2″ x 5 1/2″
Daffodil Delight 5″ x 3 3/4″
Dapper Denim banner 2″ x 5″
Gray Banner 1 1/2″ x 4 1/4″
Silver Banner 1/2″ x 3 1/2″
Calypso Coral Ribbon 3 3/4″
Scrap of White for Stitched Oval
Scrap of Calypso Coral for Scalloped Oval
Whisper White 4″ x 5 1/4″ (inside)

I really hope that those who received these swaps love them as much as I do!!

The supplies used for this project are listed in pictures below, just click on any picture to be taken to my OnLine Store!

As always!  Have a great day/weekend!

Lisa Tedder
A California Girl living in North Carolina
Product List