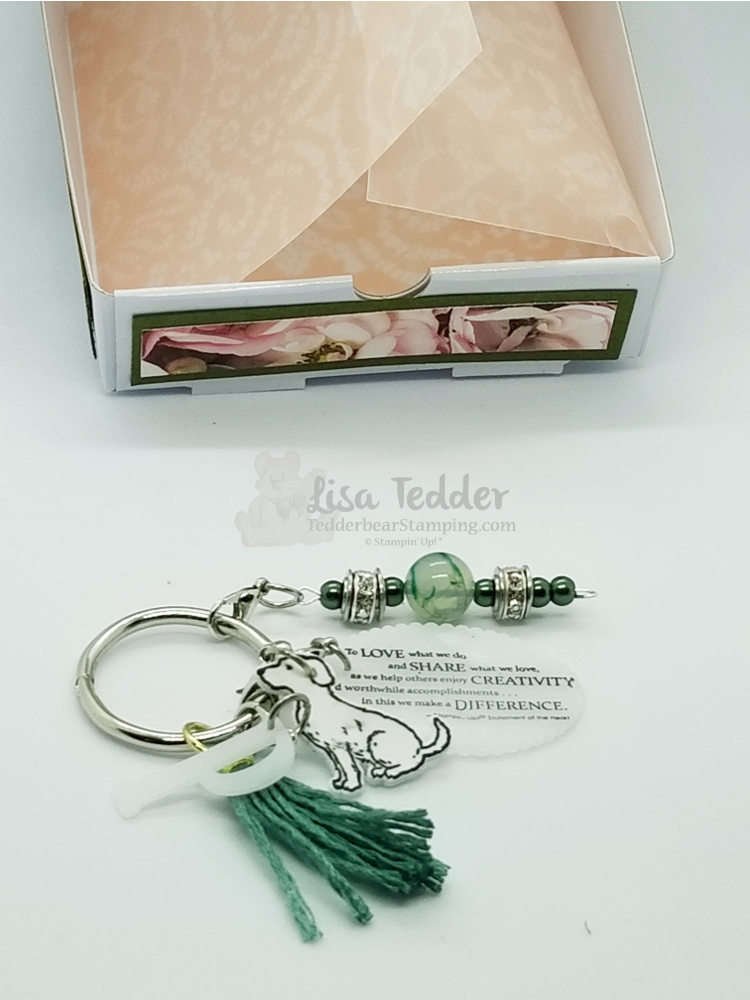
Tag Archives: Petal Promenade Designer Series Paper

Puzzle Card

Hey Guys!

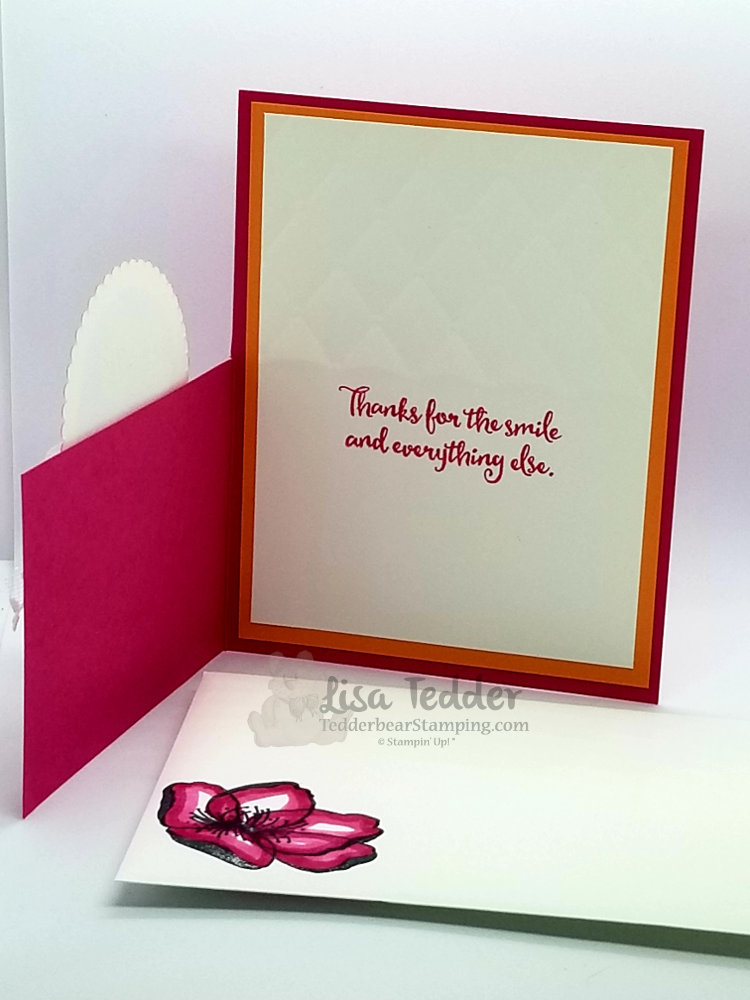
I was on the fence a long time before I decided to get the Love You To Pieces stamp set from Stampin’ Up!  I really love it, the sentiments are too cute!
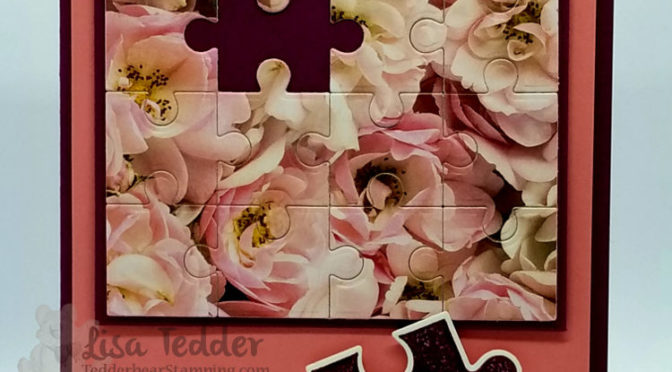
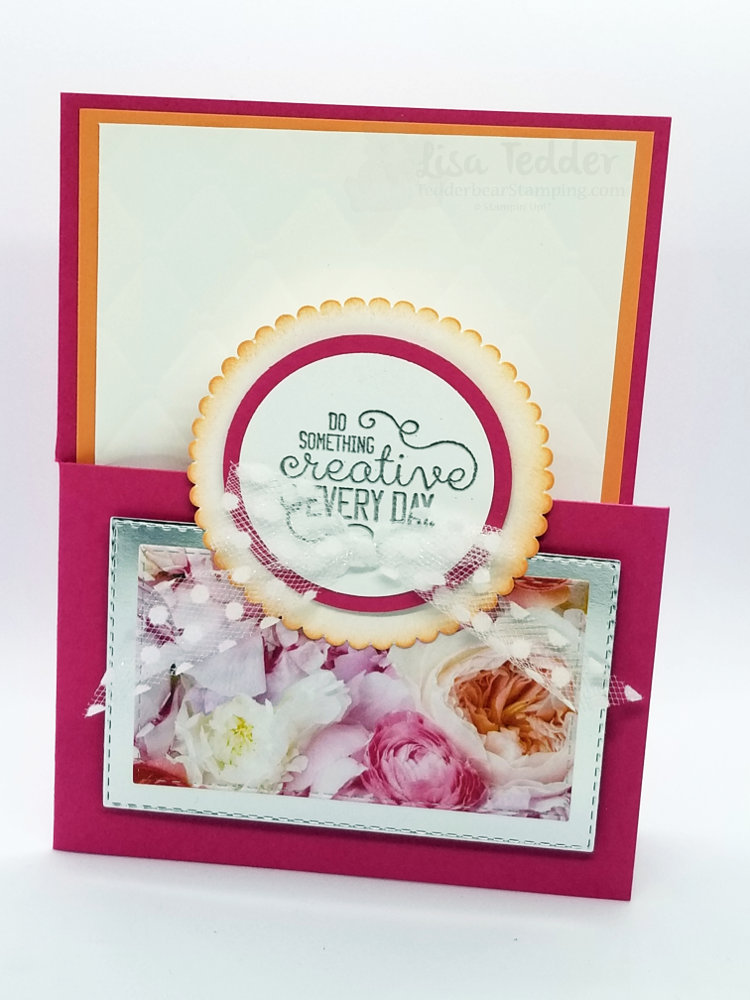
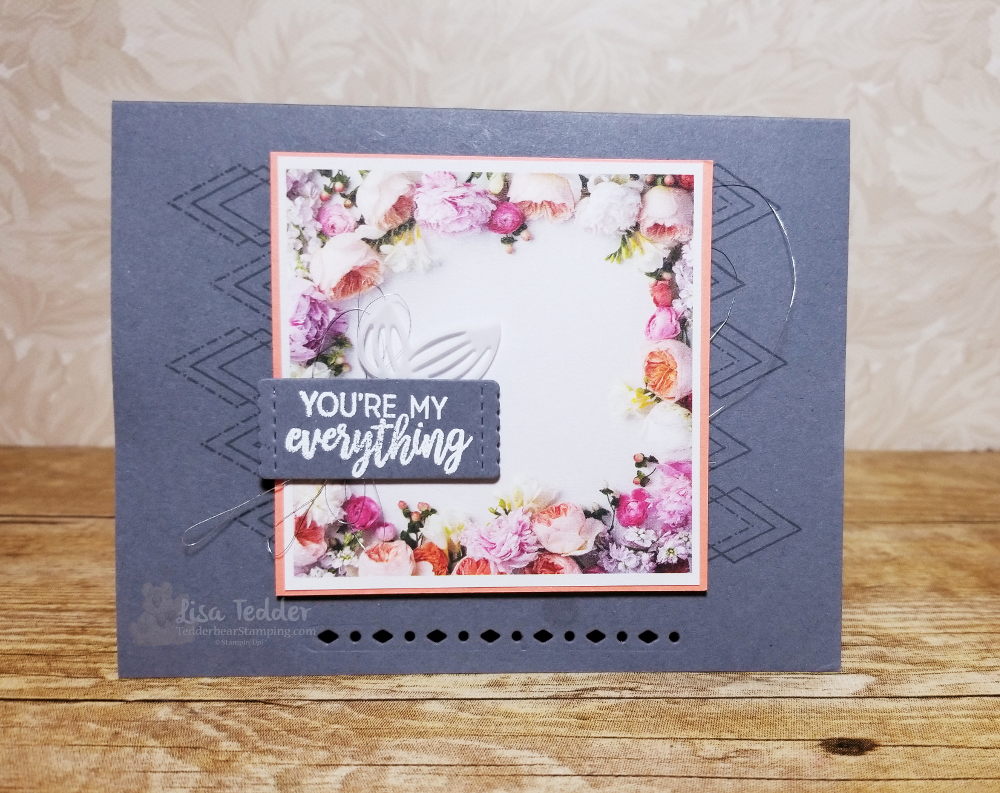
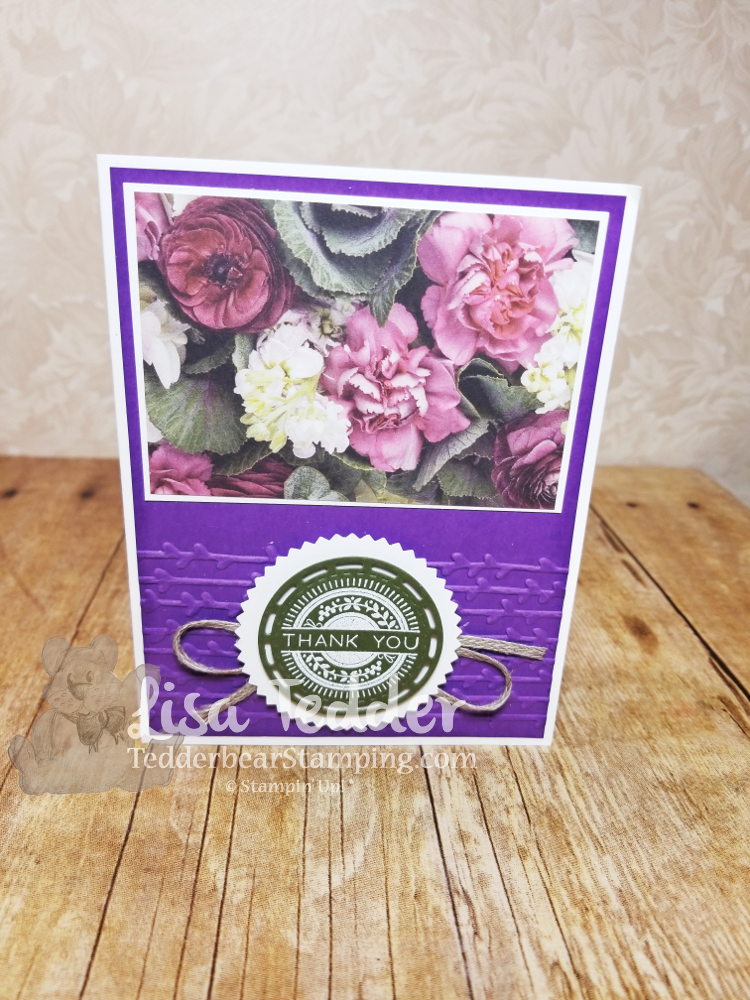
Here is my card:

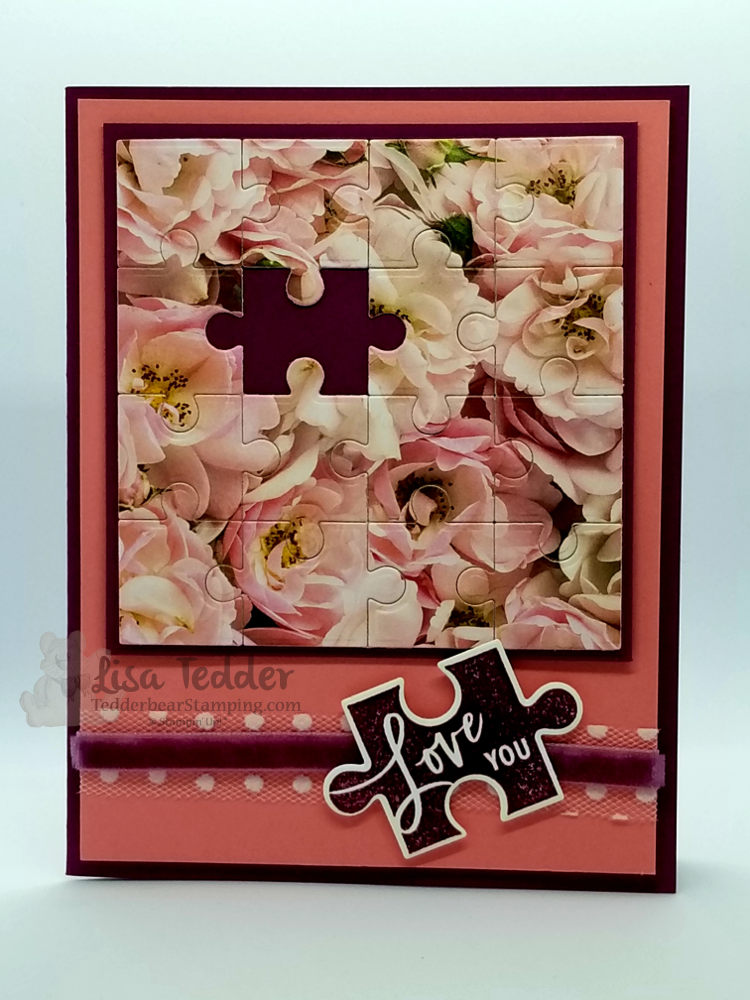
I used Designer Series paper for the main picture, you can’t beat the Petal Promenade Paper!

Here are the specifics  for this card:

PROJECT 1: Puzzle
Stamp Sets Pg #
Love you to pieces Bundle
Well Said
Paper
Rich Razzleberry 8 1/2″ x 5 1/2″, 3 1/2″ sq, 3 5/8″ sq
White 3 1/2″ sq, scraps 2 1/2″ x 4 1/4″
Petal Promenade 3 1/2″ sq
Flirty Flamingo 5 1/4″ x 4″ (x2)
Inks
Rich Razzleberry
Accessories
 Big Shot, Clear EP, Heat Tool
Tear n Tape
Polka Dot Tulle ribbon
Rich Razzleberry Velvet ribbon
Tombo Multi Purpose glue
Dimensionals

I recommend putting the DSP onto a piece that’s the same size of thick Whisper White.  This helps it not be so fragile when you run it through the Big Shot with the Puzzle Die.  Then turn it over, put Tear N Tape on the back to help hold it together, but skip the one piece you want to be missing.

Below are the supplies that I used to make this card, click on any picture and you will be taken to my OnLine Store!  I would LOVE to be your SU! Demo if you live in the U.S.!  For every OnLine order I send you a small gift as a token of my appreciation! You can pick this card if you would like it!  If I still have it in my possession I will send it to you!  Just let me know which card you want.

Thanks for stopping by!

Lisa Tedder
A California Girl living in North Carolina
Product List

<!——– TAMS End —-

Want to see what my Customers earned at my Sale-a-Bration Celebration?!

Hey Guys!

Every year after Sale-a-Bration, I have a Party for those who participated in Sale-a-Bration each month.  Not only did they earn FREE goodies from Stampin’ Up!, but they get to attend my Celebration!

My husband cooks a gourmet meal of pasta (made to order for each guest).  I have a scrumptious dessert for those who didn’t eat too much pasta.

After dinner, we got to make 2 cards which I will post about later.  During cardmaking I bring out their first surprise.

I put candy in this,  everyone thought he was stinkin’ cute!  I didn’t come up with this, Susan Campfield made some like this,  I HAD  to make it!

Here are all the other things I made for my group:

Filled with M & M’s!

I got this idea from a  video on someone’s blog……It’s been so long since I made it I can’t find the video anymore! If you know who did this, PLEASE let me know!

I made a card that went with this candy…….

Not sure you can see it, but the inside white is embossed with the Tufted Embossing folder. And for the inside of the card:

They loved the card but the thing they LOVED the most is this………


Inside the pizza box is a scissor Charm!  Put these on your scissors handle and you will never lose them again! I put the initial of the person, a dog or cat (on Shrinky Dink) depending on their preference ( I asked them if they were a dog or cat person…..no context….they were so curious!!), a pretty beaded string, a tassel and then on Shrinky Dink I stamped the SU! Statement of the Heart!

I did a video if you are wanting to know how to make this!  You can find it here!

PLUS we made two cards!  That post will be on Monday so be sure and check in to see what we made!

If you are in need of a Stampin’ Up! Demo, I would love it if you would choose me if you live in the U.S.

Below are the links (in picture form) of what I used, click on any of them and you will taken to my online store!  If you choose, for your gift from me for ordering, I will make you a cute Scissor charm!

Thanks for stopping by!

Lisa Tedder
A California girl living in North Carolina
Product List

Vellum, Roses and Silver Oh My!

Hey Guys!

Here is another beautiful yet simple card!

This card is inspired by one I saw on Pinterest by Kristine McNickle.  I LOVE Basic Gray and Grapefruit Grove  together!  It is a great pairing, don’t you think?  See that cut out at the bottom? When the card is closed you can see the Grapefruit Grove peeking through.  It is a pretty design element.  The square floral paper is Designer Series Paper!  Such a pretty and easy way to bring elegance to a card.  I stamped the sentiment with Versamark and embossed with White Embossing powder.

The Beautiful Promenade stamp set, has a thinlit that goes with it called Beautiful Layers.  This is where I got the feature at the base of the card.  You can get 10% off the Bundle when you purchase both the stamp set and the thinlits.  My next post will have another thinlit from this set, so check back in!!

Here are the particulars for this card:

Stamp Sets
Beautiful Promenade Bundle
Paper
Basic Gray 8 1/2″ x 5 1/2″, 2 5/8″ x 3 5/8″, scrap
Grapefruit Grove 3 1/4″ sq, 5 1/4″ x 4″
Whisper White 3 1/2″ x 2 1/2″
Petal Promenade DSP 3 1/8″ sq
Vellum scrap
Inks
Basic Gray
Versamark
Accessories
White EP/ Embossing Buddy/ Heat tool
Stitched Labels Framelits
Silver Thread
Dimensionals
Big Shot

Below are the supplies used in picture form, click on any of them and you will be taken to my OnLine Store.  Any Online order will receive a gift from me!

If you are in search of a Demonstrator, I would be honored for you to pick me!  Also, it would be to my utter delight to have you join my Team if you are considering joining SU!

Thank you for stopping by, hope you enjoyed your stay and that you will stop by again!

Lisa Tedder
A California Girl living in North Carolina

Product List

Beautiful Promenade Photopolymer Bundle

Stitched Labels Framelits Dies

Basic Gray 8-1/2" X 11" Card Stock

Grapefruit Grove 8-1/2" X 11" Cardstock

Petal Promenade Designer Series Paper

Vellum 8-1/2" X 11" Card Stock

Versamark Pad

Basic Gray Classic Stampin' Pad

White Stampin' Emboss Powder

Embossing Buddy

Heat Tool

Silver Metallic Thread

Stampin' Dimensionals

Big Shot

Elegant Card that has a bonus Tear off Book mark!

Hey Guys!

I was so excited when I saw the Die set Stitched Labels, it has a die that will give you a serrated edge!  I LOVE it when a handmade card is interactive!  THIS card is not only gorgeous, but it has a bookmark that can be torn off and the card is still beautiful! Below is a link to a video that I made showing how to make this!

Here is the front.  And here it is open:

And here is a close up of the bookmark!

Don’t you love it!?

This is very fun, I made a video (click here) so you can see how I made this card!

For a limited time, I will be giving prizes out on my Youtube Channel from my videos.  You only need to Subscribe, Share or give a thumbs up to be in the drawing!  Super easy things to do to get into a drawing for something free!!

I hope you like this card as much as I do!  Below are the supplies needed to make this card, click on any picture to be taken to my OnLine Store!

Thanks for stopping by!

Lisa Tedder
A California Girl living in North Carolina
Product List

Shadow Box using NEW 2018 Annual Catalog

Hey Guys!,

I made a video  and at the end I showed this Shadow Box. I promised I would have the measurements here on my blog so if you want to make it you can!!  It took a little longer than I promised, but at least I got it done!  Here is a picture of the Shadow Box:

Here are all the Measurements:

Shadow Box Instructions:

Top Left:

Melon Mambo 3 7/8”sq, Black 3 5/8” sq, Rose Glimmer 3 ½” sq, DSP Petal Promenade 3 1/8”, black die cut 3” sq, Butterfly die cut colored w/blends add Wink of Stella. Add colored rhinestones.

Top Middle:

Melon Mambo 2 5/8” x 3 9/16”, Black 2 ½” x 3 7/16”, Rose Glimmer 3 ¼” x 2 3/8”, Vellum DSP cut out with oval framelit, colored on back with Blends, Foam adhesive on back of Glimmer.

Top Right:

Silver Glimmer 4” sq, Black 3 ¾” sq, White 3 ¼” sq, Black 2 7/8” sq, stamp bench in Versamark and emboss with Silver EP, add Clear Faceted Gem in heart.

Left Center:

Silver Glimmer 3 5/8” x 2 9/16”, Black 3 1/2” x 2 3/8”, White 3 3/8”, Smoky Slate 3 1/8” x 2 1/8”, Stamp Dandelion in Versamark and emboss with Silver EP. Add Rhinestones

Center:

Rose Glimmer 2 ½” x 1 7/8”, Black 2 3/8” x 1 ¾”, White 2 5/16” x 1 11/16, stamp sentiment with Versamark then emboss with silver, add rhinestones.  Under this square crisscross the Berry Burst Metallic Edge Ribbon.

Right Center:

Silver Glimmer 3 5/8” x 2 9/16”, Black 3 1/2” x 2 3/8”, White 3 3/8”, Ink up Bokeh stamp with Smoky Slate, stamp on White. Stamp fly away Dandelions using Versamark emboss with silver.  Add Rhinestones

Left Bottom:

Silver Glimmer 3 7/8” sq, Black 3 ¾” sq, White 3 1/4” sq, Black 3” sq.  Stamp Dandelions in Versamark emboss with Silver, add rhinestones.

Bottom Center:

Melon Mambo 3” sq, Black 2 ¾” sq, Melon Mambo die cut 3” sq, Silver 1 15/16” sq, Black Circle 2 ¼” punch, White Shimmer 2” circle punch STAMP FIRST, THEN PUNCH OUT!!!  Color with Blends, add Rhinestones.

Bottom Right:

Melon Mambo 3 7/8” sq, Black 3 ¾” sq, Rose Glimmer 3 ½” sq, Black 3 ¼” sq, White 3” sq, Vellum DSP 3” sq.  Add colored Rhinestones.  Color back of Vellum with Blends.

All the Supplies I used are listed below.  Click on any of the pictures  to be taken to my OnLine Store!

Hope you enjoy this project as much as I do!!

Lisa Tedder
A California Girl living in North Carolina
Product List

Painted Glass with Rose Glimmer Paper

Hey Guys,

This card is the Epitome of a Girly Card!!  I used the Petal Promenade Designer Paper, with the die from the Painted Glass bundle.  The butterfly is from the same stamp set!  I used a Fresh Fig ink pad with an aqua painter and the Petal Pink for the middle to color the butterfy.  Then I covered the whole thing with Wink of Stella!  This card is so much fun!

The base is Fresh Fig, next layer is Petal Pink, then black and finally the Designer Paper.  The banner is Petal pink edged with the Rose Glimmer!  HAD to add the sparkle!!

This is a very simple card, just pop out the die, stamp the sentiment and the butterfly.  Color the butterfly and layer  all the cardstock and you are done!  BUT, it is so pretty!!  You would think it took much longer.

I was inspired by Rene Daley, you can see her card here.

Thanks for stopping by!!  I appreciate you!

Lisa Tedder
A California girl living in North Carolina
Product List