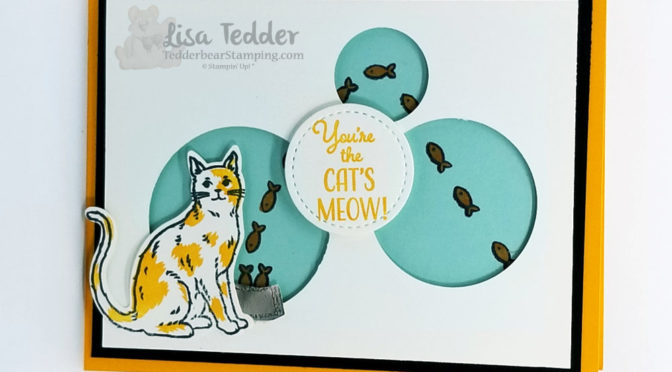
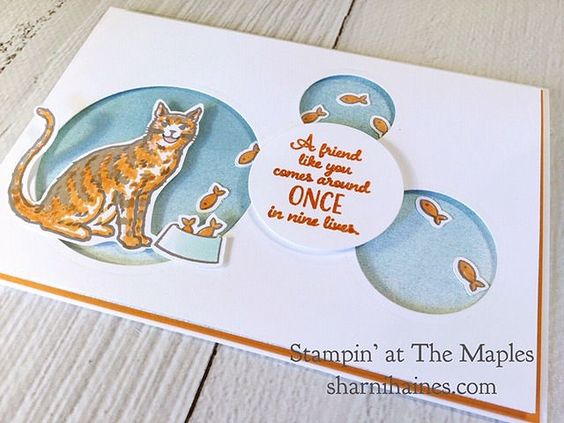
Another card that I saw on Pinterest and decided to CASE. Here is Sharni Haines card:
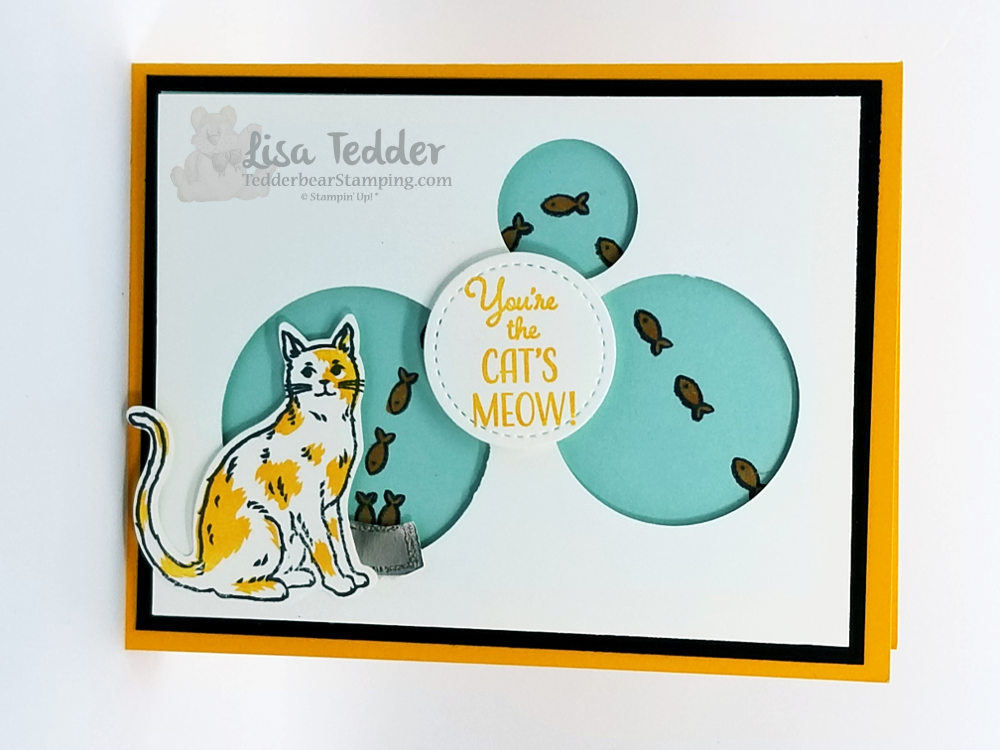
I changed it up a little by adding layers, a different sentiment and changing the color of the cat. I thought the idea was so stinkin’ cute that I had to make it!
Here is my card:
My fish look like they are doing a high dive….LOL
Here are the specifics to my card:
PROJECT 1: Cat’s Meow
Stamp Sets
Pg #
Nine Lives
Well Said
Paper
Mango Melody 8 1/2″ x 4 1/4″
Basic Black 5 1/4″ x 4″ (x2)
Pool Party 5″ x 3 3/4″
White 5″ x 3 3/4″ (x2)
Champagne Foil scrap
Inks
Memento
Mango Melody
Blend: Pumpkin Pie Dk
Accessories
2″, 1 3/4″ &1″ circle punches
Stitched Framelits
Dimensionals
Wink of Stella
Cat Punch
Clear EP, embossing buddy, heat tool/Stamparatus
Below are pictures of the supplies, click on any of them and you will be taken to my OnLine Store. I would love if you choose me to be your Stampin’ Up! Demonstrator.
Thank you for stopping by!
Lisa Tedder
A California girl living in North Carolina Product List
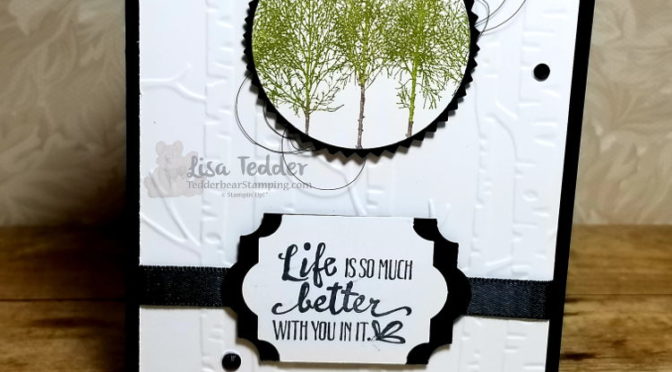
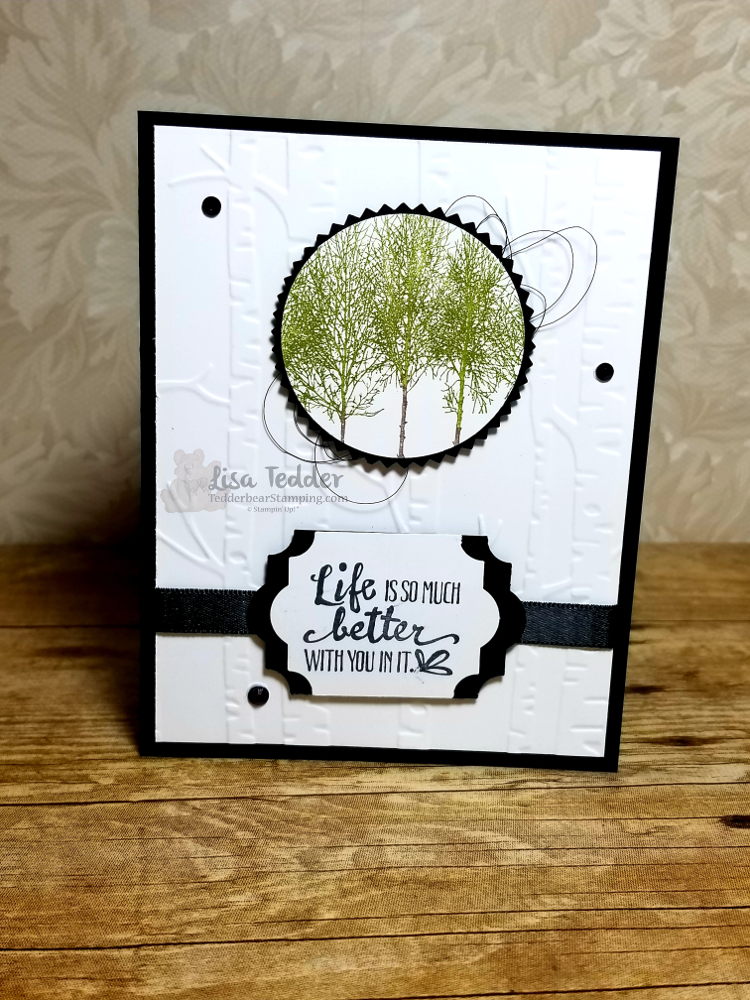
Do you want some peace? This card makes me peaceful just by looking at it! I hope you agree!
I used the Winter Woods stamp set from the Holiday Catalog from Stampin’ Up! Guess what!? It is one of the stamps that is NOT retiring! I am so happy! This stamp set is sooooo pretty and I just love it, bet you couldn’t tell, right?
I used the Woodland Folder to get the background. This is about as ‘simple’ as I can get…….you would think that making cards with more details would be harder, but NO, I have problems making cards that have less stamps, less layers, less embellishments……ok I have problems with LESS! LOL I try really hard to make quick and simple one layer cards and I just can’t do it! Who’s with me!?
Here are all the particulars for this card:
PROJECT 2: Trees
Stamp Sets
Petal Palette
Winter Woods
Paper
Basic Black 8 1/2″ x 5 1/2″, scraps
Whisper White 5 1/4″ x 4″ (x2), scraps
Inks
Momento
Old Olive Marker
Soft Suede Marker
Dk. Black Blend
Accessories
Rhinestones
Everyday Label Punch/Starburst Punch
2″ Circle Punch
Dimensionals/ Woodland Embossing Folder
Black Shimmer Ribbon/Black Metallic Thread
Below are pictures of all the products used to make this card. Click on any of them and you will be taken to my OnLine Store! I would love it if you would choose me to be your Demo! Any online order receives a gift from me!
If you are thinking of joining the SU! Family I would also love for you to choose my Team – LETS Stamp! (the LETS stands for my name: Lisa Easterday Tedder, You would make a great addition to my SU! family!
Thanks for stopping by!
Lisa Tedder
A California Girl living in North Carolina
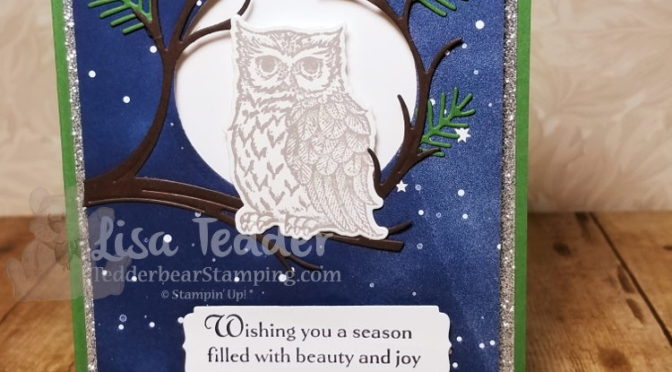
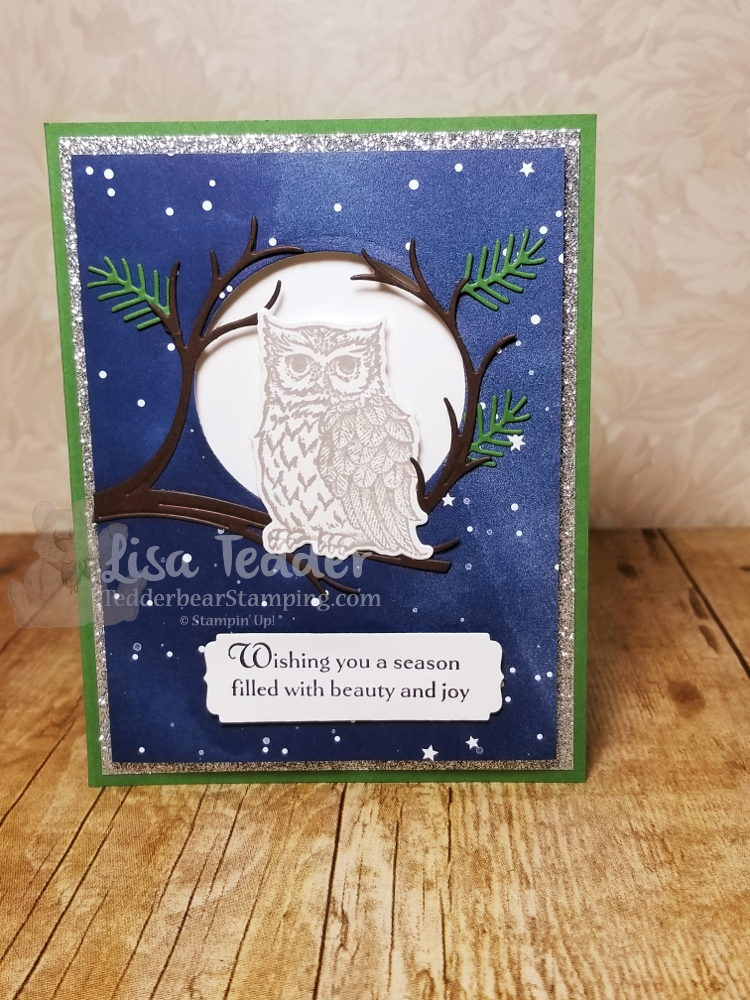
The owl in Still Night is one of my favorites. I love the dies in the bundle because not only does it cut out the owl & branch but it also cuts out pine boughs to make the branch look great! The set has 4 dies to cut out the boughs so you don’t spend all your time cutting one at a time!
Stamp sets: Still Night Bundle, Merry Christmas to All Cardstock: Garden Green 8 ½” x 5 ½”, scrap, Silver Glimmer 5 ¼” x 4”, Twinkle Twinkle DSP 5” x 3 ¾”, white 5 ¼” x 4”, 2 ¾” sq, 1 ¼” x 3” (sentiment), 1 ¾” x 2 ½” (owl) Early Espresso 3 ½”sq Inks: Night of Navy, Gray Granite Misc: Big Shot, Clear EP, Embossing buddy, heat tool, dimensionals, 2” circle punch, glue dots, fine tip glue pen
I would love to be your demonstrator if you live in the US! And you are MORE than welcome to join my team: LETs Stamp!
Below are all the supplies in picture form, click on any picture to be taken to my OnLine Store!
Thanks for stopping by, come again to see my next project!
Lisa Tedder
A California Girl living in North Carolina Product List
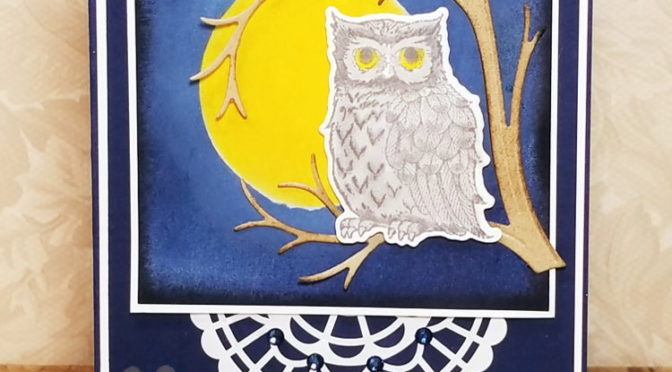
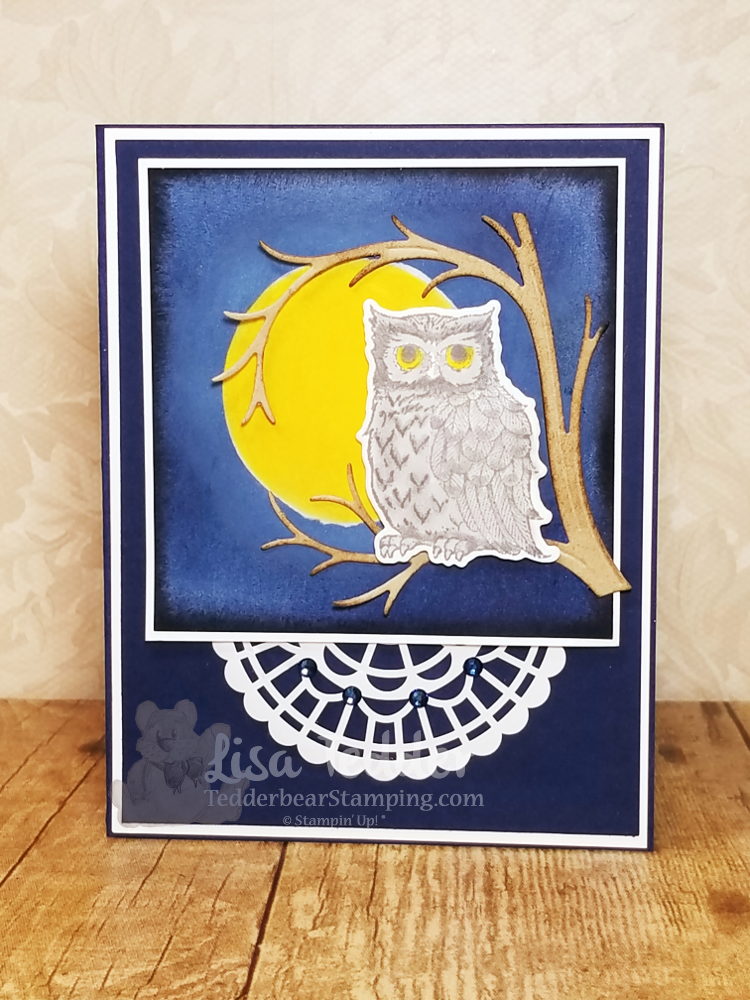
Today I am showing you a card using the new stamp set Still Night. It’s from the Occasions Catalog from Stampin’ Up! I love owls, and this one called to me! I was in bed last night and this design came to me.
This was so much fun to make! And very easy too. I did a video walking you through making this card, you can catch it here.
I love sponging and using the brayer. It adds that extra oooomph! LOL Couldn’t think of another word that fit better!
The supplies used for this card are listed below. Click on any pic and you will taken to OnLine Store!
I hope you like this card as much as I do!
Lisa Tedder
A California Girl living in North Carolina
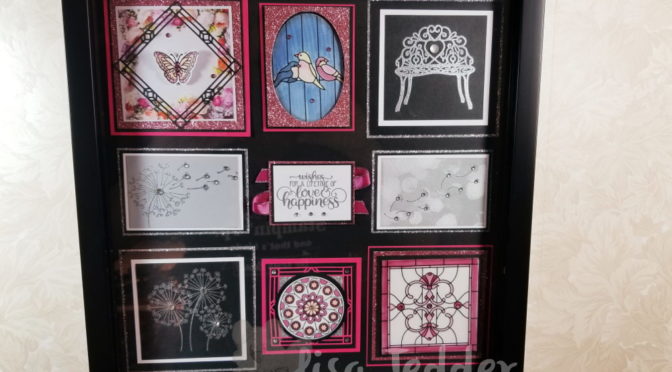
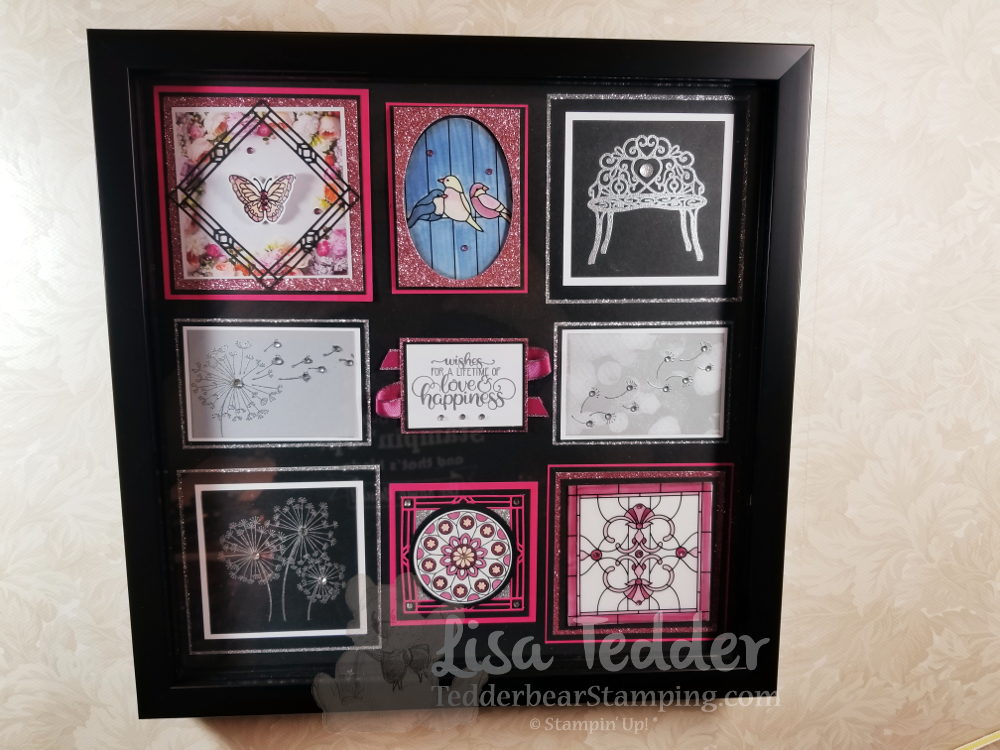
I made a video and at the end I showed this Shadow Box. I promised I would have the measurements here on my blog so if you want to make it you can!! It took a little longer than I promised, but at least I got it done! Here is a picture of the Shadow Box:
Here are all the Measurements:
Shadow Box Instructions:
Top Left:
Melon Mambo 3 7/8”sq, Black 3 5/8” sq, Rose Glimmer 3 ½” sq, DSP Petal Promenade 3 1/8”, black die cut 3” sq, Butterfly die cut colored w/blends add Wink of Stella. Add colored rhinestones.
Top Middle:
Melon Mambo 2 5/8” x 3 9/16”, Black 2 ½” x 3 7/16”, Rose Glimmer 3 ¼” x 2 3/8”, Vellum DSP cut out with oval framelit, colored on back with Blends, Foam adhesive on back of Glimmer.
Top Right:
Silver Glimmer 4” sq, Black 3 ¾” sq, White 3 ¼” sq, Black 2 7/8” sq, stamp bench in Versamark and emboss with Silver EP, add Clear Faceted Gem in heart.
Left Center:
Silver Glimmer 3 5/8” x 2 9/16”, Black 3 1/2” x 2 3/8”, White 3 3/8”, Smoky Slate 3 1/8” x 2 1/8”, Stamp Dandelion in Versamark and emboss with Silver EP. Add Rhinestones
Center:
Rose Glimmer 2 ½” x 1 7/8”, Black 2 3/8” x 1 ¾”, White 2 5/16” x 1 11/16, stamp sentiment with Versamark then emboss with silver, add rhinestones. Under this square crisscross the Berry Burst Metallic Edge Ribbon.
Right Center:
Silver Glimmer 3 5/8” x 2 9/16”, Black 3 1/2” x 2 3/8”, White 3 3/8”, Ink up Bokeh stamp with Smoky Slate, stamp on White. Stamp fly away Dandelions using Versamark emboss with silver. Add Rhinestones
Left Bottom:
Silver Glimmer 3 7/8” sq, Black 3 ¾” sq, White 3 1/4” sq, Black 3” sq. Stamp Dandelions in Versamark emboss with Silver, add rhinestones.
Bottom Center:
Melon Mambo 3” sq, Black 2 ¾” sq, Melon Mambo die cut 3” sq, Silver 1 15/16” sq, Black Circle 2 ¼” punch, White Shimmer 2” circle punch STAMP FIRST, THEN PUNCH OUT!!! Color with Blends, add Rhinestones.
Bottom Right:
Melon Mambo 3 7/8” sq, Black 3 ¾” sq, Rose Glimmer 3 ½” sq, Black 3 ¼” sq, White 3” sq, Vellum DSP 3” sq. Add colored Rhinestones. Color back of Vellum with Blends.
All the Supplies I used are listed below. Click on any of the pictures to be taken to my OnLine Store!
Hope you enjoy this project as much as I do!!
Lisa Tedder
A California Girl living in North Carolina Product List
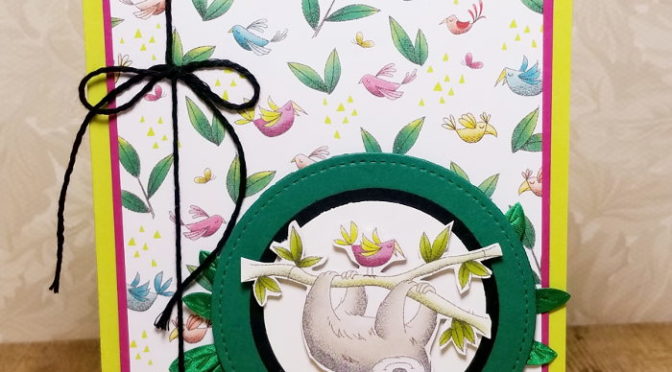
My family has a very funny story about Sloths. Since this time I have always had a special place in my heart for Sloths. If you want to hear the story, just send me a msg and I will tell you. I don’t want to bore everyone! HA!
I was inspired by a card on Pinterest by Melissa Davies, you can see the card here. I changed up SOME of the card, but the general idea was hers! Thanks Melissa!
As soon as I saw the Designer Paper Animal Expedition I HAD to get it only because of this stinkin’ cute Sloth! I wish it was a stamp, but he’s pretty easy to cut out, so I’ll take what I can get!
I used the Leaf ribbon because not only does it look awesome, but it’s so easy to adhere to the back!!
The supplies for this card are listed below, click on any picture to be sent to my OnLine Store!
Thanks for stopping by!! I appreciate you supporting me!
Lisa Tedder
A California girl living in North Carolina Product List
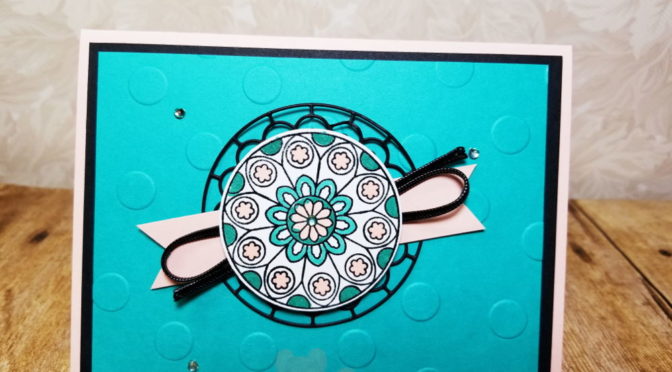
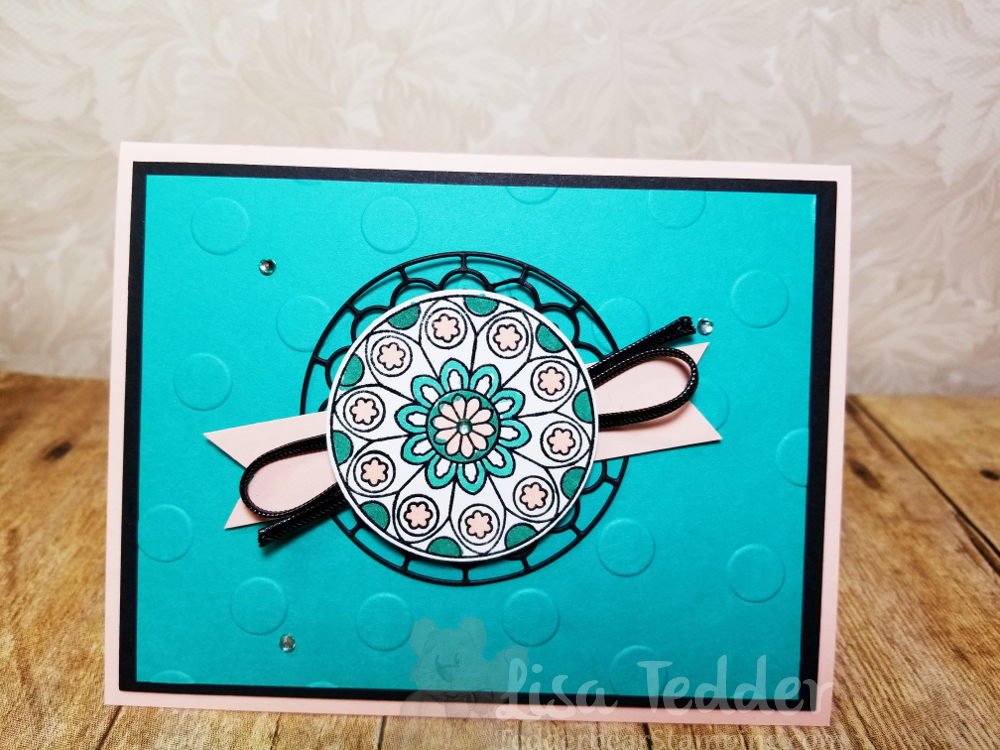
Today I am sharing with you a Clean and Simple (CAS) card. I don’t do these very often, but I always ask myself why I don’t when I make things this pretty!
I used the Stained glass Bundle, which is a definite need if you haven’t bought it already! The center of the image is punched out with the 2″ circle punch! LOVE when I can use a punch!
Here is the card:
There is a Rhinestone in the center of the medallion that I colored with a Bermuda Bay Blend. The black outside is from the die, cut twice. It’s a half circle, but I put them together and hid the seam with the Banner in Petal Pink. Then the Black Cording. I also have more Rhinestones colored the same way around the card. Polka Dot Embossing folder was used also.
Hope you like this as much as I do!! I’ll be posting again soon!
Thank you for your support!
Lisa Tedder
A California girl living in North Carolina Product List
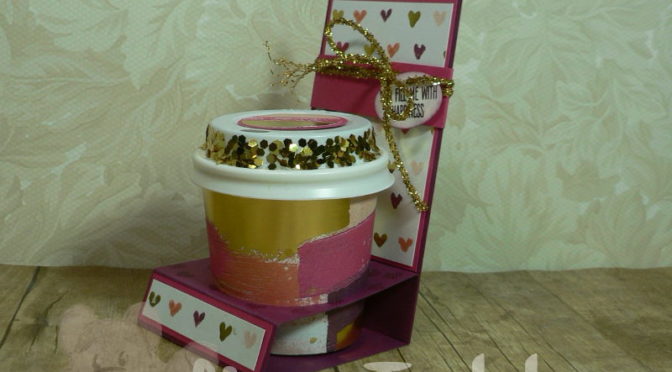
Today is Tuesday!! Today I am going to share with you a REALLY cute project that I’m sure you have seen around……..I JUST made it after Christmas with my team members and I LOVED it! They did a class for our team, and I got to come and be a Student!! It was so much fun and I am TRYING to get them to do it again! LOL
The one we did with them was a regular coffee theme and it was stinkin’ cute! Those little cups are darling!
For my Technique this time I wanted to do something that ANYONE would love to get! It is so full of love I just had to share!
The Belly Band can hold a gift card behind the cup. It has the Sentiment ‘You Fill me with Happiness’, and of course I filled the cup with Chocolate! The sentiment comes from the SU! stamp set Jar of Love. The DSP is Painted with Love Specialty Designer Series Paper and it has Gold Foil Accents throughout the paper! This paper is stunning in person! I had a hard time cutting into it…….just had to keep reminding myself that “It’s just paper”! LOL I’m sure I am not the ONLY one who does that!
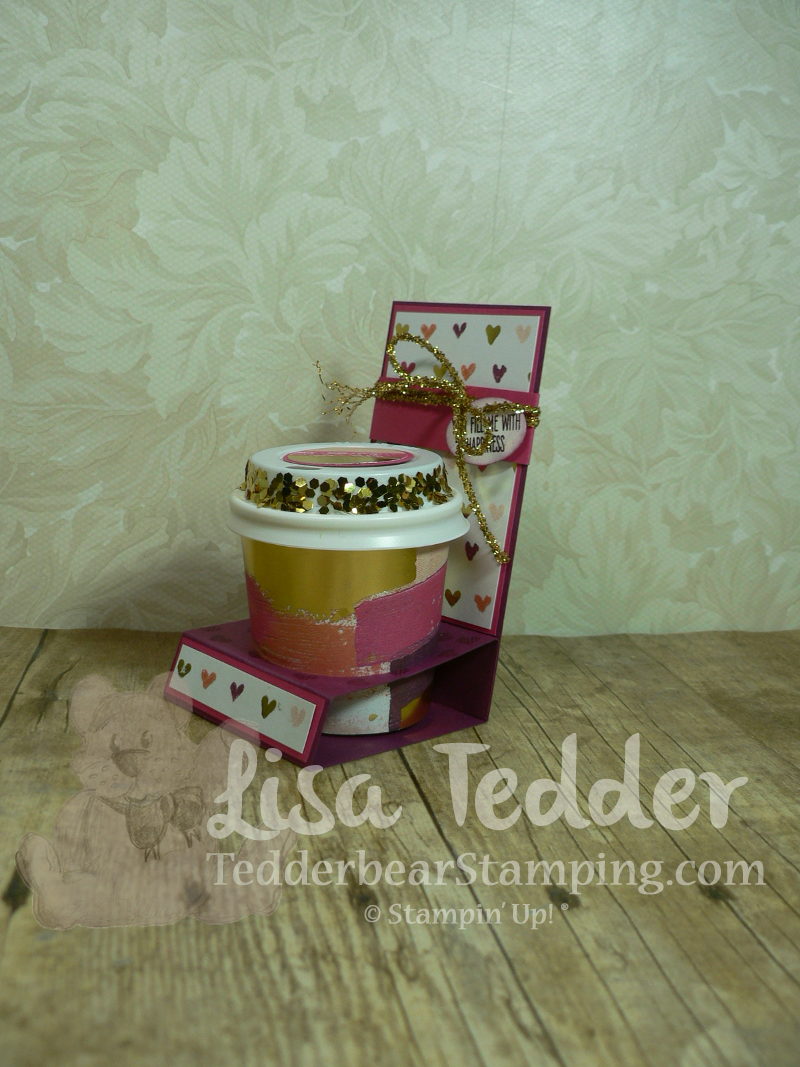
On the video I will have all the dimensions for the project, and you can see how it was made. IF you really want to see the glimmer and glam check out the video! NEXT week I’ll show you a quick and easy way to make the Gift Card Holder using your own Designer Paper!!
And for all the dimensions I have written them down on my Coffee Cup that I took apart to get the exact measurements. I’ll show you that on the video too! But here is what I wrote down.
This includes the card holder which I will show you next Tuesday!
You can click on any supply image below to be taken to my OnLine Store! I hope you choose me to be your demonstrator in the US!
Have a great day!
Lisa Tedder
A California Girl living in North Carolina Product List


 Designer Vellum")


 Metallic-Edge Ribbon")


 Circle Punch")


 Cord")