Tag Archives: Simply Scored

Christmas in July Blog Hop!

Hey Guys!,

It’s July! You know what that means! I usually do Christmas in July. This year is no different. Today I am participating in a blog hop! I don’t usually do this, so you’ll have to let me know if you enjoy it!

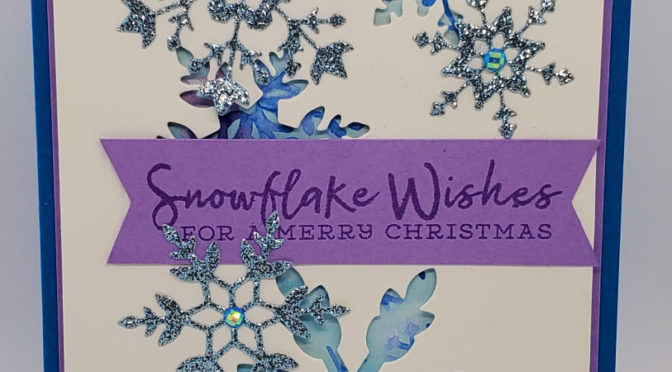
Today I am sharing with you a card I did using Stampin’ Up!’s Bundle Snowflake Wishes! I LOVE this Suite to be honest! I bought the whole thing! The Glimmer Balmy Blue paper is sooooo pretty! There are only two things in the Suite I didn’t use on this and that is the Snowflake Splendor 1/4″ ribbon and the Winter Snow embossing folder. I’m adding it to the pictures below so if YOU want to use it for this card you can!

Here is my card:
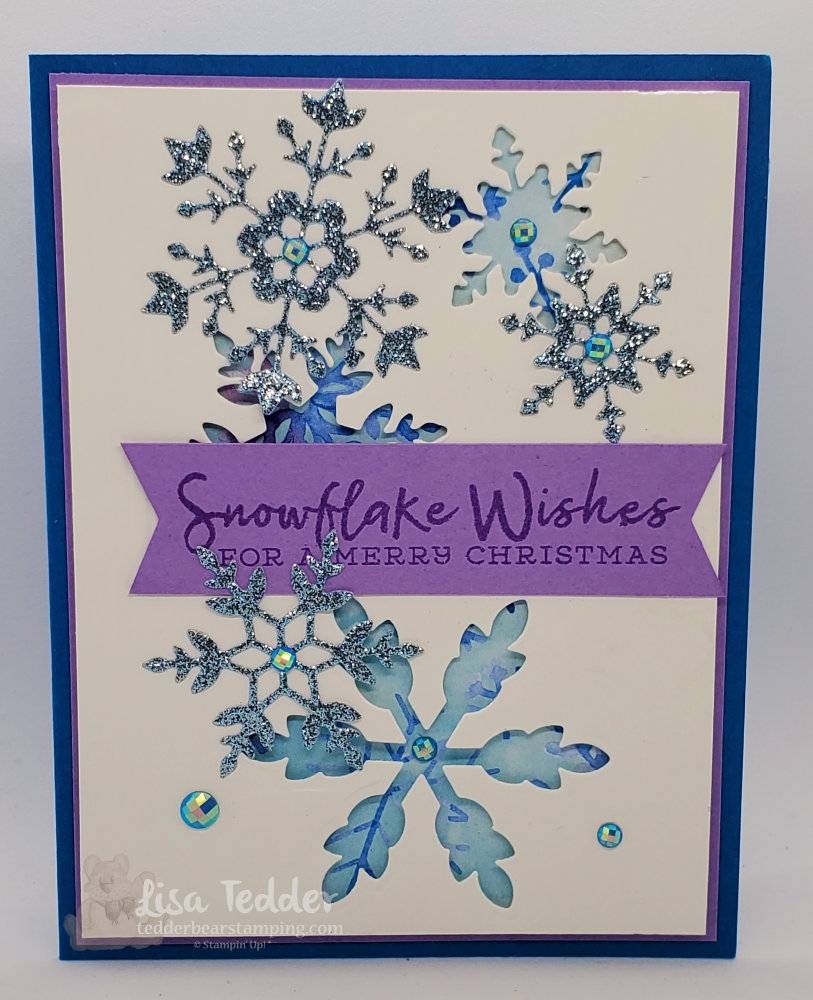
Snowflake Wishes Christmas in July
Snowflake Wishes Suite Christmas in July

Doesn’t the Highland Heather just make this pop! I love all the sparkle this card has in person! It’s too bad you can’t see it, oh!, wait! you can! I made a video showing this card! You can see the video here!

For another Christmas card in July using this same Suite you can see it here. I also made a video doing that card which you can catch here.

Here is the inside to my card:
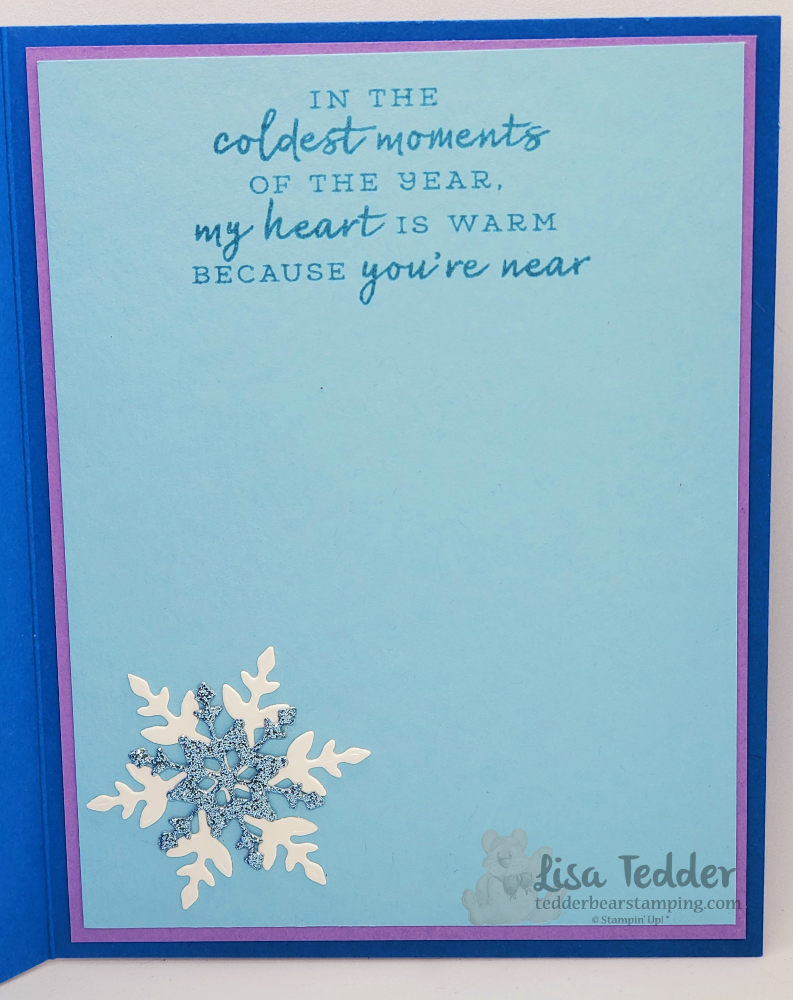
Christmas in July Blog hop inside

As usual, here are the specifics for this card.

Stamps:
Snowflake Wishes Bundle

Inks:
Highland Heather

Paper:
Pacific Point 8 1/2″ x 5 1/2″
Highland Heather 5 1/4″ x 4″ (x2), scrap 7/8″ x 3 3/4″, 1 3/4″ x 2 3/4″ (for inside)
Snowflake Splendor DSP 5 1/8″ x 3 7/8″
Whisper White 5 1/8″ x 3 7/8″, scraps for the snowflakes
Balmy Blue 5 1/8″ x 3 7/8″
Balmy Blue Glimmer Paper scraps for snowflakes

Misc:
Dimensionals
Simply Scored
Blue Adhesive-backed Gems
Wink of Stella
Everyday Label Punch
Banners pick a punch

You will also see the supplies in picture form below, click on any of them to be taken to my OnLine Store. If you purchase $35 or more from me you will receive a pdf that has 16 projects with pictures and step by step instructions!

For the scores on the sides of the white cardstock (can’t see in the picture, but it really makes this card) I started at 3/8″ and then did three lines in a row, turned the cardstock and did the same on the opposite side. It really adds some interest, don’t you think? I also popped up this layer since it makes the DSP underneath really shine! Of course I had to add the Blue Adhesive backed Gems!

I hope you have enjoyed this post! Please stop back in, I will be posting regularly now! Don’t forget to sign up for my Newsletter! I send out good ideas!

Lisa Tedder
A California girl living in North Carolina

Powered by Linky Tools

Click here to enter your link and view this Linky Tools list…

Product List

Gang’s All Meer Double Slider Easel Card

Hey Guys,

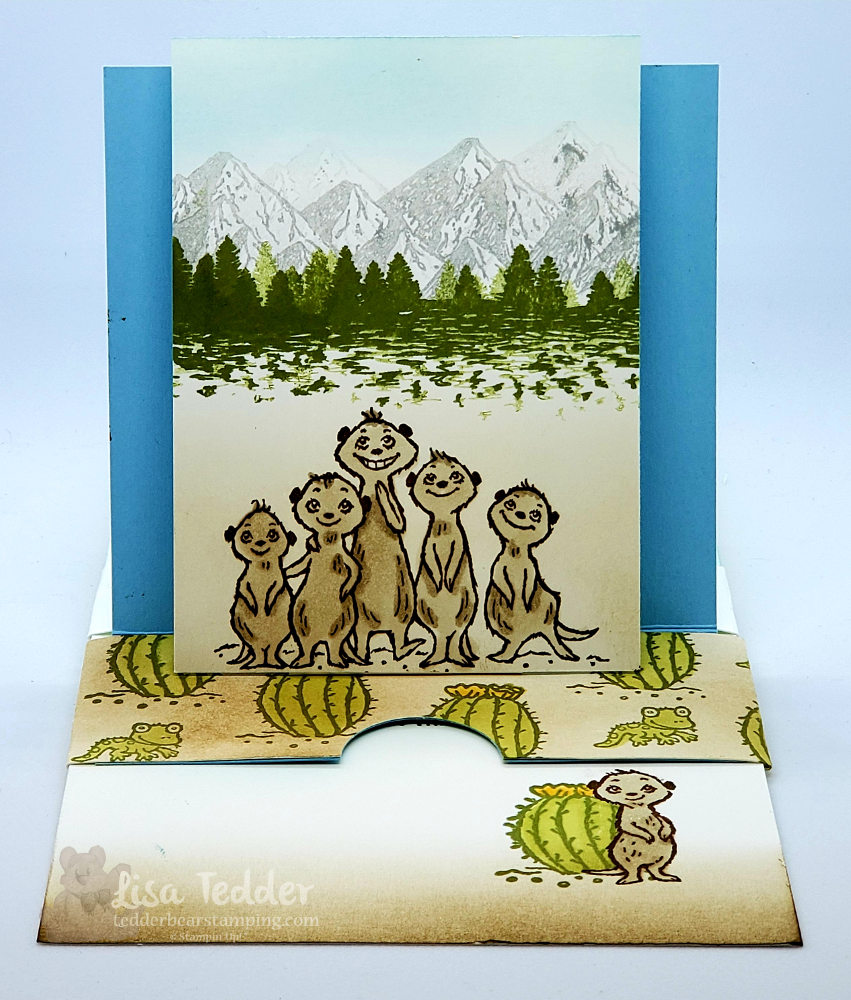
I’m sure that you have seen around the Double Slider Easel Cards, I saw them too, and tried my hand at it! Using The Gang’s All Meer Stamp set from Stampin’ Up! was a no brainer for me. They are so stinkin’ cute! Plus, the sentiment says “Happy Birthday to a STAND-UP friend”, thought it would be perfect to have a stand up card! LOL

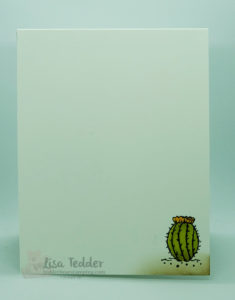
Also I used the SU! set Mountain Air, because I thought they would make a great backdrop for those adorable MeerKats! The Belly band is stamped with the cactus and colored with Blends. I tried so hard to find a fitting Designer Series Paper (DSP) that would fit with these cuties, but alas I couldn’t! So, what is a crafter to do? Make their own DSP! 🙂

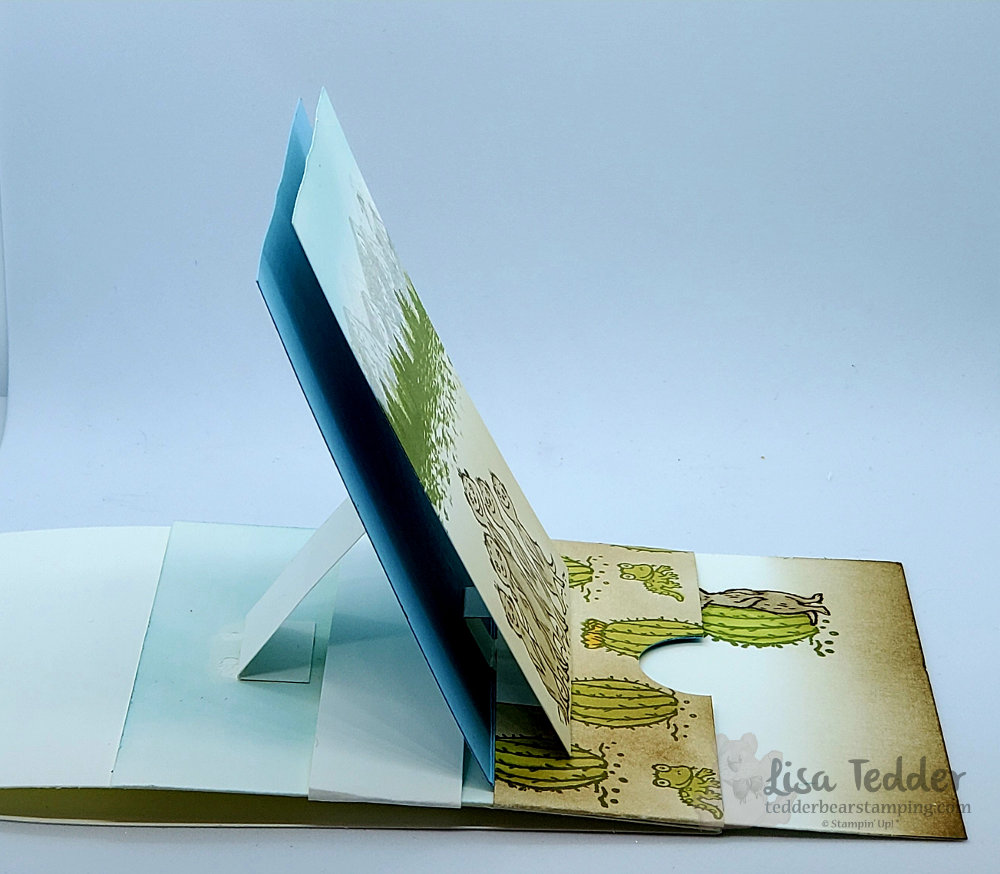
Here is my card, you’ll see a few pics since I want to show you all the angles:

This can open fuller, the sentiment is on the pull out. Can you see that this is open on it’s own?
sideways view
Inside

Cute right? I like it, depending on what everyone says at my classes is whether or not we make this in a class. It’s a little over the top, meaning it takes some time to get all the pieces together and put in the right place. BUT, it was super fun once I got the gist of it! Thanks go to Frenchie for her video! I may make a video if you would like to see it, just let me know!

As usual, here are the specifics for this card:

Stamps:
The Gang’s All Meer
Mountain Air

Inks:
Smoky Slate (mountains)
Old Olive (trees and cactus/lizard)
Early Espresso (meerkats)
Soft Suede (behind Meerkats and cactus on belly band)
Balmy Blue (sky)
Blends: Crumb Cake combo, Old Olive light, Mango Melody combo

Paper:
Whisper White thick 4 1/4″ x 11″
Whisper White 5 1/2″ x 4 1/4″, 3″ x 4″, 1 1/2″ x 9 1/2″ for banner & for Extra banner if you make a full card: 1″ x 9 1/2″
[2 3/4″ x 1″ (scored @ 1/2″ each end), 2 1/2″ x 1 1/2″ scored @ 1/2″, 1 1/2″ x 1/2″ scored @ 1/2″ & 1″…..for mechanisms]
Balmy Blue 4″ x 5 1/4″

Misc:
1″ circle punch
sponges
Simply scored

So, what do you think? Is this something you want to make for yourself!? I hope you give it a try!

Below you will see in picture form all the supplies needed for this card. Just click on any of them and you will be taken to my Online Store! Anytime you purchase from me, you will receive from me a file FULL of tutorials for you to use! There are usually 40 or more, but I like to promise 35…….don’t want to disappoint anyone! I will also send you a handmade card as a thank you! Every time you order you will get these as my thanks to you! If you live in the US and would like to use me as your Demonstrator, use away! LOL

Thanks for stopping by, hope you enjoyed your visit!

Lisa Tedder
A California girl living in North Carolina

Product List

August Class Stained Glass Vellum

Hey Guys,

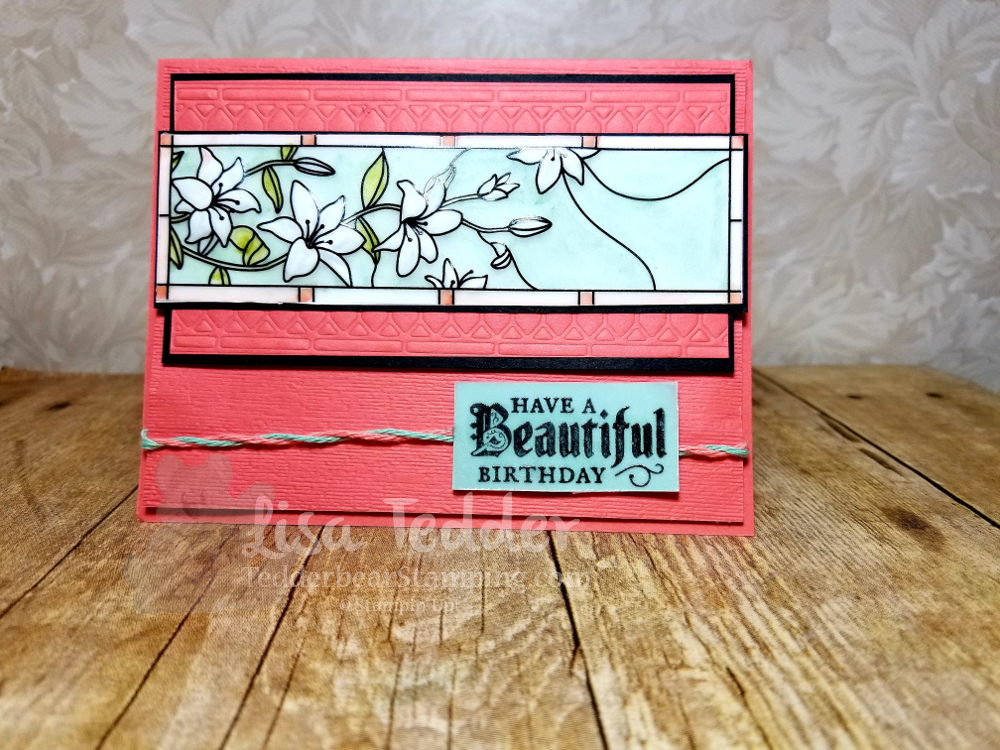
I’m super excited to share this card with you!  I absolutely LOVE to do this technique with Vellum.  I turn the vellum over and using an Impressor and a soft pad I push into the Vellum softly at first and then add more pressure as the paper fibers break down.  You don’t want to push too hard or you will go through the paper, but the more you can press the puffier it will get in the front! This is what makes the vellum white!

Here is a picture:

All the white you see in the lily is the Vellum where it is puffy!  In person this card is stunning! You just want to feel it!  I have a video doing this technique if you want to watch it on YouTube!

I colored it using Blends: Mint Macaron, Old Olive, Calypso Coral.  The ribbon is two colors twisted together, and the sentiment is from Graceful Glass stamped on Vellum and then attached to Mint Macaron cardstock.  The one layer is Calypso Coral run through the Brand New Folder Subtle.  It really gives you a nice texture!

For the background panel, I used the Embossing Mats and the die from this set and just got the impression of the die.  That is so much fun to do!!  When you watch the video all the dimensions will be included.  I saw the background for this card on Pinterest, but can’t remember where!  If you know, please let me know so I can give credit!

Thank you for stopping by!  I appreciate your support!

Below is the list of supplies, just click on any picture to go to my Online Store!

Lisa Tedder
A California Girl living in North Carolina
Product List


Make your own Dimensional Snow!

Hey Guys!!

I was making a Christmas card (Yes, I DO know that it’s March, but I had an idea!) and needed my trees to have snow on them.  I wanted to try something and it worked!  NOT sure it’s been done before, but I’ve never heard of it!

First, here’s the card:

It’s really hard to see on this picture, but the trees have touchable snow.  It’s puffy, shiny, white and sparkly!  If you want to see it made in person (along with other stamping tips) you can go see my video here!  I was super excited to see that my idea not only worked, but it was EASY! AND you probably have the supplies in your stash already!

You need to get your Fine Tip Glue Pen, and draw lines with the glue where you want your snow.  Once you have all your lines, then dip it STILL WET into White Embossing Powder, set aside for about 10-15 minutes.  You can use that time to create the box card.  Go to this blog post to see how to make the box part.   You can see the video for that on my YouTube channel here.

This Christmas card is SUPER pretty!  Even prettier than the one I made with the Magical Day and I loved that one too.

Below you will see all the product used for this project, click on any picture to be taken to my OnLine Store. I would love to be your Stampin’ Up! Demonstrator if you live in the US.

Thank you for stopping by.  Hope to see you again soon!

Lisa Tedder
A California Girl living in North Carolina


Product List

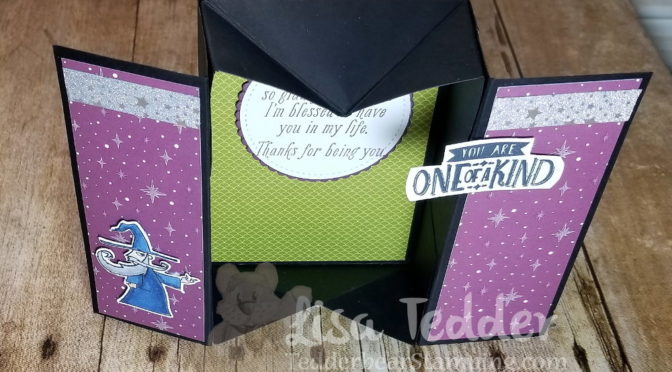
Magical Day Box Card

Hey Guys!

So glad you could join me for this awesome project I have for you today!

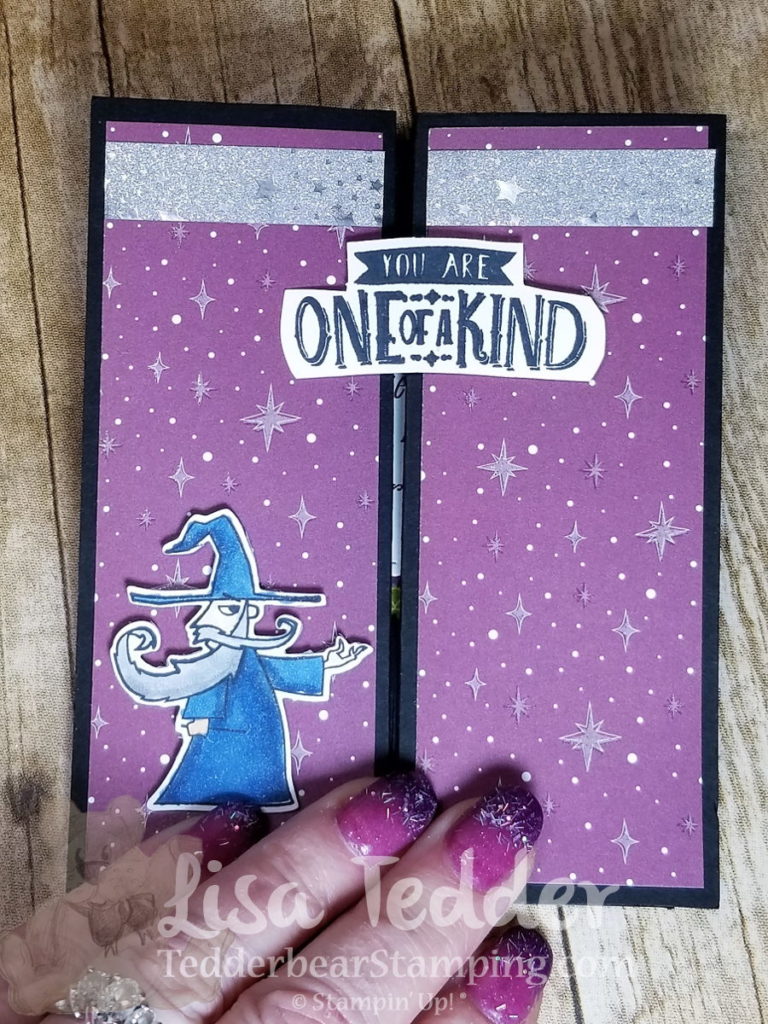
Funny that my nails match!!  Just got them done today!  This is the card in the closed position

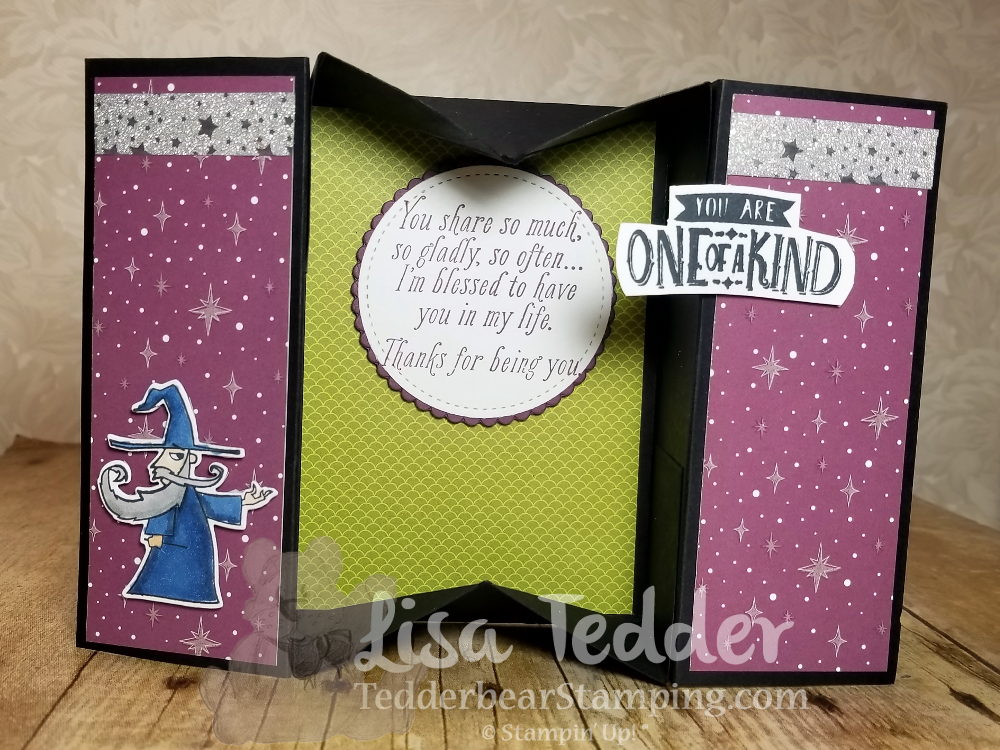
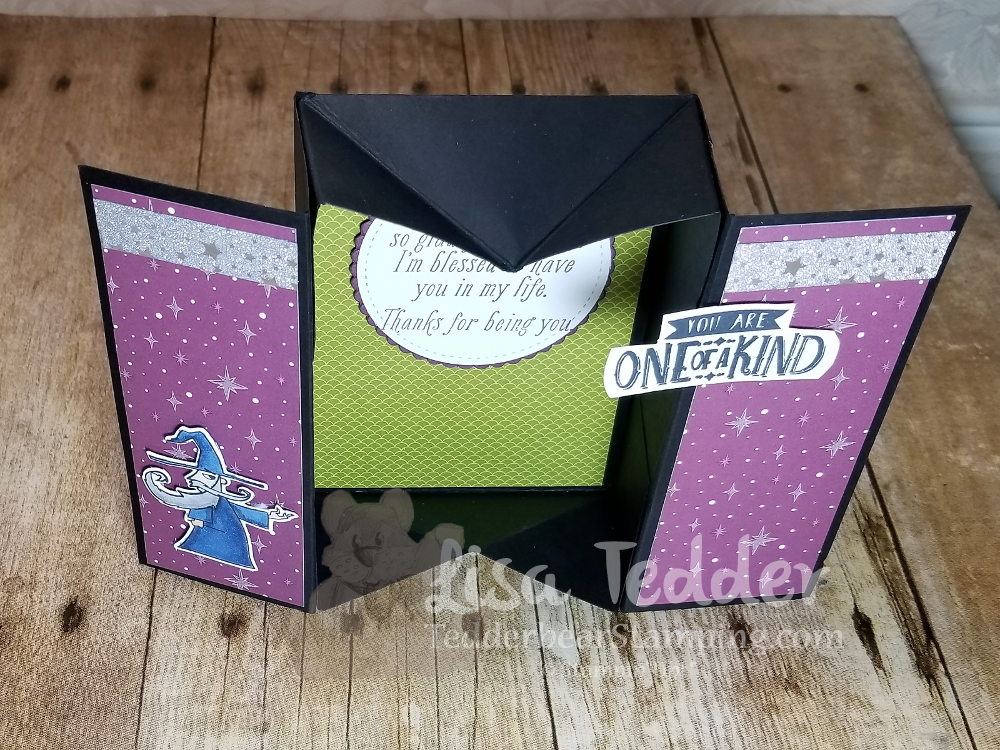
Here it is Open, the next picture shows it from a higher angle so you can really see the ‘box’.

This was super fun!  I love the Magical Day Stamp set……I had used EVERY stamp in the set but the Magician,  and now I have used them ALL!  I colored with the Blends and also used the Magical Day Washi Tape!  This entire Suite is awesome!

I got this idea from Natalie Lapakko……..I’m a visual learner so seeing a video would have helped me learn, so I thought I could help you if you also learn by seeing!

This project takes a whole piece of 8 1/2″ x 11″ piece of cardstock.  Score Horizontal @  2″, 3 3/4″, 7 1/4″ and 9″

Score Vertical @ 1 3/4″ and 6 3/4.

Follow along with the video to see where to snip and trim!  It was MUCH easier than I anticipated!

Below will be pictures of the items used to make this project.  Click on any picture to be taken to my OnLine Store!!  If you purchase from me, I will send you one of my handmade cards!

Thanks for stopping by!  If you are new to me, I have a YouTube Channel where I TRY to do a video every Tuesday!  I would love it if you would subscribe and be alerted when my next video posts!

Lisa Tedder
A California Girl living in North Carolina

Product List
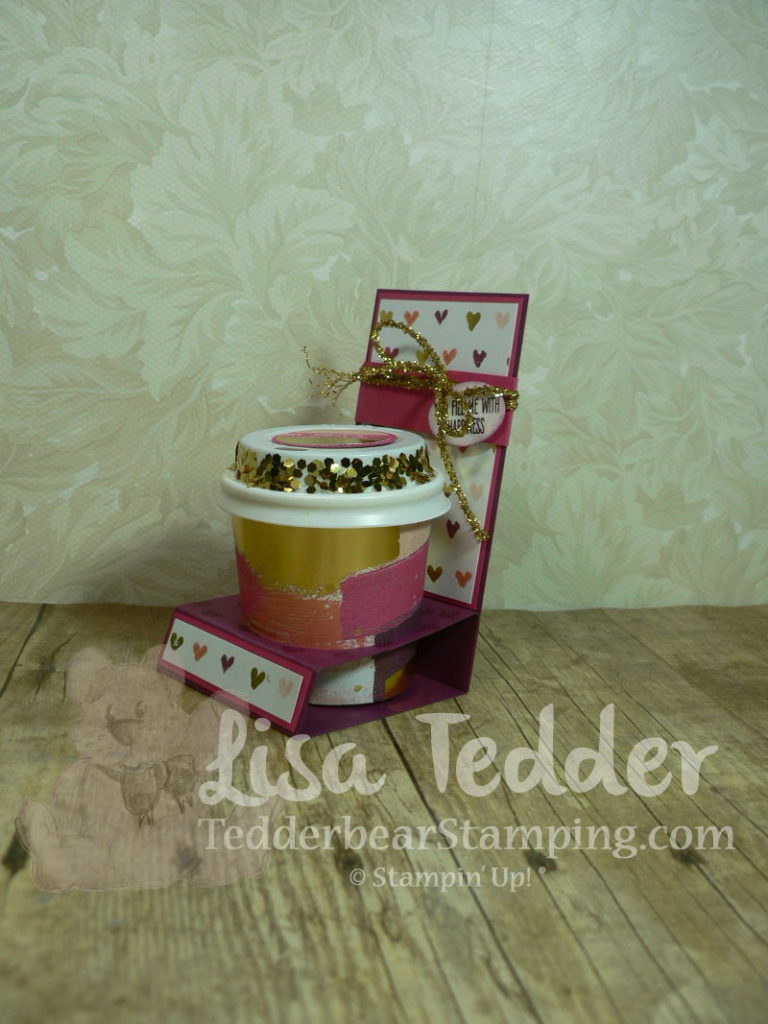
Technique Tuesday – Espresso cup holder for Valentines Day or for a loved one ANY day!


Hey Guys!

Today is Tuesday!!  Today I am going to share with you a REALLY cute project that I’m sure you have seen around……..I JUST made it after Christmas with my team members and I LOVED it!  They did a class for our team, and I got to come and be a Student!!  It was so much fun and I am TRYING to get them to do it again!  LOL

Click here to see the video!

The one we did with them was a regular coffee theme and it was stinkin’ cute!  Those little cups are darling!

For my Technique this time I wanted to do something that ANYONE would love to get!  It is so full of love I just had to share!

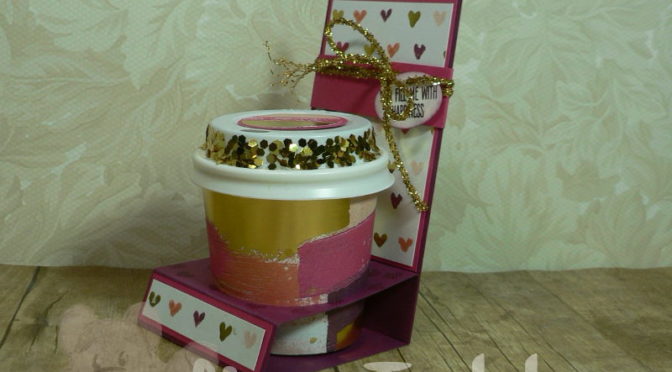
The Belly Band can hold a gift card behind the cup.  It has the Sentiment ‘You Fill me with Happiness’, and of course I filled the cup with Chocolate!  The sentiment comes from the SU! stamp set Jar of Love.  The DSP is Painted with Love Specialty Designer Series Paper and it has Gold Foil Accents throughout the paper!  This paper is stunning in person!  I had a hard time cutting into it…….just had to keep reminding myself that “It’s just paper”!  LOL  I’m sure I am not the ONLY one who does that!

On the video I will have all the dimensions for the project, and you can see how it was made.  IF you really want to see the glimmer and glam check out the video!  NEXT week I’ll show you a quick and easy way to make the Gift Card Holder using your own Designer Paper!!

I bought the cups/lids here.

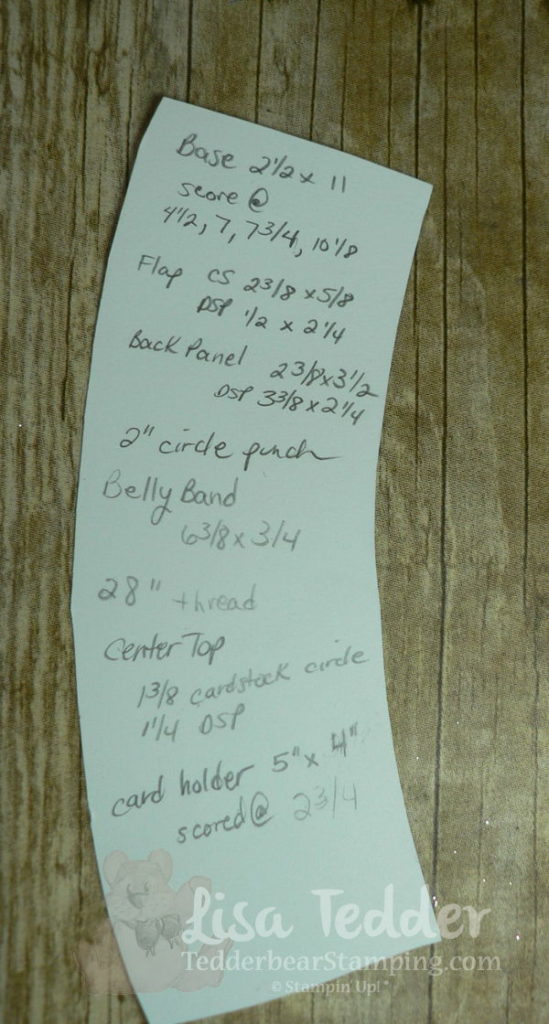
And for all the dimensions I have written them down on my Coffee Cup that I took apart to get the exact measurements.  I’ll show you that on the video too!  But here is what I wrote down.

This includes the card holder which I will show you next Tuesday!

You can click on any supply image below to be taken to my OnLine Store!  I hope you choose me to be your demonstrator in the US!

Have a great day!

Lisa Tedder
A California Girl living in North Carolina
Product List


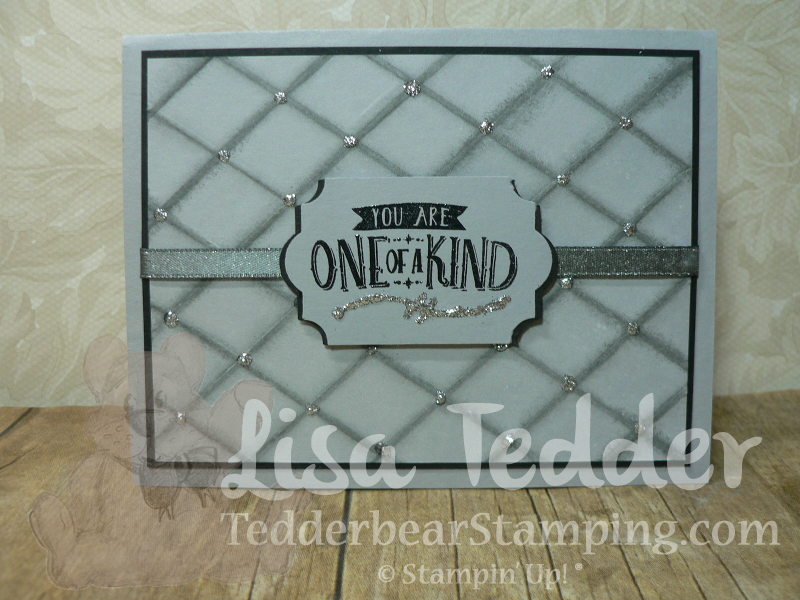
Technique Tuesday-Making a Diamond pattern background

Today is Tuesday!  That means that I have a video out today showing another Technique!  Today’s Technique is making a Diamond pattern using the Simply Scored and sponging to highlight those scores.  It came out so pretty!  Surprisingly a very easy background!  I used the Fine Tip Glue Pen on each point that intersects and then added Silver Glitter.  You can see the video here!

I also used the FREE ribbon from Sale a Bration that has THREE different ribbons!  If you need one of the catalogs, just let me know and I will get it out to you!  You can also get the new 2018 Occasions catalog!  I send out mailings once a week, so just ask!

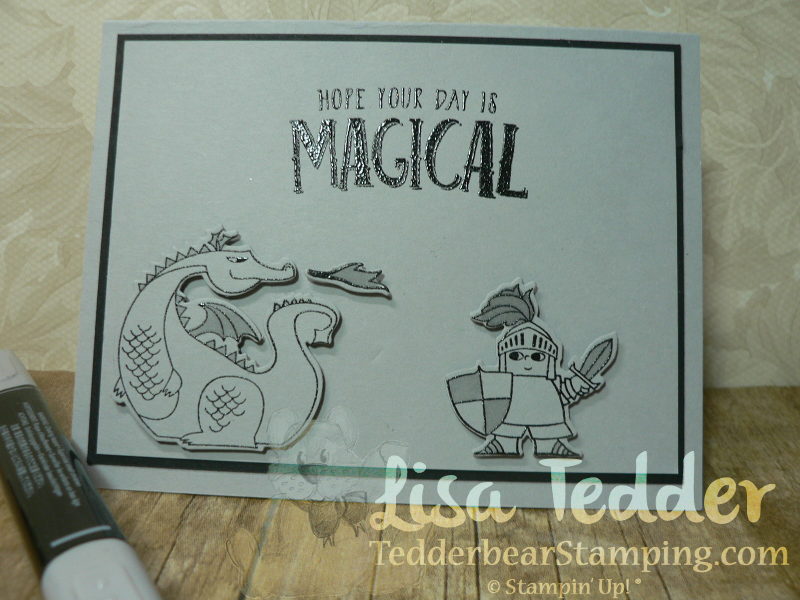
The inside is pretty too!  I LOVE the new Stamp set from Stampin’ Up! called Magical Day!  It really brings out my inner child!

Isn’t that Dragon too cute!?  I colored the wings and the parts of the Knight with the light Smoky Slate Blends!

I hope you enjoyed my post today!  Stay tuned, I will be sharing this months cards throughout the month!

Click on any picture of the supplies I used below and you will be taken to my OnLine Store!

Lisa Tedder
A California Girl living in North Carolina
Product List

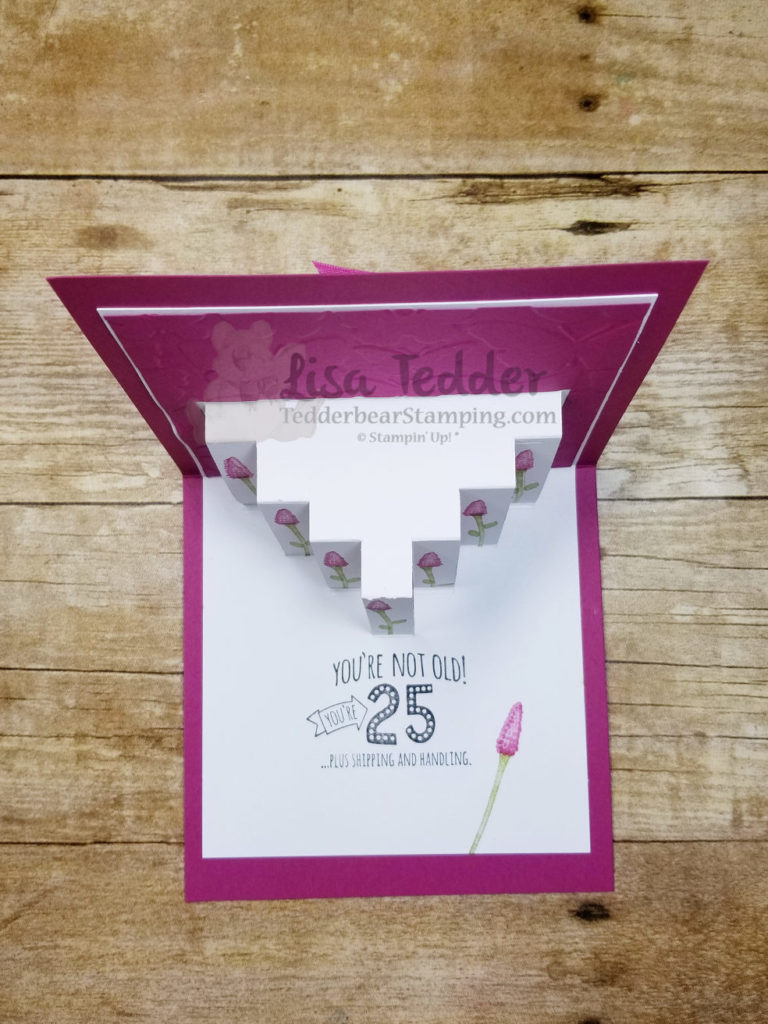
Technique Tuesday Cascading Steps

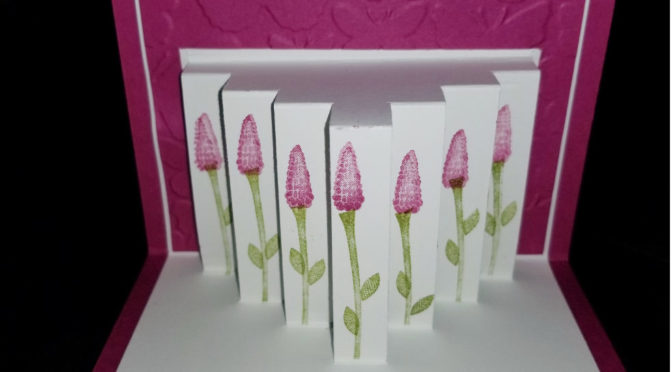
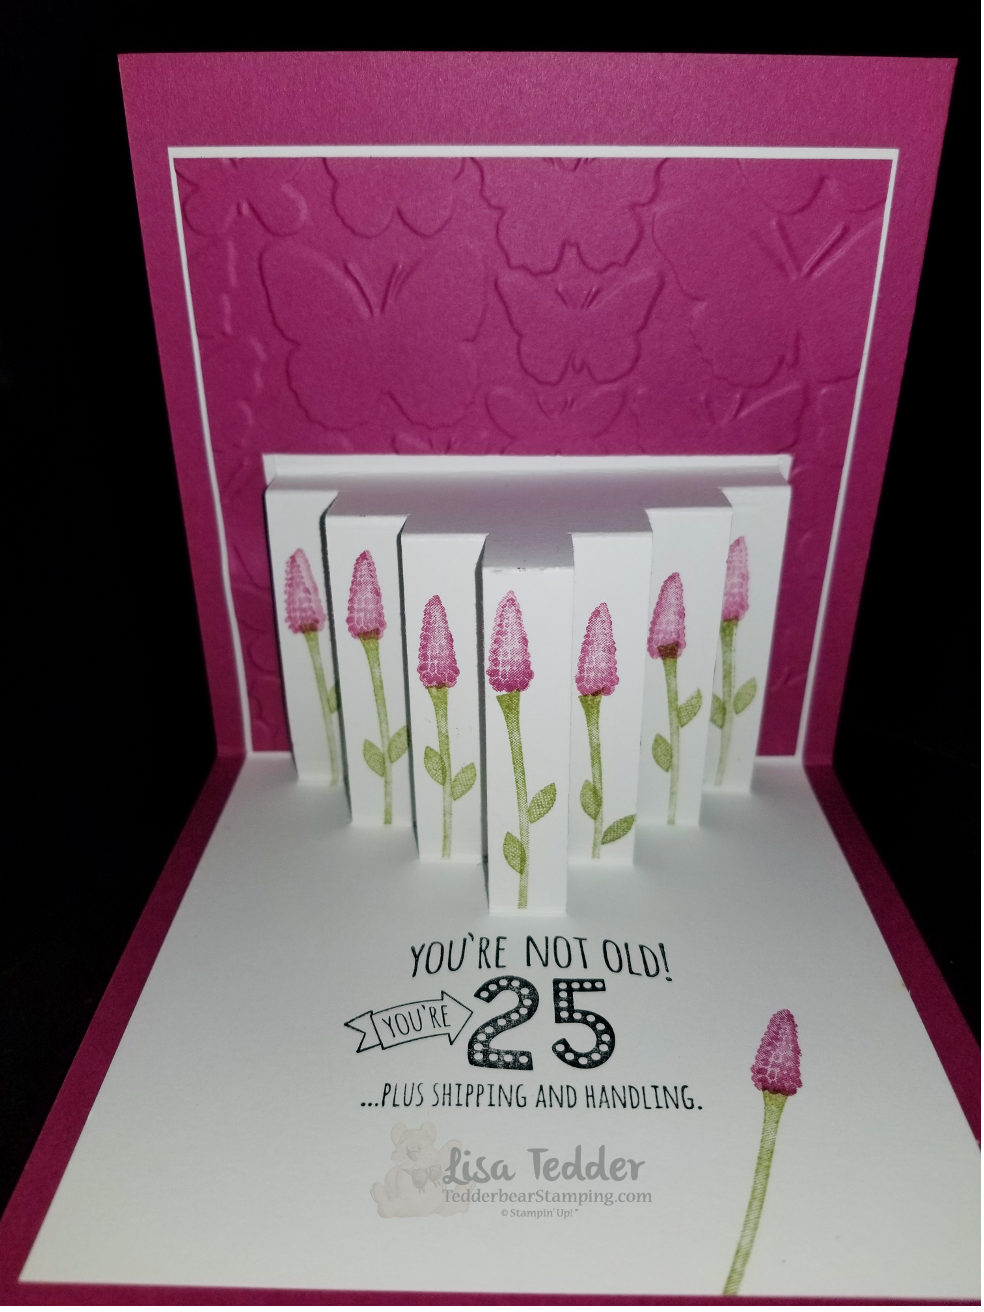
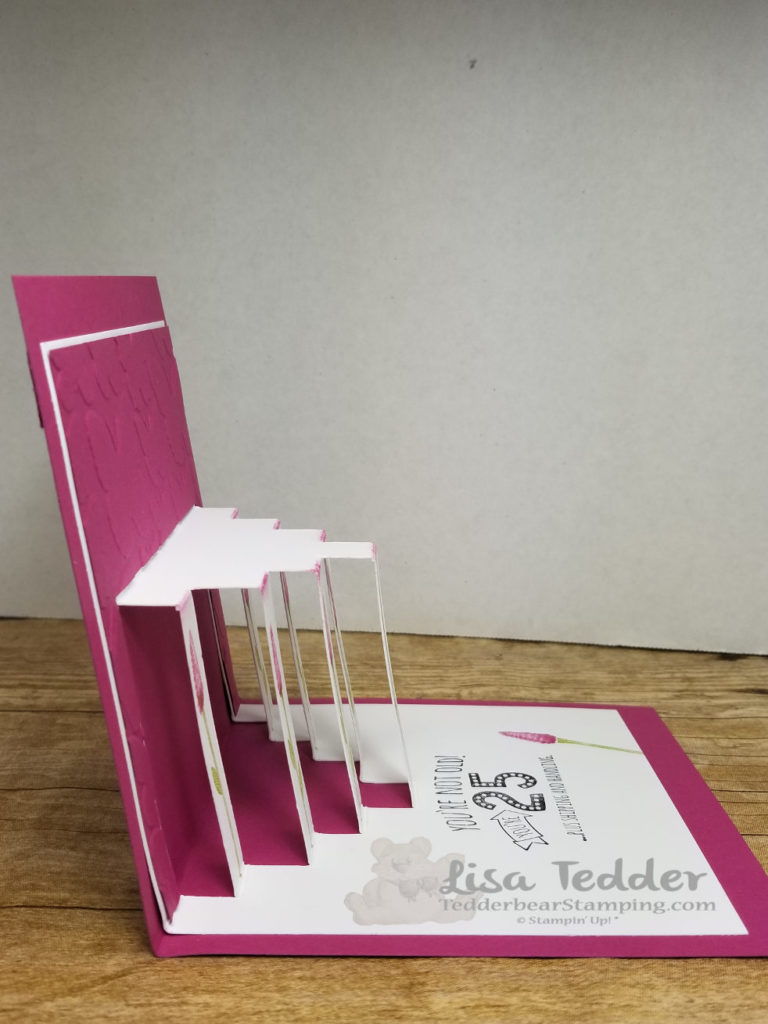
YOU are in for a Treat!  Today I am sharing with you my latest Technique!  To see it done, go to this video on YouTube!

The reason I am so excited is because I have only seen this ONCE before about 15 years ago on a tv show and I had to remake the instructions according to what I SAW. There were no instructions anywhere!  So after about a week of trial and error, I remade the design!

Here is another view:

And from the top:

Well?  Do I have reason to be excited??!!

Want to be able to print out your own Cheat Sheet?  Well, I have written it down for you!  Click below to print your own!

cascading steps instructions

I have used this design for Palm Trees, Christmas Stockings, other flowers…….Can you think of a Stampin’ Up! stamp set that would work here?  I would LOVE to get more ideas!

Hope you enjoyed my latest technique!  I am always looking for new ideas, any techniques that you would love for me to make a video of?
Click on any of the pictures below to be taken to my OnLine Store!

Until next time!!

Lisa Tedder
A California Girl living in North Carolina

Product List