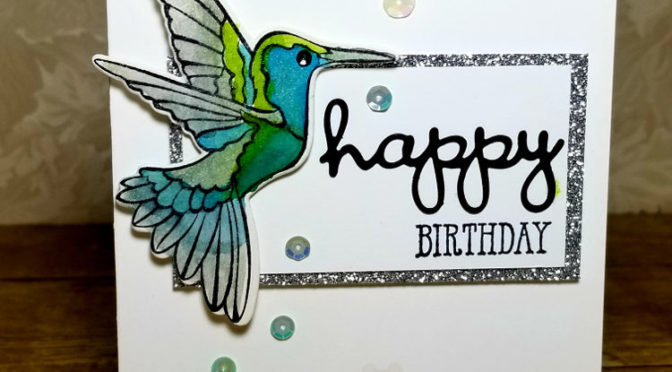
Today I am sharing with you a card that I copied from a card I saw on Pinterest by Lali Peach.
Here is my card:
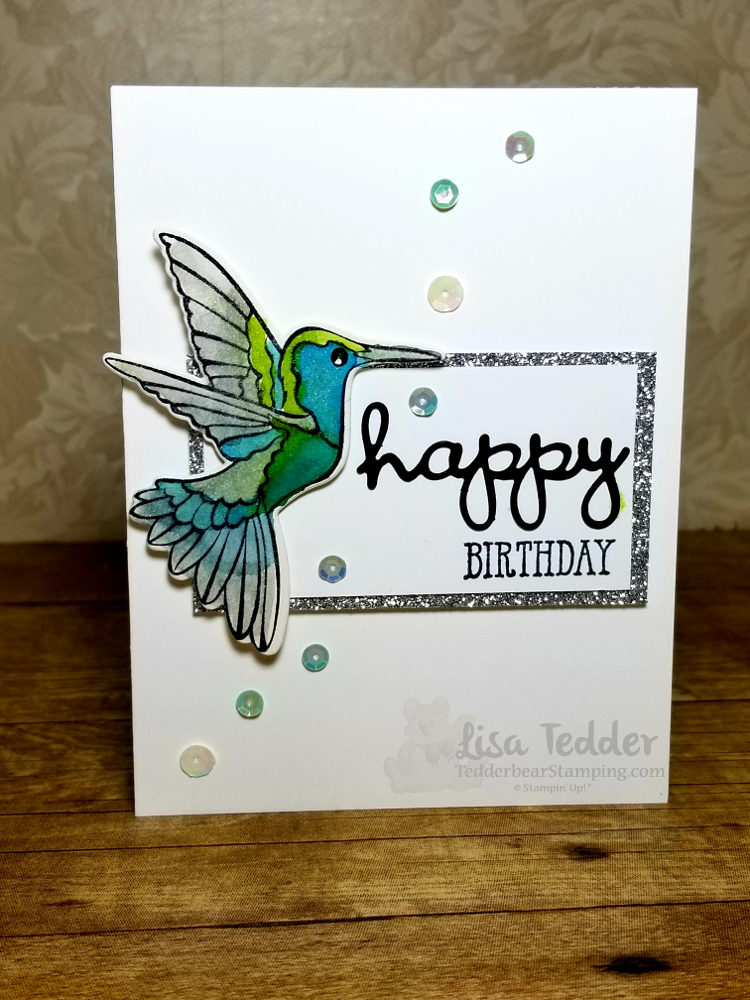
I love this stamp set and when I added the silver Glimmer paper to the back of the sentiment panel, it really popped!
Here are the specifics of this card:
PROJECT 3: Humming Bird
Stamp Sets
Pg #
Humming Along Occasions
Well Said Bundle
Paper
Thick White 8 1/2″ x 5 1/2″
White 3 1/4″ x 1 3/4″, 3 3/4″ x 5″ (x2)
Pacific Point 5 1/4″ x 4″
Silver Glimmer 3 1/2″ x 2″
Shimmer White Paper 3″ x 4″, Black scrap
Inks
Pacific Point
Smoky Slate
Granny Apple Green
Momento Black
Accessories
Clear EP
Iridescent Sequins/Metallic Sequins/Fine Tip Glue
Wink of Stella
Dimensionals
Aqua Painters
Big Shot
For his eye I used a teeny tiny black sequin. This card was for a handmade card class at my local Senior Center. They loved it! Who doesn’t love sequins!?
Below are the supplies used in picture form. If you click on any of them you will be taken to my OnLine Store. If you purchase from me I will send you a small thank you gift!
Lisa Tedder
A California girl living in North Carolina Product List
Happy New Year! Hope you had a great Christmas and New Year. I’m excited to see what the New Year Brings, are you?
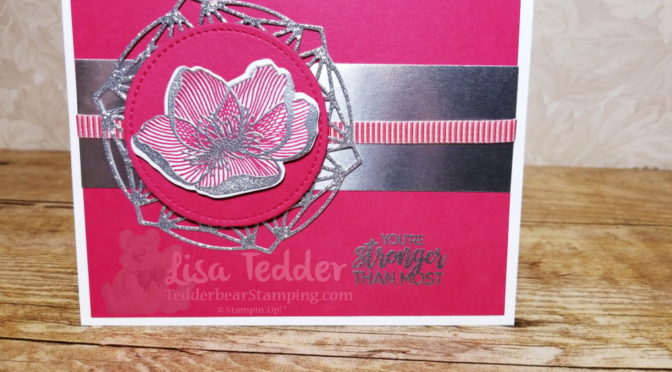
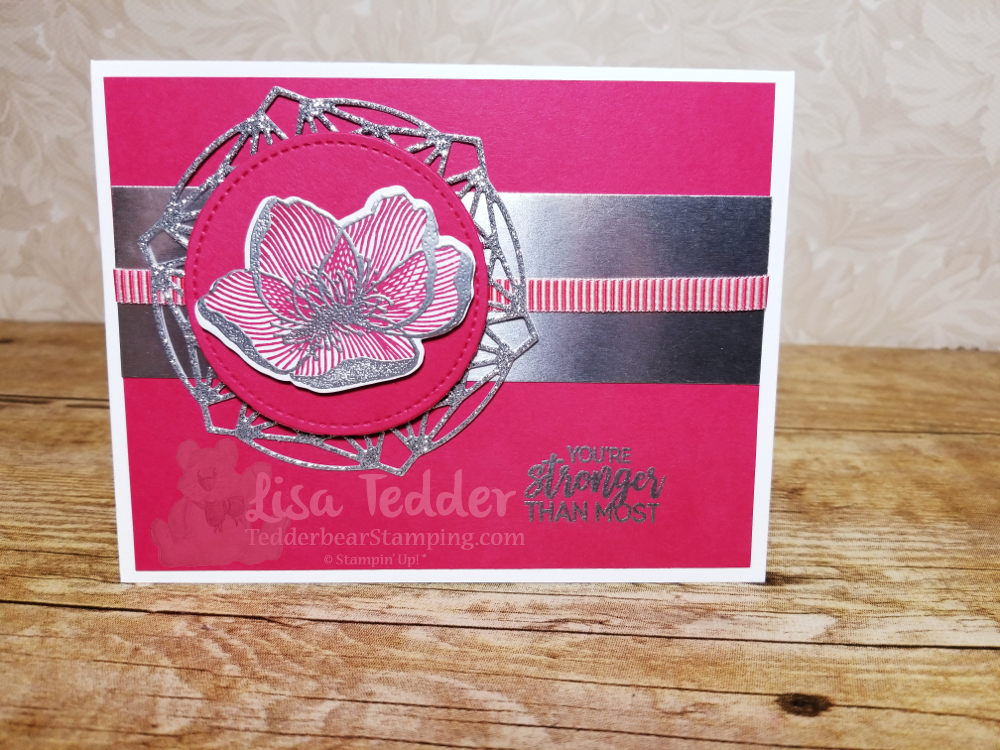
Here is another card that I saw on Pinterest that I HAD to copy! The idea came from Robyn Cardon, I added the ribbon/changed the color, but the rest of the idea came from her!
This is my first time using the New Lovely Lipstick in the In Colors. I really like it! The picture makes it look more like Melon Mambo, but it has more red than pink to it.
I used Silver Embossing powder to make it pop, and added the ribbon.
Here are the particulars for this card:
Stamp Sets
Beautiful Promenade Bundle
Paper
Whisper White Thick 8 1/2″ x 5 1/2″
Lovely Lipstick 5 1/4″ x 4″ (x2), 3″ sq
Silver Glimmer 3 1/2″ sq
Silver Foil 1 1/2″ x 5 1/4″
Whisper White 5″ x 3 3/4″, scrap flower
Inks
Versamark
Lovely Lipstick
Accessories
Silver EP/ Embossing Buddy/ Heat tool
Big Shot
Poppy Parade Mini Striped Ribbon
Dimensionals
All of the pictures below show the supplies used, click on any of them and you will be taken to my OnLine Store! All Online purchases receive a gift from me!
If you are considering joining the SU! Family, I would love to be your Team Leader!
Hope you enjoyed my share for today! Hope to see you back soon!
Lisa Tedder
A California Girl living in North Carolina
I love when I design a card and it turns out great! I get so worried when I am designing on my own, I ‘think’ it turns out good, but have to ask everyone I know what they think, just to be sure!
Here is the card:
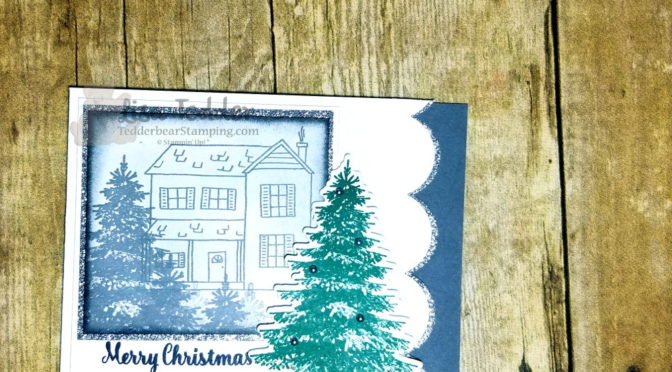
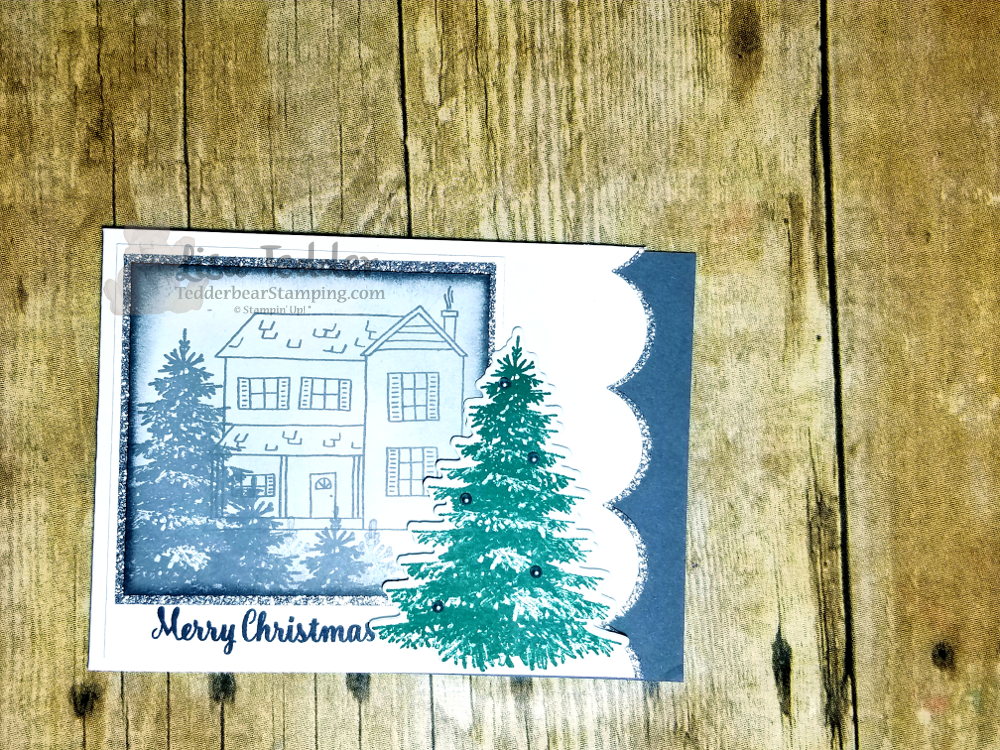
I love how this looks like a photo with a tree on the side. I used the Colorful Seasons Die to get the scalloped edge, I cut both the white and the Silver Glimmer to go behind it. In person, this is really pretty and shiny! Basic Gray is on the inside to offset the Silver, it is a great look! I love how stamping the house and tree in the ‘picture’ is an easy way to use this stamp set, and just cut out the tree and your card is just about ready!
Here are the specifics for this card:
Supplies:
Stamp set: Farmhouse Christmas, Star of Light, Winter Woods Cardstock: Thick Whisper White 4” x 11”, Whisper White 3 ½” x 3 ¾”, 3” x 3 ½”, 3 ¼” x 3” (for black and white house),
Silver Glimmer 3 3/8” x 3 3/16”, 4” x1 ½”, Basic Gray 4” x 5 3/8” Inks: Basic Gray, Shaded Spruce, Memento Black Misc: Big Shot, Seasonal Layers thinlits, Dimensionals, Metallic Pearls, sponges, Wink of Stella
This is one of my favorites that I designed! I hope you like it too!!
Below are pictures of the supplies used for this card, click on any picture and you will be taken to my OnLine Store! I would love to be your Demonstrator if you live in the US.
Thank you for stopping by, please come back and see me!
Lisa Tedder
A California Girl living in North Carolina
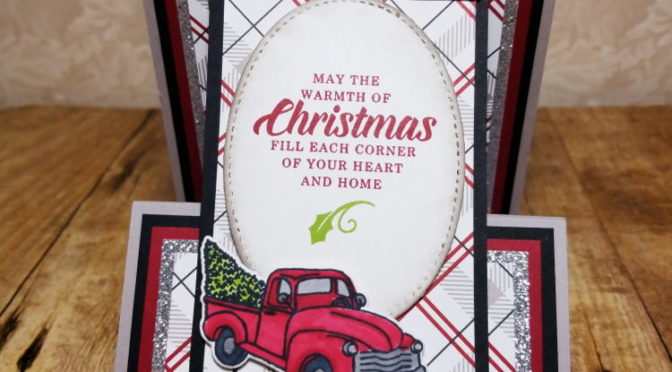
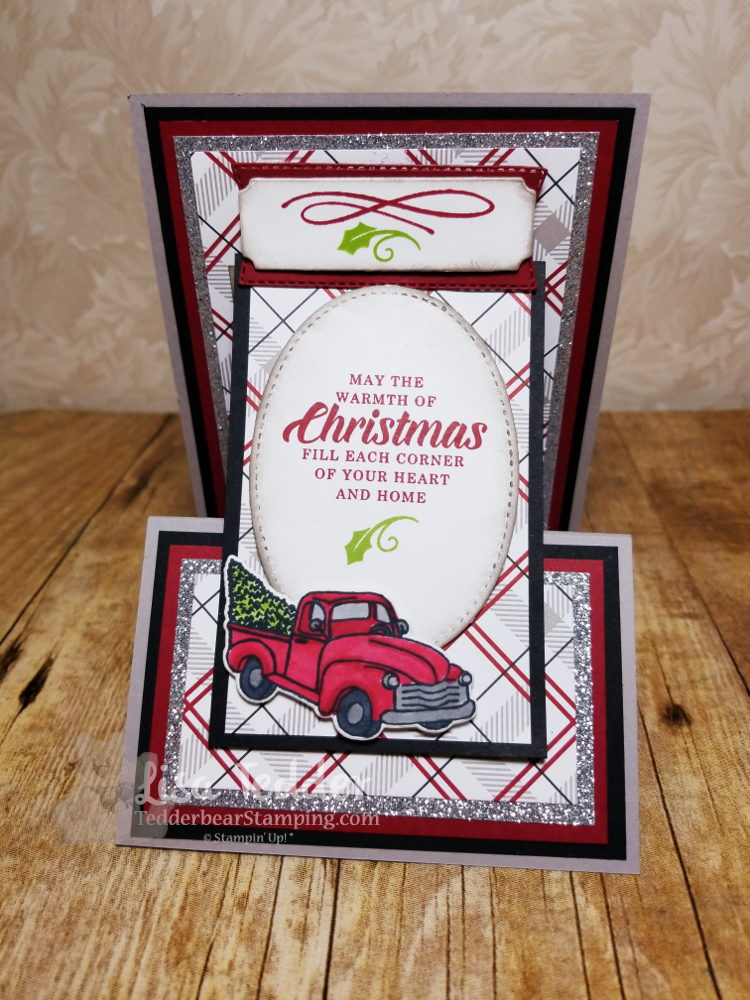
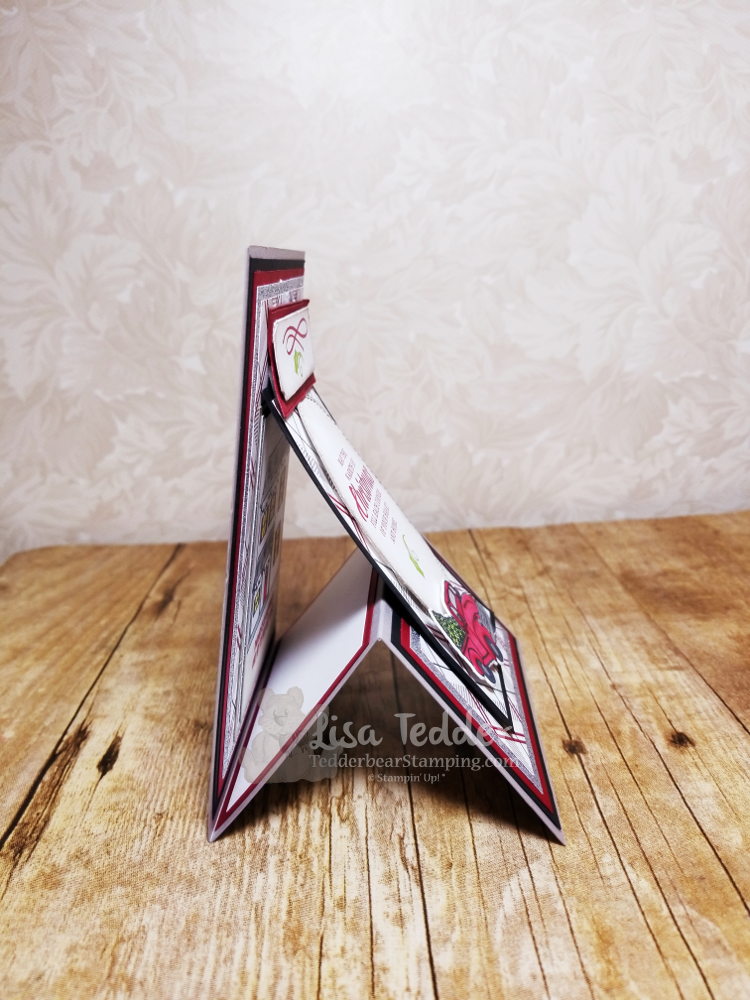
#14 is one I did a video on, you can find my YouTube video here. This was a fun card, and I love how it can stand up on it’s own!
Side look:
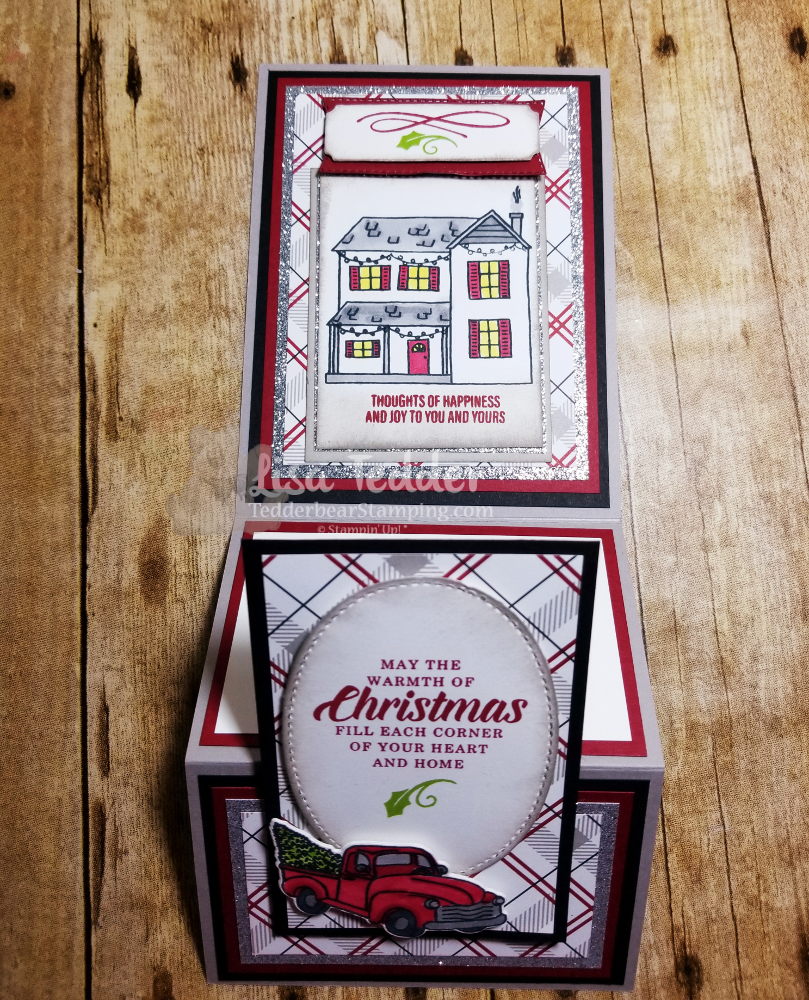
And showing the inside:
All the supplies are:
Stamp Sets: Farmhouse Christmas Bundle, Timeless Tidings, Merry Christmas to All Cardstock: Gray Granite 4 ¼” x 11” scored at 2 ¾” & 5 ½”, 2 ¾” x 3 ½”, Basic Black 5 ¼” x 4”, 2 ½” x 4”, 4 ¼” x 2 ¾”, Cherry Cobbler 5” x 3 ¾”, 2 ½” x 4”, 3 ¾” x 2 3/8”, scrap 1” x 3”, Silver Glimmer 5” x 3 ½”, 2 3/8” x 3 3/8”, 2 1/8” x 3 ½”
DSP Festive Farmhouse 3 ¼” x 1 ¾”, 2 ½” x 4”, 4 ½” x 3 ¼”, Whisper White 3 ¼” x 2 ½”, 1 ¼” x 3”, 2 ¼” x 3 ¾”, 2 ¾’ X 3 ¾”, 2 ¾” X 1 ½” (For car) Inks: Momento Black, Cherry Cobbler, Granny Apple Green, Gray Granite
Blends: Cherry Cobbler combo, Granny Apple Green Dk, Black lt, Smoky Slate combo, Mango Melody Lt Misc: Rhinestones, Dimensionals, Foam Adhesive Strips, sponges, Glue Dots, Big Shot, Stitched Framelits
All of the supplies are listed below in picture form. Click on any picture to be taken to my OnLine Store. I would love to be your Stampin’ Up! Demonstrator if you live in the US.
Thank you for stopping by! Check back in to see what I’m up to!
Lisa Tedder
A California Girl living in North Carolina Product List
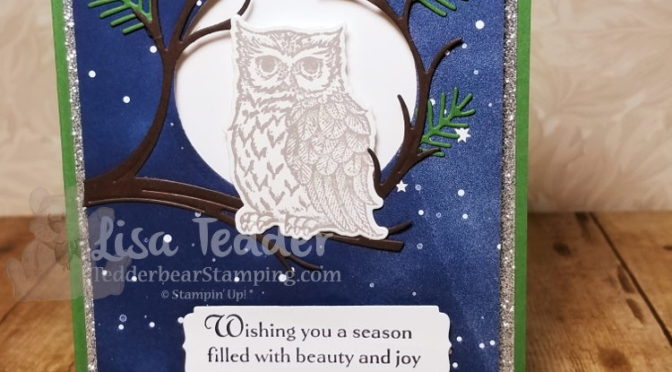
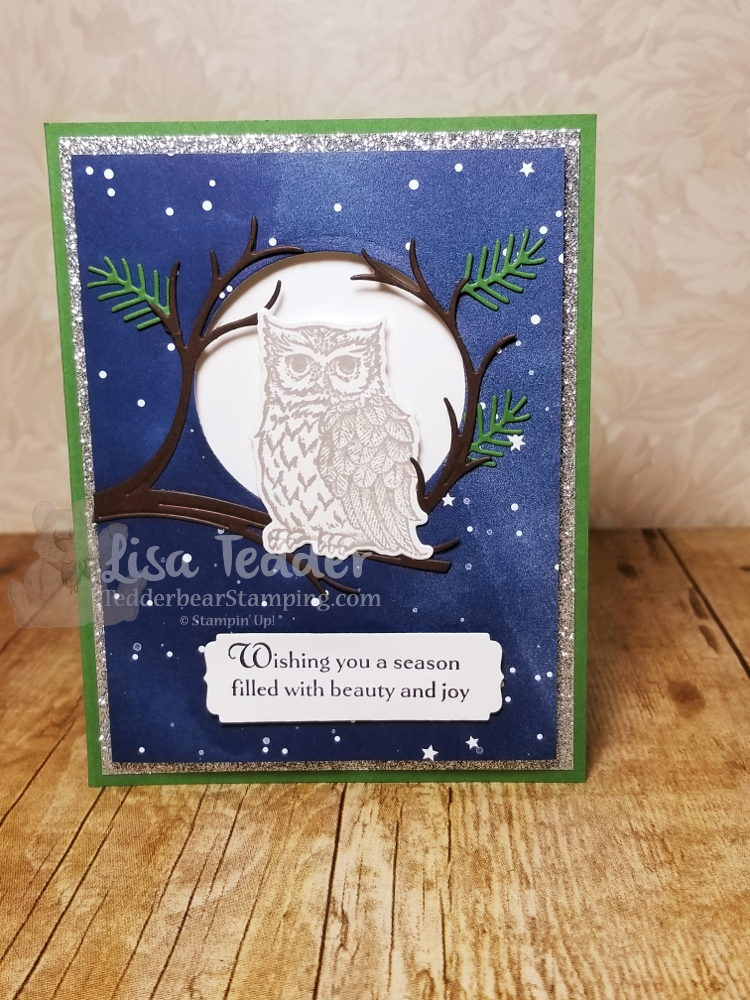
The owl in Still Night is one of my favorites. I love the dies in the bundle because not only does it cut out the owl & branch but it also cuts out pine boughs to make the branch look great! The set has 4 dies to cut out the boughs so you don’t spend all your time cutting one at a time!
Stamp sets: Still Night Bundle, Merry Christmas to All Cardstock: Garden Green 8 ½” x 5 ½”, scrap, Silver Glimmer 5 ¼” x 4”, Twinkle Twinkle DSP 5” x 3 ¾”, white 5 ¼” x 4”, 2 ¾” sq, 1 ¼” x 3” (sentiment), 1 ¾” x 2 ½” (owl) Early Espresso 3 ½”sq Inks: Night of Navy, Gray Granite Misc: Big Shot, Clear EP, Embossing buddy, heat tool, dimensionals, 2” circle punch, glue dots, fine tip glue pen
I would love to be your demonstrator if you live in the US! And you are MORE than welcome to join my team: LETs Stamp!
Below are all the supplies in picture form, click on any picture to be taken to my OnLine Store!
Thanks for stopping by, come again to see my next project!
Lisa Tedder
A California Girl living in North Carolina Product List
I am sharing with you my Christmas cards that I am doing with my classes in October. For my class my girls make 3 cards each of 5 different designs and one special card that they only make 1 of. They end up going home with 16 Christmas cards! We make a day of it, everyone brings food to share and we play Christmas songs! It’s a great way to get your Christmas cards done!
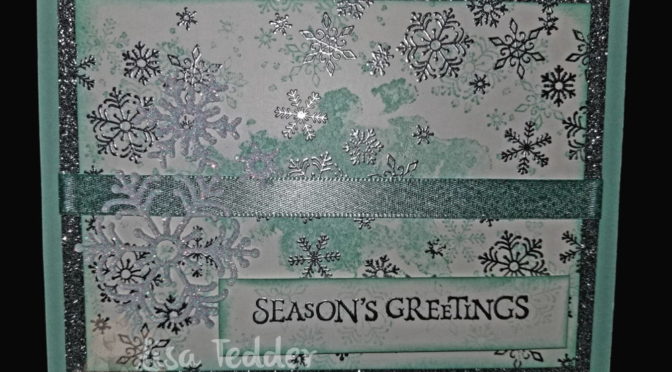
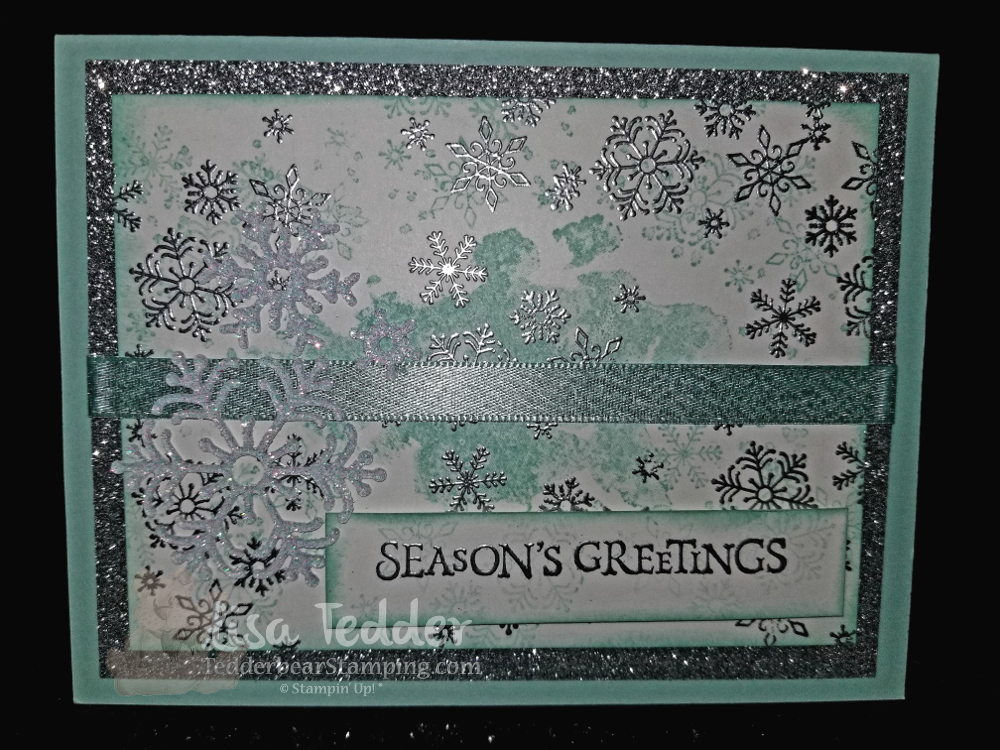
Here is the card that I am sharing with you today:
This is so pretty in person!
I LOVE Pool Party with Silver!
Here are the specifics:
Stamp Sets: Beautiful Blizzard Bundle Cardstock: Pool Party 8 ½” x 5 ½”, Silver Glitter Paper 5 ¼” x 4”, Whisper White 4 ¾” x 3 ½”, 4” x 5 ¼” (inside), 3 ¼” x ¾”, Sparkle Glimmer scrap for snowflakes Inks: Versamark, Pool Party Misc: Embossing Buddy, Heat tool, Silver EP, Pool Party Shimmer ribbon, Fine Tip Glue Pen, sponges
Below are all the supplies used in picture form. Just click on any of the pics and you will be taken to my OnLine Store! I would love to be your SU! Demonstrator if you live in the US.
Lisa Tedder
A California girl living in North Carolina Product List
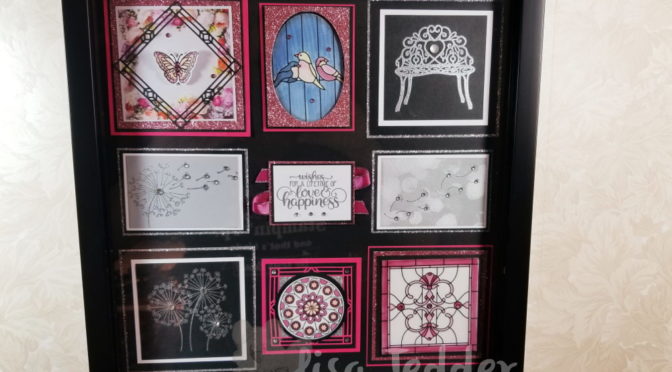
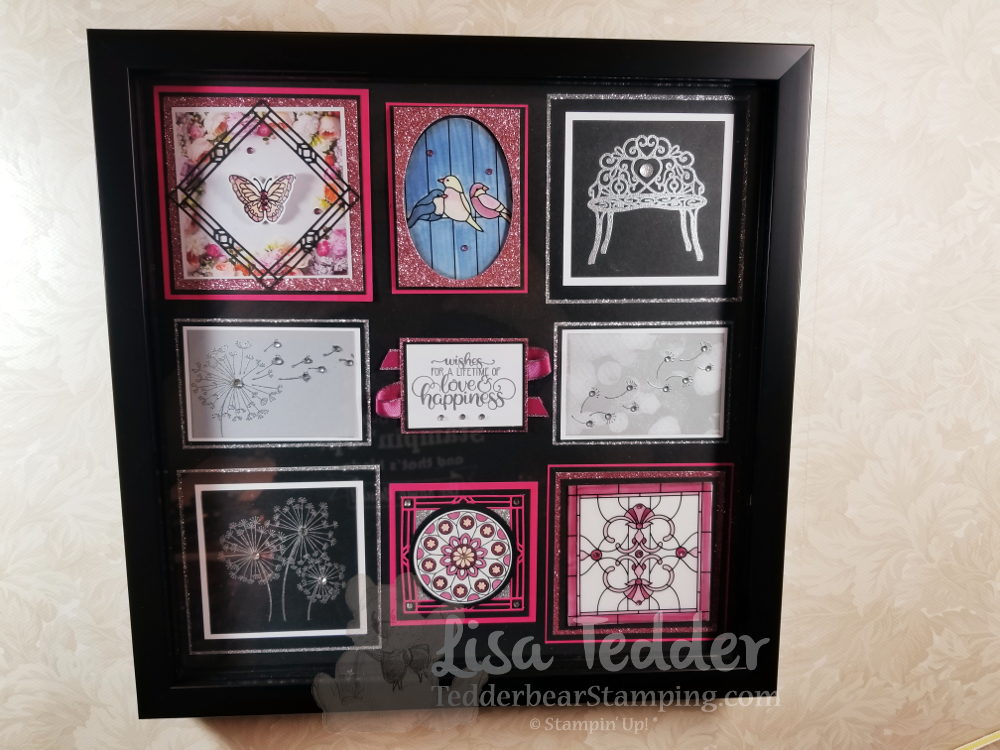
I made a video and at the end I showed this Shadow Box. I promised I would have the measurements here on my blog so if you want to make it you can!! It took a little longer than I promised, but at least I got it done! Here is a picture of the Shadow Box:
Here are all the Measurements:
Shadow Box Instructions:
Top Left:
Melon Mambo 3 7/8”sq, Black 3 5/8” sq, Rose Glimmer 3 ½” sq, DSP Petal Promenade 3 1/8”, black die cut 3” sq, Butterfly die cut colored w/blends add Wink of Stella. Add colored rhinestones.
Top Middle:
Melon Mambo 2 5/8” x 3 9/16”, Black 2 ½” x 3 7/16”, Rose Glimmer 3 ¼” x 2 3/8”, Vellum DSP cut out with oval framelit, colored on back with Blends, Foam adhesive on back of Glimmer.
Top Right:
Silver Glimmer 4” sq, Black 3 ¾” sq, White 3 ¼” sq, Black 2 7/8” sq, stamp bench in Versamark and emboss with Silver EP, add Clear Faceted Gem in heart.
Left Center:
Silver Glimmer 3 5/8” x 2 9/16”, Black 3 1/2” x 2 3/8”, White 3 3/8”, Smoky Slate 3 1/8” x 2 1/8”, Stamp Dandelion in Versamark and emboss with Silver EP. Add Rhinestones
Center:
Rose Glimmer 2 ½” x 1 7/8”, Black 2 3/8” x 1 ¾”, White 2 5/16” x 1 11/16, stamp sentiment with Versamark then emboss with silver, add rhinestones. Under this square crisscross the Berry Burst Metallic Edge Ribbon.
Right Center:
Silver Glimmer 3 5/8” x 2 9/16”, Black 3 1/2” x 2 3/8”, White 3 3/8”, Ink up Bokeh stamp with Smoky Slate, stamp on White. Stamp fly away Dandelions using Versamark emboss with silver. Add Rhinestones
Left Bottom:
Silver Glimmer 3 7/8” sq, Black 3 ¾” sq, White 3 1/4” sq, Black 3” sq. Stamp Dandelions in Versamark emboss with Silver, add rhinestones.
Bottom Center:
Melon Mambo 3” sq, Black 2 ¾” sq, Melon Mambo die cut 3” sq, Silver 1 15/16” sq, Black Circle 2 ¼” punch, White Shimmer 2” circle punch STAMP FIRST, THEN PUNCH OUT!!! Color with Blends, add Rhinestones.
Bottom Right:
Melon Mambo 3 7/8” sq, Black 3 ¾” sq, Rose Glimmer 3 ½” sq, Black 3 ¼” sq, White 3” sq, Vellum DSP 3” sq. Add colored Rhinestones. Color back of Vellum with Blends.
All the Supplies I used are listed below. Click on any of the pictures to be taken to my OnLine Store!
Hope you enjoy this project as much as I do!!
Lisa Tedder
A California Girl living in North Carolina Product List
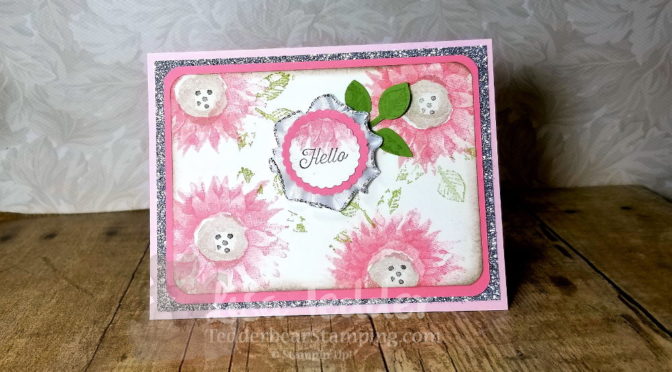
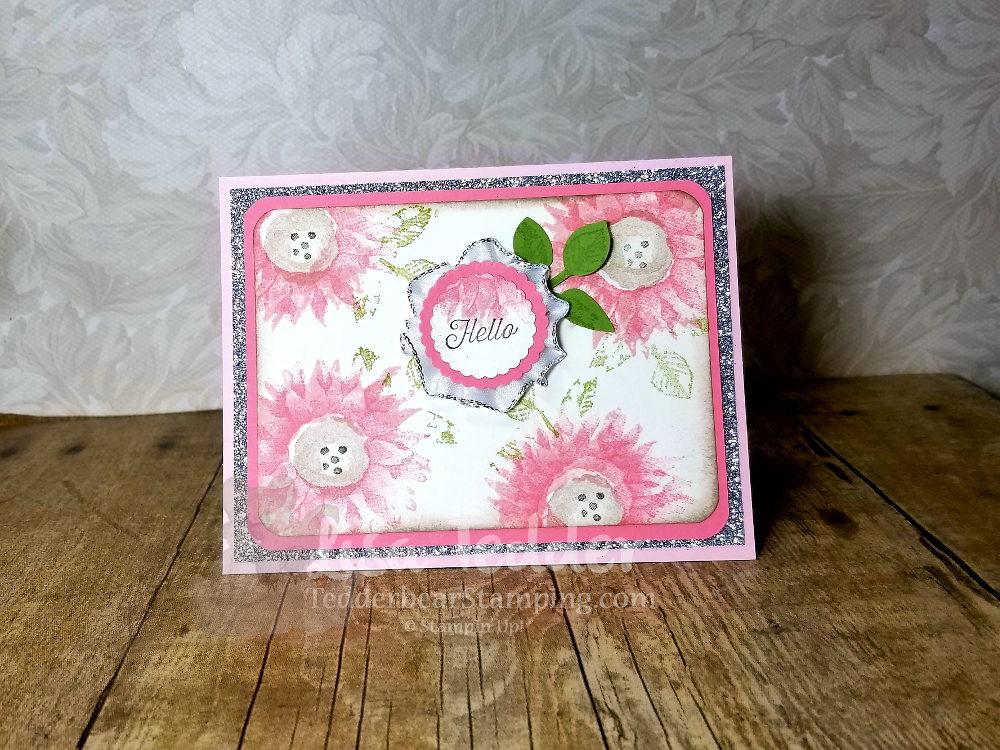
Today I bring you a handmade card that I just LOVE! It uses the Stamp set from Stampin’ Up! called Painted Harvest.
This elegant card has sparkle and dimension. When I show this to people in person, they just say WOW! Love when that happens.
Here is the inside:
A simple card with Maximum effect. I used the Metallic Edge Ribbon to pleat around the sentiment to add to the effect.
Dimensions:
Blushing Bride 5 1/2″ x 8 1/2″
Silver Slimmer paper 5 1/4″ x 4″
Flirty Flamingo 5 1/4″ x 4″ (inside), 5″ x 3 3/4″ (front)
Very Vanilla 4 3/4″ x 3 1/2″ (front), 5″ x 3 3/4″ (inside)
I rounded the corners on the two smallest layers on the front to add dimension.
I would appreciate it so much if you would choose me as your demonstrator if you live in the US! Click on any picture below to be taken to my OnLine Store!
Lisa Tedder
A California girl living in North Carolina Product List
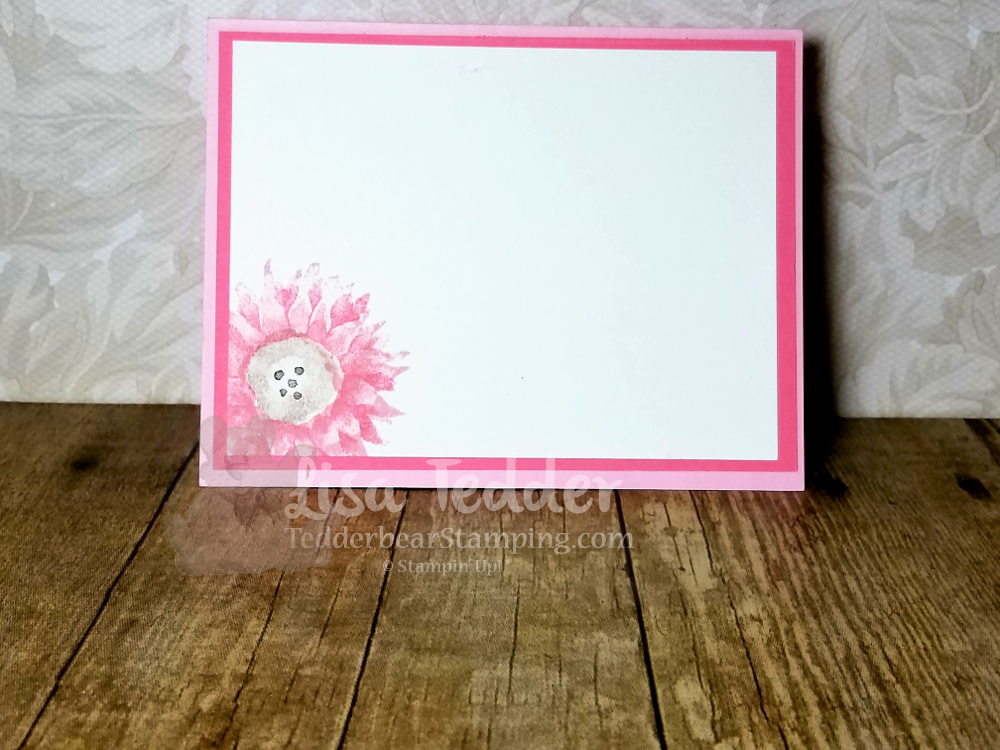
I am sharing with you a card that I made for a swap that I signed up for where I made 20 of these cards (below) and received 20 different swaps back!
Here is my card:
I think I love this stamp set so much because it reminds me of Disney and being a kid. Below I will have all the supplies listed to make this card, just click on any of the pictures to be taken to my OnLine Store.
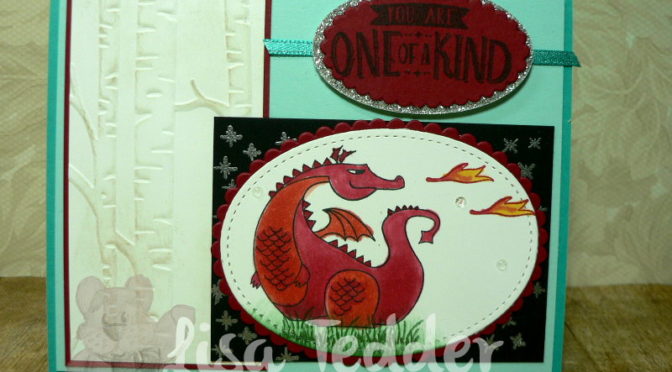
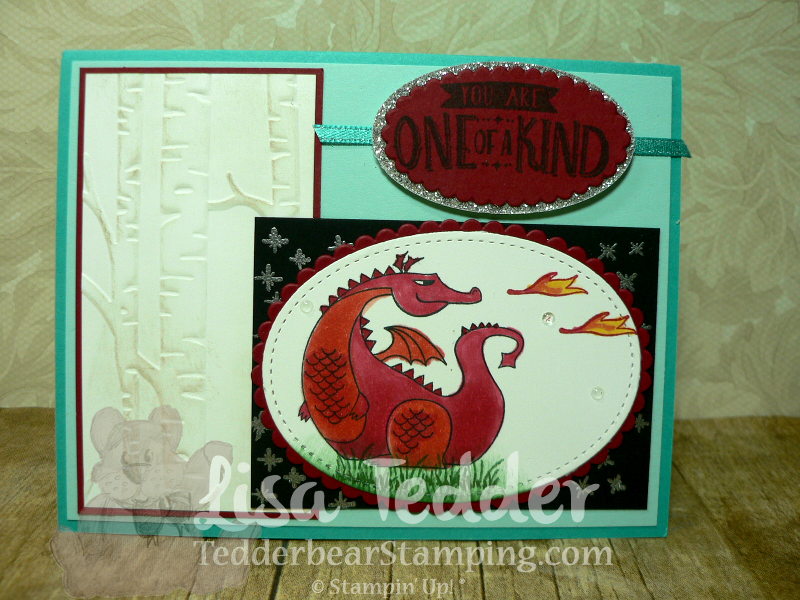
I also used the Stamp set In the Trees by Stampin’ Up! for the grass under the dragon. I stamped the ‘Magic stars’ in Versamark on the Black and then embossed it with Silver Embossing powder. I thought it added just that right sense of MAGIC!!
The dimensions for this card are as follows:
Bermuda Bay Base: 8 1/2″ x 5 1/2″
Soft Sky: 5 1/4″ x 4″
Cherry Cobbler: 2 1/8″ x 3 7/8″, scrap for scalloped Ovals
Whisper White: 2″ 3 3/4″, scrap for Stitched Shape Oval
Basic Black 2 1/2″ x 3 1/2″
Silver Glimmer Paper: scrap for Oval
I hope this helps you if you want to recreate this card! I had a lot of fun making it!
Lisa Tedder
A California Girl living in North Carolina Product List
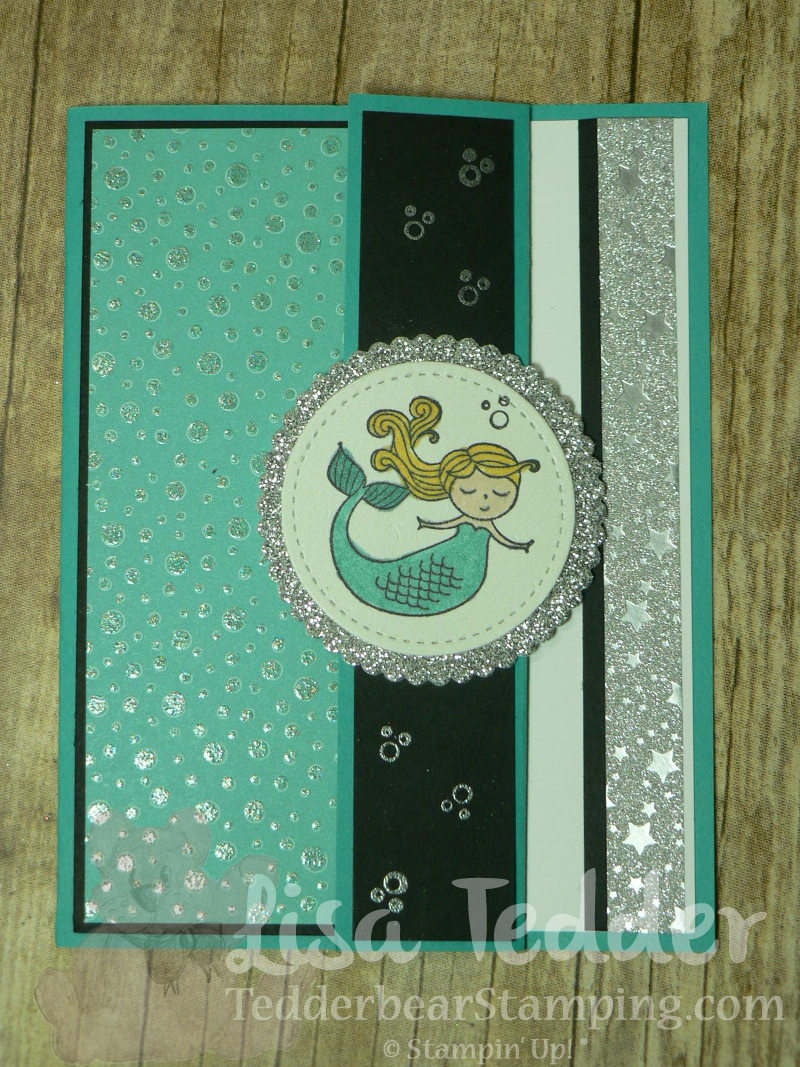
Today I am sharing with you a couple of cards that I made for my YouTube Channel. I have a very simple fold but the cards are stunning! You can see the video here!
While I was at OnStage in Salt Lake City in UT I got to see first hand cards that were made using this set!! I fell in LOVE!
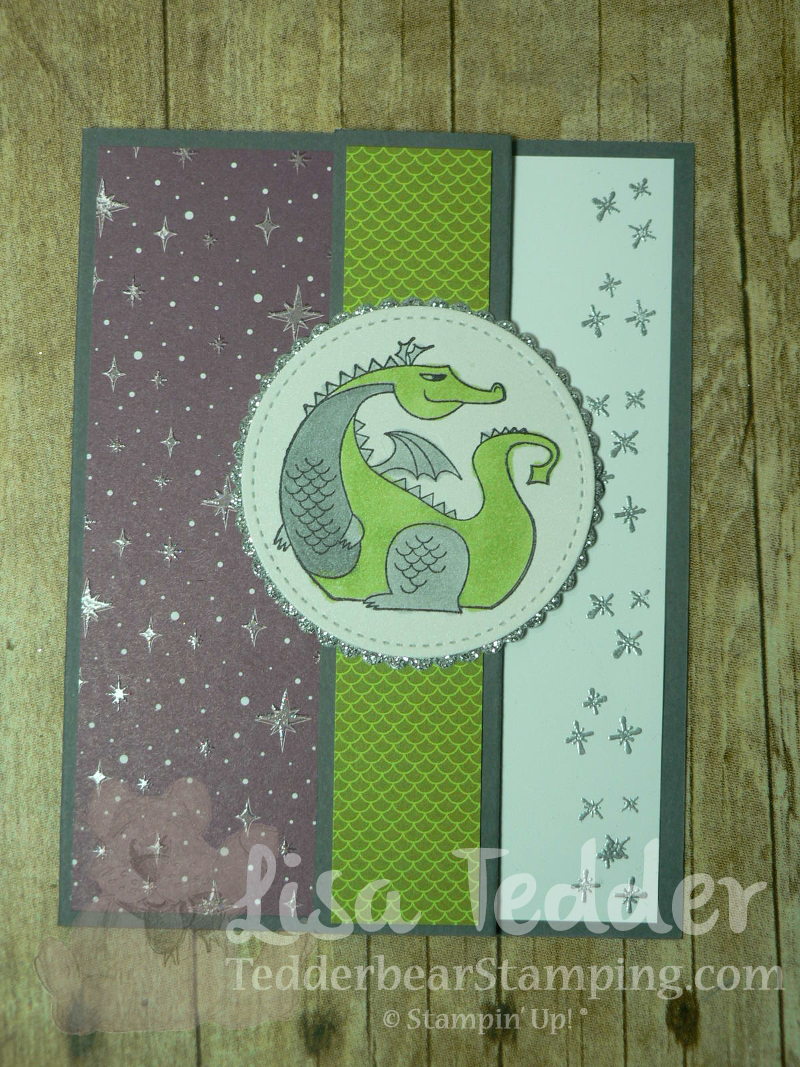
Here is the front of my card:
The Designer Series Paper (DSP) is called Myths & Magic, it is embossed and GORGEOUS!! ON the Video you can see how shiny and beautiful they are!
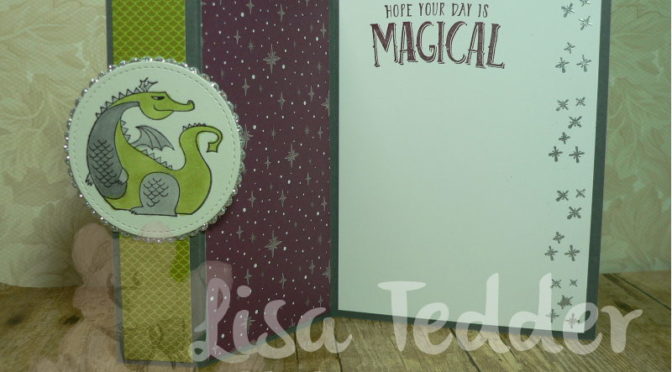
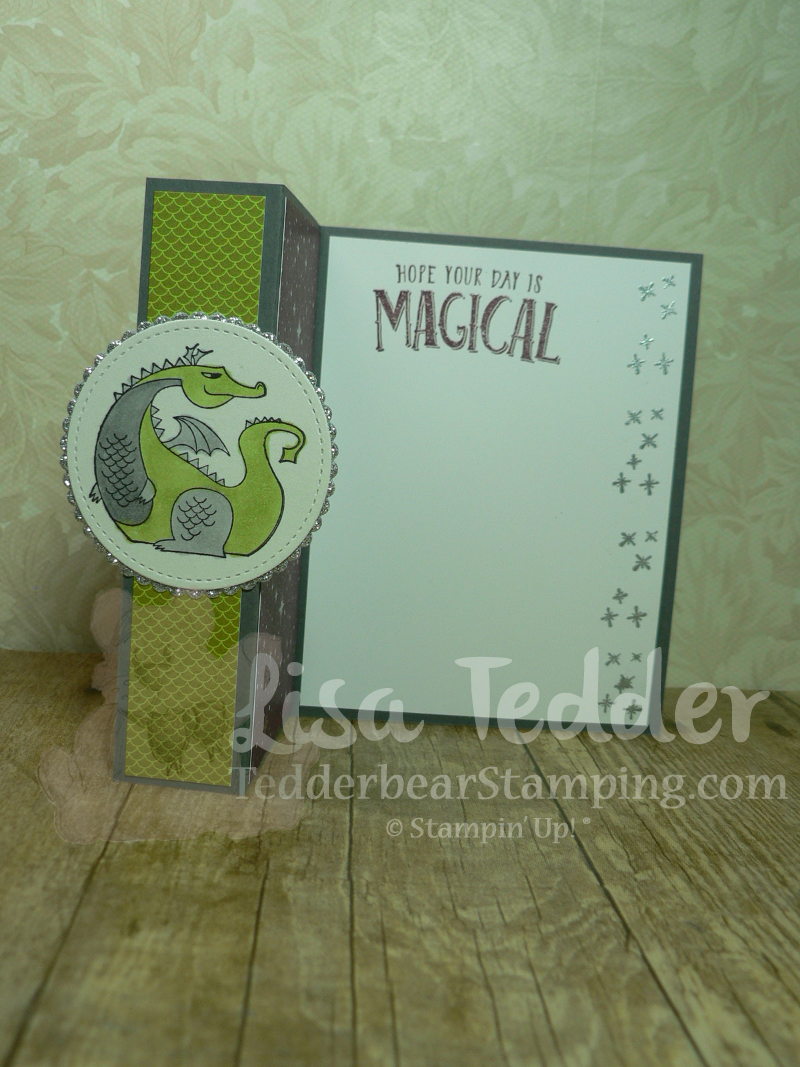
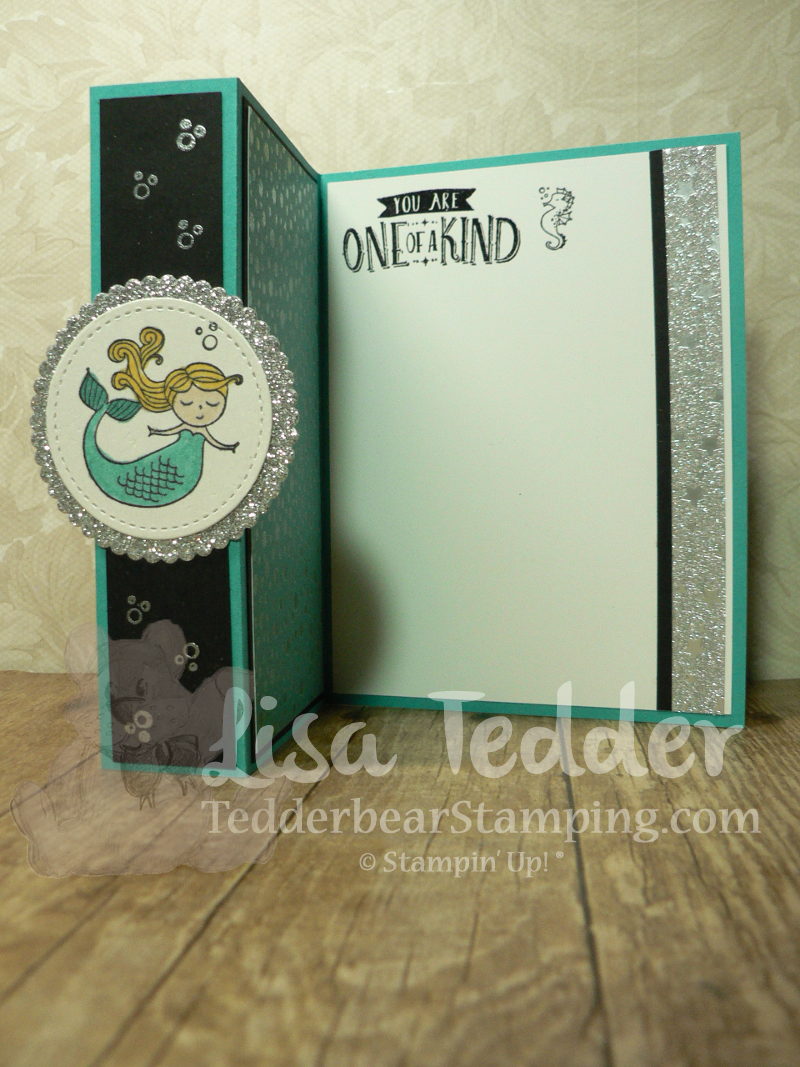
Here it is partially open:
I embossed the ‘sparkles’ on the side using Silver embossing powder.
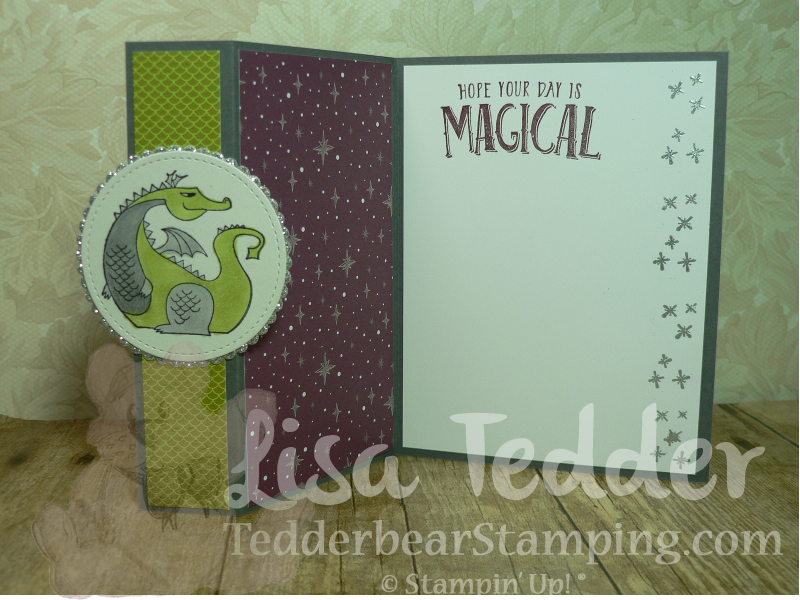
Here is this card open all the way, isn’t it pretty!!?
I used Stampin’ Blends, and just love this card so much!!
Now, here is the other card, same design, different stamps!
I used the Myths & Magic Washi Tape on the side, isn’t it gorgeous!?
I am already planning on ordering MORE of this DSP and Washi Tape!
Well? Do you love it?! If you want a catalog, just let me know and I will get it to you!!
Click on any picture below and you will be taken to my OnLine Store!
Have a great day!
Lisa Tedder
A California girl living in North Carolina Product List


 Mini Striped Ribbon")


 Designer Series Paper")


 Designer Vellum")


 Metallic-Edge Ribbon")


 Circle Punch")


 Scallop Circle Punch")
 Scallop Circle Punch")


 Shimmer Ribbon Pack")