Happy New Year! Hope you had a great Christmas and New Year. I’m excited to see what the New Year Brings, are you?
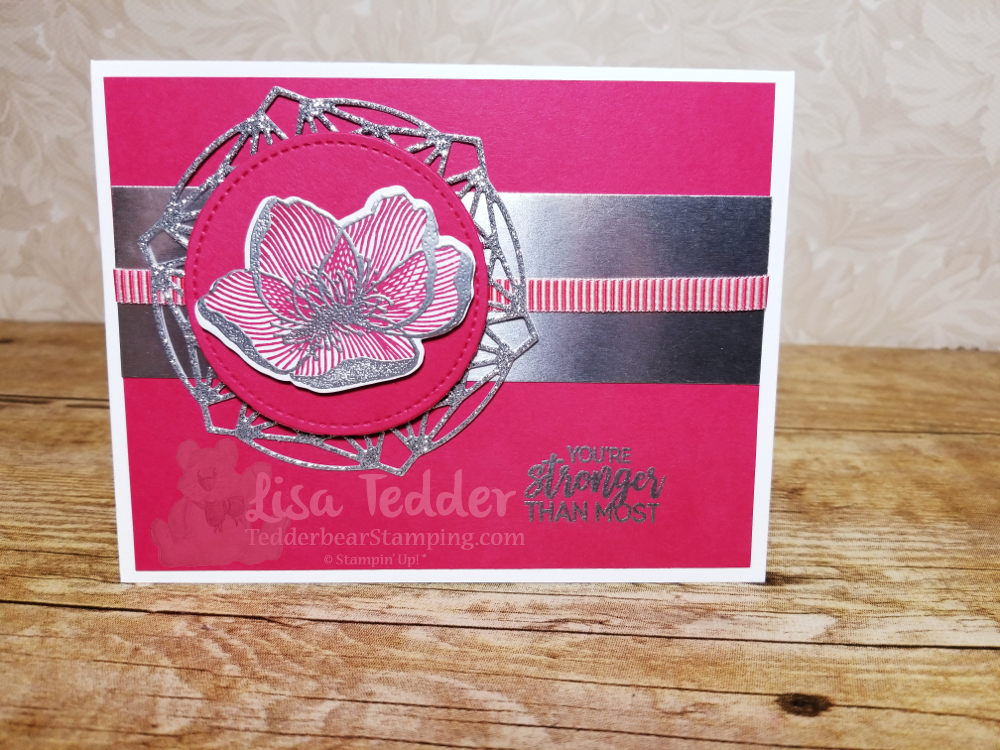
Here is another card that I saw on Pinterest that I HAD to copy! The idea came from Robyn Cardon, I added the ribbon/changed the color, but the rest of the idea came from her!
This is my first time using the New Lovely Lipstick in the In Colors. I really like it! The picture makes it look more like Melon Mambo, but it has more red than pink to it.
I used Silver Embossing powder to make it pop, and added the ribbon.
Here are the particulars for this card:
Stamp Sets
Beautiful Promenade Bundle
Paper
Whisper White Thick 8 1/2″ x 5 1/2″
Lovely Lipstick 5 1/4″ x 4″ (x2), 3″ sq
Silver Glimmer 3 1/2″ sq
Silver Foil 1 1/2″ x 5 1/4″
Whisper White 5″ x 3 3/4″, scrap flower
Inks
Versamark
Lovely Lipstick
Accessories
Silver EP/ Embossing Buddy/ Heat tool
Big Shot
Poppy Parade Mini Striped Ribbon
Dimensionals
All of the pictures below show the supplies used, click on any of them and you will be taken to my OnLine Store! All Online purchases receive a gift from me!
If you are considering joining the SU! Family, I would love to be your Team Leader!
Hope you enjoyed my share for today! Hope to see you back soon!
Lisa Tedder
A California Girl living in North Carolina
I am sharing with you my Christmas cards that I am doing with my classes in October. For my class my girls make 3 cards each of 5 different designs and one special card that they only make 1 of. They end up going home with 16 Christmas cards! We make a day of it, everyone brings food to share and we play Christmas songs! It’s a great way to get your Christmas cards done!
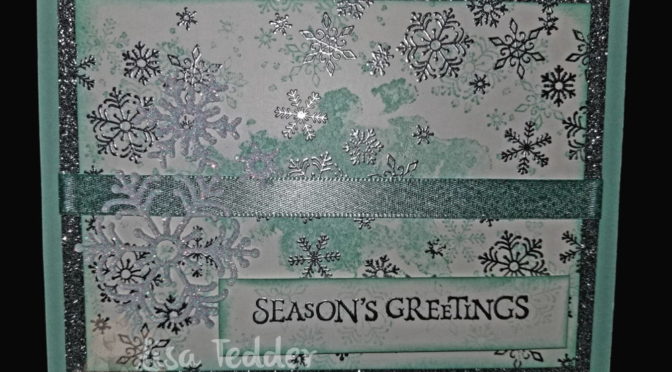
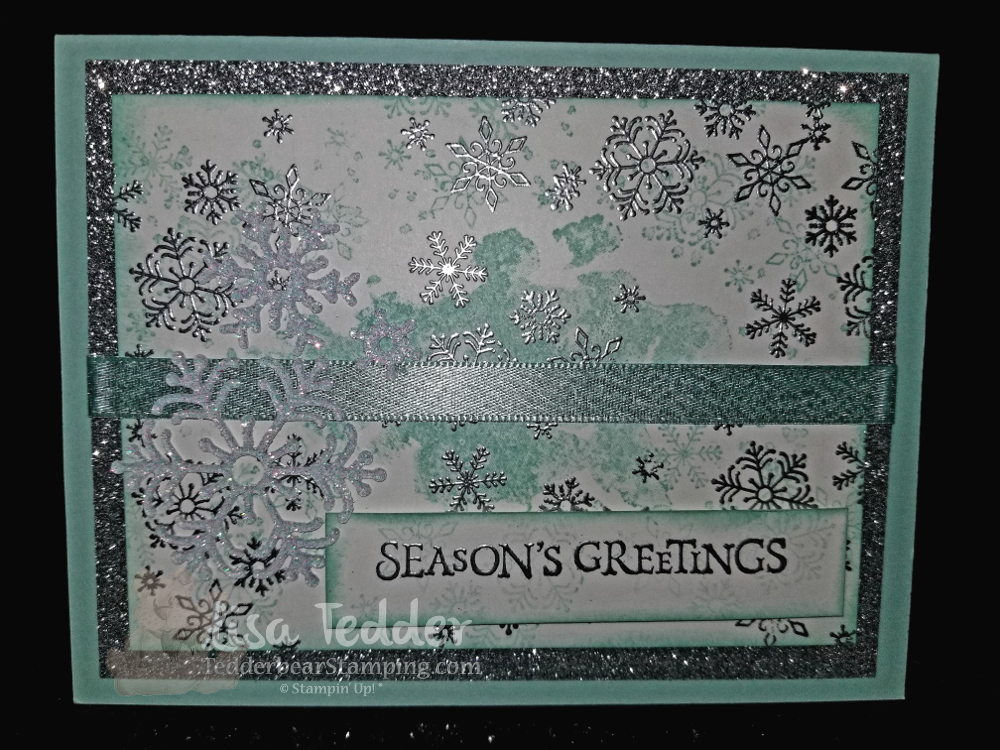
Here is the card that I am sharing with you today:
This is so pretty in person!
I LOVE Pool Party with Silver!
Here are the specifics:
Stamp Sets: Beautiful Blizzard Bundle Cardstock: Pool Party 8 ½” x 5 ½”, Silver Glitter Paper 5 ¼” x 4”, Whisper White 4 ¾” x 3 ½”, 4” x 5 ¼” (inside), 3 ¼” x ¾”, Sparkle Glimmer scrap for snowflakes Inks: Versamark, Pool Party Misc: Embossing Buddy, Heat tool, Silver EP, Pool Party Shimmer ribbon, Fine Tip Glue Pen, sponges
Below are all the supplies used in picture form. Just click on any of the pics and you will be taken to my OnLine Store! I would love to be your SU! Demonstrator if you live in the US.
Lisa Tedder
A California girl living in North Carolina Product List
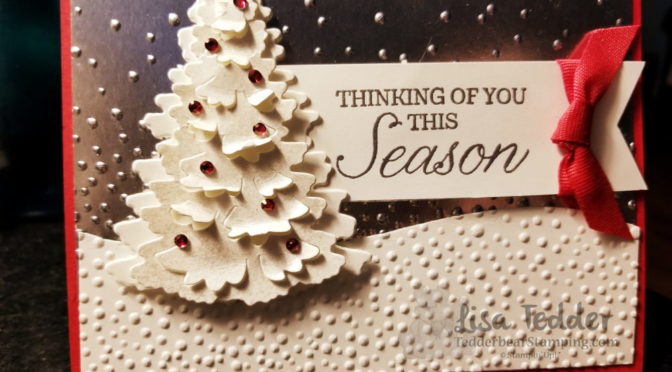
The Christmas card I’m sharing with you today was CASE’d from Sharon Armstrong. Since I have so many Christmas card classes it is great when I come across a card that’s so pretty I don’t have to do a lot of designing. Here is the card:
Isn’t this pretty?! My class is going to love this! I spritzed the Tree with White Shimmer Paint mixed with Alcohol, using the SU! Spritzer. It really looks shimmery in person!
Here are the specifics:
Supplies
Stamp Sets: Winter Woods Bundle, Timeless Tidings Cardstock: Real Red 8 ½” x 5 ½”, Whisper White 5 ¼” x 4”, 2 ¾” x 5 ¼” (you will get two out of one sheet, share please), 3 ¾” x 5 ¼” (you can cut out both pieces of the tree with this one sheet), 1 ¼” x 4 ¼”, Silver Foil 5 ¼” x 4” Inks: Versamark, Real Red Misc: Red Rhinestones, Softly Falling Embossing Folder, Real Red 3/8” Cotton ribbon, Frost White Shimmer Paint, Stampin’ Spritzer, rubbing alcohol, Dimensionals, glue dots
The pictures below will take you to my OnLIne Store! If you are looking for a Demo here in the US, I would LOVE to be that person!
I’m getting ready for Hurricane Florence so I need to let you go. Hope you enjoyed this post!
Check back in to see the other Christmas Cards for my classes!
Lisa Tedder
A California girl living in North Carolina Product List
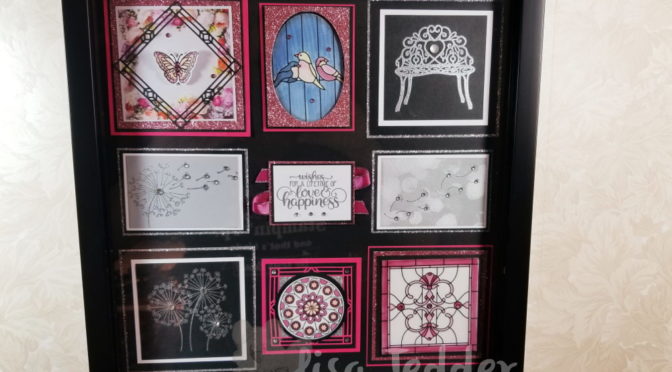
I made a video and at the end I showed this Shadow Box. I promised I would have the measurements here on my blog so if you want to make it you can!! It took a little longer than I promised, but at least I got it done! Here is a picture of the Shadow Box:
Here are all the Measurements:
Shadow Box Instructions:
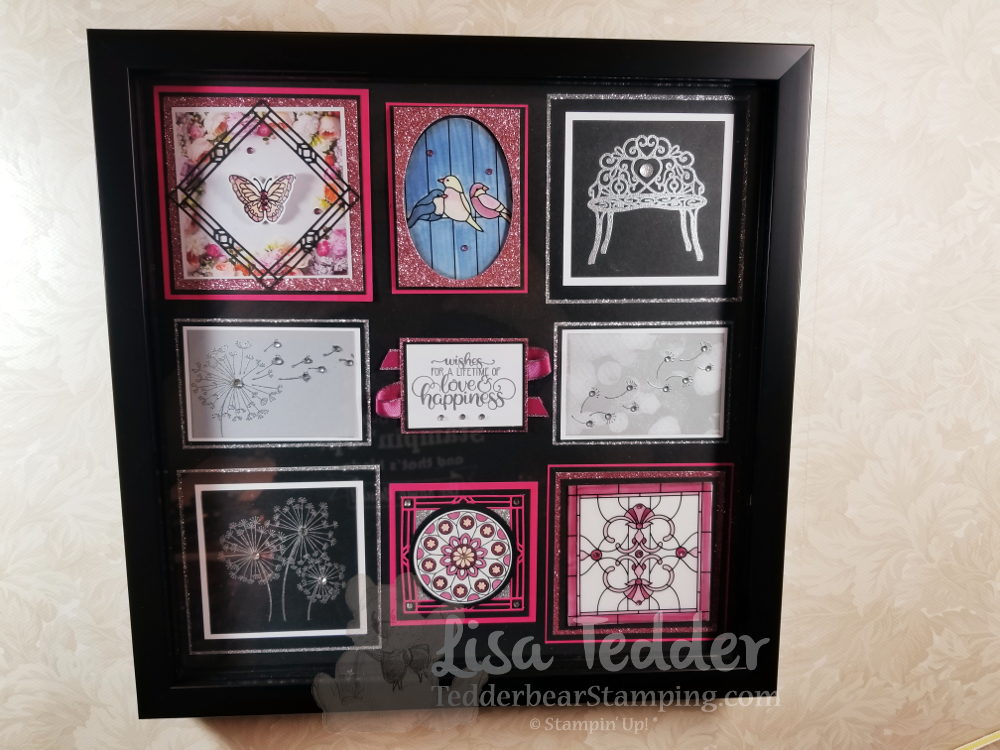
Top Left:
Melon Mambo 3 7/8”sq, Black 3 5/8” sq, Rose Glimmer 3 ½” sq, DSP Petal Promenade 3 1/8”, black die cut 3” sq, Butterfly die cut colored w/blends add Wink of Stella. Add colored rhinestones.
Top Middle:
Melon Mambo 2 5/8” x 3 9/16”, Black 2 ½” x 3 7/16”, Rose Glimmer 3 ¼” x 2 3/8”, Vellum DSP cut out with oval framelit, colored on back with Blends, Foam adhesive on back of Glimmer.
Top Right:
Silver Glimmer 4” sq, Black 3 ¾” sq, White 3 ¼” sq, Black 2 7/8” sq, stamp bench in Versamark and emboss with Silver EP, add Clear Faceted Gem in heart.
Left Center:
Silver Glimmer 3 5/8” x 2 9/16”, Black 3 1/2” x 2 3/8”, White 3 3/8”, Smoky Slate 3 1/8” x 2 1/8”, Stamp Dandelion in Versamark and emboss with Silver EP. Add Rhinestones
Center:
Rose Glimmer 2 ½” x 1 7/8”, Black 2 3/8” x 1 ¾”, White 2 5/16” x 1 11/16, stamp sentiment with Versamark then emboss with silver, add rhinestones. Under this square crisscross the Berry Burst Metallic Edge Ribbon.
Right Center:
Silver Glimmer 3 5/8” x 2 9/16”, Black 3 1/2” x 2 3/8”, White 3 3/8”, Ink up Bokeh stamp with Smoky Slate, stamp on White. Stamp fly away Dandelions using Versamark emboss with silver. Add Rhinestones
Left Bottom:
Silver Glimmer 3 7/8” sq, Black 3 ¾” sq, White 3 1/4” sq, Black 3” sq. Stamp Dandelions in Versamark emboss with Silver, add rhinestones.
Bottom Center:
Melon Mambo 3” sq, Black 2 ¾” sq, Melon Mambo die cut 3” sq, Silver 1 15/16” sq, Black Circle 2 ¼” punch, White Shimmer 2” circle punch STAMP FIRST, THEN PUNCH OUT!!! Color with Blends, add Rhinestones.
Bottom Right:
Melon Mambo 3 7/8” sq, Black 3 ¾” sq, Rose Glimmer 3 ½” sq, Black 3 ¼” sq, White 3” sq, Vellum DSP 3” sq. Add colored Rhinestones. Color back of Vellum with Blends.
All the Supplies I used are listed below. Click on any of the pictures to be taken to my OnLine Store!
Hope you enjoy this project as much as I do!!
Lisa Tedder
A California Girl living in North Carolina Product List
I’ve been showing you the 6 Christmas Cards that I have done for my Christmas in July stamp class. We are now on card #4! If you missed any of the ones before, click on my header and you can find them that way.
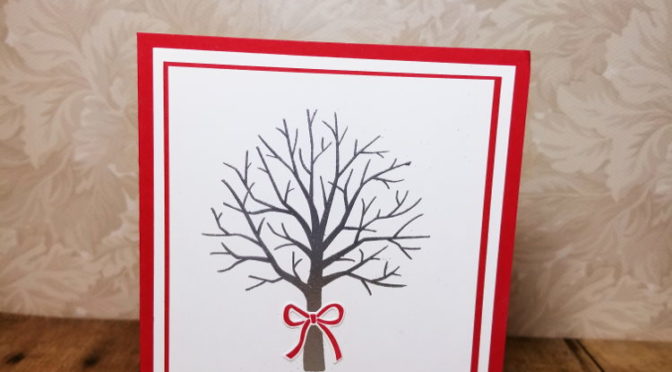
The card today is using Sheltering Tree from Stampin’ Up!
Here is the front of the card:
We Stamped the tree in Versamark and then embossed it with Silver Embossing Powder. It’s quite beautiful in person! The bow is from the Stamp set Beautiful Bouquet from SU! as well.
I got this idea on Pinterest by Bibi Cameron, I changed up a little by using a different sentiment and bow, but the idea was hers! Thank you Bibi!
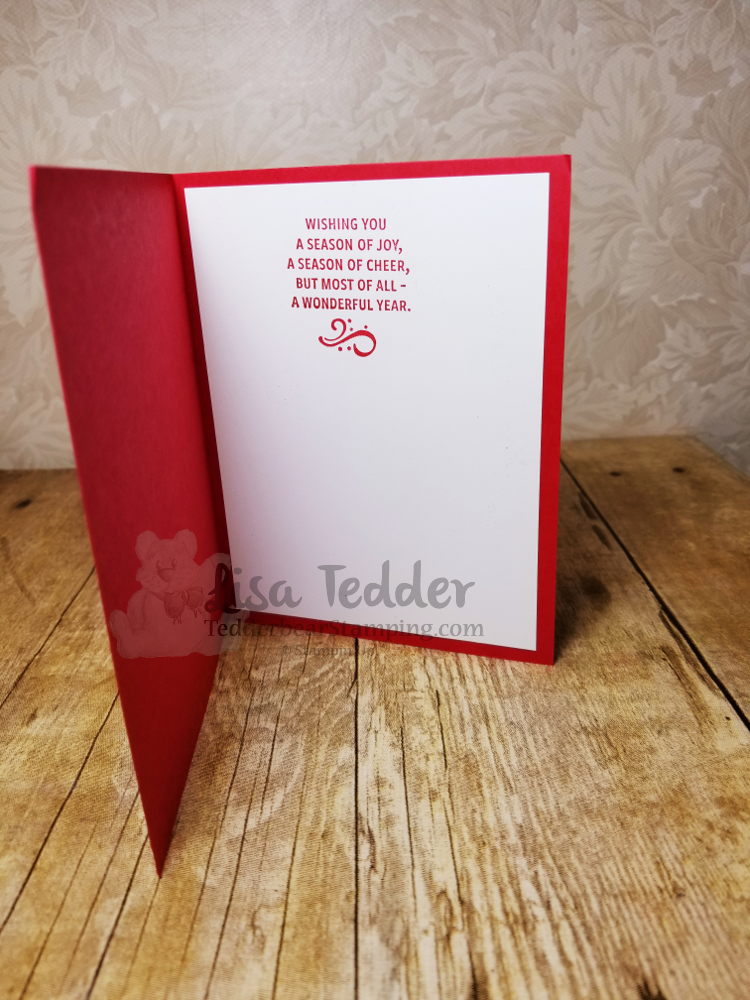
Here is the inside:
VERY easy yet extremely beautiful and elegant! Everyone in class loved this!
The supplies are listed below, click on any picture to be taken to my OnLine Store!
Come back for card # 5! Thanks for stopping by!
Lisa Tedder
A California girl living in North Carolina Product List
Today I am sharing with you a couple of cards that I made for my YouTube Channel. I have a very simple fold but the cards are stunning! You can see the video here!
While I was at OnStage in Salt Lake City in UT I got to see first hand cards that were made using this set!! I fell in LOVE!
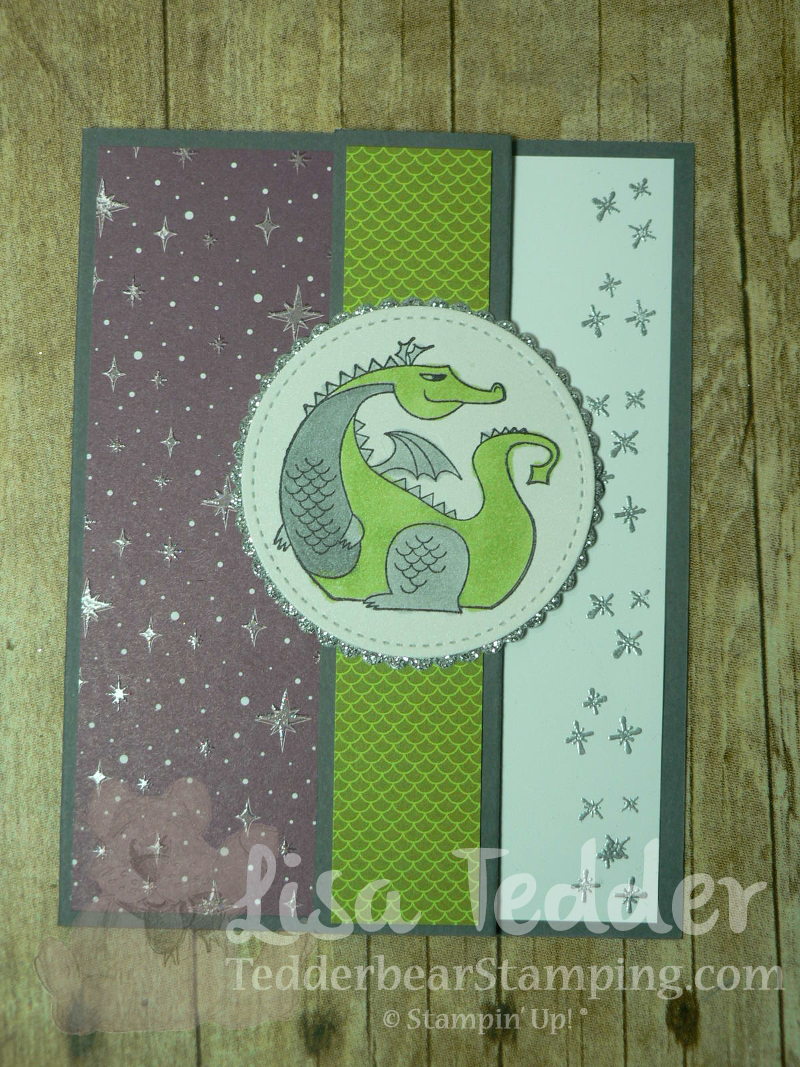
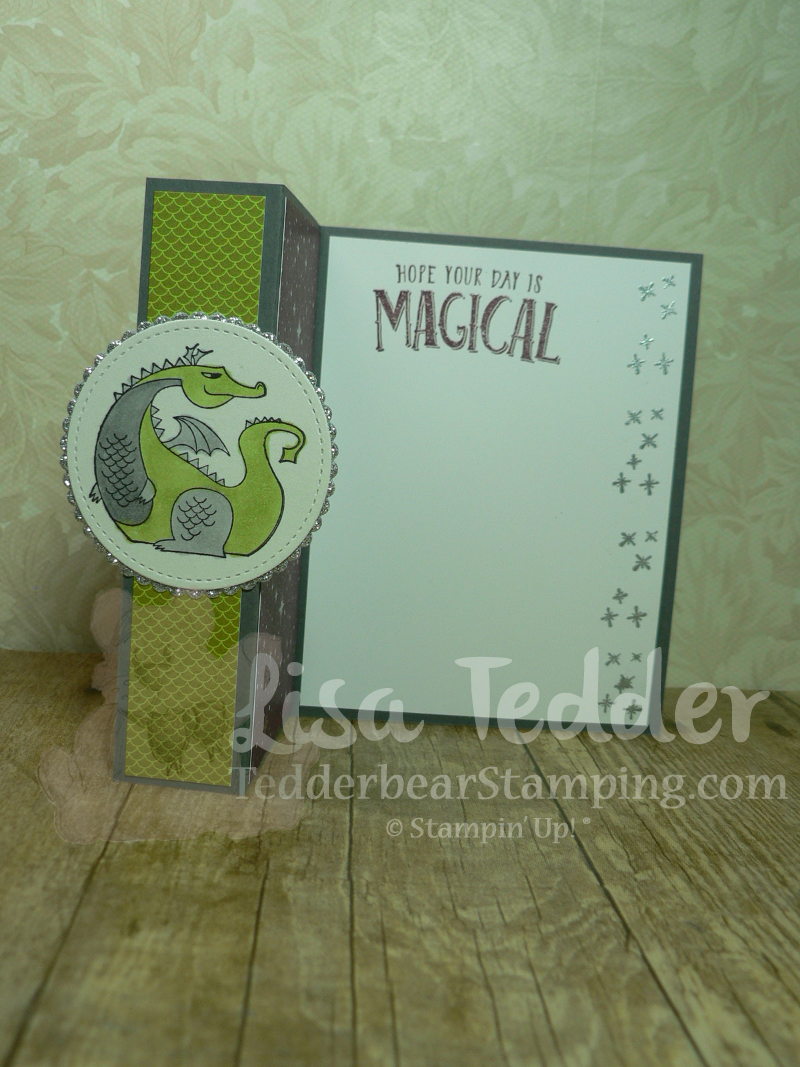
Here is the front of my card:
The Designer Series Paper (DSP) is called Myths & Magic, it is embossed and GORGEOUS!! ON the Video you can see how shiny and beautiful they are!
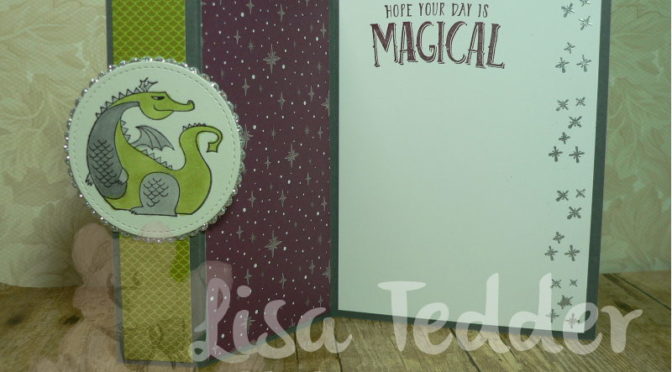
Here it is partially open:
I embossed the ‘sparkles’ on the side using Silver embossing powder.
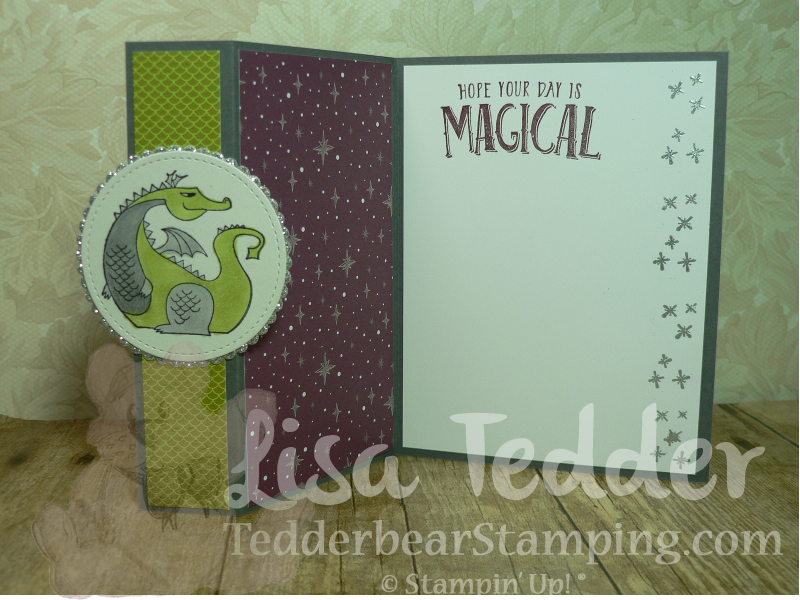
Here is this card open all the way, isn’t it pretty!!?
I used Stampin’ Blends, and just love this card so much!!
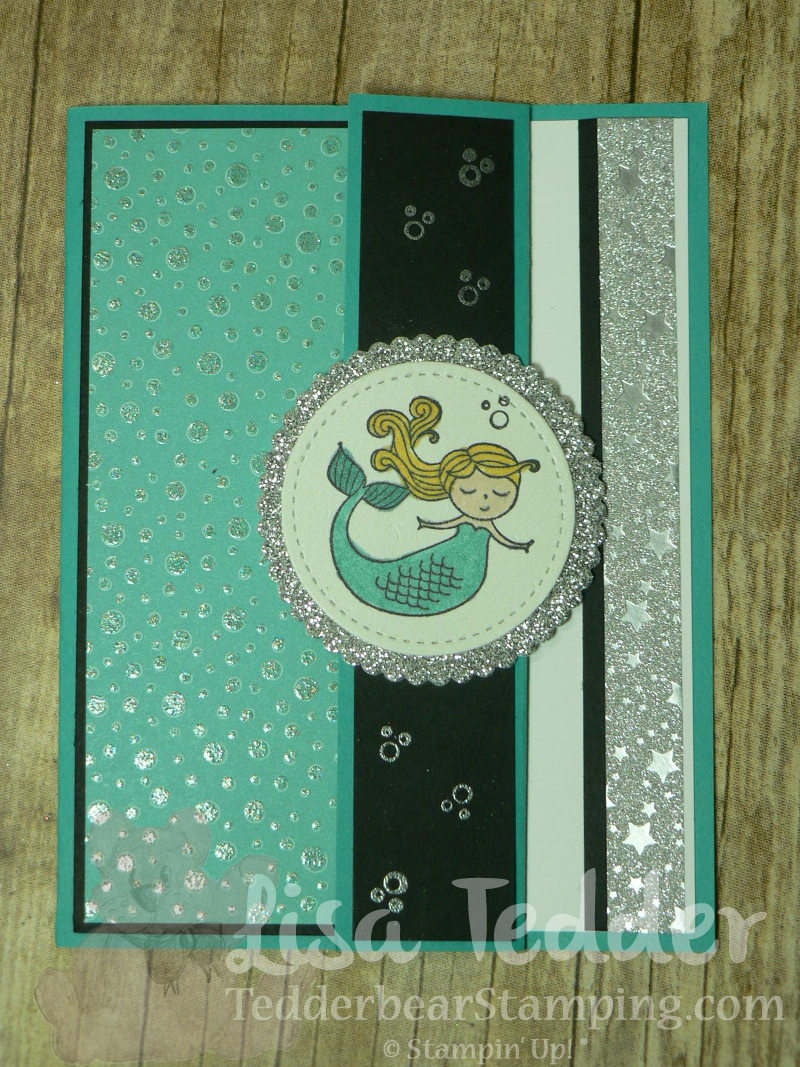
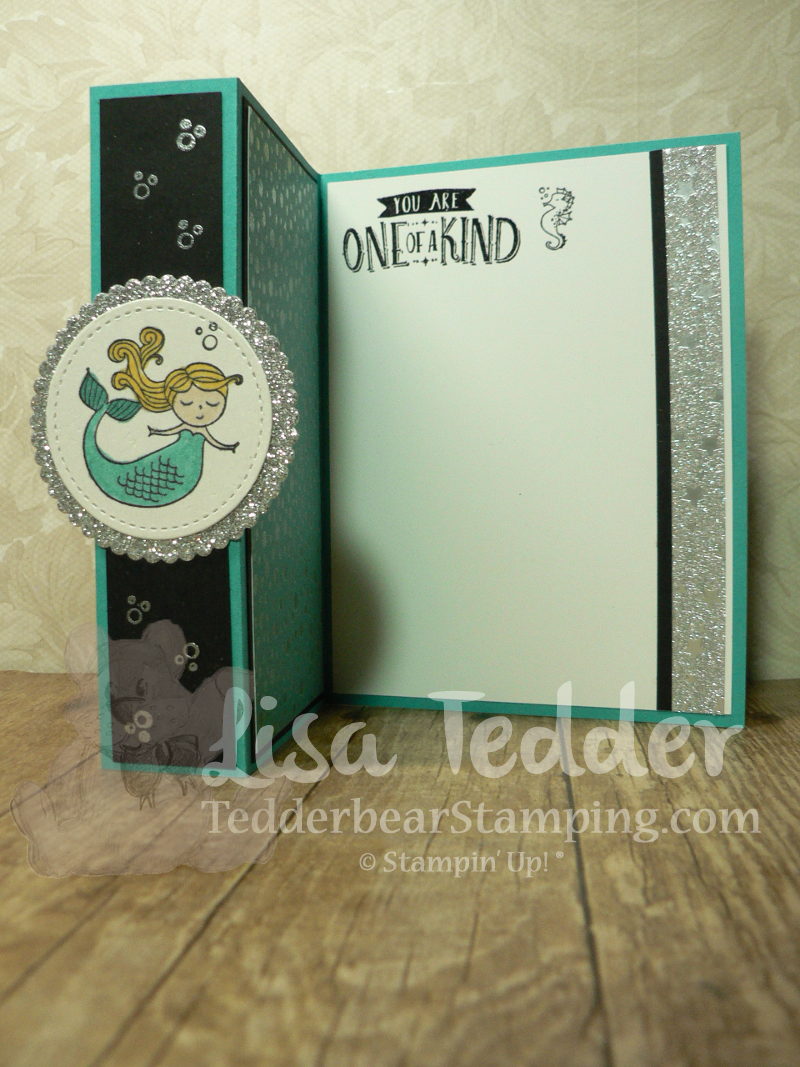
Now, here is the other card, same design, different stamps!
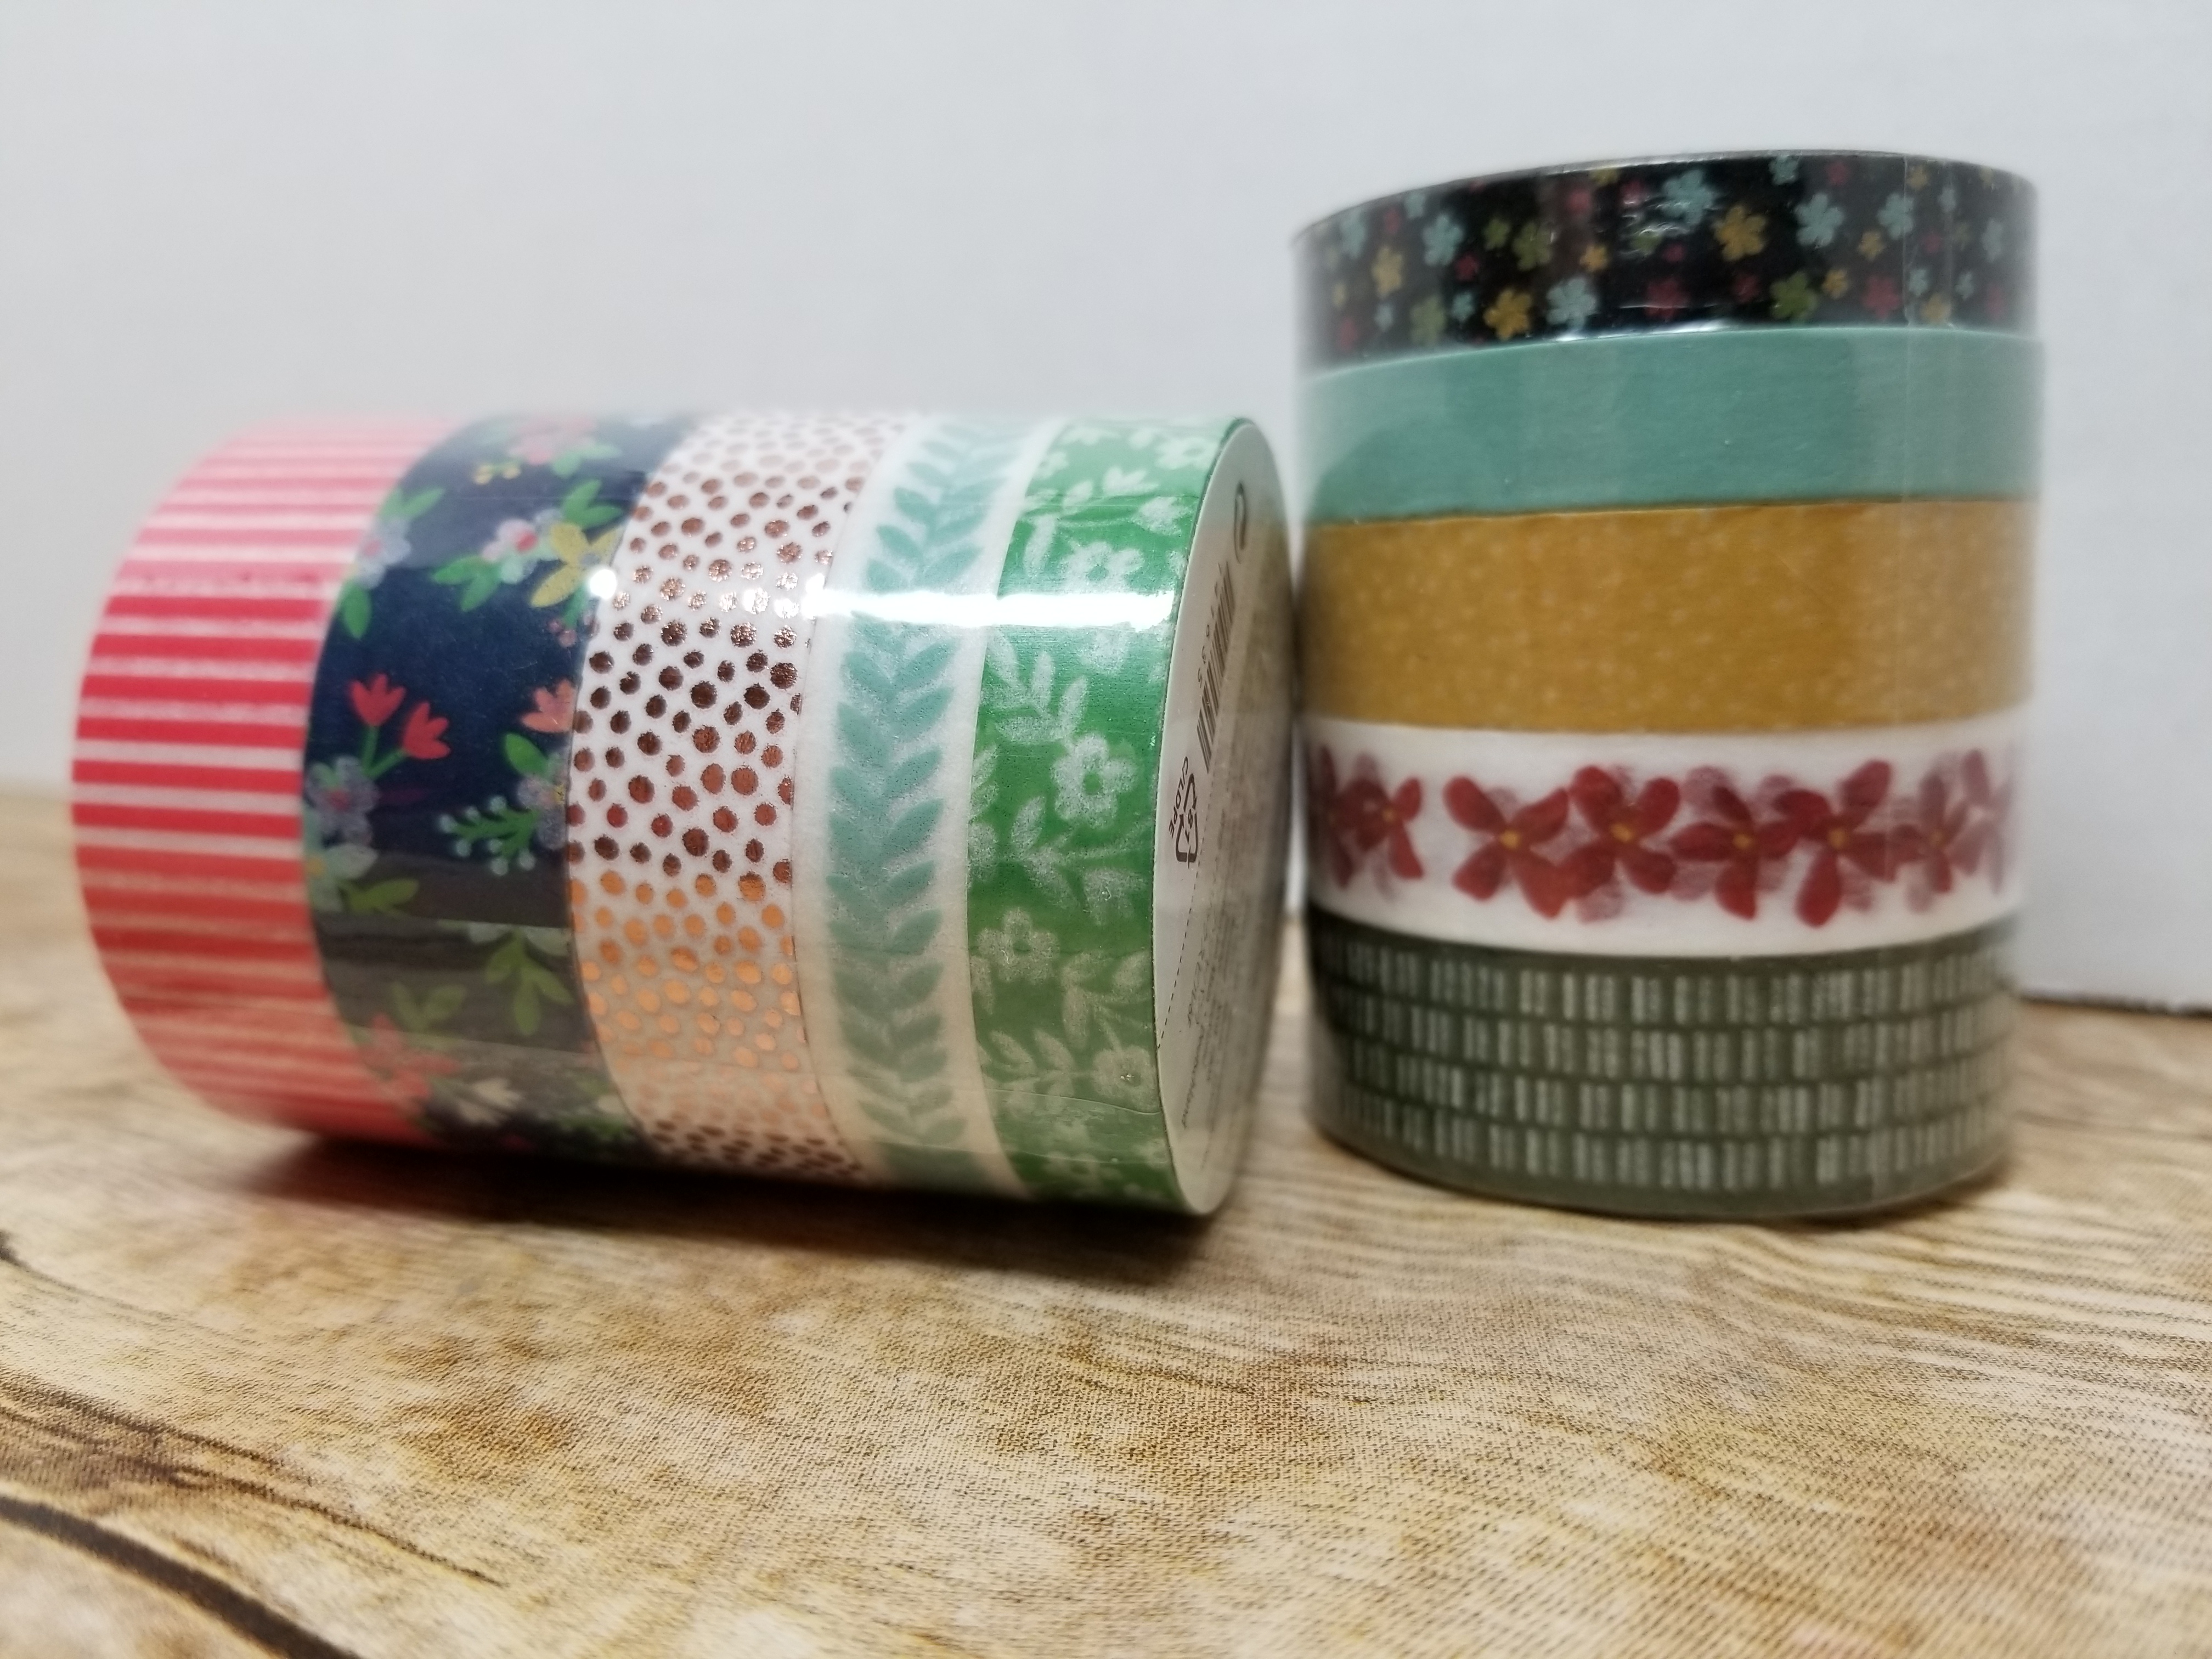
I used the Myths & Magic Washi Tape on the side, isn’t it gorgeous!?
I am already planning on ordering MORE of this DSP and Washi Tape!
Well? Do you love it?! If you want a catalog, just let me know and I will get it to you!!
Click on any picture below and you will be taken to my OnLine Store!
Have a great day!
Lisa Tedder
A California girl living in North Carolina Product List
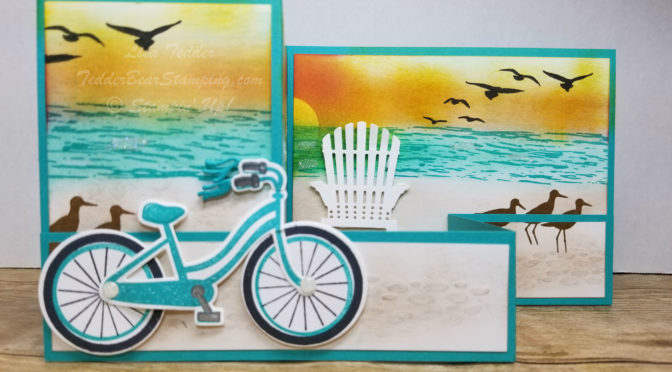
I was perusing Pinterest seeing what I could make, and I found a Z fold card by Karen Watts and loved her scene! Of course I had to start making my own! And being me, I HAD to add to what I saw on her card AND put in my NEW stamp sets that I just got from the NEW catalog by Stampin’ Up!
I wanted to use the Bike Ride, have the bike going along the beach, and since I had a beach I HAD (again) to use High Tide for the water! High Tide is the greatest stamp set for making water! And since I was using the water I also used the grass, birds on the beach and the birds that are flying! Birds!! For those that know me everytime I use the word/stamp birds, I think of Bambi and say it like Flower said it……..BIRD! 🙂
I also wanted to pull in Seasonal Layers with their Beach Chair! That is such a fun set! Ok, I admit it…….Stampin’ Up! has waaaaaaay too many cute sets! They are fun to play with and BOY they are great for making a story!
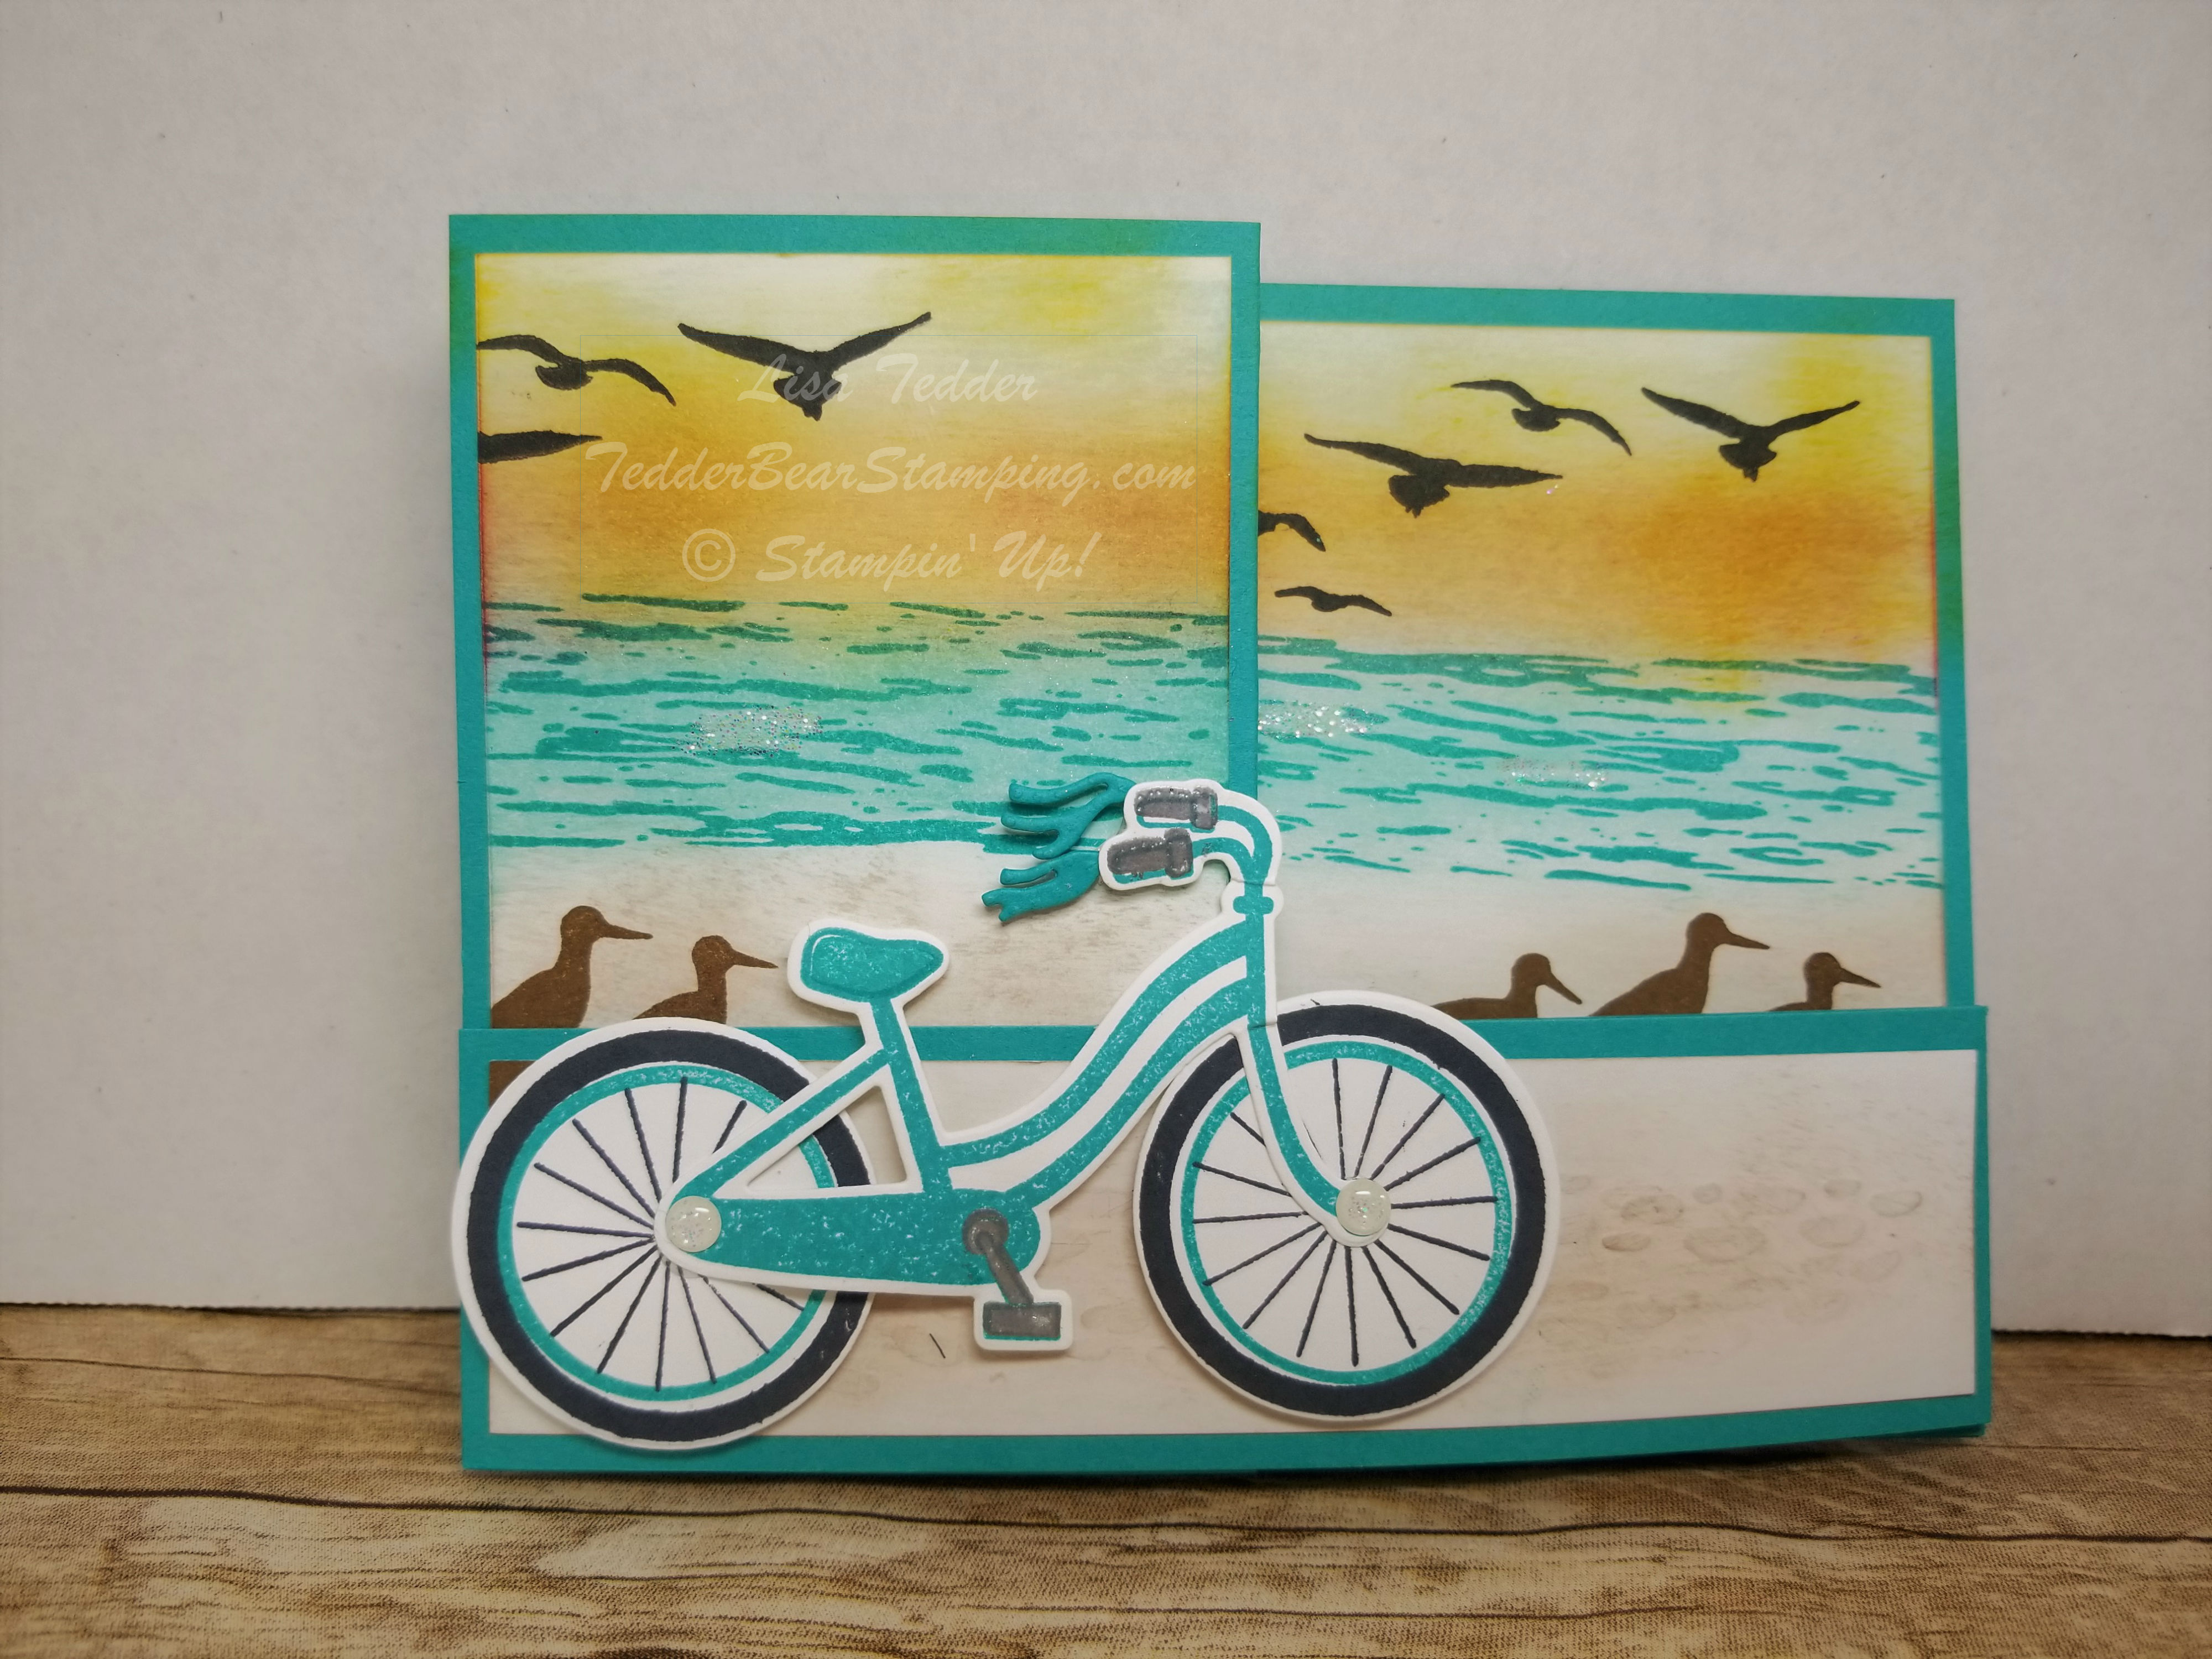
Here is my card closed:
Cute, right?!!
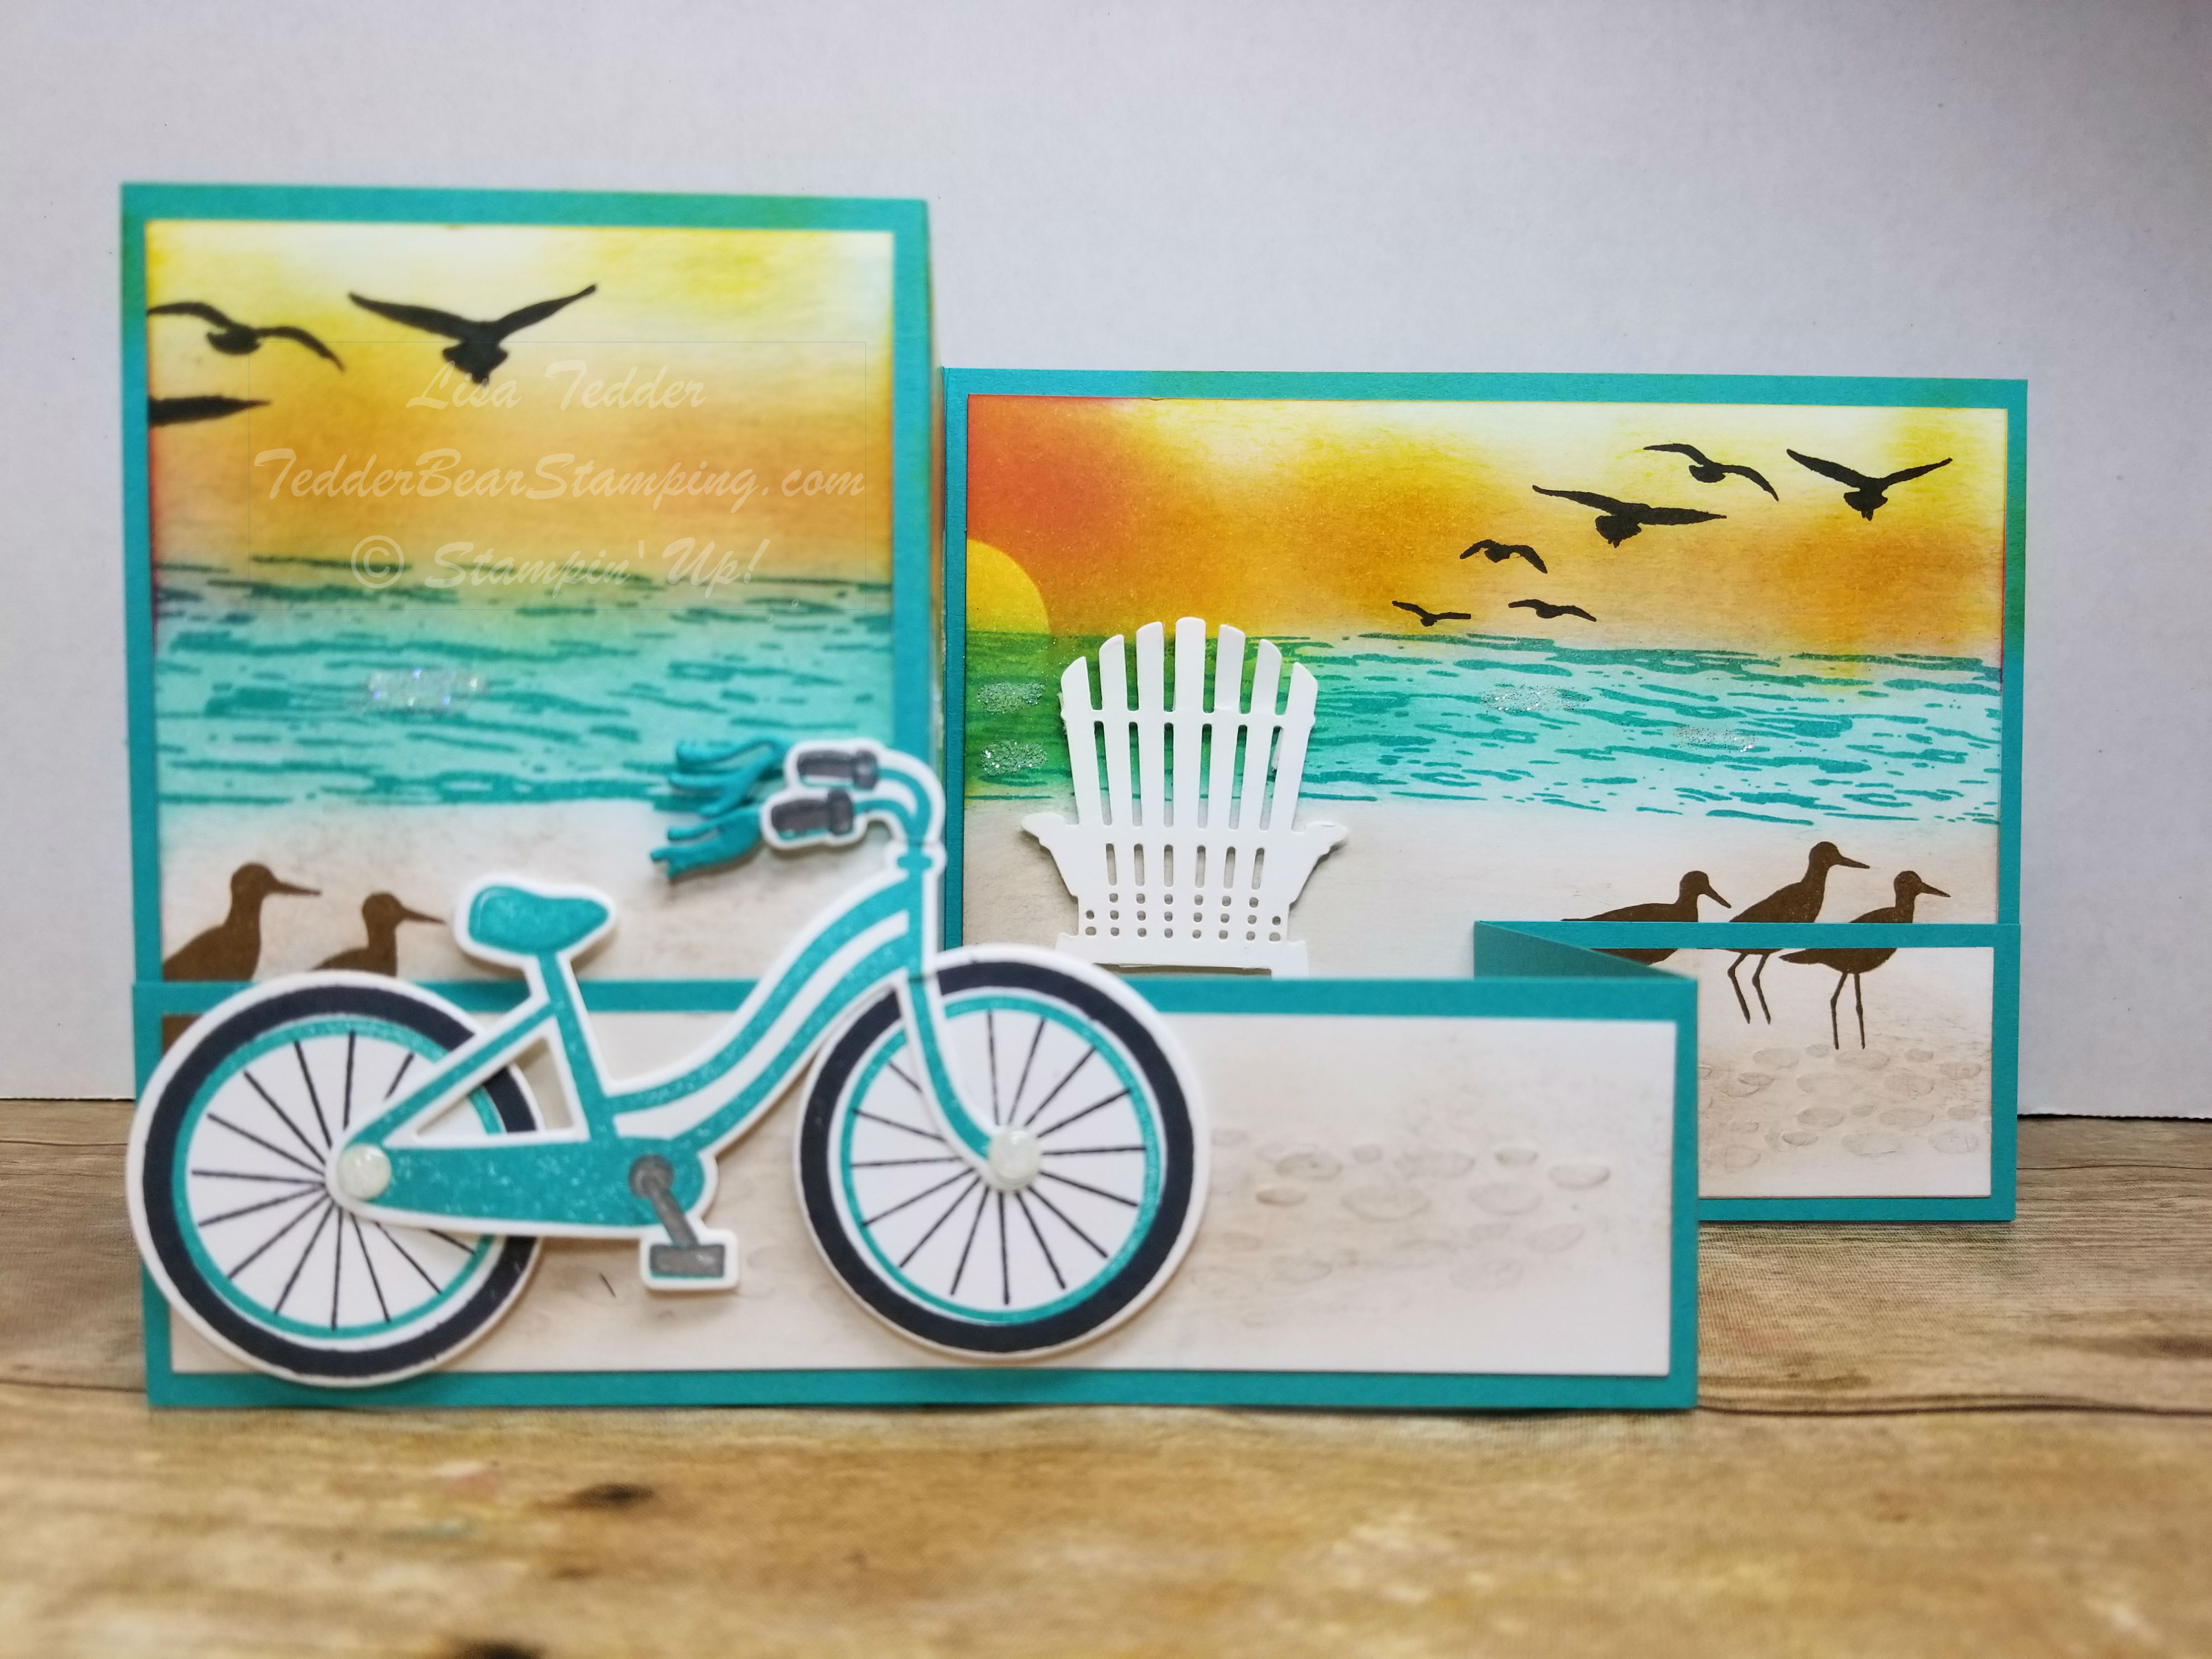
Here is the card partially open:
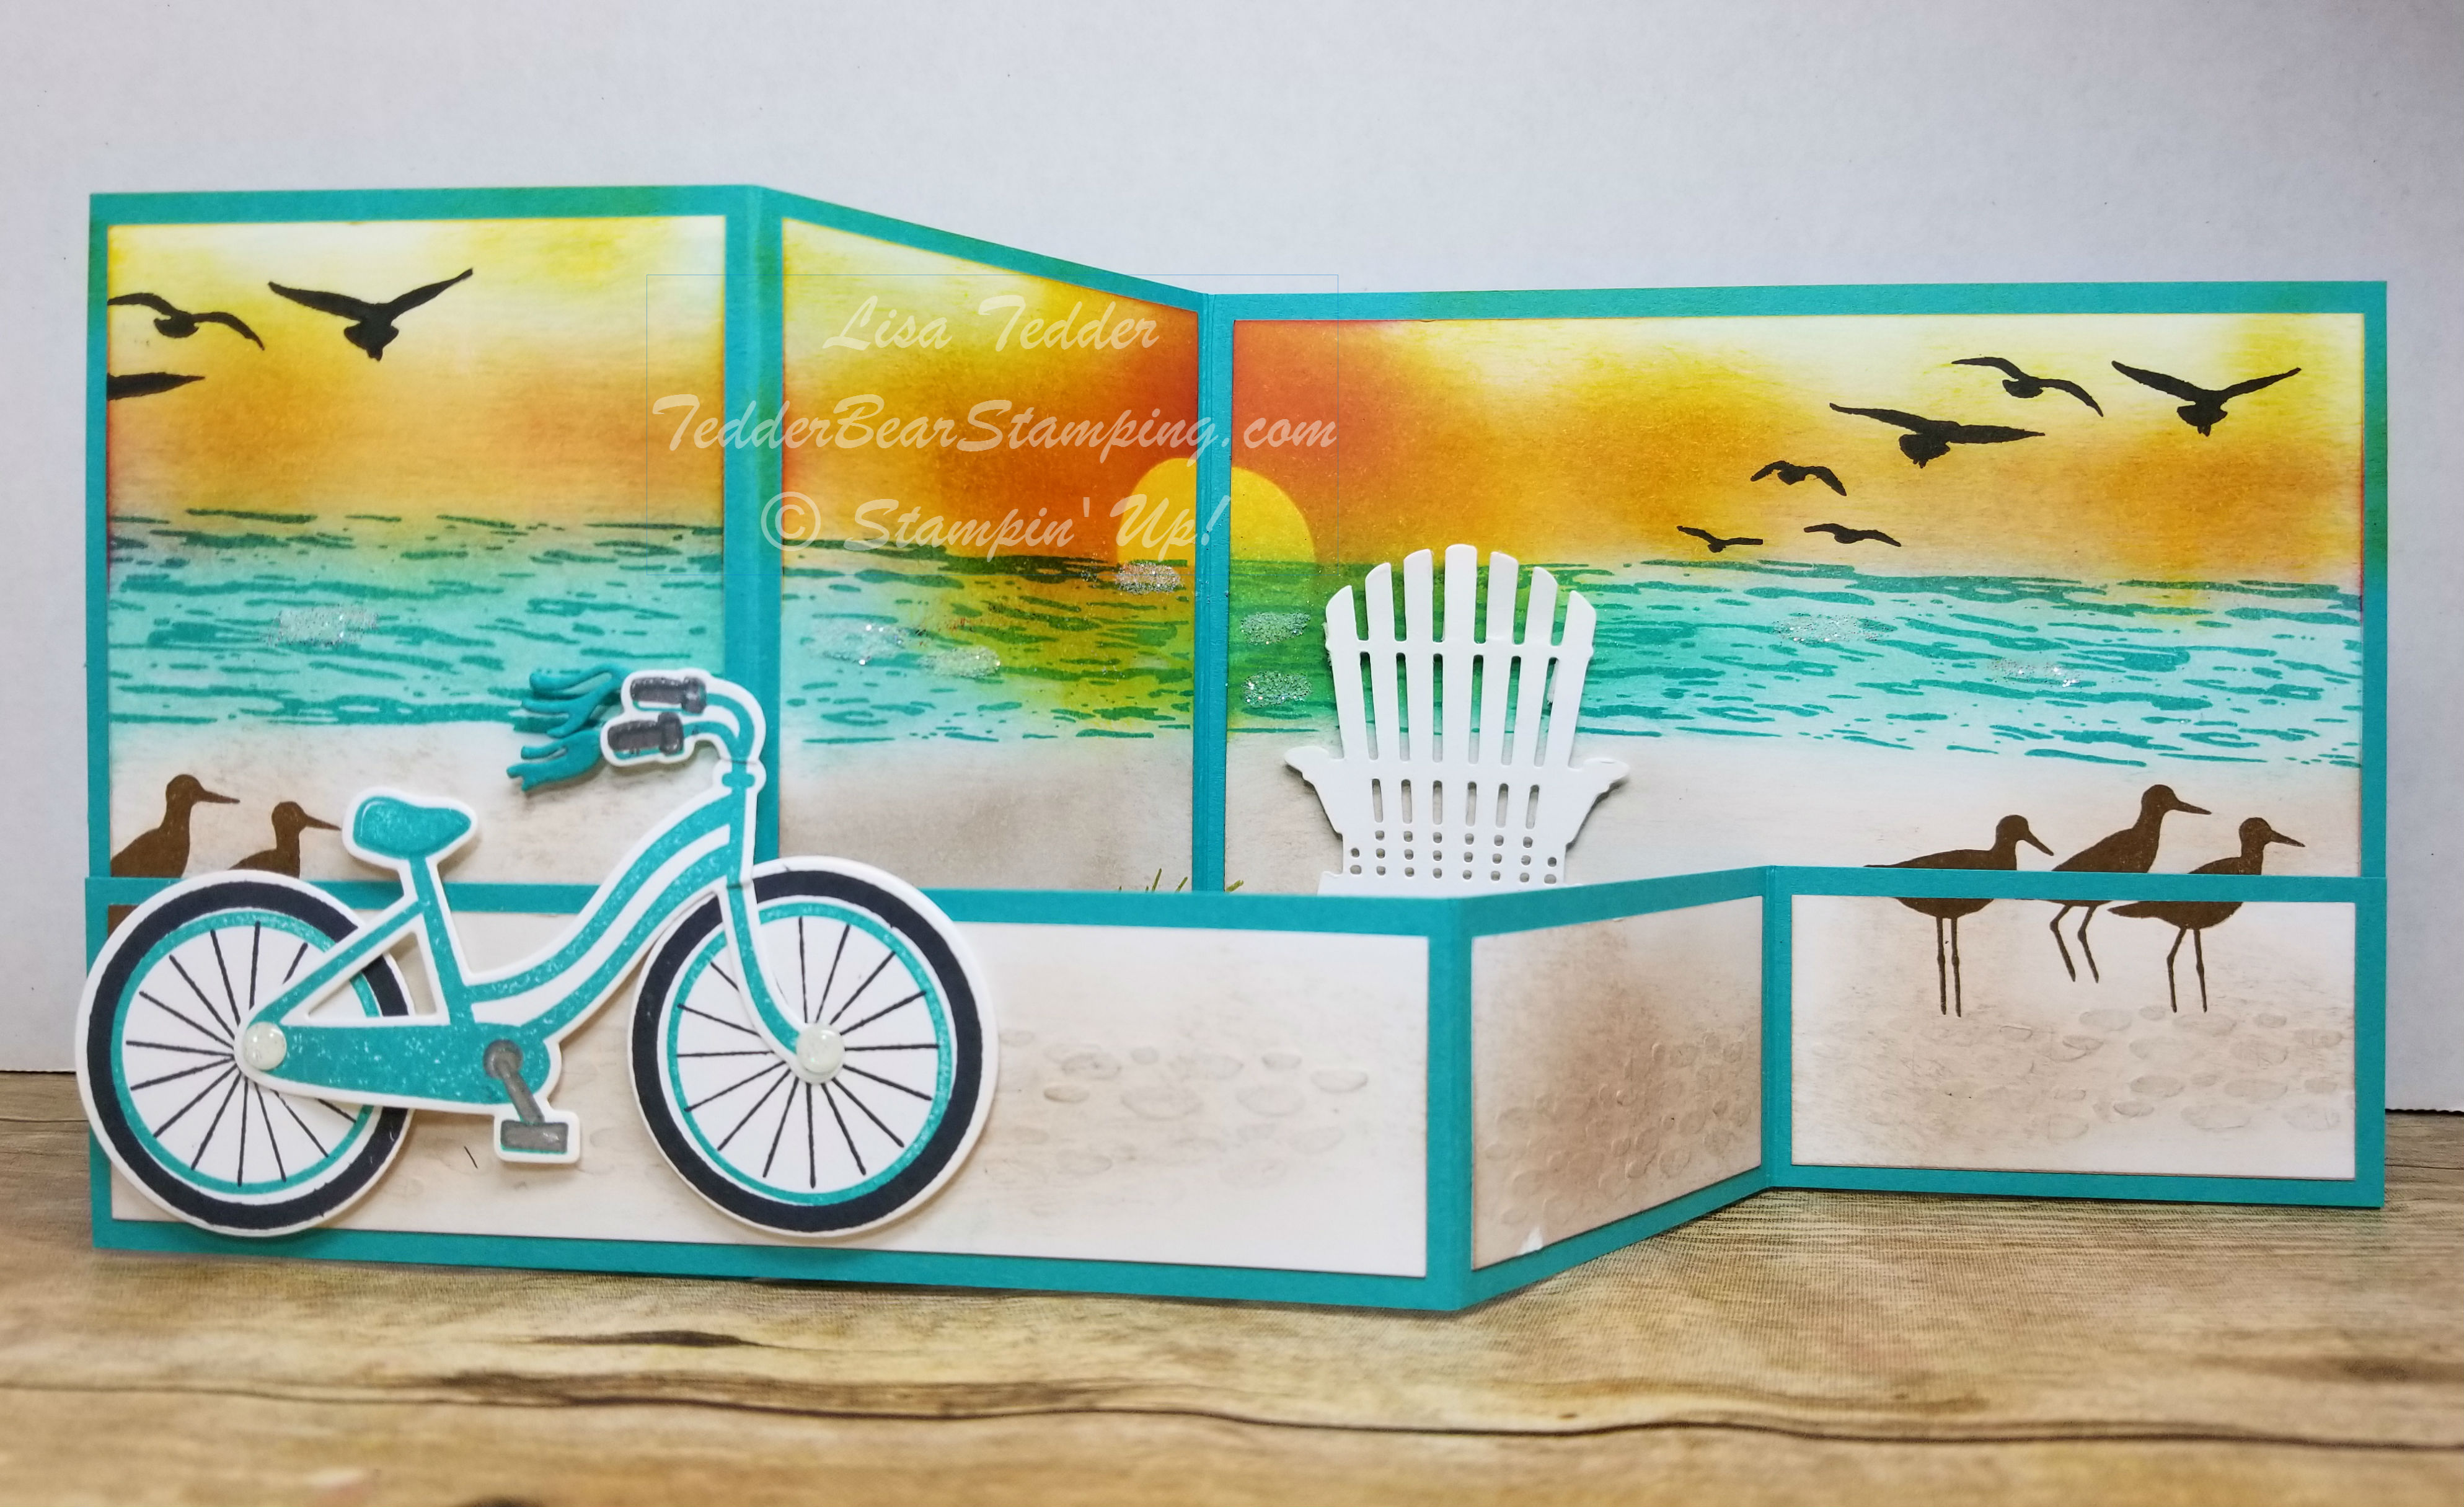
There’s the chair! And now open all the way:
I LOVE how it came out, don’t you!? Not sure what sentiment to put on, or if it needs one……what do you think? Sometimes when I send out my greeting cards, I don’t put a greeting on it, since I want to say what I want to say and let the card speak for itself! Do you ever do that?
The Deets:
Cardstock
Bermuda Bay: 4 1/4″ x 11″ scored at 8 1/4″, 1 1/2″ x 11, scored in the same places (when you put on card, the folds are opposite)
Whisper White: 5 1/4″ x 4″, 2 1/2″ x 4 (x’s 2), 5 1/4″ x 1 1/4″, 2 1/2″ x 1 1/4″ (xs 2) and scraps for stamping and chair.
I used a post it for the sun, JUST be sure and cut the circle in HALF before you sponge sun! LOL For some reason my mind couldn’t fathom that when I stamped the ocean that it would cover the circle….kind of hard when I didn’t take off the circle when I stamped the ocean OVER the circle! Let me tell you, for some reason (though I’ve done it before) it didn’t dawn on me to cut the circle in half since I was ONLY using half of it to mask the sun. Sheesh!! I’m sure I am the ONLY one that happens to!
Now, on to my Blog Candy!!
You can get in on the drawing by posting comments here on this blog (any post! or multiple posts!) or on my Facebook page and I will put your name down each and every time you comment! But be aware…..there are some that follow me that take that comment VERY seriously! I’ve had her comment on each and every post that I make and she also comments on my Facebook page, Twitter AND my Instagram! She’s one serious girl! YOU know who you are, and I appreciate you very much! 🙂
The moral of the story is if you REALLY want to win my Blog Candy comment on everything! I put the names into a Name Generator so I have NO say on who wins!
It’s Washi Tape!! These are from (lf – rt), Affectionately Yours and Botanical Gardens!! Yes, these can be yours! I am running this blog candy starting yesterday (since I said I would!) until July 4th! I think that is a great day to be giving something away for FREE! Celebrating our Freedom in a way!
Good Luck!
Click on any image below and you will be taken to my Online Store! Please use the Hostess Code: C62FFAR3 Any order you place with me online, I will be sending you a handmade card plus a little thank you gift!
I really enjoyed making this card and this post, I hope you did too! Let me know what you think! Until next time!
Lisa Tedder
TedderBearStamping
A California girl living in North Carolina


 Mini Striped Ribbon")


 Cotton Ribbon")


 Designer Vellum")


 Metallic-Edge Ribbon")


 Circle Punch")