I’ve been getting ready for my Christmas card class that’s next month! I plan on doing 3 Classes with 6 cards each class. That is A LOT of planning! Each person will make 3 of each of the 5 cards and 1 special card! That’s 16 cards that everyone makes at each class!
The New Holiday Catalog is here from Stampin’ Up! and I’ve been having fun using all my new goodies! Are you ready to start seeing the 1st of my 6 cards?!
Here is card #1:
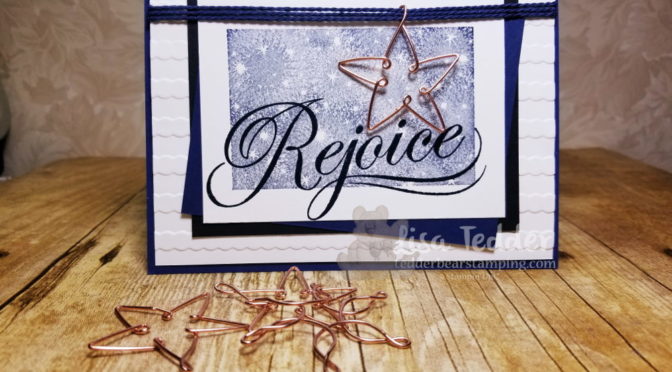
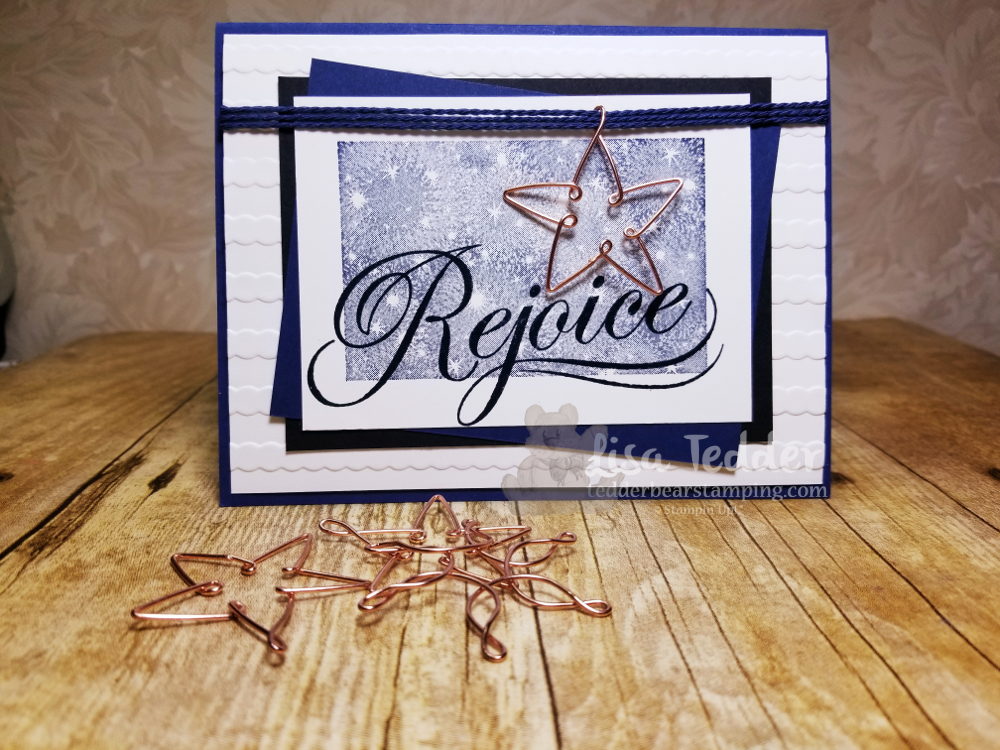
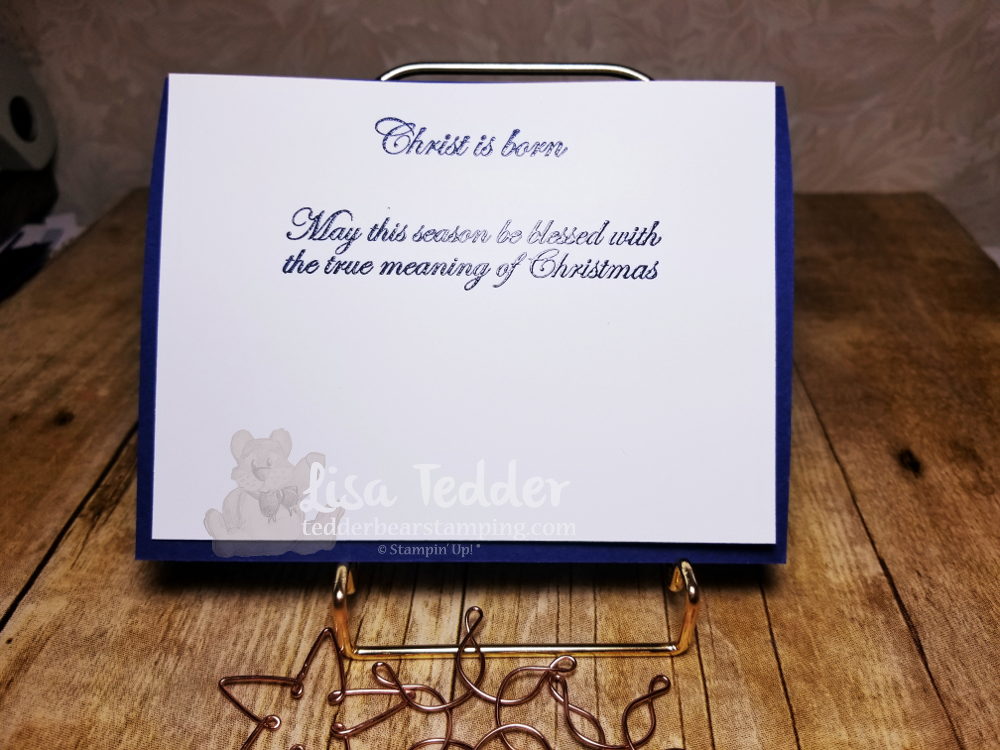
This was VERY fun to make! I used the New stamp set His Light on top of the Bokeh Stamp set, but this isn’t the bokeh it is the star one in the same stamp set. I stamped the Bokeh ‘star’ stamp in Night of Navy, then stamped ‘Rejoice’ in Memento Black. This is SUCH a pretty card in person! Here is the inside:
I love that I can make a card that really tells the true meaning of Christmas!
Here are the Particulars:
Stamp sets: His Light, Bokeh Dots
Card stock: Night of Navy 5 ½” x 8 ½”,3 1/8” x 4 1/8”, Black 4 ¼” x 3 ¼”, White 5 ¼” x 4 (x2), 4” x 2 7/8”. Ink: Night of Navy, Memento Black
Below are pictures of all the items used for this project, click on any picture and you will be taken to my OnLine Store!
Thanks for stopping by!
Lisa Tedder
A California girl living in North Carolina
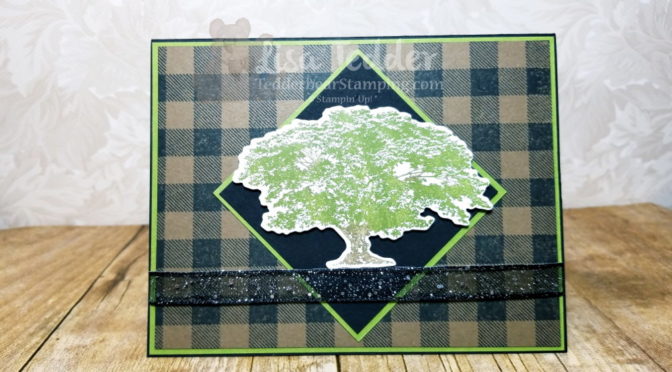
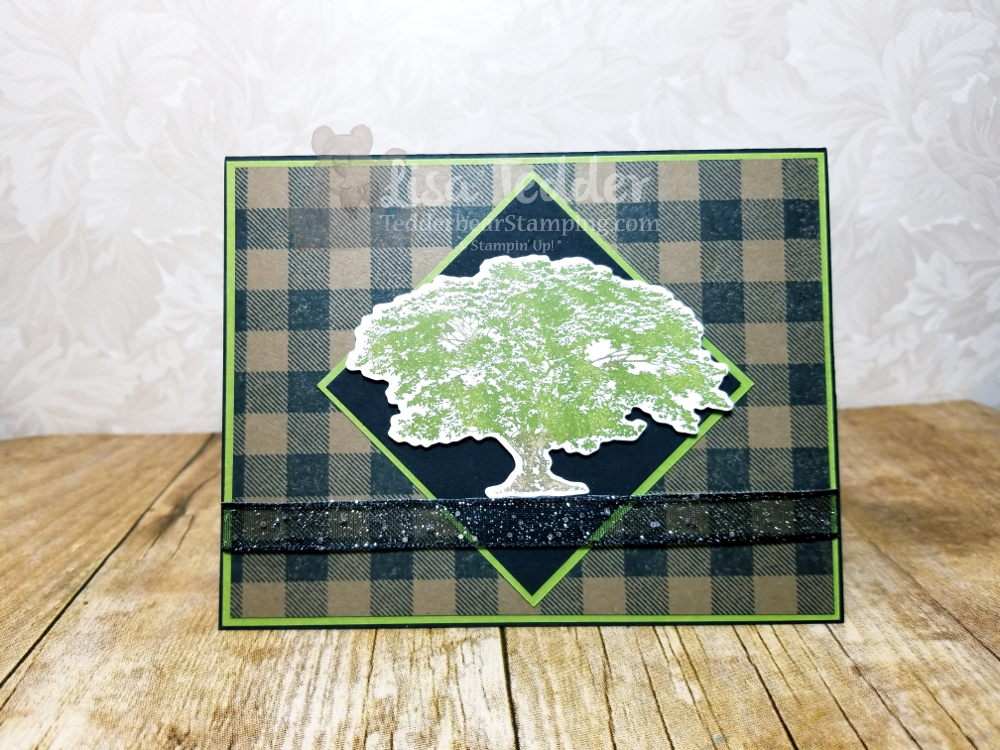
I don’t know about you, but I LOVE checkered paper! Well, the great news is that Stampin’ Up! has come out with an awesome stamp that lets you have a checkered pattern on any cardstock in any color!
I used Soft Suede cardstock and stamped the Buffalo Check in Black. It came out so nice!! I stamped the Big Oak tree from Rooted in Nature and die cut it (thank God, no more fussy cutting!), put it on a square piece of Black and it really popped. Once I put it on the Checkered pattern I was in love! I used the Black 3/8″ Glittered Organdy Ribbon from the NEW 2018 Holiday Catalog. It was the perfect touch! Instead of doing what I normally do, I placed the ribbon over the square, because it looked great with the tree ‘sitting’ on it! I hope you like it!
I’m teaching a class on the 10th at our local Senior Center, this will be one of the cards we will be making!
I have so much fun rubber stamping. When I was a young adult my sister started painting on porcelain making dolls and pottery. I was so impressed with her artistic ability. I thought well God gave her a gift, I am NOT artistic! Then I started stamping, at first I copied everything, then slowly started changing things up. I am so happy to tell you, I AM artistic! WOOHOO! I joined Stampin’ Up! over 15 years ago, and can’t see my life NOT doing this. If you would like to join my team, I would love to help you be artistic too!
Thanks for stopping by!
Lisa Tedder
A California girl living in North Carolina Product List
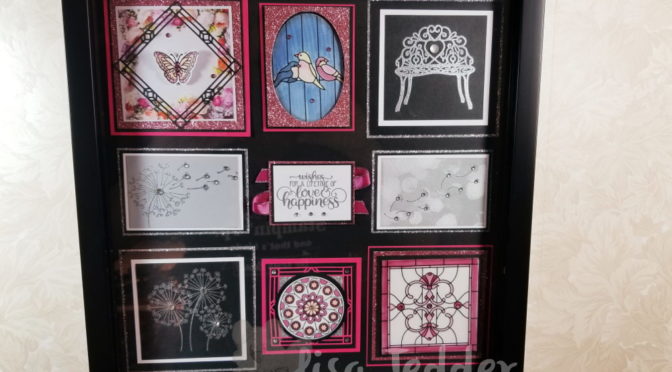
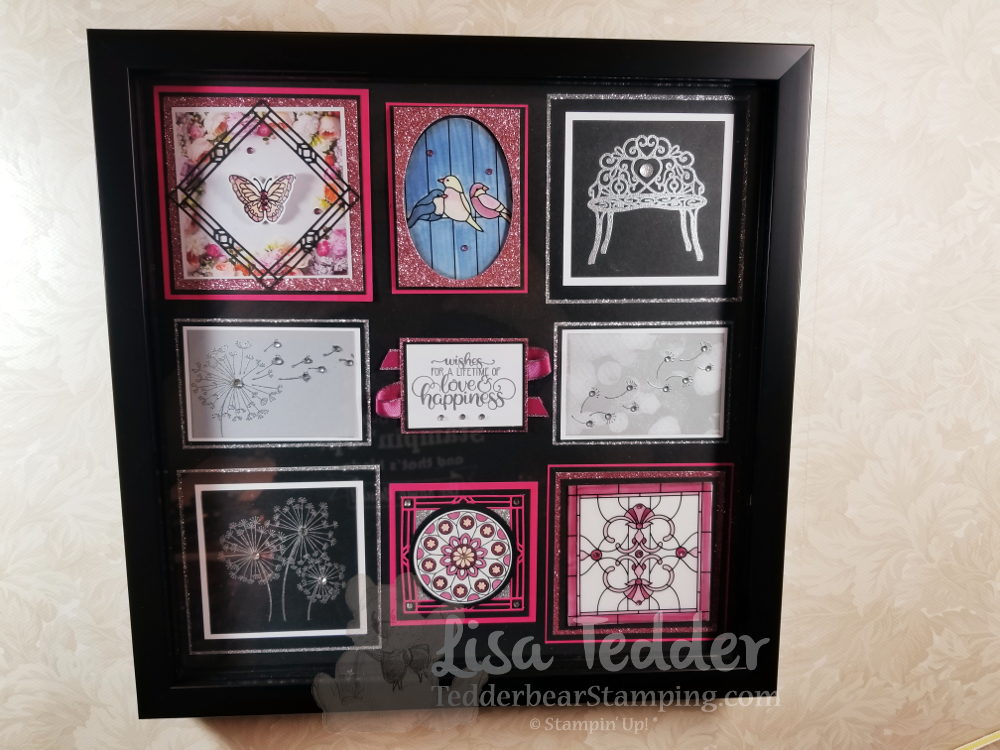
I made a video and at the end I showed this Shadow Box. I promised I would have the measurements here on my blog so if you want to make it you can!! It took a little longer than I promised, but at least I got it done! Here is a picture of the Shadow Box:
Here are all the Measurements:
Shadow Box Instructions:
Top Left:
Melon Mambo 3 7/8”sq, Black 3 5/8” sq, Rose Glimmer 3 ½” sq, DSP Petal Promenade 3 1/8”, black die cut 3” sq, Butterfly die cut colored w/blends add Wink of Stella. Add colored rhinestones.
Top Middle:
Melon Mambo 2 5/8” x 3 9/16”, Black 2 ½” x 3 7/16”, Rose Glimmer 3 ¼” x 2 3/8”, Vellum DSP cut out with oval framelit, colored on back with Blends, Foam adhesive on back of Glimmer.
Top Right:
Silver Glimmer 4” sq, Black 3 ¾” sq, White 3 ¼” sq, Black 2 7/8” sq, stamp bench in Versamark and emboss with Silver EP, add Clear Faceted Gem in heart.
Left Center:
Silver Glimmer 3 5/8” x 2 9/16”, Black 3 1/2” x 2 3/8”, White 3 3/8”, Smoky Slate 3 1/8” x 2 1/8”, Stamp Dandelion in Versamark and emboss with Silver EP. Add Rhinestones
Center:
Rose Glimmer 2 ½” x 1 7/8”, Black 2 3/8” x 1 ¾”, White 2 5/16” x 1 11/16, stamp sentiment with Versamark then emboss with silver, add rhinestones. Under this square crisscross the Berry Burst Metallic Edge Ribbon.
Right Center:
Silver Glimmer 3 5/8” x 2 9/16”, Black 3 1/2” x 2 3/8”, White 3 3/8”, Ink up Bokeh stamp with Smoky Slate, stamp on White. Stamp fly away Dandelions using Versamark emboss with silver. Add Rhinestones
Left Bottom:
Silver Glimmer 3 7/8” sq, Black 3 ¾” sq, White 3 1/4” sq, Black 3” sq. Stamp Dandelions in Versamark emboss with Silver, add rhinestones.
Bottom Center:
Melon Mambo 3” sq, Black 2 ¾” sq, Melon Mambo die cut 3” sq, Silver 1 15/16” sq, Black Circle 2 ¼” punch, White Shimmer 2” circle punch STAMP FIRST, THEN PUNCH OUT!!! Color with Blends, add Rhinestones.
Bottom Right:
Melon Mambo 3 7/8” sq, Black 3 ¾” sq, Rose Glimmer 3 ½” sq, Black 3 ¼” sq, White 3” sq, Vellum DSP 3” sq. Add colored Rhinestones. Color back of Vellum with Blends.
All the Supplies I used are listed below. Click on any of the pictures to be taken to my OnLine Store!
Hope you enjoy this project as much as I do!!
Lisa Tedder
A California Girl living in North Carolina Product List
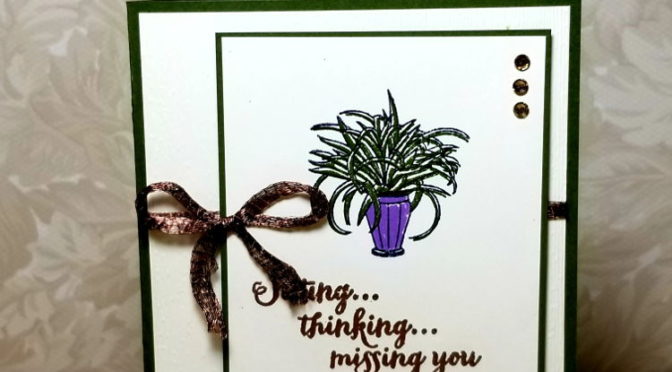
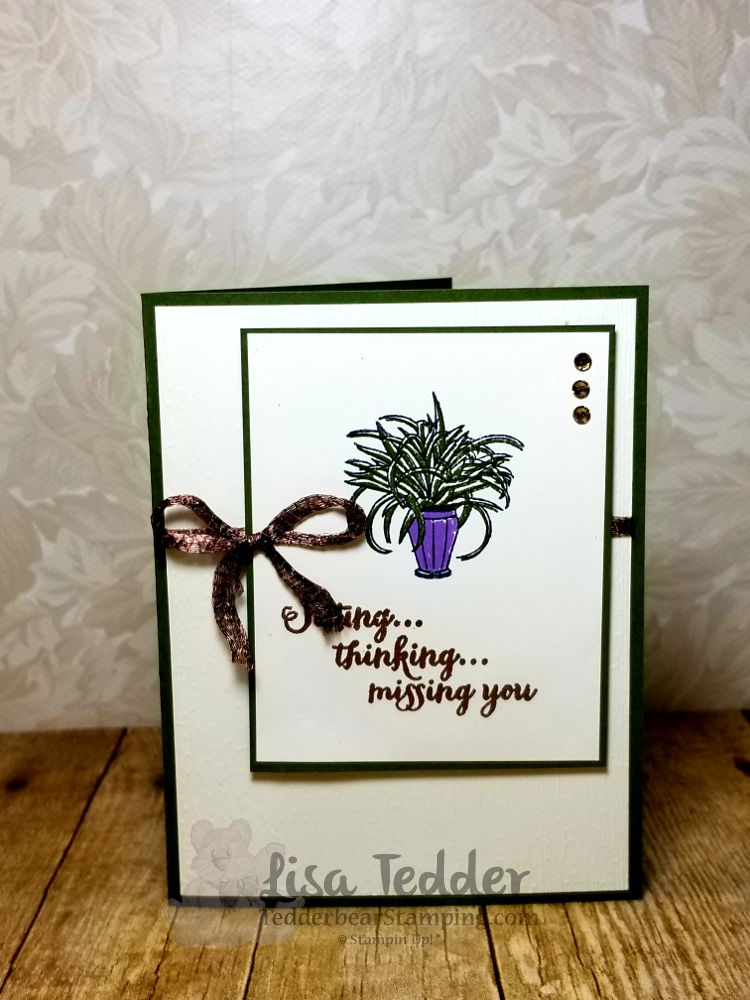
Today I am sharing you another CASE’d card (Copy and share everything), I got this idea from Nicolle Belisimo on Pinterest. It’s almost exactly like hers! Thanks Nicolle!
My vase is a different color, and I embossed the words in Copper.
I love the copper ribbon!
I used the Stamparatus to line the stamps up, boy does that make it nice!!
The supplies for this project are listed below, click on any picture to be taken to my OnLine Store!
Thanks for stopping by!
Lisa Tedder
A California girl living in North Carolina
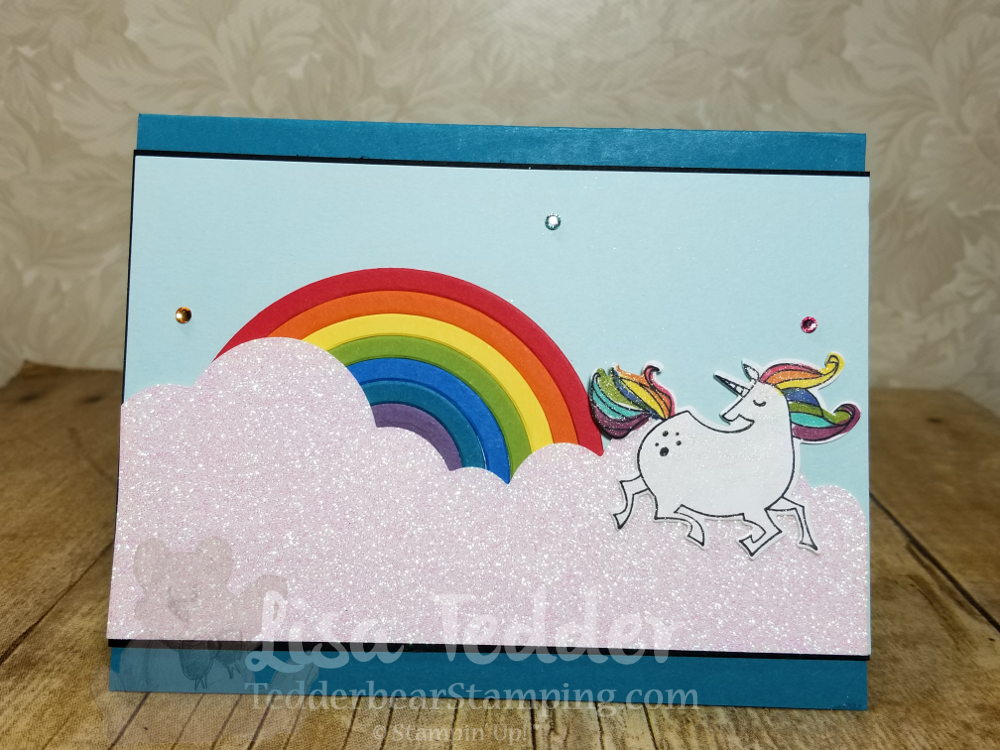
Today I have a really fun and super cute card! I LOVE rainbows, but who doesn’t? I also love Unicorns! So I put them together! I got this idea from Kirsten Aitchenson on Pinterest. I gave the card some black to make the image pop, but otherwise it’s all her. Isn’t it cute?
The Rainbow took a few minutes to cut out each color, but honestly? It didn’t take as long as I thought it would. I LOVE this card!!
TIP!!: Cut a small piece of white cardstock that you will use to mount your rainbow on. The dimensions are 2 3/4″ x 1″. Place adhesive on your white piece, and start your outer colors going down almost to the bottom of the white. This will hold your rainbow together AND let you pop it off the card with dimensionals. Your white will be covered up by the cloud!
The sparkle paper is from the Myths and Magic 6″ x 6″ glimmer paper.
Here are the dimensions for this card:
Island Indigo: 5 1/2″ x 8 1/2″, plus scrap for rainbow
Basic Black: 5 1/2″ x 3 5/8″, 5 1/4″ x 4″ for inside
Soft Sky: 3 1/2″ x 5 1/2″
Whisper White: 5″ x 3 3/4″ inside and scrap for Unicorn
Scraps for Rainbow: Real Red, Pumpkin Pie Daffodil Delight, Old Olive, Pacific Point, Island Indigo, Perfect Plum
I colored the Rhinestones to go with the rainbow and also colored the Mane and Tail using the Blends.
I used Wink of Stella for the Unicorn.
Hope you like this as much as I do!! Please visit my YouTube Channel to see my other creations and see how I make them.
Below are pictures of the supplies I used, click on any picture to be taken to my OnLine Store. For any purchase you make with me you will receive one of my handmade cards!
Thank you for stopping by! Please come back.
Lisa Tedder
A California Girl living in North Carolina Product List
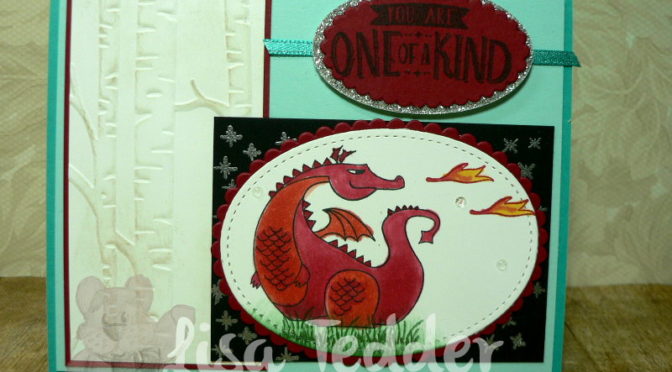
I am sharing with you a card that I made for a swap that I signed up for where I made 20 of these cards (below) and received 20 different swaps back!
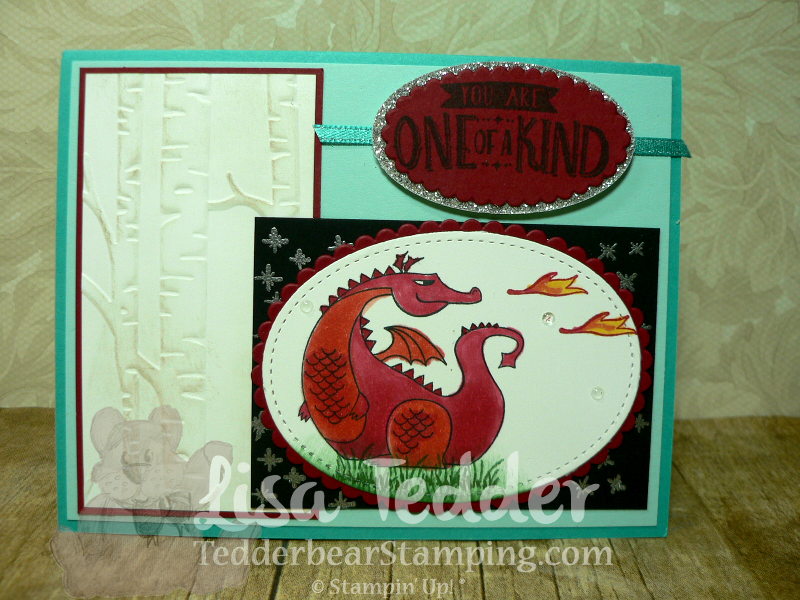
Here is my card:
I think I love this stamp set so much because it reminds me of Disney and being a kid. Below I will have all the supplies listed to make this card, just click on any of the pictures to be taken to my OnLine Store.
I also used the Stamp set In the Trees by Stampin’ Up! for the grass under the dragon. I stamped the ‘Magic stars’ in Versamark on the Black and then embossed it with Silver Embossing powder. I thought it added just that right sense of MAGIC!!
The dimensions for this card are as follows:
Bermuda Bay Base: 8 1/2″ x 5 1/2″
Soft Sky: 5 1/4″ x 4″
Cherry Cobbler: 2 1/8″ x 3 7/8″, scrap for scalloped Ovals
Whisper White: 2″ 3 3/4″, scrap for Stitched Shape Oval
Basic Black 2 1/2″ x 3 1/2″
Silver Glimmer Paper: scrap for Oval
I hope this helps you if you want to recreate this card! I had a lot of fun making it!
Lisa Tedder
A California Girl living in North Carolina Product List
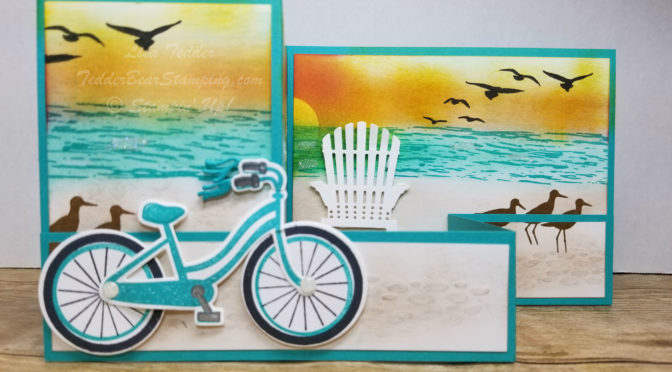
I was perusing Pinterest seeing what I could make, and I found a Z fold card by Karen Watts and loved her scene! Of course I had to start making my own! And being me, I HAD to add to what I saw on her card AND put in my NEW stamp sets that I just got from the NEW catalog by Stampin’ Up!
I wanted to use the Bike Ride, have the bike going along the beach, and since I had a beach I HAD (again) to use High Tide for the water! High Tide is the greatest stamp set for making water! And since I was using the water I also used the grass, birds on the beach and the birds that are flying! Birds!! For those that know me everytime I use the word/stamp birds, I think of Bambi and say it like Flower said it……..BIRD! 🙂
I also wanted to pull in Seasonal Layers with their Beach Chair! That is such a fun set! Ok, I admit it…….Stampin’ Up! has waaaaaaay too many cute sets! They are fun to play with and BOY they are great for making a story!
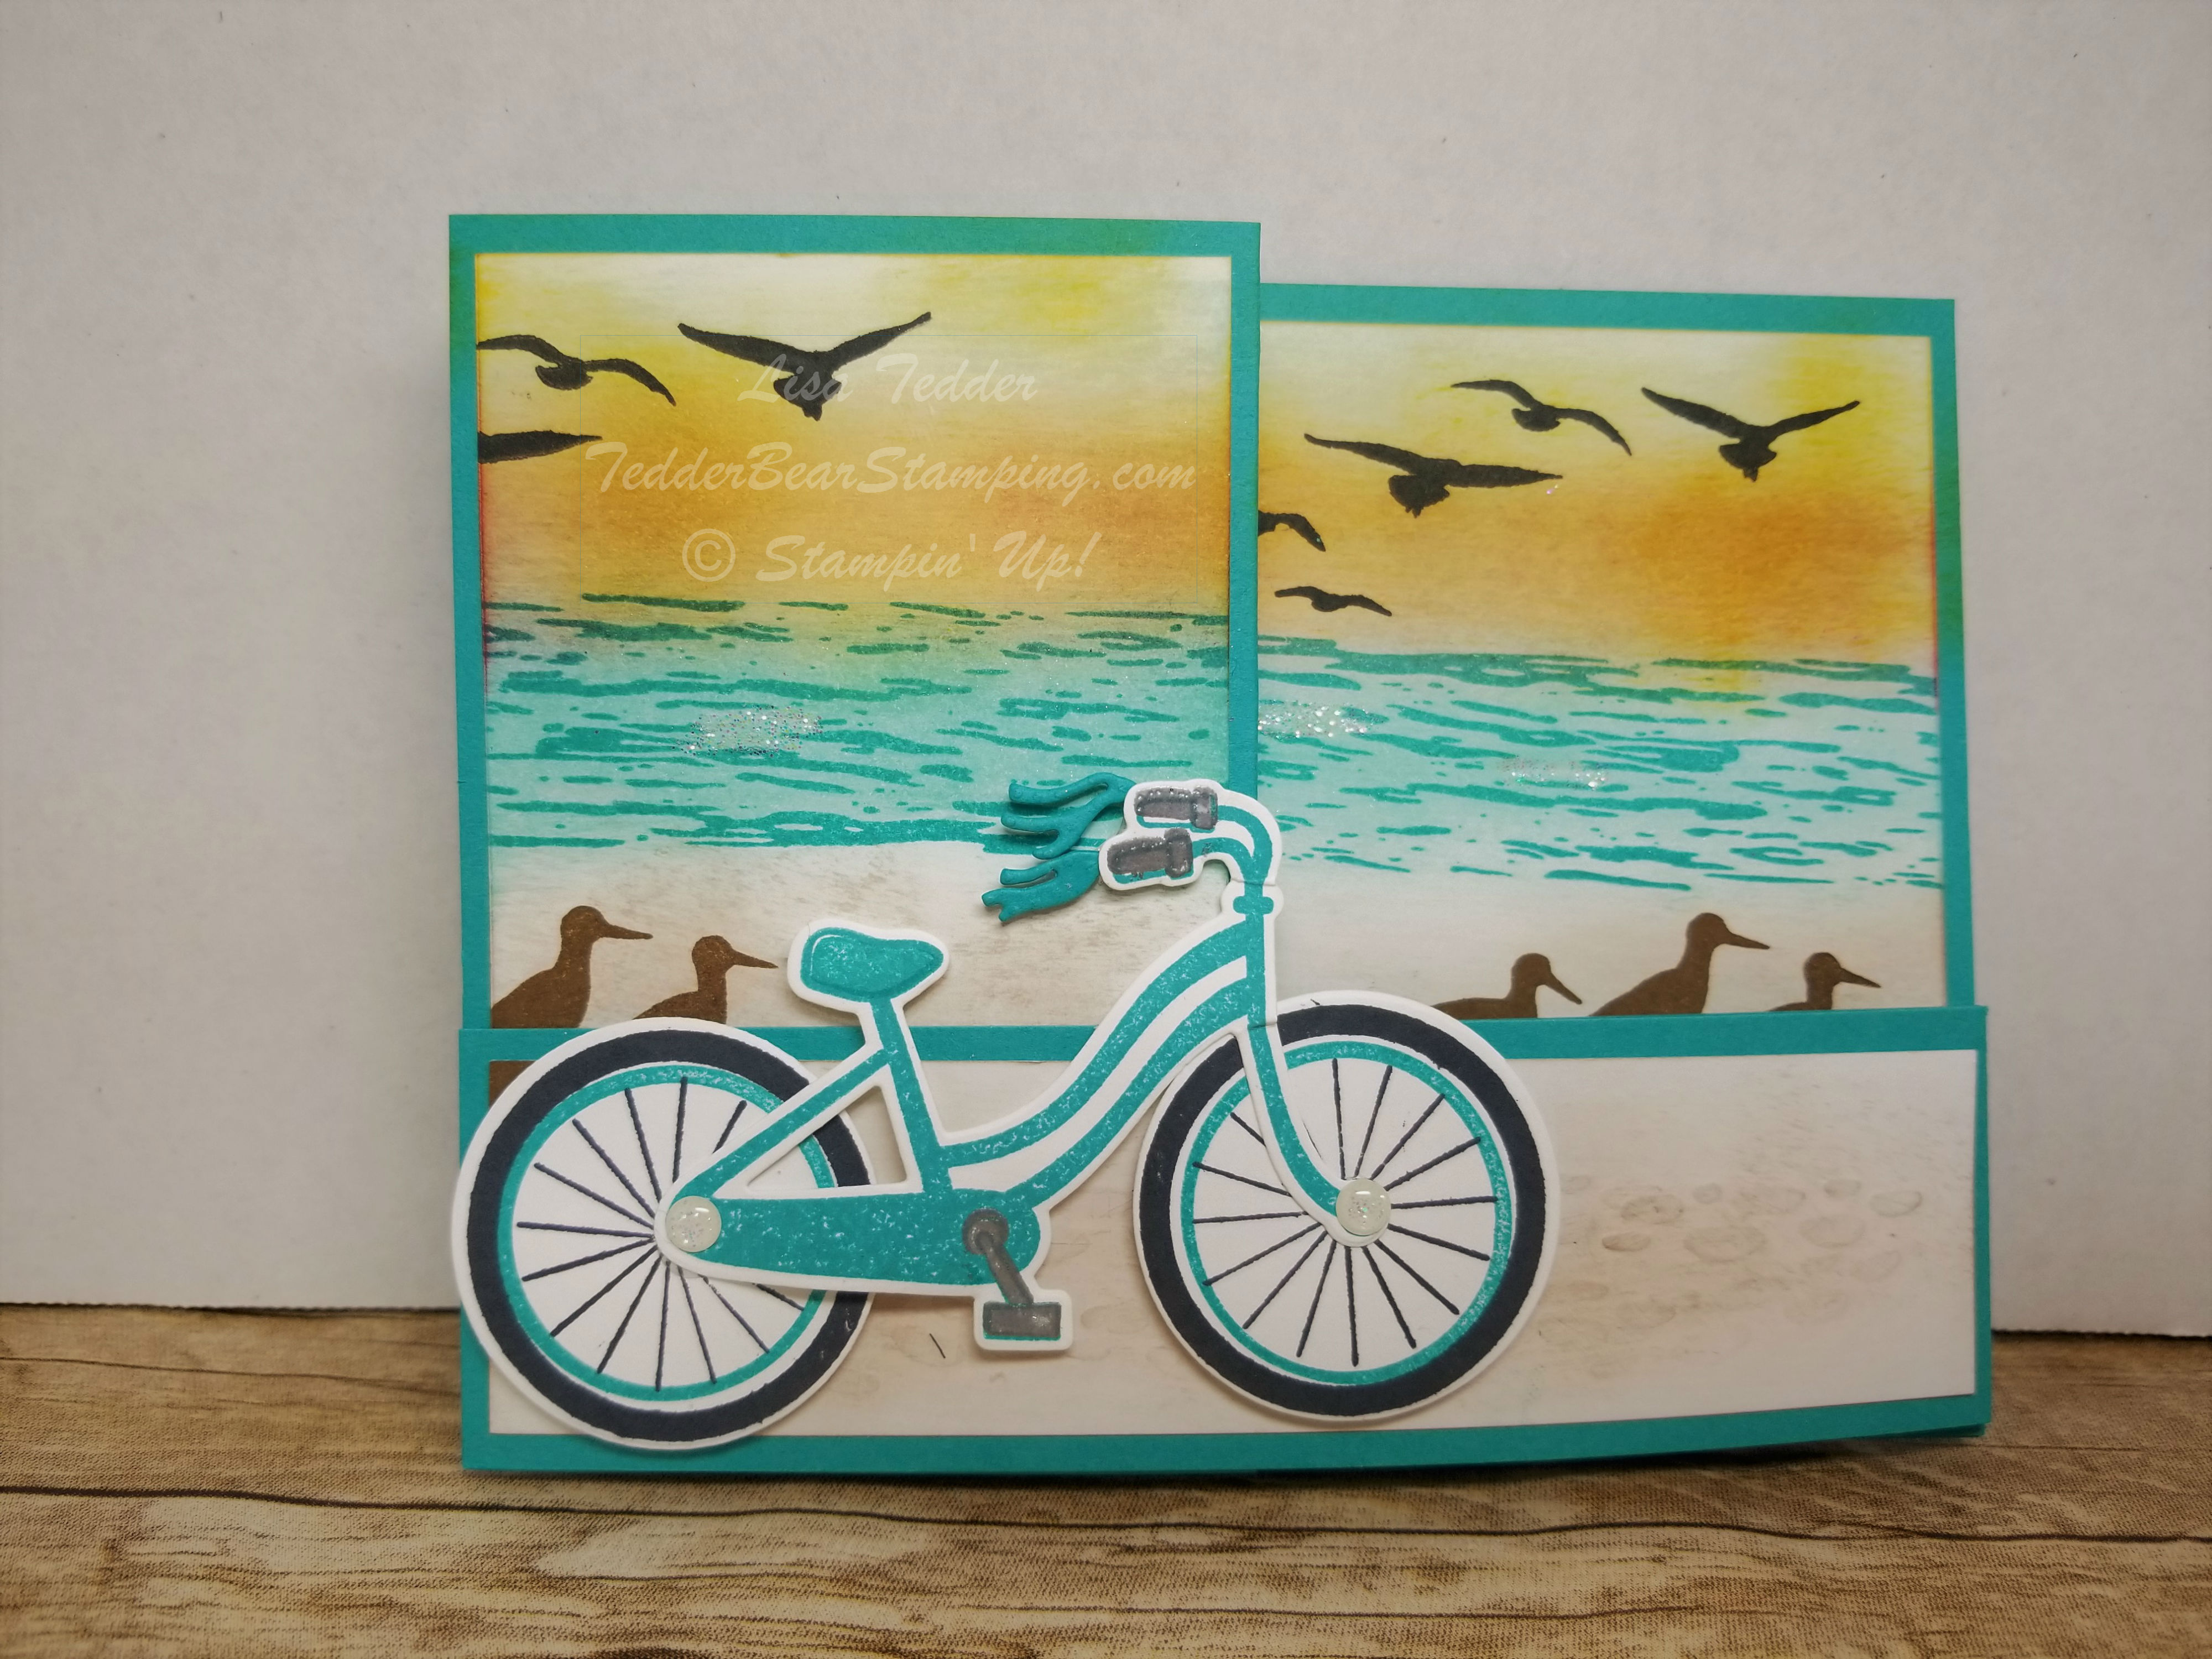
Here is my card closed:
Cute, right?!!
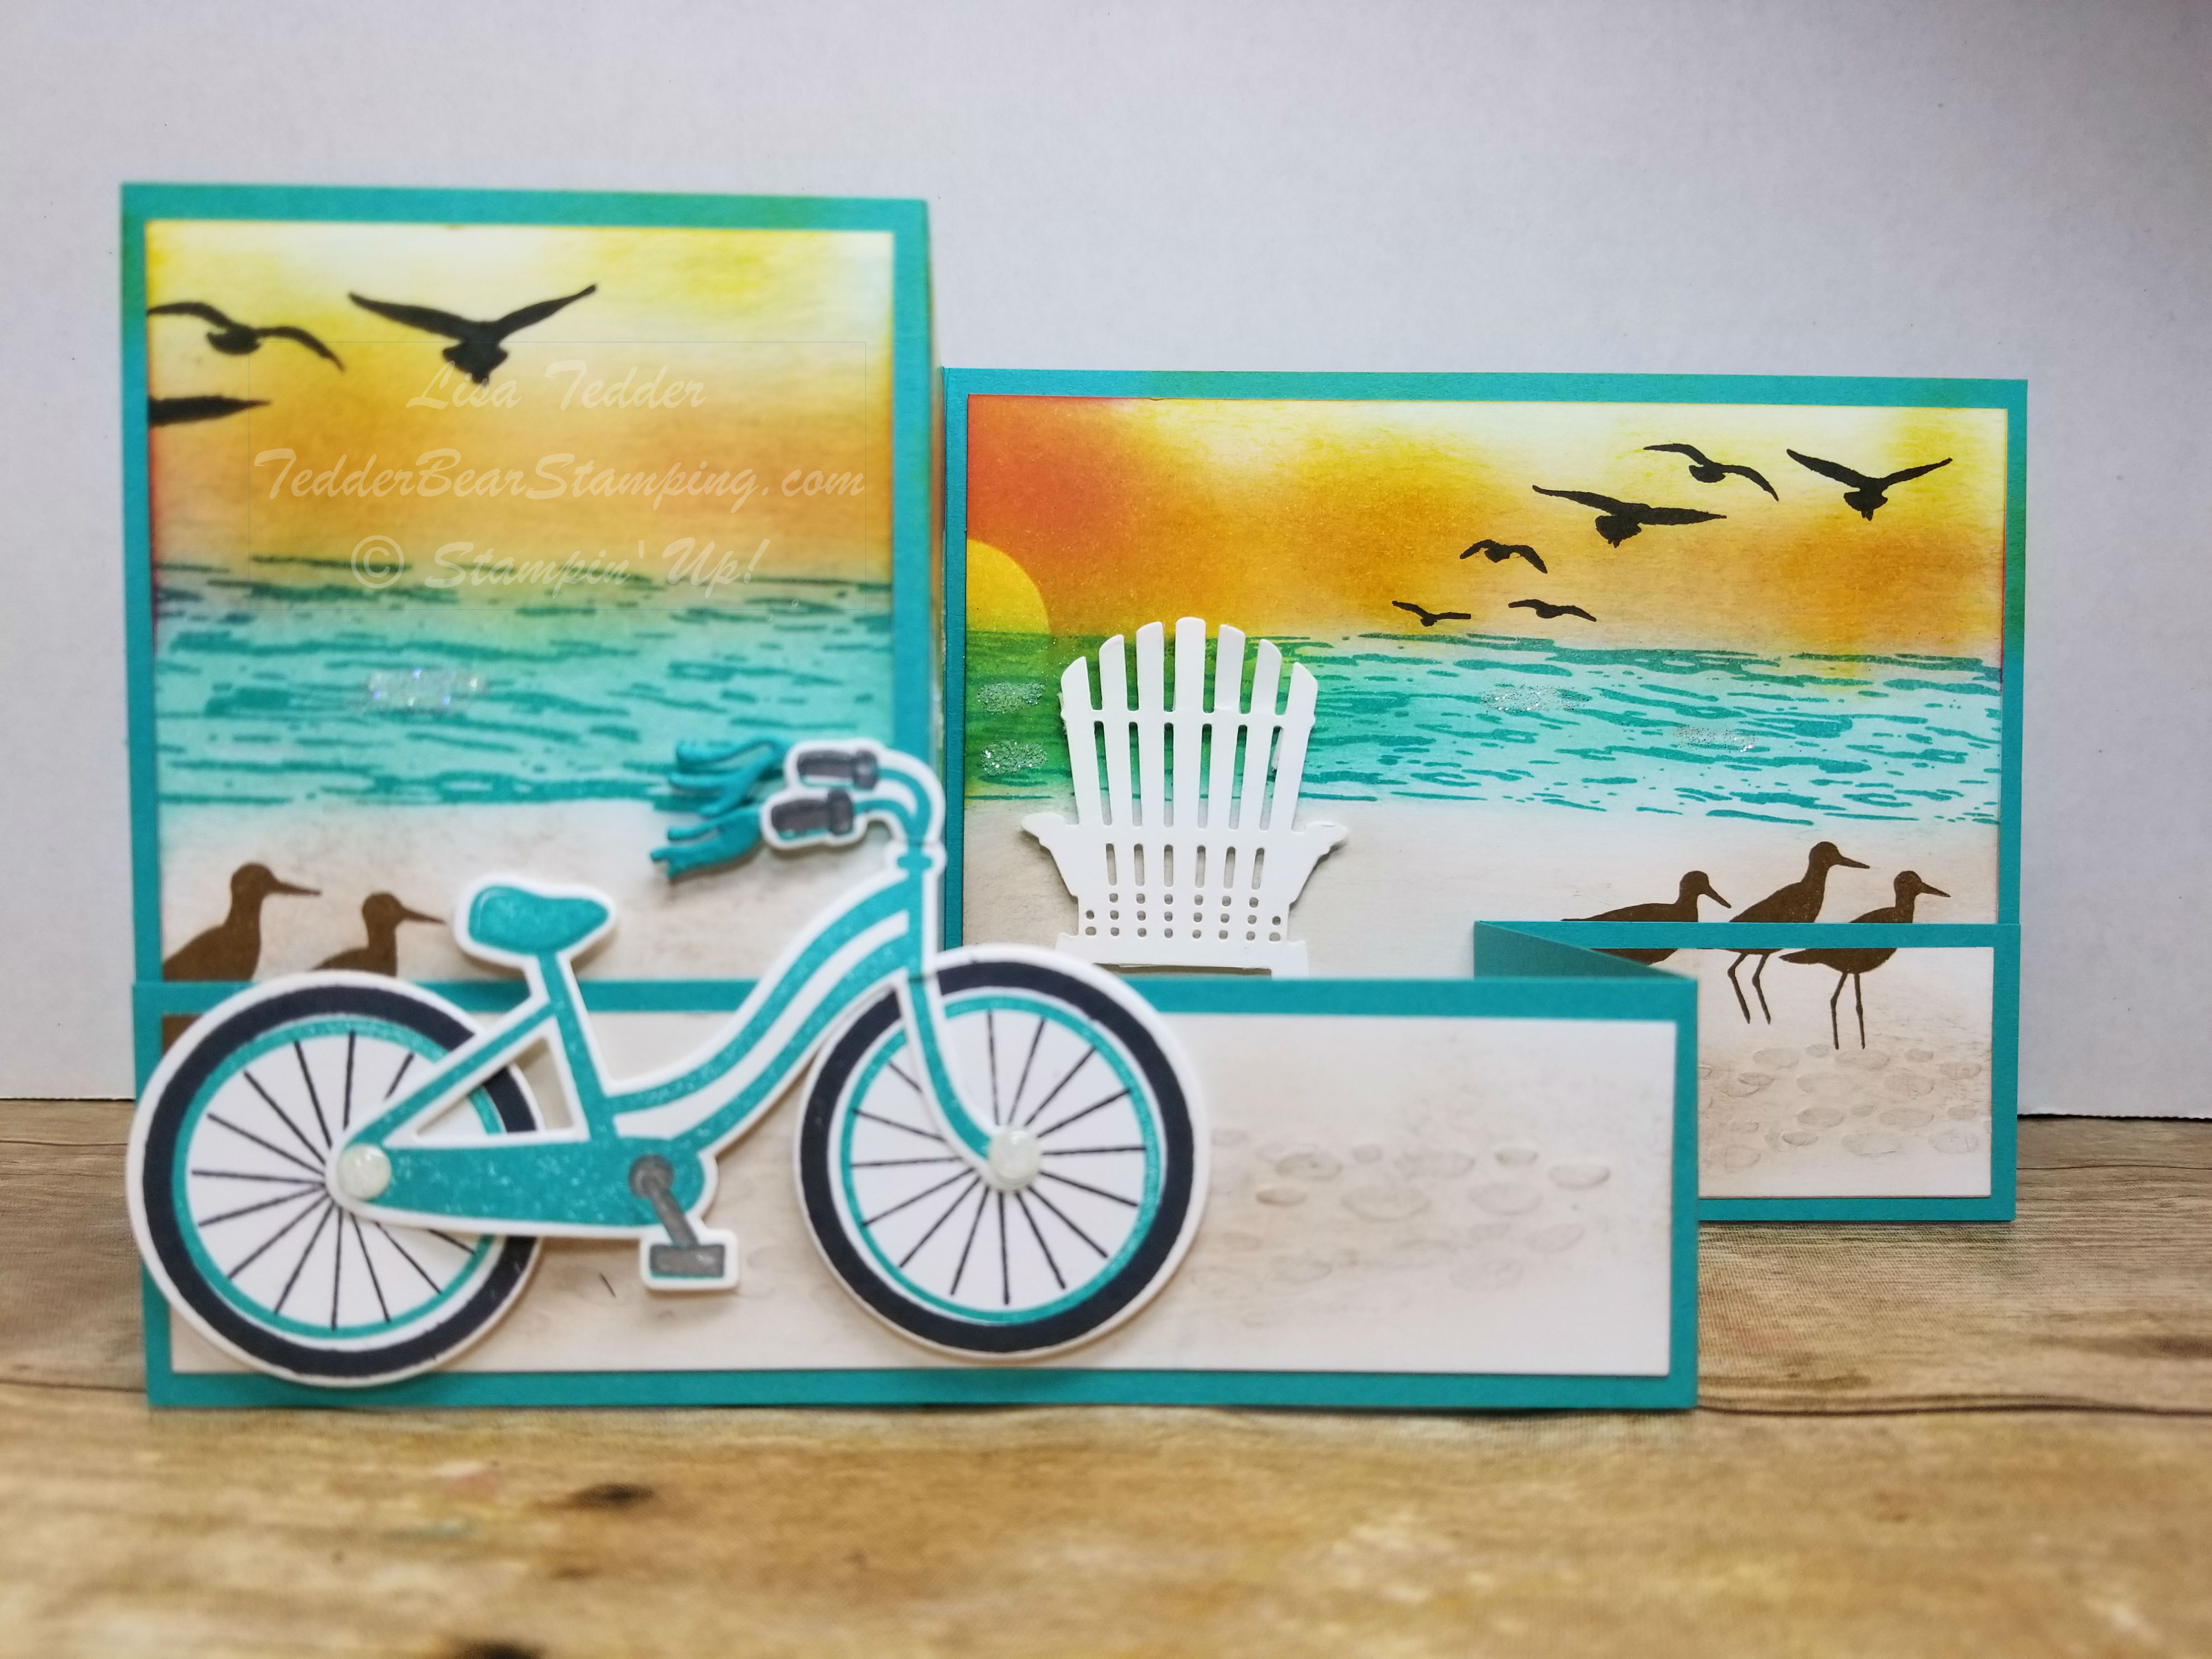
Here is the card partially open:
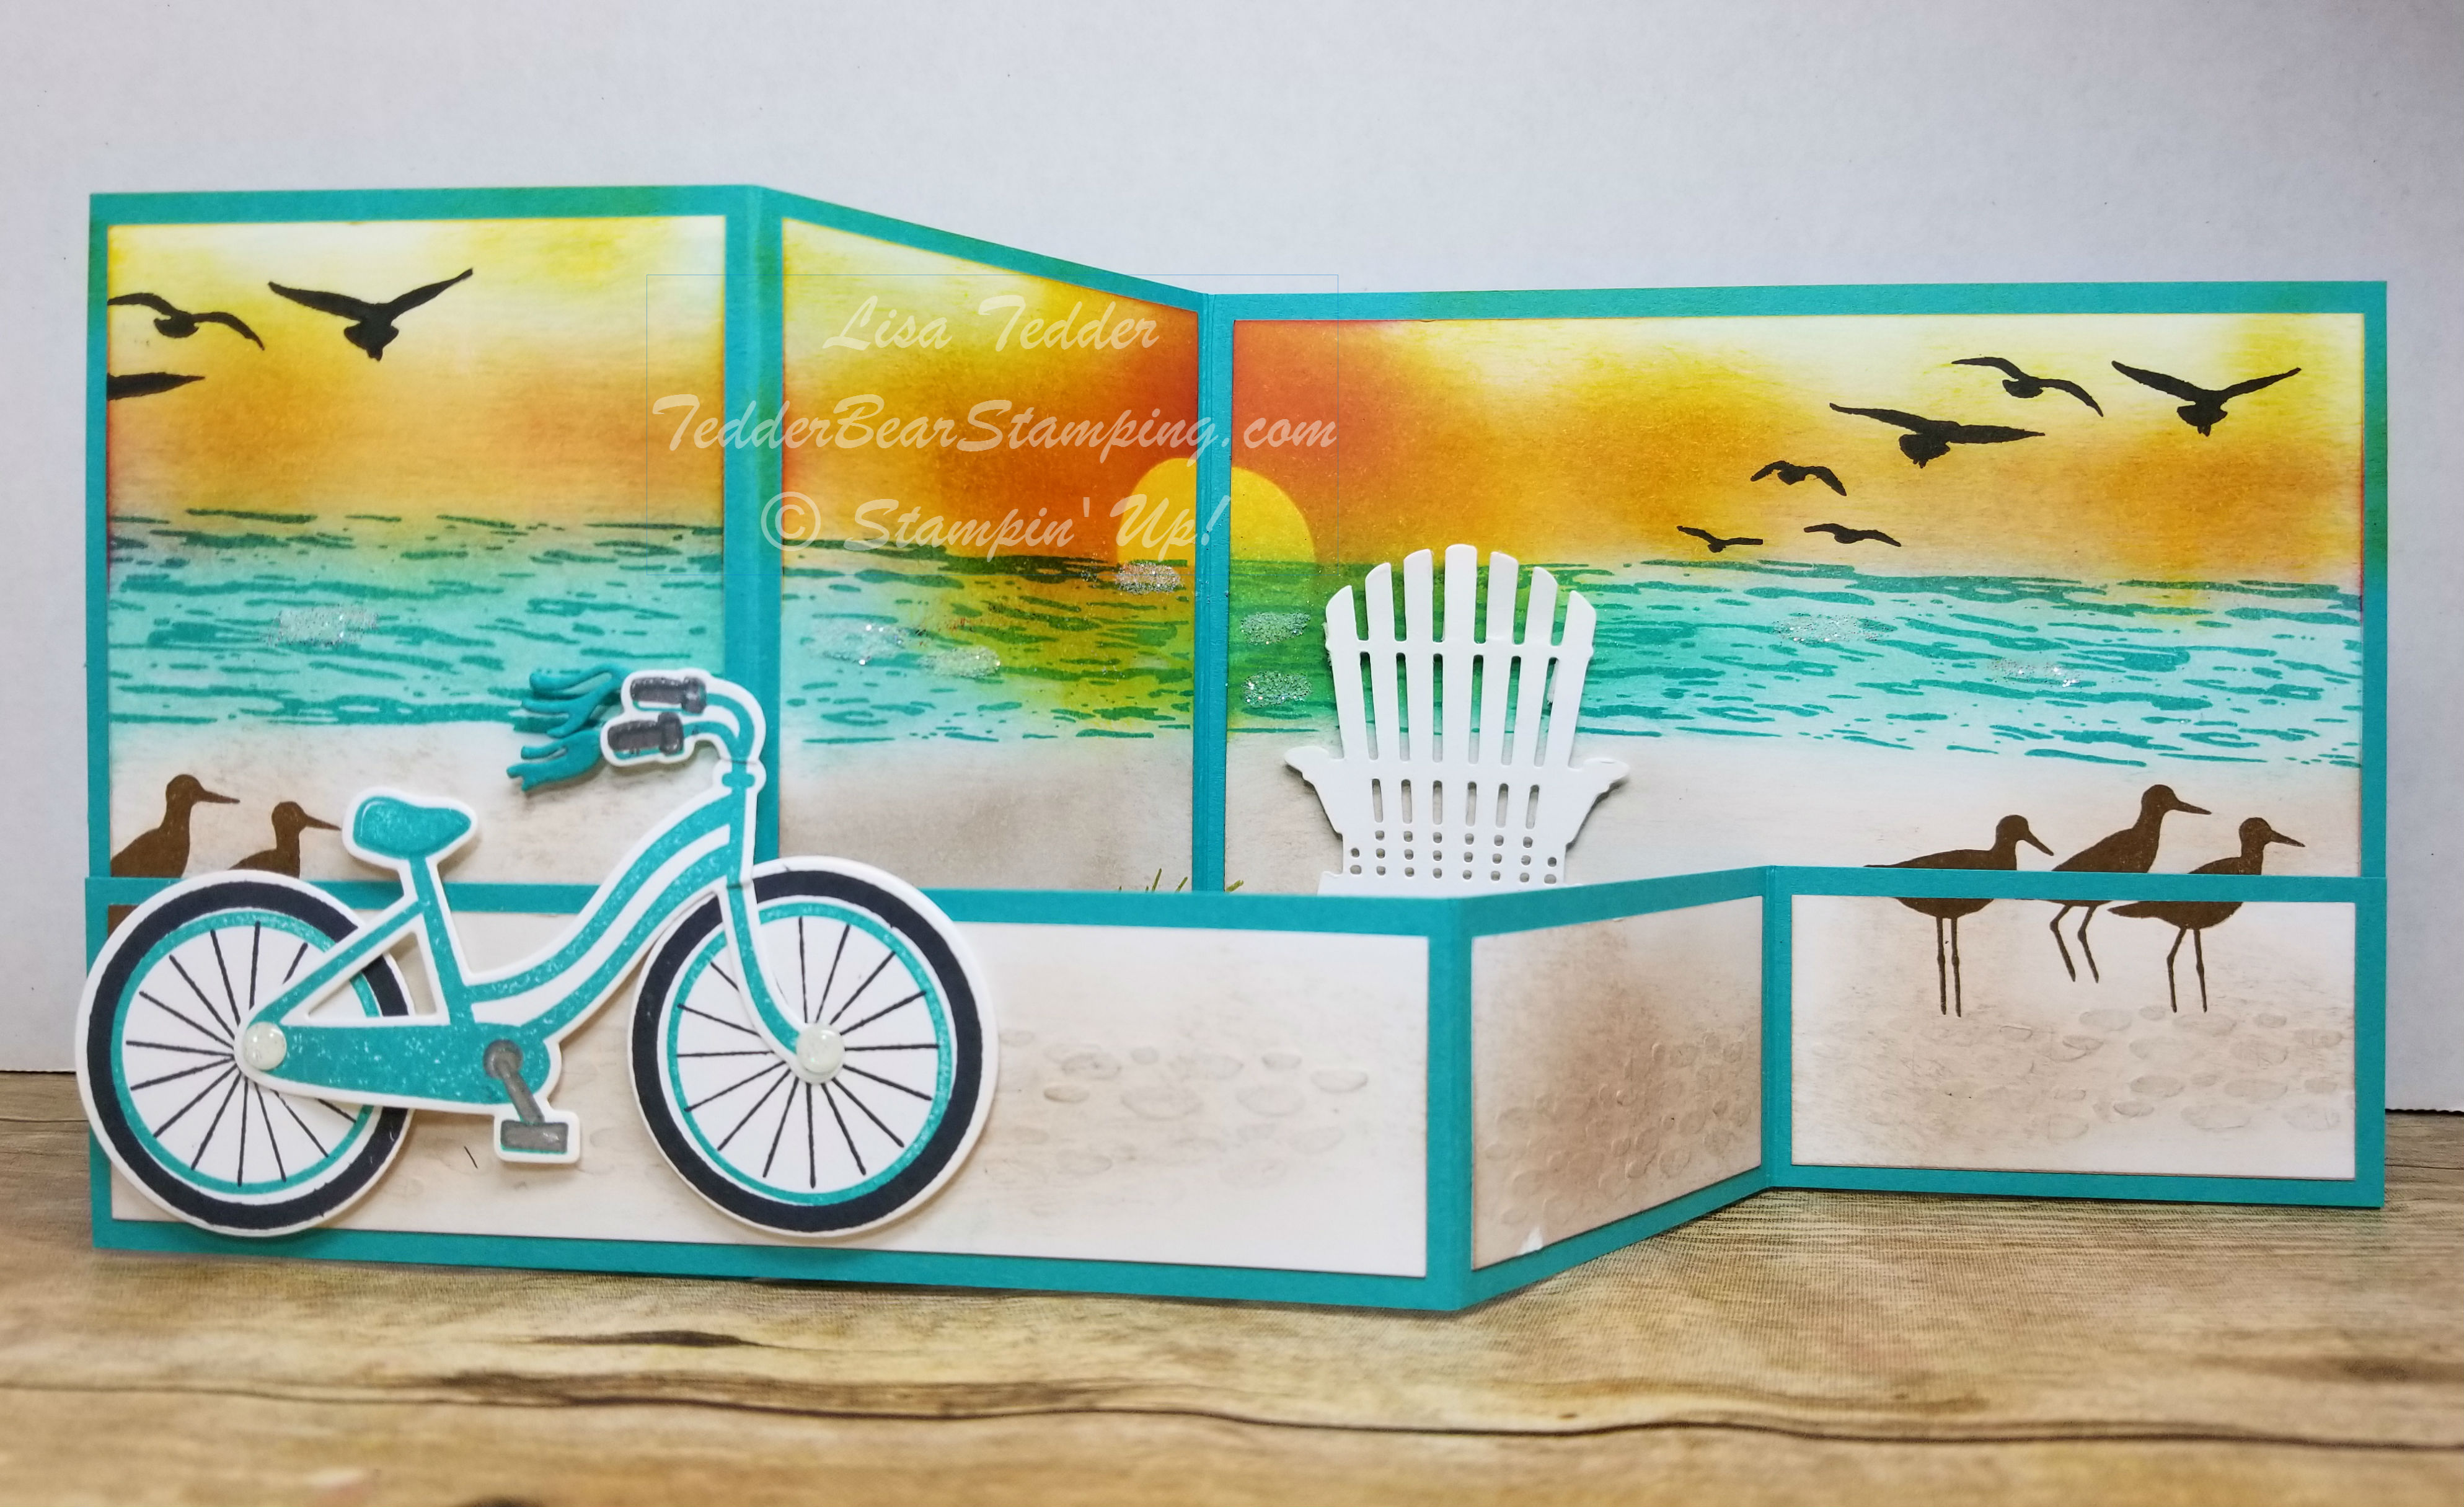
There’s the chair! And now open all the way:
I LOVE how it came out, don’t you!? Not sure what sentiment to put on, or if it needs one……what do you think? Sometimes when I send out my greeting cards, I don’t put a greeting on it, since I want to say what I want to say and let the card speak for itself! Do you ever do that?
The Deets:
Cardstock
Bermuda Bay: 4 1/4″ x 11″ scored at 8 1/4″, 1 1/2″ x 11, scored in the same places (when you put on card, the folds are opposite)
Whisper White: 5 1/4″ x 4″, 2 1/2″ x 4 (x’s 2), 5 1/4″ x 1 1/4″, 2 1/2″ x 1 1/4″ (xs 2) and scraps for stamping and chair.
I used a post it for the sun, JUST be sure and cut the circle in HALF before you sponge sun! LOL For some reason my mind couldn’t fathom that when I stamped the ocean that it would cover the circle….kind of hard when I didn’t take off the circle when I stamped the ocean OVER the circle! Let me tell you, for some reason (though I’ve done it before) it didn’t dawn on me to cut the circle in half since I was ONLY using half of it to mask the sun. Sheesh!! I’m sure I am the ONLY one that happens to!
Now, on to my Blog Candy!!
You can get in on the drawing by posting comments here on this blog (any post! or multiple posts!) or on my Facebook page and I will put your name down each and every time you comment! But be aware…..there are some that follow me that take that comment VERY seriously! I’ve had her comment on each and every post that I make and she also comments on my Facebook page, Twitter AND my Instagram! She’s one serious girl! YOU know who you are, and I appreciate you very much! 🙂
The moral of the story is if you REALLY want to win my Blog Candy comment on everything! I put the names into a Name Generator so I have NO say on who wins!
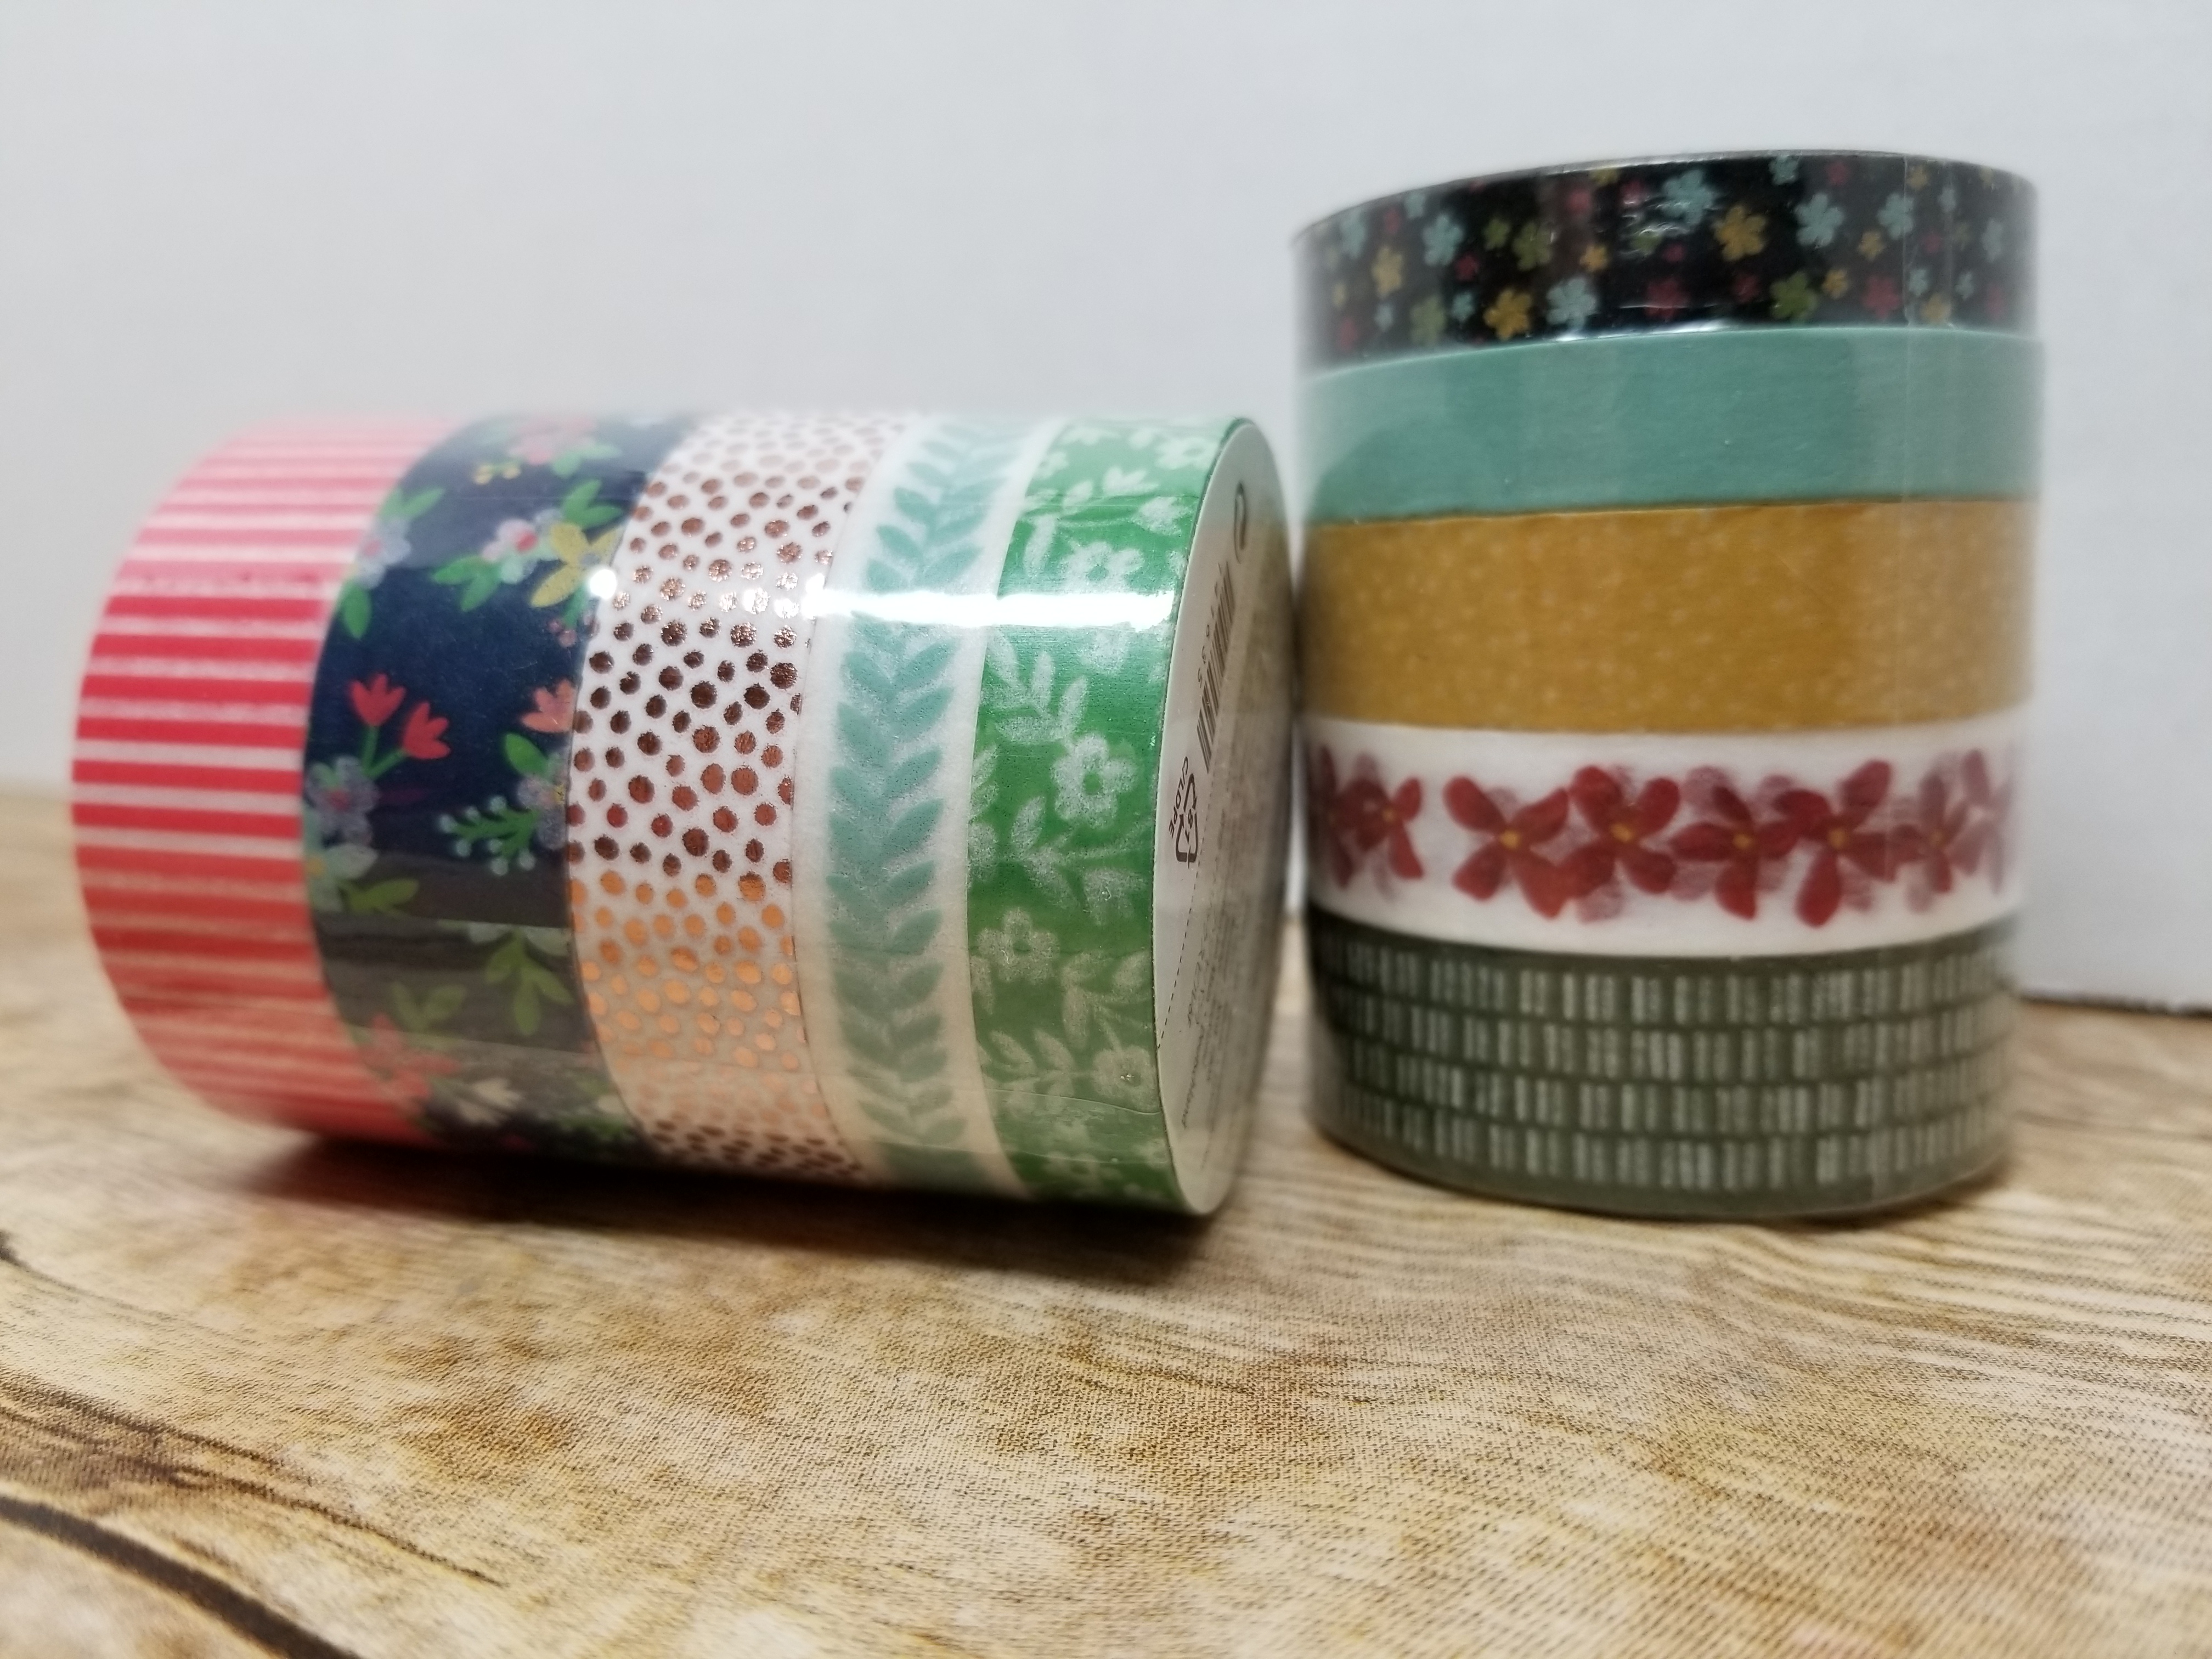
It’s Washi Tape!! These are from (lf – rt), Affectionately Yours and Botanical Gardens!! Yes, these can be yours! I am running this blog candy starting yesterday (since I said I would!) until July 4th! I think that is a great day to be giving something away for FREE! Celebrating our Freedom in a way!
Good Luck!
Click on any image below and you will be taken to my Online Store! Please use the Hostess Code: C62FFAR3 Any order you place with me online, I will be sending you a handmade card plus a little thank you gift!
I really enjoyed making this card and this post, I hope you did too! Let me know what you think! Until next time!
Lisa Tedder
TedderBearStamping
A California girl living in North Carolina
Today the mail came and inside was my framelits for Bike Ride from Stampin’ Up! Of course I had to give it a try!
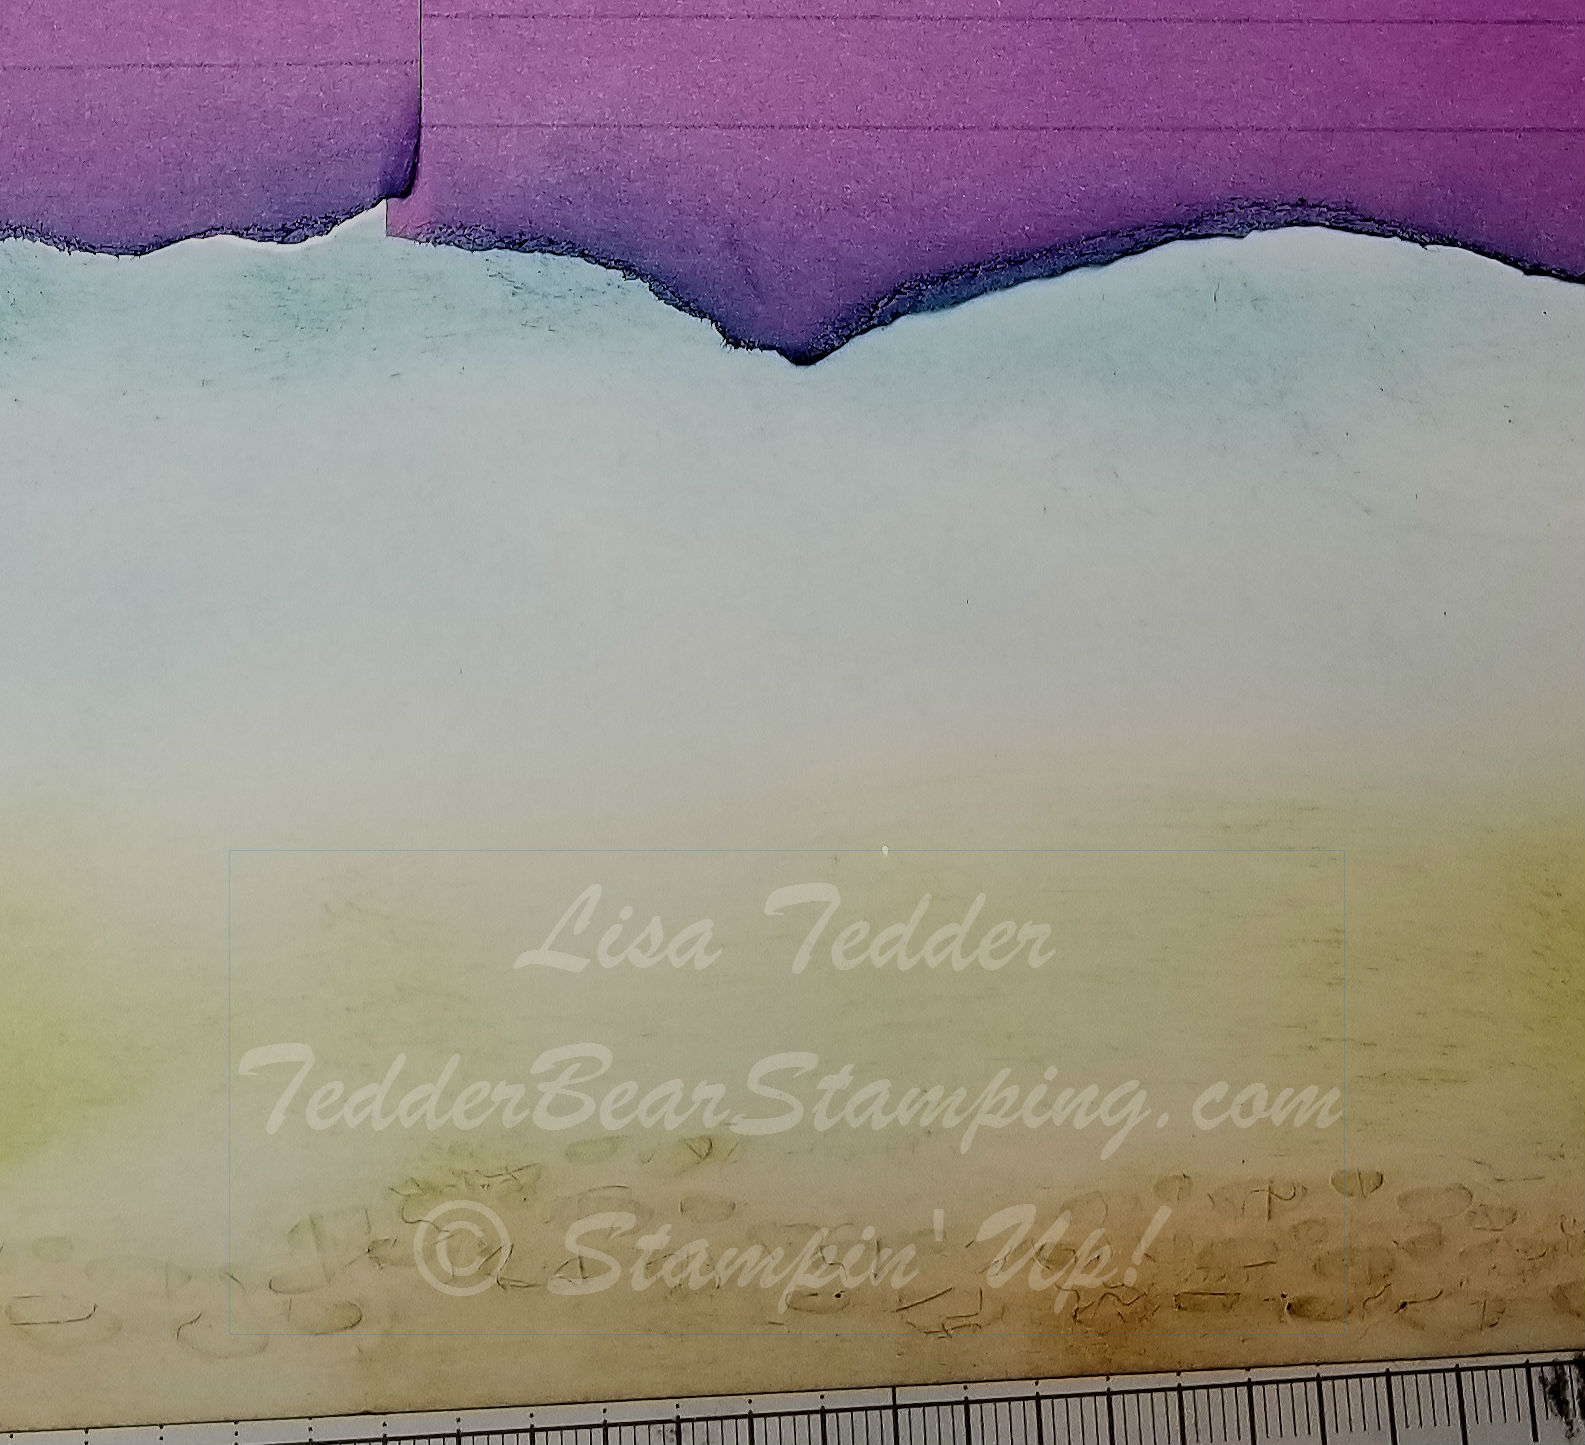
I wanted mountains in my picture so I tore some Post-It notes and stuck them to the top of my card:
I then sponged lightly Dapper Denim at the top, making the part closer to the Sticky Notes darker, and then fading the color away.
I ran the cardstock that I was using through the Big Shot with the bumpy rock thinlit under the paper, then ran it though. This gave the Cardstock the bumps! They look like rocks so I sponged over them using Soft Suede, this highlighted the rocks! I was so tickled by this! Normally you put your thinlit OVER your cardstock to cut it out, but this time I wanted the impression. Came out pretty didn’t it!?
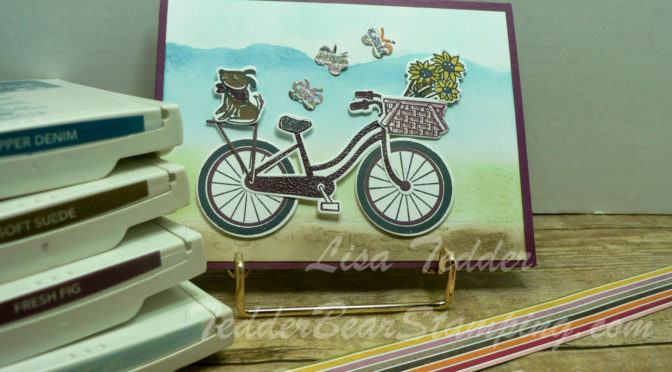
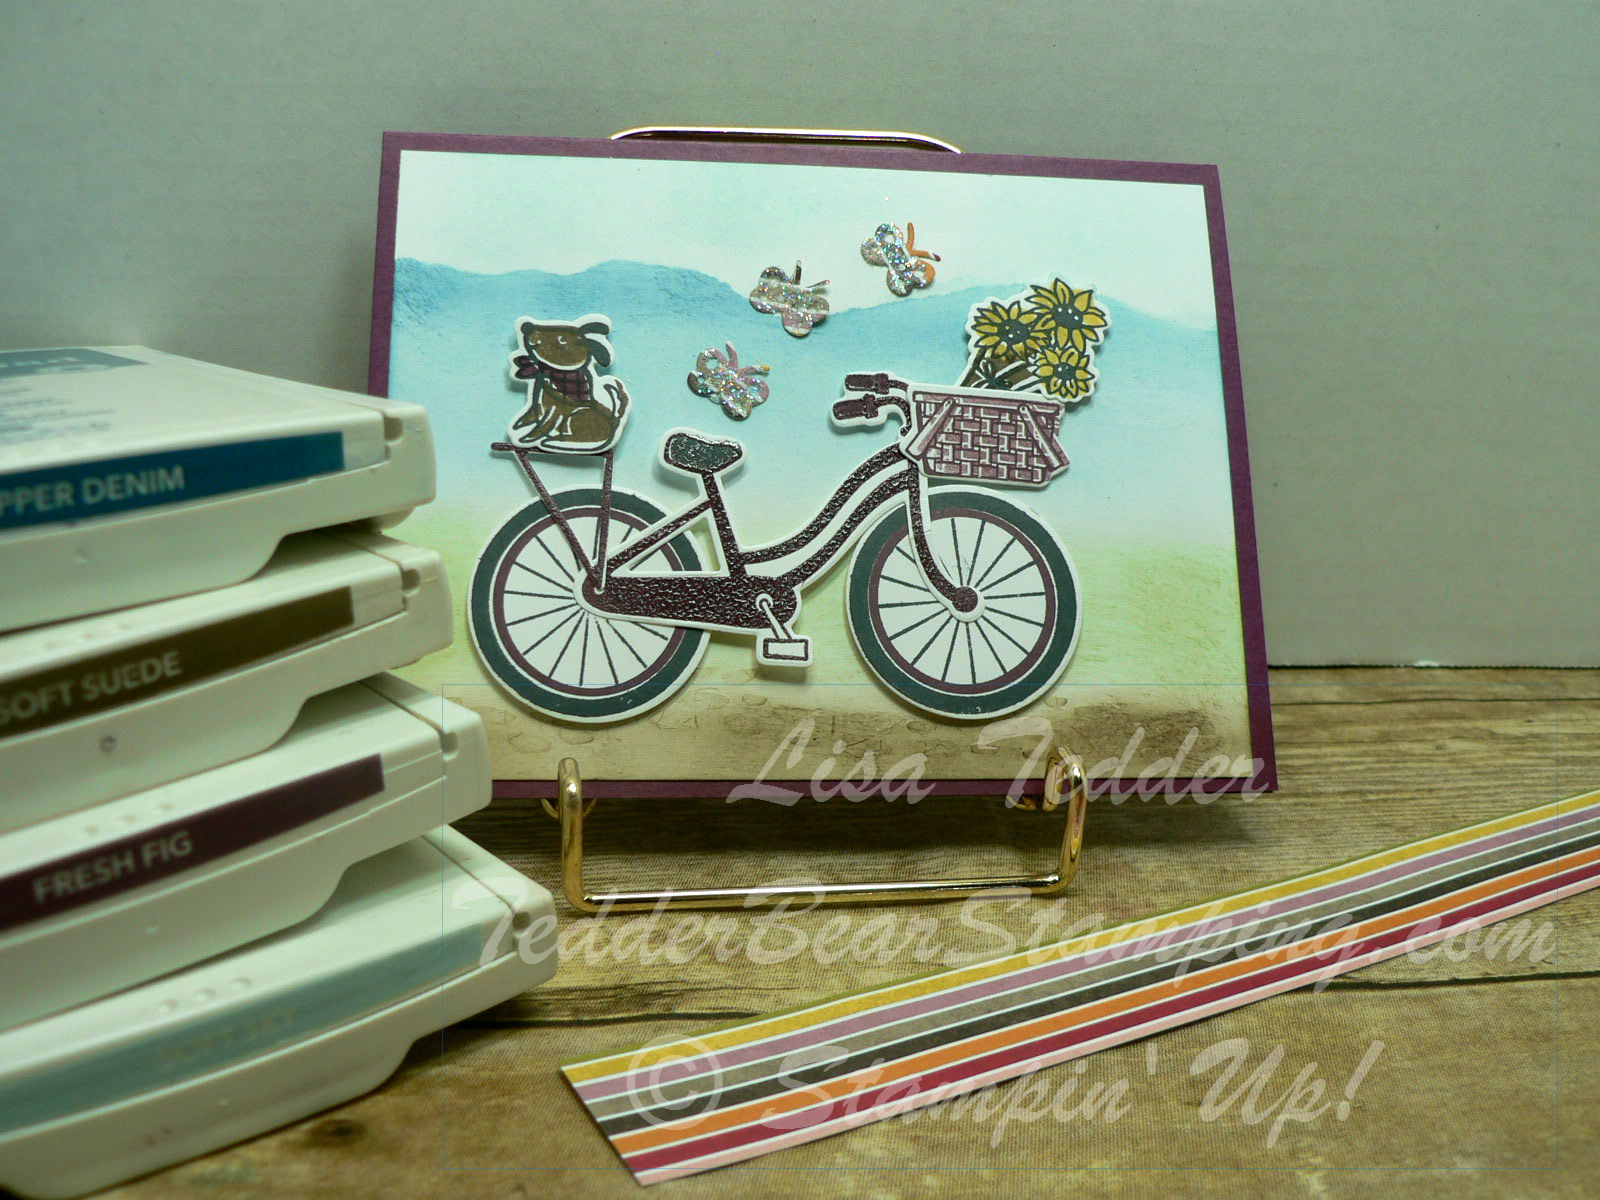
I stamped the Bike in Fresh Fig, SU’s NEW In Color! I also stamped the basket in it! The dog’s scarf is Fresh Fig too!
Here is the card:
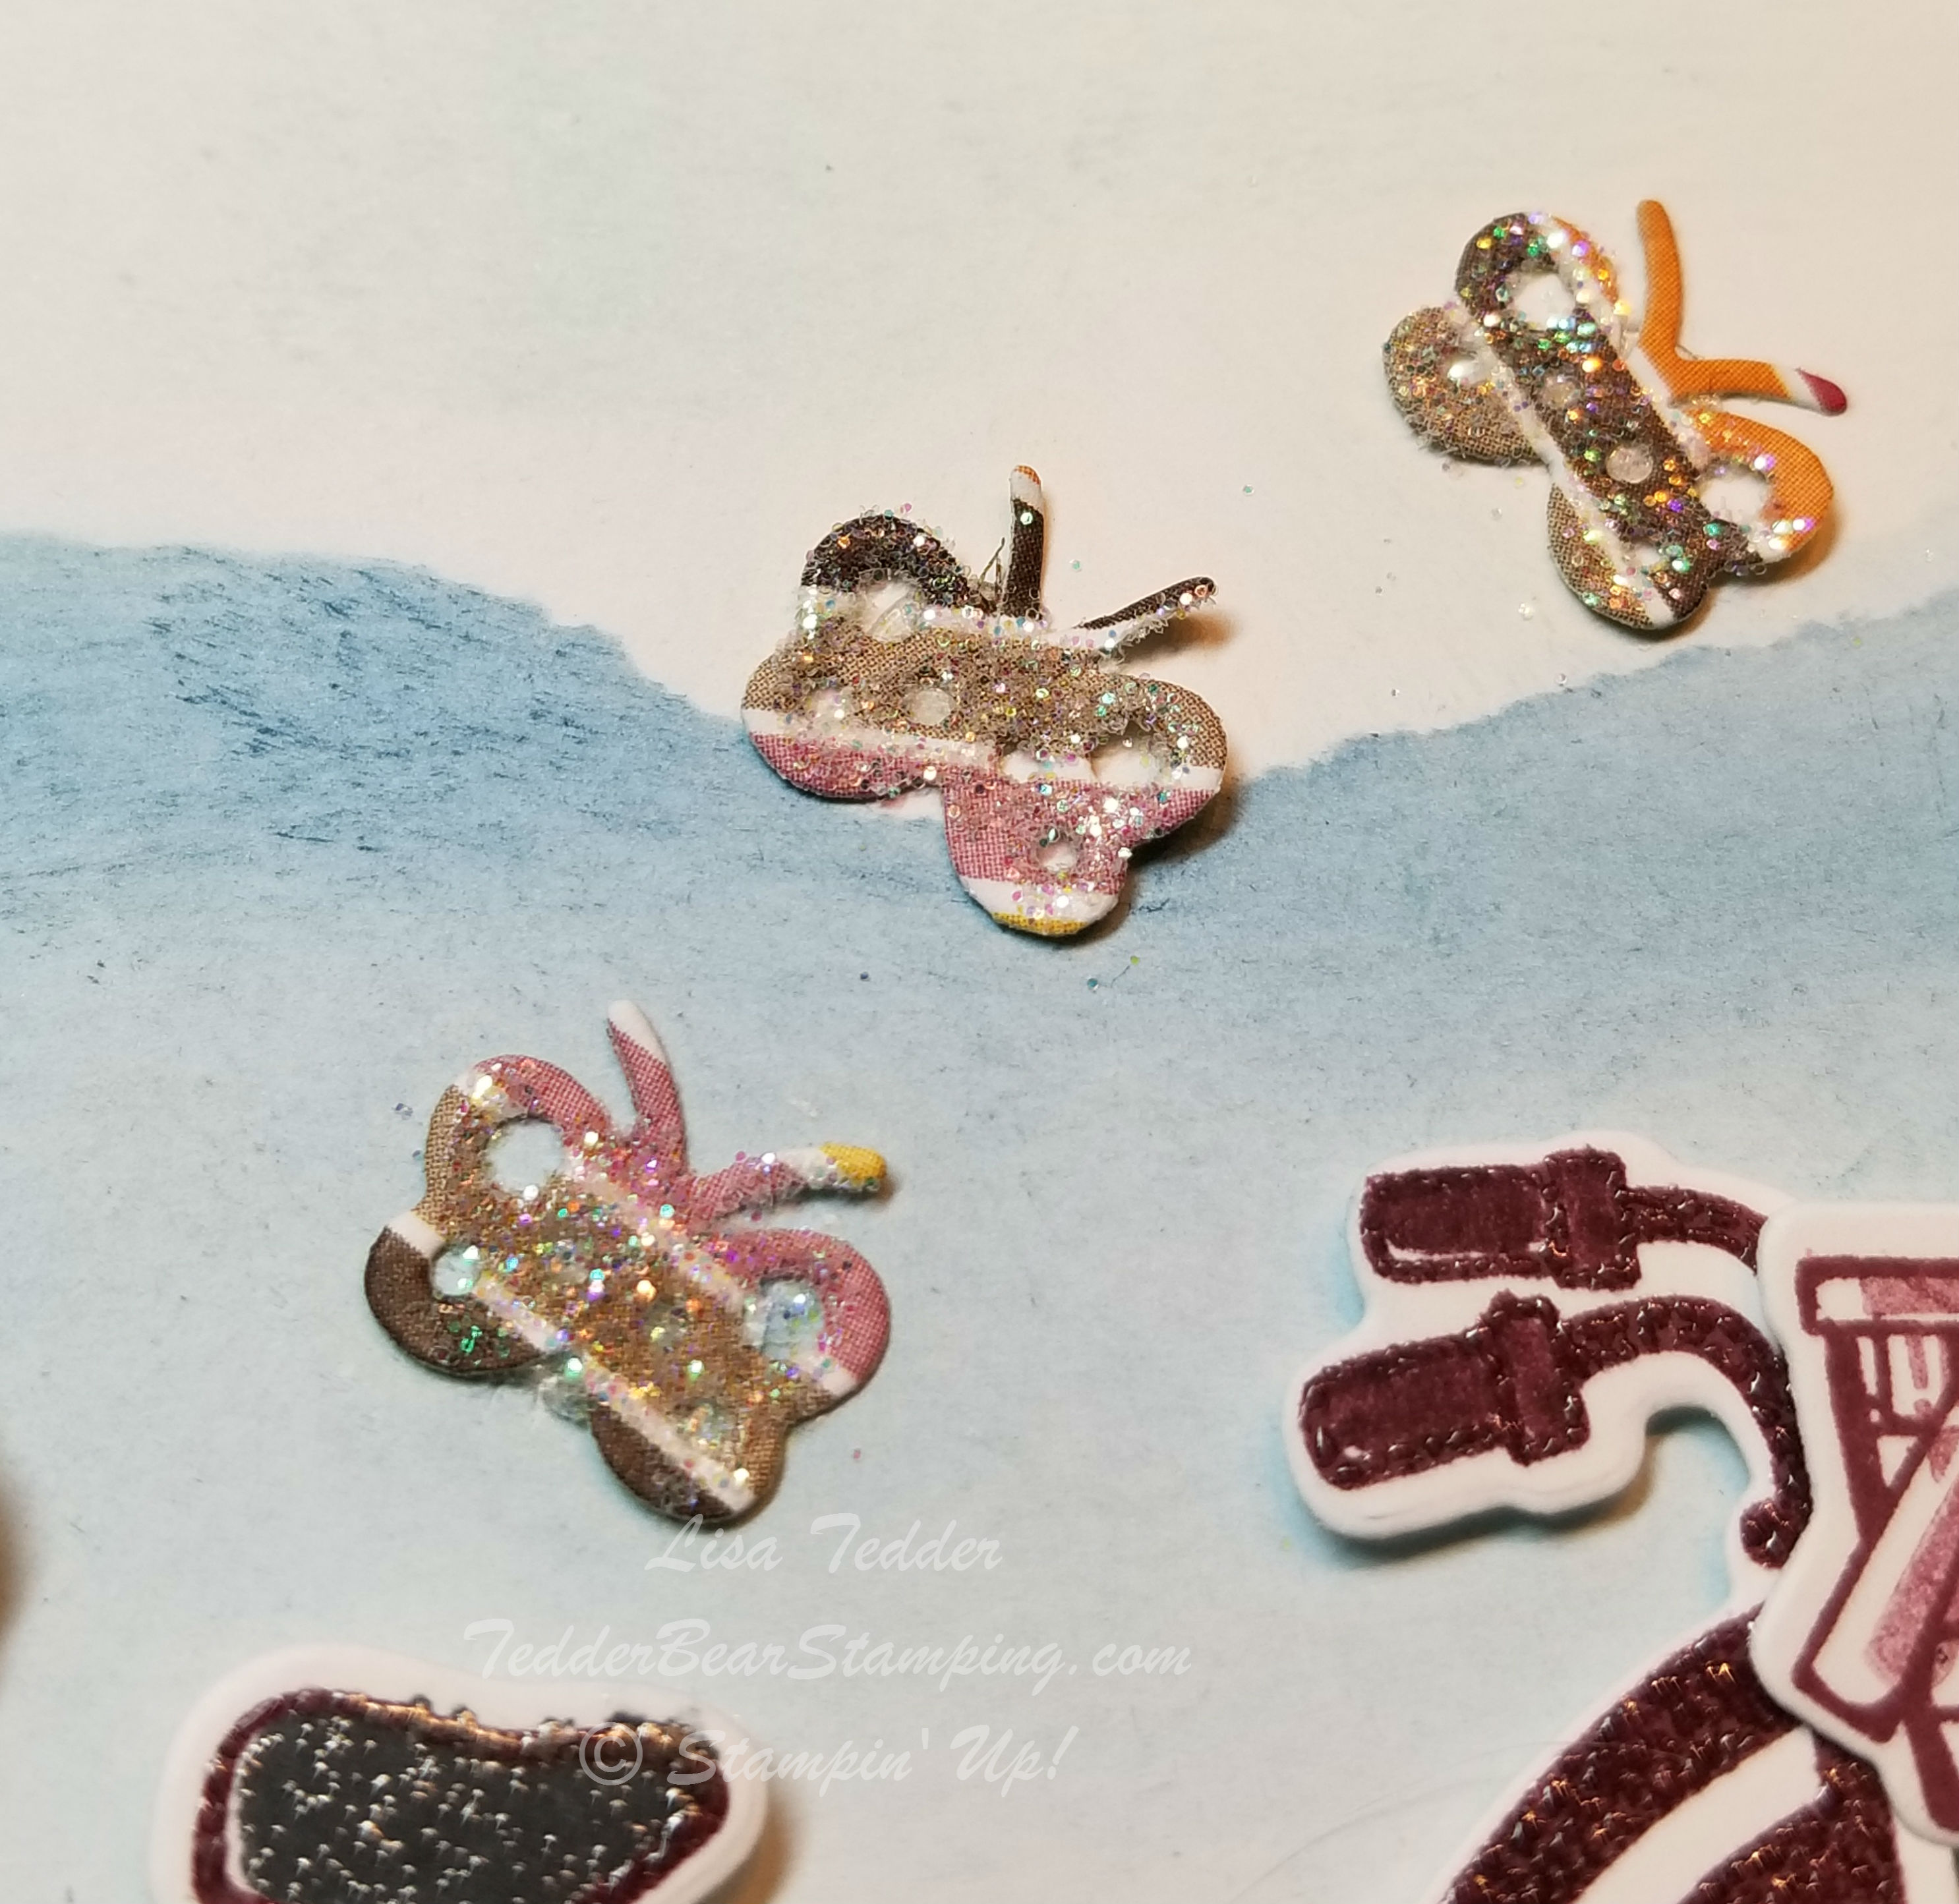
The thinlits I used are the bike frame, dog, basket, flowers and butterflies. Oh! And my favorite the rocks!
The butterflies are cut out of the Designer Series Paper Birthday Memories:
I LOVE this thinlit! Just cut out the butterfly and it has the antenna, wings and ALL! I HAD to add Dazzling Diamonds to make them look even prettier!
The Measurements are the normal card size with the Base being in Fresh Fig 8 1/2″ x 4 1/4″, scored at the 5 1/2″ line to make the card.
The Whisper White is 4″ x 5 1/4″ And scraps for all the cut outs! This was a really fun card to make!! I love how you can make so many different things be on the bike! Just change out your background and the stamp set can be for sooooo many different occasions!
I hope you enjoyed your visit today! I have more Blog Candy to give away on here tomorrow!! Be sure and visit so you can be in the drawing to win!
Click on any of the pictures below to be taken to my Online Store! If you purchase goodies from me, I will send you a handmade card and a little gift! Please use the Hostess Code: C62FFAR3
Lisa Tedder
TedderBearStamping
A California girl living in North Carolina Product List


 Glittered Organdy Ribbon")


 Designer Vellum")


 Metallic-Edge Ribbon")


 Circle Punch")


")


 Shimmer Ribbon Pack")