Tag Archives: rubber stamps

I made my own Fall Ink Pad, you can too!

Hey Guys!

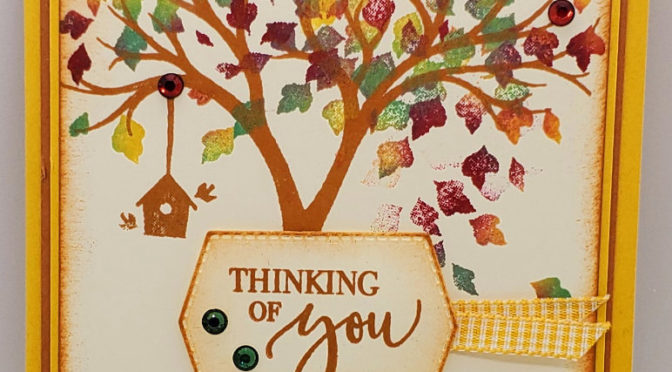
Today I am going to show you how I made my own Fall ink pad so that leaves on my tree look natural, when I am done you’ll be able to also!! Of course, I made a video you can go here if you would like to SEE how I made it! Naturally, I tend to look at pictures and if I have questions a video helps me out a lot. As an example, here is a picture of my card:
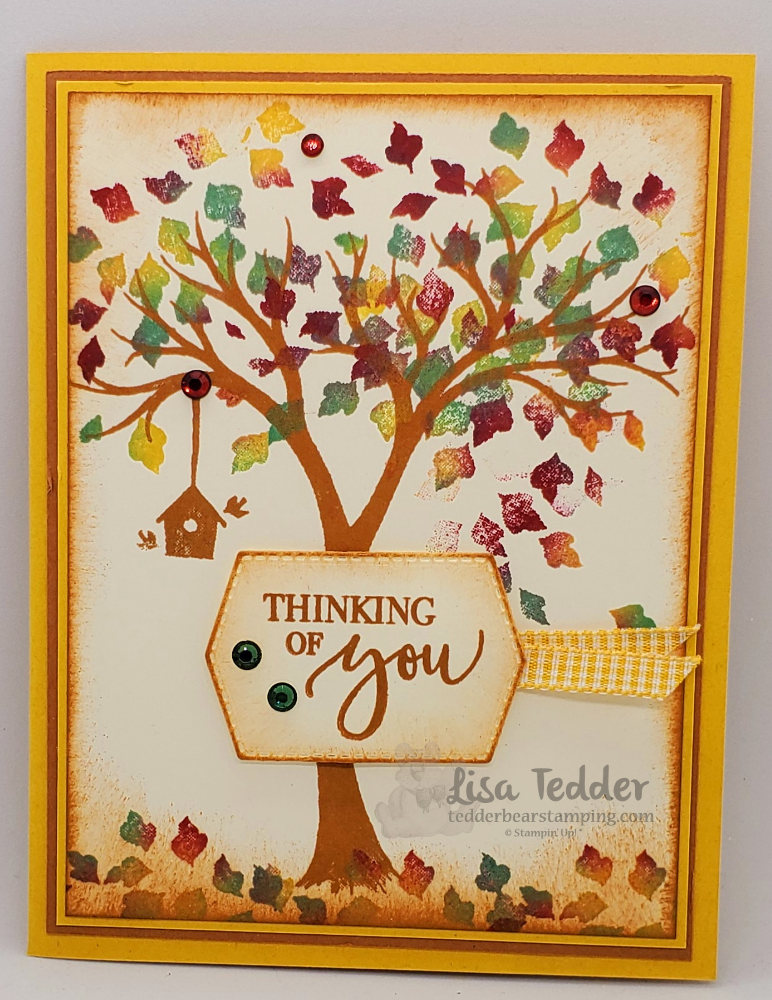
See how the leaves are THREE different colors! That’s my own Fall ink pad!
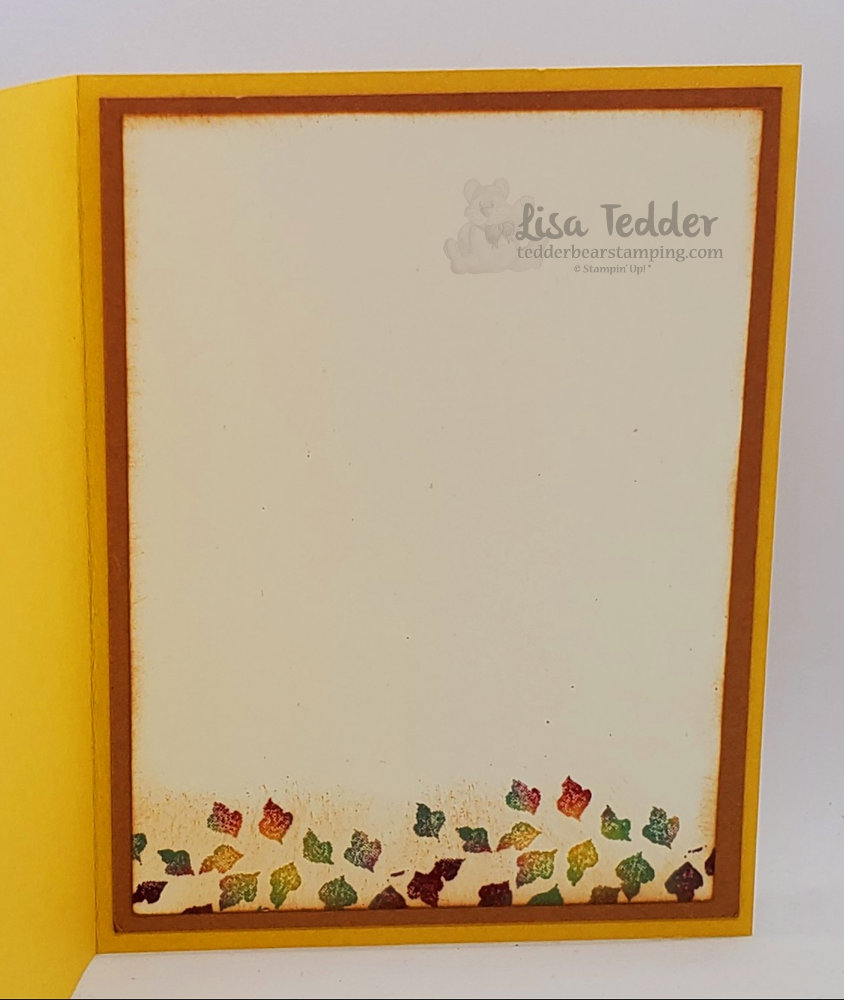
My own Fall ink pad was used for the inside too!

So, how did I make my fall ink pad? To begin with I had a dirty, yucky Versamark pad that I never used and thought of chucking it in the trash……but no, I could make my own Fall ink pad so my tree will look gorgeous AND match the colors I was using for this card!
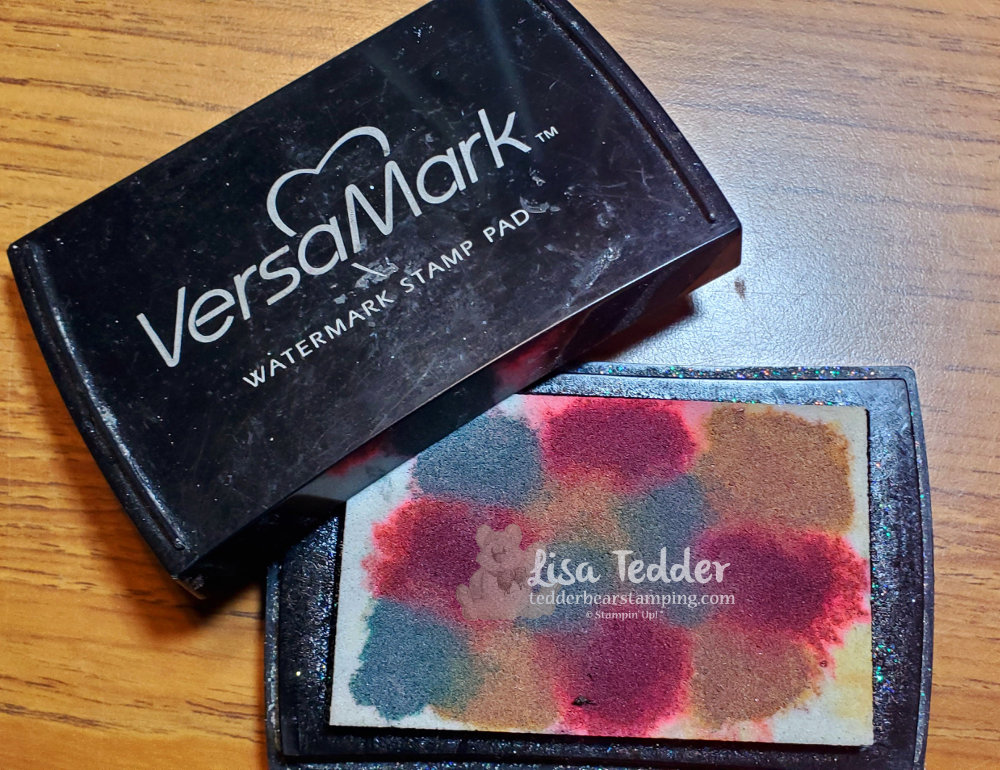
My own Fall ink pad made from an OLD Versamark pad!

Since I wanted the colors to match my card I used Bumble Bee, Cherry Cobbler and for the green I went with Just Jade. Already I knew that I wanted to use the Holiday Rhinestones and those used Cherry Cobbler for the red, and a yellow that looked a lot like Bumble Bee but the green was Shaded Spruce so I went with a lighter shade of color and used Just Jade instead. It’s funny how I go about figuring out which colors I use in my crafting, this time it was all about the Rhinestones……gotta have that BLING!

For a different fall project that I made a few years ago, click here!

As always here are the specifics for this card:
Stamps:
Life is Beautiful
Inks:
Bumble Bee
Cinnamon Cider
Cherry Cobbler re-inker
Just Jade re-inker
Bumble Bee re-inker
OLD Versamark pad (you can use new!)
Paper:
Bumble Bee 8 1/2″ x 5 1/2″ (scored at 4 1/4″), 3 7/8″ x 5 1/8″
Cinnamon Cider 5 1/4″ x 4″ (x2)
Very Vanilla 5″ x 3 3/4″ (x2), scrap for sentiment
Misc:
Holiday Rhinestones
Stamping Sponges
Dimensionals
Tasteful Labels Dies
Bumble Bee Gingham ribbon

As you know, all the supplies will be listed below in picture form. Consequently if you click on any of them you will be taken to my OnLine Store, for every purchase at or above $35 you will get from me 16 projects in a pdf with pictures and step by step instructions!
Sneak Peek for projects you will get in your pdf!

To summarize, I am a ‘give the facts and be done’ kind of girl, so I will let you go for now, check back in next week for a new card/video! If you want to know when I post, subscribe and you can also receive a Newsletter from me by subscribing to that too! Thanks for stopping by and supporting me!

Lisa Tedder
A California girl living in North Carolina

Product List

It’s a Mystery Fold!

Hey Guys!

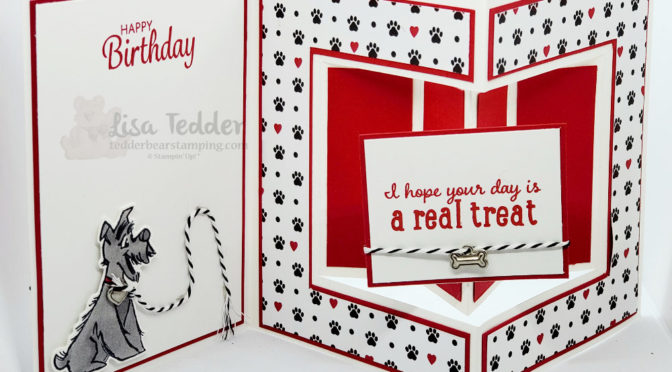
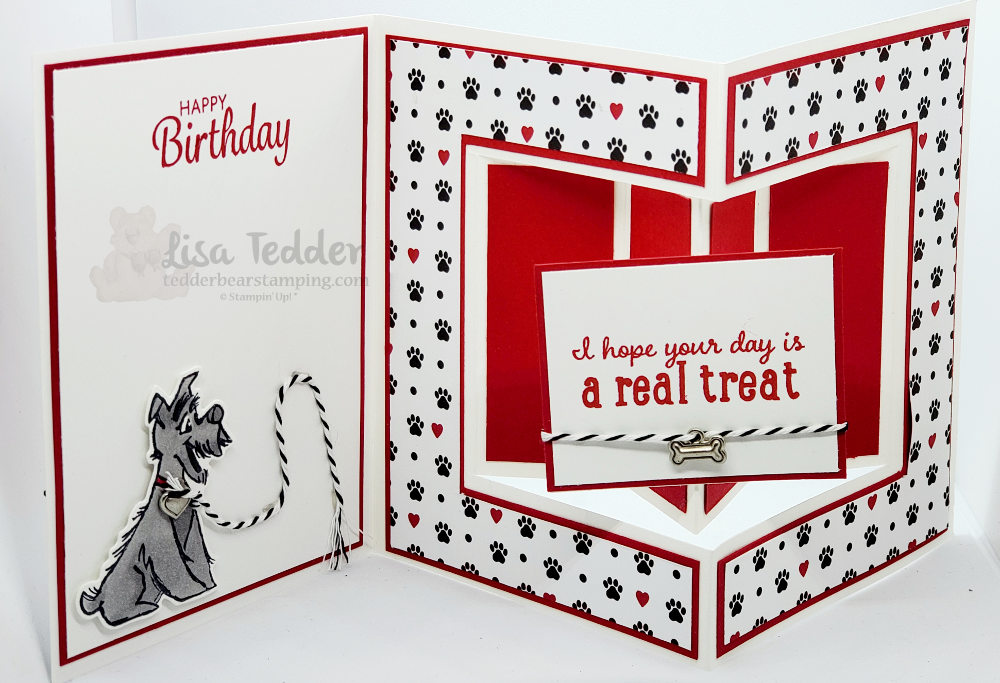
I’m on a roll! I’ve done 4 videos in 4 weeks! You can go to my YouTube channel to see the other videos I’ve done. To see this cards video you can click here. Looking OnLine I saw this fold card from Etsy, she was charging to make that card, and I figured I would try to figure it out on my own. And I did! What is great is that it fits into one of Stampin’ Up!’s envelopes and I made it work! After I saw this on Etsy, I saw someone else from Europe do the same cut but their cards are bigger than the United States so I’m even more proud that I figured it out by myself! Here is my card:

This is the card open. Isn’t that dog stinkin’ cute!? Love that I got the fold idea from Etsy!

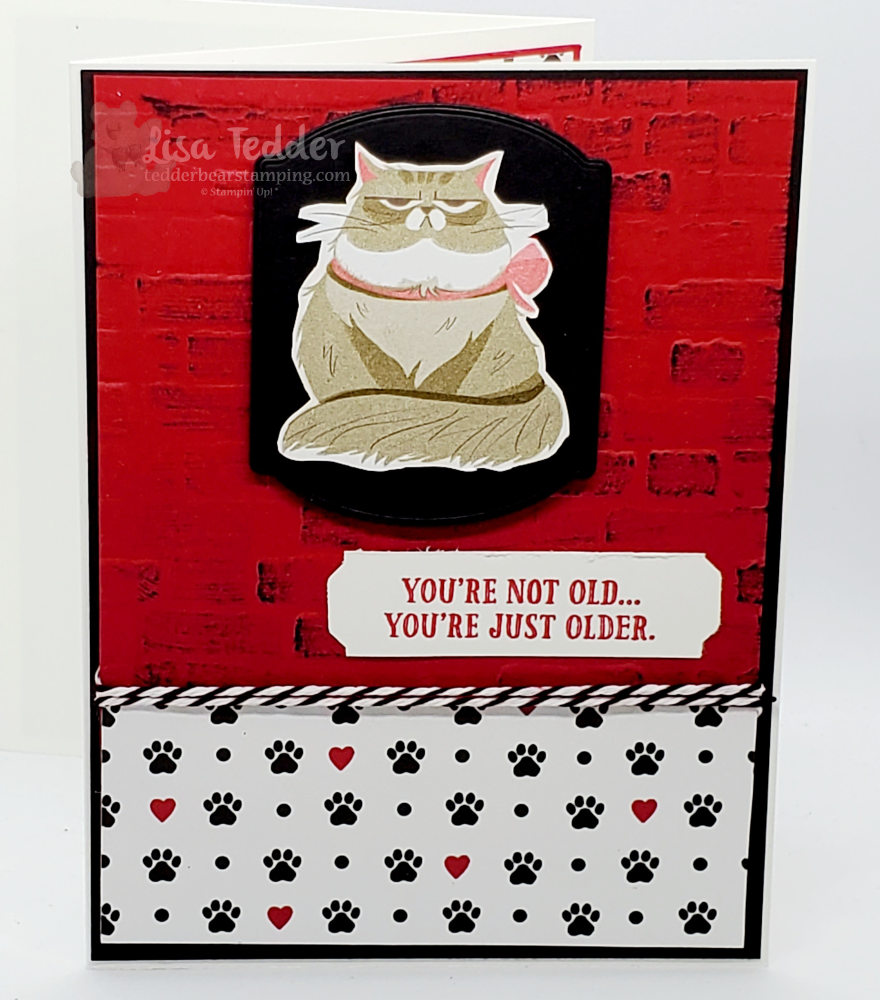
And the front of the card:

Here is that Snooty Kitty! I have one of those do you?

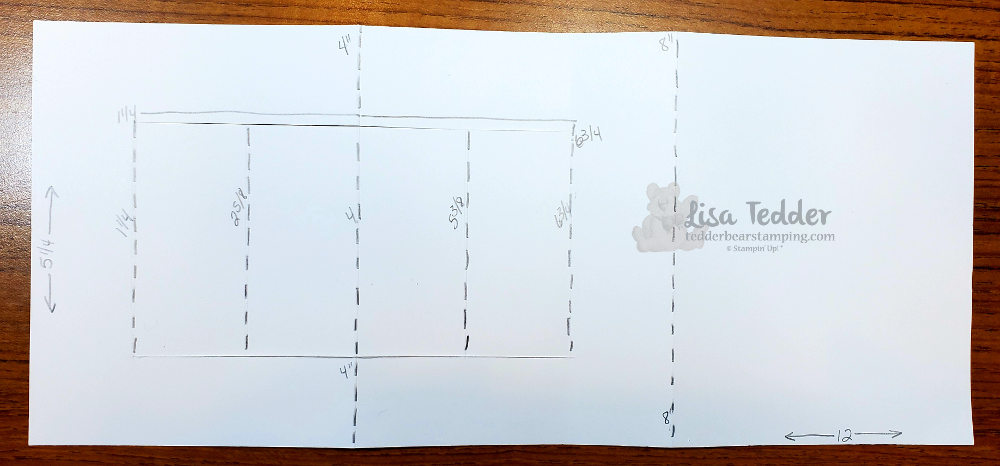
And here is my cheat sheet!

Dash Lines are Score Lines, Straight uncut lines is where you cut.

As usual, here are the specifics to this card:

Stamps:
Pampered Pets Bundle #154069
Here’s a Card #149438
Itty Bitty Birthday #148618

Inks:
Memento Black #132708
Real Red #147084
Blends: Real Red #154899, Smoky Slate #154904

Paper:
Whisper White 12 x 12 cardstock #124302 12″ x 5 1/4″ scored @ 4″ & 8″
Whisper White #100730 3 5/8″ x 4 7/8″ 2 3/8″ x 1 7/8″, scraps for dog and sentiment
Basic Black #1210453 7/8″ x 5 1/8″
Real Red #102482 3 3/4″ x 5″ (x4), 1 1/8″ x 2 1/4″ (x4), 2 1/2″ x 2″
Playful Pets DSP #152489 3 5/8″ x 4 7/8″ (x2), 3 3/4″ x 2″ & cut out cat

Misc:
Playful Pets Trim Combo #152466
Playful Pets Trinkets #152465
Paper Trimmer #152392
Brick & Mortar 3D Folder #149643
Tasteful Labels Dies #152886
Dimensionals #104430
Glue Dots #103683
MultiPurpose Liquid Glue #110755

Below you will see these same supplies listed in picture form. Click on any of them and you will be taken to my OnLine Store! Any purchase for $35.00 or more you will receive from me a Tutorial of 16 projects with step by step instructions along with photos! Here is a sneak peek if you buy from me this month.

PDF included with all orders above $35!

Wasn’t this card super cute!!? Loving how it came out! This will probably be sent out to my Grandkids….I think they will love it as much as I do!

Hey, I keep forgetting to tell you that I have a newsletter that I send out each month, be sure and sign up so you can get notified of new things coming out and get ideas for crafting!

Thank you for stopping by! Please leave me a comment so I know you are reading this. Come back again! You can subscribe to my Blog and get notified when I post next.

Lisa Tedder
A California girl living in North Carolina

Product List
Sunflower Shaker Card

Hey Guys!

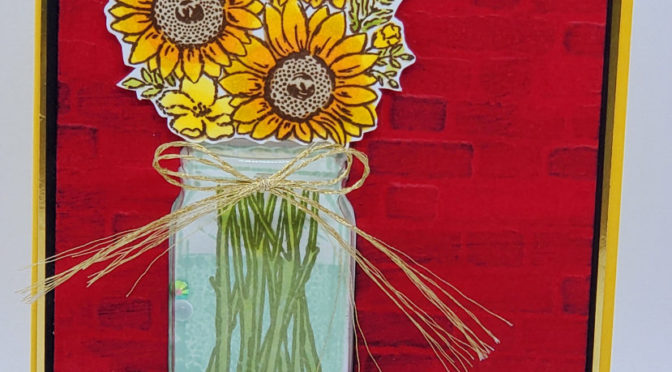
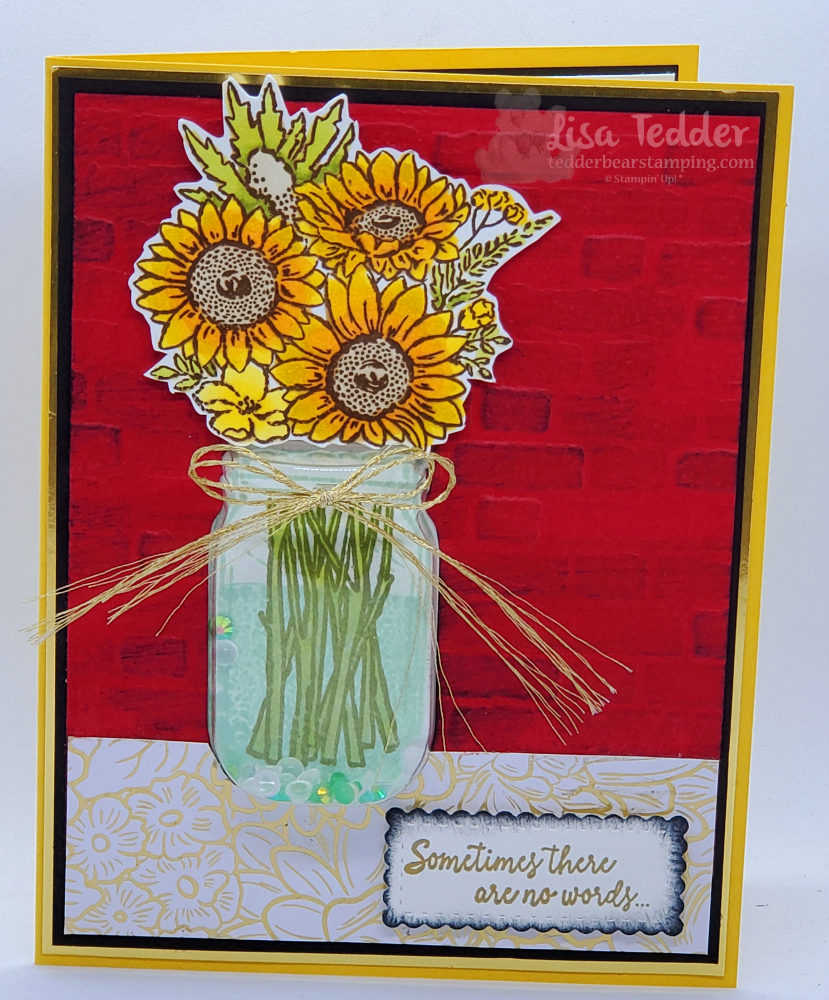
Today I am sharing with you a card I made using the Jar of Flowers stamp set AND the Mason Jar Shaker Domes! I LOVE shaker cards, and this one was so fun! The stamp of the Mason Jar is so cute! These are REVERSIBLE stamps! So, you stamp the image in Pool Party to mimic a Real Mason Jar turn the stamp over and you can shade it with the same stamp!

Here is my card:

No one can resist a shaker card! You just HAVE to shake it!

The Designer Series Paper (DSP) is supposed to be a table with the brick being the wall. Do you see that? I wasn’t so sure how to make it look like a table, so this is what I came up with.

When I did the brick, I used real red cardstock and then ran the Memento Black ink over it to look more weathered and real. For the double bow ribbon I used the Forever Greenery Combo pack, the gold really sets off the gold in the DSP. And for the inside of the jar I used the Flowers for every season Gems. Really fun to to shake!

Here are the specific for this card:

Stamps:
Jar of Flowers
Comfort & Hope

Inks:
Early Espresso (for flowers)
Memento Black (for brick and Sentiment)
Pool Party (for water and for the jar)
Old Olive (for stems)
Blends: Old Olive, Daffodil Delight, Pumpkin Pie, Crumb Cake

Paper:
Bumble Bee 8 1/2″ x 5 1/2″
Gold Foil 5 3/8″ x 4 1/8″
Black 5 1/4″ x 4″ (x2)
Real Red 5″ x 3 3/4″
DSP 1 1/4″ x 3 3/4″
Whisper White 3″ x 5″ (for flowers AND inside jar) 5″ x 3 3/4″ (for inside)

Misc:
Forever Greenery Trim (gold )
Flowers for Every Season Gems
Stampin’ Seal
Brick & Mortar 3d folder
Dimensionals
Stitched So Sweetly Dies
Mason Jar Shaker Domes

Below my name are the products in picture form, click on any of them to be taken to my OnLine Store. ANY order over $35 will get you a pdf of 16 cards with step by step instructions including pictures! Here is a sneak peek:

PDF included with all orders above $35!

Thank you so much for stopping by!  Please leave a comment so I know you like what you saw AND that you saw it!  LOL  For all I know I am writing this is as private journal and nobody is reading it!  LOL

Lisa Tedder
A California girl living in North Carolina

Product List

Celebrate Sunflowers & Watercolor Pencils

Hey Guys!

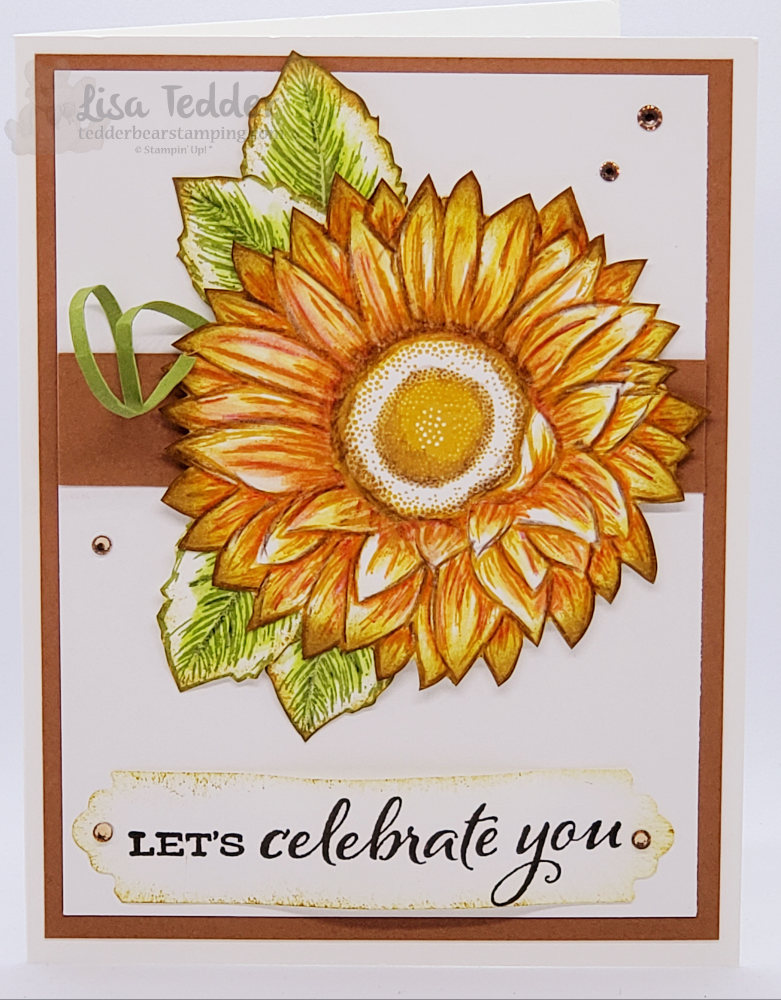
So, I was on Facebook the other day and this card from Amanda Charlesworth made me put down everything I was doing and make it! I had to make this card! I LOVE when that happens.

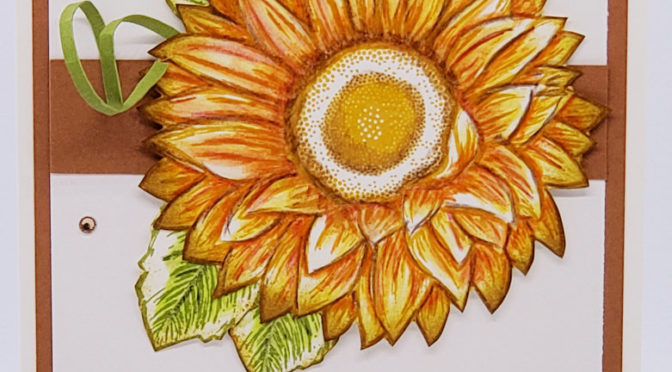
Using Watercolor Pencils, makes this image pop!

Not only was I inspired by Amanda, but I made the card exactly like she did because I wanted to see if I could color it as well as she did. I think it came out really well! What do you think?

Don’t you love it when you see something that stops you in your tracks and you want to try your hand at it? That’s what happened with this card.

Here are the specifics for this card:

Stamps:
Celebrate Sunflowers

Inks:
Crushed Curry
Old Olive
StazOn Saddle Brown
Memento Black

Cardstock:
Whisper White Thick 8 1/2″ x 5 1/2″
Whisper White 5″ x 3 3/4″ (x2) one for sunflower and leaves
Cinnamon Cider 3 3/4″ x 3/4″, 5 1/4″ x 4″
Old Olive scrap

Misc:
Champagne Rhinestones
Dimensionals
Lovely Labels Pick a Punch
Watercolor Pencils (Daffodil Delight, Early Espresso, Old Olive, Pumpkin Pie)
Watercolor Pencils Assortment 2 (Granny Apple Green)
Sponges
Blender Pen

Below are the same supplies listed in Picture form, click on any of them and you will be taken to my OnLine Store. Any purchase you make over $35 you will receive 16 step by step tutorials with Pictures! Here is a sneak Peek:

All these tutorials for purchase of $35!


This stamp set was the first one I HAD to have! So pretty!! I have offered a class using Celebrate Sunflowers where I made 5 cards and I loved everyone of them! You can see that post here. Doesn’t everyone love a Sunflower? We always had some growing, but it was very hard to keep the squirrels from jumping on them and knocking them over.

Thank you for stopping by! Please leave a comment to let me know that you are liking what I post, it also makes me happy!

Lisa Tedder
A California girl living in North Carolina

Product List

Eiffel Tower all lit up!

Hey Guys!

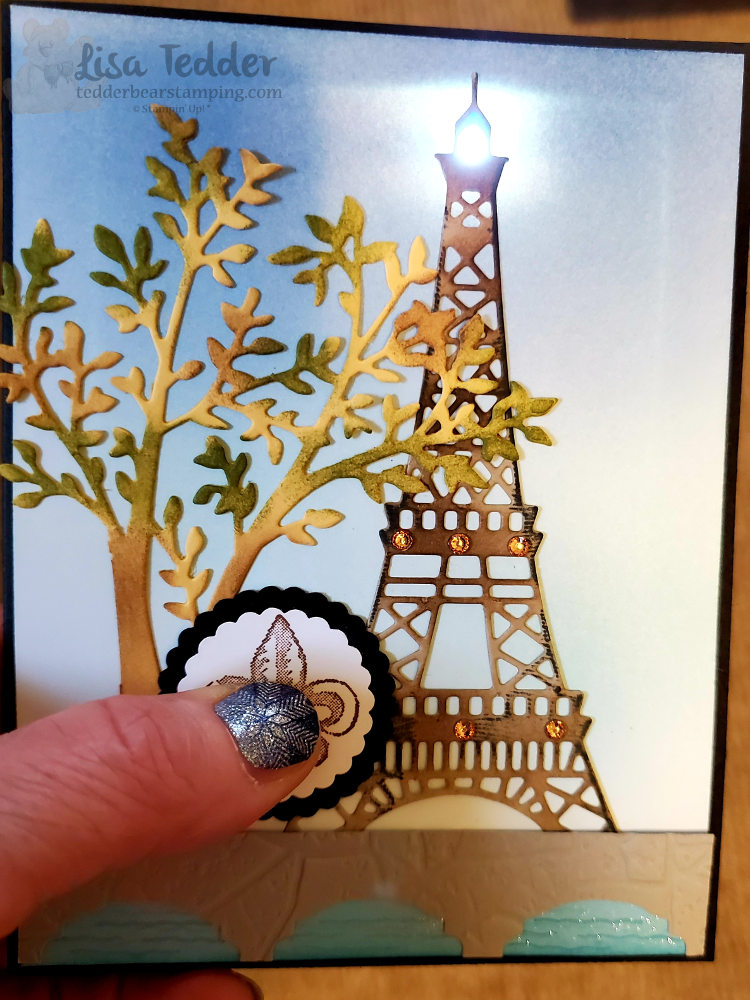
Today I am sharing with you a light up card! I love these! They are so much fun! Next year, I am planning on going to see the Eiffel Tower (thank God it’s not THIS year!). I saw this card where someone made a bridge with water under it, and the Tower is in the background. I am not sure that they used Stampin’ Up! stamps, so decided to make one using Parisian Beauty. Here is my card lit up:

Not only did I use the Parisian Beauty stamp set, but I used the punch Label Me Fancy! This is what I used to make the bridge. I tried so hard to make them evenly spaced, this is as close as I could get. Also, I used Wink of Stella to highlight the water to give it that bit of sparkle!! If you lay the Smoky Slate piece of cardstock onto a grid sheet or against a ruler, make marks at these spots: 5/8″, 2″ and 3 5/16, then put the punch into these spots and only go part way up (look at picture to see how far) making the marks in the middle of the punch. This way it will make your waterway!

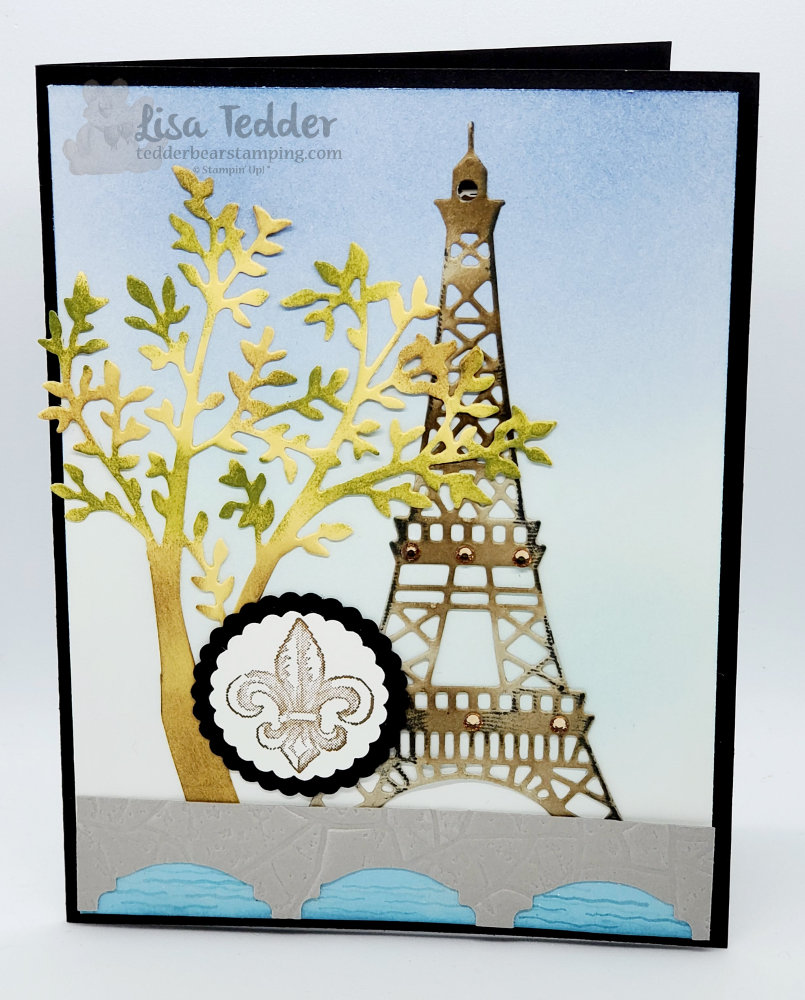
In the light of sharing with you the lit up version, I HAD to show you the card (a little more professional pic) when it’s NOT lit up:

Of course, I used a lot of bling by using Champagne Rhinestones, because you are not always going to have it turned on! The tree came from the die Sweet Silhouettes. Sponging the So Saffron cardstock after it was die-cut with Soft Suede and Garden Green, really makes this ‘tree’ look like the sun is hitting it in spots! Make sure you leave some yellow to give it that sun kissed look!

Furthermore, I also sponged the Eiffel Tower with Soft Suede and then ran the Memento Black pad itself over parts of the sides. This was to make it look like it was antiqued. What do you think? Did I hit it, or is it a miss? For those of you who love light up cards, we are going to be making this card next week! Let me know if you want to attend!

As always, here are the specifics for this card:

Stamps:
Parisian Beauty

Inks:
Soft Suede
Garden Green
Balmy Blue
Memento Black

Paper:
Basic Black 8 1/2″ x 5 1/2″, scraps
Whisper White 5 1/4″ x 4″, scraps
Whisper White Thick 5 1/4″ x 4″
So Saffron scraps (to fit tree)
Crumb Cake to fit Tower
Balmy Blue 4 ” x 1/2″ (for water)
Smoky Slate 5/8″ x 4″

Misc:
1 1/8″ & 1 3/8″ circle punches
Sweet Silhouettes Dies
Champagne Rhinestones
Stone 3d Folder
Foam Adhesive Strips
Tombo Liquid Glue
Batteries/Lights
Label Me Fancy punch

Furthermore, below you will see all the supplies in picture form. Click on any picture and you will be taken to my OnLine Store! If you purchase $35 or more from me, you will receive a handmade thank you card AND two sets of files with 16 tutorials in one and the other has over 40 tutorials! Every month you will get different tutorials with each purchase, I hope you take me up on it!

Thank you for stopping by, please come again!

Lisa Tedder
A California Girl living in North Carolina

Product List

Another CUTE kid card!

Hey Guys!

In my last post I showed you a really cute bug card for a kid in your life. Today I am going to show you a card for an older kid using the Stampin’ Up! Bundle Grace’s Garden. Let me tell you this set called to me for MONTHS and I finally broke down and bought it two weeks ago! Normally, I try not to buy too much from the Occasions Catalog, but this time there was just too many things that I fell in love with, so of course I overdid it! The great thing is that this set I can keep forever because it will work great in Scrapbooking!

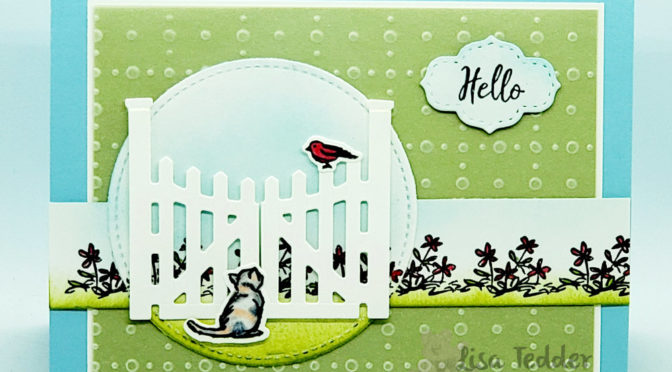
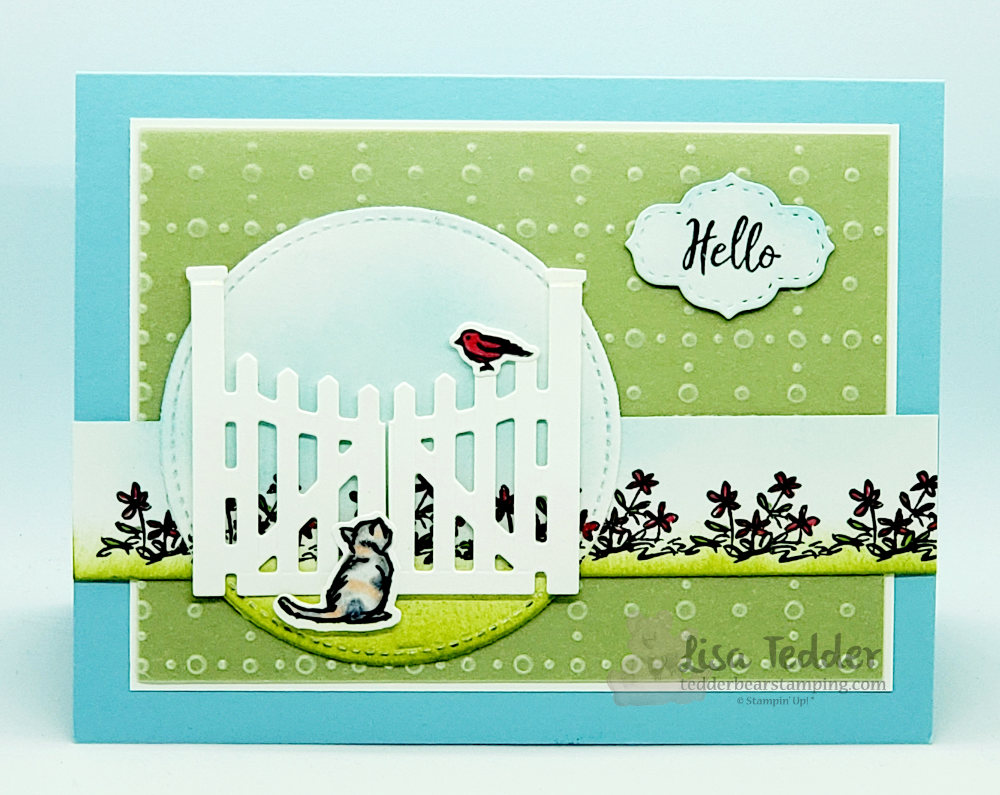
Isn’t this so cute?!! I love the kitty saying ‘hello’ to the bird! I choose to believe that is what he is doing! LOL I have owned a cat that looks like this kitty, her name was Pepper (after my daughter’s imaginary friend when she was little!)

Are you like me? Do you love fencing/gates or anything like it on a card? I think it really adds a lot! This idea came from KB Papercraft on Pinterest. Changing up the background paper to use the really pretty So Very Vellum DSP in the Sale-A-Bration catalog! Vellum is something I absolutely LOVE working with. To make the Vellum stand out even more I layered under it Pear Pizzazz cardstock, this makes it be more vibrant. The sentiment is different on mine too, I love to use Dies to set it off.

Here are the specifics for this card:

Stamps:
Grace’s Garden Bundle

Inks:
Memento Black
Pear Pizzazz
Balmy Blue
Blends: Real Red D, Granny Apple Green L, Calypso Coral L, Smoky Slate D, Basic Black D

Paper:
Balmy Blue 8 1/2″ x 5 1/2″
Whisper White 4 7/8″ x 3 5/8″ (x2), 1″ x 5 1/2″, 3″ for circle, scraps for sentiment, cat, bird and gate
Pear Pizzazz 4 3/4″ x 3 1/2″
So Very Vellum DSP 4 3/4″ x 3 1/2″

Misc:
Mini Dimensionals (cut in half)
Stitched So Sweetly Dies
Stitched Shapes Dies
Sponges

Below you will see the products in Picture form, click on any of them to be taken to my OnLine Store. When you place an order from $35 on up you will be sent 50 + Picture tutorials to make all kinds of projects, for Free! This is my way of saying thank you!

Come back to see me! And leave a comment so I know you came by!

Lisa Tedder
A California girl living in North Carolina

Product List

FINAL card for my Painted Poppies class!

Hey Guys!

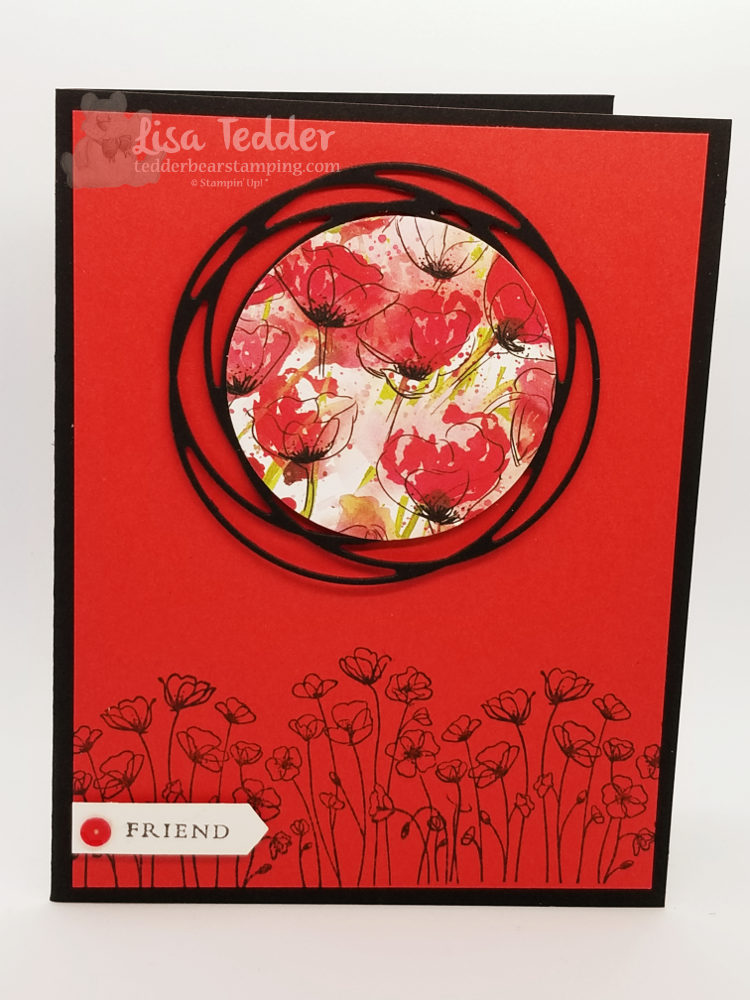
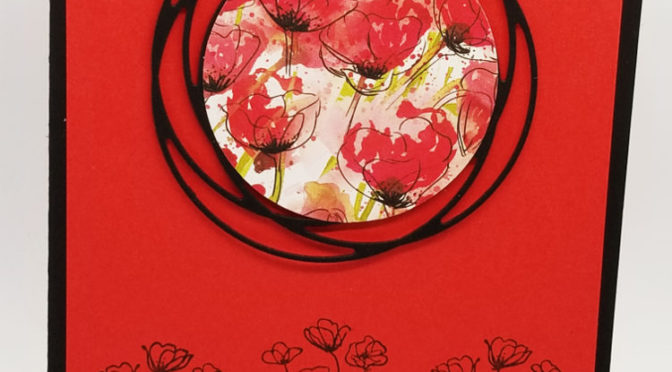
The card I am going to show you today is the design of Susan Campfield! Usually, I try to change up the cards I am inspired by, but this one is perfect, so I left it as it was! Thank you Susan!

I did Lie about ONE thing, hers had a different sentiment, but this one worked from Forever Blossoms. But, it was a little white lie, so I’m sure you’ll forgive me. 🙂

This card is pretty straightforward, stamping and die cutting the DSP/swirly ……very fast and easy! I hardly ever do ‘simple’ cards, they are more of a challenge for me, go figure! Ha!

Here are the specifics for this card:

Stamps:
Painted Poppies Bundle
Forever Blossoms

Inks:
Memento Black

Paper:
Black 8 1/2″ x 5 1/2″, scrap for swirl
Poppy Parade 5 1/4″ x 4″
White scrap
Peaceful Poppies DSP scrap for center of swirl

Misc:
Dimensionals
Layering Circle Dies
Classic Label Punch
Peaceful Poppies sequins
MultiPurpose Liquid glue

As usual, the supplies will be listed below in picture form, click on any of them to be taken to my OnLine Store. If you purchase from me you will receive from me a handmade thank you card and 40+/- tutorials! Each month you can get brand new tutorials with any purchase! IF you are interested in my class where you can get the 3-5 cards for free, purchase the Painted Poppies stamp set (to get 3) or the Painted Poppies bundle (to get all five cards in a tutorial!). If you live near me in North Carolina, you are welcome to come to my classes! I have day and night time classes!

Lisa Tedder
A California girl living in North Carolina

Product List

Bees, don’t you just love bees?!

Hey Guys!

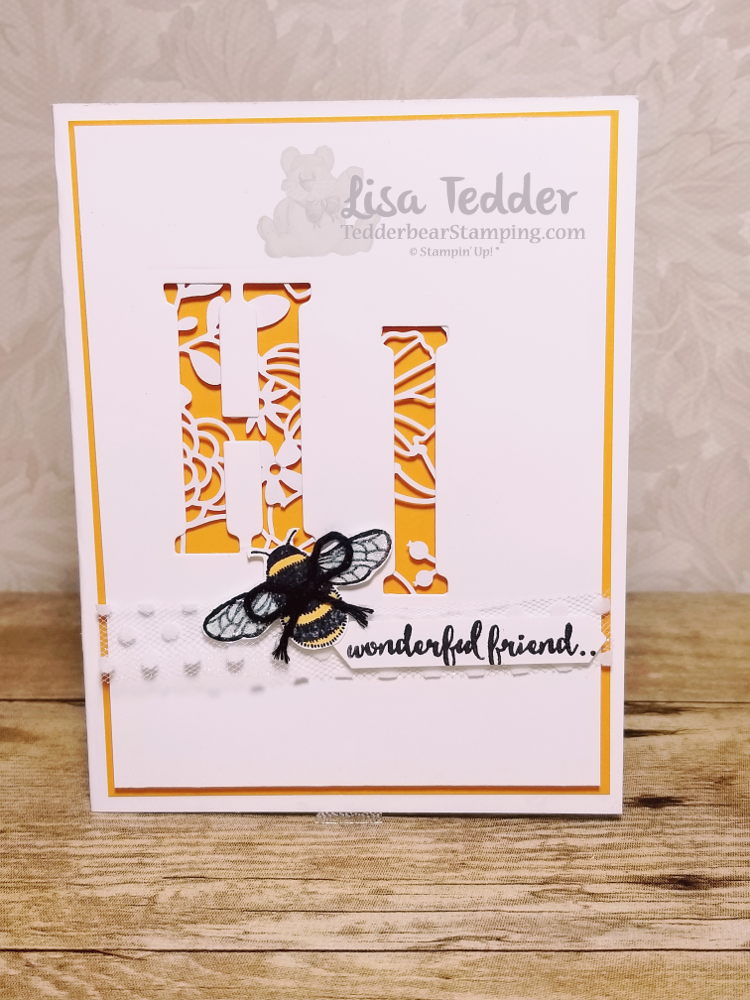
Today I am sharing with you a card that I saw on Pinterest by Monica Gale.  I only changed up the yellow behind the ‘HI’, so technically I CASE’d it (Copy and Share Everything).

I fell in love with it as soon as I saw it and HAD to make it!  LOVE when that happens, it really gets my creative juices flowing!

I used the Large Letter framelits to cut out the HI, then placed some of the Delightfully Detailed Laser cut behind the panel, added dimensionals and then had the Mango Melody behind.  Colored the Bee  using the Mango Melody  Blend!

Here are the particulars for this card:

PROJECT 3: Hi
Stamp Sets Pg #
Dragonfly Dreams
Paper
Whisper White Thick 8 1/2″ x 5 1/2″
Whisper White 5 1/4″ x 4″ (x2), scrap
Mango Melody 5″ x 3 3/4″ (x2)
Inks
Memento Black
Blends: Mint Macaron light, Mango Melody Dark
Accessories
Large Letter Dies
Delightfully Detailed Laser Cut DSP
Classic Label Punch
Black Bakers Twine
Dimensionals
Wink of Stella/Whisper White Polka Dot Ribbon

Dazzling Diamonds with glue on wings

I was very happy with how it came out, can’t wait to see what my girls think when we do it in class!

Below are pictures of all the supplies used for this card, click on any of them and you will be taken to my OnLine Store!  Every Online order receives a gift from me!

If you are in the market for a Stampin’ Up! Demonstrator, I would love to be her!  Or you could join my Team and become a part of my SU! family!

Thanks for stopping by, hope you come back soon!

Lisa Tedder
A California Girl living in North Carolina

Product List

Dragonfly Dreams Photopolymer Stamp Set

Large Letters Framelits Dies

Delightfully Detailed Laser-Cut Specialty Paper

Whisper White 5/8" (1.6 Cm) Polka Dot Tulle Ribbon

Dazzling Diamonds Stampin' Glitter

Fine-Tip Glue Pen

Stampin' Dimensionals

Classic Label Punch

Whisper White 8-1/2" X 11" Thick Cardstock

Whisper White 8-1/2" X 11" Card Stock

Mango Melody Classic Stampin' Pad

Mango Melody Dark Stampin' Blends

Light Mint Macaron Stampin' Blends Marker

Big Shot

Basic Black Solid Baker's Twine

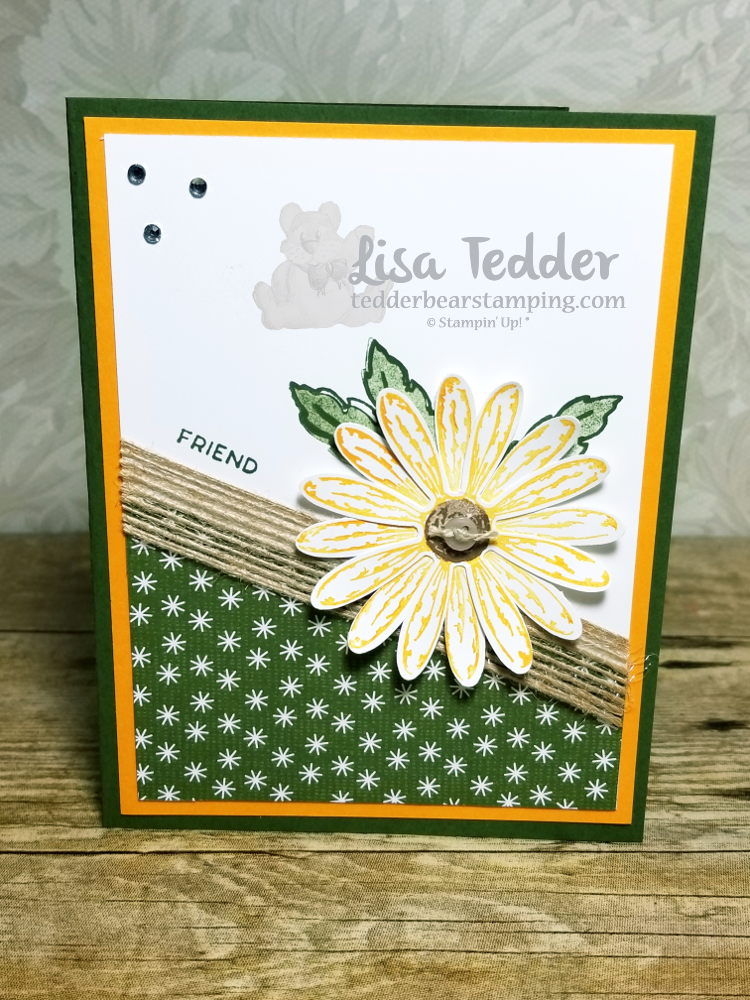
First time using the Daisy Bundle, Really?!

Hey Guys!

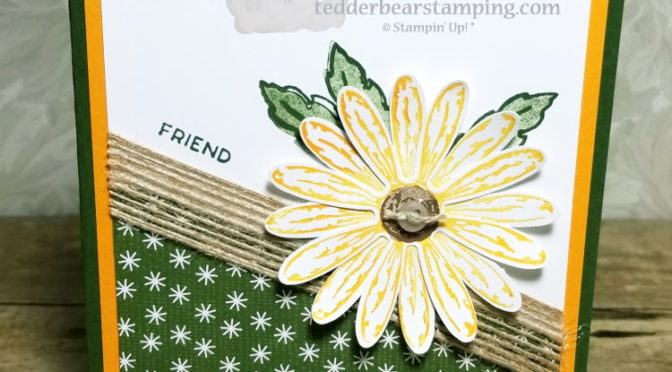
As my title says, this was the first time using my Daisy stamp and punch!  I have had it for a good 9 months, but forgot I had it!  Does that tell you that I have a few too many stamps?  NO!  You can NEVER have too many stamps!

This card was inspired by a card on Pinterest by Jari

Here are the particulars for this card:

Stamp Set
Stitched All Around
Daisy Delight
Paper
Mossy Meadow 8 1/2″ x 5 1/2″
Mango Melody 5 1/4″ x 4″
Whisper White 5″ x 3 3/4″ (x2), 5 1/4″ x 4″
Festive Farmhouse DSP 3 3/4″ x 2 1/2 ” cut
       diagonal
Inks
Mango Melody
Mossy Meadow
Soft Suede
Accessories
Daisy Punch
Needlepoint Nook mini buttons
Burlap Ribbon
Glue Dots, Dimensionals
Rhinestones

I had so much fun making this card!  I am definitely going to be using this stamp set again soon!!

All the supplies for this card are listed below in pictures.  Click on any of them and you will be taken to my OnLine Store!  All Online orders receive a gift from me!!

Thank you so much for stopping by!  I hope you enjoyed yourself enough to come back!

Lisa Tedder
A California Girl living in North Carolina

Product List

A NON Christmas Card using Farmhouse Christmas

Hey Guys!

I am so excited that as a demonstrator for Stampin’ Up!, that I get to purchase NEW items a month before they are available to the public!  I wanted to use them right away BUT didn’t necessarily want to do Christmas.  So, my dilemma……….how do I use these obvious Christmas sets and NOT have it be Christmas.
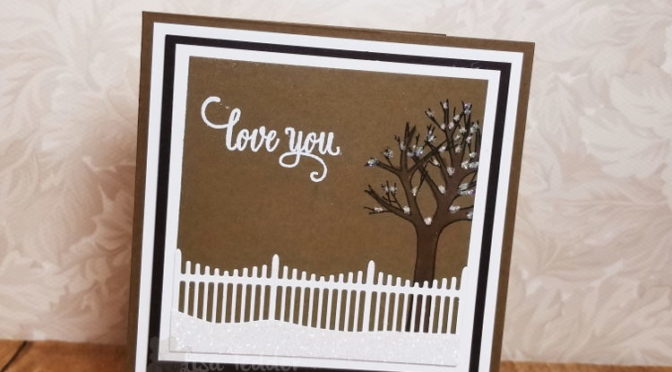
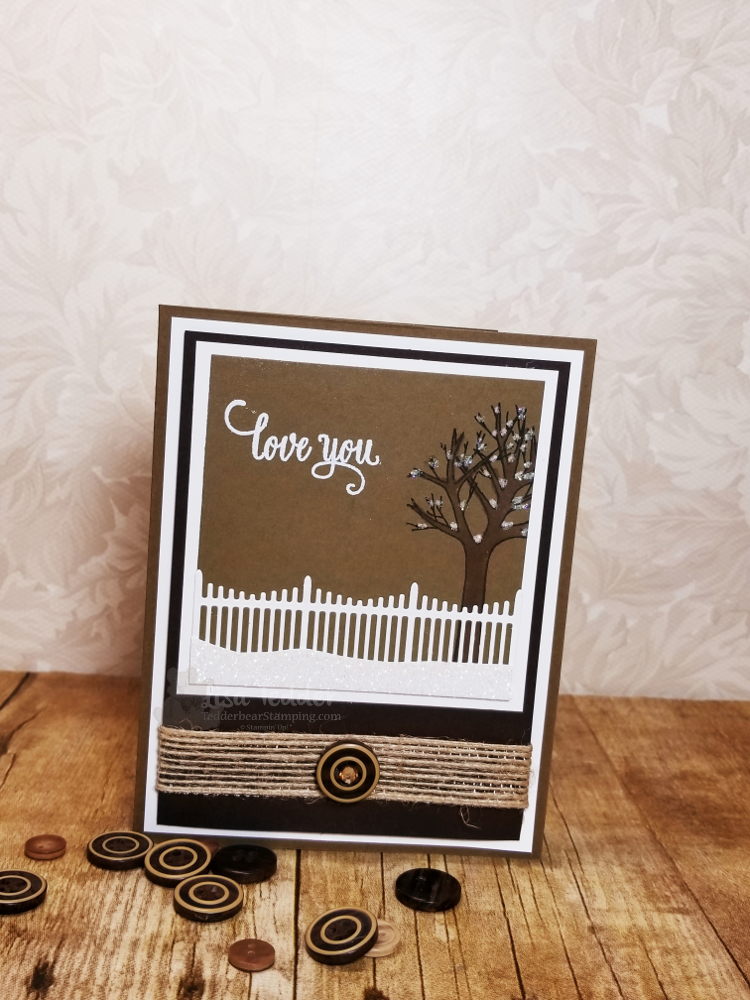
I got out the Farmhouse Christmas stamp set, decided to use the tree  AND the incredible fence!!  Did you see the fence!!??  I stamped the tree on Soft Suede using Early Espresso ink. This stamp set better stick around because I can use that fence for a lot of things!  Follow this link to see my video.

Isn’t it the cutest!!??  Not sure if you can see the Glitter snow in front of the fence, but in person it is very shiny and sparkly!  The tree has snow in all its crannies.  I used the Fine-Tip Glue pen to go over the white (used the chalk marker) and then sprinkled Dazzling Diamonds over the wet glue.  I forgot how much I LOVE Dazzling Diamonds!  I will be getting that out a lot more.

I stamped the ‘Love You’ from the Enjoy Life stamp set using Versamark and white embossing powder.

I layered these onto a piece of Early Espresso, but before I layered these onto white I wrapped some Burlap Ribbon around and adhered a True Gentleman button in the middle.  If you look closely you can see a Rhinestone that I colored with the Bronze Blend to go into the middle of the button (I HATE threading linen thread through those tiny holes!).  The final layer is Soft Suede to tie in all the colors.

I’m planning on doing this card in a class this month.  Hope they like it as much as I do!

Below are all the supplies I used for this card.  Click on any picture to be taken to my OnLine Store!

Thanks for stopping by!  Check back in!  I’m adding all my cards that I do for my classes to this blog!

Lisa Tedder
A California girl living in North Carolina
Product List