Tag Archives: Pacific Point 8-1/2″ X 11″ Card Stock

Make N Takes for Sale-a-Bration part 2

Hey Guys!

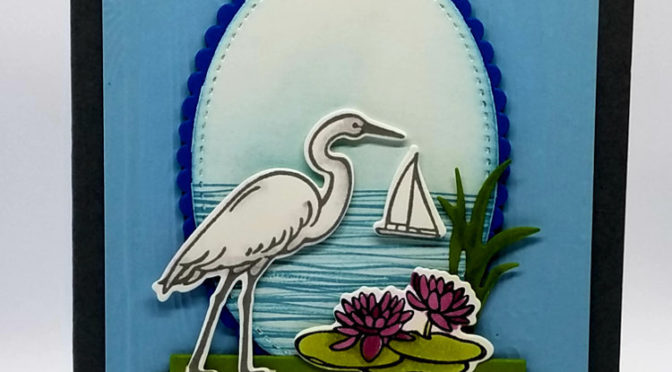
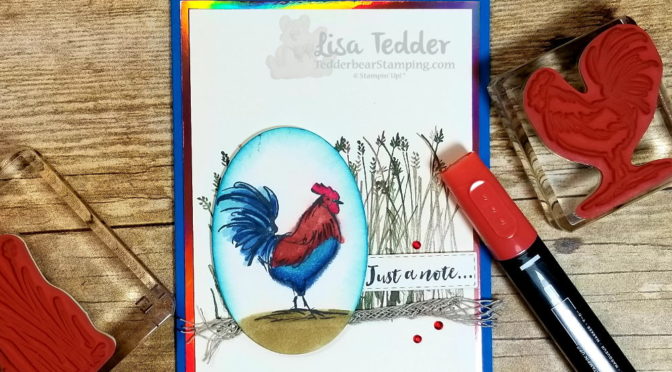
Today I am sharing with you my Second card that I had for my SAB Celebration attendees!

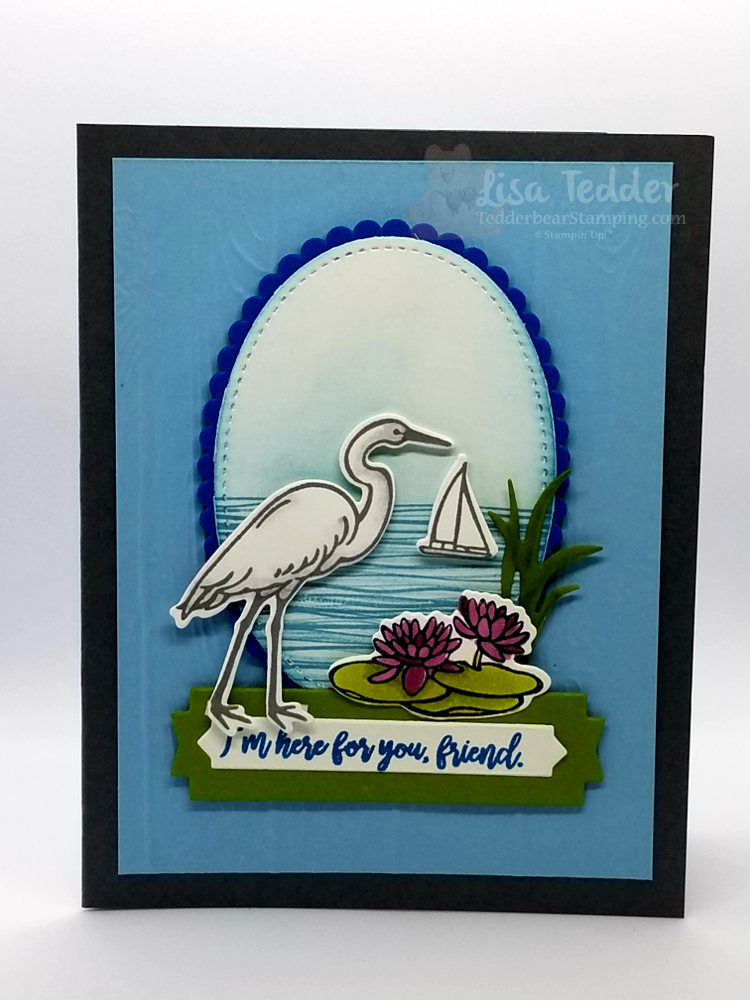
I cased this from Lyssa Zwolanek, you can see her post here.  I switched the colors a little, but I loved hers so much that I kept it close to how hers was.

Here are the specifics for this card:

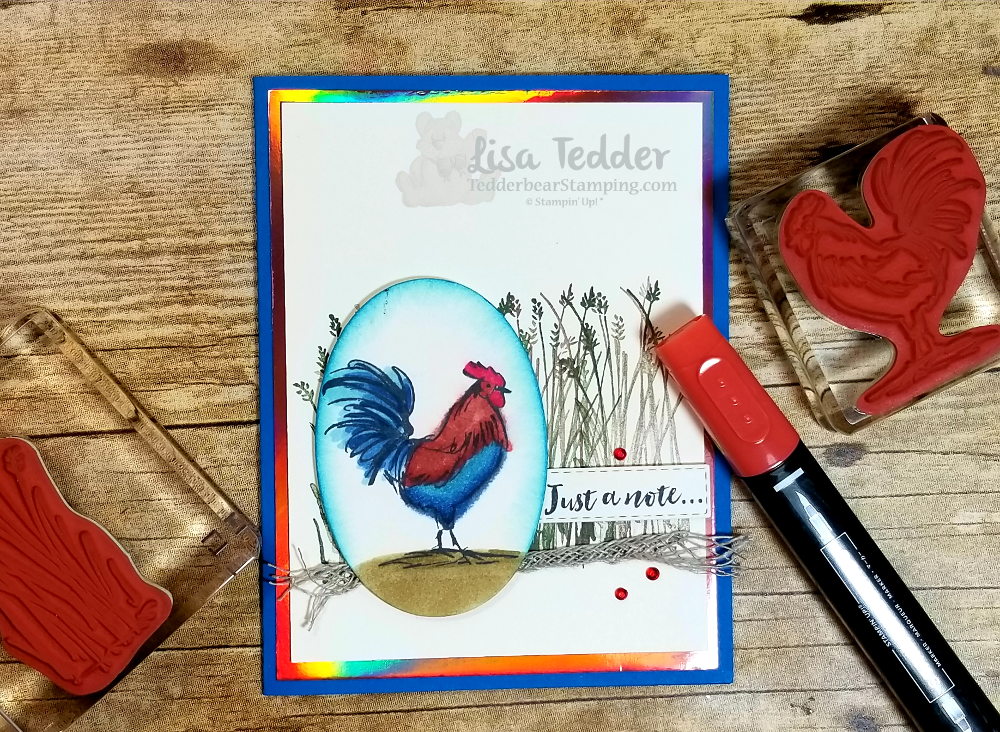
PROJECT 2: lilypad lake
Stamp Sets Pg #
Lilypad Lake
Beautiful Promenade
Paper
Basic Gray 8 1/2″ x 5 1/2″
Balmy Blue 5″ x 3 3/4″
Pacific Point 2 3/4″ x 3 3/4″
White 2 3/4″ x 3 3/4″, 5 1/4″ x 4″ scraps
Old Olive scraps
Inks
Balmy Blue
Blends: Rich Razzleberry, Smoky Slate, Old Olive
Color Lifter
Pacific Point
Basic Gray / Momento
Accessories
Stitched Shapes
Oval Layering dies
Lakeside framelits
Pinewood planks
dimensionals

My group loved this card, thanks Lyssa for the  idea!

All the supplies for this card are in picture form below, click on any of them to be taken to my OnLine Store!  If you live in the U.S. I would LOVE to be your demo! Every OnLine purchase gets a special token of appreciation from me! Look through my blog and let me know if anything catches your eye and I will try to send it to you!

Thanks for stopping by!

Lisa Tedder
A California girl living in North Carolina
Product List

<!——– TAMS End ———-

Home to Roost

Hey Guys!

I saw this picture on Pinterest by Stesha Bloodhart using the Home to Roost stamp set by Stampin’ Up! and had to Case it for a class I was having!

Here is my card:

When coloring with the Stampin’ Blends I used the Color Lifter to give it a watercolor look.  This Rooster is so stinkin’ cute!  I think I will use him for a framed piece for my kitchen!  Did you know that you can Earn this stamp set for FREE!?  Spend $50 on goodies from SU! and you can get this for free.  But, don’t wait!  These are only as supplies last and only until Sale a Bration is over at the end of March, whichever comes first.

Here are the specifics for this card:

Stamp Sets Pg #
Home to Roost SAB FREE
Paper
Pacific Point 5 1/2″ x 8 1/2″
Very Vanilla 5″ x 3 3/4″ (x2)
Grapefruit Grove foil 5 1/4″ x 4″
Black 5 1/4″ x 4″
Inks
Memento Black
Blends: Night of Navy cmb, Cajun Craze cmb,
Blends: Soft Suede cmb, Balmy Blue cmb, Real Red Dk
Color Lifter
Mossy Meadow, Pacific Point and Soft Suede ink pads
Accessories
Braided Linen Trim
Red Rhinestones
Rectangle Framelits
Layering Ovals
Dimensionals & Glue Dots


The supplies are in picture form below, click on any of them and you will be taken to my OnLine Store.  I would love if you choose me as your Stampin’ Up! Demo! When you purchase from me I will send you a small token of my appreciation.

Thanks for stopping by!

Lisa Tedder
A California girl living in North Carolina

Product List

Rainbows and Unicorns!

Hey Guys!

Today I have a really fun and super cute card!  I LOVE rainbows, but who doesn’t?  I also love Unicorns!  So I put them together!  I got this idea from Kirsten Aitchenson on Pinterest.  I gave the card some black to make the image pop, but otherwise it’s all her.  Isn’t it cute?

The Rainbow took a few minutes to cut out each color, but honestly? It didn’t take as long as I thought it would.  I LOVE this card!!

TIP!!:  Cut a small piece of white cardstock that you will use to mount your rainbow on.  The dimensions are 2 3/4″ x 1″.  Place adhesive on your white piece, and start your outer colors going down almost to the bottom of the white.  This will hold your rainbow together AND let you pop it off the card with dimensionals. Your white will be covered up by the cloud!

The sparkle paper is from the Myths and Magic 6″ x 6″ glimmer paper.

Here are the dimensions for this card:

Island Indigo: 5 1/2″ x 8 1/2″, plus scrap for rainbow
Basic Black: 5 1/2″ x 3 5/8″, 5 1/4″ x 4″ for inside
Soft Sky: 3 1/2″ x 5 1/2″
Whisper White: 5″ x 3 3/4″ inside and scrap for Unicorn
Scraps for Rainbow: Real Red, Pumpkin Pie Daffodil Delight, Old Olive, Pacific Point, Island Indigo, Perfect Plum

I colored the Rhinestones to go with the rainbow and also colored the Mane and Tail using the Blends.

I used Wink of Stella for the Unicorn.

Hope you like this as much as I do!!  Please visit my YouTube Channel to see my other creations and see how I make them.

Below are pictures of the supplies I used, click on any picture to be taken to my OnLine Store.  For any purchase you make with me you will receive one of my handmade cards!

Thank you for stopping by!  Please come back.

Lisa Tedder
A California Girl living in North Carolina
Product List

NEW Technique Tuesday Making a Scene using an Embossing Folder

I love Tuesday’s!  Techniques are my favorite thing about stamping.  I get to use my Stamps in a totally different way!!  The Technique I am using today had me thinking of what I could put BEHIND trees, but still show what I needed it to show.

Here is today’s card:

I made a YouTube video showing this stamping technique.  I love Birch Trees, I also love the Birthday Delivery Stamp set by Stampin’ Up!  I got super excited about being able to use BOTH!  When you go watch the video it will show you exactly how easy this technique is to do!

Stamping directly onto an Embossing Folder isn’t something you think of normally.  Tips:  1. Stamp on the side that has the negative (dipping down) the part you want as your focal in the folder this will be the part that is raised on your card. 2.  Pick images to stamp on that you will see in the lines available that are the flat parts of the folder.  3.  Use colors that will enhance what you are stamping.  4. Use a brayer to lay down a color that will be behind the images (sky), anything you stamp over the brayered color will be at the top of the cardstock.  5. Make sure that you don’t move the folder once you put all the stamping in (I did NOT follow this rule on my video, but I fixed my mistake!)  6.  Remember that it’s ONLY PAPER, and play with it!

I won’t be able to show you here how to do this technique, it would be too confusing, so please go check out my video and see how fun and easy it is.  You will notice that you will look at stamps in a totally new way!

As always, I will have the supplies listed below, just click on any image to be taken to my OnLine Store!

Thanks for stopping by!  Until next time!

Lisa Tedder
TedderBearStamping
A California Girl living in North Carolina

Product List