Tag Archives: Rhinestones

Fancy Fold & Who let the Sheep out!?

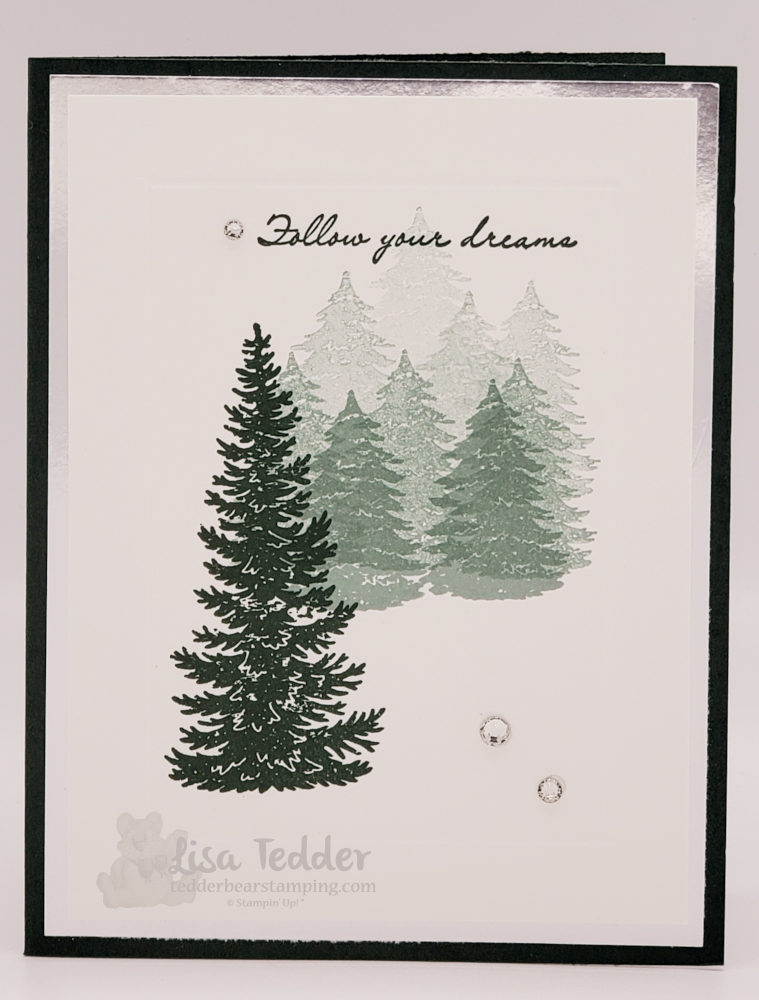
This new fold is easy AND pretty!

Hey Guys!

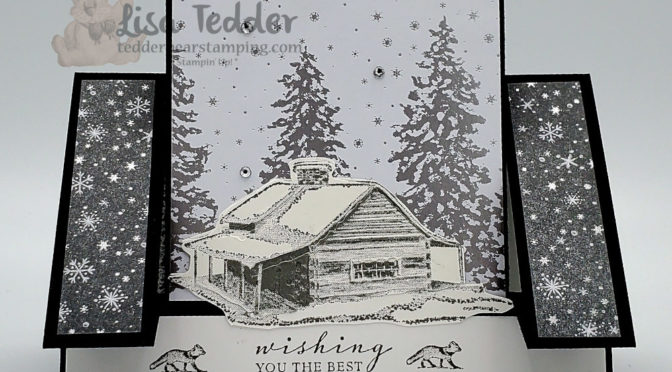
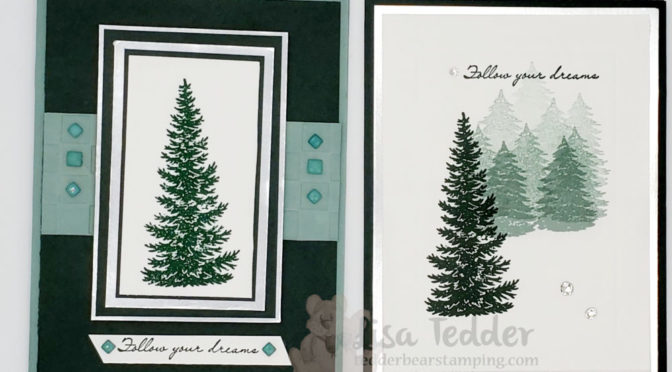
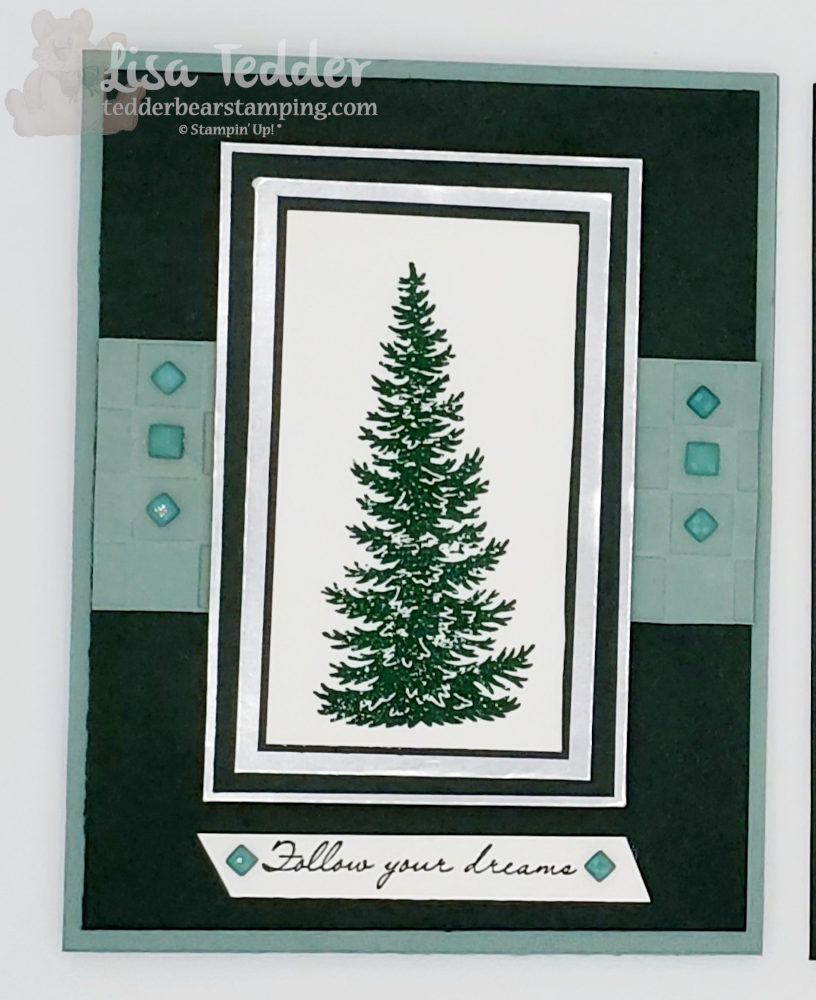
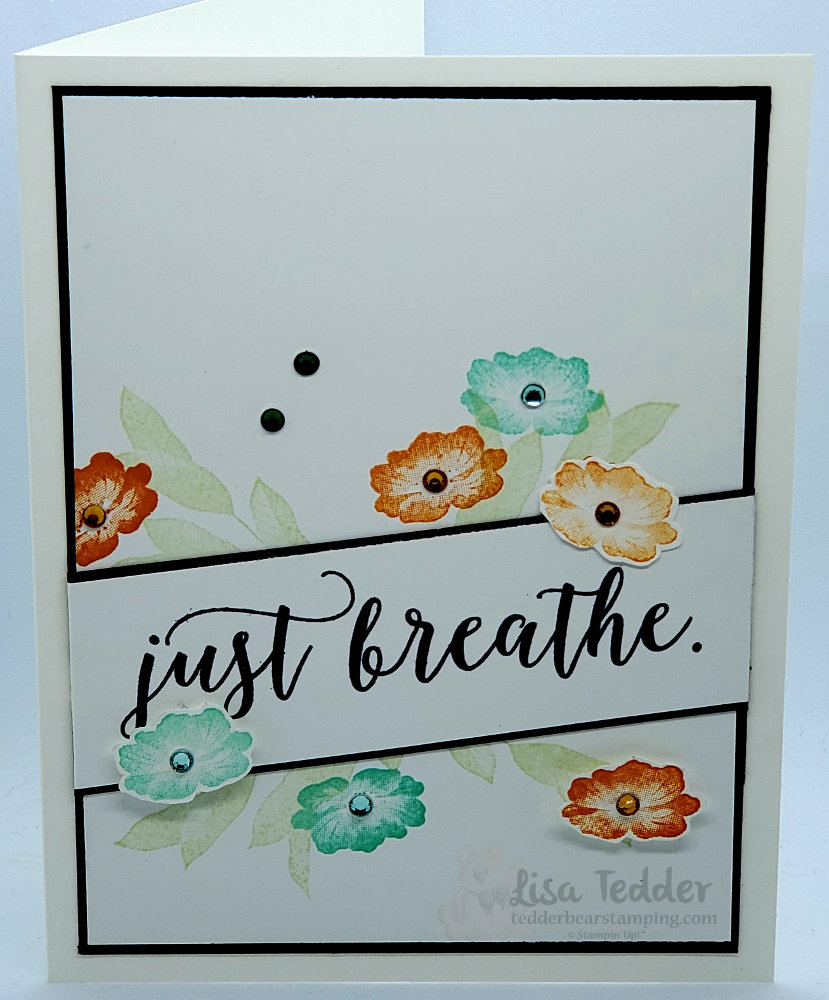
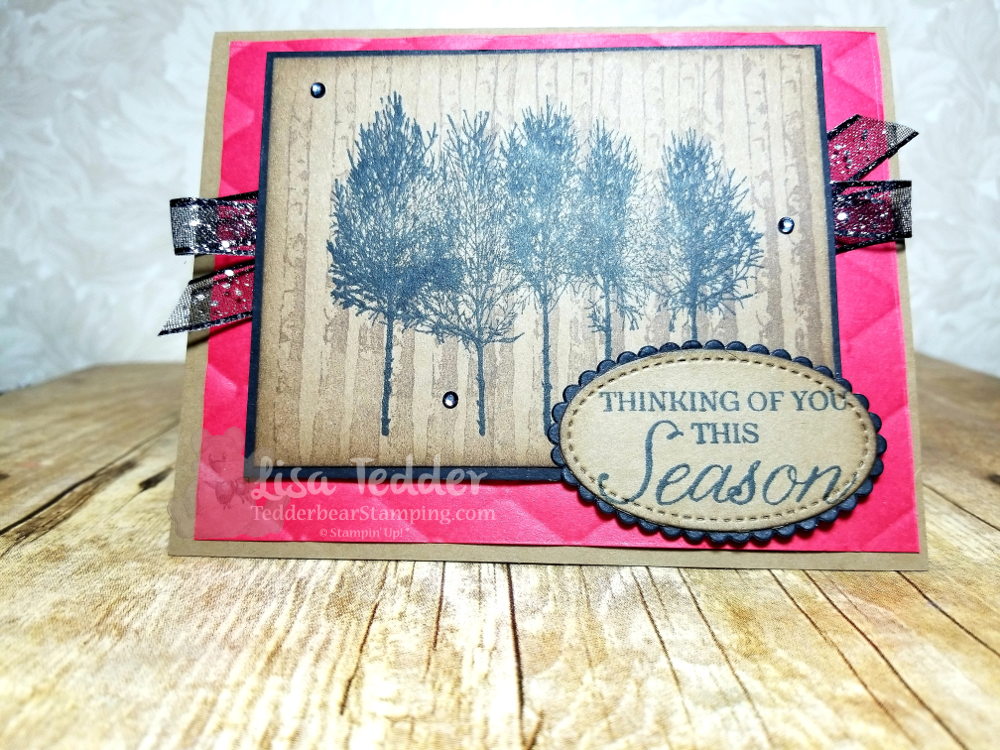
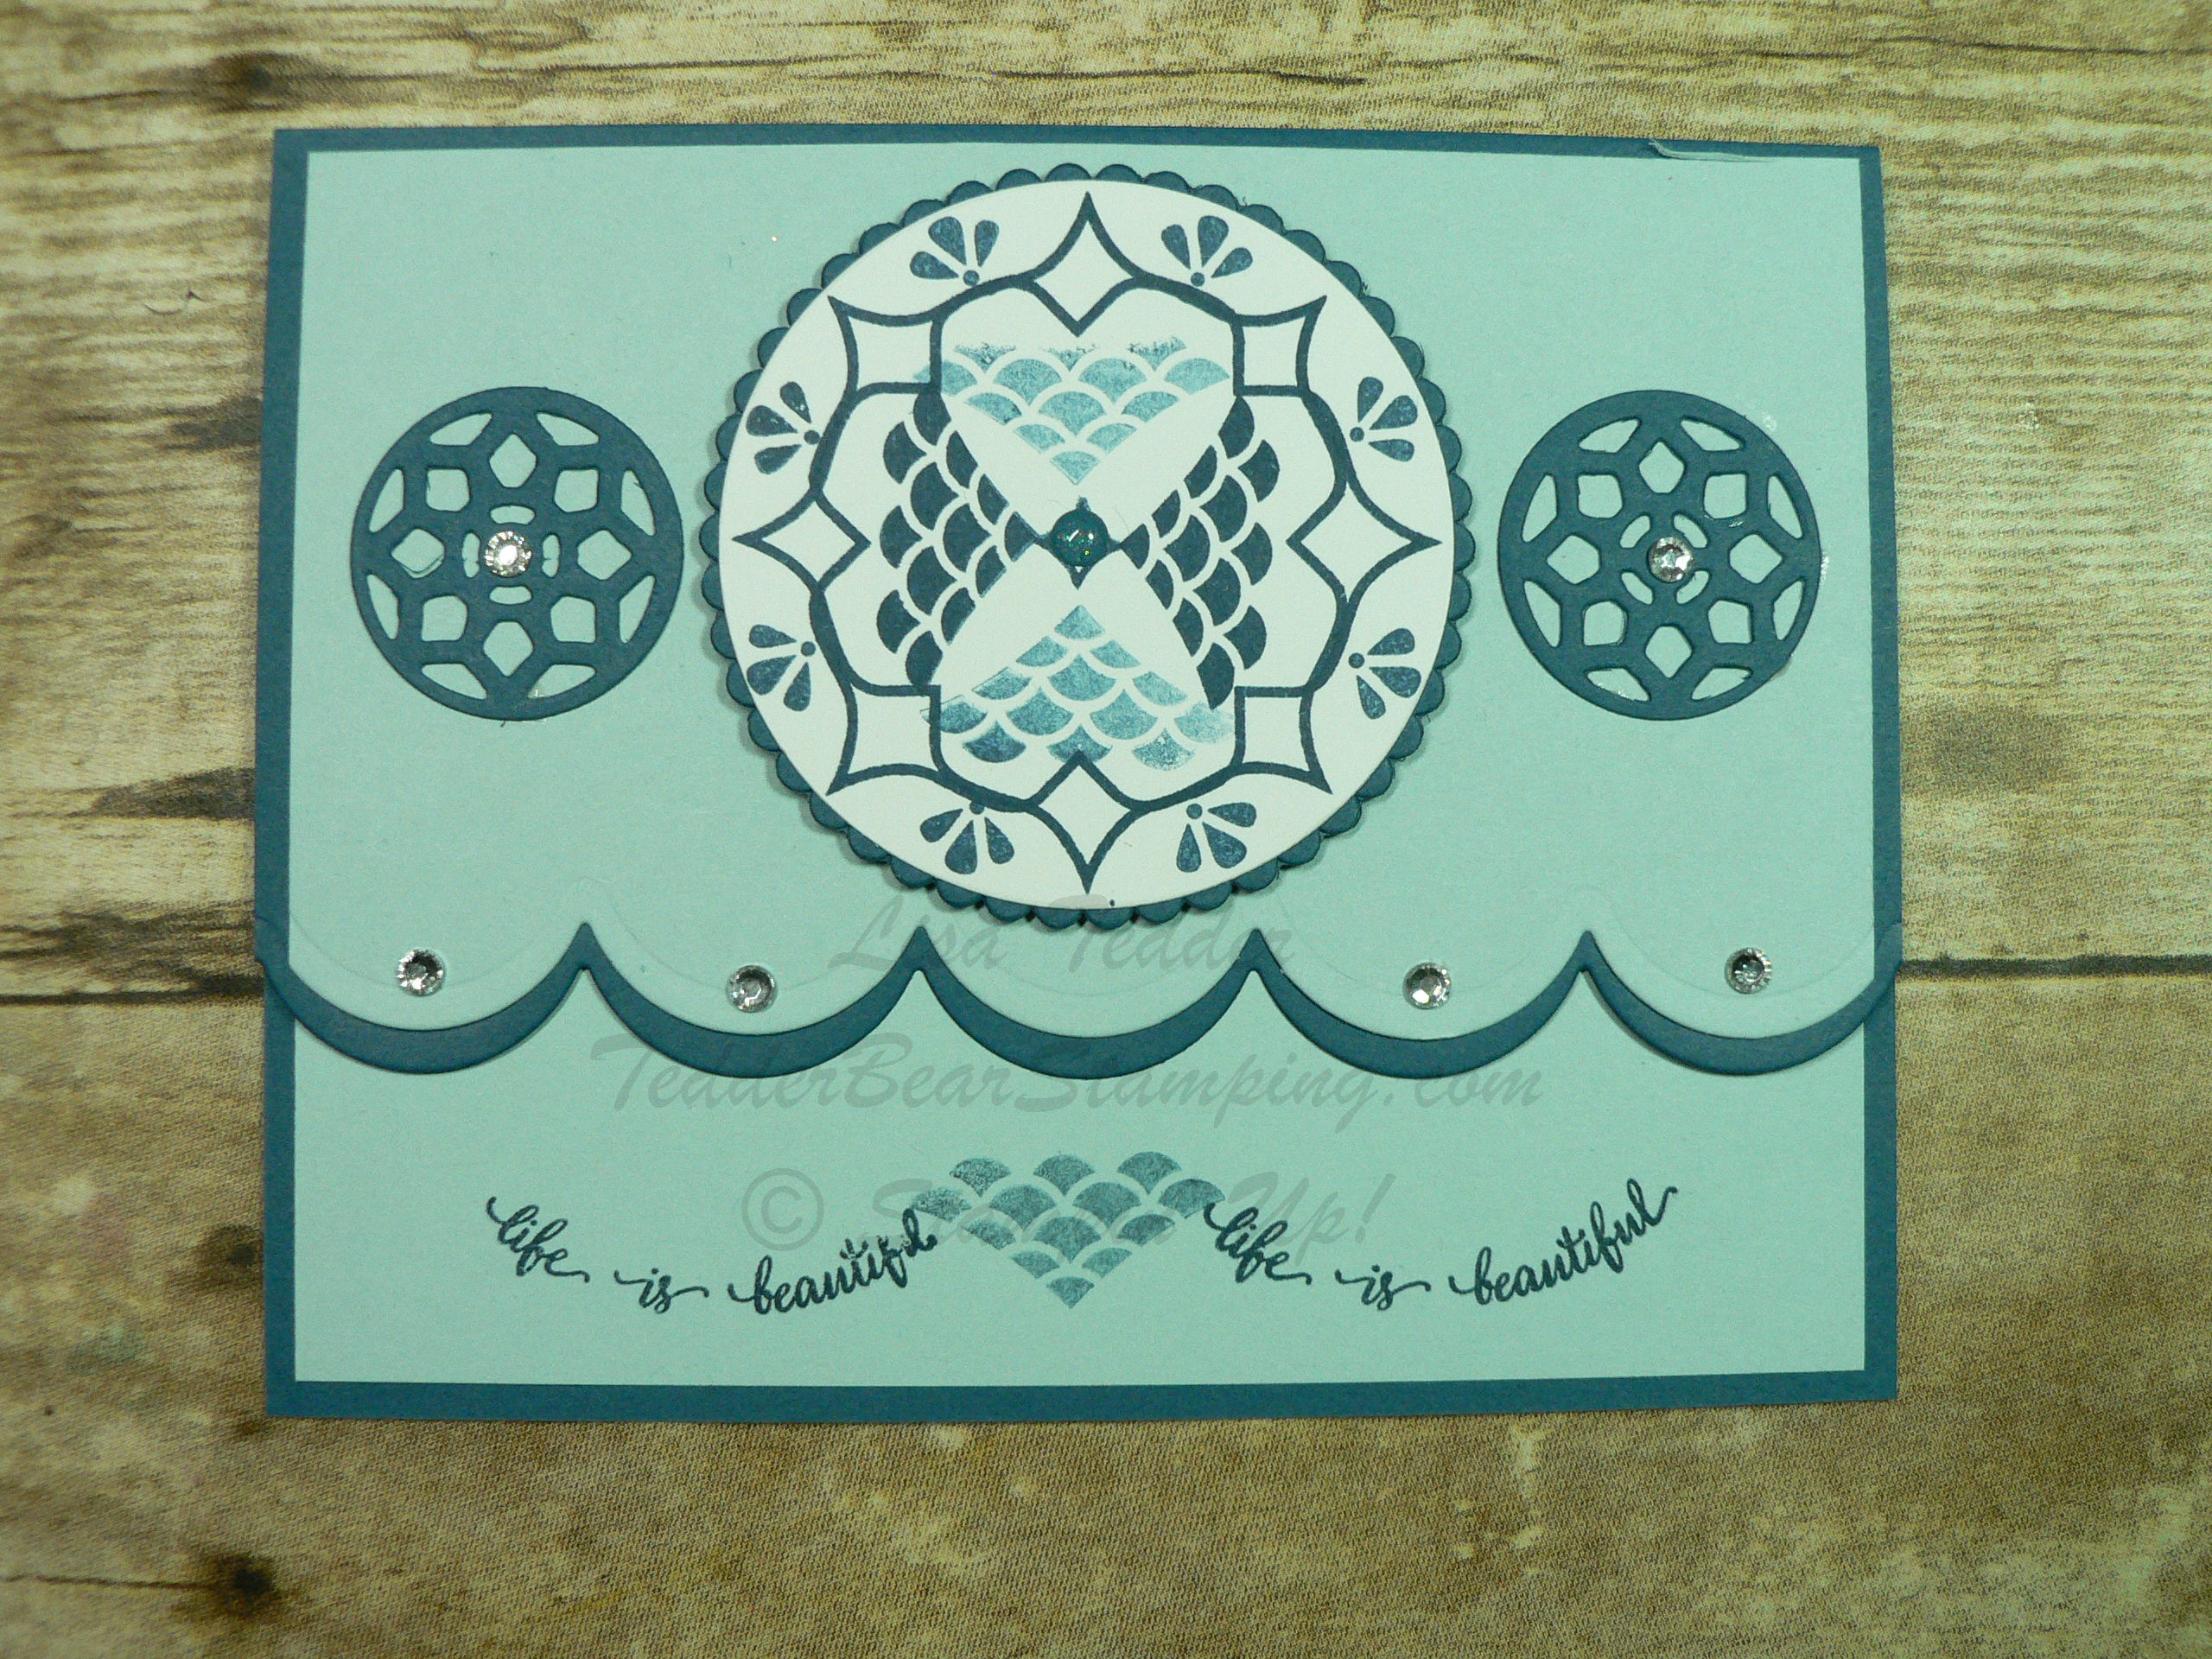
I’m home and I’ve got a great new fancy fold for you, that’s pretty AND easy! Above all, I love new folds and especially love them when they aren’t hard! Thus, when I saw this fold done by Lavonne S. I had to give it a try! This is the same fold as doing a 3 step card, but with making the folds go a different way you have a brand new Fancy Fold! Earlier today I did my Live on my YouTube channel where I showed you how to make these cards, I hope you join me and if you join while I’m live you can be in the drawing to have one of these cards mailed to you!

I love new folds and especially love them when they aren’t hard!
l, I love new folds and especially love them when they aren’t hard!

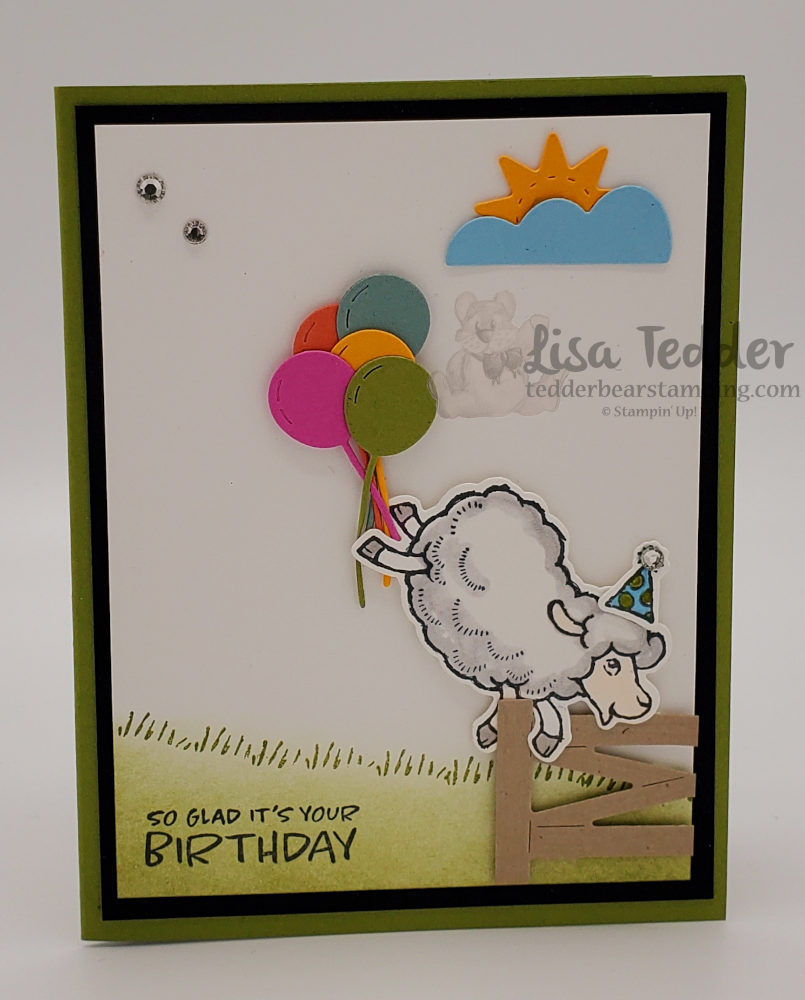
Besides doing fancy fold cards I love cutesy cards and the Counting Sheep stamp set fits that bill perfectly! Plus, this stamp set is one you can get for FREE! Yes, you heard that right this stamp set is a Sale-a-Bration (SAB) set and when you buy something for $50 you can pick Counting Sheep as your free set. Of course that is only if you purchase before the end of September! For this reason, you can buy the bundle for the Peaceful Cabin! Indeed, this bundle you can get for $54 and that will let you pick out a free SAB item! Basically that is a ‘Win-Win’!!

Counting Sheep
Counting Sheep inside

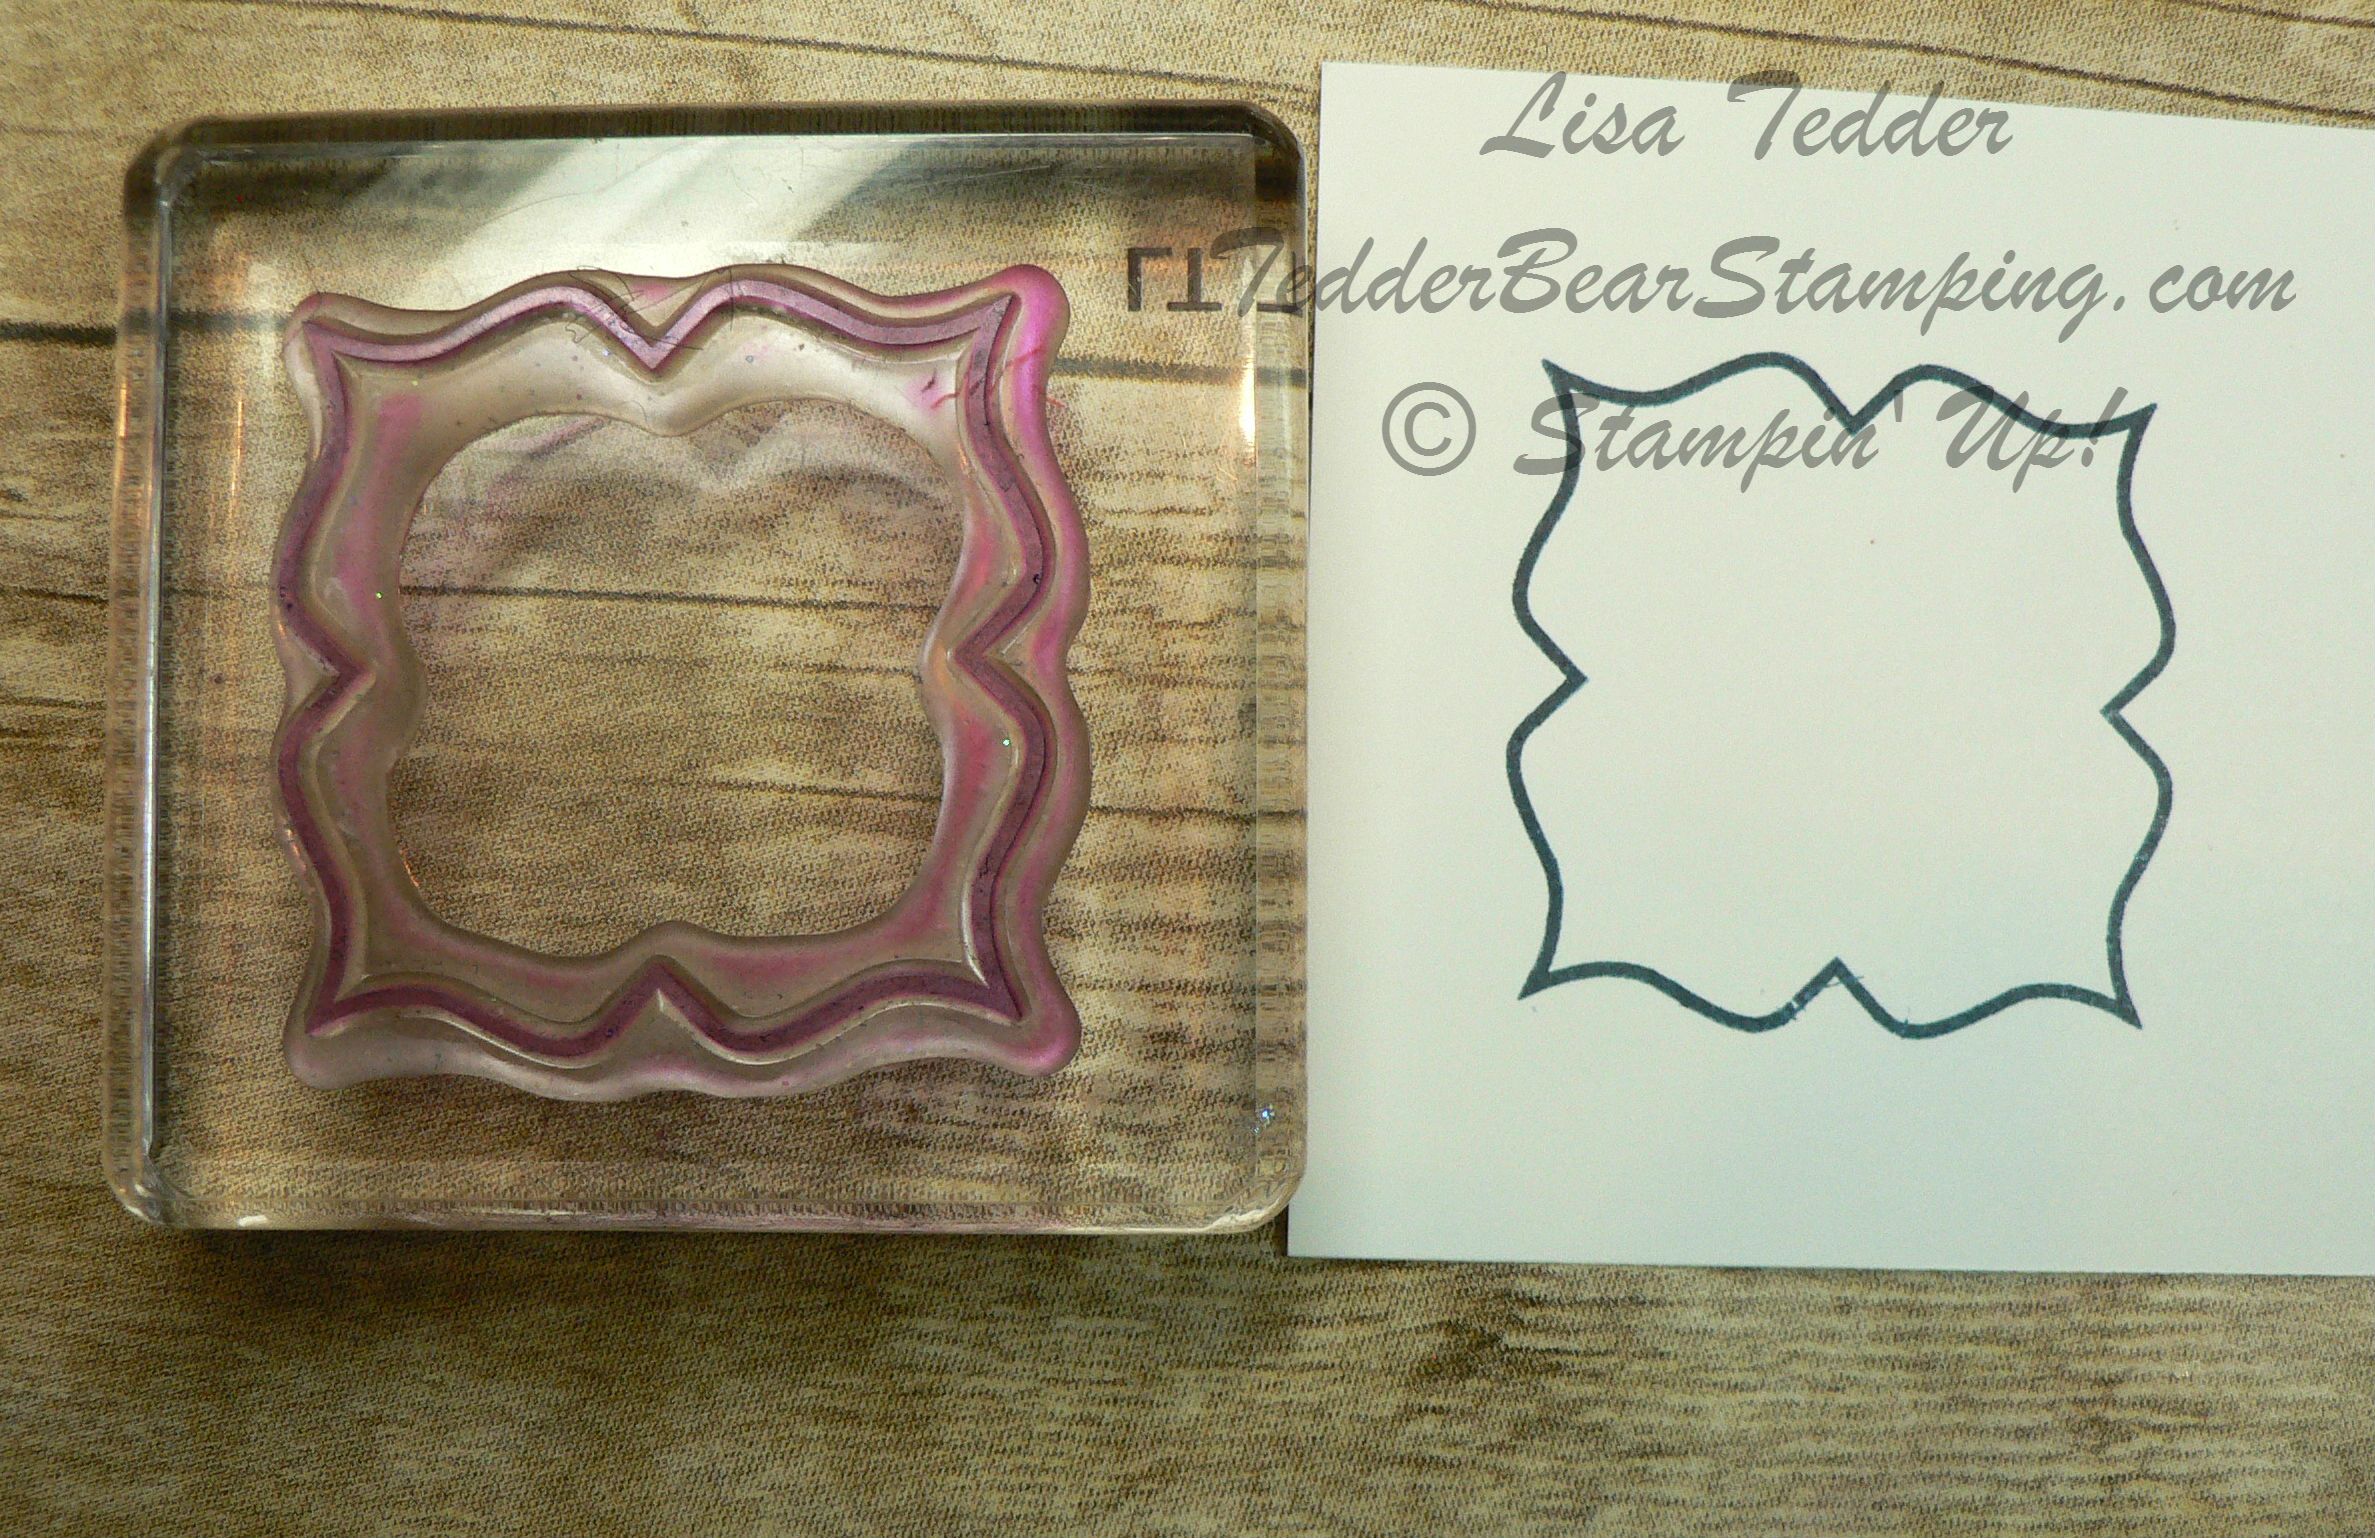
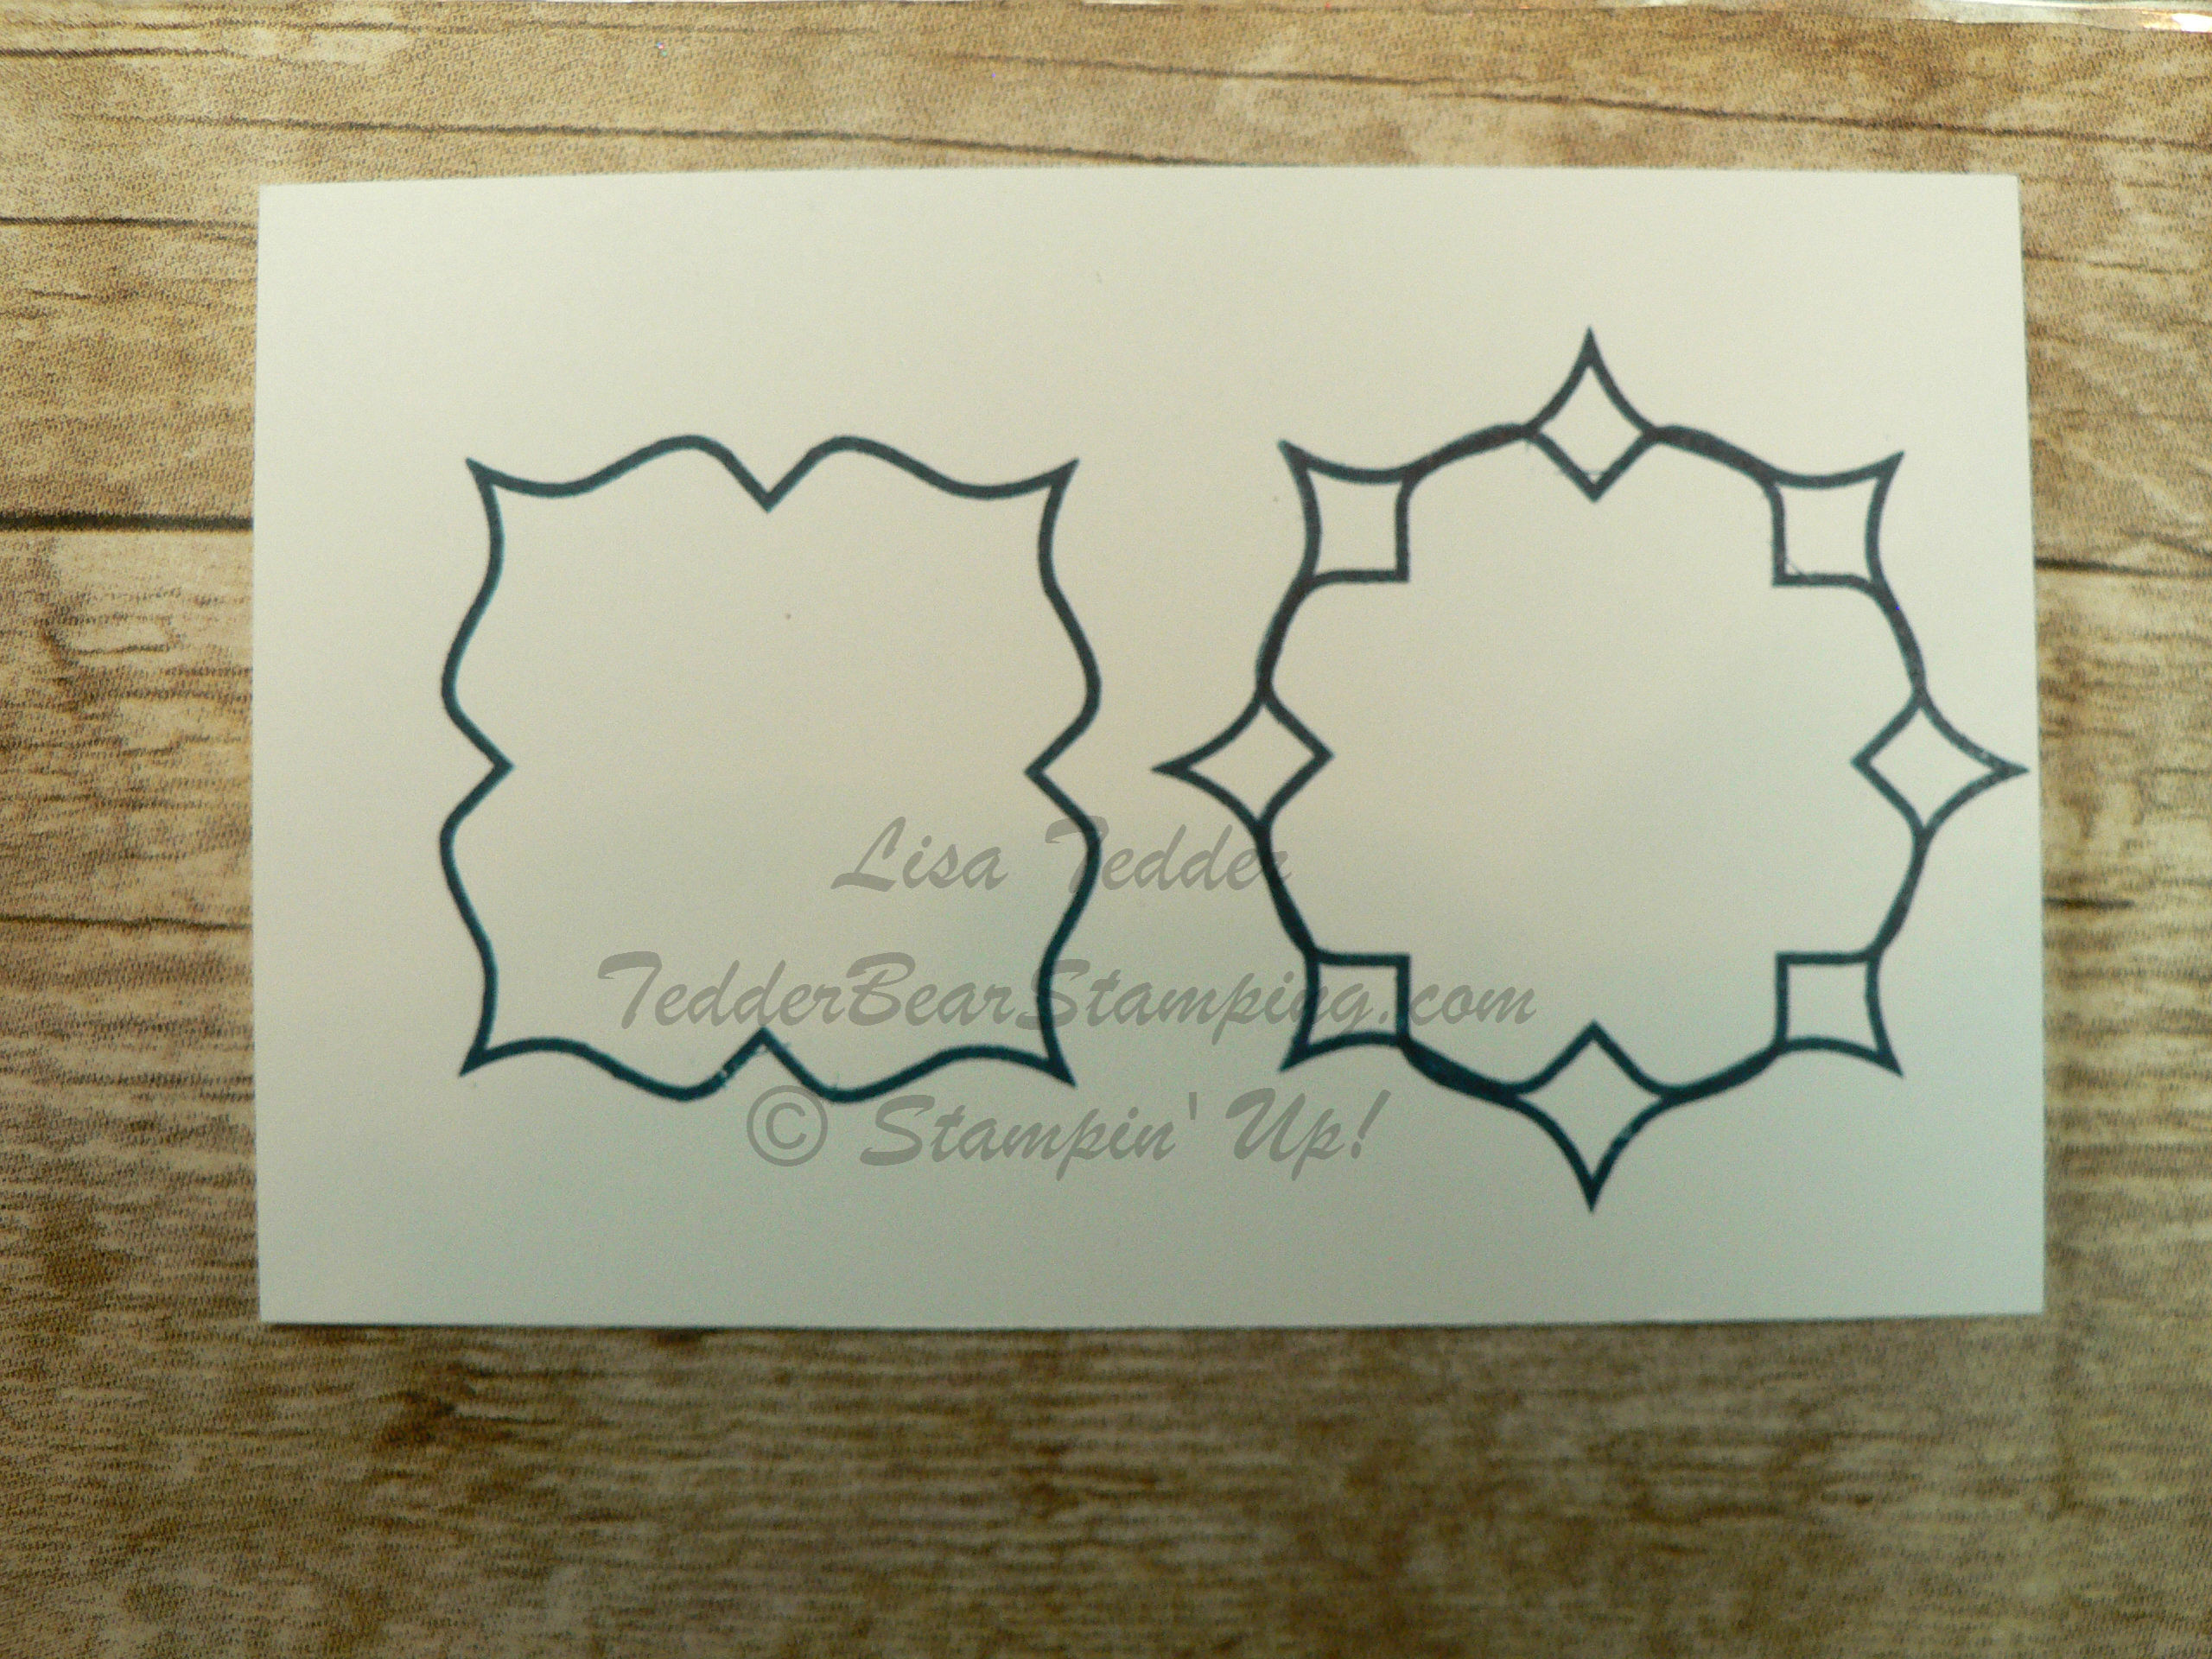
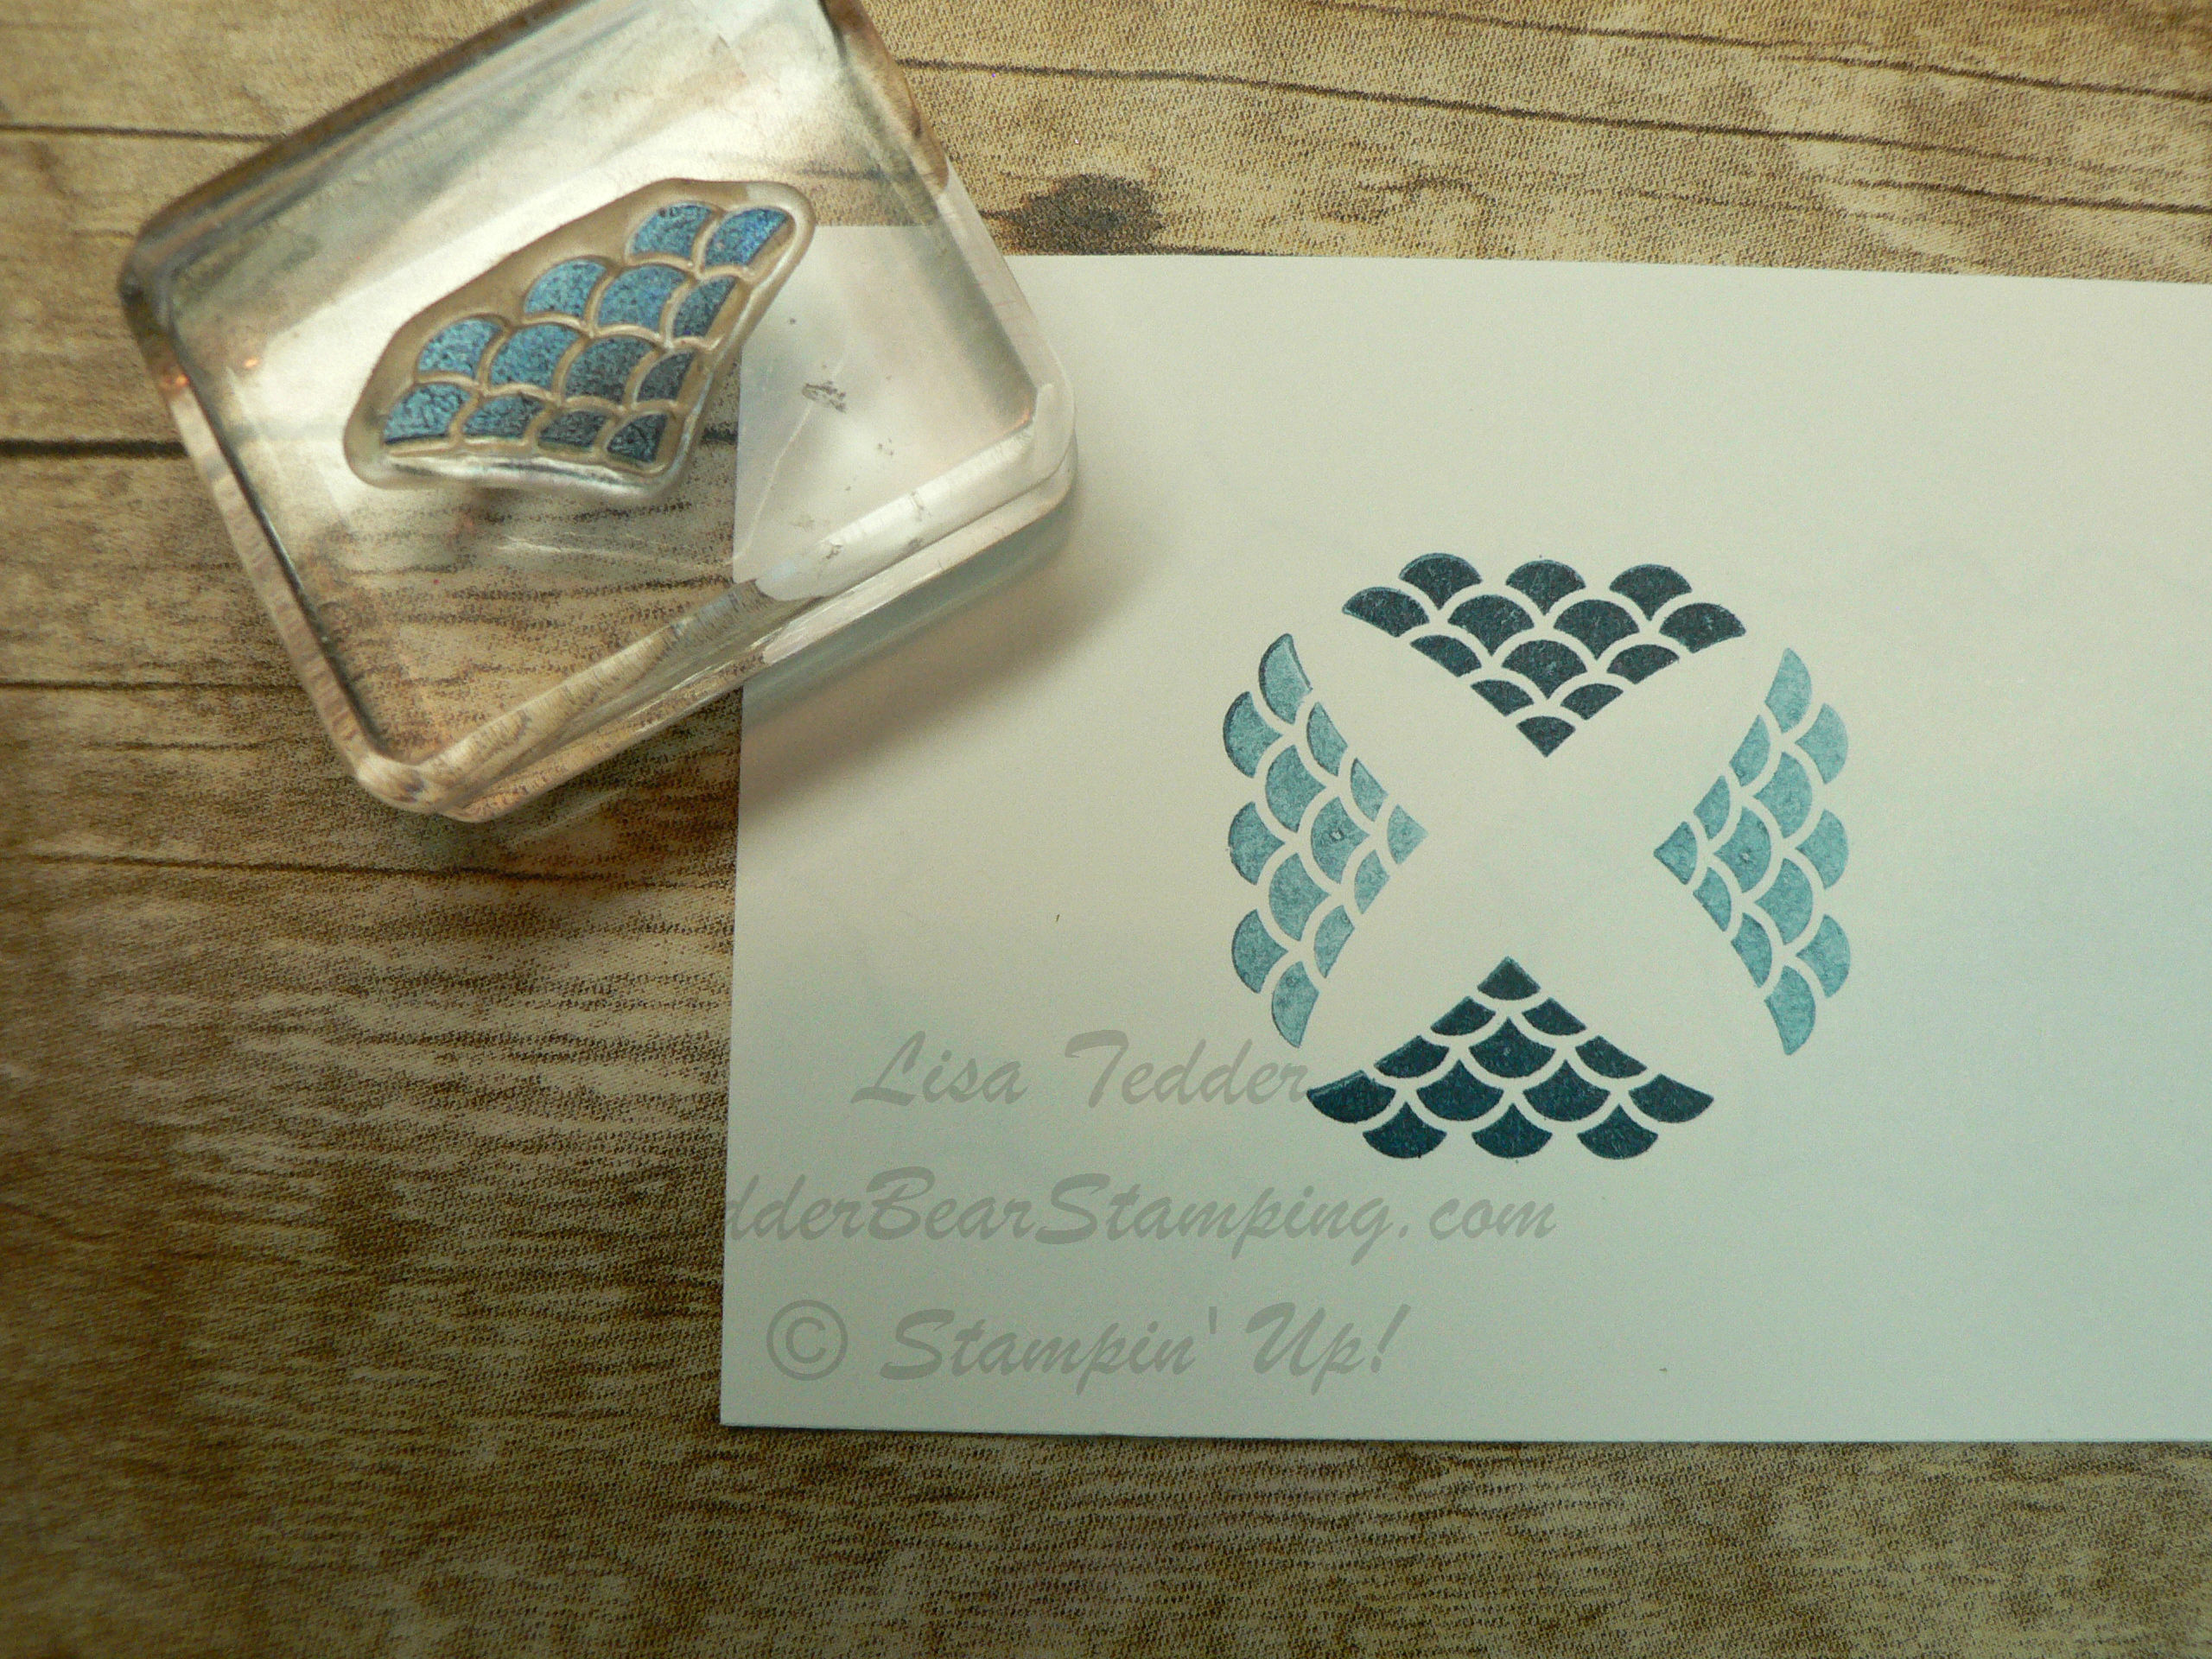
As always below is my list of supplies needed for both cards, there is also picture images below my name that you can click on to be taken straight to my OnLine Store!

Supplies:

Stamps:

  • Peaceful Cabin Bundle
  • Counting Sheep

Inks:

  • Memento Black
  • Old Olive
  • Basic Gray

Blends:

  • Smoky Slate
  • Petal Pink
  • Color Lifter

Markers:

  • Melon Mambo
  • Old Olive

Paper

Card 1:

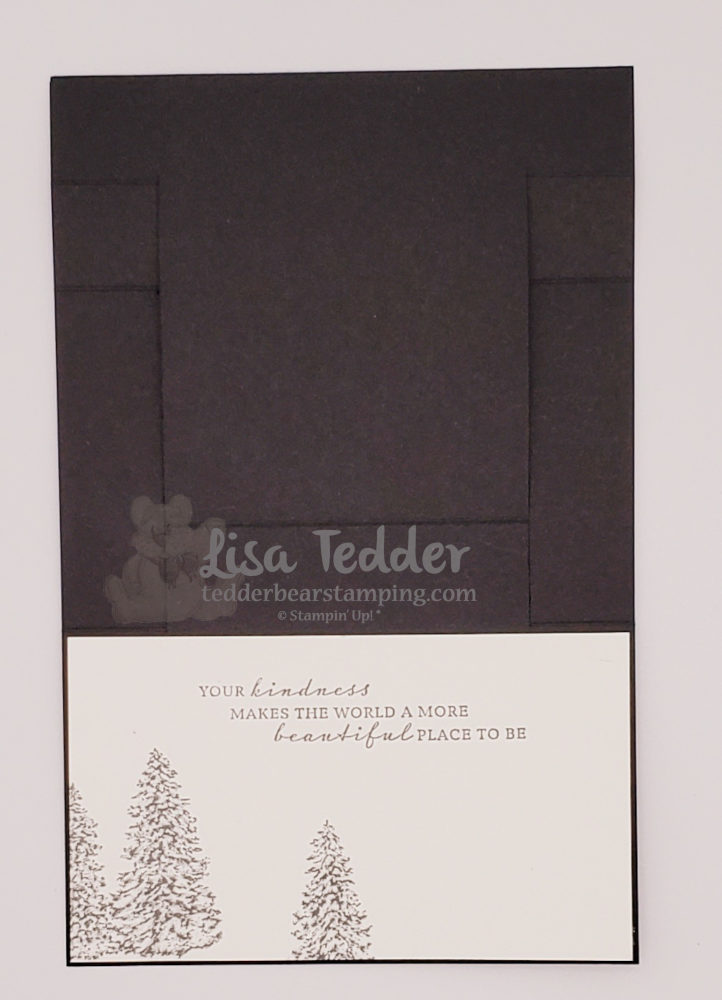
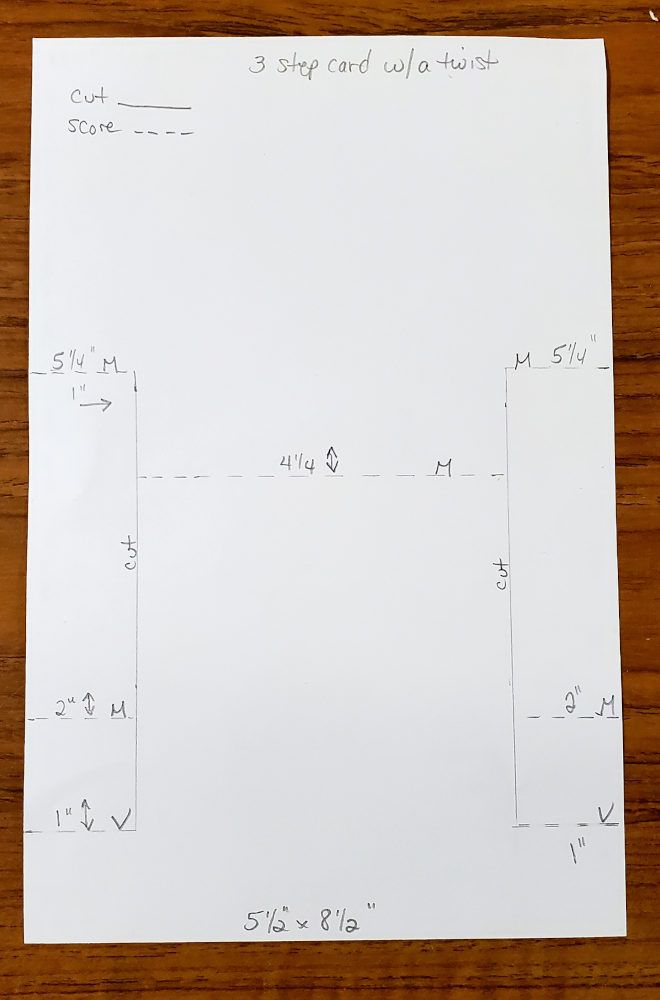
  • Basic Black 5 1/2″ x 8 1/2″, see picture above for scoring and cutting
  • Peaceful Place Designer 3 1/4″ x 3 3/8″, 3/4″ x 3″ (x2)
  • Basic White 3 1/8″ x 5 3/8″, 3/4″ x 5 3/8″, scraps for stamping cabin twice

Card 2:

  • Old Olive 5 1/2″ x 8 1/2″ scored at 4 1/4″
  • Basic Black 4″ x 5 1/4″ (x2)
  • Basic White 3 3/4″ x 5″ (x2), scraps for sheep/party hat
  • Scraps for balloons/sun/cloud: Pumpkin Pie, Soft Succulent, Mango Melody, Magenta Madness, Old Olive, Mango Melody, Balmy Blue
  • Crumb Cake for fence

Misc:

  • Basic Rhinestones
  • Dimensionals
  • Blender Brush

On the positive side I’ve shown you two awesome cards! On the negative side I am done with this post! LOL Subsequently I hope you have enjoyed it! Again, you can catch me on my YouTube channel every Thursday at 4:00 eastern where I will have a Live class for you!

Lisa Tedder
A former California girl living in North Carolina

Product List

Getting more for your Money!

Hey Guys!,

Who doesn’t like getting more for your money!? I LOVE when I can make a stamp set do more than what it was intended for! Today, I am sharing with you a Christmas set called Evergreen Elegance but making everyday cards! I have made a YouTube Live class that you can watch and see how I made them, but here are the pics to give you a close up! Every Thursday I have a Live on my YouTube Channel, but I also have a LOT of videos that show you really great projects!

Getting more for your money!
You will need to watch the video to get the FULL effect of this card, you Can’t see the embossing.

As always below is the list of supplies and the dimensions for both cards, there is also a picture of each item used. If you click on any of the pictures below you will be taken to my OnLine Store! For every Qualifying purchase of $35 or more, you will get the class supplies for both cards (except for stamps/inks) along with a pdf that has step by step instructions and pictures for 16 projects!! By the way, this is my Thank you to you for supporting my small business! I appreciate you! Isn’t it great that you can get more for your money, just by opening your mind to changing it up?

  • Stamps:
  • Evergreen Elegance Bundle
  • Through it Together
  • Inks:
  • Evening Evergreen
  • Soft Succulent
  • Shaded Spruce
  • Paper:
  • Card 1:
  • Soft Succulent 8 1/2″ x 5 1/2″ scored @ 4 1/4″, 1 5/8″ x 4″
  • Evening Evergreen 5 1/4″ x 4″, 3 7/8″ x 2 3/8″, 3 3/8″ x 1 7/8″
  • Silver Foil 4″ x 2 1/2″, 3 5/8″ x 2 1/8″
  • Basic White 5 1/4″ x 4″ (inside), 3 1/4″ x 1 3/4″ (front), scrap for sentiment
  • Card 2:
  • Evening Evergreen 8 1/2″ x 5 1/2″ scored @ 4 1/4″
  • Silver Foil 5 1/4″ x 4″
  • Basic White 5″ x 3 3/4″ (front), 5 1/4″ x 4″ (inside) I scored the front at 1/2″ all the way around, then used the Simply Scored to enhance the scores
  • Misc:
  • Basic Rhinestones
  • Simply Scored
  • Trimmer
  • 2020-2022 In Color Square Gems
  • Dots & Squares Embossing Folders
  • Dimensionals

In Summary, I wanted to tell you about a Christmas in July class that I am having! We are making 16 cards! 2 each of 5 designs and 1 that is a Specialty card! I do this every year, except last year obviously. Finally we get to come together and make cards in person!

Furthermore, we will be doing this in a Big Room at the Senior Center in my town where we can spread out, eat food, listen to Christmas music, craft and have fun being able to get together! Let me know if you would like to attend! The cost is $40 for those not on my team and $35 for those who are on my team! Not only will you get the 16 cards but you will also get 1/2 pack of Red Rhinestones AND for those who register early you will also get some Dimensionals! Can you tell that I’m excited! I really hope you can make it!

Thanks for stopping by! Hope you come back next week!

Lisa Tedder
A Former California girl living in North Carolina

Product List

A 1 1/2″ x 3/4″ stamp made this background?!

Hey Guys!

Who doesn’t love a Technique!?

Today I am sharing with you a card I made that uses a teeny tiny stamp to make a background that is really amazing! Moreover, it is embossed with Copper to make it REALLY stand out! I love this technique, I hope you like it as much as I do!

You’ll have to watch video to see how, it’s too hard to describe otherwise!

Didn’t it come together well? As I said, techniques have always inspired me and helped to make my stamping even more fun! Look through your stamps and see if any image has this basic shape and see what you come up with! If you didn’t catch this technique, go check it out!

As usual, here are the specifics for this card:

Stamps:
Parisian Beauty
Ornate Style

Inks:
Versamark
Petal Pink

Paper:
Petal Pink 8 1/2″ x 5 1/2, 5″ x 3 3/4″ (inside), scraps for dies
Early Espresso 5 1/8″ x 3 7/8″ (x2)
Copper Foil 5 1/4″ x 4″ (x2) cut inside out for dies
White scrap for underneath dies (see video)

Misc:
Champagne Rhinestones
Petal Pink 1/4″ metallic edged ribbon
Copper embossing powder
Embossing buddy
Stamping sponges
Heat tool
Dimensionals
Ornate Frames dies

Also, you will find the supplies listed below in picture form. Click on any picture and you will be taken to my OnLine Store. If you purchase $35 or more you will receive two sets of tutorials containing 50 +/- with step by step instructions! Here is a sneak peek of one:

Step by Step tutorial for these projects + 35 more for a purchase of $35!

I hope you are staying safe during this trying time in our world! I am stamping and creating away to bring happiness to my little world and hopefully yours!!

Stay tuned and please visit again!

Lisa Tedder
A California Girl living in North Carolina

Product List

Just Breathe

Hey Guys!

Today I’m sharing with you a card that was inspired by one I saw on Pinterest (it was a rival stamp company), I thought that Stampin’ Up! Stamps would be GORgeous! I used Layered with Kindness, it is a DISTinkTive set! Do you know what that means? SU! has a patent pending for a VERY beautiful way to make stamps look realistic! LOVE them!

These leaves are stunning!

Every time I stamp with a DISTinkTive stamp set I am in awe. You’ll have to tell me if you have used them, what you think. If you want to check them out, go ahead and place an order… look for this sign:


Would you like to see the inside of the card? I used the Label Me Lovely punch. It turned out so pretty!

As usual, I give you all the particulars for this card. All supplies will be in picture form below, click on any of them and you will be taken to my OnLine Store. For purchases $35 and over you will receive from me Tutorials with pictures of over 50 projects!

Stamps:
Layered with Kindness
Colorful Seasons

Inks:
Pumpkin Pie
Calypso Coral
Memento Black
Pear Pizzazz

Paper:
Whisper White thick 8 1/2″ x 5 1/2″
Whisper White 5″ x 3 3/4″ (x2), 1 1/4″ x 4 1/4″ (cut at an angle), scrap for cut out flowers
Basic Black 1 3/8″ x 4 1/4″, 5 1/8″ x 3 7/8″ (x2)

Misc:
Holiday Rhinestones
Mini Dimensionals
Label Me Lovely Punch

This card was pretty easy, a little bit of fussy cutting but you only cut out three flowers, that’s doable! Of course if you know me, you know I love bling…..I added a rhinestone to each flower and two at the top to add a little bit of bling on it’s own. I think if balances it out!

Thank you for checking out my blog, please come back again!

Lisa Tedder
A California Girl living in North Carolina

Product List

Winter Woods from the Holiday Catalog Card #2

Hey Guys!,

Today it’s time for card #2 out of 6.  By this time of year I am excited to do Christmas cards, but by Christmas I am ready to put it aside until July of next year.

Here is a card using the stamp set Winter Woods and Timeless Tidings from Stampin’ Up!

I saw this on Pinterest, changed up the background by stamping the Birch trees in Versamark first.  But the idea came from Linda Vich.  Thank you Linda!

Here is a look at the inside:

Hope you like it as much as I do!  The ingredients for this card are pictured below, click on any of them and you will be taken to my OnLine Store!

Here are the particulars to this card:

Stamps: Winter Woods, Timeless Tidings
Cardstock: Soft Suede 8 ½” x 5 ½”, 4 ¼” x 3 ¼”, scrap, Black
4 3/8” x 3 3/8”,scrap,  Real Red 5 ¼” x 4” (x2)
Ink: Memento Black, Versamark, Dk Black Blend
Misc: Rhinestones, Black 3/8” Glittered Organdy Ribbon
5 ½” (x2),  Tufted Folder, Dimensionals

Thank you for stopping by!

Lisa Tedder
A California girl living in North Carolina
Product List

Eastern Beauty trying new combinations!

Today I am playing with Eastern Beauty, a NEW stamp set from Stampin’ Up!  This stamp set is so Versatile!!  I have seen so many different ways of stamping  with this set so I thought I would give it a try and just play with it!  I DID end up making a card!  And I love how it came out!

Here it is:

It’s a monochromatic card using ONE ink pad!  The ink I used is Dapper Denim! To get the two different colors I just stamped once on a scratch paper before I stamped on the cardstock.

The cardstock I used is Dapper Denim and Soft Sky.  The measurements are:

Dapper Denim:  5 1/2″ x 4  1/2″, scored at 1 1/4″ and another piece    5 1/2″ x 4 1/4″   (I had to cut it this way since the thinlit won’t fit through the Big Shot from side to side. The flap that I scored fits over the back of the 5 1/2″ x 4  1/4″ )

Soft Sky: 5 1/4″ X 4″ and 5 1/4″ X 3″

I then placed the curvy Thinlit from Seasonal Layers on the bottom of each piece (away from the flap on the one, and along the smaller Soft Sky)  centering it on each side so it is even.  NOT at at same time though!

Stamped this first:

Then turned stamp….

Then:

There are all kinds of ways to do this!  You can place the diamond shape further apart and get this:

Then go from there:

I put a different middle on this one!  Plus I stamped that pretty 3 point exclamation (not sure what to call it!) at each curve.

I stamped the Life is Beautiful stamp along the curve at the bottom twice and then once more stamped the ‘diamond’ shape but stamped off since I wanted it to be lighter than the words.

Here’s more images from this stamp set:

This one uses the stamp from the set that has the point in the middle, just line it up and stamp between each valley and it looks like a Spirograph from when I was a kid!

One more:

Hope you love this stamp as much as I do!  I’ve been having a lot of fun playing with it!  I would love to hear from you which image YOU like best!  Just place a comment here and you will also be eligible for my Blog Candy!  Which is this:

I LOVE Embossing folders, don’t you?!  Comment before May 15th and you might get this in YOUR mail box! You can also put a comment on my Facebook Page TedderBearStamping and I’ll put you in the drawing!

Visit me again, and to be sure you don’t miss anything, subscribe to my blog and you will be notified each time I post!

Lisa Tedder
TedderBearStamping
A California Girl living in North Carolina

Product List

Press’n Seal your thinlits for a beautiful effect

Welcome to the NC Demo Blog Hop!! Happy Spring! I thought these cards looked like Spring has Sprung! Don’t you?

I have seen on other posts where people have taken a thinlit and they pop-up the pieces onto a card and the look is so pretty! The one I went to was Billie Moan and she said in her video that the effect is beautiful but the effort was intense!

I had an idea on how to do this same technique BUT make it much easier!! I made a video showing how to do this very thing! I am not into doing things the hard way and I wanted to figure out an easier way and then share it with you!

Here is the card I made for the YouTube video:

I used the smaller rose thinlit from the Stampin’ Up! thinlit set Rose Garden! I haven’t used that set in a while, but it worked perfectly for this card, don’t you think? I put clear Wink of Stella on the top of each petal and then lined the petals with Gold Wink of Stella. The background is the Petal Burst Embossing Folder, sponged over top with the Peekaboo Peach to make the leaves stand out. I also used the Gold ribbon with the Peekaboo Peach ribbon on top to set it off!

I used the Bigger rose for another card, it took up more room, but still quite stunning!


I put some clear Wink of Stella over the petals to really make them stand out! For the background I used the Embossing Folder Fluttering and sponged the top with Mint Macaron to help the butterflies fly! The glitter paper is from Sale-a-Bration, sorry it isn’t available anymore, but any glitter paper is great!

How did I make this simpler? I worked for HOURS trying to figure out a quick version on how to make this, so it will be easy for everyone!

Have you heard of Press’n Seal? This works miracles!! You cut out your thinlit using the Big Shot and before you take the paper away from the thinlit you put the Press’n Seal over the back (make sure that the sticky part is towards the paper. You can see what I mean when you go to my video on YouTube! It really is quite simple!

Once you have it pressed to the back peal away the parts you don’t want like the excess paper and the outline of the rose. THEN you will leave it on the Press’n Seal but place Dimensionals on the back, put glue on the smaller pieces then remove all the backing on the Dimensionals flip over and push onto your project! Easy Peasy! Here’s a picture before you flip it:

Want to see some more projects using this technique??? Once I started I couldn’t stop!

I moved on to the Butterfly thinlits and made a card using three colors!!

For this one I removed some of the colors, ran it through the Big Shot with another color and when piecing them together on the card, I just laid them on top of each other, you can see the video to get an idea how I did this!

And again, I wasn’t done! I wanted to use the Dragonfly thinlits! Here is what I made with those!

I hope you have enjoyed my cards! I had so much fun making them! You can continue on to the next blog.

Jo Anne Hewins
Michelle Irinyi
Tracie Evans Langley
Sharon Maranich
Laurie Meier
Sue Root
Lisa Tedder <————–You are Here!
Frances Wagner


Don’t forget I have blog candy for those who leave messages on any post on my blog OR on my FaceBook page! The drawing will be on April 4th!


Here is what you can win!

Thanks for stopping by! I would love to hear what you think of these cards!

Lisa Tedder
A California Girl living in North Carolina
Product List