Flying Home

Hey Guys!

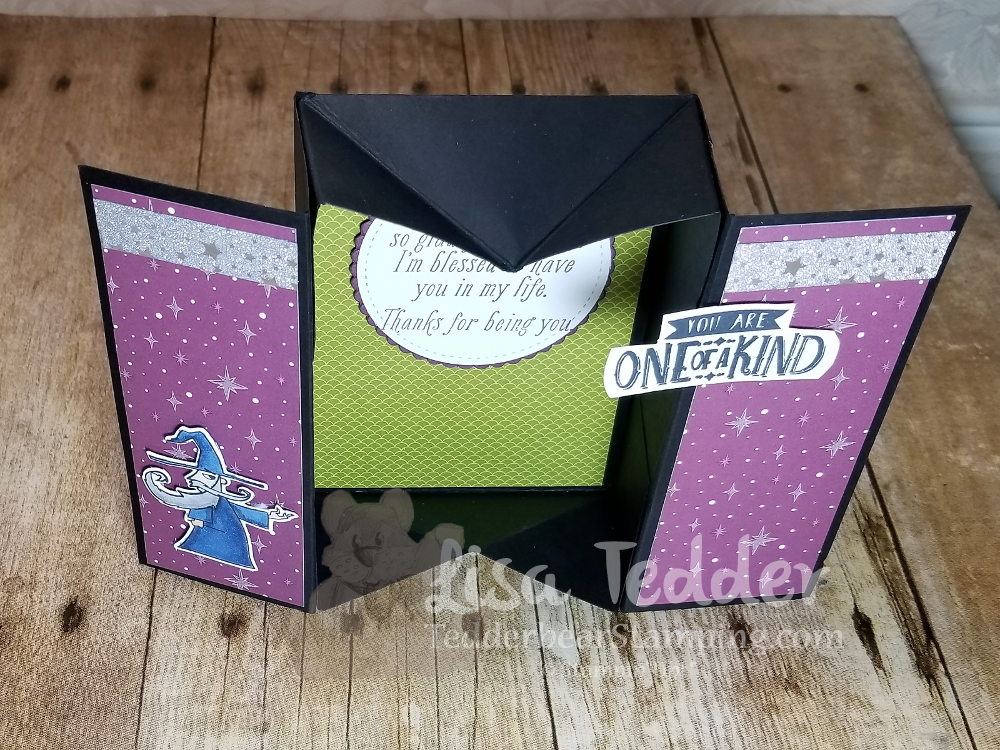
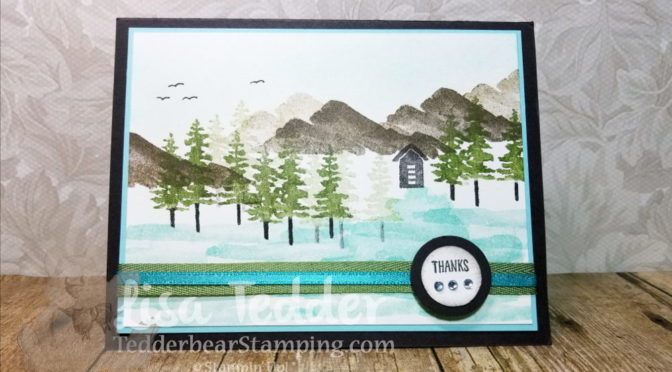
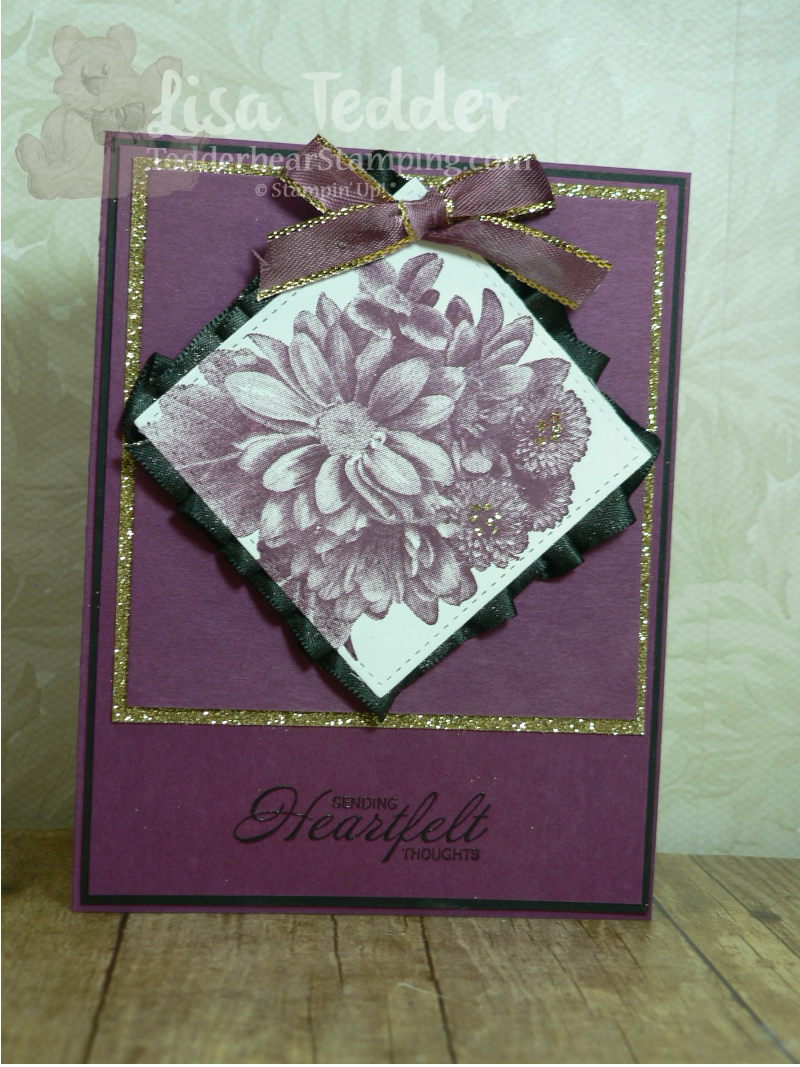
Today I am sharing with you a handmade card I had at my class last month!

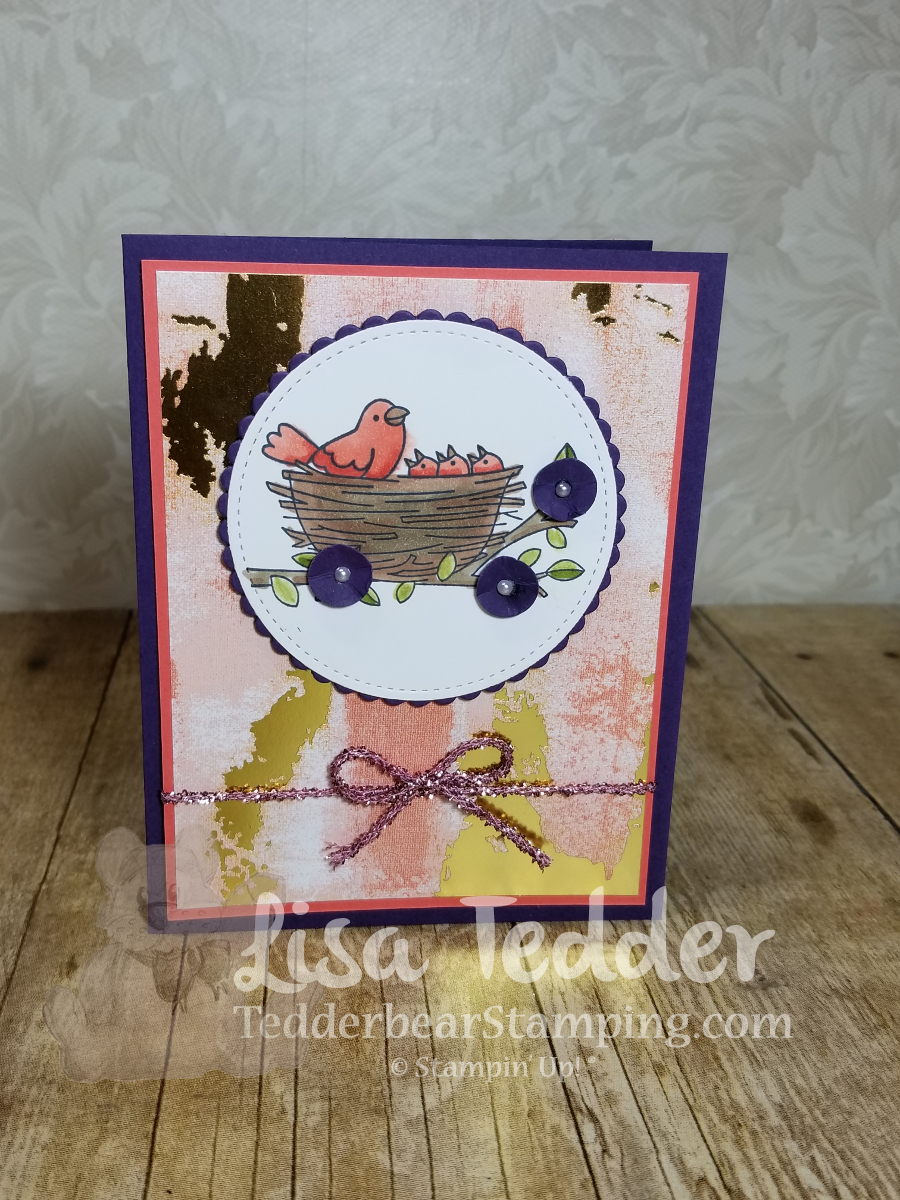
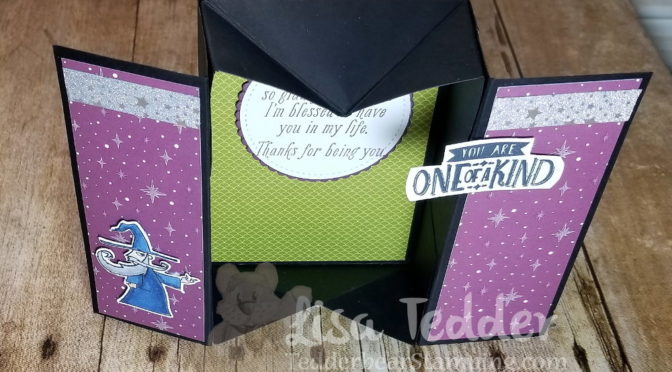
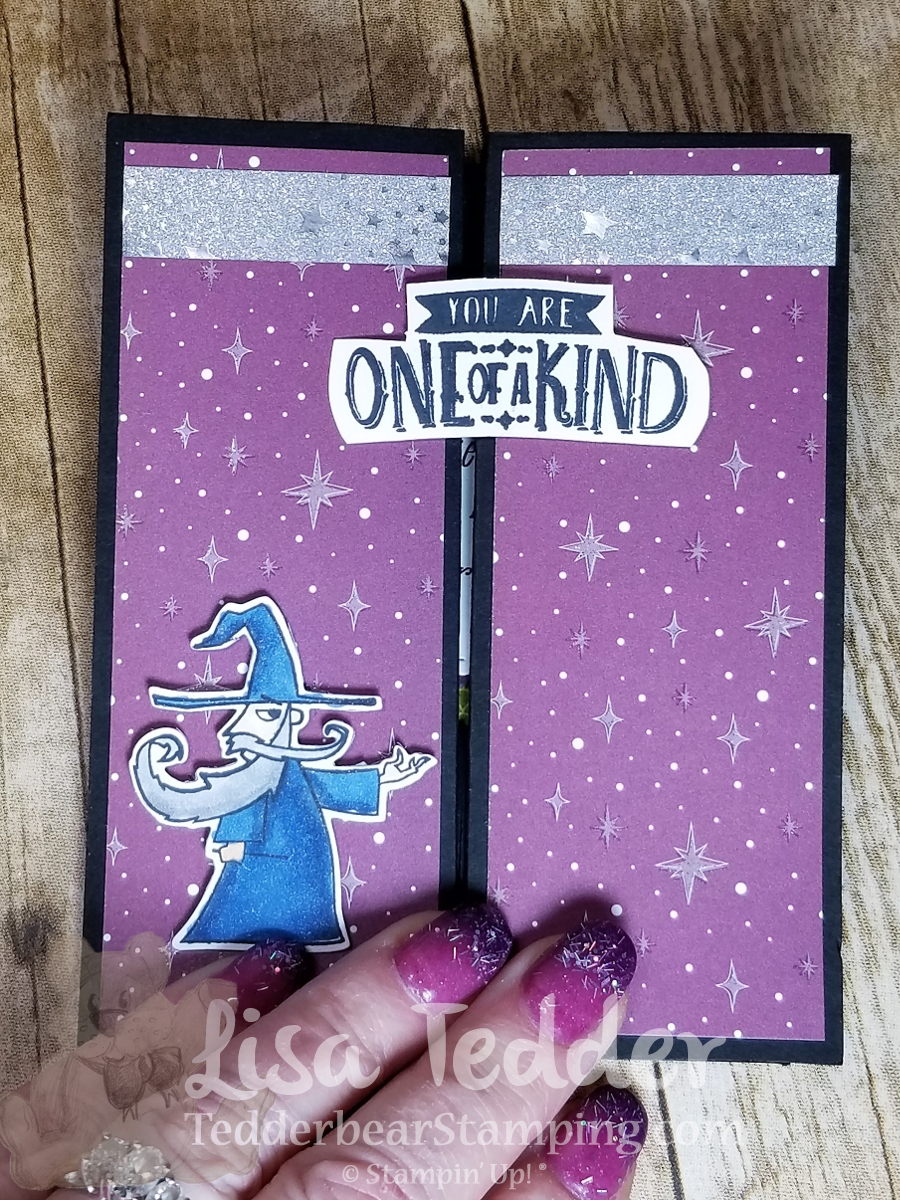
I used the Myths and Magic DSP (Designer Series Paper), which you have seen in my post here:  I LOVE this paper!  I’ve seen a LOT of Designer Paper in my 17 years of stamping, I think this IS my favorite one yet!

The dimensions for this card are:

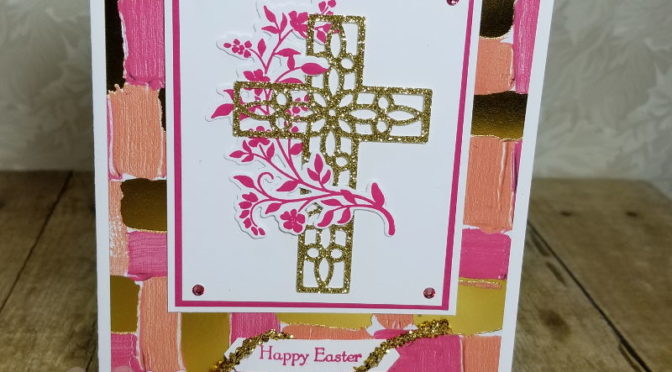
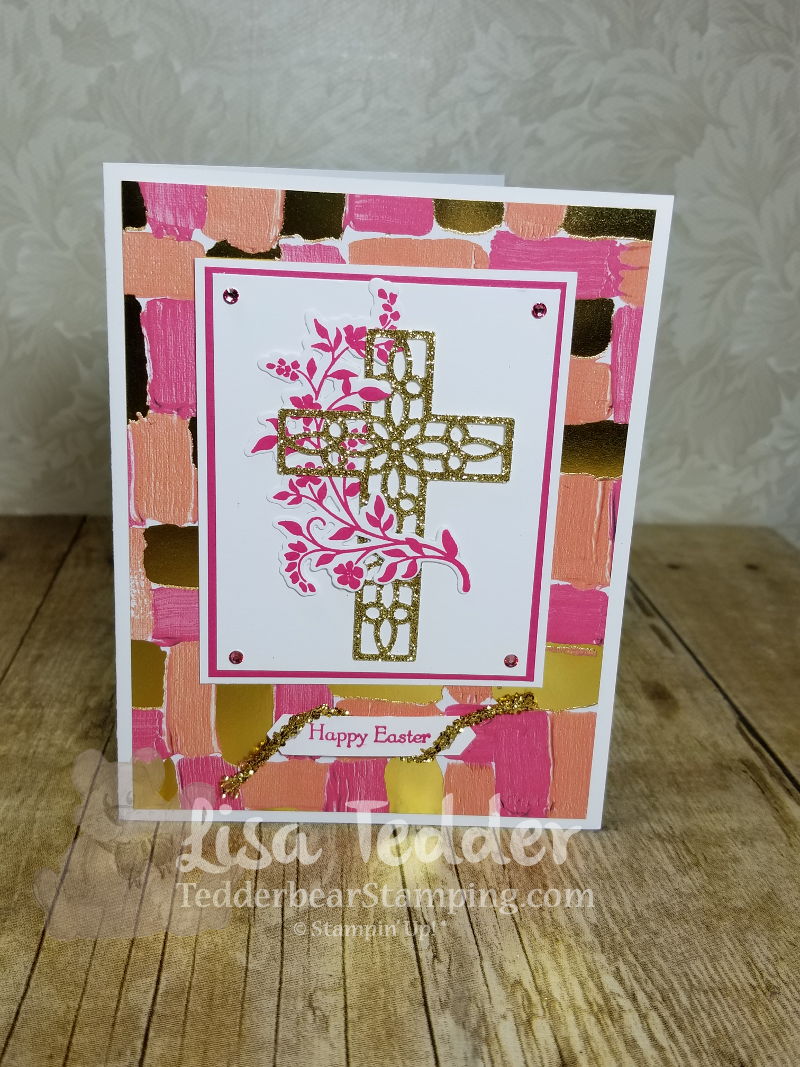
Elegant Envy: 8 1/2″ x 5 1/2″, 3 1/4″ sq for scallop circle, scraps for the flowers
Calypso Coral: 3 7/8″ x 5 1/8″
Painted with Love DSP: 3 3/4″ x 5″
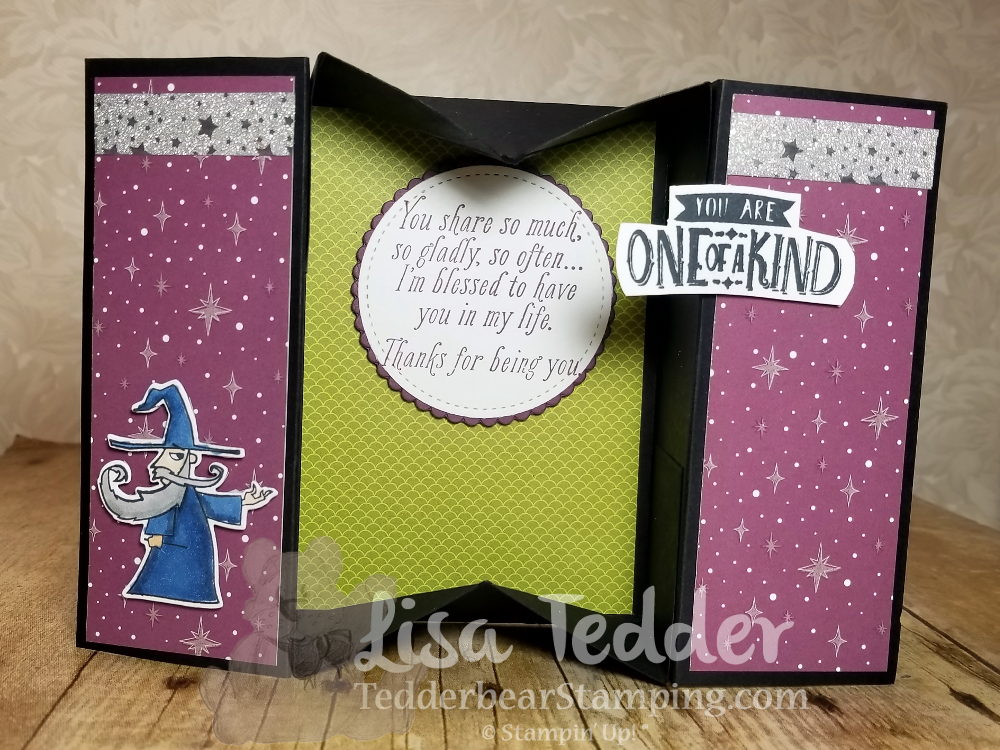
Whisper White 5 1/4″ x 4″ for inside, and 3″ x 3″ for Stitched framelit

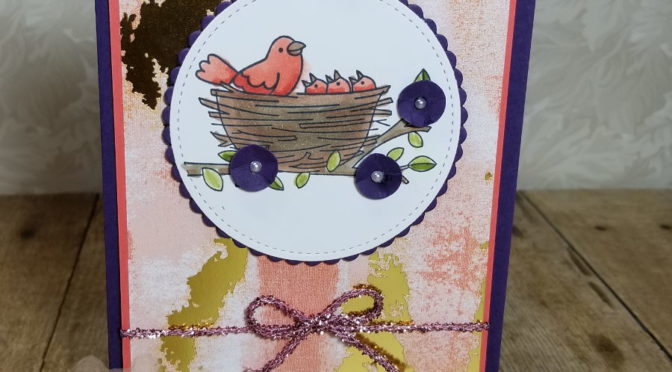
For the flowers, I punched out a 1/2″ circle and then placed it on my Stampin’ Pierce Mat and with the NON pokey side of my paper piercer, I pushed down in the center of the circle and it made it a flower shape!  I placed a pearl in the ‘bowl’ that I made to make a matching flower to the cardstock I used!

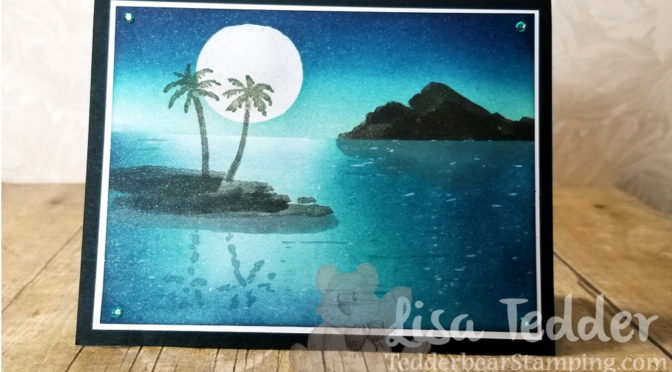
I hope you enjoyed my project!  And that you come back again!  If you get the chance go visit my YouTube Channel and see cards/projects that take a little more instruction!   My passion is making cards/projects that challenge me, or that STILL delight me that I AM artistic!  I thought my sister got all the artistic genes in my family!  STILL tickles me when I make something pretty!

Below is everything I used to make this card.  Click on any picture and you will be taken to my OnLine Store!  If you purchase from me, I will send you a handmade card!

Thanks for stopping by!  I hope you come back again!

Lisa Tedder
A California Girl living in North Carolina

Make your own Dimensional Snow!

Hey Guys!!

I was making a Christmas card (Yes, I DO know that it’s March, but I had an idea!) and needed my trees to have snow on them.  I wanted to try something and it worked!  NOT sure it’s been done before, but I’ve never heard of it!

First, here’s the card:

It’s really hard to see on this picture, but the trees have touchable snow.  It’s puffy, shiny, white and sparkly!  If you want to see it made in person (along with other stamping tips) you can go see my video here!  I was super excited to see that my idea not only worked, but it was EASY! AND you probably have the supplies in your stash already!

You need to get your Fine Tip Glue Pen, and draw lines with the glue where you want your snow.  Once you have all your lines, then dip it STILL WET into White Embossing Powder, set aside for about 10-15 minutes.  You can use that time to create the box card.  Go to this blog post to see how to make the box part.   You can see the video for that on my YouTube channel here.

This Christmas card is SUPER pretty!  Even prettier than the one I made with the Magical Day and I loved that one too.

Below you will see all the product used for this project, click on any picture to be taken to my OnLine Store. I would love to be your Stampin’ Up! Demonstrator if you live in the US.

Thank you for stopping by.  Hope to see you again soon!

Lisa Tedder
A California Girl living in North Carolina


Product List

Reverse Eclipse Card

Hey Guys!

Today I am showing you a simple card that can be used for any celebratory occasion!  I used the Stamparatus from Stampin’ Up! to have the image ” celebrate” repeat.  You just line up the stamp on the cardstock at the top, ink the stamp, close the Stamparatus, stamp and then move the Stamparatus down to the next slot, and the Stamp is positioned perfectly all down the cardstock.  You can watch a video here to see what exactly the Stamparatus is!

But to see the process I did, watch this video!   The Stamparatus will be available when the new catalog comes out!  Contact me if you need a new Catalog!!

Here is a pic of my card:

I am very proud of this simple card!  If you know me, or watch my Youtube Channel you kind of know that I love cards that are a little more detailed and use a technique of some kind.  So, when I make a card that is easy to do, but still lets me have fun and do a technique, I am in HEAVEN!

The measurements for this card are:

Pool Party: 8 1/2″ x 5 1/2″, plus scraps for the ‘YOU’
Basic Black: 5 1/8″ x 3 7/8″ (x2 for the inside too), 3 1/4″ x 2  for the label
Whisper White: 3 3/4″ x 5″ (x2 for the inside too), 2 3/4″ x 1 3/4″ for the label with the ‘YOU’ cut out.

For the Black label under the white label I cut it down on both top and bottom so it lines up with the white on top and bottom.  I used the Lots of Labels Dies 4th and 5th from the outside.

Below, you will see all the supplies I used for this card.  If you click on any image you will be taken to my OnLine Store!  If you purchase from me, I will send you one of my handmade cards!

Thanks for stopping by!  Please go visit my YouTube Channel and subscribe so you won’t miss my how-to videos!

Lisa Tedder
A California Girl living in North Carolina Product List

It’s a MAN card!!

Hey Guys!

If you’re wondering why my title sounds so weird it’s because I remember a cartoon that had the woman in it scream “It’s a MAN!”, in a very high voice, and she always scared that poor man!  LOL   My friend and I were reminiscing the other day about all our fun shows we watched growing up and this just popped in to my head when I was thinking of what Title I wanted.  ‘Manly’ cards are always a challenge for those of us that make handmade cards, for some reason the so-called ‘Girly Cards’ are much simpler to think up!  Hence the title!  LOL  So, now you KNOW just how crazy I am!

For this card I used the Truly Tailored Card from the Occasions 2018 Catalog from SU!  I got this idea from Tami White……I changed it up VERY LITTLE!!  Thanks Tami for your awesome MAN card!

Below you will see pictures of the items used for this card, just click on any picture and you will be sent to my OnLine Store!  IF you purchase from me, I will send you a handmade card as a Thank you!!

Dimensions for this card:

Thick Whisper White:
8 1/2″ x 5 1/2″, 4″ x 4 3/8″, 5″ x 3 3/4″, 2 1/2″ sq

Night of Navy:
2 3/4″ sq, 5 1/4″ x 4″

Basic Gray:
4″ x 4″

Thank you for visiting and putting up with my Childhood memories!  I have a YouTube Channel where I add a video every Tuesday (at least I try to!!) and I would love it if you would visit and subscribe so you won’t miss my next one!

Lisa Tedder
A California Girl living in North Carolina

Product List

Magical Day Box Card

Hey Guys!

So glad you could join me for this awesome project I have for you today!

Funny that my nails match!!  Just got them done today!  This is the card in the closed position

Here it is Open, the next picture shows it from a higher angle so you can really see the ‘box’.

This was super fun!  I love the Magical Day Stamp set……I had used EVERY stamp in the set but the Magician,  and now I have used them ALL!  I colored with the Blends and also used the Magical Day Washi Tape!  This entire Suite is awesome!

I got this idea from Natalie Lapakko……..I’m a visual learner so seeing a video would have helped me learn, so I thought I could help you if you also learn by seeing!

This project takes a whole piece of 8 1/2″ x 11″ piece of cardstock.  Score Horizontal @  2″, 3 3/4″, 7 1/4″ and 9″

Score Vertical @ 1 3/4″ and 6 3/4.

Follow along with the video to see where to snip and trim!  It was MUCH easier than I anticipated!

Below will be pictures of the items used to make this project.  Click on any picture to be taken to my OnLine Store!!  If you purchase from me, I will send you one of my handmade cards!

Thanks for stopping by!  If you are new to me, I have a YouTube Channel where I TRY to do a video every Tuesday!  I would love it if you would subscribe and be alerted when my next video posts!

Lisa Tedder
A California Girl living in North Carolina

Product List

Hold on to Hope Easter Card

Hey Guys!

Today I am sharing with you a card I did for my Senior Center Class (not ALL of the people attending are Seniors!), they loved this card!  It’s so pretty  and uplifting!

I used the Painted with Love Designer Paper.  This paper Is so pretty I HATE calling it paper!  It seems like there should be a better name for how beautiful it is!  LOL

Here is the card:

The colors are so stunning!  And the Gold is very shiny.  I wrapped the Love Mini Tinsel around the Sentiment to mimic the Shroud that Jesus wore.  I hope you think that this card shows love for that awesome sacrifice!!

Below are the items I used, click on any picture and you will be taken straight to my OnLine Store!

Here are the dimensions for this card:

Thick Whisper White:
8 1/2″ x 5 1/2″, 2 7/8″ x 3 1/2″, 3 1/4″ x 2  5/8″

Melon Mambo:
5 1/4″ x 4″, 5″ x 3 3/4″

Painted with Love DSP:
5 1/4″ x 4″

Gold Glimmer:
2″ x 3″ (for the cross)

Thank you for stopping by!  I hope you come see me at my YouTube Channel!

I TRY to make a video every Tuesday, subscribe to my channel so you don’t miss my next fun card/project!!

Lisa Tedder
A California Girl living in North Carolina

Product List

Moonlit Scene made with Stamps!

Hey Guys!

I have another technique for you today on making another landscape scene!  This one is for a Moonlit water scene!  To see it done in person, you can watch me make it here!

Here is the card that I show how to make it!

I was so excited on how this card came out!  I even tackled doing a reflection!

Here are some of the cards that I show at the end that you might want to see closer!

I made this one after looking at this photo i found online:

Here’s another card I made:


I saw a card like this online, but couldn’t find it again.  I pretty much copied it!  I did change a little in the sky, but the rest I kept.  If you happen to see this card please let me know so I can give credit.  UPDATE: Thank you for everyone that mentioned where I saw this, Kim Jolley at stampinartfully.blogspot.com is the one that I got the idea from.  Thank you Kim!!

This is also from the same person, this is where I learned HOW to make the Scenes!  Again, if you see or know who made the original, please let me know!  I did add some Glitter & Clear Epoxy Dots to make the rain look more real!

Hope you like this post.  Check back in for my other posts!

Everything listed for my main picture at the top is listed below.  Click on any picture to be taken to my OnLine store!

Talk to you soon!

Lisa Tedder
A California Girl living in North Carolina

Product List


Make a Pop Up Card easy by Eyeballing it!

Hey Guys!

I am not much of a Measurer and if it takes me too long to ‘figure it out’ I tend to not want to do it!  That doesn’t mean that I WON’T do it, just that I put it off until I have plenty of time!  I keep seeing these Pop-Up Cards and I wanted to figure out an easy way to make one, that I could teach and show on a video…….
I figured out a quick and easy way to make a Pop-Up card that takes minimal measuring and hardly ANY stress!  Check out my video!

Here is the front of the card:

I absolutely LOVE this Stampin’ Up! set: Waterfront!  It really makes you feel like an artist, and you can make the scenery any way you can imagine!!  I changed the scenery inside, popped up some trees and I am thrilled with the result!

The trees fold down when the card is closed and Stand up when open!  On my video you can see just how easy this card is!

Here is the view from above:

I hope you like this card as much as I do!  The supplies are listed below, just click on any picture to be taken to my OnLine Store!

Until next time!

Lisa Tedder
A California Girl living in North Carolina

Product List

Stunning card made with FREE stamp set-Heartfelt Blooms

Hey Guys!

The card today is one I came up with all by myself!  That happens rarely and I get so tickled when I make something that I didn’t get any help from Pinterest or any other places!  It popped into my head and it came out even better than I thought it would!!

Not only is this stamp set Gorgeous, but did you know that Stampin’ Up! has a patent pending on HOW they made it?!!  When you look at the actual stamp before inking it up, it looks absolutely FLAT!  How in the World did they get a completely flat stamp to have so much dimension!?  NOT sure what/how they did it but I love it!

I’ve seen pictures of people who have stamped it and used different colors to differentiate the flowers,  here is one I took while at On Stage Live in Salt Lake City:

Isn’t that So pretty!!!?  The hint they gave to us was to stamp it with a light color so you could follow it.  If you give it a try I would love to see it!  I tried, but it didn’t come out.  That is why mine is one color!  Hahahaha   I’m still trying to figure out how to work the blends and have perfect shading………

So for my card above, I used Rich Razzleberry Cardstock, black and Gold Glimmer paper!  I added ribbon to the back by putting Tear & Tape around the edges (after I stamped it and cut it with the Stitched Framelits) and then I pleated the Black 3/8″ Shimmer Ribbon over the tape.  I then used the Foam Adhesive Strips to make it stand up higher.

I added some Fine Tip Glue to put some Gold Glitter on the smaller flowers.  I also used the Gold Metallic Edge Ribbon and colored it with the Razzleberry Blend so it would go with the card!  Love that!

I stamped the sentiment in the Basic Black and then immediately clear Embossed it so it would give texture and it just makes the Sentiment look so elegant, don’t you think?

Here are the Dimensions of the paper:

Rich Razzleberry: 8 1/2″ x 5 1/2″, 4″ x 5 1/4″ (x2) one for the inside,
3 5/8″ x 3 3/4″
Basic Black 4 1/8″ x 5 3/8″ (x2) one for the inside
Gold Glimmer paper 3 7/8″ x 4″
Whisper White 2 3/4″ sq (to fit the square stitched framelit)

I hope this helps!!

As always, the supplies are listed below, just click on any picture to be taken to my OnLine Store!  I would love to have you purchase your goodies from me!

Lisa Tedder
A California Girl living in North Carolina

Product List


Gift Card holder made easy with the Mini Treat Bag Thinlits

Hey Guys!

Glad you could come and see my latest creation!

Today I am sharing a video on how to EASILY make a gift card holder using the Mini Treat Bag Thinlits!  It’s so simple I even amazed myself at how well it went together!  You can watch my video here!

Here is a picture of the finished project:

On my video I show not only how to make this, but how to add the Designer Series Paper and add the half circle so it looks Perfect!  You can now make your very own Gift Card Holder and Personalize it!

I used Rich Razzleberry cardstock for the base and for the DSP I used is Painted with Love.

All supplies are listed below and if you click on any picture you will be taken to my OnLine Store!!

Thanks for stopping by!

Lisa Tedder
A California Girl living in North Carolina

Product List

Learn how to make cards that won't end up in the trash!