Tag Archives: techniques

NEW product is here!!

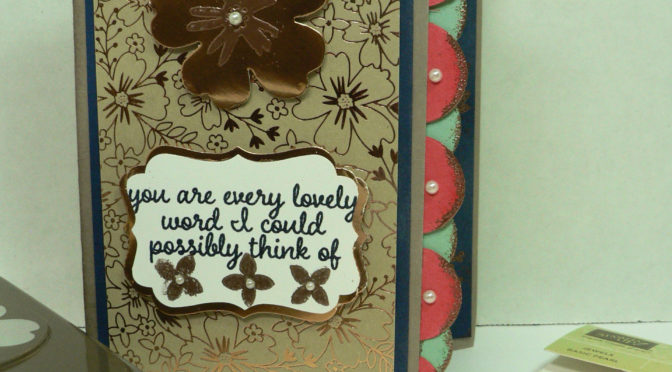
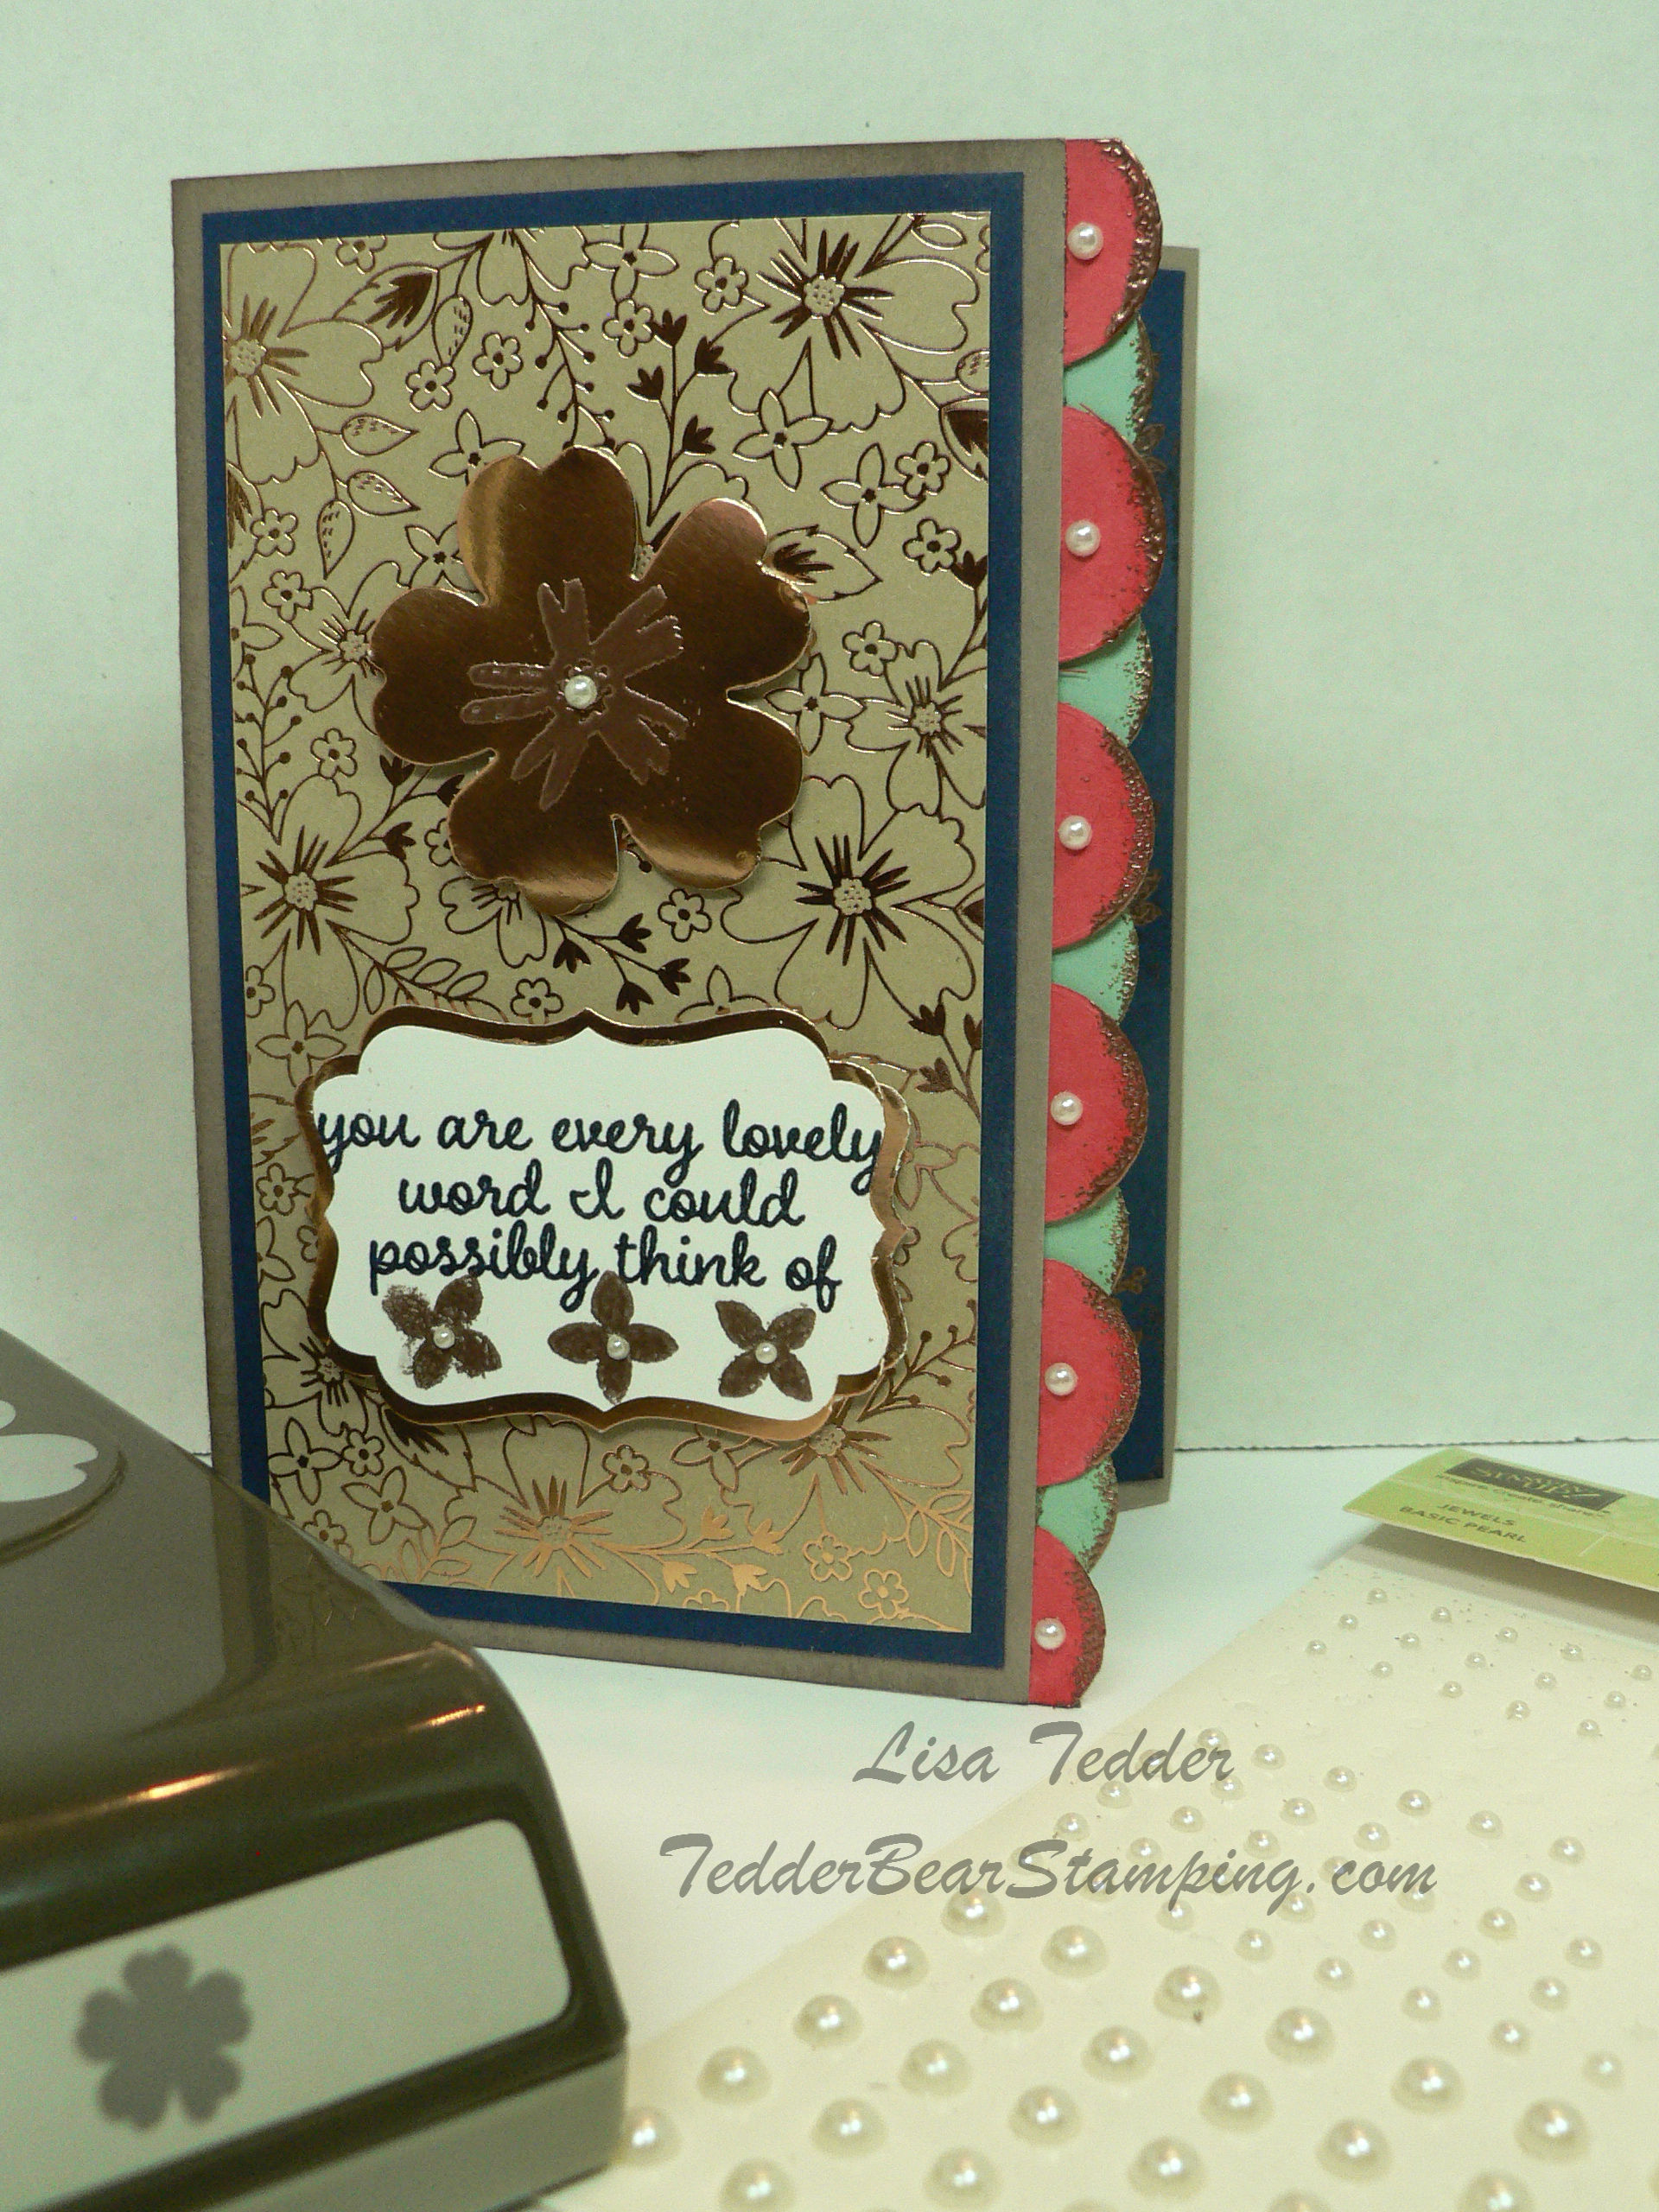
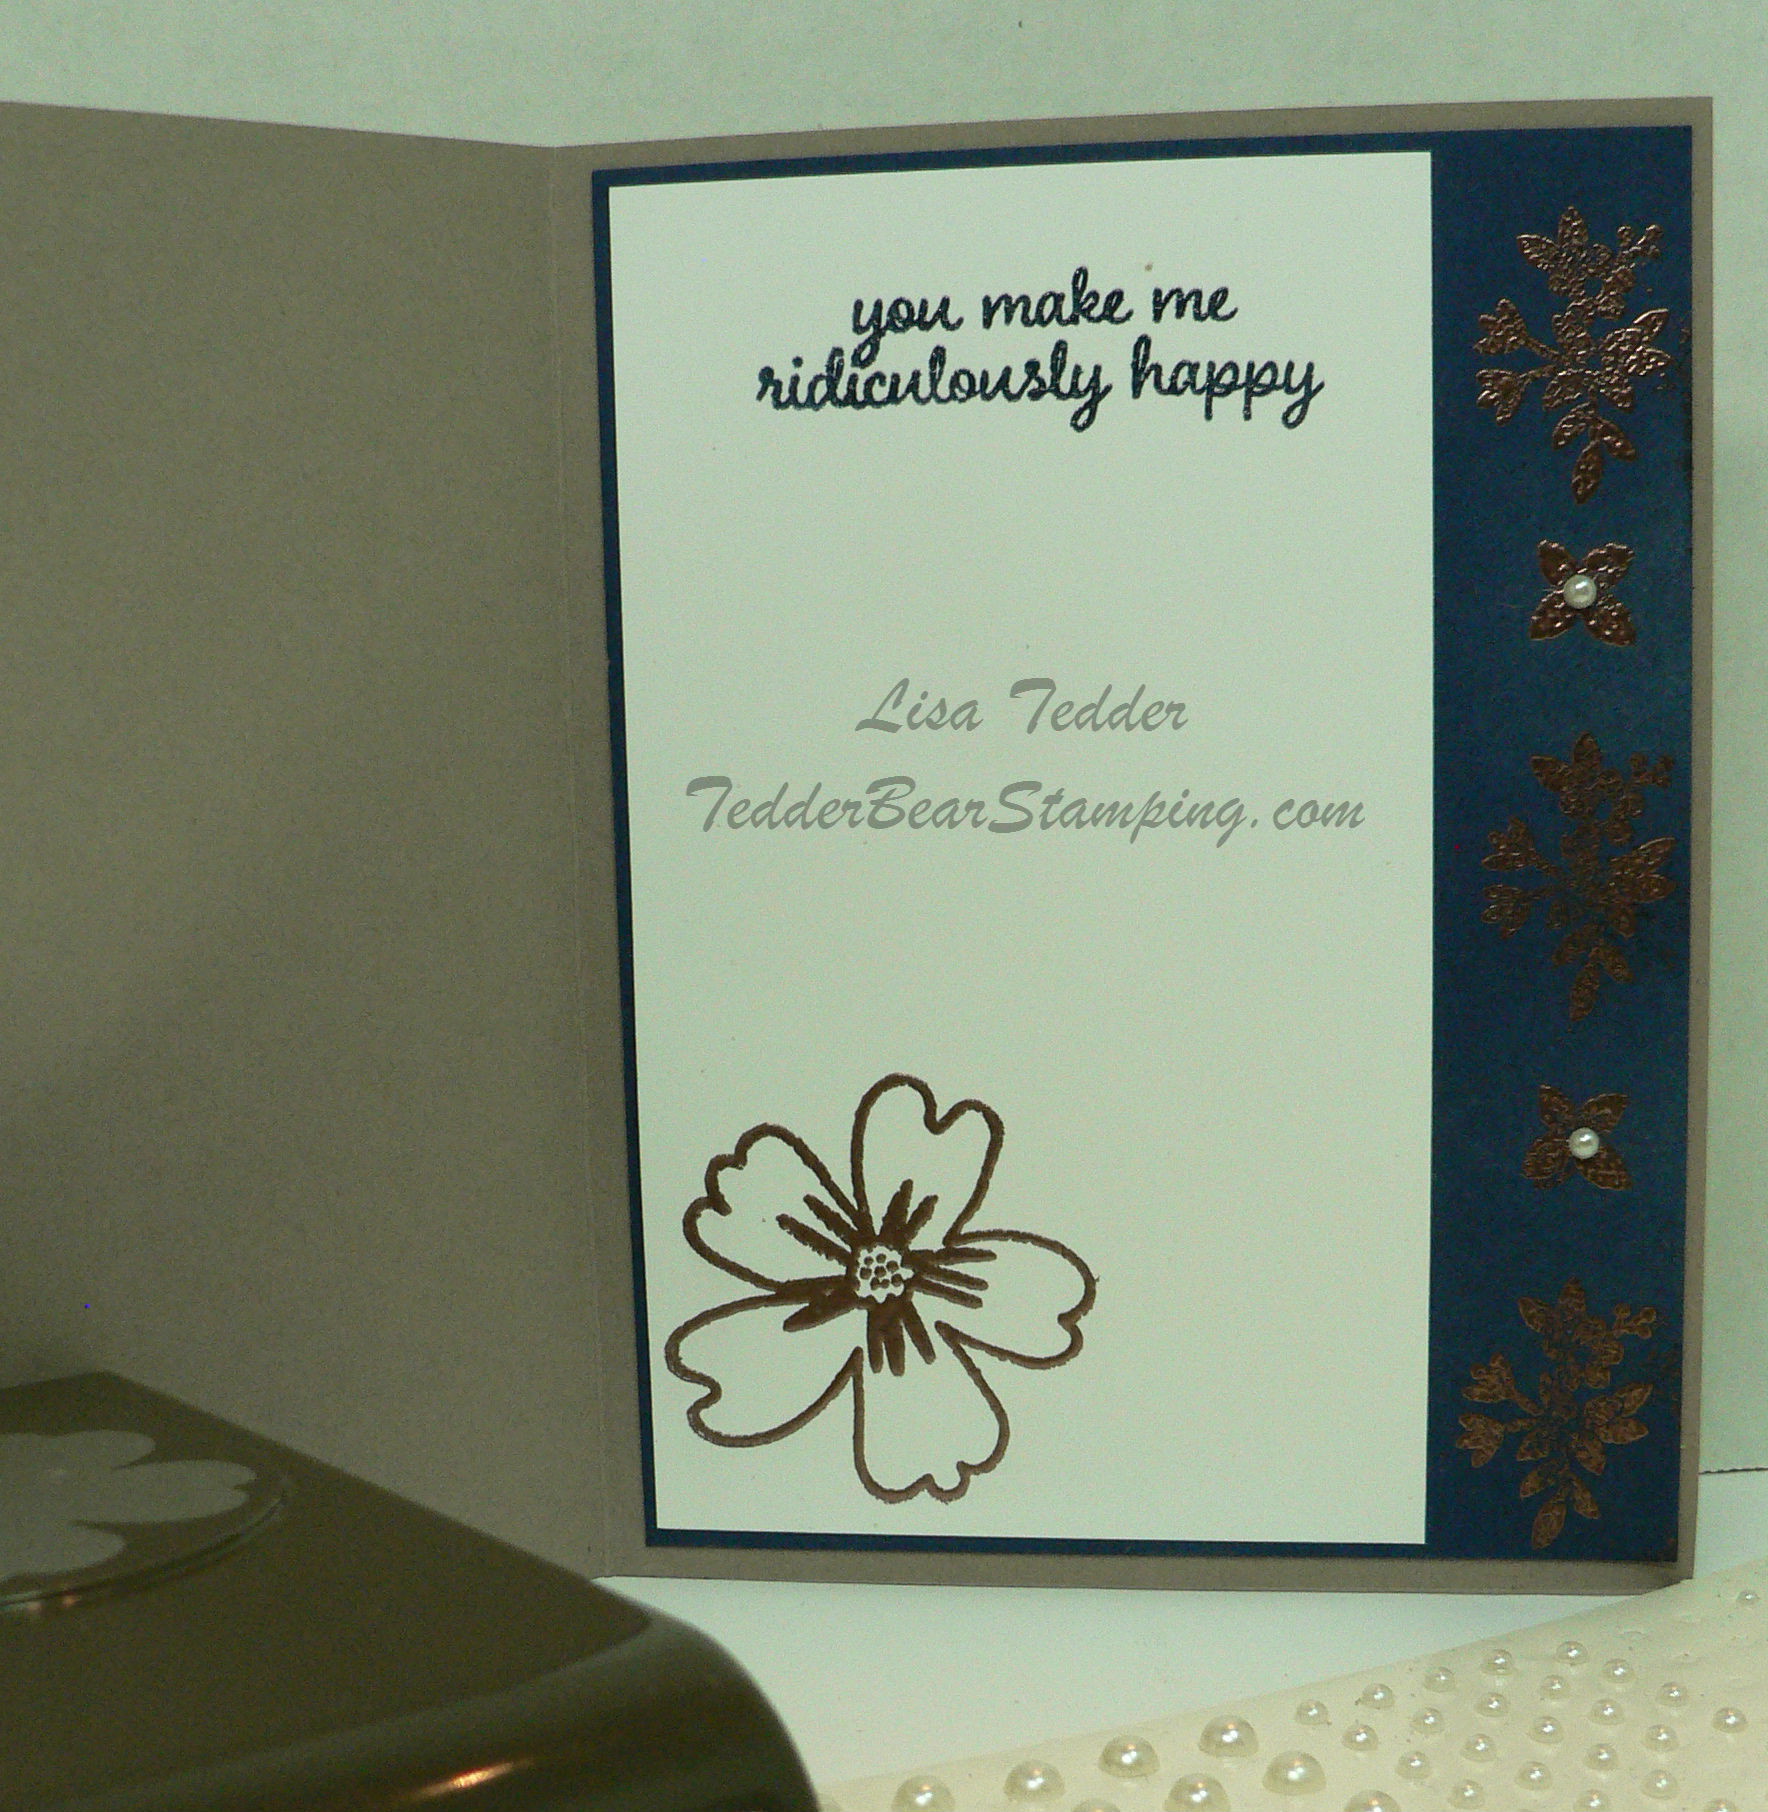
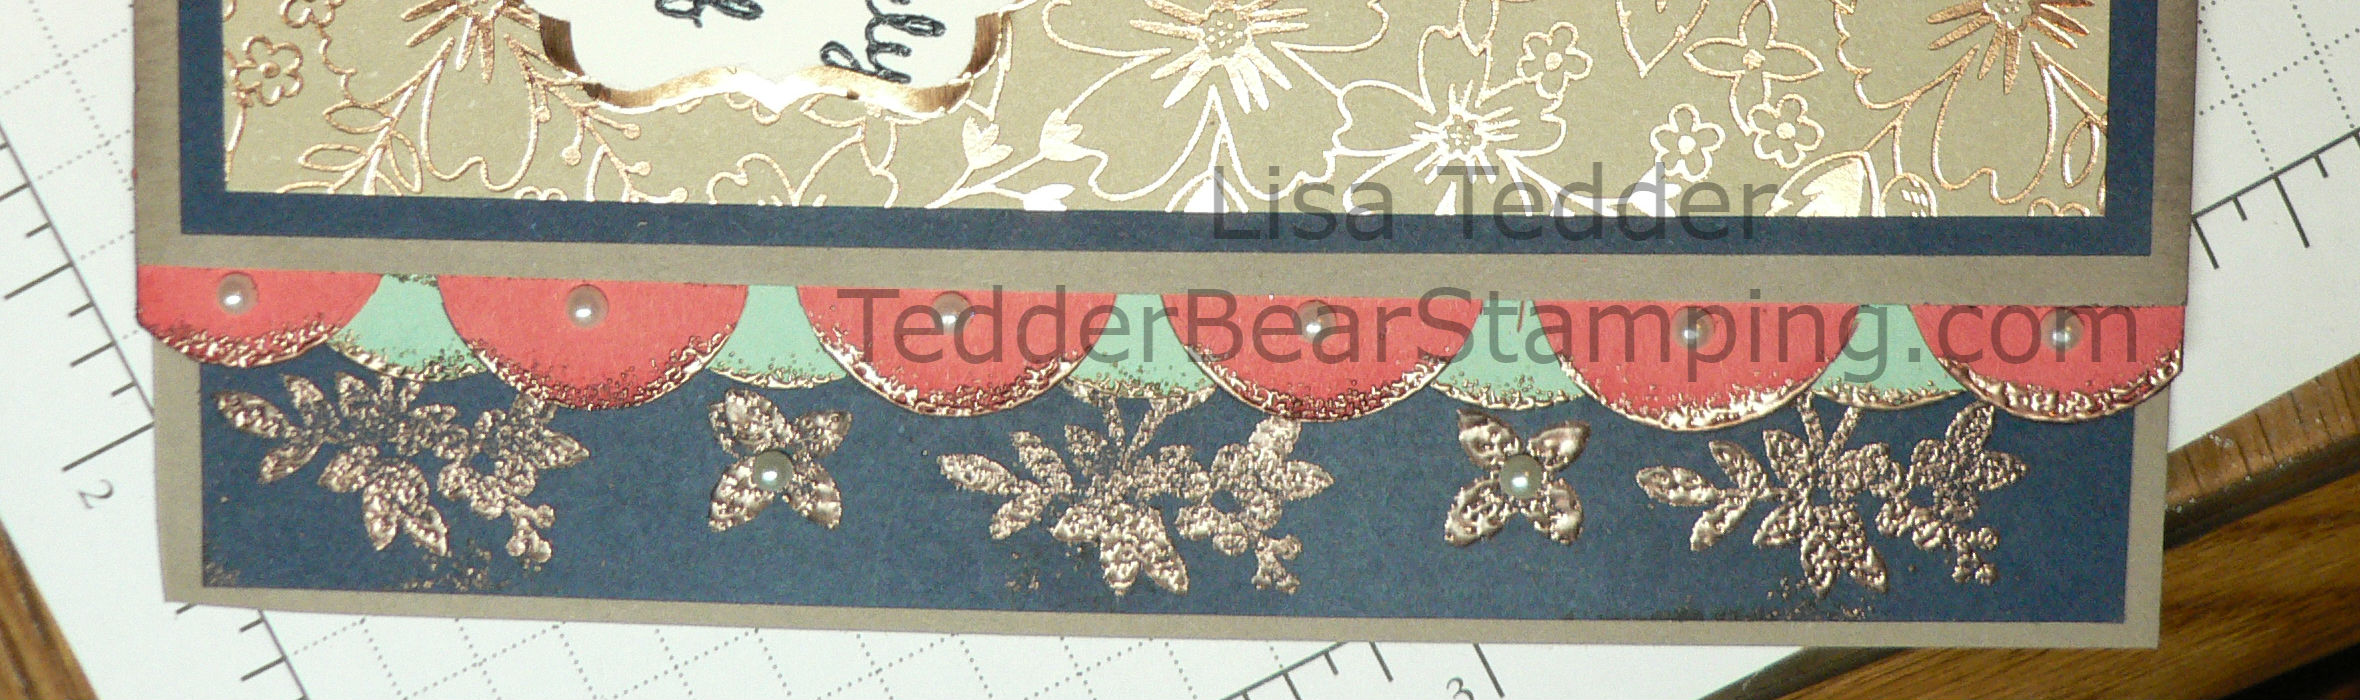
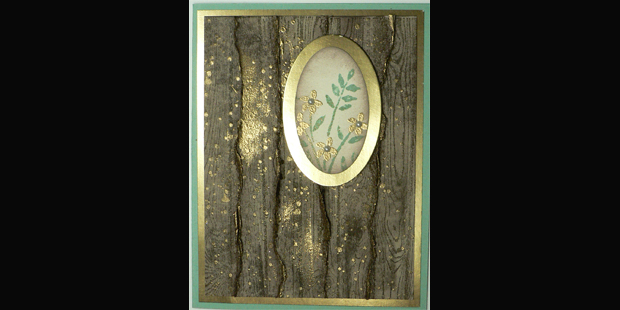
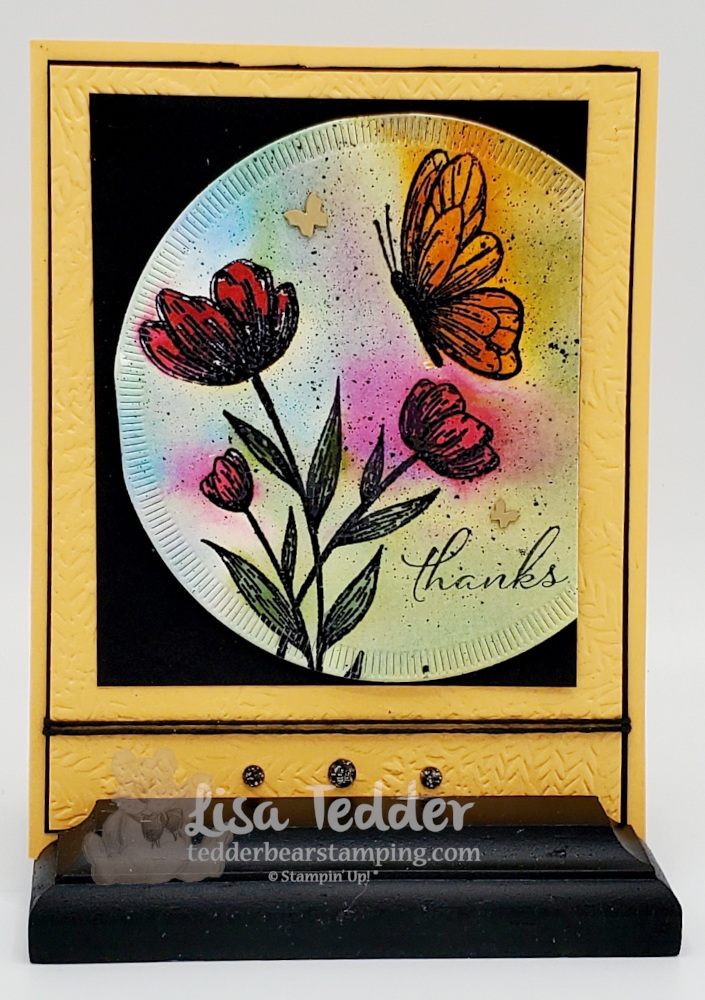
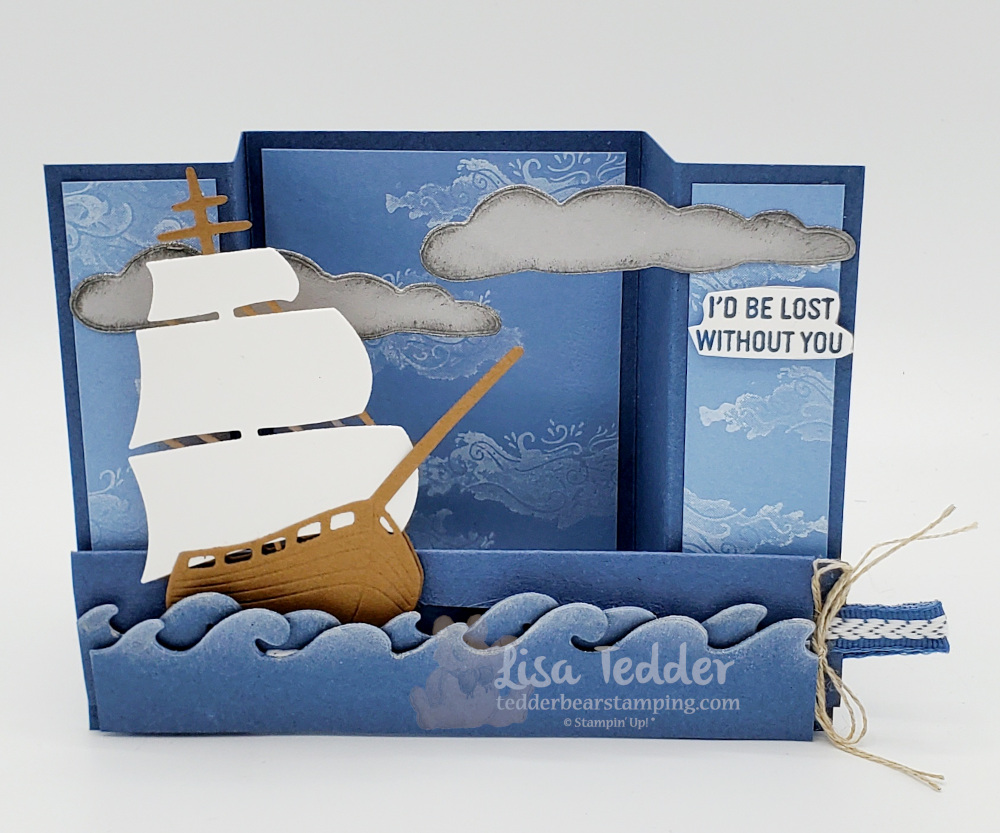
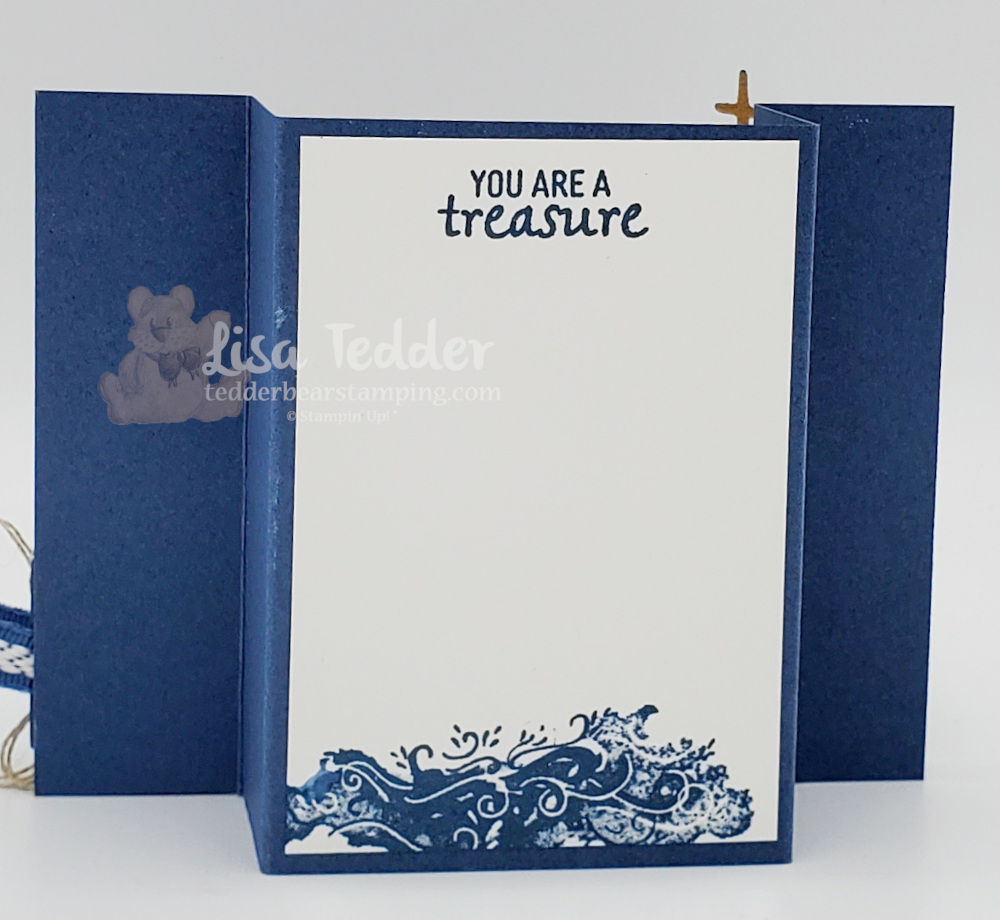
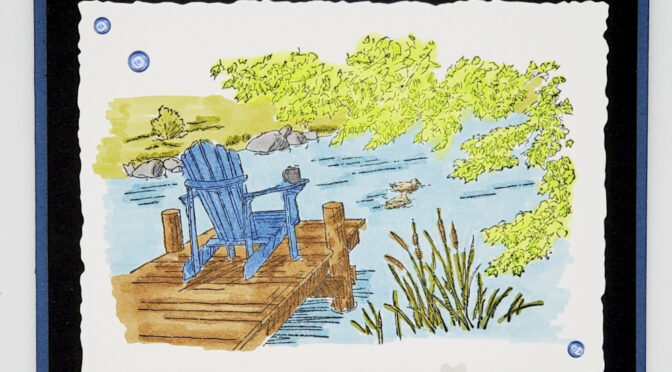
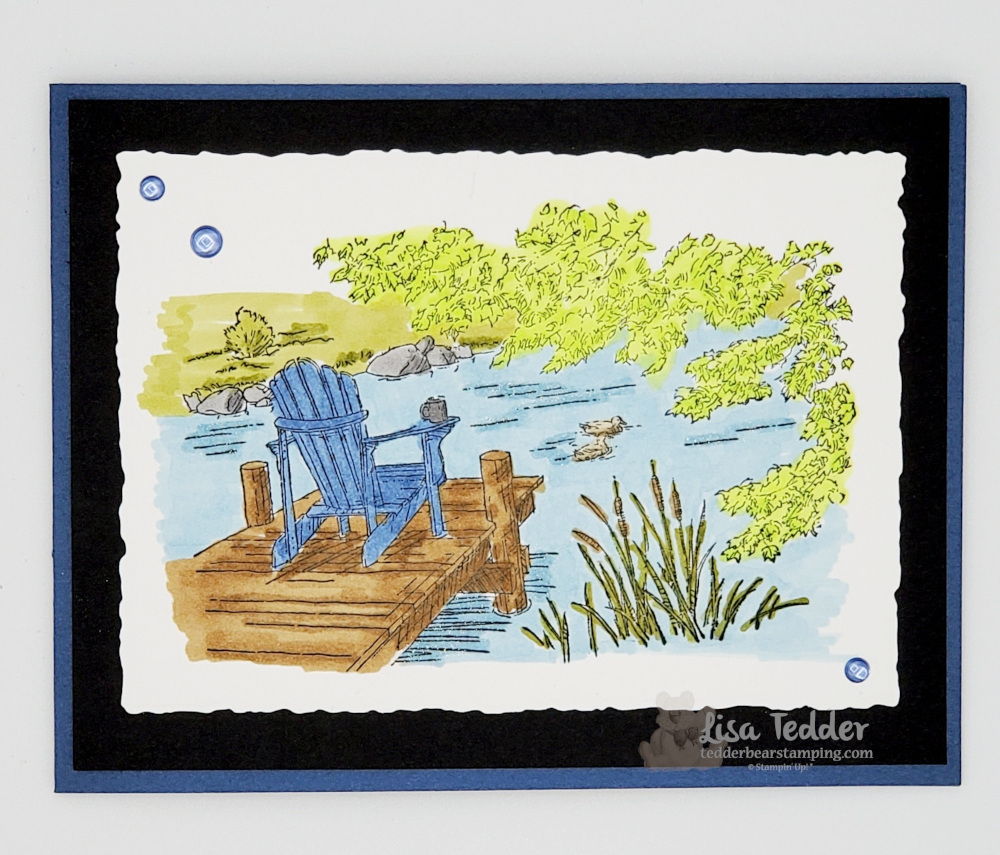
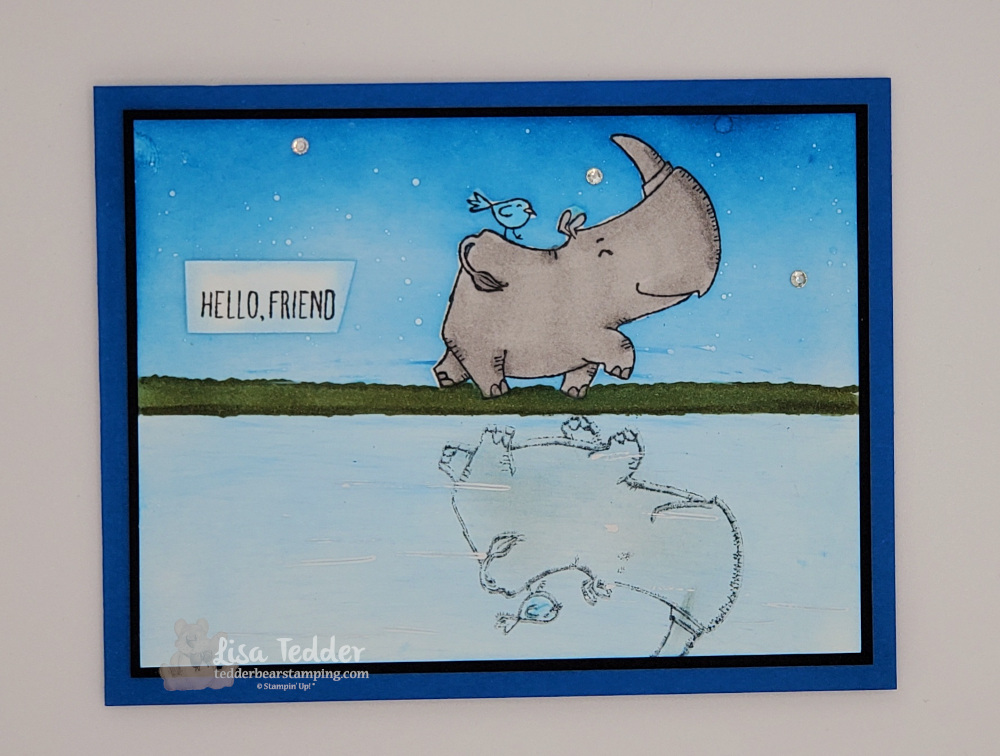
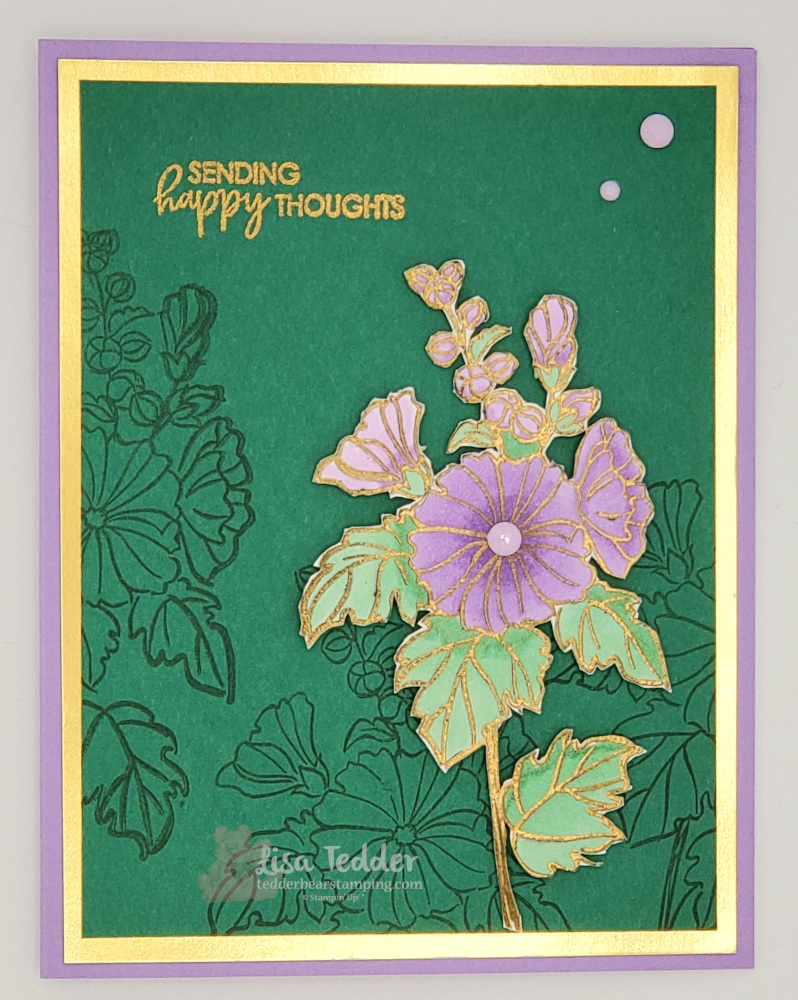
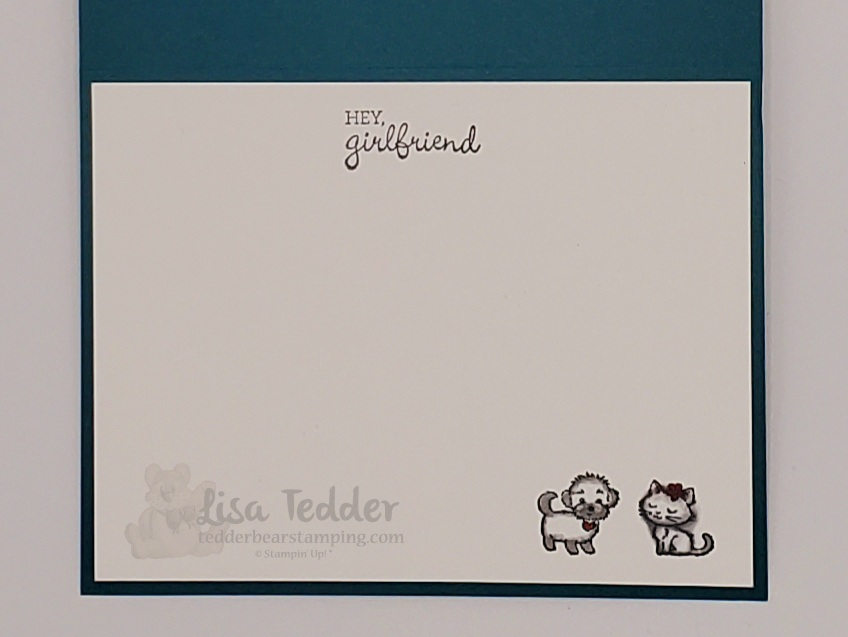
Hey Guys, NEW product is here!! I love getting my hands on NEW stamps! On the Ocean is retiring, so I HAVE to share a card that I made today on my YouTube Live, you’ll also get to see NEW product and learn some great techniques! That is, If you missed my video you can catch it here. Also, did you know that if you watch Live you will be put in a drawing to get one of these cards mailed to you?!

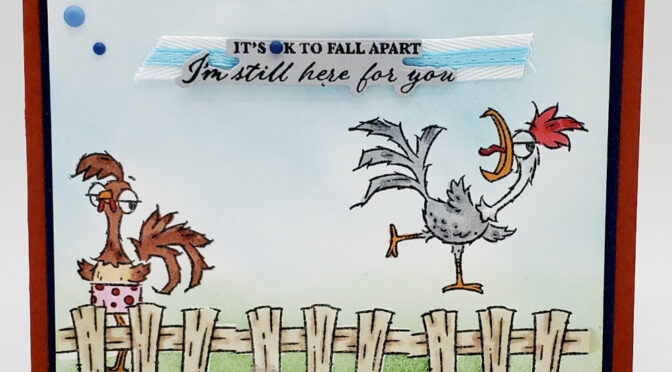
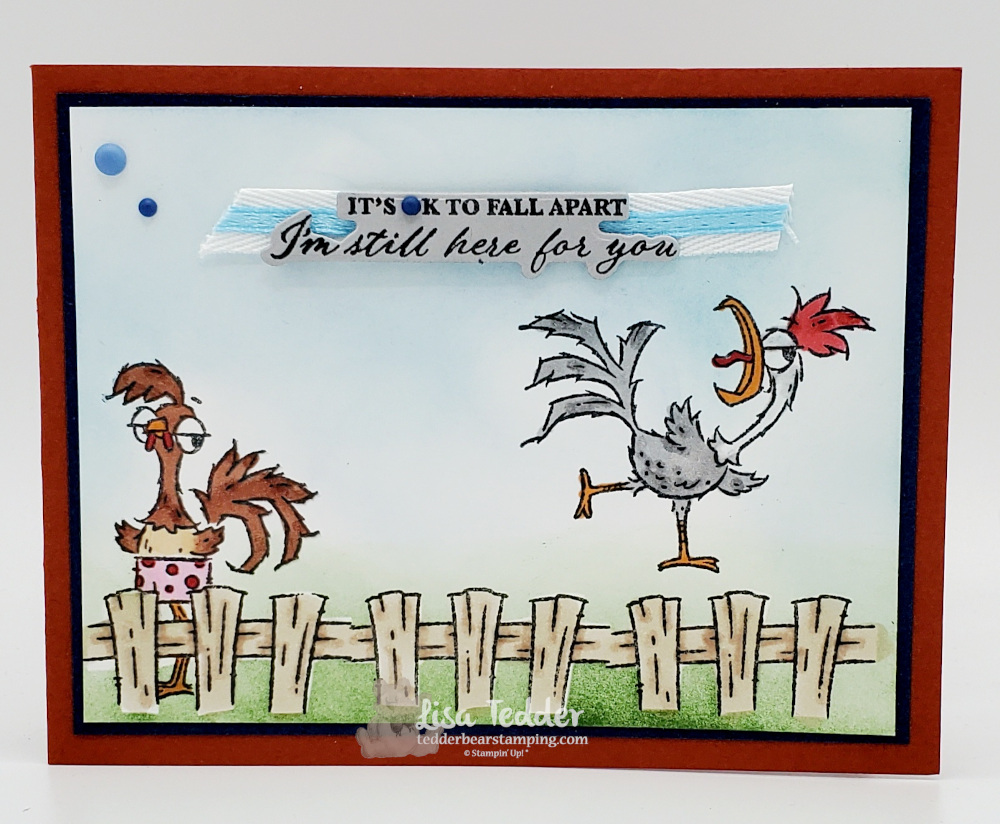
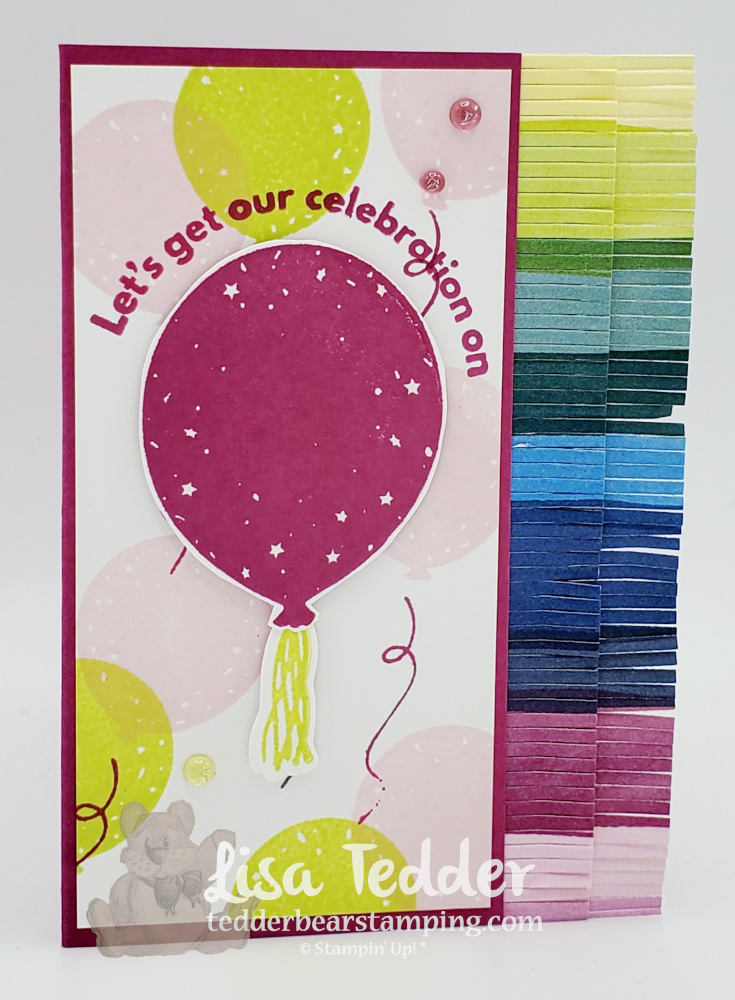
New product is here!

NEW product is here
NEW product is here
NEW product is here, but this is retiring. :-(
NEW product is here

I’m back from Houston!

As you know, I went to Houston last week for a Stampin’ Up! Convention. I not only got to visit with friends and make new ones, I have the NEW catalog in my hands!! EEEEEE! One of the MANY perks of being a SU! Demo, I don’t think I’ve ever stuck with anything as long as I’ve been one. I’m going on 21 years! So, can you guess what!? Most important, next year the Convention will be here in North Carolina! Of course I am excited since my team will be able to attend with me! In brief, how would you like to go with us? Of course, if you would like to get all the perks of being a Demonstrator on my team click here!

I’d love to have you in my Stamping Family!

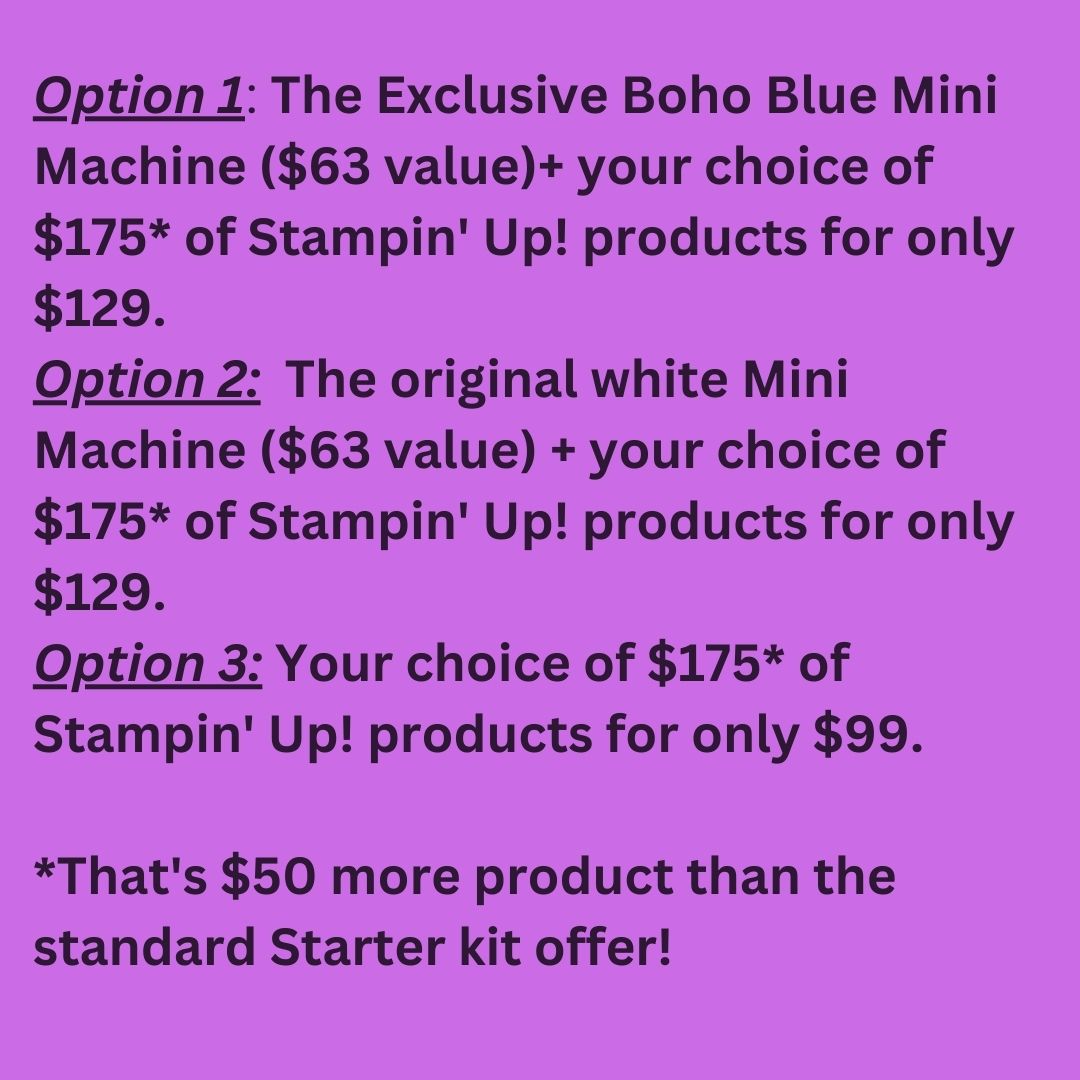
In the meantime, join the Fun! Of course, you can become a member of Stampin’ Up and my community, called The Tedder Bears! with the purchase of the Stampin’ Up starter kit.

 Our group across the U.S. is made up of hobby stampers and more business minded stampers, and we welcome everyone!

There are many perks to being part of Stampin’ Up:

1. Ongoing 20% discount off all of your orders (and the ability to increase that to 25%)

2. Earn additional income of up to another 18% of your sales

3. VIP access to new product releases and pre-order before they hit the streets

4. Earn free stamps with various promotions

5. Qualify for cash bonuses, product rewards, incentive trips and more

6. Receive Succeed Weekly electronically on a monthly basis

Here are the perks for Joining: The Tedder Bears

  • Join us for our Monthly meeting where we get together and have fun stamping or just having a meal together!
  • Get Exclusive pdfs which have 16 projects with instructions and pictures every month for free!
  • About the Starter Kit….The kit is a sweet deal – just pick out $125 of product for only $99 – and no shipping!
  • Get a discount on my classes!

Until next time!

Every Thursday I have a video and I would love it if you would join us! Of course I always try to make things that I think YOU will like, but you can always let me know if there is something you want to see! Thank you for being here and my hope is that you enjoyed my projects! Until next time!

Lisa Tedder
A former California girl living in North Carolina

Product List

Fun & Funny Stamping

Featuring Beautiful Balloons and Hey Chuck

Hey Guys, Fun & Funny Stamping is right up my Alley!! Of course I love to laugh (who doesn’t!?), so I made one of the cards super funny (at least to me). Every day I look in the mirror I SEE that I love to laugh! If you would like to join me on my Live and watch these cards being made, click here! As can be seen in this card Fun & Funny Stamping is the best!

Fun & Funny stamping, I used Wonderful Thoughts to make this funny.

Fun & Funny stamping – THIS is my FUN card

Who doesn’t love Frills!? The dies for this Balloon stamp set has Frills! Definitely, I wanted to show how you could look at the catalog and use the images to make something. Especially since the Stampin’ Up! catalog is FULL of ideas! Moreover I used the design for this card from the catalog, BUT the card in the catalog was a Slim Line card. So, I decided to use the design but make it different, so I could be me.

This is the FUN part of 'Fun & Funny stamping'

New Catalog is Now out!!

Surely, you know if you follow Stampin’ Up! at all that our new Catalog is now out! Of course as soon as I saw the Hey Chuck set I HAD to get it! Then I saw the Balloon set and when you put the Dies together with the set, it’s perfect! IF you like the Hey Chuck set and want to get a PDF of 16 card projects using NEW sets click here! Furthermore I added my Host code to that link, so you could get BOTH the stamp bundle and the PDF!

Finally

At this point, I’m sure you know what I’m going to say! Of course I am going to tell you that I appreciate you coming here and reading my post! The fact that you are here makes me so excited that you like what you see/read! Please come back next week when I will be having another video to share! YOU are the reason I do what I do, thank you!

Lisa Tedder
A former California girl living in North Carolina

Product List

Combining New with Old

Plus Techniques!

Hey guys, combining New with Old and then adding in a technique, you don’t have to ask me twice!! Certainly, every Thursday at 4:00 (eastern) I have a video, I swap each week with a Live and a recorded one. Chiefly I would love it if you would join me at either! After all I have HUNDREDS of videos in my library on YouTube. Of course, I have everything you could hope for! Moreover, if by chance you want to watch Live with me today, click here. Emphatically, I would LOVE to see you and chat with you! Indeed, every week, I do a random drawing for those watching Live, or those commenting on my recorded video, where you may get one of the cards I made!

Combining New with Old

Of course, here is my fun card using a technique AND using New (or coming back) colors!

Combining New with Old - Here I use the returning color Midnight Muse.

Combining New with Old – Host set

combining New with old

Do you want the Pdf’s for FREE!?

Nevertheless, for those who love to get the instructions/pictures of cards, here’s your chance! Correspondingly, I will be sending them out to those who sign up for my Newsletter (look —–>). Furthermore, I send out my Newsletter with the Pdf’s attached with any info I feel like you would be interested in, each week.

3 Days left….

Of course, IF you like getting a deal, and ordering craft supplies, now is the time! Obviously you should head over to my OnLine Store! Moreover, the retiring list is on Sale! Especially appealing to getting a deal, you can get another! When you order $35 or more in my Store, you will also get a pdf with 16 projects! Of course, these projects are made by Stampin’ Up!’s TOP demonstrators, don’t miss out! Finally, at the end of each month, I send this to those who ordered, YOU should be one of them!

Thank you for being here

I say it every week, but I really want you to KNOW! YOU are awesome if you are reading this, the fact that you are visiting me makes me so happy! Overall, Please subscribe to my YouTube channel and for my Newsletter here on my blog. Of course, this way you won’t miss anything! Whereas I look for things to learn, you do too! I emphatically advise you to join the Besties Club! Because I have been doing this for over 2 years and I STILL learn things every month! Basically, when can you spend $40 on a kit (6 cards) AND get $22 worth of product AND learn!? Especially when you are getting the know how for $12? Certainly a great deal, want to learn more, click here.

Lisa Tedder
A California girl living in North Carolina

Product List

Midnight Muse 8-1/2" X 11" Card Stock


Midnight Muse 8-1/2″ X 11″ Card Stock
[126843]
$6.95


Deckled Rectangles Dies


Linen Thread


$5.00


Blending Brushes


$12.50


Reflection Card

Using Rhino Ready

Hey Guys, I’m making a Reflection card today as well as a cool card using Heron Habitat over on YouTube! The Reflection card uses Rhino Ready the stamp set only sold OnLine. BOTH of these sets you just might want to get sooner rather than later. As far as Heron Habitat, the dies are already sold out and they aren’t coming back. Of course this means that this stamp set is retiring. As far as Rhino Ready goes, it is only available OnLine, so we don’t know how long it will be there.

Reflection card

Reflection Card. LOVE how they look so happy!

I used a Wite Out pen!

Get BOTH PDF's for the cards today, just register for my Newsletter!

Get the PDF’s! Even the Reflection Card

Presently, you can get the PDF’s for both these projects, just by signing up for my Newsletter!! This can be found to the right on my Blog. Every week, I do a video and make PDFs which I then share to those who are on my Newsletter list!! Surely, getting a free PDF is a deal, I send out my Newsletter a couple times a month, so these add up!

Want more PDF’s?

Another key point is that I also offer another PDF with 16 projects! By comparison of my tiny PDF’s with only one project each one, this one has the same step by step instructions along with color photo’s, only this one has 16! How do you get it, you ask…you only need purchase $35 worth of product from me in My Online Store! As shown below, here is a sneak peek:

Sneak peek of pdf

Lastly

Of course I say this all the time, but I really mean it, THANK you! Basically I know that you can visit anywhere online, the fact you visit my blog and watch my videos mean so much to me! I appreciate you so much! Henceforth I would love it if you would join me on my Lives (every other week) so I could thank you in person AND get to talk with you! As far as my videos, I do a Live every other week and fill in with ones I do beforehand, so I have a video every week. I emphatically hope to see you on one of my Lives!

Lisa Tedder
A former California girl living in North Carolina

Product List

Techniques & Fancy Folds!

Problem Solved!

Hey Guys!, today I have Techniques & Fancy Folds along with Solving problems! Have you ever tried to color something you already Embossed with Powders? For some reason the Blends don’t work with them. Of course, I still want to use my embossing powders and use Blends, so with my Stamparatus I have brought the two together perfectly! You can watch my video where I walk you through the steps.

Techniques, do you like them?

You may remember that I used to have a channel where every Tuesday I would do Two techniques. I called it Twosday’s Techniques and I posted on Vimeo (you can still find them there!). Well, I love techniques because using them gives more life to your stamping supplies. Anything that lets me come up with cool cards/scrapbook pages is in my wheel house. For todays video I am showing how to use two products that are like oil and water, but teaching you how to use them together.

Fancy Folds yay or nay?

I would love to know if you like Fancy Folds? Obviously I like them, but I don’t want to do them as often if YOU don’t! Sometimes I get bored with the cards folded the regular way, there is only so many ways you can change it up. After all there is landscape and portrait, that’s pretty much it! Of course the challenge is whether it fits in our envelopes, If I find a fancy fold that won’t fit in our envelopes, I tend to stear clear. What do you think? I’d love to know what you like.

Techniques & Fancy Folds!

Techniques & Fancy folds, of course this is a fancy fold!
Techniques & Fancy Folds, this is the technique card!

These cards are very fun to make, the first one I got the fold from Sue Campfield, and the other one I saw on Pinterest, both I designed myself, hope you love them as much as I do! Techniques & Fancy Folds are my jam!

You can get BOTH PDF’s by signing up for my Newsletter (upper right of post), each time I do a pdf I send it to my Newsletter people. Get ready to get a bunch of ideas!!

Last chance!

This year seems to be speeding by once again. You only have one month left to get your Sale-a-Bration free stamps! Spend $50 and you can pick out from this one or others! Click on the link and you will be in my store, you can see all the items for SAB by clicking on the specials tab. IF you spend enough to get a Free SAB item, you also spent enough to get my PDF with 16 projects with pictures and step by step instructions! DOUBLE Sale!!

Also I want to let you know if you decide to join (hopefully under me!) you have three choices:

Starter kit offer!!  Great Deal!
You will love my Team Lets Stamp! We have a lot of fun and I send out 1 free stamp set every month!

Sorry I was gone for a month

Some of you already know this but I went to DisneyWorld with my family last month! We spent 8 days with all my grandkids and all three of my daughters with 2 of their significant others. Every day was full of waking up before dawn, opening the park (rope drop anyone!?) and then trying to get all our rides that we ‘had to’ ride before it got too busy. Can I tell you that the new Guardians of the Galaxy ride is so awesome! I have a bad neck due to my accident when I broke my C2 vertebrae, so most roller coasters I worry will exacerbate my condition, but the Guardians ride was so smooth and fun! If they let us I’m sure we would have got right back in line!

As if that wasn’t enough, we also spent 4 days at Universal Studios, also opening the park! Let’s just say we left our ‘vacation’ more tired than we started! 🙂 All of us have decided that NEXT time, Universal will only be 1-2 days and being a Disney Family we still HAVE to spend a day at each park. BUT we will add in rest days so we can recoup and enjoy the resort.

Anyone here a Disney Fan? I moved to CA in 1969, grew up going to Disney. Then we moved all around the states and once we moved to NC we figured we could still be a Disney Family, but this time it would be Disney World. I LOVE Disney and feel my happiest when I am there, you?

That’s it for today!

I hope you enjoyed your visit! Please come back next week for my next round of cards/video. NOT sure if I will do a Live on YouTube or just upload a video. All depends on my time and schedule! Thank you so much for coming, I really appreciate you!

Lisa Tedder
A former California girl living in North Carolina

Product List

Two Techniques in one Class

Hey Guys!

For today’s post I am sharing with you a mini class that I am doing on YouTube that has two techniques! One of the techniques I’m doing for the first time! I really hope you joined me on my Live, but if not you can always catch it here.

One of Two Techniques
Inside
Technique two, one mini class
Inside card 2

As always, here are the supplies for both of these cards:

  • Stamps:
  • Hey, Girlfriend
  • Inks:
  • Memento Black
  • Blends:
  • Real Red
  • Basic Black
  • Mango Melody
  • Cinnamon Cider
  • Ivory
  • Petal Pink
  • Soft Suede
  • Granny Apple Green
  • Smoky Slate
  • Paper:
  • Pretty Peacock 8 1/2″ x 11″ card 2
  • Fine Art Floral Designer Series Paper 5 1/4″ x 4″ card 2
  • True Love Designer Series Paper 3 3/4″ x 2 3/4″, scrap for dress. card 1
  • Real Red 8 3/4″ x 4 1/4″ scored @ 3 1/4″, 5″ x 1 1/4″ scored @ 1/2″. card 1
  • Basic Black 5 1/4″ x 4″, 4″ x 3″, 3 3/4″ x 2 3/4″ (for scalloped piece behind girl), 2 1/4″ x 1 1/4″ (for scalloped piece behind sentiment) card 1
  • Basic White 5″ x 3 3/4″, 3 7/8″ x 2 7/8″ (front flap card 1), 3 1/2″ x 2 1/2″ (for stitched shape of girl) , 2″ x 1″ for sentiment, 5 1/4″ x 4″ for card 2, scraps for circles for card 2
  • Misc:
  • Layering Ovals dies
  • Stitched shapes dies
  • Foam Adhesive Strips
  • Woven Threads Sequin Assortment
  • White Chalk Marker
  • Magnet
  • Stampin’ Cut & Emboss Machine
  • Stampin’ Seal +

As a rule, I have the same supplies listed in picture form below, click on any of them to be taken to my OnLine Store! Likewise, for every $35 purchase you will receive from me the class packet from this class (excluding stamps/inks) and a PDF of 16 projects with step by step instructions. Sneak Peek:

Subsequently, I hope you enjoyed my Two Techniques in one Mini Class, if you missed my class from last week, you can go here. Likewise, if you missed my last blog post about that video you can see it here. That class was one of my very favorites, I hope you like it as much as I do!

Again, I want to share with you my Stampin’ Bestie Club! You can find all the info about it here, and you can join at any time! Though, you DID miss our inaugural class you can always be there next time! For those who join, Hetty, Carol and I would love to let you in on one of our favorite traditions: getting a charm for a bracelet every time we get together! We supply the bracelet too! Hence you will LOVE being apart of our club, we will have so much fun and each month you will receive between $19 – $22 of fun product!

In Conclusion, thank you so much for joining me today! I appreciate you supporting my small business and hope to see you on one of my Live videos so I can say hi!

Lisa Tedder
A former California girl living in North Carolina

Product List

I will miss this!

Today I made a greeting card from a Retiring stamp set from Stampin’ Up! called Love & Affection.  I forgot how much I love this set!  I’ll be sorry to see it go!

I used some of the Designer Series Paper called Affectionately Yours that I have HOARDED!  Yes, I can admit it, I hoard paper!  Sigh……

This isn’t just any Designer paper, oh no!  It has Copper embossed in it!  Yes!  It’s true!  Now do you see why I hoarded it?  This card today is made up by me……I don’t do this very often.  I have been wanting to use the Framelit from the Fiesta Time stamp set!  And that’s how my card started!  Ha!  Funny how that worked!  I cut out two of the strips that are the half circles that are attached together to make a banner, I cut out one from Watermelon Wonder (retiring) and Mint Macaron (also retiring).  This is where I started, I thought these colors looked good with Night of Navy, so that is what the center cardstock will be, since those will be resting on that cardstock.

Pretty together, right?  The colors I used are listed below with a link to my Online Store.  The Hostess Code for this month is:  69EGW4G2   If you purchase from me, I will send you a VERY pretty handmade card!

Here are the measurements of my card if you want to try it!

Tip Top Taupe  5 1/2″ X 7 1/2″ scored at 4 1/4″  landscape
Night of Navy (inside) 4″ x 5 1/4″,  (front) 3″ x 5 1/4″
Affectionately Yours Specialty Designer Series Paper (DSP) 2 – 3/4″X 5″
Whisper White Inside:  3″ x 5 1/8″, scraps for sentiment

Here is the card in all it’s Beauty!

I used the Petite Petals punch (retiring) to make a focal flower on the front in Copper Foil.  And cut out the sentiment using the Decorative Label punch (also retiring), I cut out another two of the Decorative Label from the Copper Foil to give a border around the sentiment.  You cut each piece in half and then layer them on the back!

I sponged VersaMark on the edges of the Fiesta Time Framelits to give a little Copper edging to it!  Also along the edge of the Night of Navy I stamped in VersaMark the flowers from the Stamp set and embossed with Copper!  Added some pearls to each half circle on top, and to the small flowers on the inside flap.

Here is a picture of the inside!

I love how elegant this card is!!  So, STOP hoarding your DSP and use it!  Before you know it you’ll be getting new DSP and will forget all about the ones you’ve been hanging onto for a special day!  The day is NOW!

The side of the inside is peeking out on the front,

I am proud of myself!  It’s a little scary to just go with an idea and not know how it will turn out!  Sometimes it doesn’t, but that’s where you learn!  Remember, it’s just paper!  I tell myself that when I am really scared!  heehee  Are you scared when you try something without any idea on where it is headed?   You might just surprise yourself (like I did!) when you give it a try!

I hope you enjoyed your visit here today!  I would love to hear from you, I will be having another Blog Candy drawing soon, I have to figure out what to give away!  What would you rather…….stamp sets, ribbon, accessories, paper?  I want to give out what YOU want!!  Let me know!

Lisa Tedder
TedderBearStamping
A California Girl living in North Carolina!

Product List

NC Demo Blog Hop – Tree Bark Technique

It’s time for the NC Demo Blog Hop again!  If you didn’t attend last month, you won’t want to miss this month!

I LOVE doing techniques!  Today I have made two cards that use the Tree Bark technique!

I have made a Periscope, if you want to see how I made it, I think if you look me up on Twitter it will show you where to find it on Katch.me!  But for those who don’t have Periscope I will try and explain it with words!

You start off with either Soft Suede CS (2nd card) or with Sahara Sand (1st card).  You then stamp the Hardwood stamp using the color of your cardstock, I want it to be subtle so it looks more realistic.  I then rub direct to paper the Chocolate Chip ink pad VERY softly, using only the corner of the pad and only in a few places, I want that also to be subtle.

Then you will tear towards you an uneven amount of strips, 1st card has 5 and my 2nd has 3.  Make sure you tear TOWARDS yourself, so you have an uneven edge and it is able to be sponged and manipulated.  Then you will sponge the rough edges with the Chocolate Chip ink and then go over it again, with the same ink/sponge and sponge up, so the edge curls up.

You will do this to all your pieces…….this will make the edges stand up from the card.  Once you have that done, you will adhere your pieces so they match up with the edges standing up.  You can see this on both of my cards.

Once it is all adhered, you will want to LIGHTLY go over the raised edges with Versamark, then Gold Embossing Powder.  Heat it, and you will have this really pretty edge to each torn piece!

I used an In Color for the 1st card: Mint Macaron for the leaves and base, then embossed the flowers gold. The stamp set is: Number of Years.

The 2nd card uses Pool Party and the Stamp set: Pedal Pusher.  BOTH cards utilizes the Gold Foil Sheets since I wanted to bring out the Gold EP.

Bark-Technique1

Bark-Technique2

I really loved making these cards, and I would love to see if you make any using this technique!  Just share with me so everyone can see your pretty Tree Bark Cards!

Thanks for visiting!  You will now go onto the next Blog, just click on the picture below!


Shavon Borders
Regina Campbell
Tamra Davis
Kitty Helton
Jo Anne Hewins
Amy Ingram
Michelle Irinyi
Melissa Kerman
Tracie Langley
Sharon Maranich
Laurie Meier
Mary Robinette
Sue Root
Pam Staples
Lisa Tedder
Frances Wagner

Lisa Tedder

CreatingWithLisa.com


Lisa Tedder

CA girl living in NC!!