Tag Archives: fun

November Paper Pumpkin Alternatives

Gifts Galore Paper Pumpkin FUN cards!

Hey Guys!,

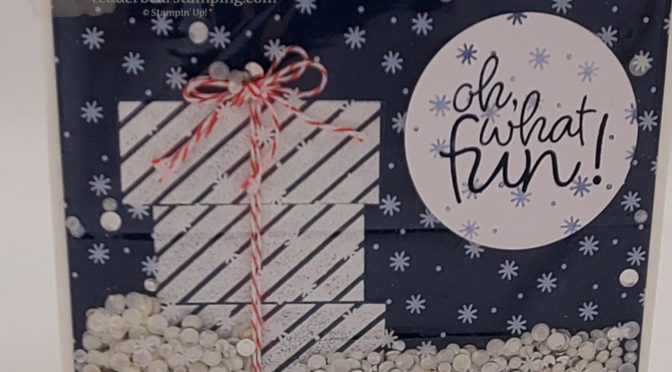
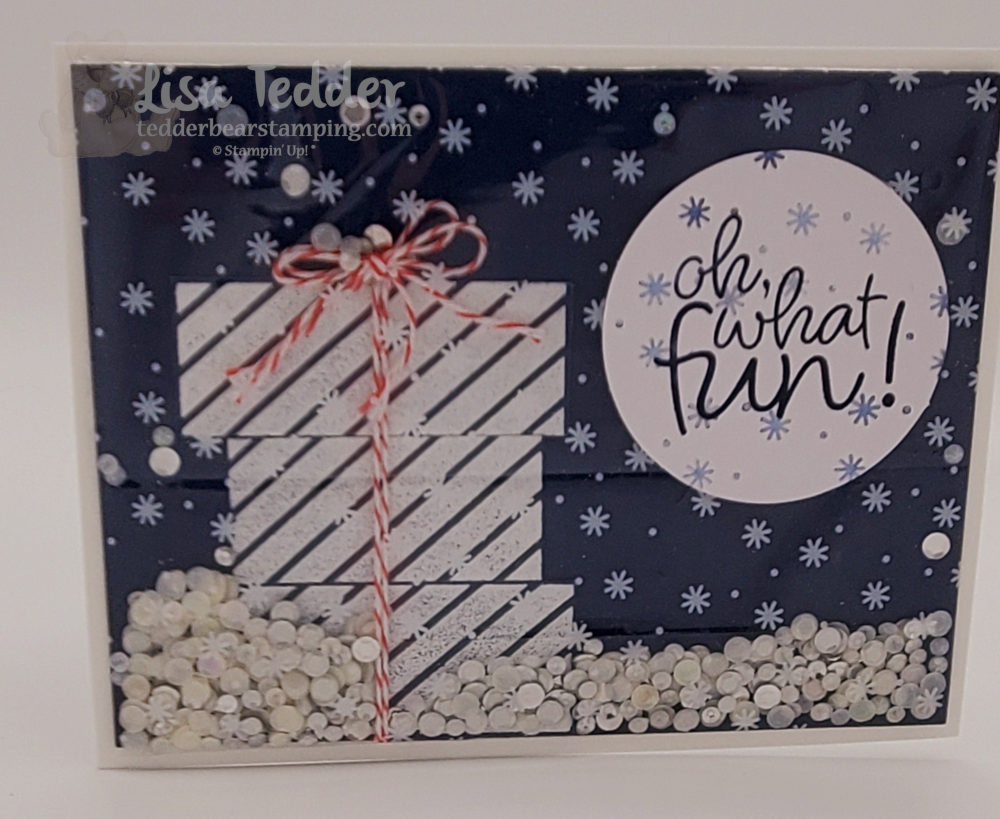
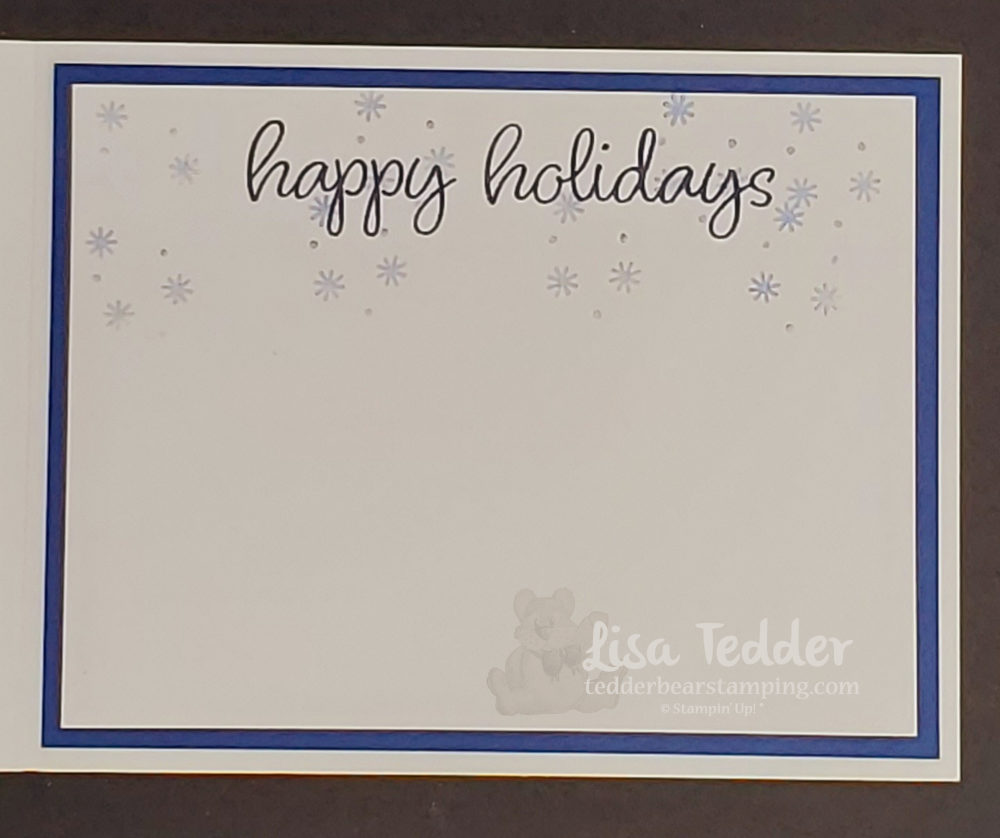
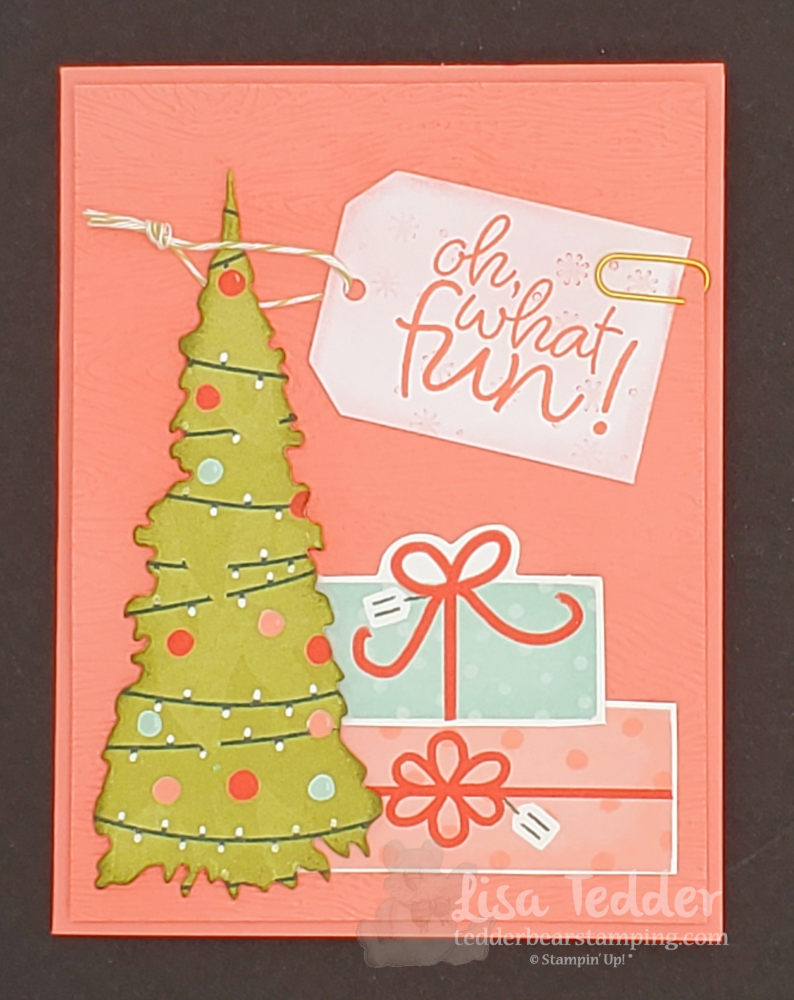
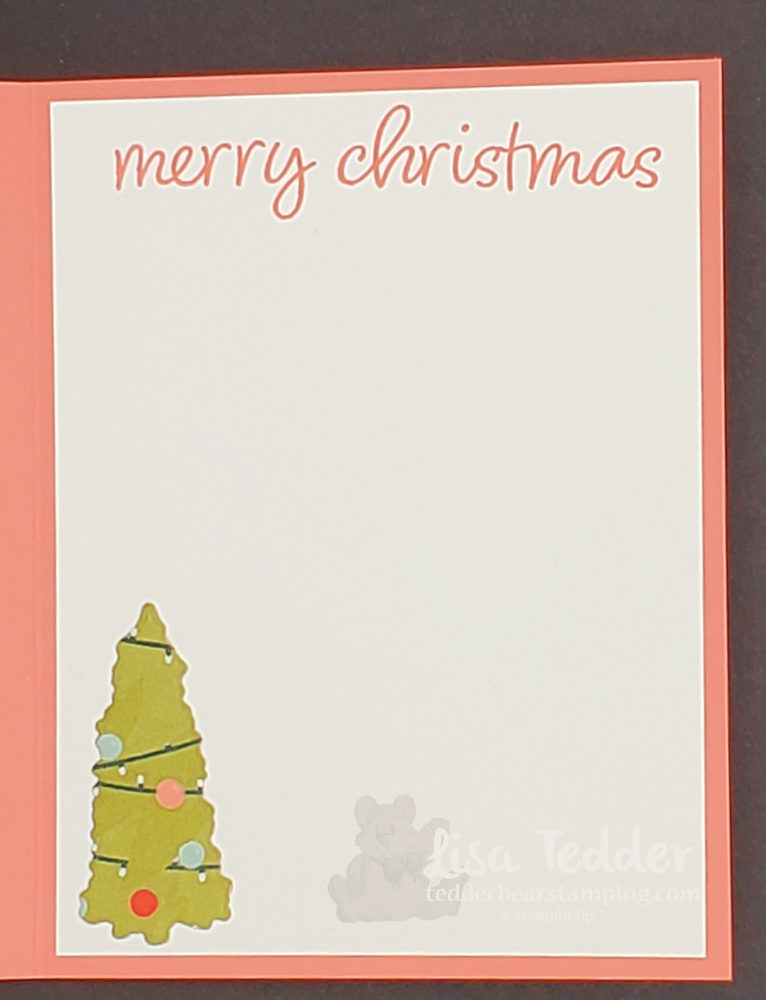
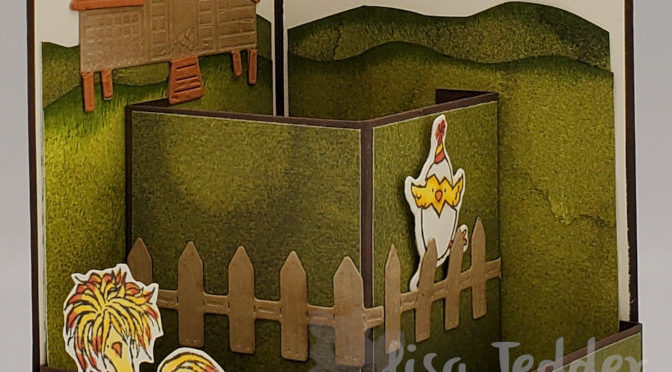
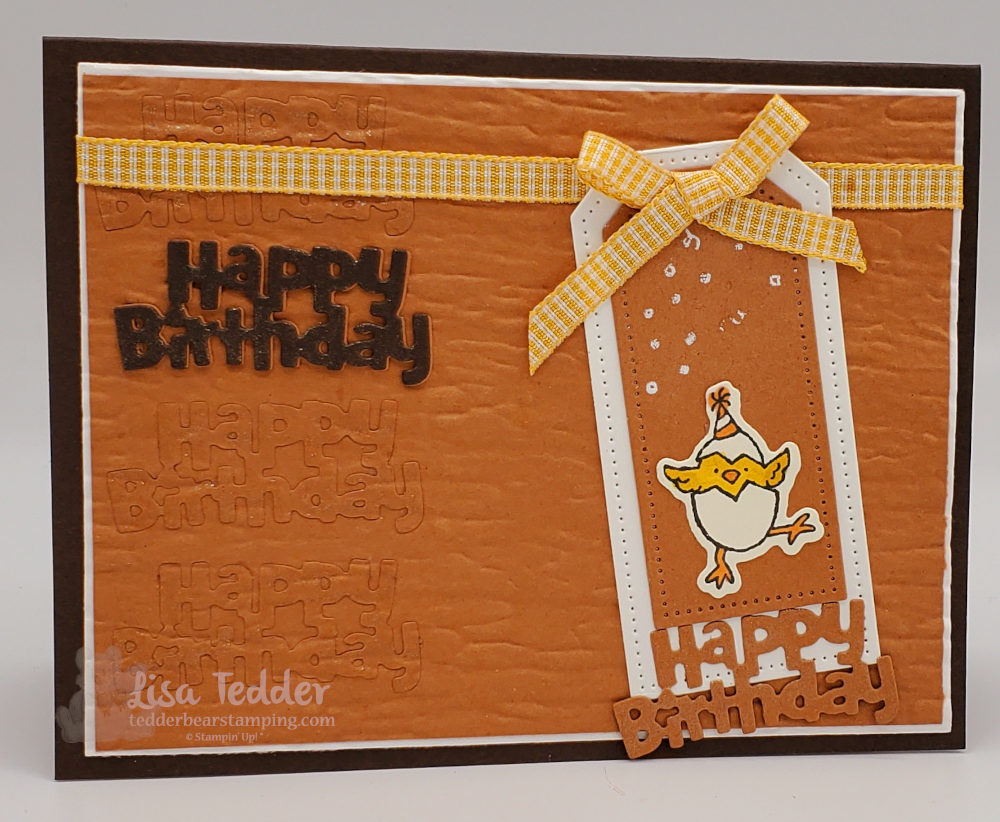
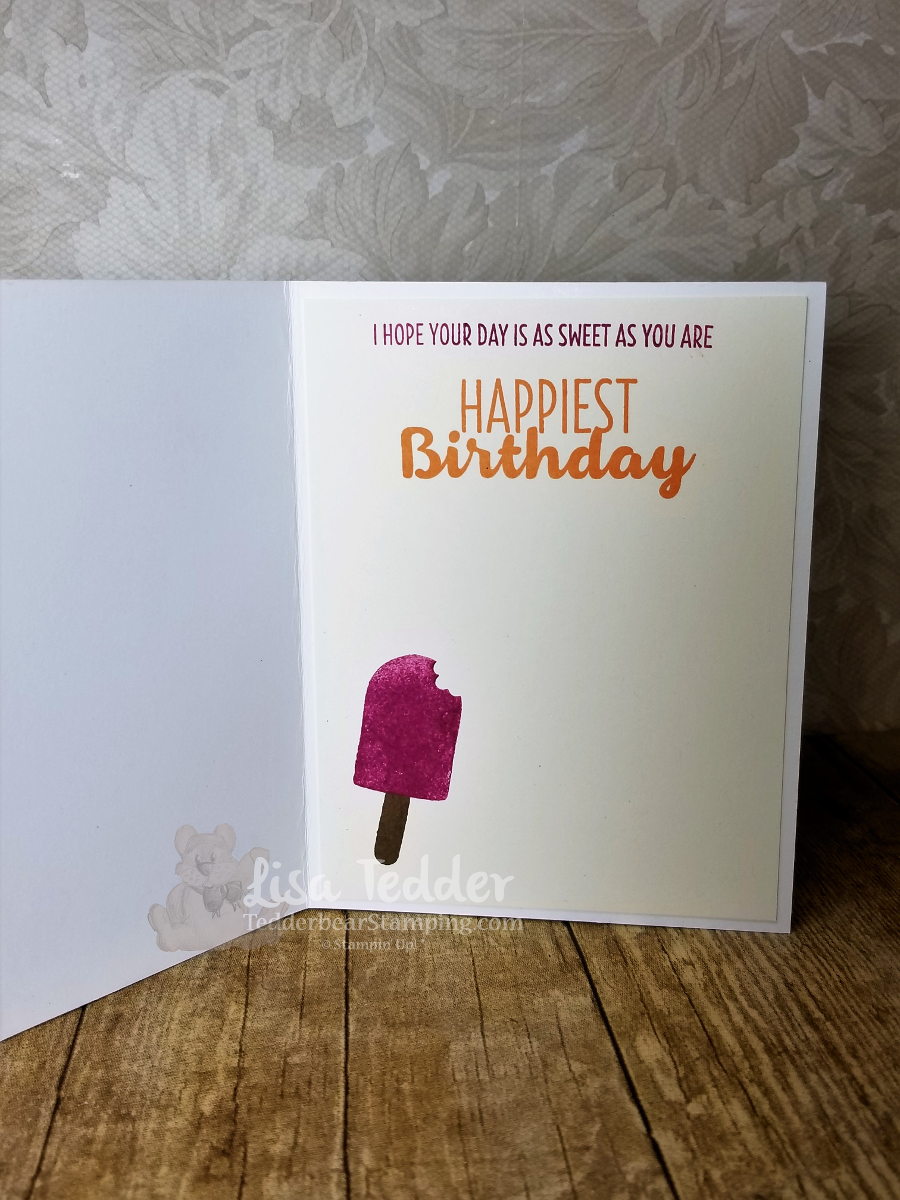
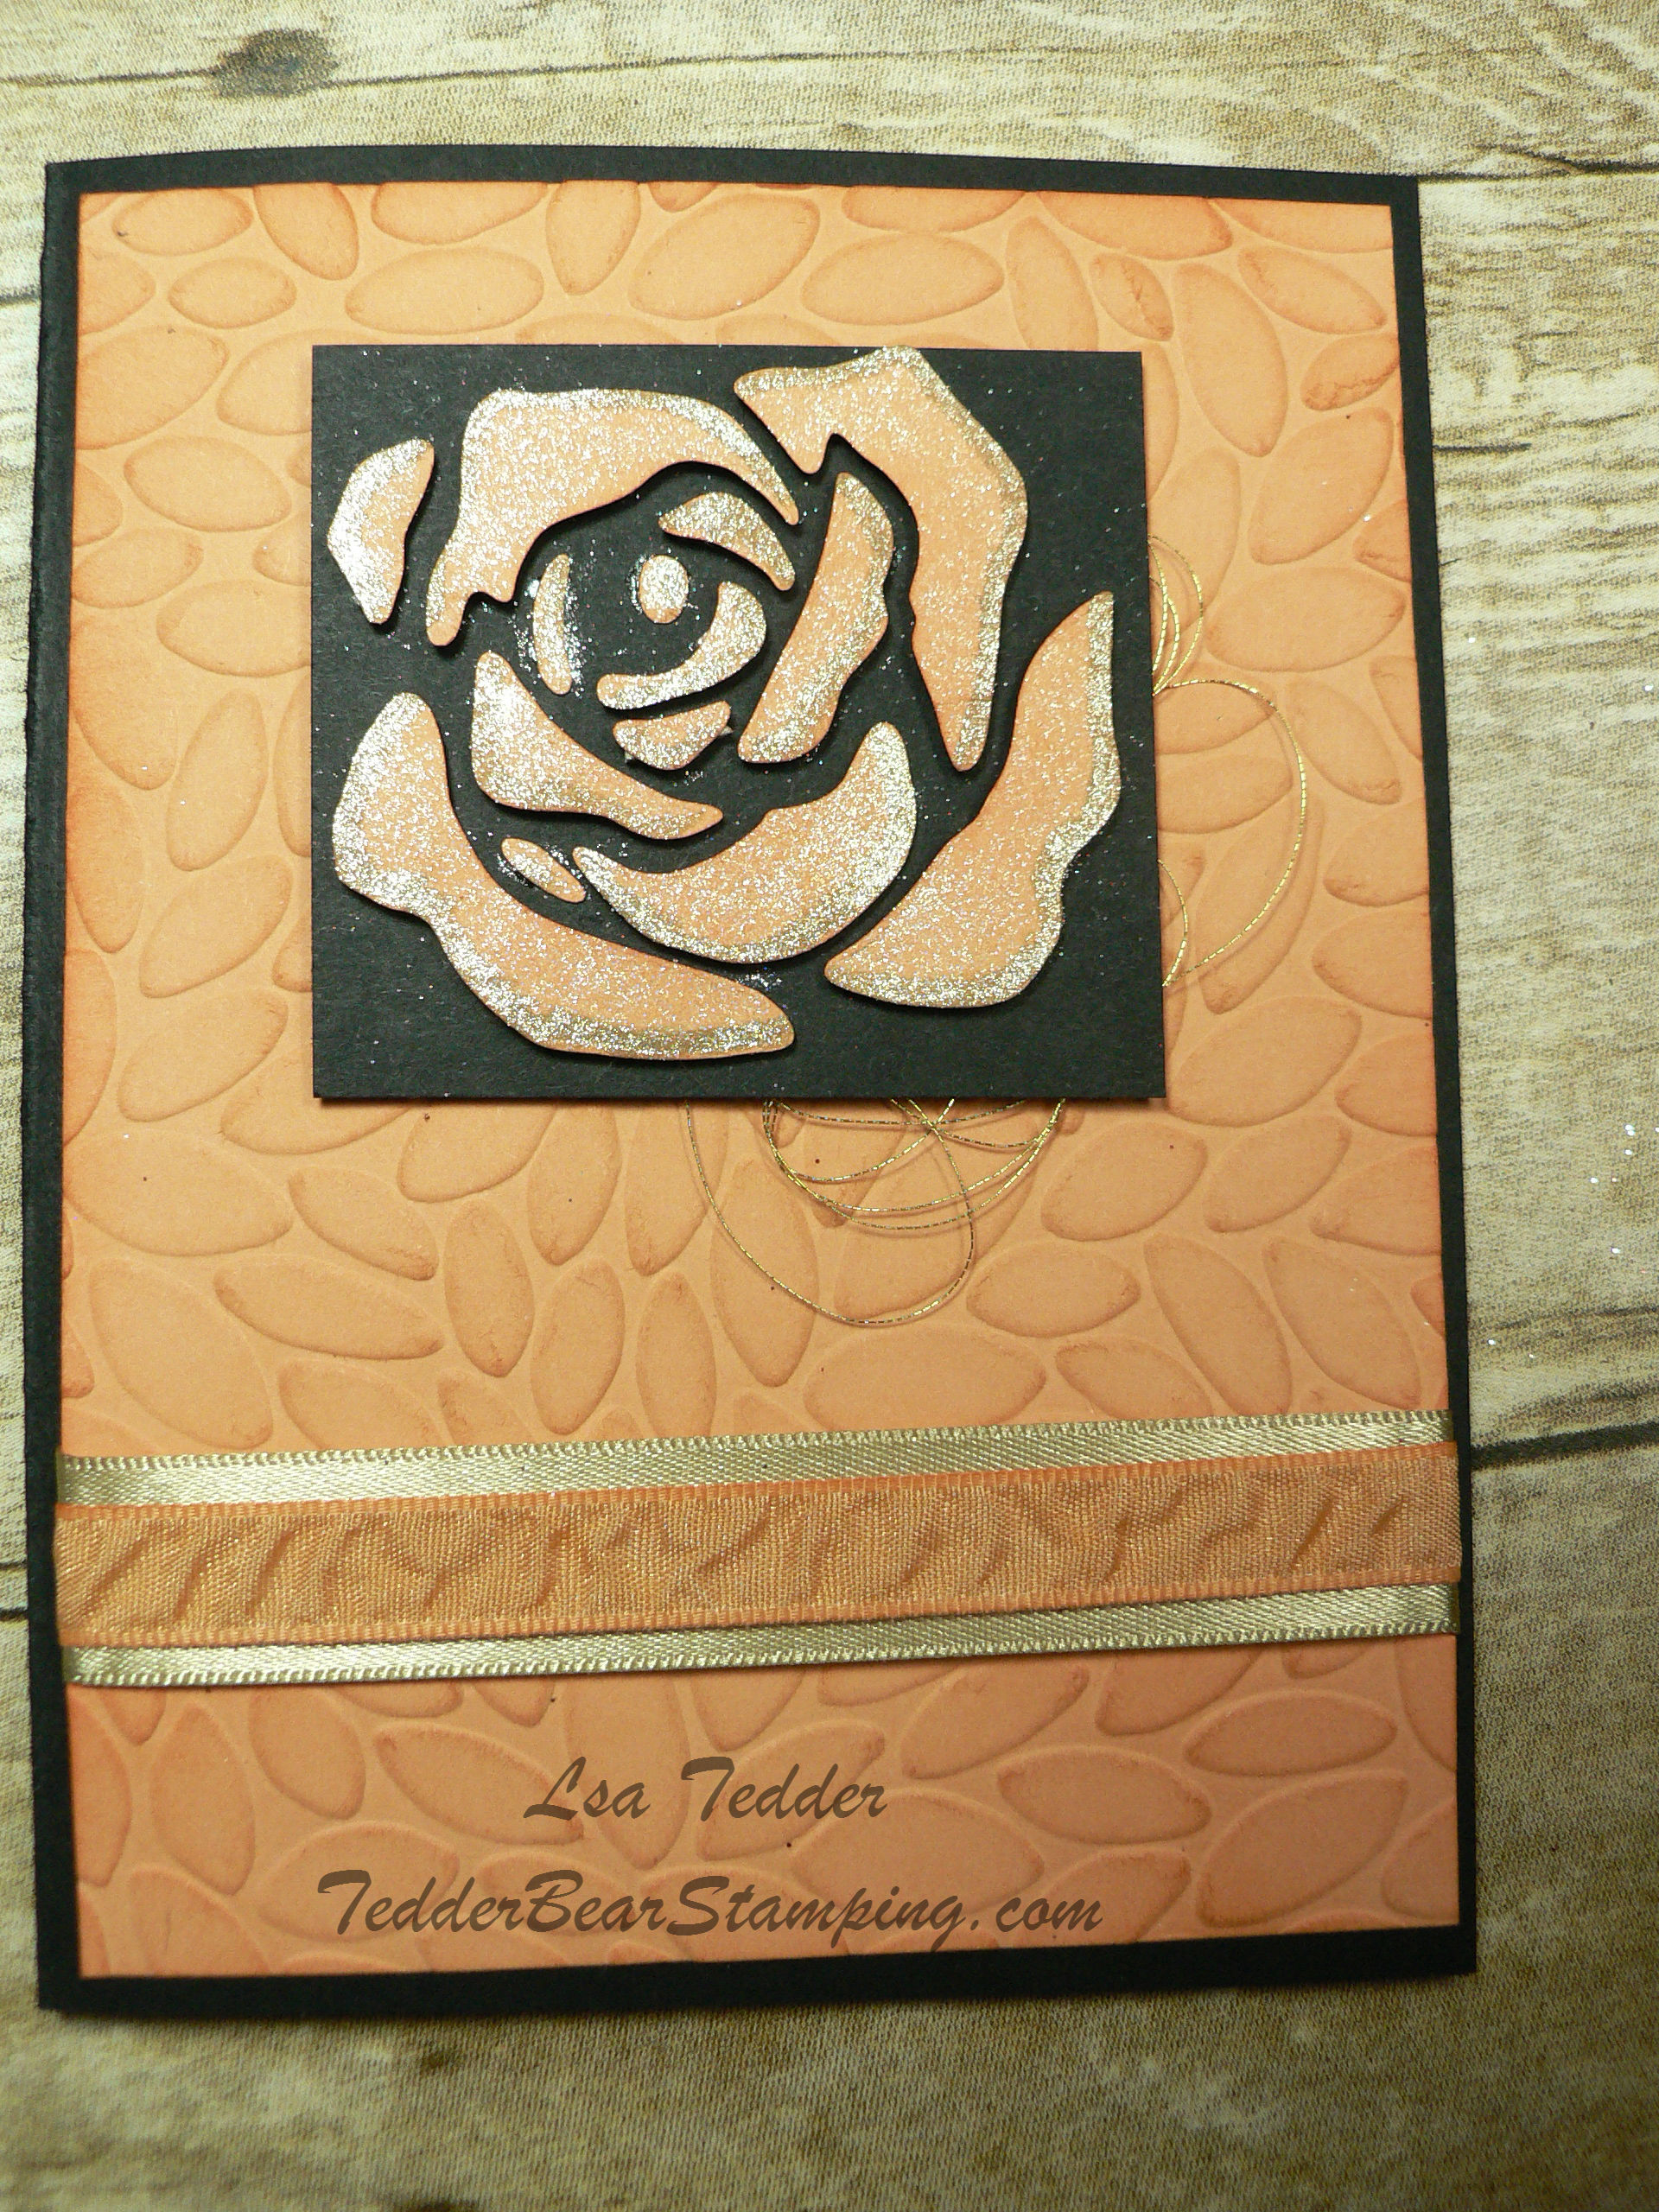
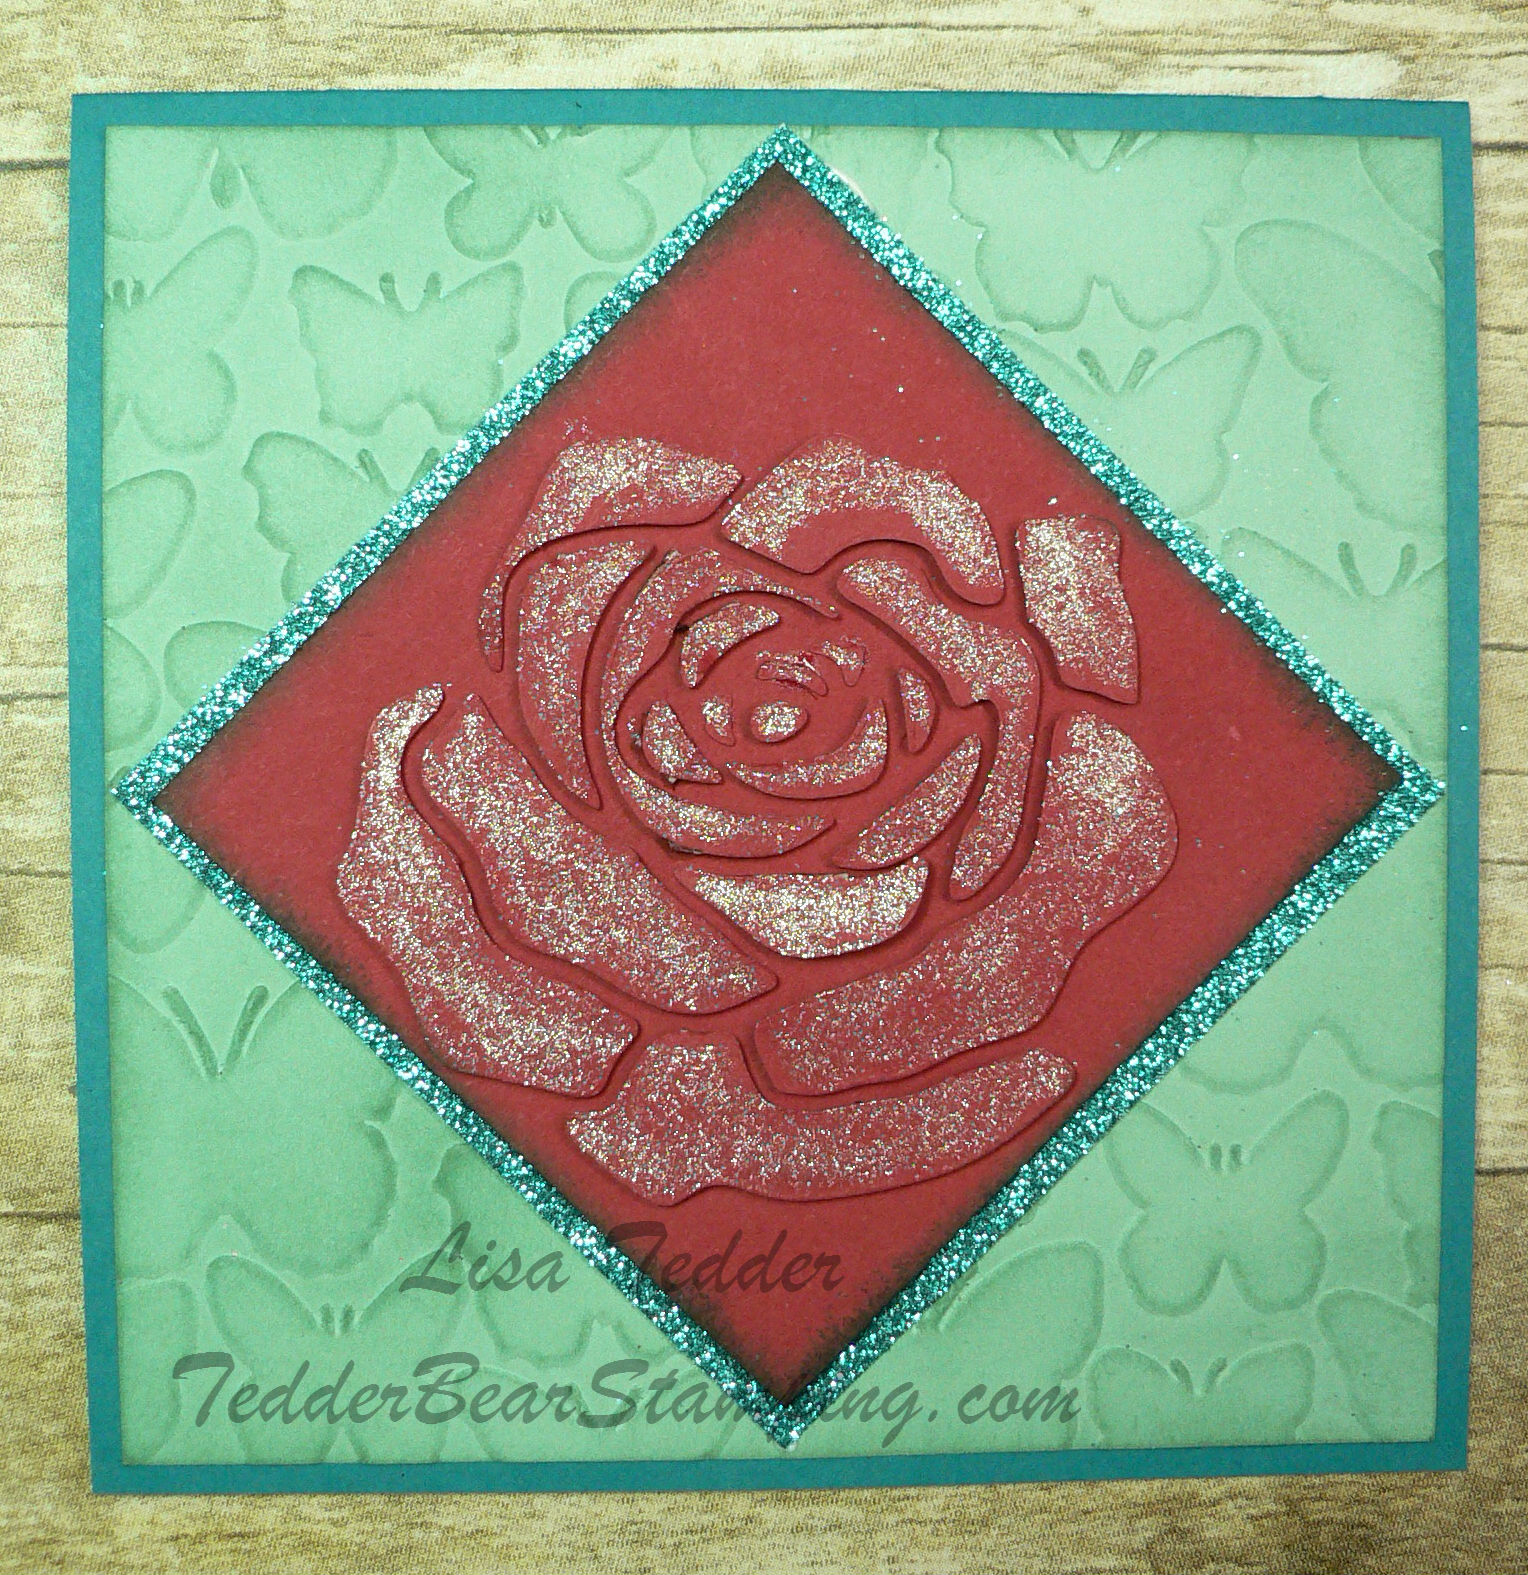
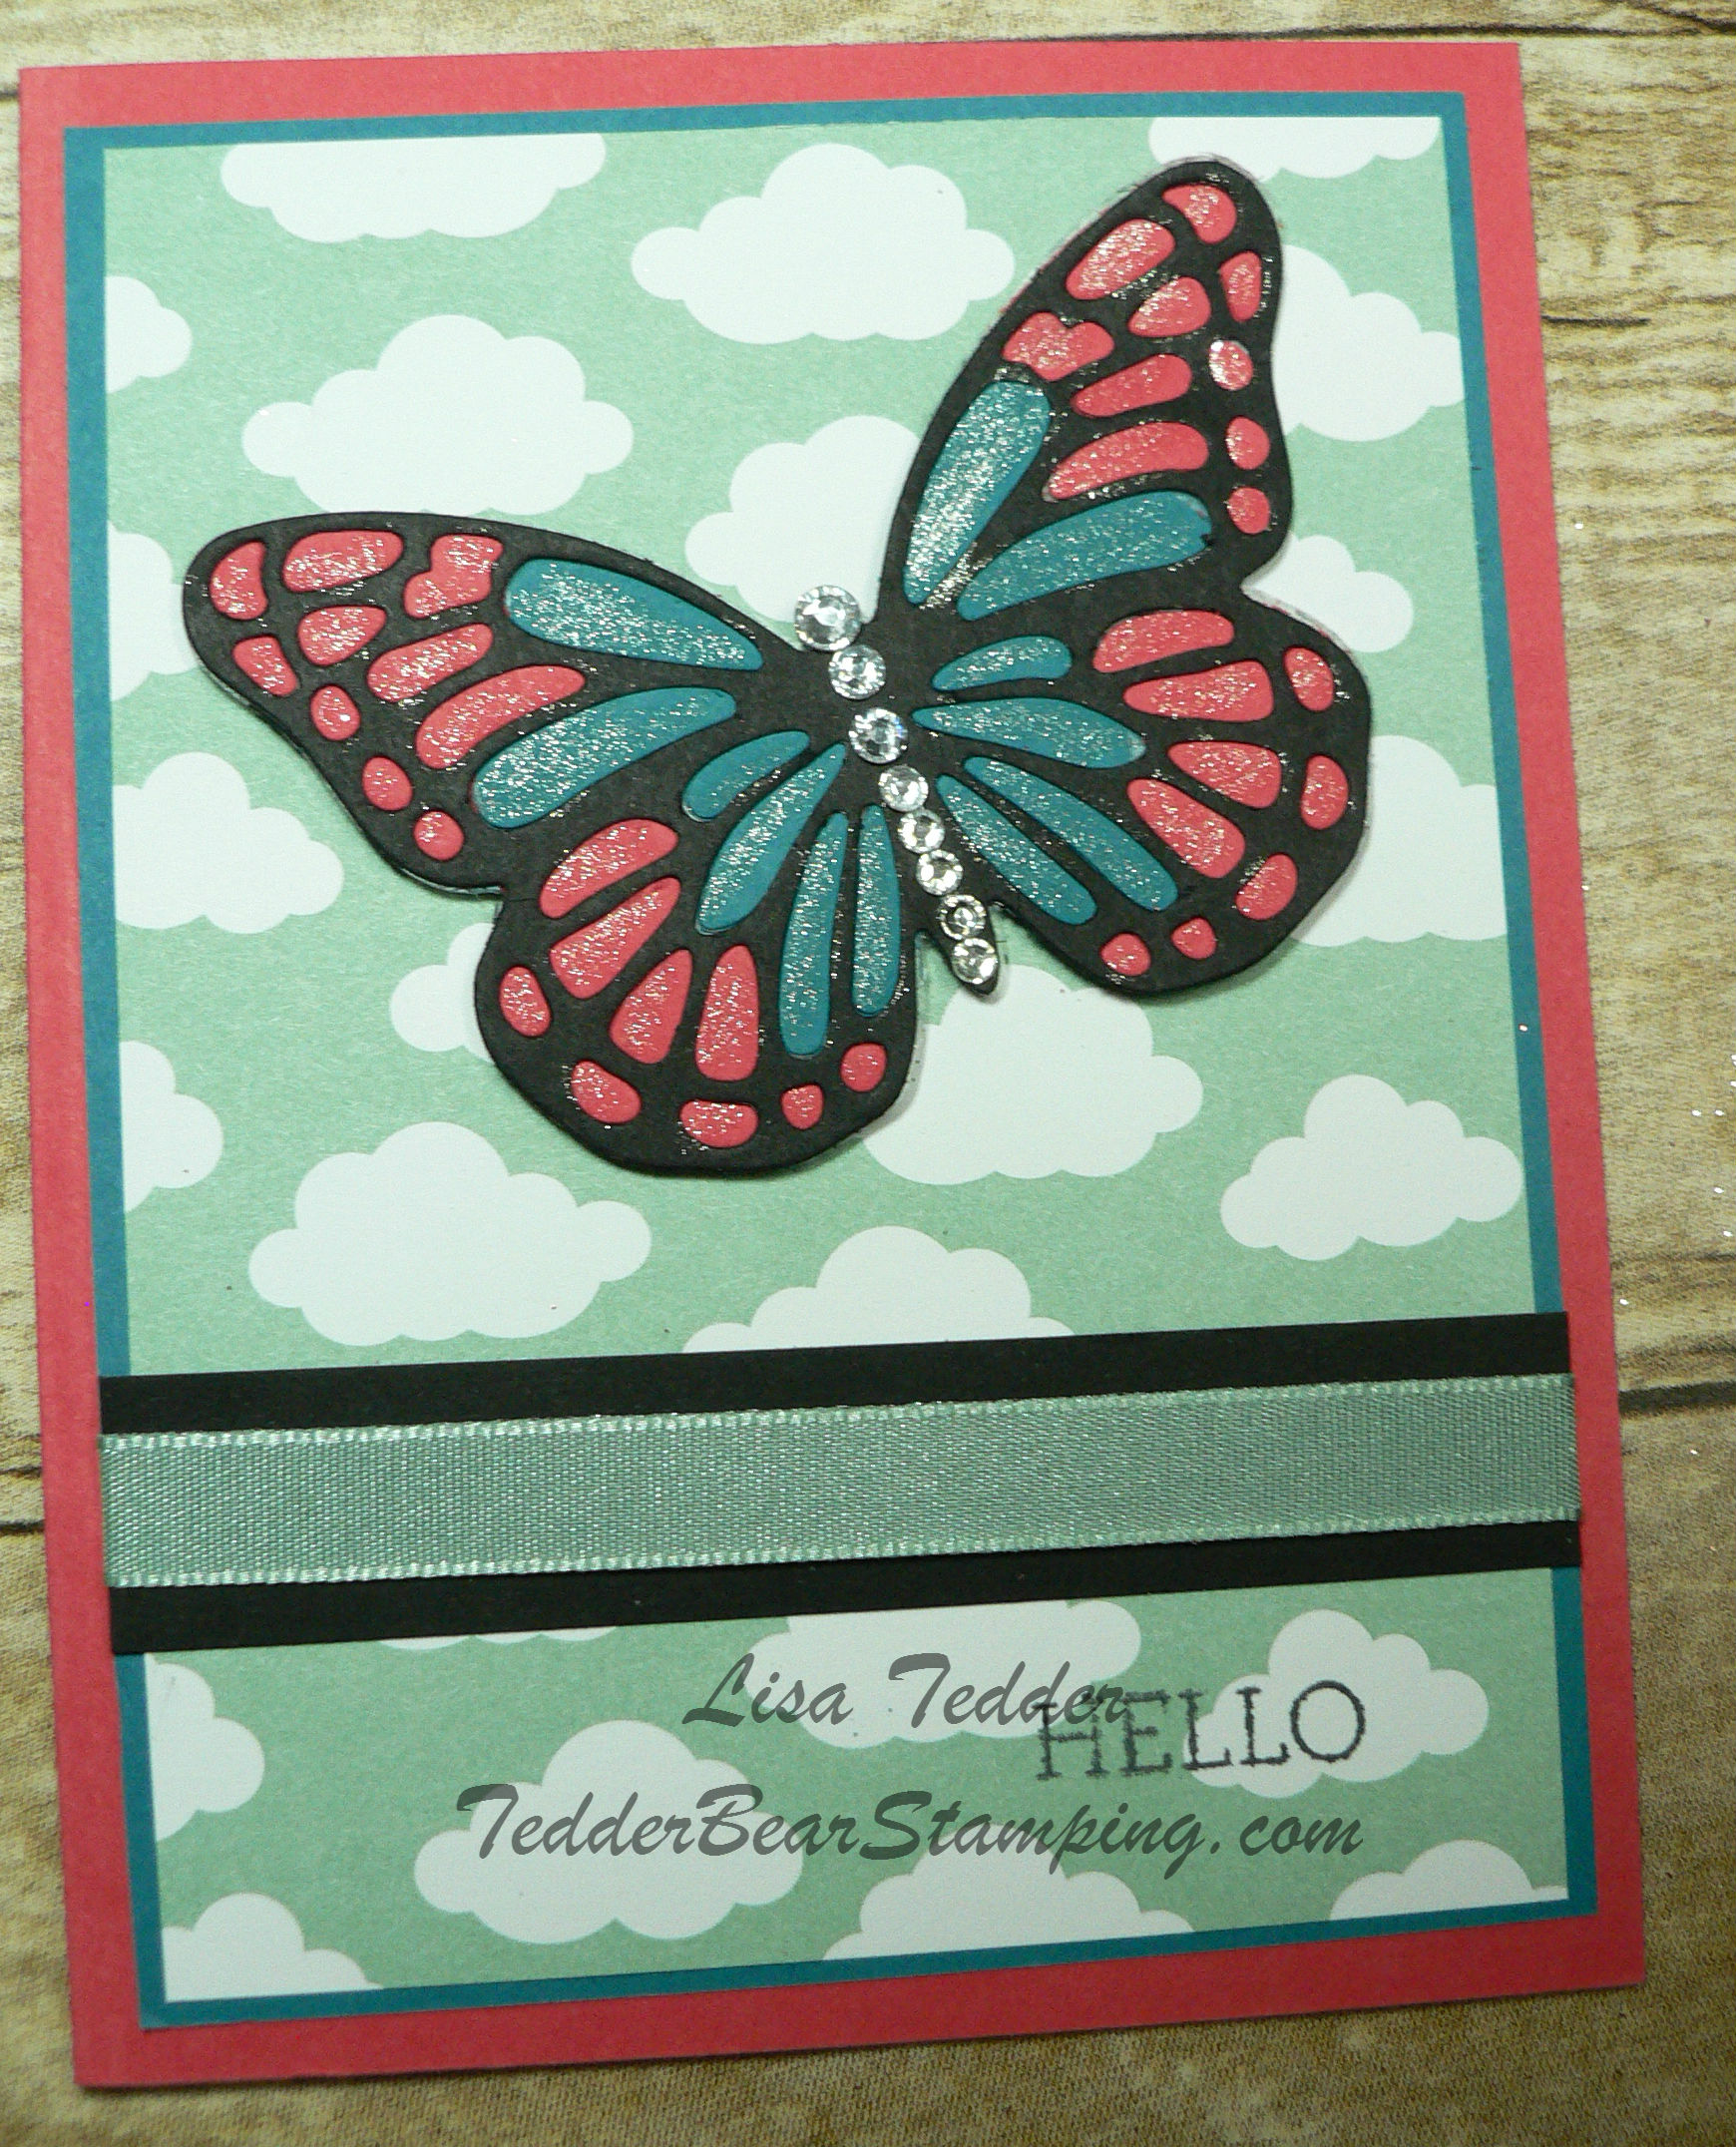
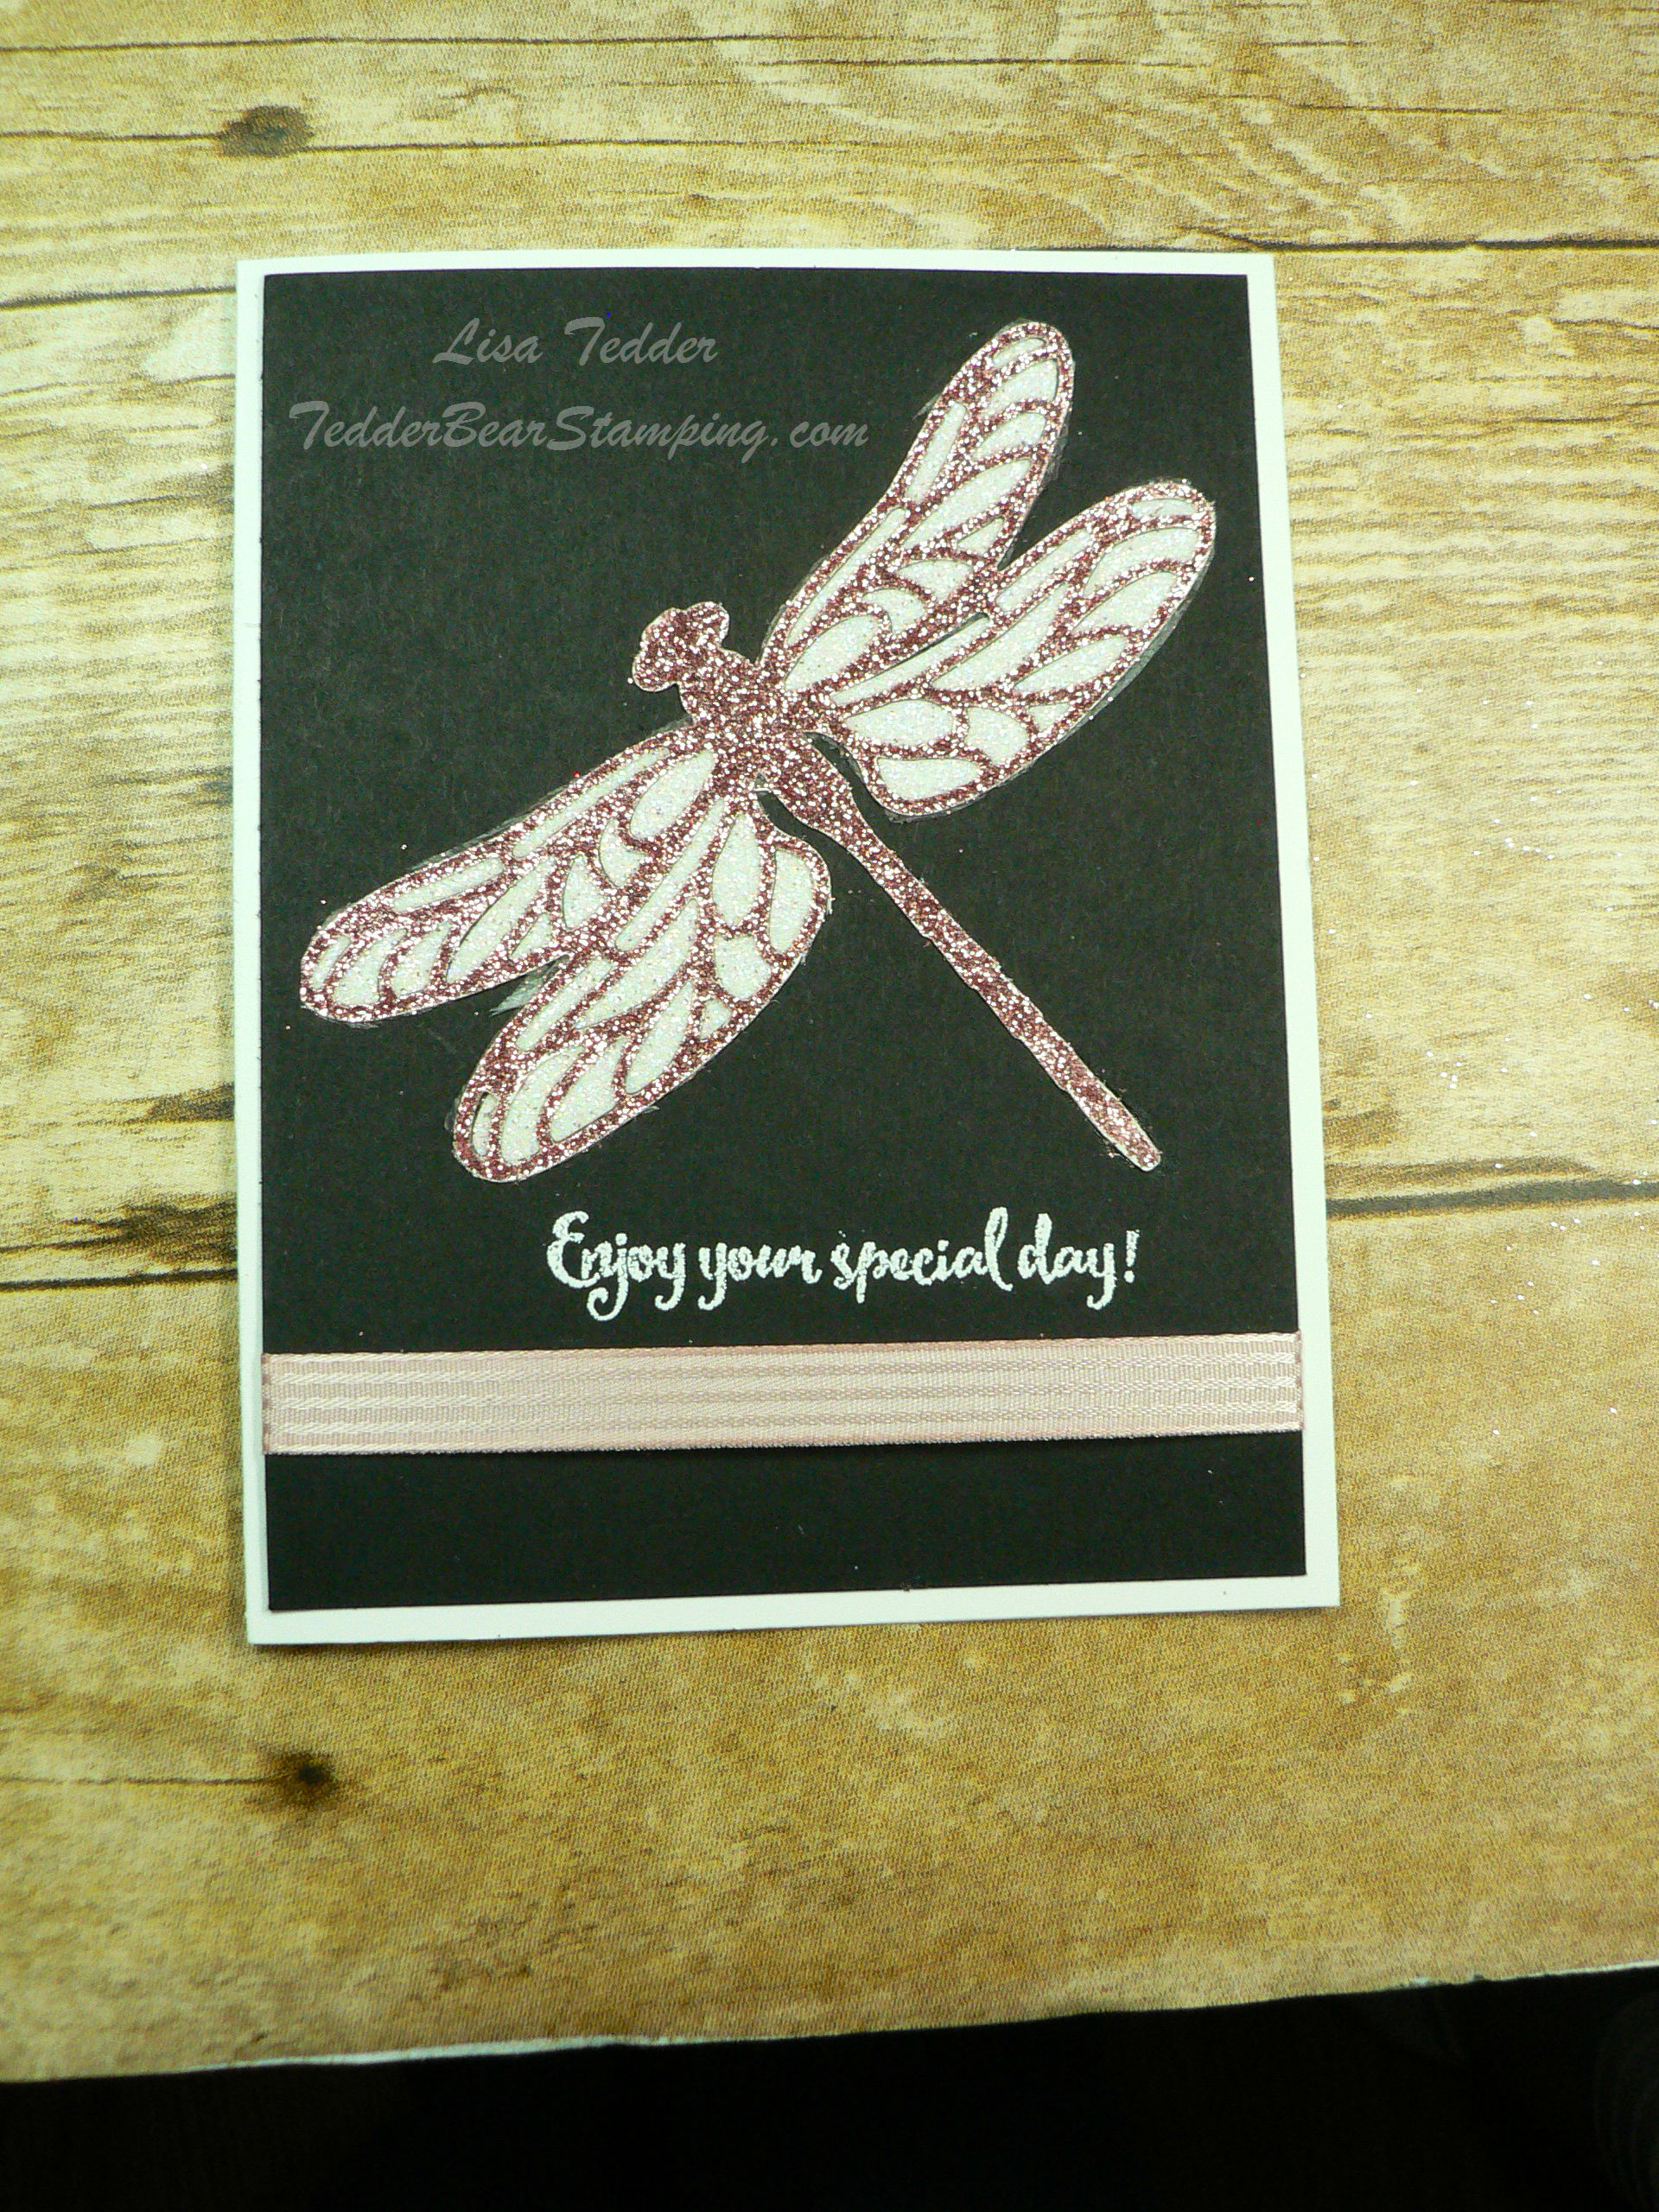
It’s that time again, time for me to give you my November Paper Pumpkin Alternatives! First thing to remember is that if you want to see these cards made, you can catch it here on my YouTube Channel. Undeniably, I LOVE when I get my Paper Pumpkin kit in the mail! Especially since there aren’t very many true surprises any more, this box you can make it as planned or change it up and create ‘outside the box’! As can be seen by my cards below, you can tell that I LOVE the Gifts Galore Paper Pumpkin cards, these were so fun! Get more for your money by thinking outside of the box the Paper Pumpkin Box!

Gifts Galore Paper Pumpkin FUN cards!
November Paper Pumpkin Alternative

Another key point is that I always give you the supplies used other than what is in the box! As always along with being listed below, under my signature are pictures of the supplies, you can click on any of them and be taken to my OnLine Store! Consequently, if you purchase a Qualifying amount ($35 or more) you will get a pdf of 16 projects that also has step by step instructions along with pictures! Emphatically, I appreciate your business and will do all I can to make you a happy shopper!

Projects

Stamps:

  • Gifts Galore from Paper Pumpkin

Inks:

  • Flirty Flamingo (included in PP kit)
  • Night of Navy
  • Versamark

Blends:

  • Pool Party
  • Flirty Flamingo
  • Poppy Parade

Paper

Card 1:

  • Basic White Thick 4 1/4″ x 11″ scored at 5 1/2″
  • Basic White 3 3/4″ x 5″
  • Night of Navy 4″ x 5 1/4″ (x2)

Card 2:

  • Flirty Flamingo 5 1/2″ x 8 1/2″ scored at 4 1/4″, 4″ x 5 1/4″ (run through the 3D Timber Embossing Folder)
  • Basic White 5 1/4″ x 4″

Misc:

  • 3D Timber Embossing folder
  • Subtle Shimmer Sequins
  • White Embossing Powder
  • Heat Tool
  • Basic Rhinestones
  • Blending Brushes
  • Dauber

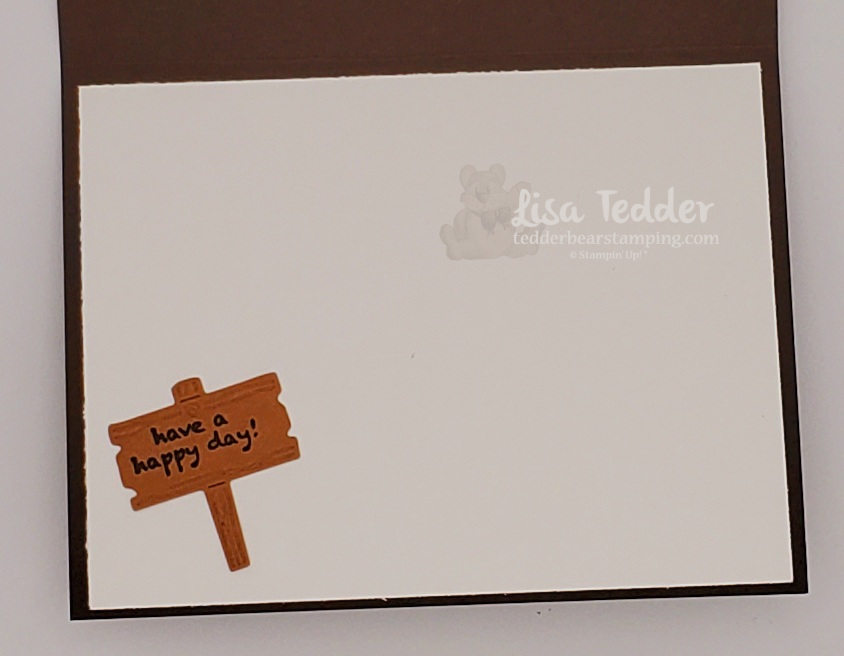
Most of the items I used for these cards are included in the box! Above all, I love it when I come up with really fun alternatives for Paper Pumpkin, especially when I think of them all by myself! For that reason, I hope you love what I have made today! As said before, Get more for your money by thinking outside of the box the Paper Pumpkin Box! As always, you can check out my YouTube channel for all my other designs, I have over 200 videos for you to get ideas! By all means check it out and leave me a message! Thank you for stopping by, hope you come back soon!

Lisa Tedder
A Former California girl living in North Carolina

Product List

A Fancy Fold balcony Card….What!?

Who doesn’t love a New Fancy Fold?!

Hey Guys!!

First off, I want to say how much I LOVE Fancy Folds, today I am sharing a Balcony Card…..What!? Yes, I have never heard about it either, so I am sharing with you how to make one by doing my weekly video that you can watch. Also, who doesn’t love a new fancy fold?! Second I saw this fold on Pinterest, but have never heard about it, have you?

Consequently, after looking at Pinterest, I started making it and here is what I made:

Front of the Balcony Card
I LOVE Fancy Folds, today I am sharing a A Balcony Card…..What!?

In addition to Fancy Folds, I also like techniques! As a result of that, I am showing you my 2nd card that I did on my video using the same set Hey, Chick! and Hey Birthday Chick. In this case, I used the technique where you emboss with a folder, the entire card front, layers and all (I placed ‘Happy Birthday’ several times down one side, and embossed that too!), it’s a very cool technique!

Who doesn’t love a Technique!?

Generally I like to keep to one stamp set for my videos, but this time the two: Hey Chick! and Hey Birthday Chick work so well together, I HAD to use them both! Subsequently, you will need to buy Hey Chick asap, since it won’t be available after June! And, doing a Balcony card….what!?, yes a Balcony card was a must for me, I hope you like it as much as I do!

As a rule, here are the specifics for both cards:

Paper:

  • Hey, Chick Bundle
  • Hey Birthday Chick Bundle

Inks:

  • Memento
  • Crumb Cake (to sponge over fence/barn)
  • Early Espresso
  • Black Stampin’ Write Marker
  • Blends
  • Daffodil Delight
  • Pumpkin Pie
  • Calypso Coral

Paper:

Card 1

  • Early Espresso: 6″ sq (for the video I made it 5 1/2″ x 6″), 7″ x 1 1/2″ scored @ 1/2″, 3 1/2″, 6 1/2, 5″ x 2 1/2″ scored @ 1/2″, 2 1/2″, 4 1/2″, 1 1/8″ x 2 1/2″ (trim after), scraps for Happy Birthday
  • Very Vanilla 5 7/8″ sq x 3 (for the video it is: 2 7/8″ x 5 3/8″ 3 times), scrap for sentiment/ chickens
  • Crumb cake: scraps for 5 fences, 1 barn
  • Cinnamon Cider: scrap for pieces of the barn
  • Bumblebee: scraps for baby chicks
  • Beauty of the earth DSP: 1 3/8″ x 2 7/8″ (x2), 1 7/8″ x 2 3/8″ (x2), 2 3/4″ x 3 5/8″

Card 2

  • Early Espresso 4 1/4″ x 11″, scraps for Happy Birthday
  • Cinnamon Cider 3 7/8″ x 5 1/8″, scrap for tag/happy birthday/sign
  • Basic White 4″ x 5 1/4″ (x2), scrap for chick/tag

Misc:

  • Bumblebee Gingham ribbon
  • Wink of Stella
  • Tailor Made Tags
  • Bark 3D embossing folder

Finally, this is where I tell you that the supplies listed above are also in picture form below, click on any of them and you will be taken to my On Line Store. Incidentally, for purchases above $35 you will not only get the card packet for the class I did on YouTube that week, but you will also get a PDF of 16 cards with step by step instructions as well as pictures! Above all, I want you to know how much I appreciate you and your support of my small business!

Sneak Peek of the 16 projects!

One last thing, I also have a Besties Club that is in it’s 5th month! Every month we (my besties Carol from AZ and Hetty from Canada) and I come up with 2 cards each using one stamp set/suite.

For example, we are using Tidings & Trimmings for July (you have until the 22nd to sign up!) for your $34 you get 1/2″ pack of the Designer Series Paper “Tidings of Christmas”, Full pack of Gold Gems, 1/3 pack of Red Rhinestones and a full roll of Evening Evergreen Chevron Weave ribbon! Every month you get between $19 – $21 worth of product in your kit, PLUS all the cardstock cut and ready for you! Plus a special gift from me!

All for that low price, we prefer to be paid by Stampin’ Up!, this way you get the most for your $$! Of course we have so much fun, you can go HERE to get all the specifics and sign up!

In Conclusion, I hope you have enjoyed this post, you can always go to the video to see HOW I made the cards, it’s too much to explain it when I also have it on video, hope you understand!

Lisa Tedder
A former California girl living in North Carolina

Product List

One cute, one elegant, ONE stamp!

Hey Guys!,

Today I am sharing with you TWO different looks from ONE stamp! So, what stamp can you get these two very different looks from, you ask, well it is Turtle Friends from Stampin’ Up! Earlier, in my title I said that one card I’m doing is cute, one elegant, gotta love that you can get that from ONE stamp set! If you missed my Live on YouTube you can see it here!

Here is my first card:

Two different looks ONE stamp, this is the cute one!
Inside the cute one!
TWO different looks ONE stamp, this on is the elegant one!

As always, here are the specifics for both of these cards!

  • Stamps:
  • Turtle Friends
  • Inks:
  • Evening Evergreen
  • Memento Black
  • Versamark
  • Blends:
  • Evening Evergreen
  • Soft Succulent
  • Paper:
  • Card 1:
  • Evening Evergreen 11″ x 4 1/4″ scored @ 5 1/2″, 4 3/4″ x 3 1/2″
  • Gold Foil 5 1/8″ x 3 7/8″
  • Basic White 5 1/4″ x 4″
  • Card 2:
  • Evening Evergreen 11″ x 4 1/4″ scored @ 5 1/2″
  • Basic White 5 1/4″ x 4″ (x2), scraps for turtles/sentiment
  • Soft Succulent 5 1/8″ x 3 7/8″
  • Misc:
  • Rhinestones colored with Dk Soft Succulent for card 1
  • White Embossing powder
  • Heat tool
  • Paper Lattice
  • Paper snips
  • 3/8″ Open Weave ribbon: Soft Succulent & Evening Evergreen
  • Gold Gems
  • Dimensionals
  • Blending brushes

In addition to listing the products above, they are listed below in picture form. Click on any of them and you will be taken to my OnLine store! As a result of you making a Qualifying purchase you will not only receive the class packet but you will also get the PDF of 16 other projects with step by step instructions along with pictures! What is the Qualifying purchase you ask, it is only $35 or more! Here is a sample of what you can get with your order.

In conclusion, THANK YOU for supporting me and my small business! Remember I do weekly YouTube Live videos on Thursdays @ 4:00 eastern time, hope you can make it so we can visit and have fun!

Lisa Tedder
A former California girl living in North Carolina

Product List

Wanna see a Rocker Card?

Hey Guys!,

My question is: Wanna see a Rocker Card? I have wanted to tackle this design for quite a while, so today I am showing you how on this Live YouTube video! Also, the stamp set I am using is called Back on Your Feet by Stampin’ Up! Did you know that I have 3 favorite animals……and YES they are ALL in this set!

Giraffes are super cool, I got to feed one and it’s a memory I’ll cherish! Turtles aren’t REALLY animals, but I love them none the less! Every time we see one crossing a road we stop wherever we are and move them so they won’t get hit by a car! Last but not least is the Sloth. I have a great family memory involving a Sloth and it makes me smile whenever I see a picture of one! So, of course I HAD to get this set! Here is my first fun card:

This card was sooooo much fun!

Isn’t this cute?!

Wanna see a rocker card is not my usual way of starting off my blog posts, but this was so much fun I wanted to share!

As always, the details for these cards:

  • Stamps:
  • Back on Your Feet
  • Inks:
  • Old Olive
  • Mossy Meadow
  • Balmy Blue
  • Memento Black
  • Card 1
  • Paper:
  • Basic Black 8 1/2″ x 5 1/2″
  • Basic White 5 1/4″ x 4″ (x2),
  • Blends card 1
  • Daffodil Delight
  • Pumpkin Pie
  • Old Olive
  • Misc:
  • Scalloped Contours
  • Genial Gems
  • Dimensionals
  • Many Messages Die
  • Blending Brushes
  • Card 2
  • Paper:
  • Mossy Meadow 5 1/2″ circle, scrap for Label
  • Beauty of the Earth DSP 5 1/4″ circle (cut in half)
  • Basic White 5 1/4″ circle (cut in half), scrap for turtle and the sentiments
  • Blends:
  • Old Olive
  • Ivory
  • Soft Suede
  • Misc:
  • Shimmery Crystal Effects
  • Dimensionals
  • Bumblebee Trinkets
  • Window Sheets
  • Blending Brushes
  • Glue Dots

Usually I always tell you that the pic’s below are the same as listed above, just click on them and you will be taken to my OnLine Store! Since I just told you that, I’ll also let you know that if you purchase $35 or more you will receive from me a PDF of 16 projects that have pictures and step by step instructions, see pic below. Also, you will get the card packet of my latest class, so if you want me to cut for you these two cards (including the circles!), get your order in before Wed April 14th and I will mail it out to on the 14th! That’s a great deal! I love doing this for you guys!

SIXTEEN projects, plus a class packet, all for a $35 or more order!!

Thank you for checking out my blog! I really appreciate you supporting me and my small business! IF you are in need of a catalog, let me know and I will mail one to you for $10, PLUS a $10 gift certificate for your first order!

Lisa Tedder
A former California girl living in North Carolina

Product List

Hey, Chick Special release

Hey Guys!

Special Release of Hey Chick and Hey Birthday Chick, are out now from Stampin’ Up! Hey Chick is a stamp set that is brought back from a Sale-a-Bration a couple of years back and it was darling! Now, they have a die set that goes with it that’s even CUTER!! Is that even possible? Also there is a coordinating set that goes along with it called Hey Birthday Chick.

I did a YouTube Live in my weekly mini class! You’ll have to go see it, they are super cute!! If you missed last weeks Mini Class, you can still catch it here!

Here are a couple cards I made using the Hey Chick Bundles!

Hey Birthday Chick front
Inside Hey Birthday Chick barn card

I got the idea for the Barn card from Lauren’s Scrap Lot. Thank you Lauren!

Hey Chick front
Hey Chick inside, LOVE that chicken!!

Don’t you LOVE these cards? I did an online Live on my YouTube channel if you want to see how it’s done! I hope you can join me sometime so we can at least get together online!!

Here are the specifics for both cards:

  • Stamps:
  • Hey Chick
  • Hey Birthday Chick
  • Inks:
  • Real Red
  • Memento Black
  • Blends:
  • Real Red
  • Daffodil Delight
  • Smoky Slate
  • Crumb Cake
  • Pumpkin Pie
  • Paper:
  • Real Red 11″ x 3 3/4″ scored at 7″ & 1 3/4″ these will fold up with the top slightly going over the bottom bigger piece. 3 1/2″ sq. (you will cut this in half (corner to corner) for top of barn. 1 7/8″ sq, cut in half from corner to corner (see video) for inside of door. 5 1/4″ x 4″ (x2) for 2nd card, scrap for die cut of barn on 2nd card
  • Basic Black 8 1/2″ x 5 1/2″, 5 1/8″ x 2″, scrap for 2nd card & corn husks
  • Basic White 2 strips of 3 3/4″ x 1/4″ (x2), 4 1/4″ x 1/4″, 3 1/4″ x 3″ (x2) 1st card, scraps to stamp on, card 2- 5″ x 3 3/4″ (for inside)
  • Bumble Bee Scraps for both cards
  • Basic Gray scrap for corn stalk
  • Playful Pets DSP (for front of 2nd card) 1 7/8″ x 5 1/8″
  • Misc:
  • Stampin’ Cut & Emboss machine

As always the list of supplies will again be below in picture form, click on any of them and you will be taken to my Online Store!!

For a purchase of $35 or more you will receive the class packet with everything (but stamps) to make these cards. If you want to recreate them exactly you can purchase the stamps through my store, get a SAB item and get a pillow gift along with the class packet!

I have REALLY BIG NEWS to share with you next week! Be sure to come back, you will love it!! I’m so excited to share it with you, just need to iron out all the details first!!

Please remember to watch one of my Lives on Youtube, it is every Thursday at 4:00 eastern! I look forward to chatting with you!

Lisa Tedder
A former California girl living in North Carolina

Product List

Cool Treats – Get yours before it’s gone!

Hey Guys!

I was perusing Pinterest and saw this Beautiful card by Robin Feicht.  I loved it so much I CASE’d it just like it was!

Here is my card:

Here is the inside:

She didn’t show her inside, so this is what I came up with.  I LOVE this set and am sad to see it go.  If you want this set, be sure to check out my OnLine Store to get yours!  Just click on any of the pictures below to be taken there!

Dimensions:
Whisper White 8 1/2″ x 5 1/2″
Very Vanilla 5 1/4″ x 4″ (x2)
Watercolor paper 2 3/4″ sq then cut out with biggest Square (stitched shapes)
Gold Foil same as watercolor paper

I hope you enjoyed my card, if you are in the neighborhood of Kernersville NC, come attend a class!

Lisa Tedder
A California girl living in NC
Product List


Press’n Seal your thinlits for a beautiful effect

Welcome to the NC Demo Blog Hop!! Happy Spring! I thought these cards looked like Spring has Sprung! Don’t you?

I have seen on other posts where people have taken a thinlit and they pop-up the pieces onto a card and the look is so pretty! The one I went to was Billie Moan and she said in her video that the effect is beautiful but the effort was intense!

I had an idea on how to do this same technique BUT make it much easier!! I made a video showing how to do this very thing! I am not into doing things the hard way and I wanted to figure out an easier way and then share it with you!

Here is the card I made for the YouTube video:

I used the smaller rose thinlit from the Stampin’ Up! thinlit set Rose Garden! I haven’t used that set in a while, but it worked perfectly for this card, don’t you think? I put clear Wink of Stella on the top of each petal and then lined the petals with Gold Wink of Stella. The background is the Petal Burst Embossing Folder, sponged over top with the Peekaboo Peach to make the leaves stand out. I also used the Gold ribbon with the Peekaboo Peach ribbon on top to set it off!

I used the Bigger rose for another card, it took up more room, but still quite stunning!


I put some clear Wink of Stella over the petals to really make them stand out! For the background I used the Embossing Folder Fluttering and sponged the top with Mint Macaron to help the butterflies fly! The glitter paper is from Sale-a-Bration, sorry it isn’t available anymore, but any glitter paper is great!

How did I make this simpler? I worked for HOURS trying to figure out a quick version on how to make this, so it will be easy for everyone!

Have you heard of Press’n Seal? This works miracles!! You cut out your thinlit using the Big Shot and before you take the paper away from the thinlit you put the Press’n Seal over the back (make sure that the sticky part is towards the paper. You can see what I mean when you go to my video on YouTube! It really is quite simple!

Once you have it pressed to the back peal away the parts you don’t want like the excess paper and the outline of the rose. THEN you will leave it on the Press’n Seal but place Dimensionals on the back, put glue on the smaller pieces then remove all the backing on the Dimensionals flip over and push onto your project! Easy Peasy! Here’s a picture before you flip it:

Want to see some more projects using this technique??? Once I started I couldn’t stop!

I moved on to the Butterfly thinlits and made a card using three colors!!

For this one I removed some of the colors, ran it through the Big Shot with another color and when piecing them together on the card, I just laid them on top of each other, you can see the video to get an idea how I did this!

And again, I wasn’t done! I wanted to use the Dragonfly thinlits! Here is what I made with those!

I hope you have enjoyed my cards! I had so much fun making them! You can continue on to the next blog.

Jo Anne Hewins
Michelle Irinyi
Tracie Evans Langley
Sharon Maranich
Laurie Meier
Sue Root
Lisa Tedder <————–You are Here!
Frances Wagner


Don’t forget I have blog candy for those who leave messages on any post on my blog OR on my FaceBook page! The drawing will be on April 4th!


Here is what you can win!

Thanks for stopping by! I would love to hear what you think of these cards!

Lisa Tedder
A California Girl living in North Carolina
Product List