Tag Archives: Kernersville

Sneak Peek of NEW Stampin’ Up! stamp sets Eastern Beauty, Eastern Madallions and Colorful Seasons

Today I TRIED to do a Facebook Live, and it came out ok, but I REALLY need to practice more!  hahahaha

I wanted to share with you today TWO/Three NEW sets from SU! that is coming out in June!  The reason I say Two/Three is because I am showcasing a set that has a Thinlit that works with it.  Not sure you would say they are separate sets, but they could be used apart.

The one I am sooooo excited about it Eastern Beauty and Eastern Medallions!  This set is so Versatile!  You can use the stamp set to make ALL kinds of great designs!  I have to still work on seeing what it does, so for now I will be sharing the card I made using the Eastern Medallion thinlits and a few of the stamps!!

Here is the card:

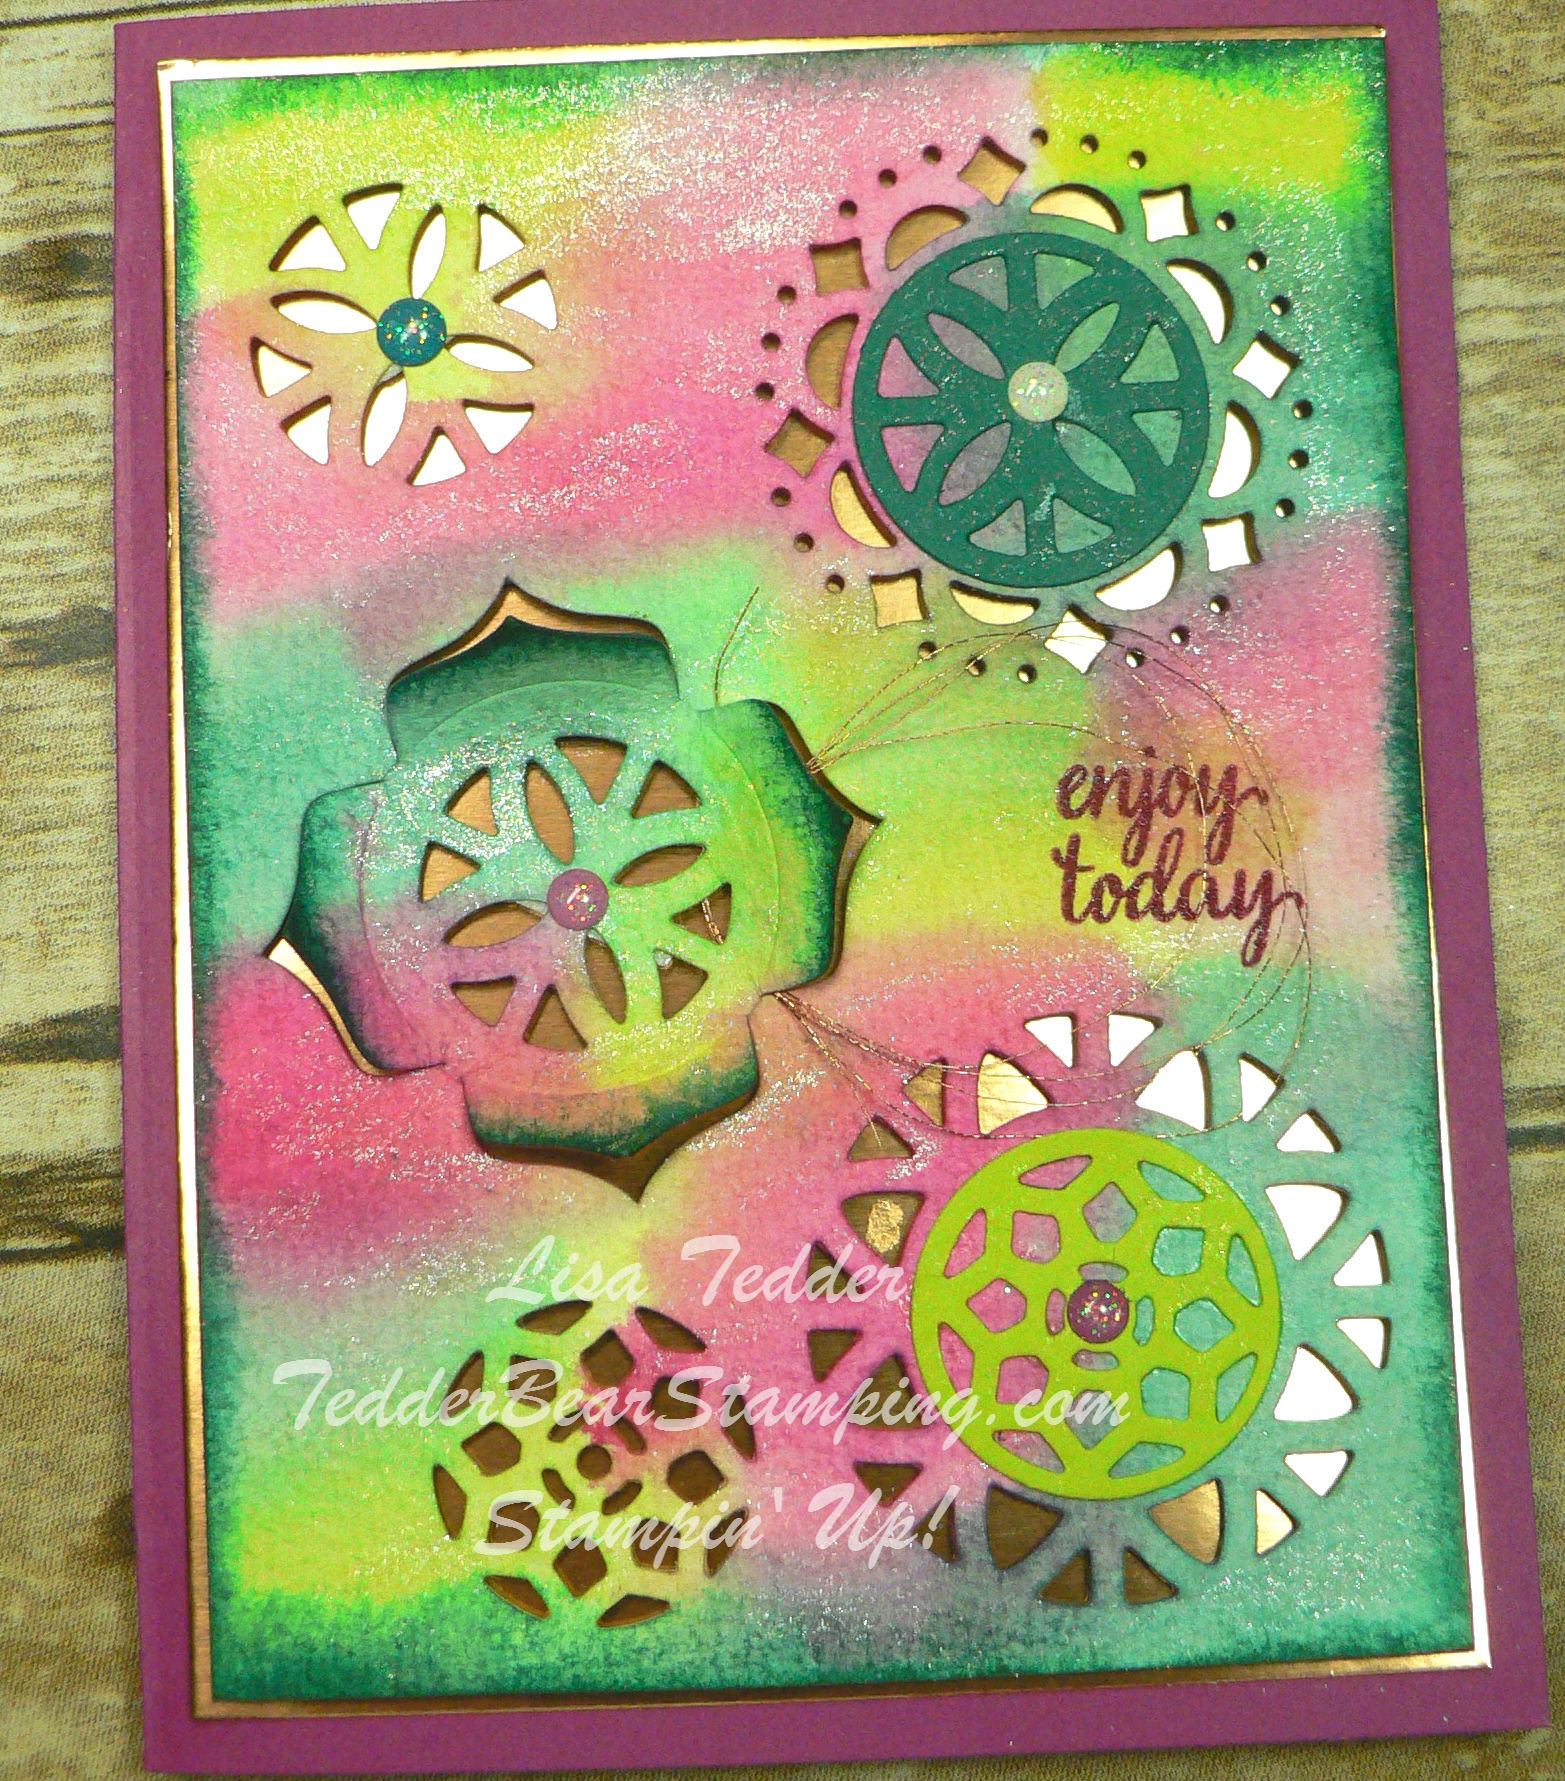
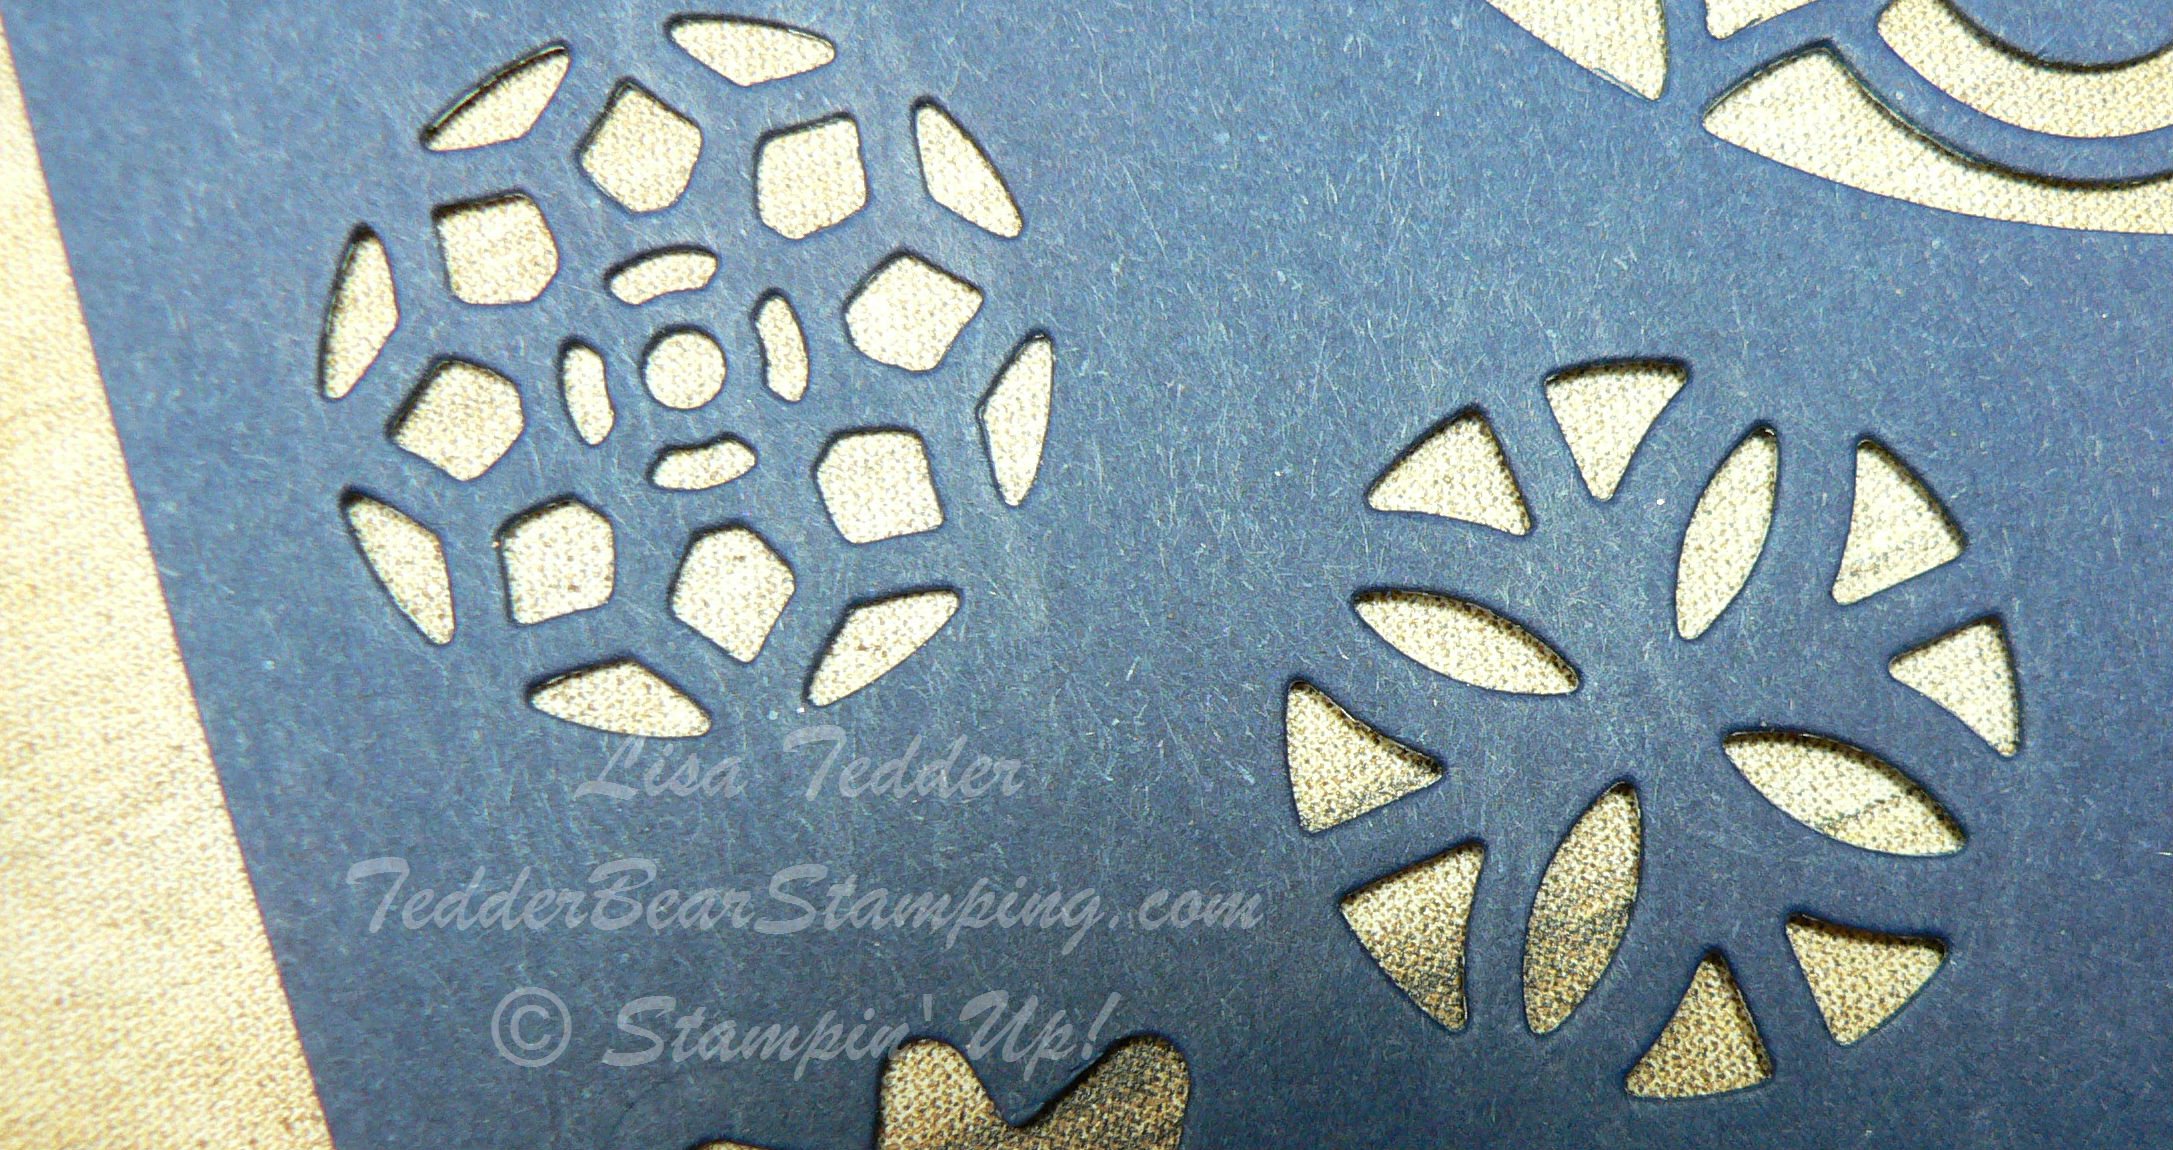
VERY pretty colors, right?  This is made with a lot of the framelits.  The cool thing is that you can mix and match them!  The one on the card that has the popped up part, is usually solid in the middle.  I used one of the other thinlits and placed it in the middle and made it so you can see through it!  Here is a sheet showing the one still attached to the cardstock and the other framelits in the set:


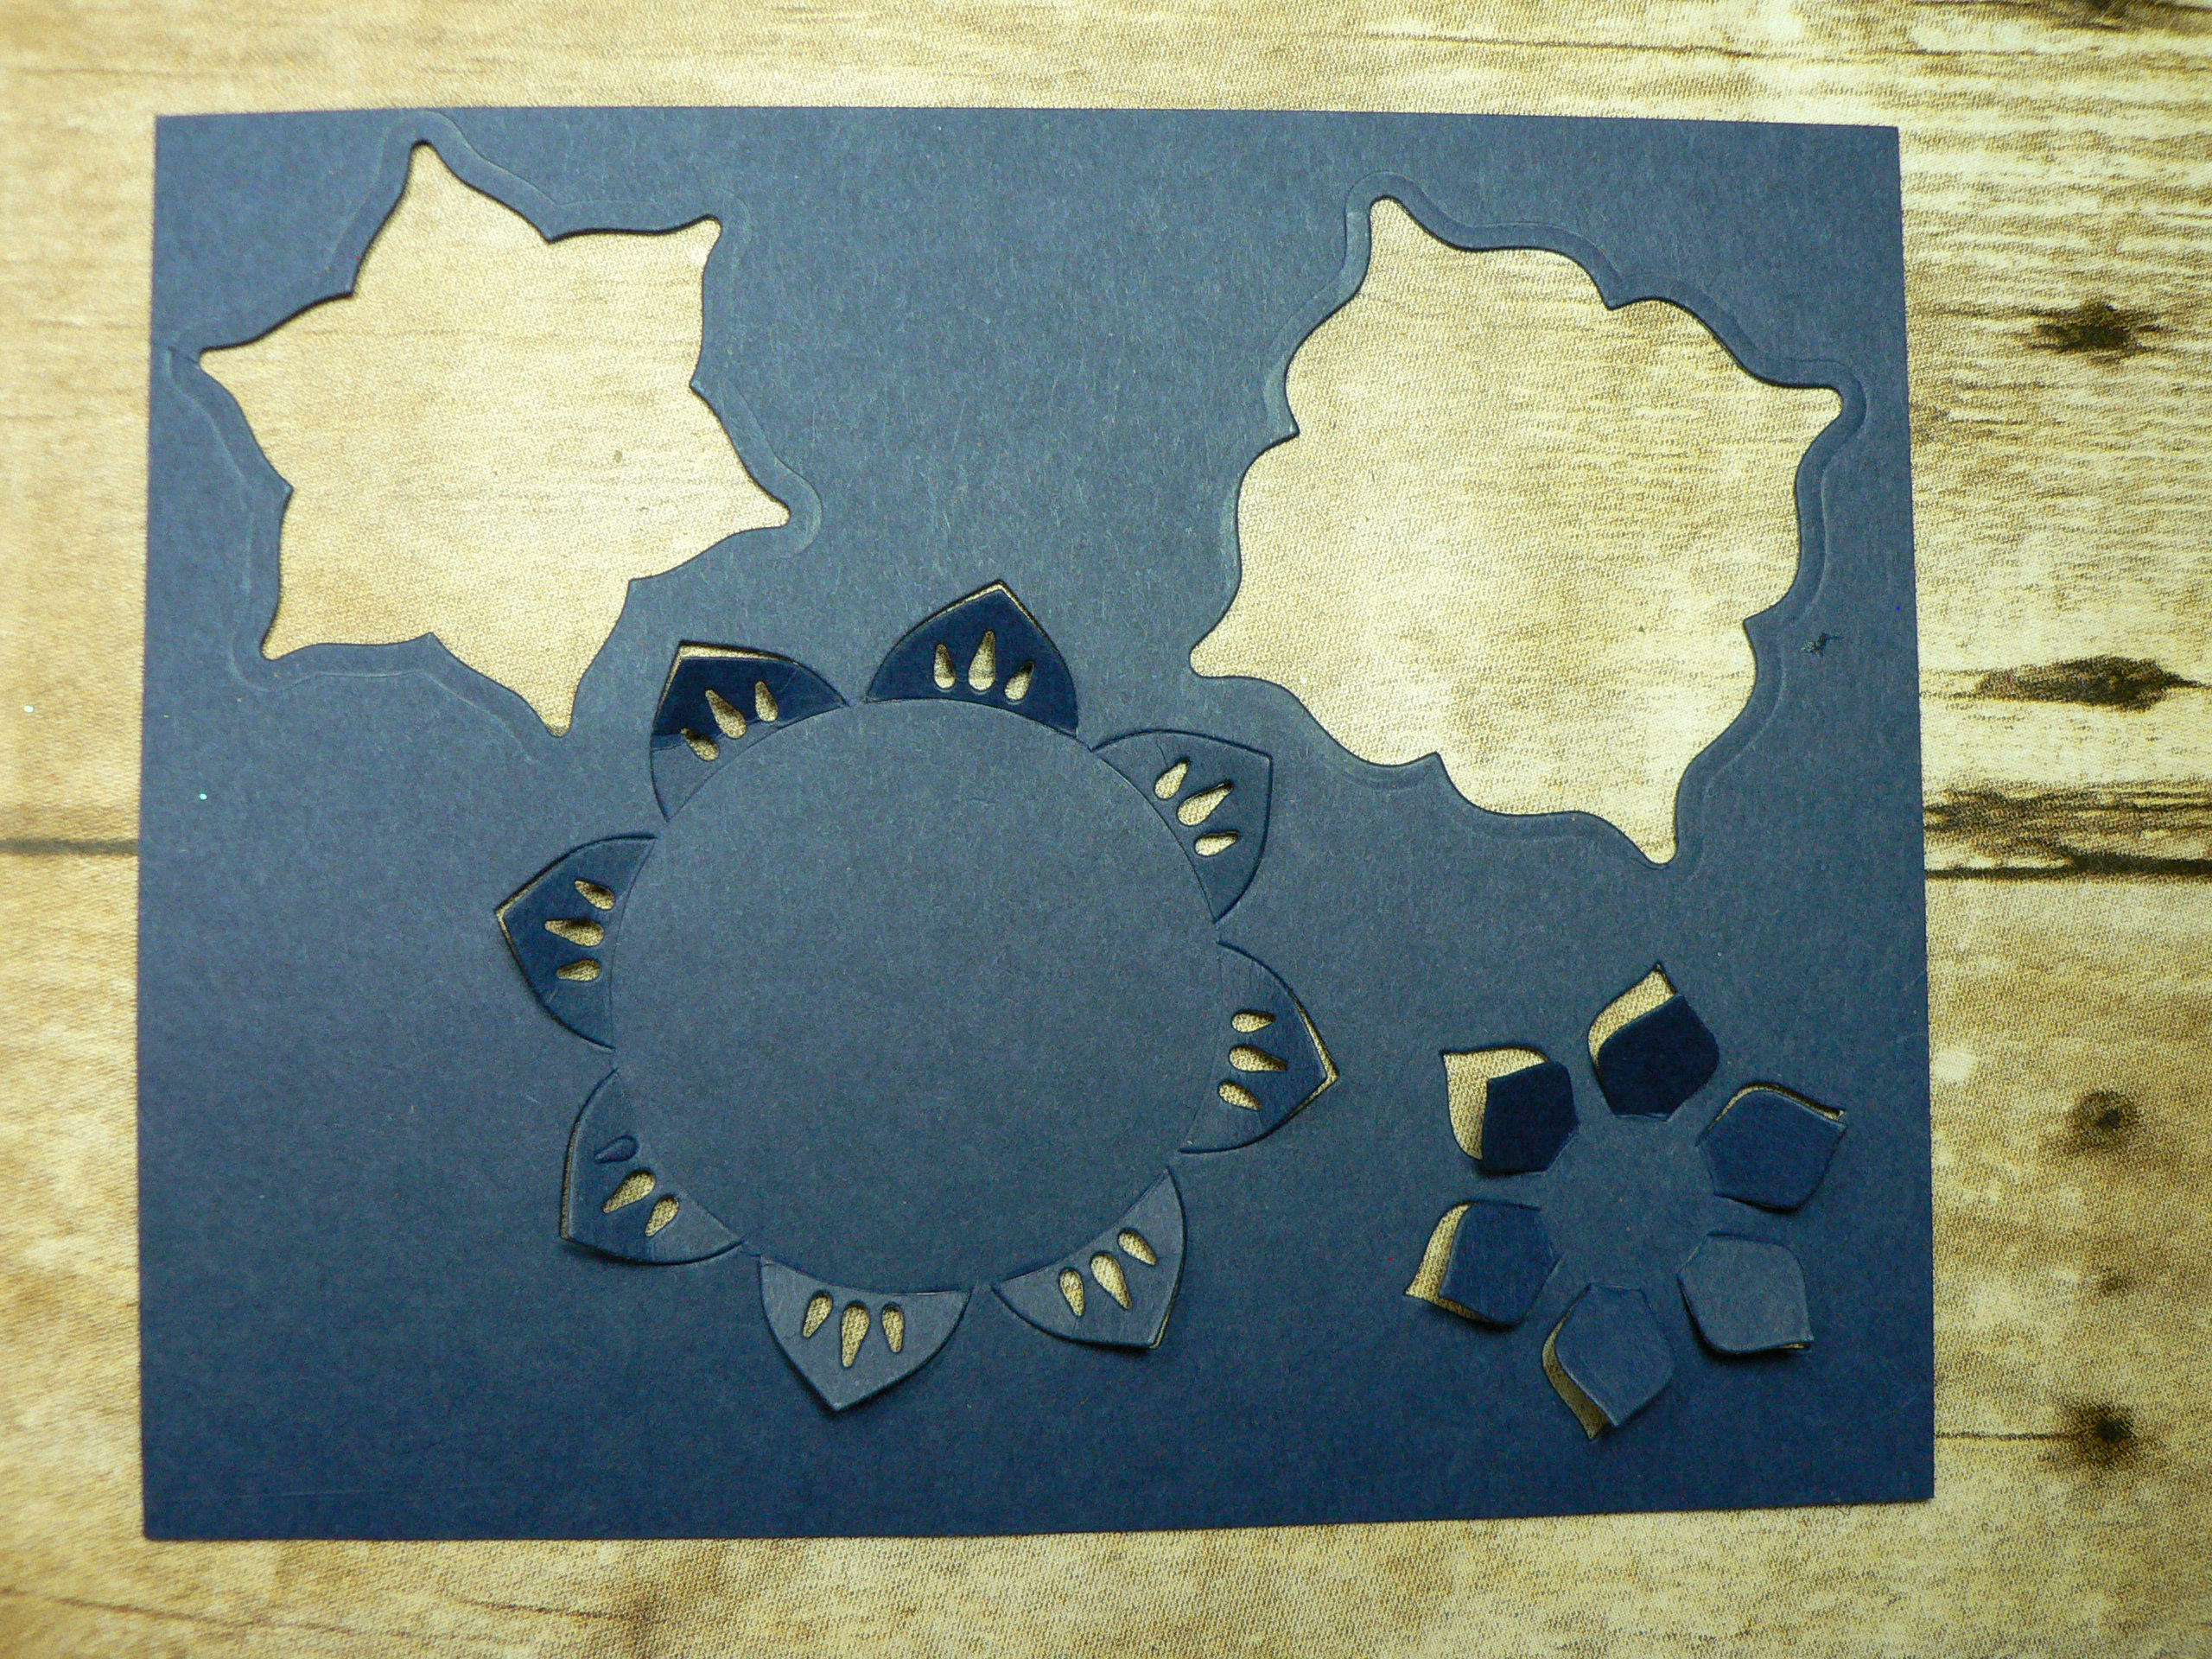
If you want to cut out an image to either put in the center. or cut out a center, you can see this piece leaves just the cutouts that you see:

OR if you want to cut out the image, use the smallest circle from the Layering Circles #141705 and t cuts it out perfectly!

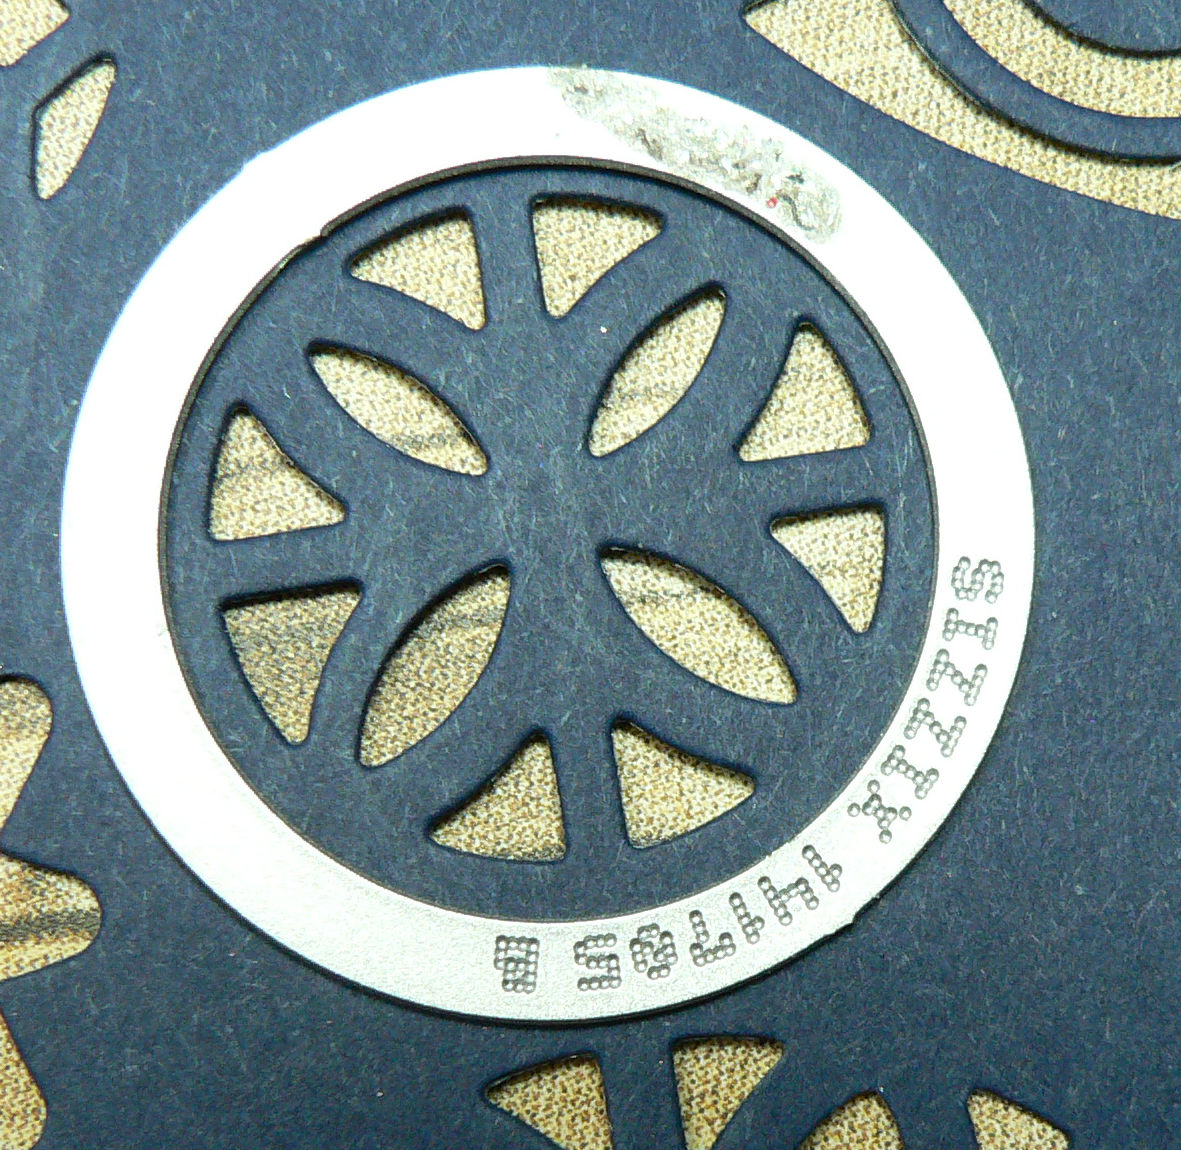
Doesn’t Stampin’ Up! think of everything!  🙂

I started with a 3 3/4″ x 5″ piece of Watercolor Paper and placed a lot of the Thinlits on the Watercolor paper, then added to them, to get the look I wanted.   I then got my Aqua Painter and colored some of the new pretty In Colors on the top of the Water Color Paper, making it as bright and pretty as I could!

I used Wink of Stella to make the paper sparkle and then popped up the piece in the center left by making the edges pull up (the piece doesn’t pop out all the way, just the petal edges).  I placed Dimensionals on the bottom of the entire Piece of Paper and then placed it on  5 1/8″ x 3 7/8″ piece of Copper Foil.  It looks so pretty in person, with the copper peeking out!

I stamped the saying from Eastern Beauty “enjoy today” on the right center and then used clear Embossing powder on it to make it more textural (I LOVE that our inks are wet enough to do this!!)

I used the brand new Glitter Enamel Dots that I got from attending OnStage in Savannah GA!!  If you are a demonstrator one of the MANY perks is that you get to see product before anyone else!  AND if you attend OnStage (which is all over the world!) you can pre-buy certain product before other demos that didn’t attend!  Of course I HAVE to go, so I can see/touch and order new goodies……as I’ve said MULTIPLE times, I am NOT  a patient person!  LOL

For the added touch before putting it onto the Berry Burst Cardstock I wrapped some Copper Thread so it peeks out of the side of the lifted petal and goes around the sentiment!

Here is the inside of the card!

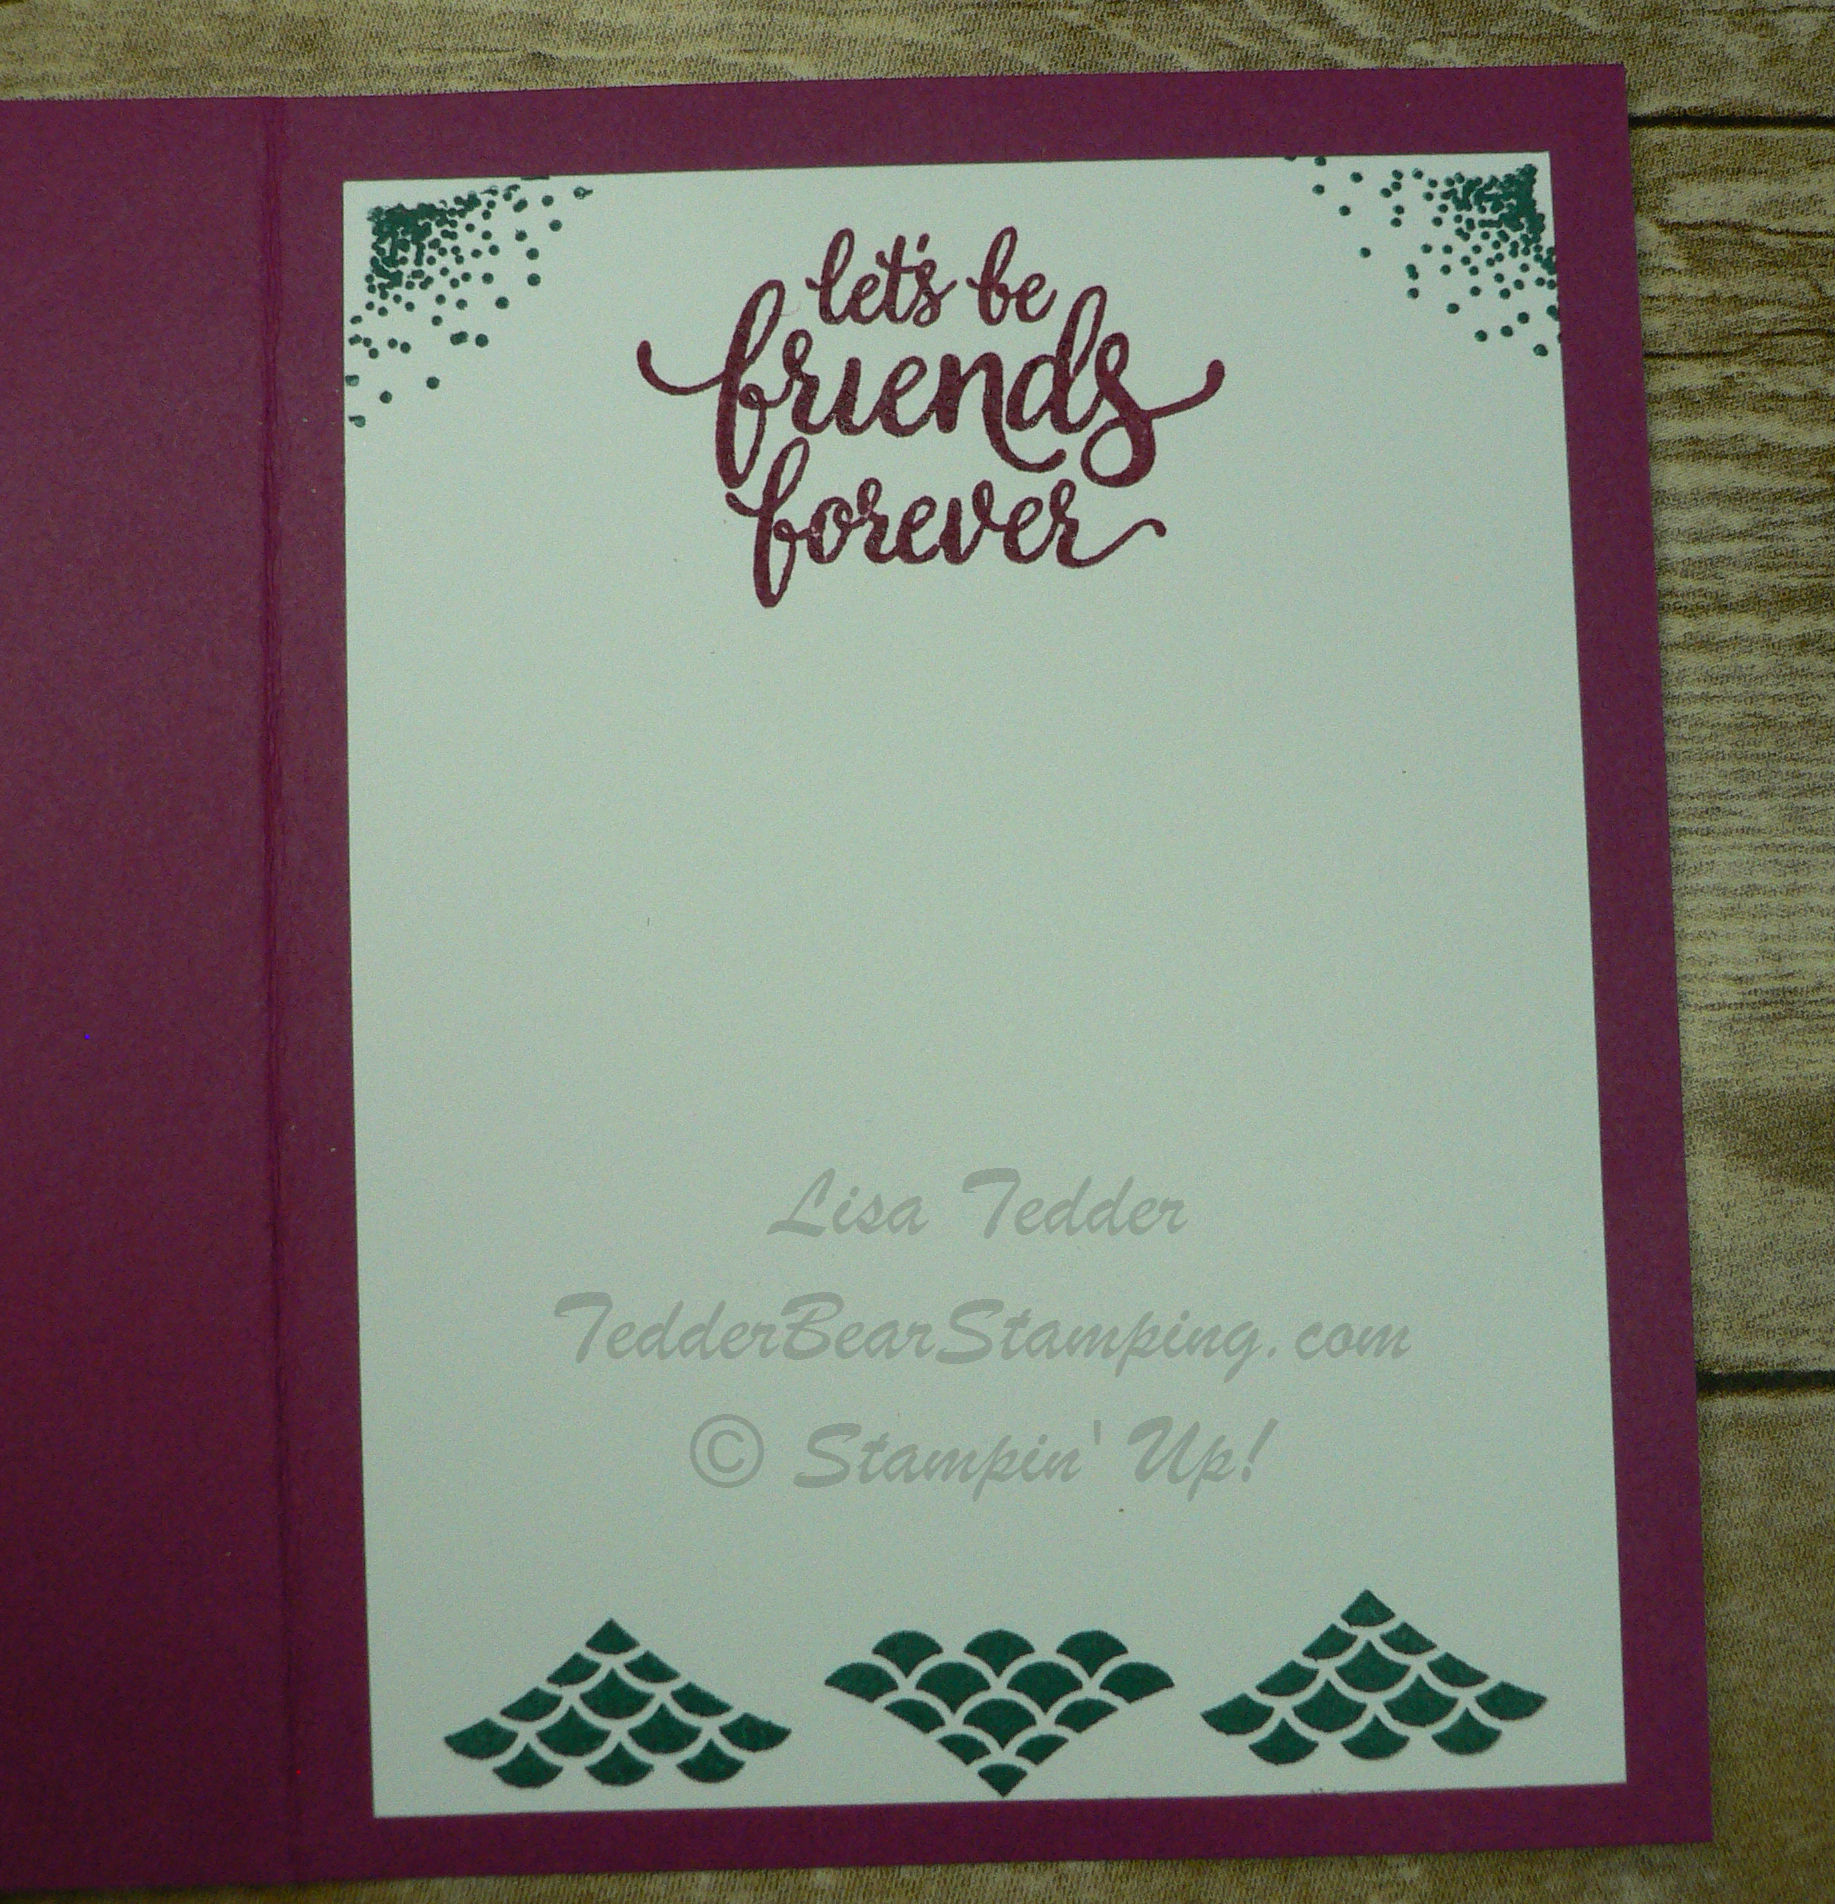
Again, I used the stamps from the Eastern Beauty to adorn the inside!  Well?  Do you like it?

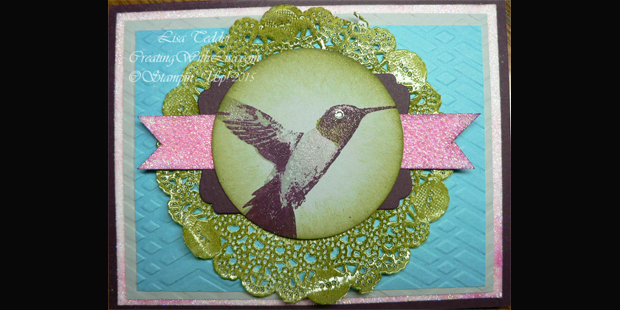
On my Facebook Live Video  New Sneak Peek Stamp sets I also showed another card.  I showed how this one was made, so I will show you the picture and if you want to see it made, go see the video…..just ignore how silly I look/sound/act……..this is what happens when you are not super experienced at it!  HAHAHAHA

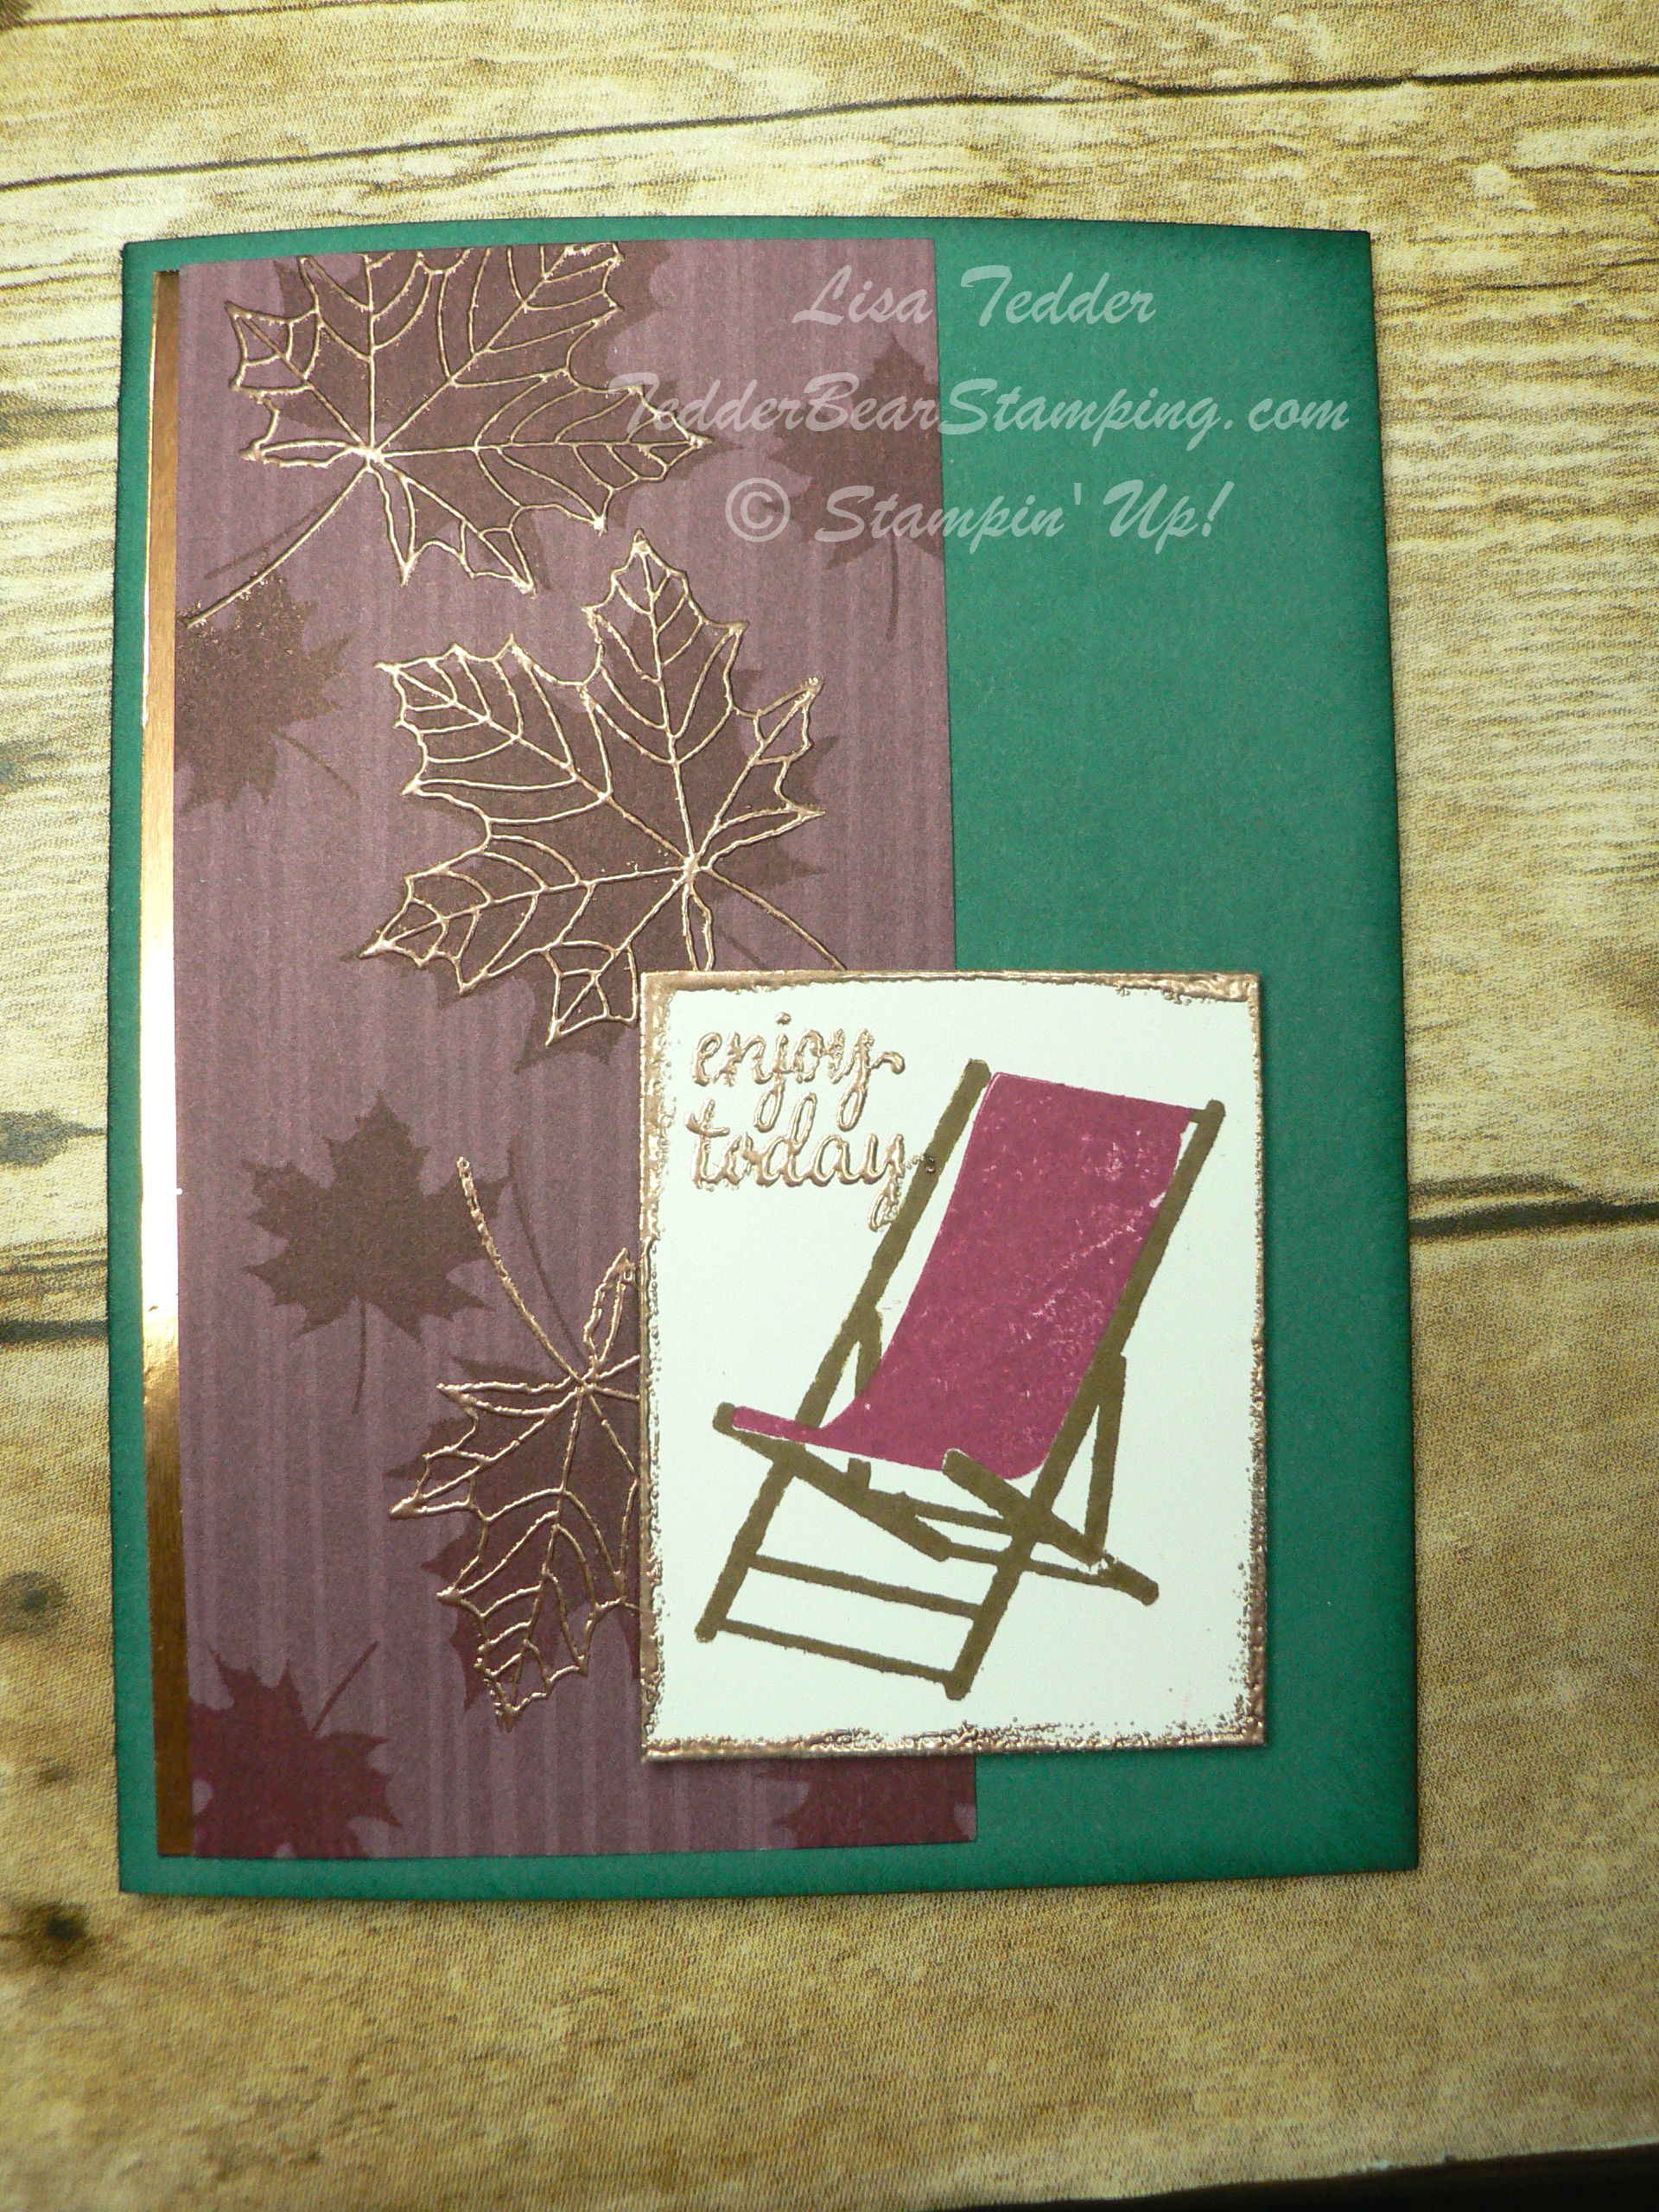
I won’t show you the one I tried to make better on the video, because in the long run, I liked this one better!

Here is the inside:

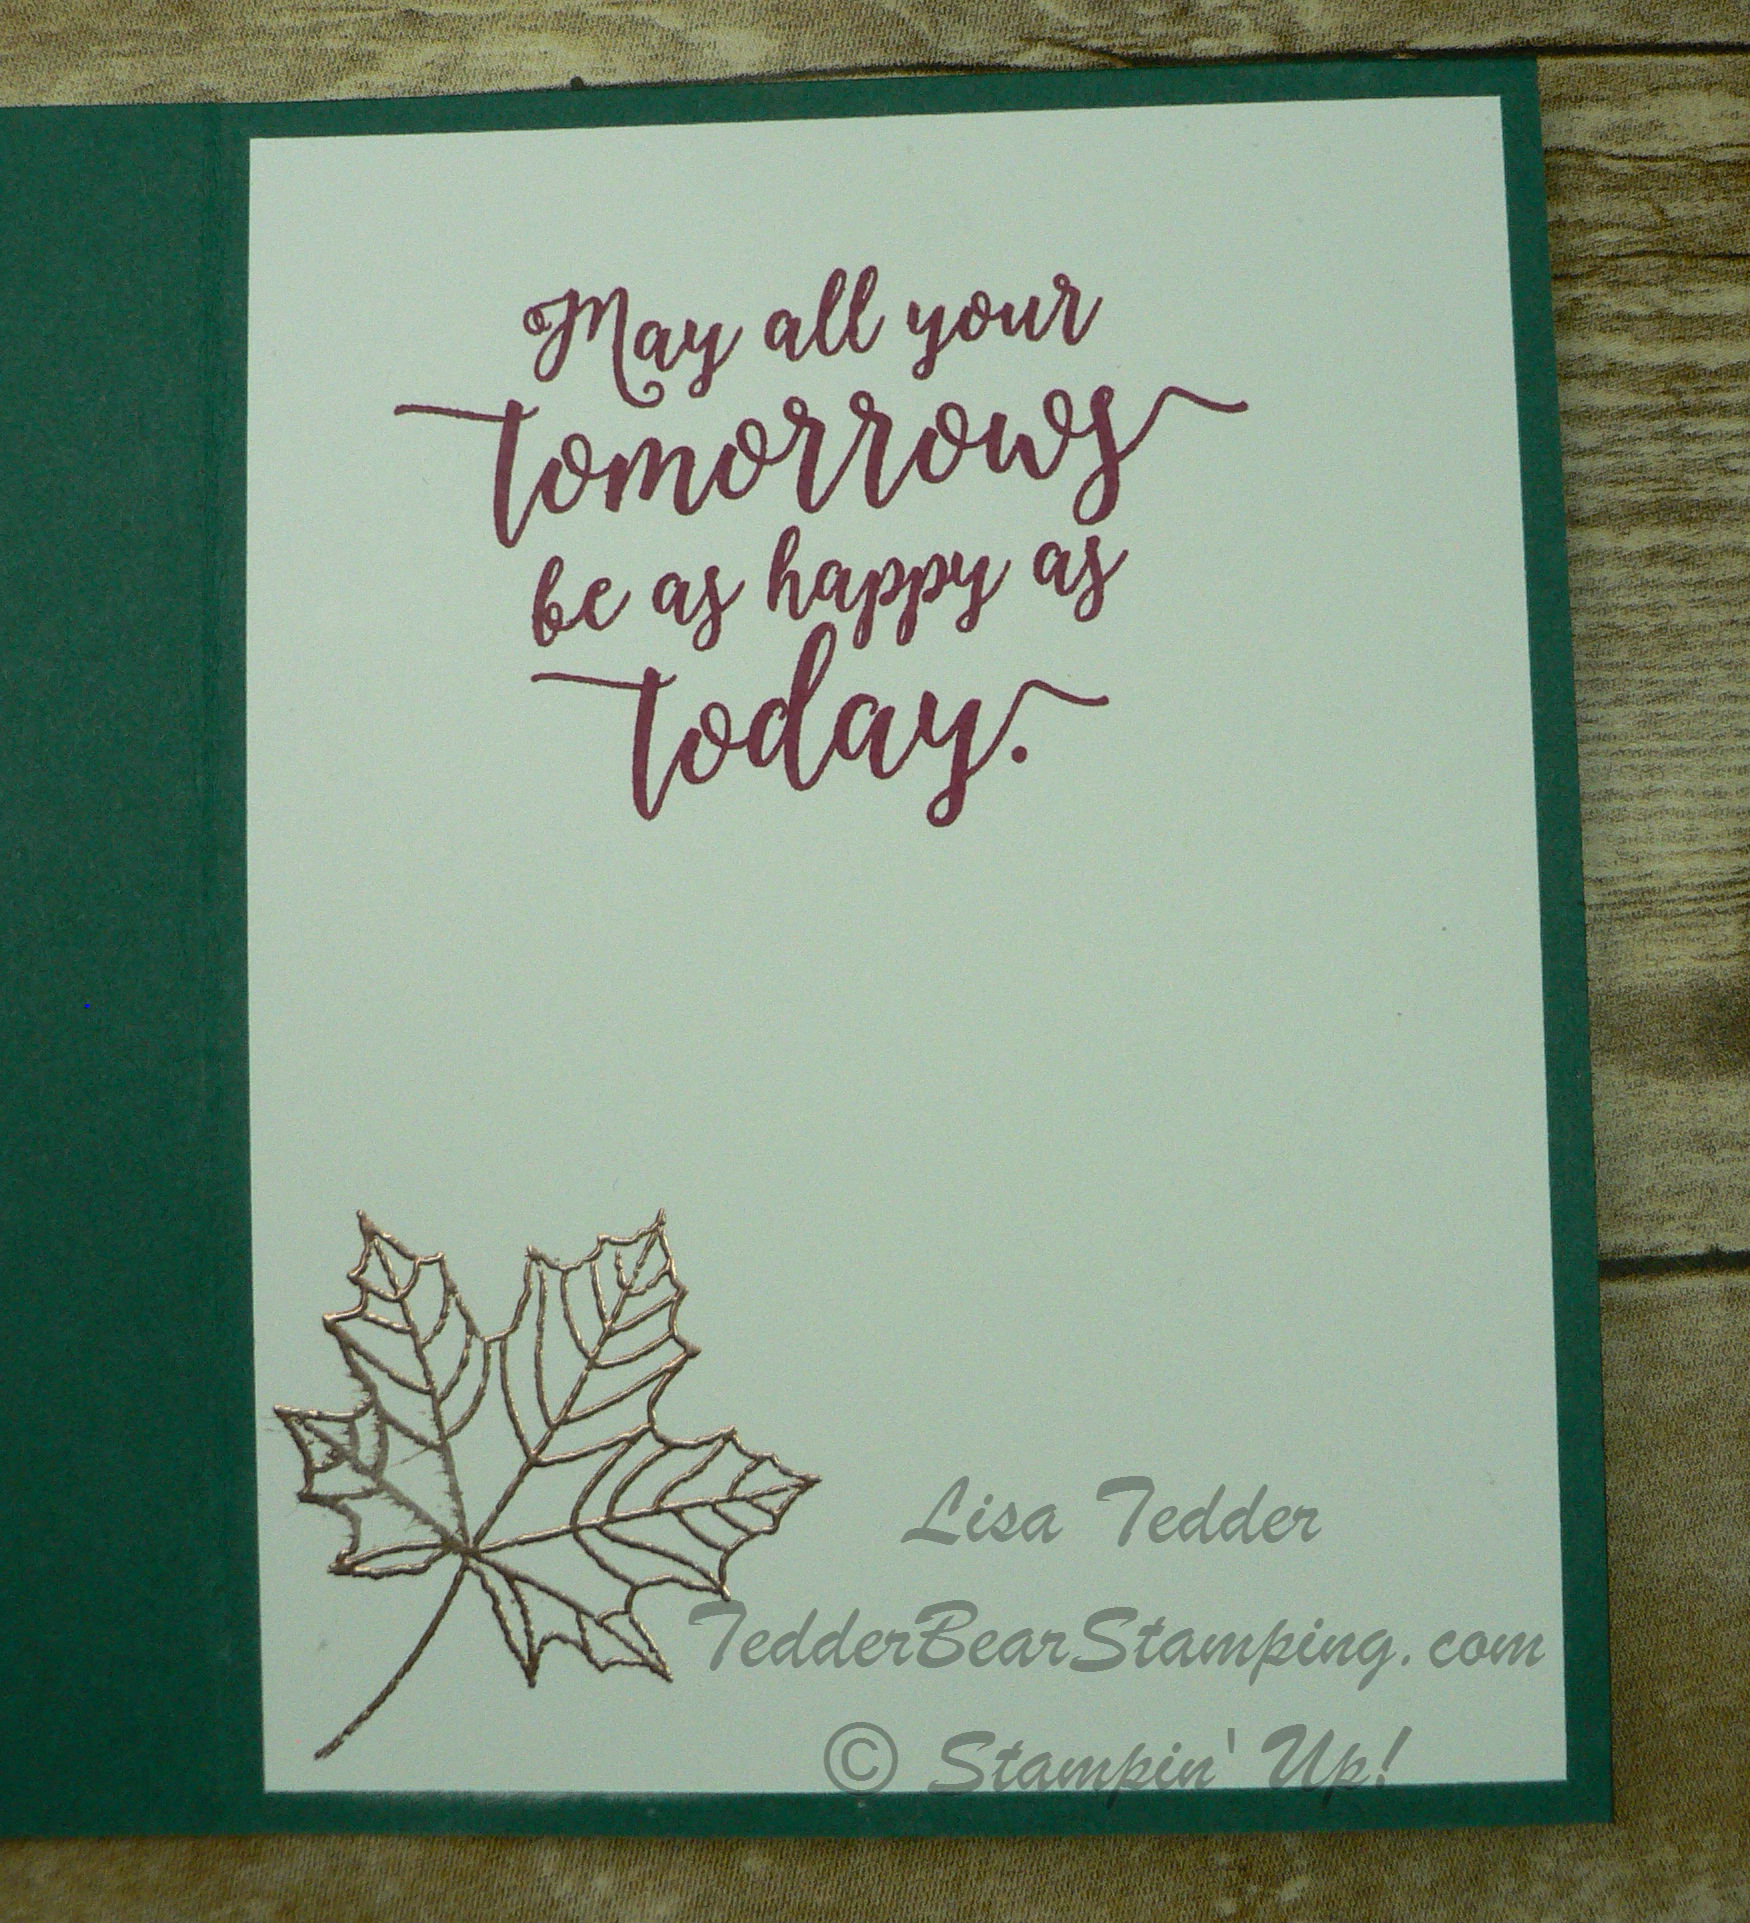
I really love the Copper on the Designer Series Paper (DSP), don’t you?!  And the leaf in Copper looks so pretty on the inside!

If you live in the USA, I would LOVE to have you be a part of my Team!  You can sign up under me, get a discount, get to attend SU! functions, order product early and get to meet the BEST people!  What can be better than getting paid to do what you love to do!?

Check back in with me, I’ll be posting more retiring ideas AND new product!  Subscribe both to my blog and to my Newsletter and you won’t miss anything!

Lisa Tedder
TedderBearStamping
A California Girl living in North Carolina

Making a Sunset

I LOVE sunsets, don’t you? I wanted to make one that was easy but still be stunning…….at least I think so, hopefully you do too!!

I have a video on YouTube walking you through this technique, I hope you check it out here. You can also shop for the products you see in this post and on my videos at my Online Store!

Making a Desert scene was my final one, I had to make FOUR cards with Sunsets! Just couldn’t help myself!

The first one is one I posted on my FaceBook page Let’s Stamp!

It features a lighthouse and this is where my Sunset journey started! I saw a video by Tina Zinck on making sunsets, so off I went!

This was so fun and easy (Thanks Tina!!) That I didn’t stop there! But first let me tell you what I used to make this card!

Stamps: High Tide #143006
Inks: Cherry Cobbler #126966, Watermelon Wonder #138323, Night of Navy #126970, Perfect Plum #126963, So Saffron #126957, Crushed Curry #131173, Crumb Cake #126975, Early Espresso #126974, Chocolate Chip #126979, Whisper White #101731, Momento Black #132708, Versamark #102283 and Sahara Sand #126976
Paper: Cherry Cobbler #119685 – 8 1/2″ X 5 1/2″, Whisper White #100730 – 4″ X 5 1/4″
Misc: Project Life Corner Rounder #135346, Cherry Cobbler Baker’s Twine #123125, 1″ circle punch #119868, Gold Embossing Powder #133457

Now, on to the next Sunset Card! This one uses the Lift Me Up Stamp set, but uses the same techniques as on my video.

I love how the Ocean/water came out on this one! This uses the same color palate as the card above. Here are the dimensions for the card stock, since everything else is the same:

Cherry Cobbler 8 1/2″ X 5 1/2″, Crushed Curry #131199 – 3 1/4″ X 4 3/4″, Cherry Cobbler- 3 1/8″ X 4 3/4″, Whisper White – 3″ X 4 3/4″ and 2″ X 1 1/2″ (for the sentiment).
I also used Dazzling Diamonds #133751, and Fine Tip Glue to make the Dazzling Diamonds stick #138309

What else can I make with this Sunset? I just HAD to make more!! So I pulled out my Trusty set of Lovely as a Tree!!! Love this set!
Again, I used the same colors, just used the Stamp set Sending Thoughts #142965 from the Occasions Catty 2017 and I also used the FREE with Sale-A-Bration ribbon Metallic Gold #143601!

Here are those dimensions:
Elegant Eggplant #105126 – 8 1/2″ X 5 1/2″, Whisper White 5 1/4″ X 4″
The Elegant Eggplant Ink # is 126969, Gold Embossing Powder #133457

And now for the Final Card, this is the one I made the video on!!

I had so much fun making this one!! Like I said at the Beginning, I LOVE sunsets, by this time you might just believe me! hahahaha

The supplies for this card are:

Stamps: Birthday Fiesta #141500, Thoughts and Prayers #127805, Here for You # 142164
Inks: Watermelon Wonder #138323, Night of Navy #126970, Crushed Curry #131173, Crumb Cake #126975, Early Espresso #126974, Chocolate Chip #126979, Momento Black #132708, Night of Navy #126970, Black Marker
Paper: Night of Navy #100867 – 5 1/2″ X 4 1/2″ , Watermelon Wonder #138334 – 5 1/4″ X 4″, Whisper White #100730 5″ X 3 3/4″
Misc: Sponges #141337, Big Shot #143263, Up & Away thinlits #142748

If you love these colors together, make sure and stock up on Watermelon Wonder!! It’s one of the In Colors that is retiring this year 🙁 This is a GREAT color to make your sunsets with! The other reds are either too red, or too dark. It’s doable, but this one just makes it easy!

I hope you enjoyed all my Sunsets, and that you will want to visit me again! I will be making more videos, I am really enjoying it! Make sure you sign up on my YouTube page to be notified when I have another one coming out!

Also!!! Click on my Newsletter button, you will receive monthly ideas and keep up to date with my schedule!

Now, click on each name to see the rest of the blog Hop from Demo’s from North Carolina!!

Lisa Tedder
CA girl living in NC!

Debra Ballance-Byrd

Tamra Davis

Jo Anne Hewins

Michelle Irinyi

Melissa Kerman

Tracie Evans Langley

Sharon Maranich

Laurie Meier

Lisa Tedder <———–You are Here!

Frances Wagner


NC Demo Blog Hop – Progressing Christmas Page

If you just came from Pam’s page, welcome to my page! If you started at mine, click on the names below to see what others have done for the Holidays!  Enjoy!

Today I am showing you how I go about doing a Scrapbook Page by showing that you can make ANY size page depending what you like.  I started off making a 6 X 6 page:

6x6page

The red block is for putting your picture in.  I LOVE handmade scrapbook pages!  And the Stamp set from Stampin’ Up! called Christmas Magic is one of my FAVES!  It’s so pretty and versatile!  I made tags too with the sets I used for this page, check it out at the end of this post!

For the next part of the page I made an 8 1/2″ x 11″ page and placed the 6 x 6 on that one.

middlepage

The White under the Santa and next to the snowman is where You put the picture on this part!  I used the Santa from the Stamp set Cookie Cutter Christmas.  This was so much fun to do! I stamped it on Vellum using Black ink and embossed it with clear.  I then turned it over and colored the back, making sure I shadowed it.  I put it on my Stampin’ Pierce Mat and with my embossing tool from the Simply Scored Scoring Tool upside down (embossed side down) and rubbed the embossing tool over all the white pieces.  This raises the vellum and makes it white.  REALLY WHITE!  It is so much fun to do this technique and looks great on sails and other stamped images that need to be white and fluffy.

santainside

This is what it looks like before you turn it over.

santafinal

Once you turn it over you can really see the white is white!  I did NOT use ANY ink on the white parts, that is all because the vellum changes to white when you press on it with the embossing tool.

Now, here is the finished page on 12 x 12 :

beckypagedone

I die cut the ‘Merry’ from the Christmas Greetings Thinlits.  I also stamped the bells from the Christmas Magic stamp set and embossed it with Silver Embossing Powder, then using my blender pen colored in Smoky Slate to ‘look like’ silver.  But first I stamped the Swirl from Star of Light and ‘hung’ my bells from that.

If you notice under the snowman, I have three bells on white bakers twine, this is so they won’t fall off (my daughter is going to frame this with her Christmas pictures on the wall), and I wanted to make sure that no matter what they wouldn’t fall off.  I made the white twine go through the paper and I tied a  knot in the back.

This page, in person, is so pretty!!  Have you ever made something and are impressed with how much better it came out than you thought it would when you started?!!   That’s how I feel, I hope you like it too!!

Now, here are the tags that I made to go along with this gift:

p1120035

I love the simple yet elegant feel of these!  Which is perfect for something that you will want to make a lot of!  I used the Scallop Tag Topper for all of these, the middle one is just a little bit shorter than the other two.

Here is the details that you might want to know!

Stamp sets:
Christmas Magic #142119
Star of Light # 142110
Merriest Wishes # 142066

Inks:
Versamark
Real Red
Basic Black
Old Olive

Cardstock:
Whisper White 8 1/2″ x 11″, 4″ x 6″, 6″ x 6″, 1 1/2″ x 2 1/2, scrap for ‘merry’  and the bells and 2″ x 5″ for tags
Real Red 12″ x 12″, 3″ x 5 3/4″, 8 1/4″ x 10 3/4
Dapper Denim 2″ x 4 1/4″ for tag

Accessories:
White embossing powder #109132
Silver Embossing powder #109131
Scalloped Tag Topper Punch #133324
Classic Label punch #141491
Mini Jingle Bells #142002
Simply Scored Scoring Tool #122334
3/8″ Ruched Ribbon – Dapper Denim #141424
3/8″ Stitched Satin Ribbon – Real Red #141693
Dazzling Diamonds #133751
Blender Pens #102845
Dazzling Diamonds Glimmer Paper #135315
Christmas Greetings Thinlits #139659

So?  That is what I am presenting  for you on this blog hop!  I hope you love them as much as I do!  I would love to hear from you!!

Jo Anne Hewins
Michelle Irinyi

Tracie Evans Langley

Laurie Meier
Sue Root
Pam Staples
Lisa Tedder
Frances Wagner

Lisa Tedder

TedderBearStamping

12642618_10208338697962909_6250260198526436679_n


PCCC #183

I decided that I am going to start doing more with this blog!! Hopefully you will be as excited as I am!
To start with I decided to do a Challenge that the Paper Craft Crew is doing and that is the Color Challenge!!
Here is the challenge I worked on today:
PCCCS163-006-300x300

My card uses one of my favorites from the Occasions Catalog from Stampin’ Up!, it is called Picture Perfect.  My Dad used to feed the Hummingbirds in our front yard, it was very full of plants that framed our front walk very nicely.

He would stand there for quite a while and when the Hummingbirds would come to drink from the feeder, he would put his finger under the feeder for the birds to rest on.  It took a while for them to grow comfortable with him there, but he finally got them to land on his finger!!  I would watch from the window and wish I was the one out there!

Ever since then I have had a LOVE for Humminbirds!  So that leads me to this post, I wanted to use the stamp set Picture Perfect since it has them!

Here is my card:

Pccc183-Picture-perfect

The base of the card is Blackberry Bliss, the next layer is Smoky Slate with Marina Mist which I ran through the Big Shot using the embossing folder Zig Zag.  I then brayered the Tea Lace Paper Doilies using Old Olive ink, I then put versamark over that and embossed with Clear Embossing Powder.  I like how it’s shiny, don’t you?

I cut out a thinlit of Blackberry Bliss using the Deco Labels, colored a piece of Dazzling Diamond Glitter Paper using the Blackberry Bliss, then set it using clear embossing powder after running over it with my Versamark again.

Stamped the Hummingbird using Blackberry Bliss, Smoky Slate and Old Olive. put a Rhiinestone for his eye, and then for the coup de grace (sp?) I went over the entire image with the Wink of Stella!!  It is so pretty and shiny in person!  And the texture makes you want to fell it!

So, I am done with my first Challenge in a LONG time!  How do you think I did?  I’m excited for next time!  I wonder how I’ll do in the Sketch Challenge!

Make sure you check back in to see how I did, and I would love some feedback on what you like or don’t like!

Thanks for stopping by!

Lisa Tedder

CA girl living in Kernersville NC

Puffy Vellum

If you happened to see my Periscope video on this technique, I apologize that i didn’t get my orientation right, but it was my first one, so I’m happy I got it done, didn’t stutter and it looked good, even though you’ll get a crick in your neck watching it!

I promise next time I will get it right!!  Here is the card I was working on.  The white flower is Vellum and I used my  score tool from my stampin’ score board.  It not only makes the vellum stick out on the other side, but it makes it white!!

You can’t see the clear Wink of Stella on it, it’s so pretty!!  I also added the gold thread behind the flower and behind the sentiment that I cut out with my Big Shot and Lots of Labels thinlits!

puffy-vellum-front


Here is the side so you can see the flower is puffy:

puffed-vellum-side

It’s hard to see,but WOW when you feel it, there is so much texture and interest on your card!

Keep an eye on my next Periscope, and if you leave a comment I will put you in a drawing for a free SAB stamp set, the drawing will be at the end of February, so you’ll have plenty of times to leave comments!!

I love stamping, it gives me so much pleasure.

Working for a company like Stampin’ Up! lets me get PAID for doing something I love to do!

There is a sale right now during Sale-a-Bration, if you decide to join the SU! team and mine (LETs Stamp!) you get for your $99……..$150 worth of product PLUS the shipping is free!!  March is the last month of SAB and your chance to get sooooooo many goodies for so little!

I would love to have you join my team and me when we share fabulous creations and have meetings!  I try to skype with the down line that is not living close enough.

I’m not very savvy with all the technical things, but I usually just have to ask one of my kids!!  🙂

Go take a look at my Periscope, look under Puffy Vellum or my name Lisa Tedder, or Lisa E Tedder, it won’t be there but 24 – 48 hours!!

Thanks for visiting, hope to see you next time!

Lisa Tedder

Kernersville NC

August Paper Pumpkin

August 2015 PP

I played with my Paper Pumpkin today!!  It was so much fun, I just went to the Pinterest Paper Pumpkin site after I did the handmade cards and box straight from the PP directions, I wanted to do some different ones, and this site helped me pick out what I wanted to do!

The SU! card in the middle uses the new Gold 3/8″ glitter ribbon #139614 from the Holiday Catalog (2015) .  I cut up one of the cards with the stripes so I could get more from that one sheet (since it is printed front and back, I can make a lot of cards by piecing it.)

I also paired the saying with the Metallic Foil Doilies #138392 behind it to make it POP!  Adding dimensionals underneath really made it stand out!

The card to the right of the middle I used the cut up piece (from the middle card) and layered it onto Gold Foil Sheets #132622, and used the ribbon from the kit I was inspired by one of the cards on the site listed above.

Don’t forget to take advantage of the 1/2 off deal that Stampin’ Up! is offering now until the 10th of September, you get TWO months for the price of one!!  Just go to PaperPumpkin.com site and sign up!  Just remember to put me down as your Demonstrator!

Lisa Tedder

Kernersville, NC

Creative Blog Hop!

I have been invited by Frances Wagner to participate in a Monday Creative Blog Hop!  I’m very excited to be asked and I have been creating a bunch of cards for a Class where we get to participate in Sale-a-Bration for one more month!!

We will order in March $50.00 worth of product and then pick out a SAB item for free, then the class will be free!

I plan on Three cards at this event and then I will have a Sale-a-Bration Celebration!  What is that you ask? Well, for those who have received 2-3 SAB items from purchasing through me they get a class for FREE where we will make 5 cards, with door prizes and munchies and LOTS of goodies (presents?) for those who are participating!

This Stampin’ Up! handmade card below uses the stamp set Butterfly Basics, I just HAD to make it once I saw it online, it was made by Erica Logtenberg, the only thing I changed from her absolutely GORGEOUS card was where I put my pearls!  No need in changing a brilliant card!  Make sure you enlarge the picture so you can see how pretty it really is!


blog-hop1


The second card I want to show you is one made from Adventure Awaits!  This SU! card is a great card for a Man!  I used the Dots and Stripes Decorative Masks and the Aquamarine Chalk Pad to make these wonderful stripes!  It is a fast and easy card!  Did you know that you can stamp with Chalk ink and then emboss it with Gold Embossing Powder?  I thought I would try it and it worked great!  That way you have less you need to buy to make this Manly card!  I also used Champagne Glitter Paper and cut banner ends to make the main image Pop.

bog-hop2

For my last card today, I wanted to show you this really pretty card made using the Artisan Embellishment Kit.  It was fun using the rose piece inside as a mask to sponge my color – Rose Red over my ‘mask’ and then I embossed it with Clear Embossing Powder!  Wow is it shiny!  And you just have to touch it, it is a fun card to look at and texturally (is that a word?!)  :-/   a card that once you give it away the person will want to touch it and ask how you did that!!

The cute little Bee is from the Stamp set from SU! ( I LOVE SU! can you tell?) named Baby Bumblebee.  Once I saw this set I just HAD to have it!  I stamped him on So Saffron cardstock using a juicy StazOn pad (I keep it juicy so I can emboss it using clear EP, I LOVE embossing……it’s like magic every time and you won’t get tired of doing it!)  I did have to cut out the bumblebee, that was the hardest part of this card!!  I used a little heart from the Itty Bitty Accents Epoxy Stickers which I colored Red with our Blender pens!  This bee is just so stinkin’ cute!

I also used the stamp set Hello Life for the Sentiment on the bottom of the card.

blog-hop3


I hope you have enjoyed my part of the blog hop!!  I have been asked to answer some questions, so I will do that before I leave and have you continue your journey!

* What are you working on?

I am constantly working on my next class.  I have a few that I do out of my home in NC, and I also have classes at the Senior Center in my town.  I also have classes at my local Parks and Recreation.  I am waiting for the ok to go through classes to teach at my local Battered Womens Shelter!  I’m very excited to do this, as I was in their shoes a LONG time ago before I met my husband who spoils me MORE than I would ever have  expected!  We’ve been married for 26 wonderful years and have 5 kids and 3 grandkids!

* How does your work differ from others in your genre?

I love to create my own cards, but love to see something from Pinterest and recreate it using Stampin’ Up! product, or if they used SU! already then I usually change it up just a bit to put my stamp on it!  Pun not intended!

* Why do you create what you do?

Before I started stamping, my sister was always doing these really creative things, like making china Christmas Tree Ornaments, or painting china dolls.  I thought that I was not granted the gene of artistry.  Then I went to my first SU! party, I made a beautiful card, and then couldn’t mail it out because it was so pretty!  In my classes, I try to have all the dimensions written down so my friends/clients can recreate what we are making!  I REALLY love it when I see the smile on someone’s face who also thought they weren’t artistic.  And the first class they come to they are changing up one of my cards to fit them!  That tells me that I am doing my job and showing them that they can do this too!!

* How does your creative process work?

That’s a hard one!  It’s really funny that I can look at pretty much anything and think of using a part of what I see on a card!  I can see some colors that I like and then think of what SU! colors will match…..then I just need to figure out what stamp to use and then I am almost done!  SU! makes it really easy to make projects, all their goodies coordinate with each other!  I can also use colors from a certain color family and that will make sure that the colors will go together.  Pinterest helps get my juices flowing and so does the other demonstrators who put their designs on Stampin’ Connection where us demo’s can go and see what others have made using a specific stamp set.

Thanks again for stopping by!!  Come back again!

Lisa Tedder

Kernersville, NC

Here are the other people who have posted to this blog hop:

Carol Valentine

Lynn Peters

Deb Paisie

Cindy Fodor

hanniejoy

Anne Matasci

Frances Wagner