I am going to show you my SIX cards that I am making for my class today the 30th of November, some I will post after the event, but I still want to share them with you!
The first one is:
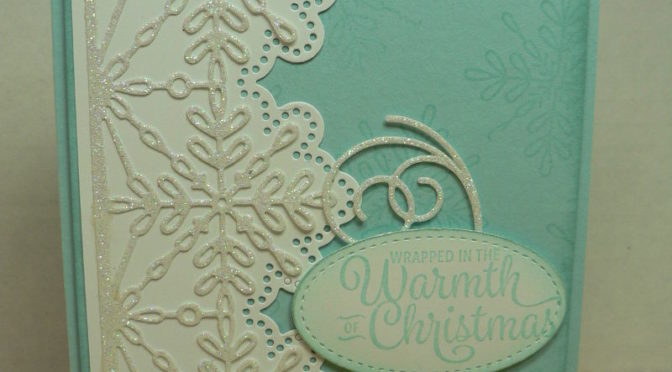
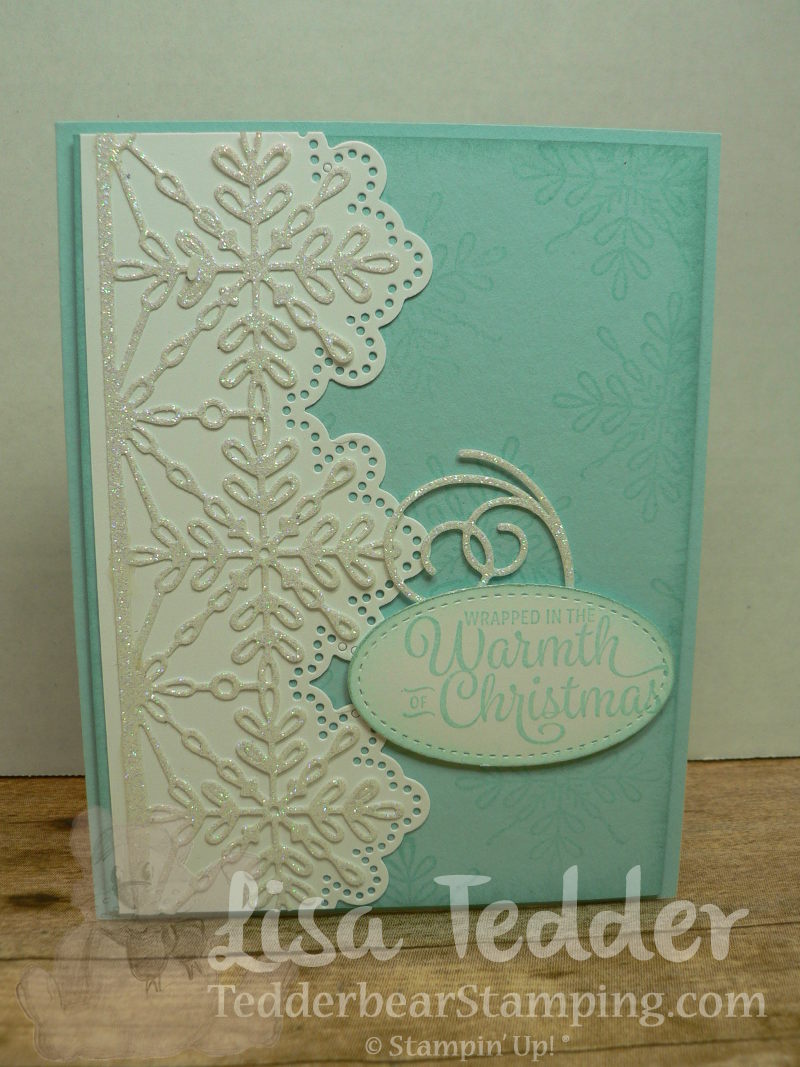
This one is so STUNNING in person! The Dazzling Diamond paper is so Pretty!!
I have a pdf available 7 pages of instructions, supplies, dimensions and pictures of all 6 Christmas Cards! If you purchase $50.00 from me at my OnLine Store I will email you the pdf!!The items are listed below, just click on any of them to be taken to my Store!! Please use the hostess code CGCDT6ZJ
Off to ‘work’, got lots to do!
Lisa Tedder
A California girl living in North Carolina Product List
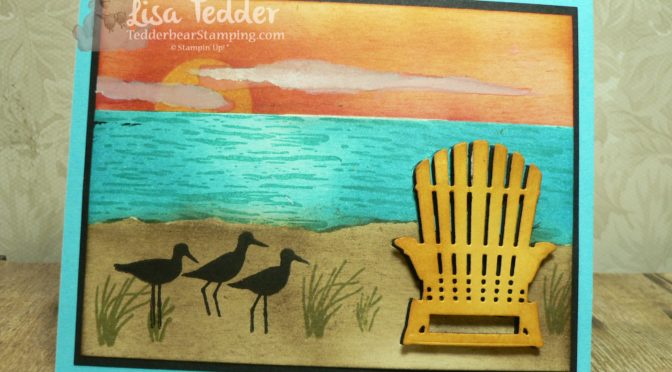
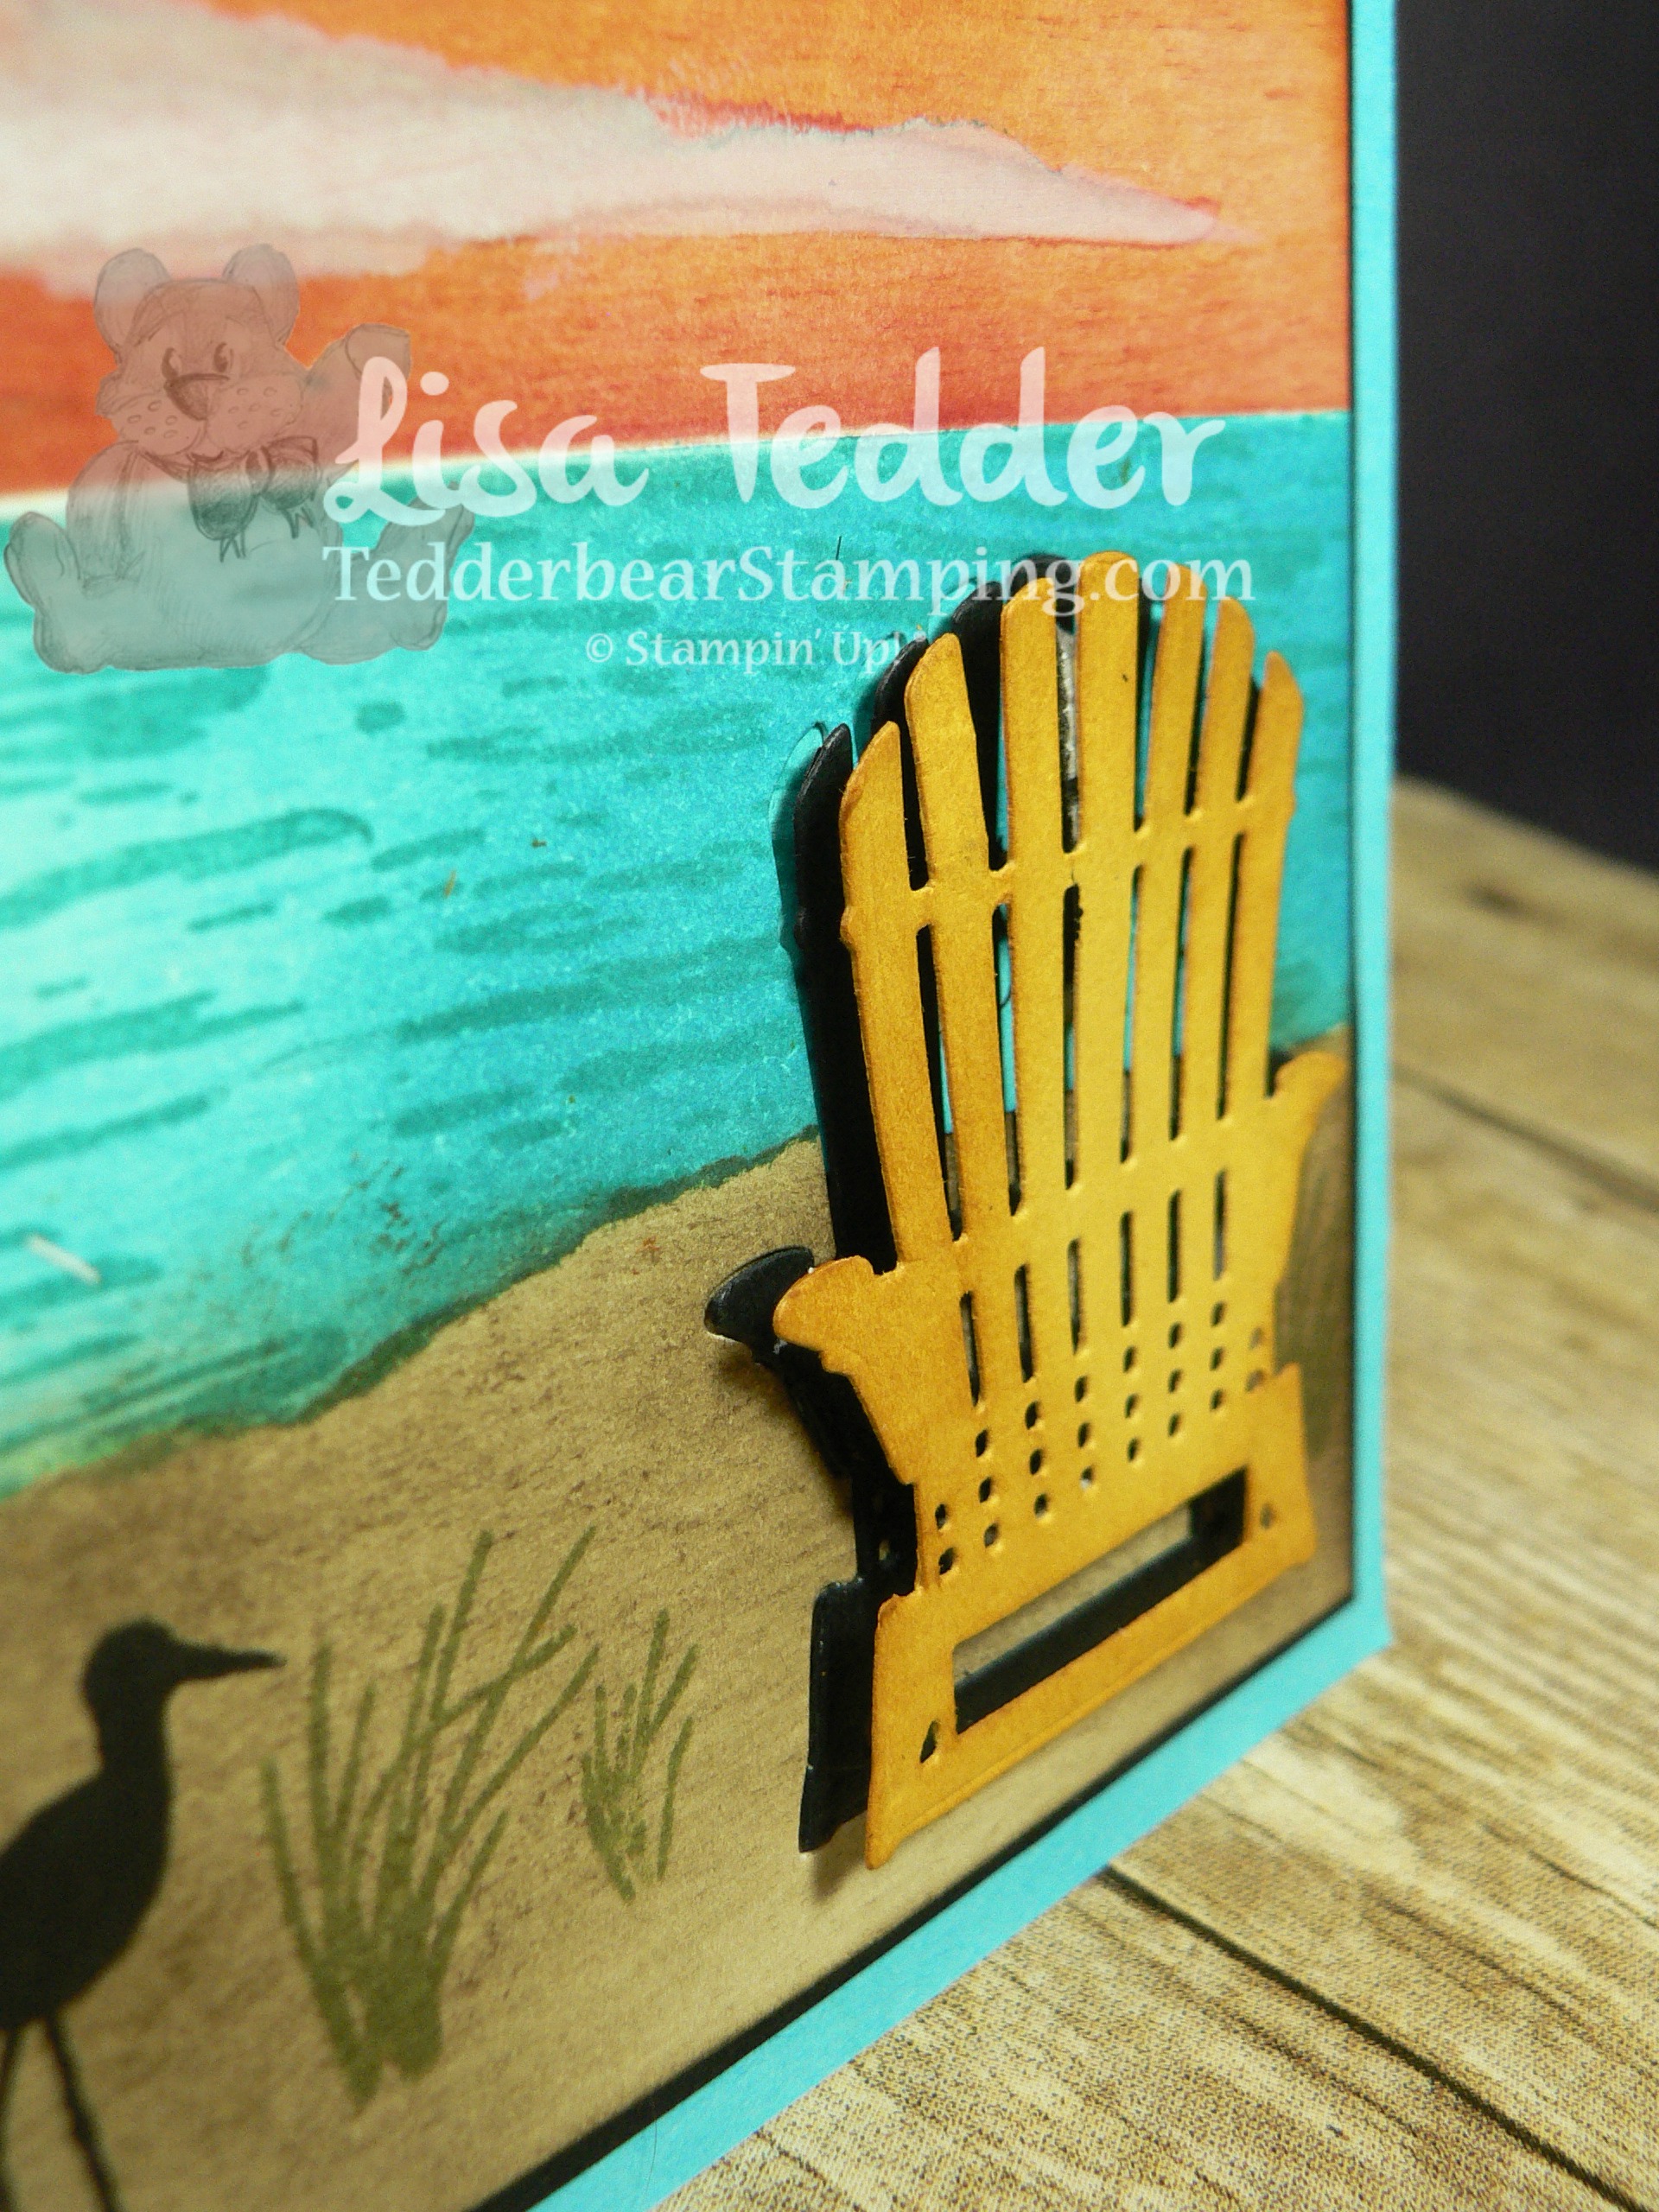
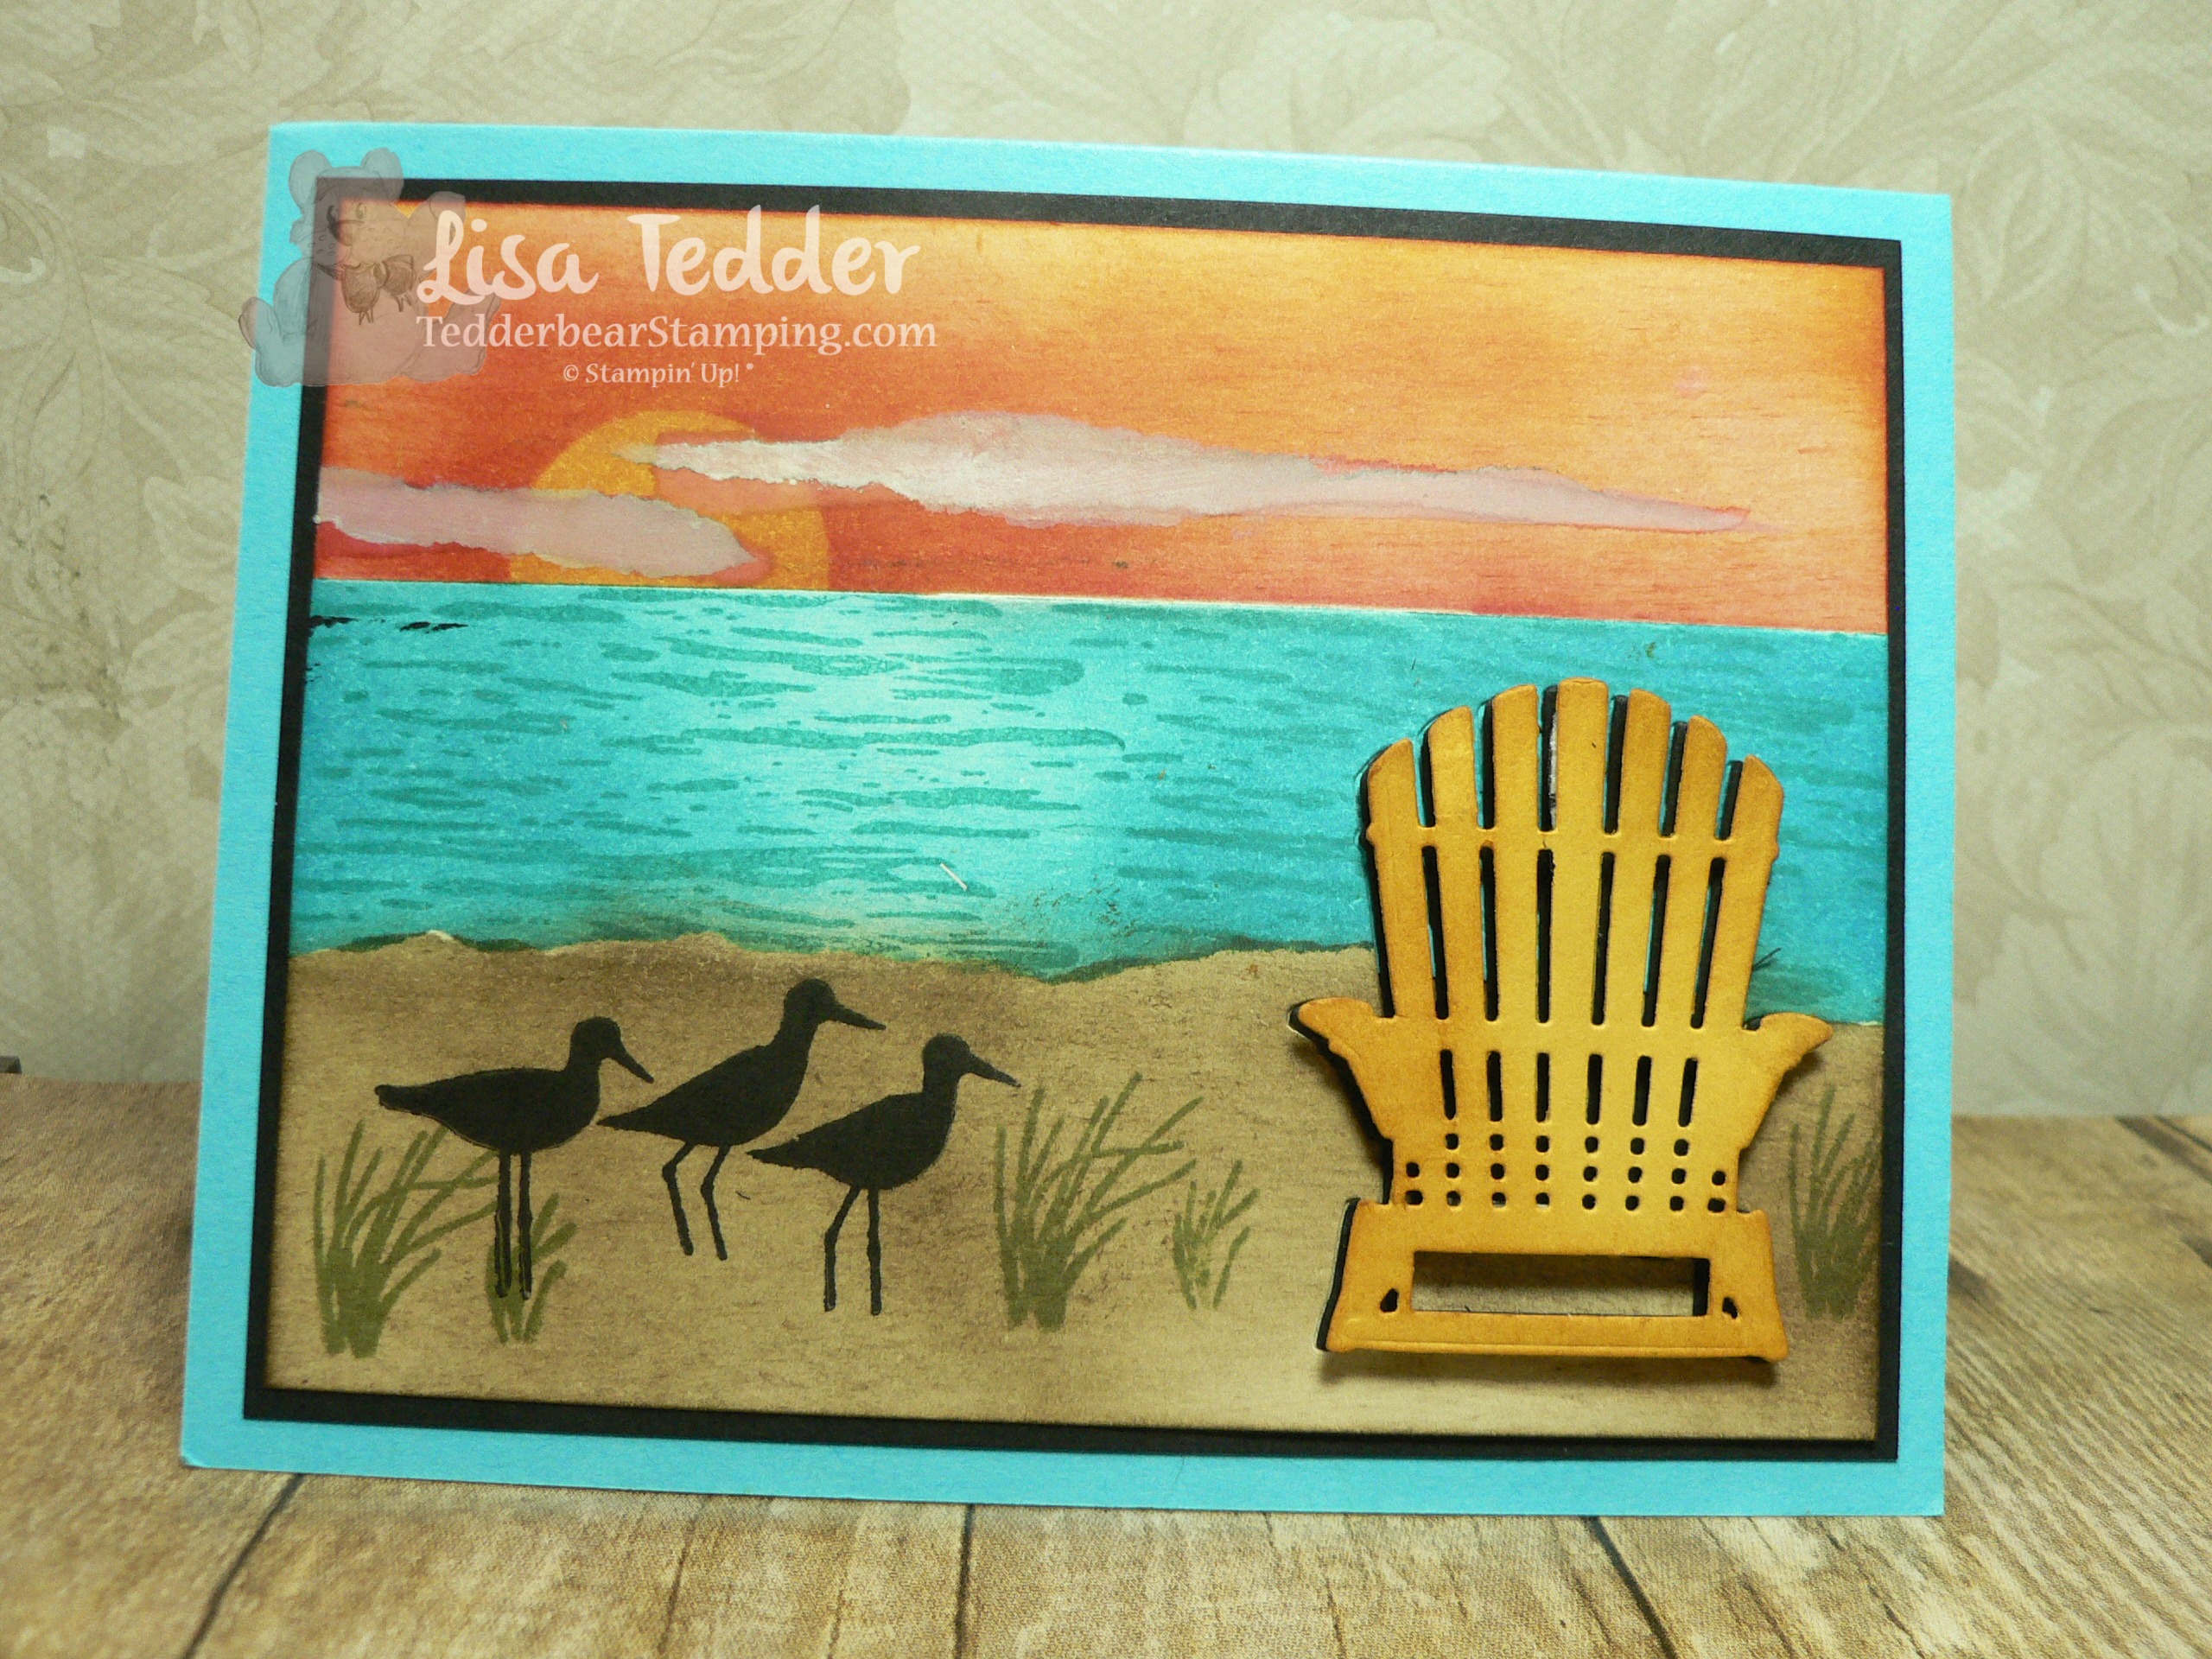
I see the ‘Ghosting’ Technique all over, and I wanted to do this with a Twist! I made a Beach landscape card, and wanted my chair to have a shadow, or ghosting effect, BUT I wanted to be able to see the water and sand behind the chair. The thinlit from SU!’s Seasonal Layers cuts the entire chair out, and that would leave a BIG hole in my beach scene! :-O Can’t have that!! So, I die cut out 2 images of the chair, one in Crushed Curry and one in Black. Plus, I had to die cut out the chair directly from my scene!
Once the card was made, I cut out the chair which left a BIG hole in my card, so I had to remake my background on scraps of Very Vanilla to match the colors that I already had on my card. This is much easier than you would think…….just sponge the colors you used onto Very Vanilla and stamp the waves for the water, tape them onto the back of your card. It’s that easy!! Then you will still have the outline to place a black chair, and it will be flat to the card, it looks just like a shadow!
As always the supplies are listed below, just click on ANY picture to be taken to my OnLine Store! IF you purchase from me using this Hostess code: WNUY3EBP, I will make YOU this card and mail it to you!
Be sure and subscribe to my YouTube channel so you won’t miss the next Technique Video!
I’m off for now!!
Lisa Tedder
TedderBearStamping
A California Girl living in North Carolina
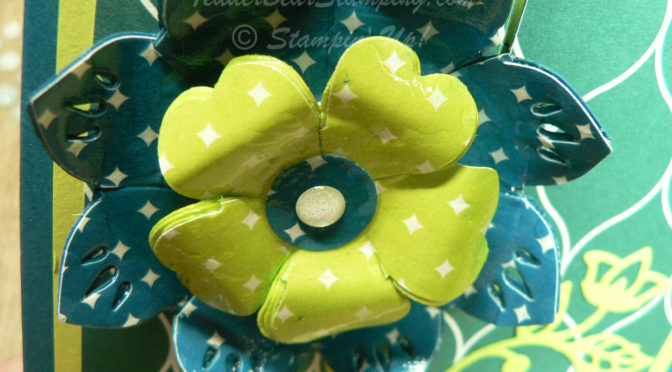
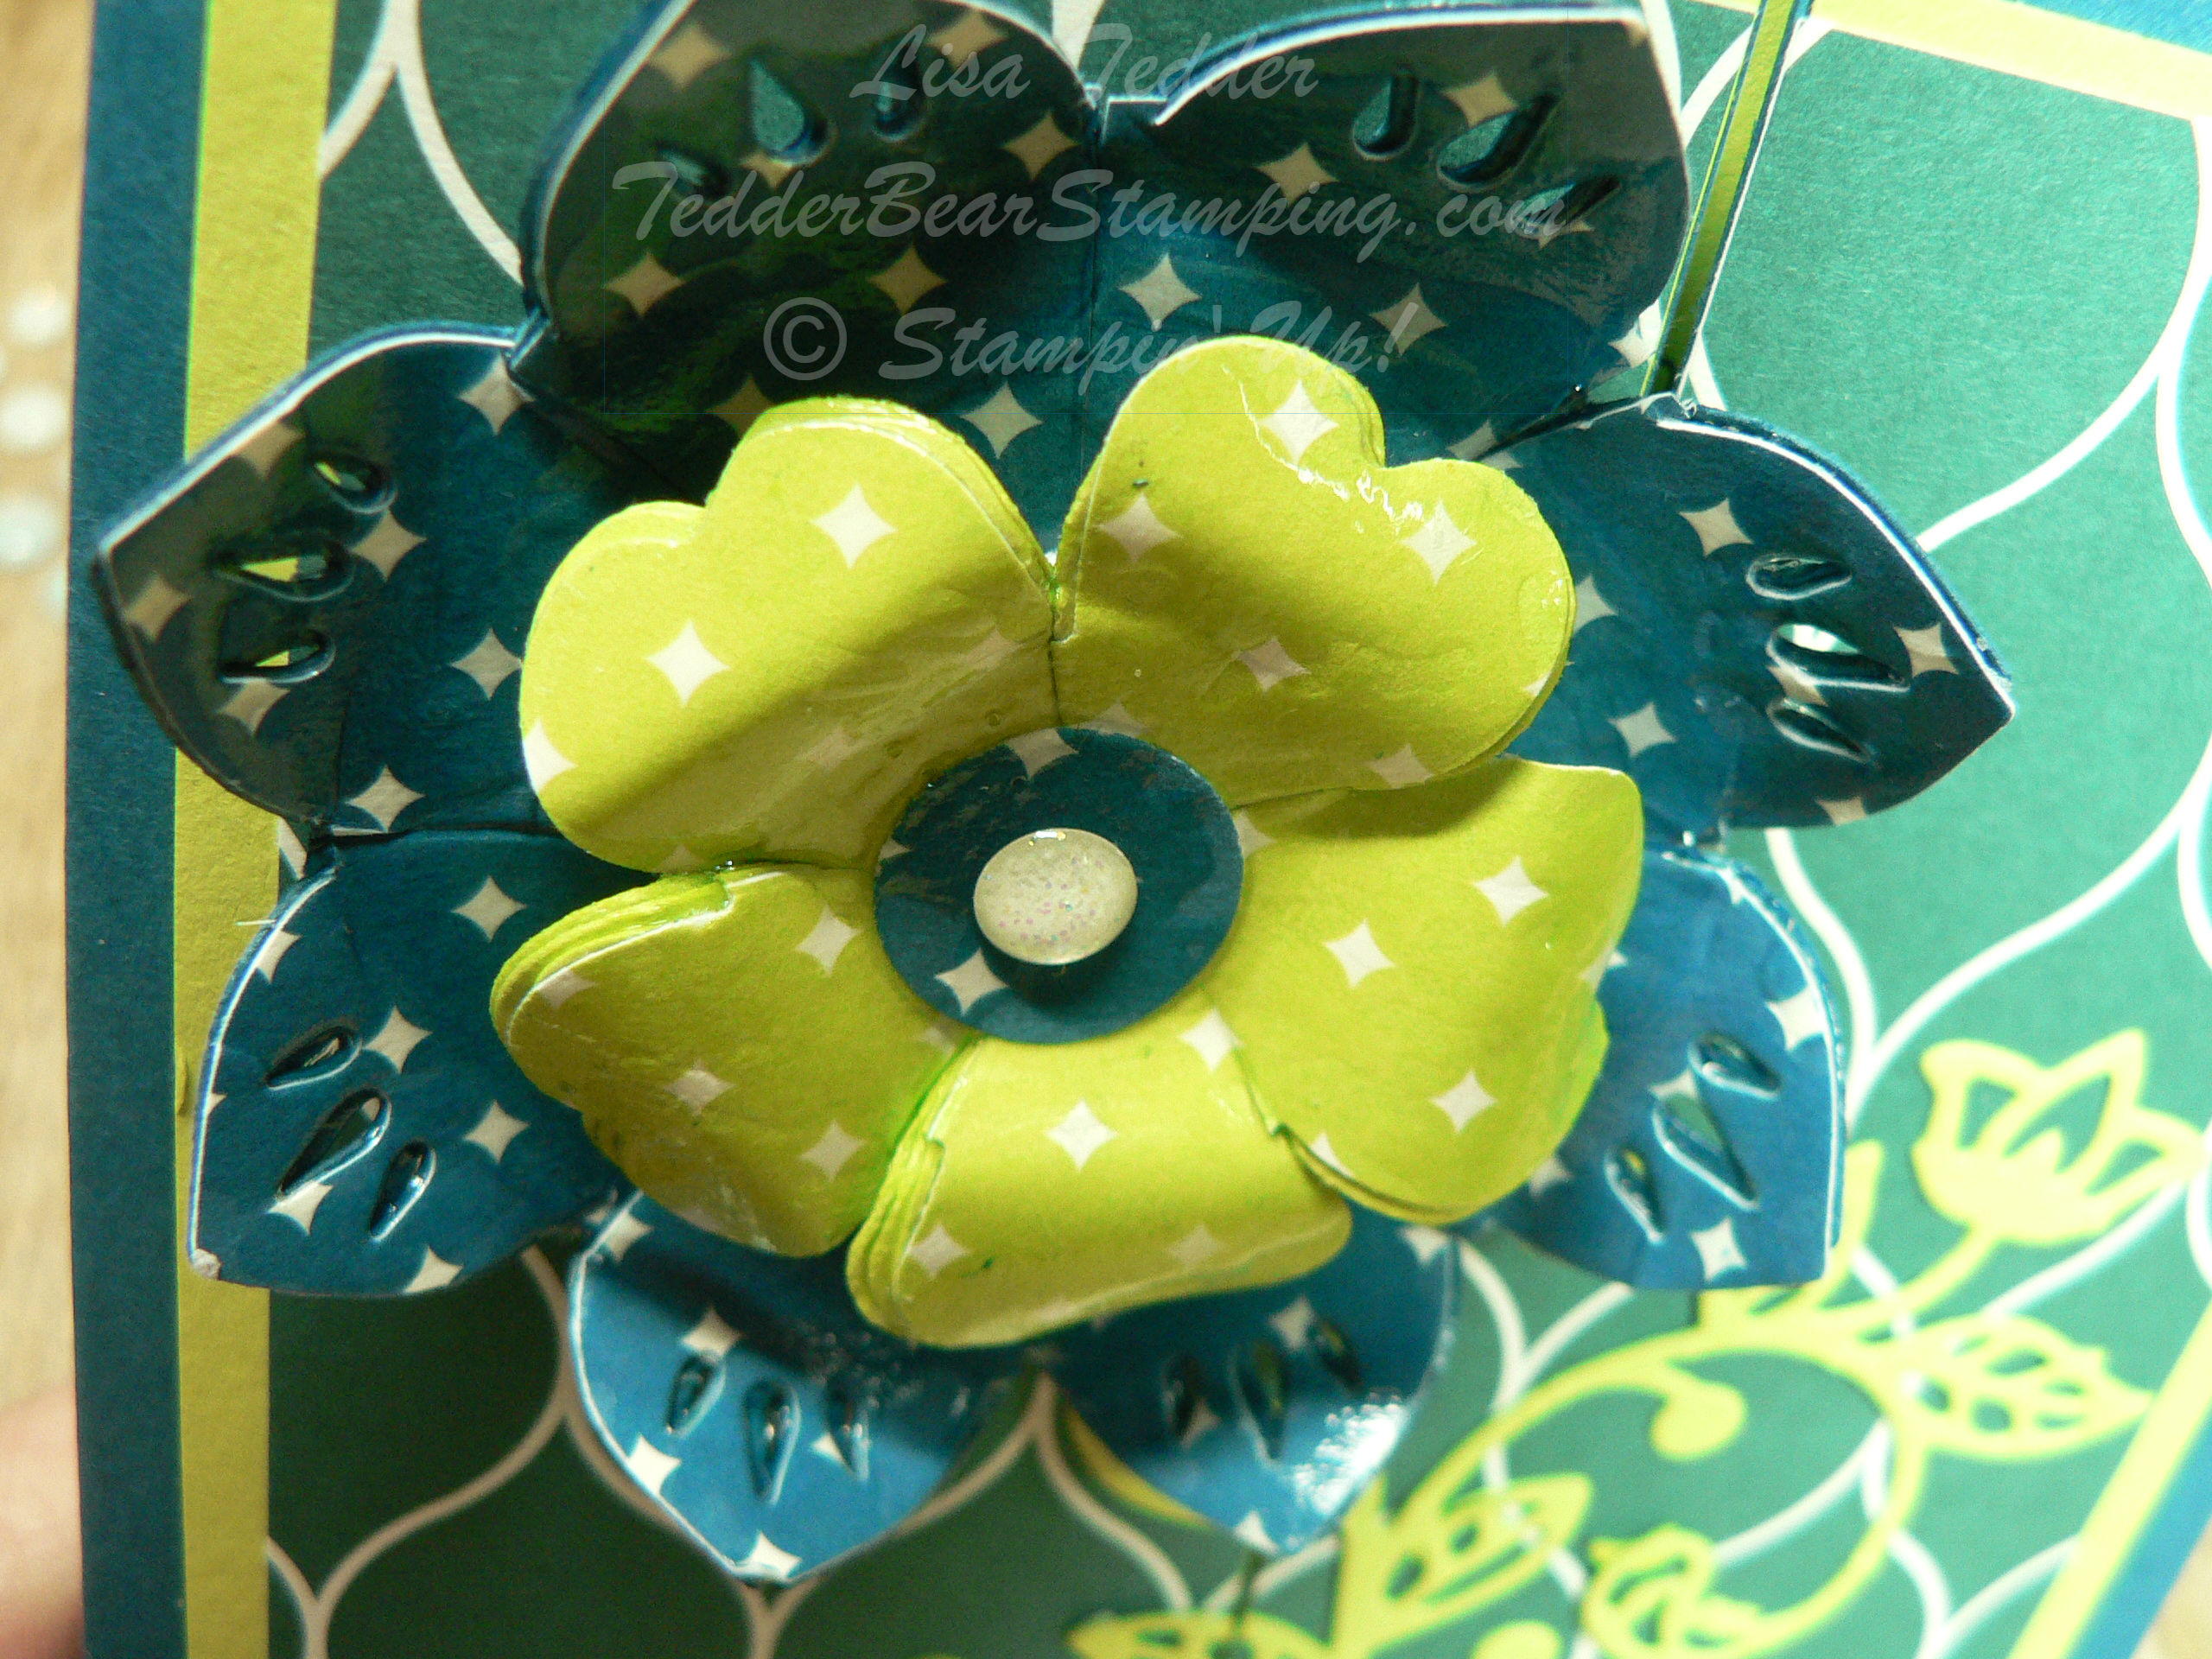
First, you will need to pick a shape you want to transform! I chose two, the Pansy Punch and the flower from Eastern Medallions Thinlits. I punched out 3-4 of each image with another one from DSP. I chose the Eastern Palace since it was so pretty.
Take your Silicone Craft Sheet, a foam brush, Mod Podge and your cut outs. Starting with the colored images, not your one cut from the DSP, spread a thin layer of ModPodge over entire surface with your Foam brush. Then lay another layer of the image on top of that and repeat. You will do this 3 – 4 times ending with the one you cut out of the DSP (do not put ModPodge on top). Then you can cut into all layers if you want to manipulate the paper more than the design allows. Keep working at it until you are happy with the shape. Once done, you will spread Fine Tip Glue over entire surface, set aside to dry.
When dry, put your two pieces together as shown:
This is already attached to my card, but this gives you a close-up of what it looks like when dry.
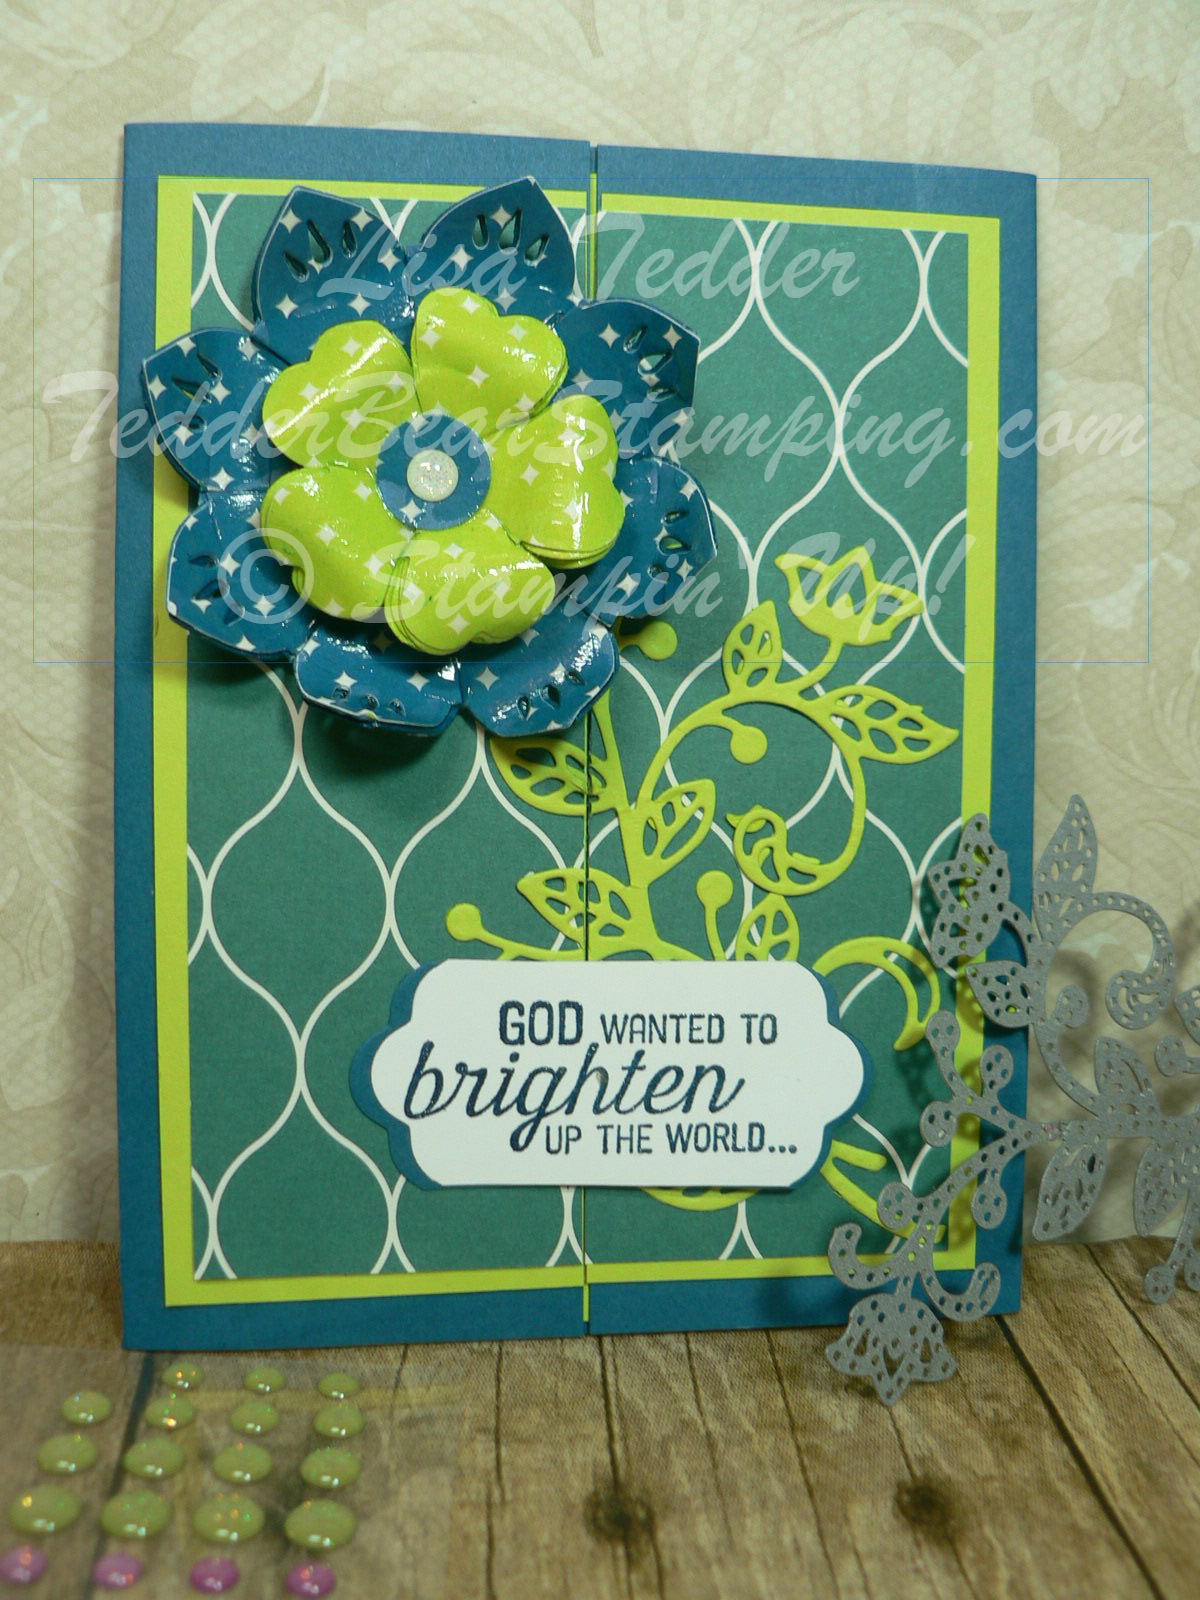
Here is a picture of the closed card:
In the video I show you how to apply the Flourish Thinlits and how to adhere it to the card!
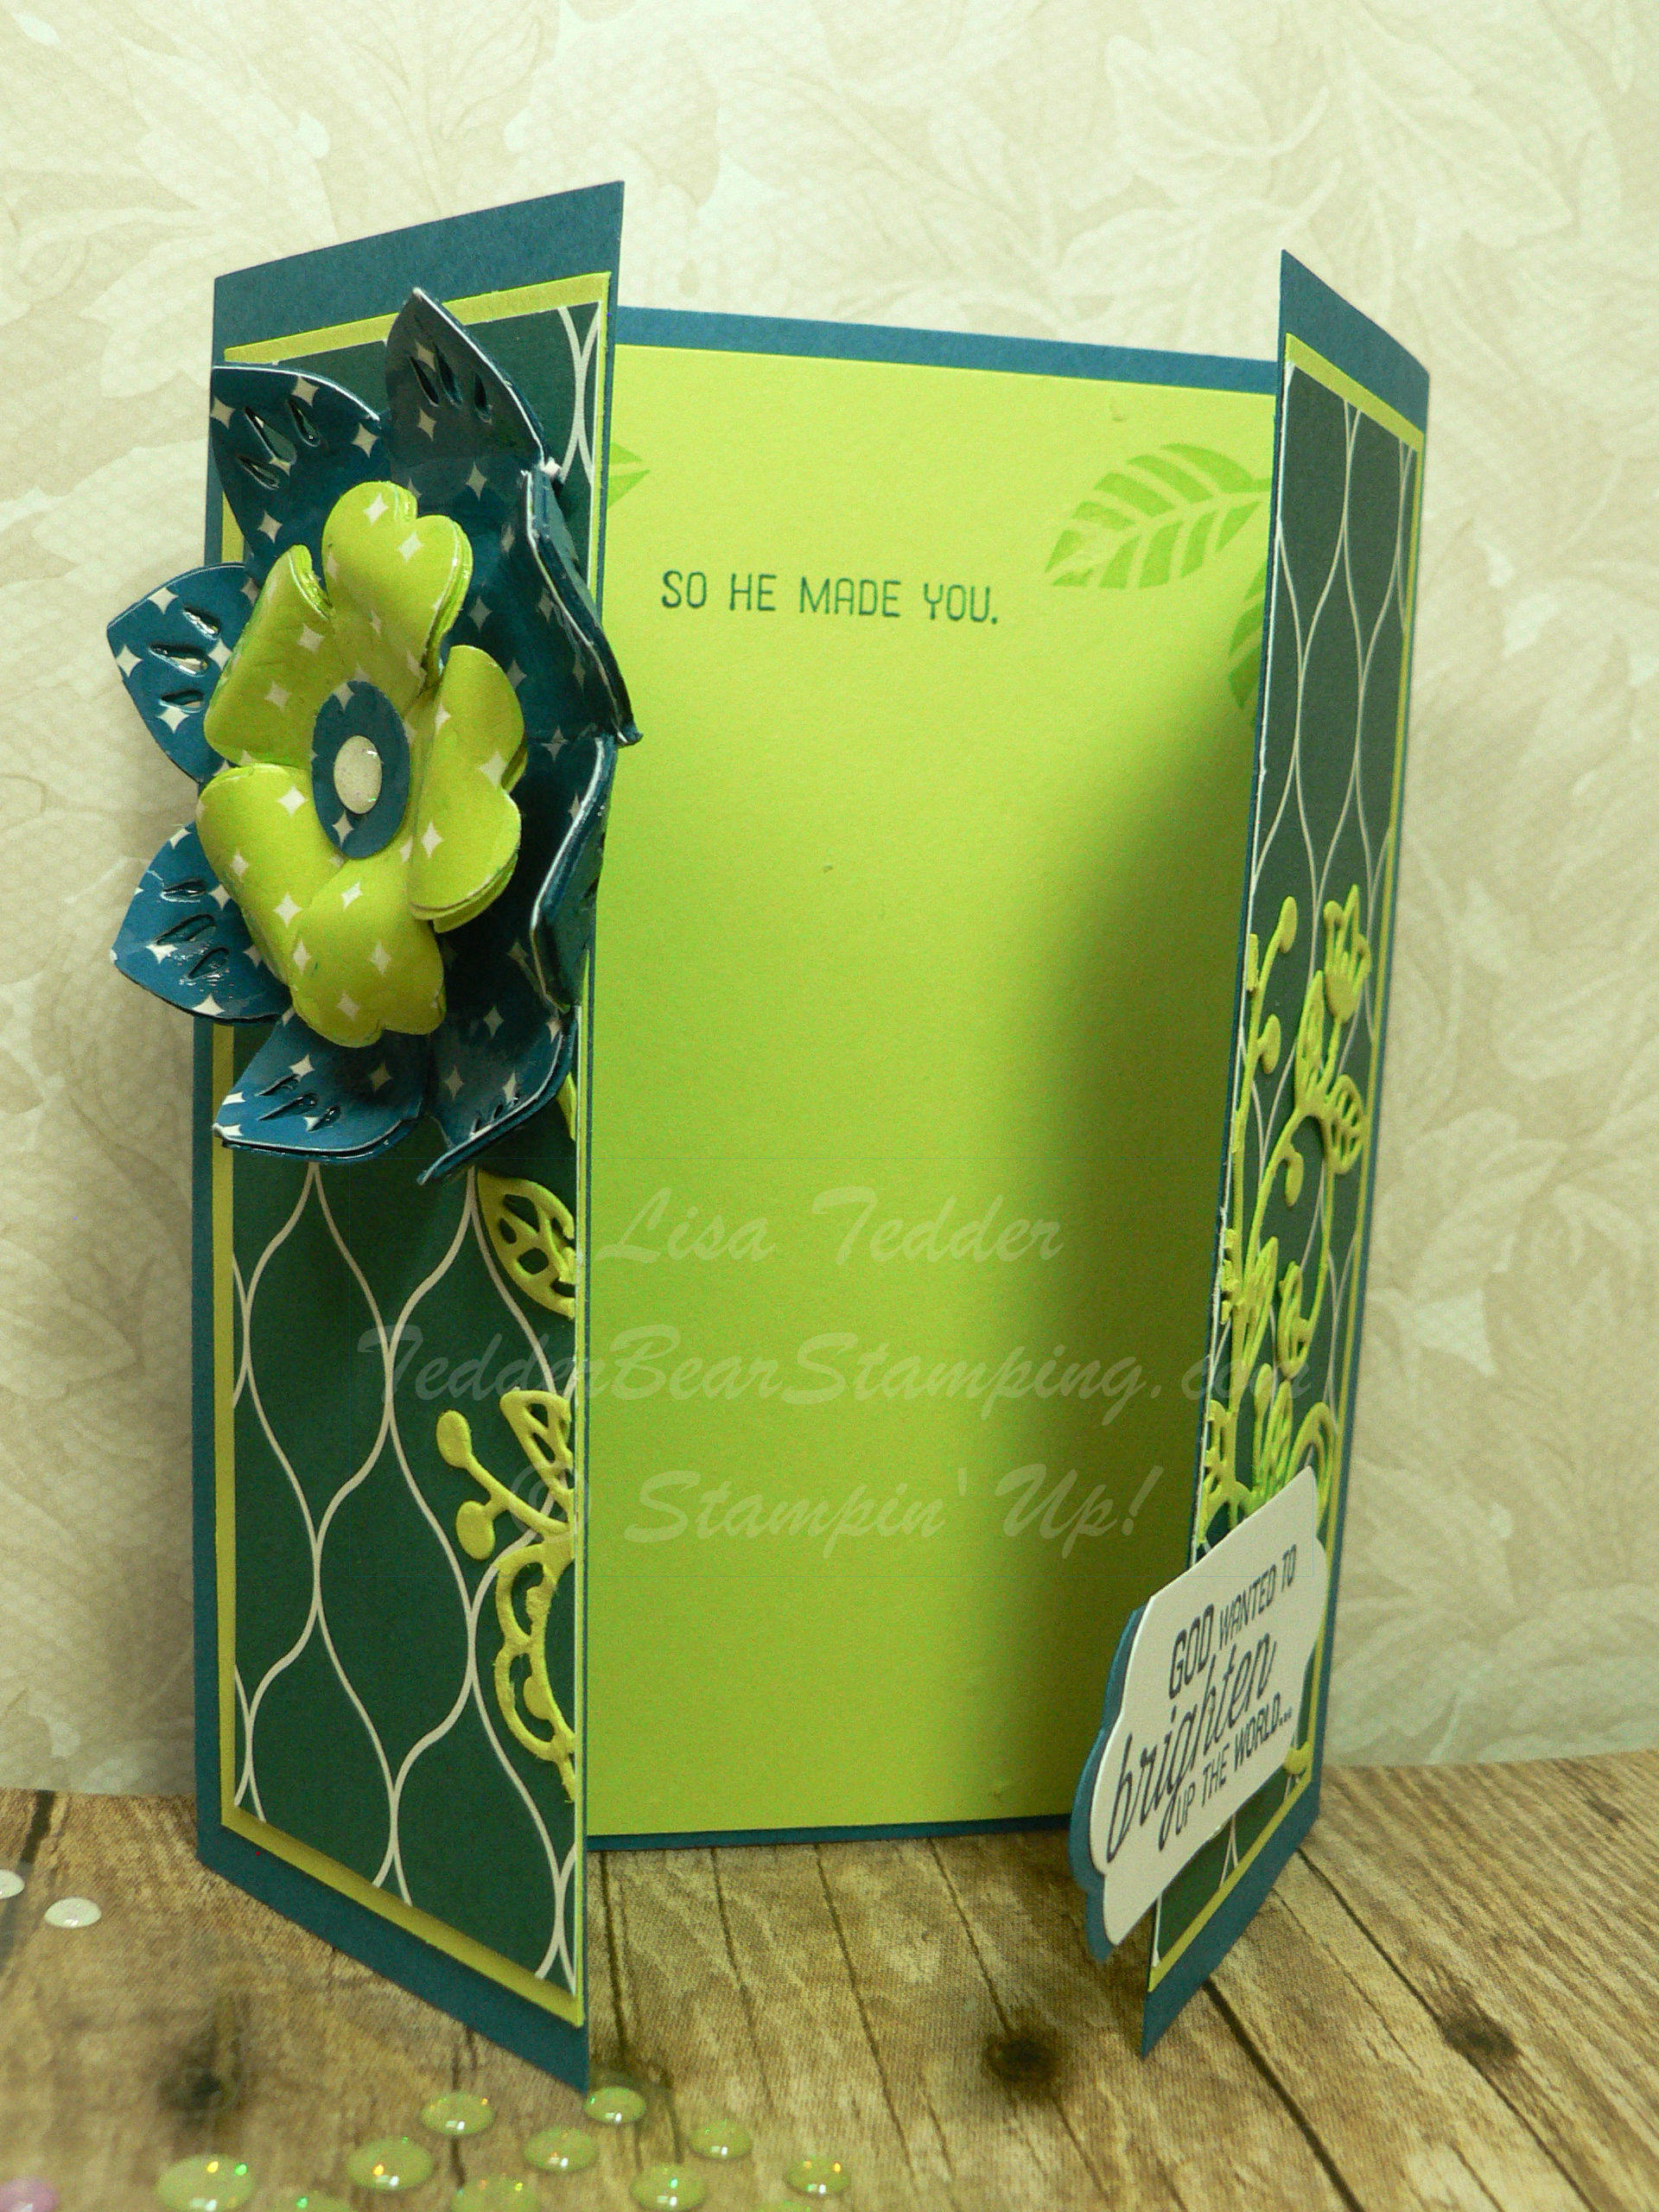
This is a Fancy Fold card, here it is open:
If you wanted, you could attach the flower on front with a Pin, and then mail it to someone who loves to wear brooches, or use it for a headband! I have done in the past a 3d Rose, and that was gorgeous!
Please subscribe to my YouTube channel to be informed when a New Technique video is ready! Tuesday is the day I chose, since Technique Tuesday has a certain ring to it, don’t you think?
And don’t forget to subscribe to my blog so you won’t miss out on anything here.
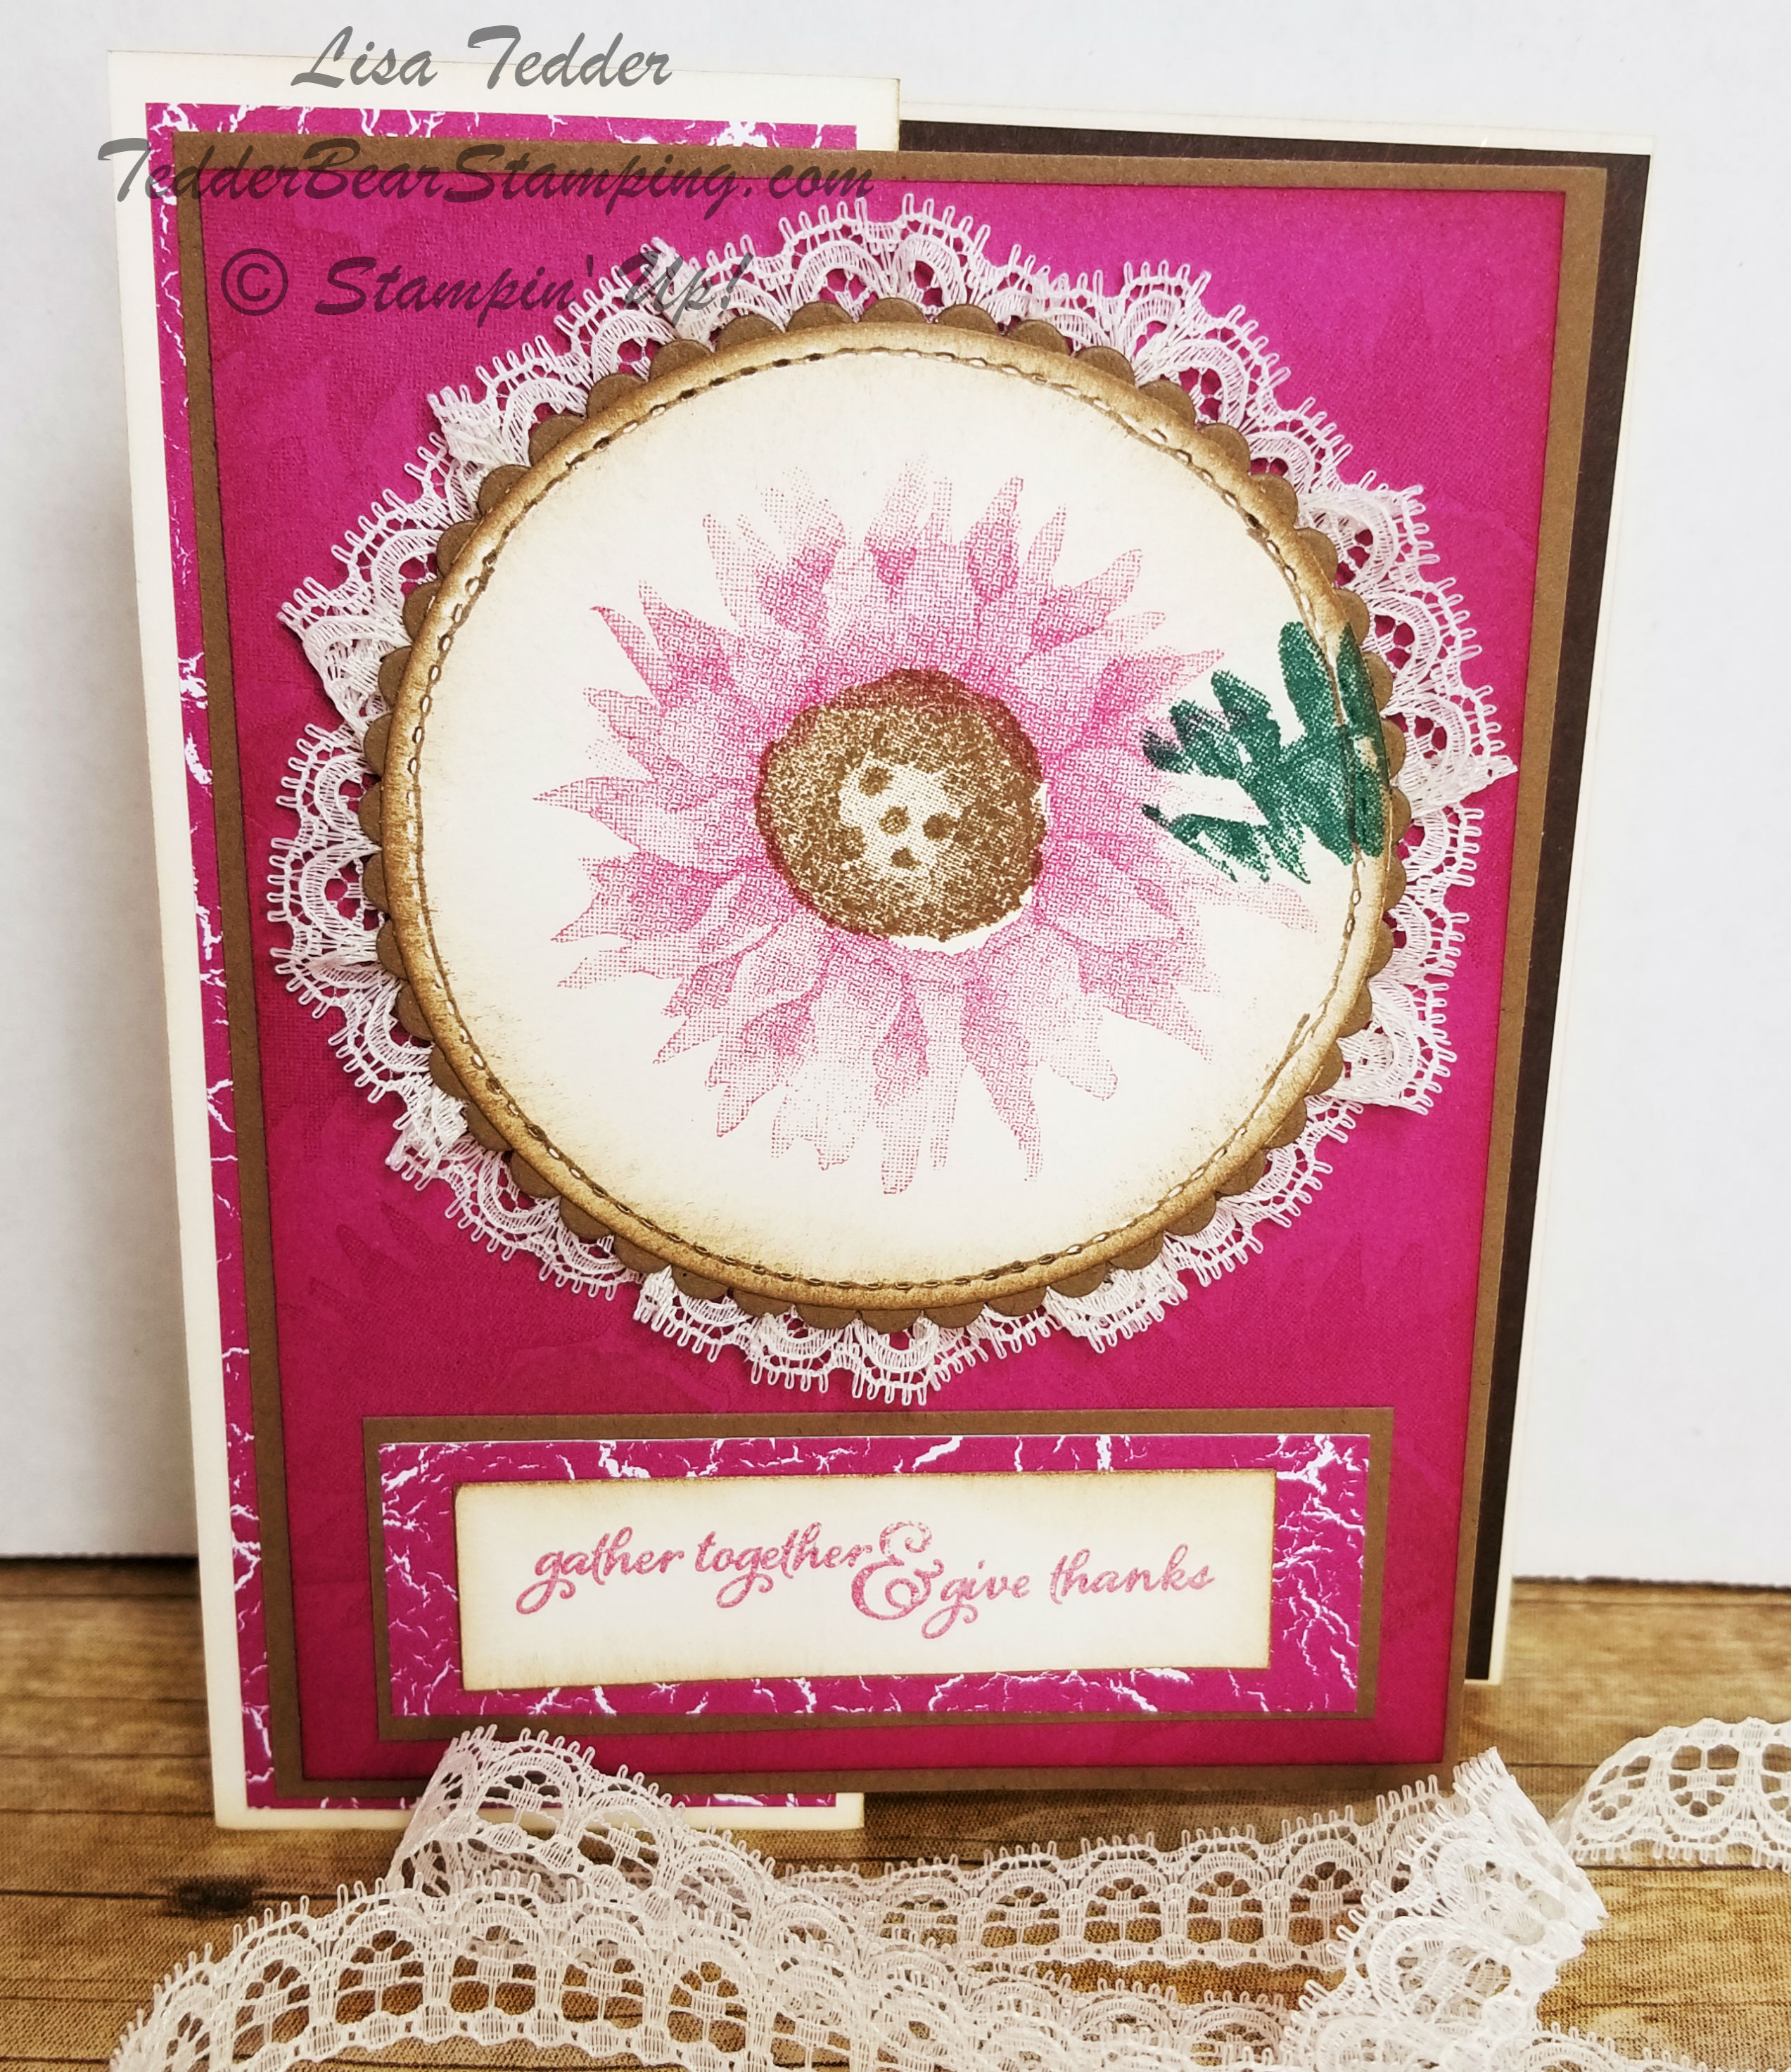
TOMORROW I have the drawing for this card:
Today is your last chance to either leave me a message on here, or on my YouTube page, if you click on that link you will be taken to the video where I made this card. You will be AMAZED how much MORE prettier this card is in person!
I am off for now, until next time!! As always I will have the list of the supplies used (below) for the card today, just click on any of the pictures to be taken to my OnLine Store!
Lisa Tedder
TedderBearStamping
A California Girl living in North Carolina
You just came from Laurie Meier’s blog, she’s great isn’t she? I am Thankful for Melissa Kerman for giving me inspiration!
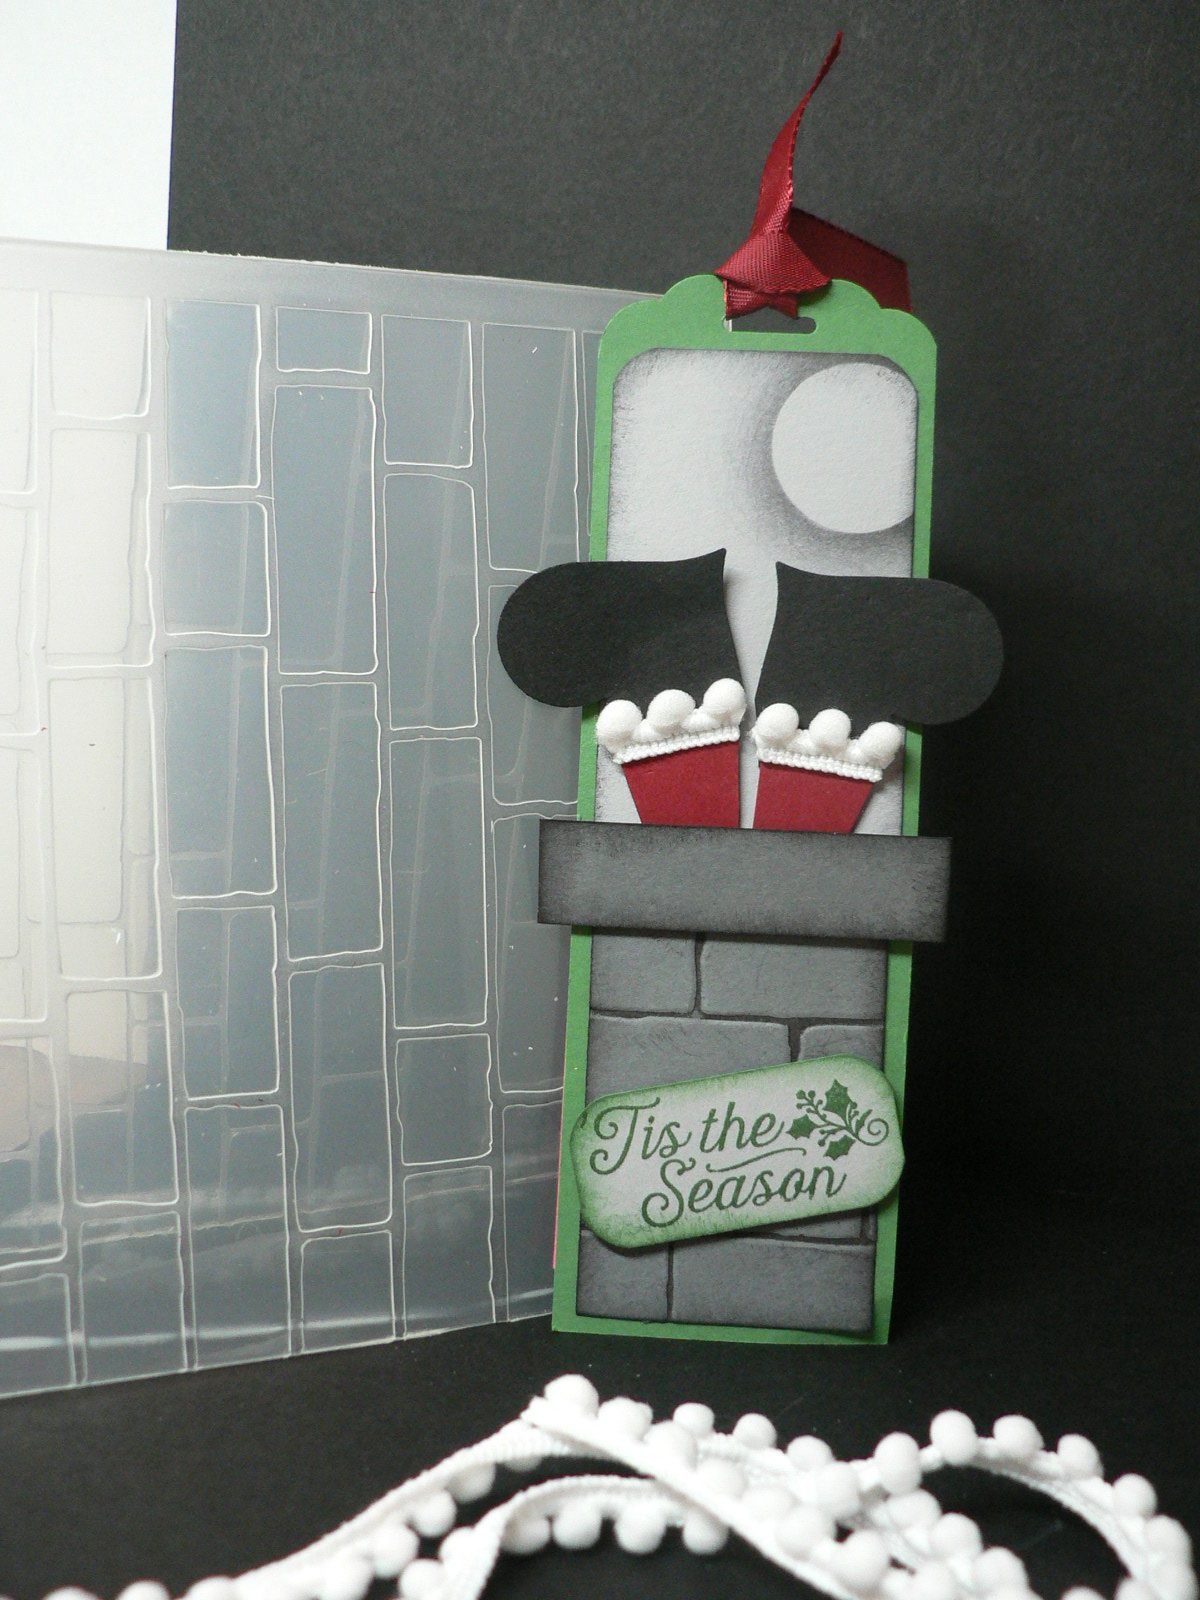
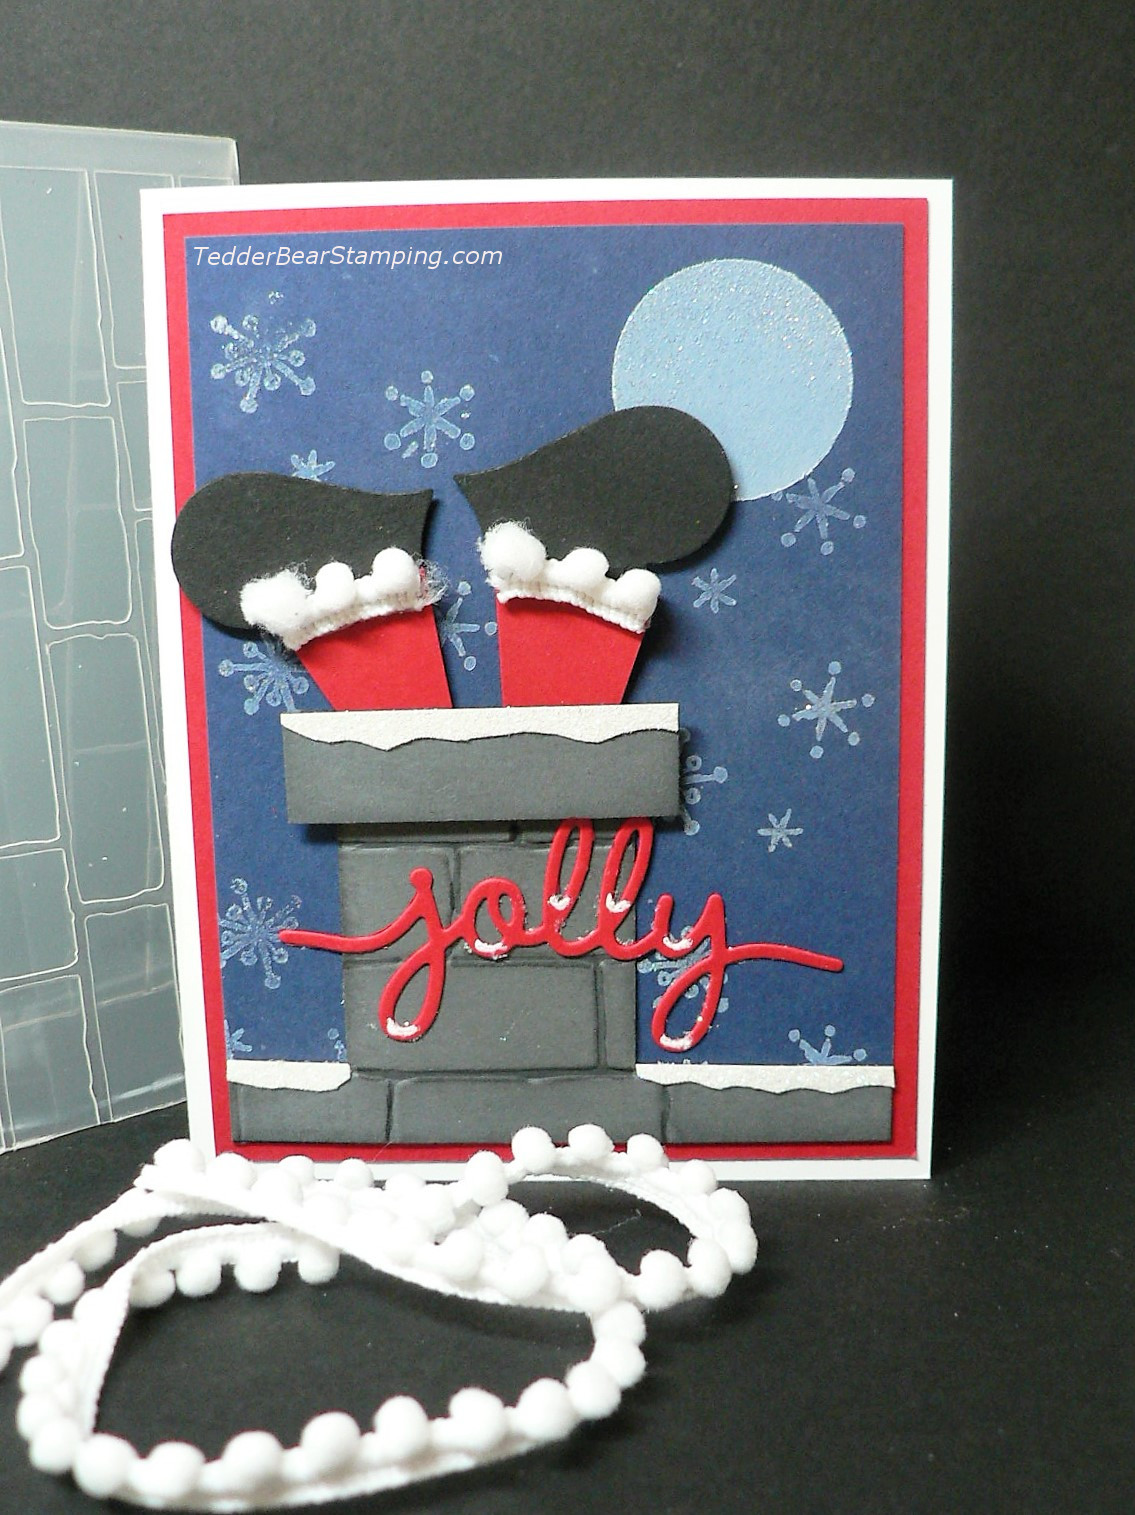
I got this idea from her at our NC Demo Quarterly (see below for details). We had a tag swap, which stupidly I didn’t join. :-/ Live and learn, right? Well, she made this awesome tag with Santa’s legs coming out of the chimney. Here is a picture of it:
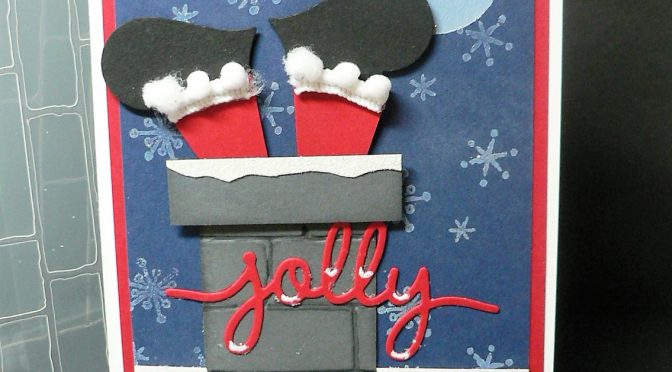
I wanted to make a card from the tag, and this is what I came up with:
I used the Heart punch (which I didn’t know Melissa used, until I really looked at the boots, and was AMAZED!) and she free cut the pants, so I did that too. The Chimney I changed up some, I added some roof so I could put ‘snow’ on the edges. I used the Dazzling Diamonds Glitter Paper and cut thin wavy strips to give the snow effect. I stamped the background with the Snowflake stamp from the Stampin’ Up! set called Snow Place. The Jolly is a framelit from Christmas Greetings. LOVE how I used a white gel pen to put ‘snow’ on the word, then sprinkled some Dazzling Diamonds on top. In person this card looks so sparkly and pretty!!
The ribbon is the Whisper White Mini PomPom Trim! Even though this is all Christmas I got everything out of the current SU! catalog!
This is a list of everything I used:
Stamp sets: Snow Place #139738
Inks:
Whisper White #101731
Paper:
Night of Navy 5″ X 3 3/4″
Real Red 5 1/4″ X 4″ and scraps
Whisper White 8 1/2″ X 5 1/2″
Basic Gray 3 3/4″ X 5″ (I ran this through the Embossing Folder and got 2 chimneys out of one piece of paper, you have to go from each side seperately)
Basic Black Scraps
Accessories:
1 1/4″ circle punch
Whisper White Mini PomPom Trim
Dazzling Diamonds
Dazzling Diamond Glitter Paper
Heart Punch
Brick Wall Embossing folder
Christmas Greetings thinlits
Sponges
Big Shot
Precision Base Plate
NC Demos is a group in North Carolina that gets together all over the state and we have ‘meetings’. Really it’s a great get together where ideas are shared and we stamp ALL DAY!! We learn a lot from each other and go home energized to play/work!
It’s great to meet other stampers, especially close to home!
If you live in North Carolina you can be a member too, as long as you are a Stampin’ Up! Demonstrator! If you have any more questions, please feel free to ask! We really are a GREAT group!!
I hope you like my Blog Hop Post! For some reason, my blog hop button isn’t working, so click on the next name below!!