Tag Archives: craft

Easy Way to Make a Vintage Card, Plus Blog Candy Winner

I saw on Pinterest a card using the rubber stamp set from Stampin’ Up! called In This World.  I had bought this set because I love anything Vintage and this called to me!

I changed it up so much that I went back to see hers and it was nothing like what mine turned out as!  Has that happened to you? You can find her YouTube video here  It’s very pretty, but not the way I went with mine.  I followed some of her ideas, but that’s as far as I got!
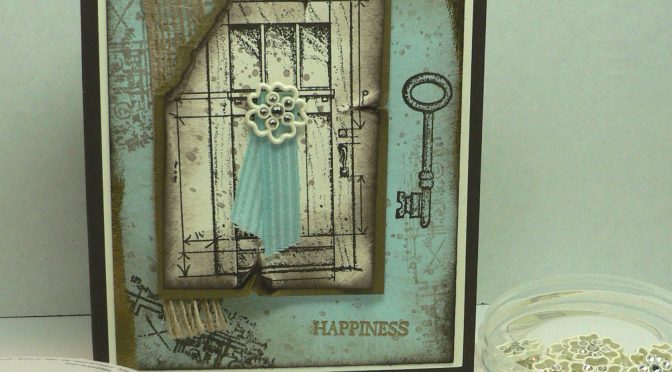
Here is my version:  


What do you think?  It needed a ‘spot’ of color, so I added the ribbon and the Falling In Love Trinket.  This picture has the Burlap ribbon in it, going along the side.  I ran out (I’m making swaps for my Savannah OnStage event!!) so I just went without for the rest of the swaps.

Here is the other version:  

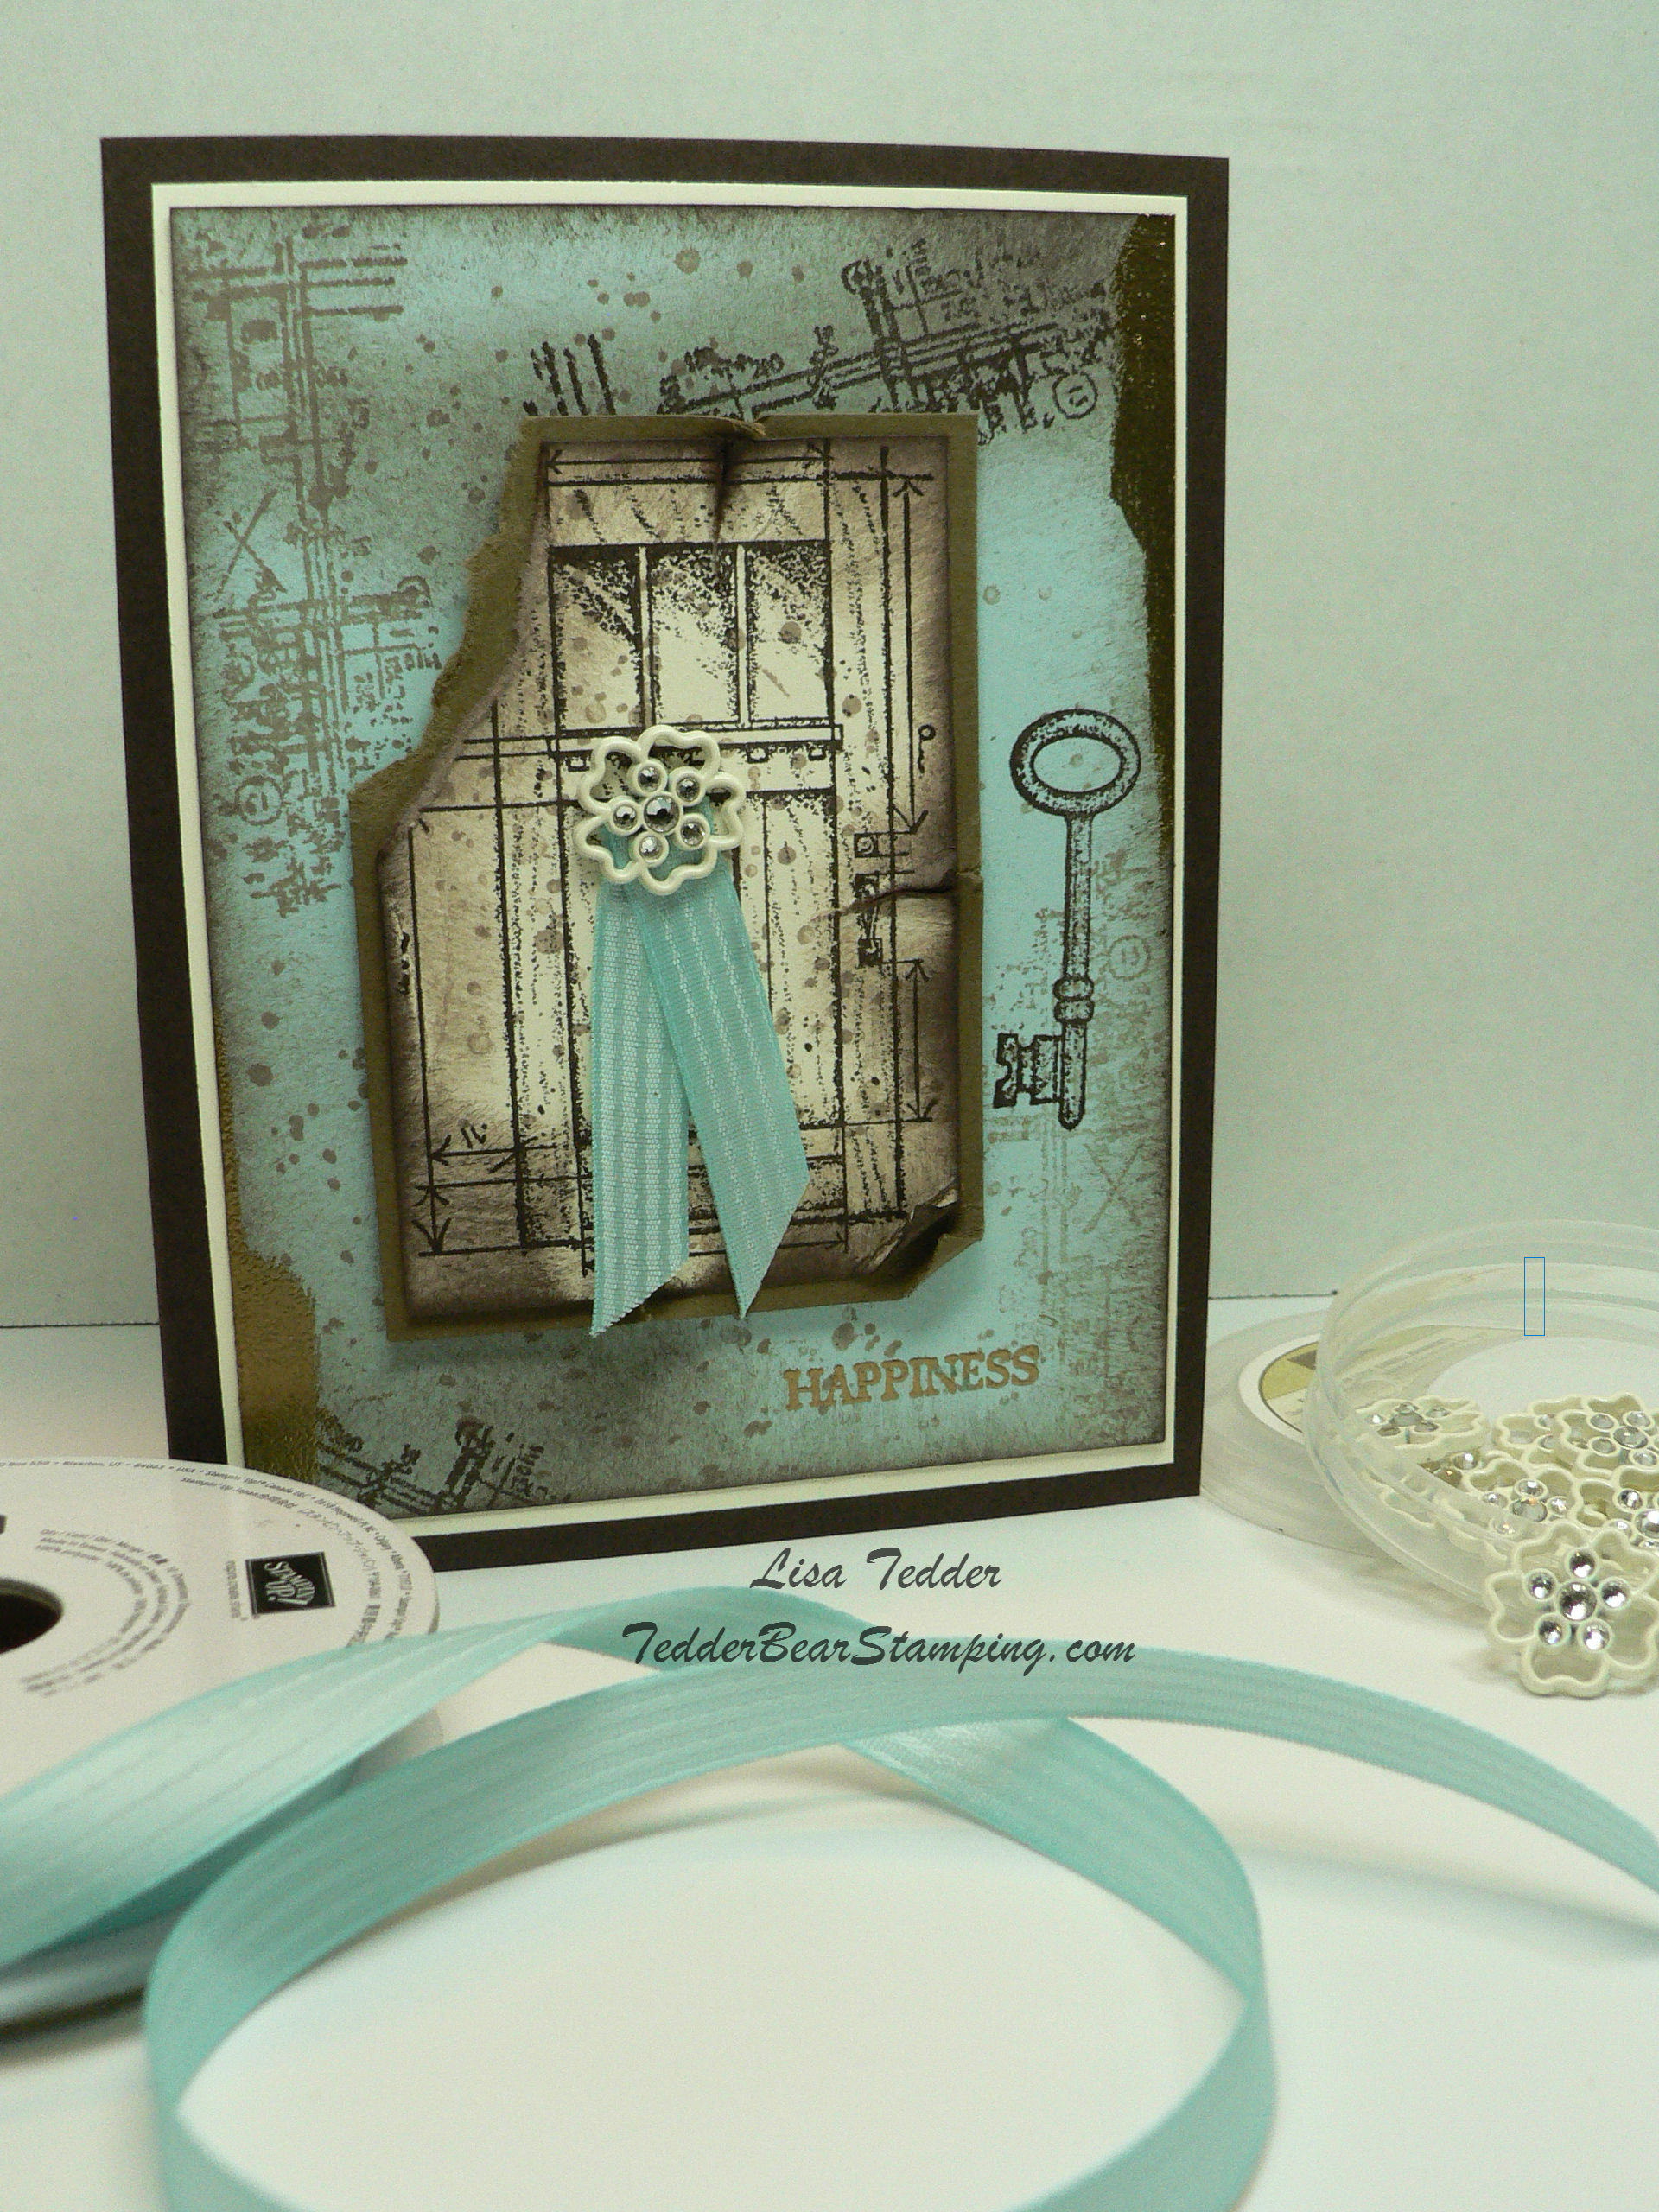
I used VersaMark on the sides of BOTH swaps and added Gold Embossing Powder.  Plus added it to the Sentiment to make it stand out.

Here is a close-up of the treatment on the Soft Sky:  

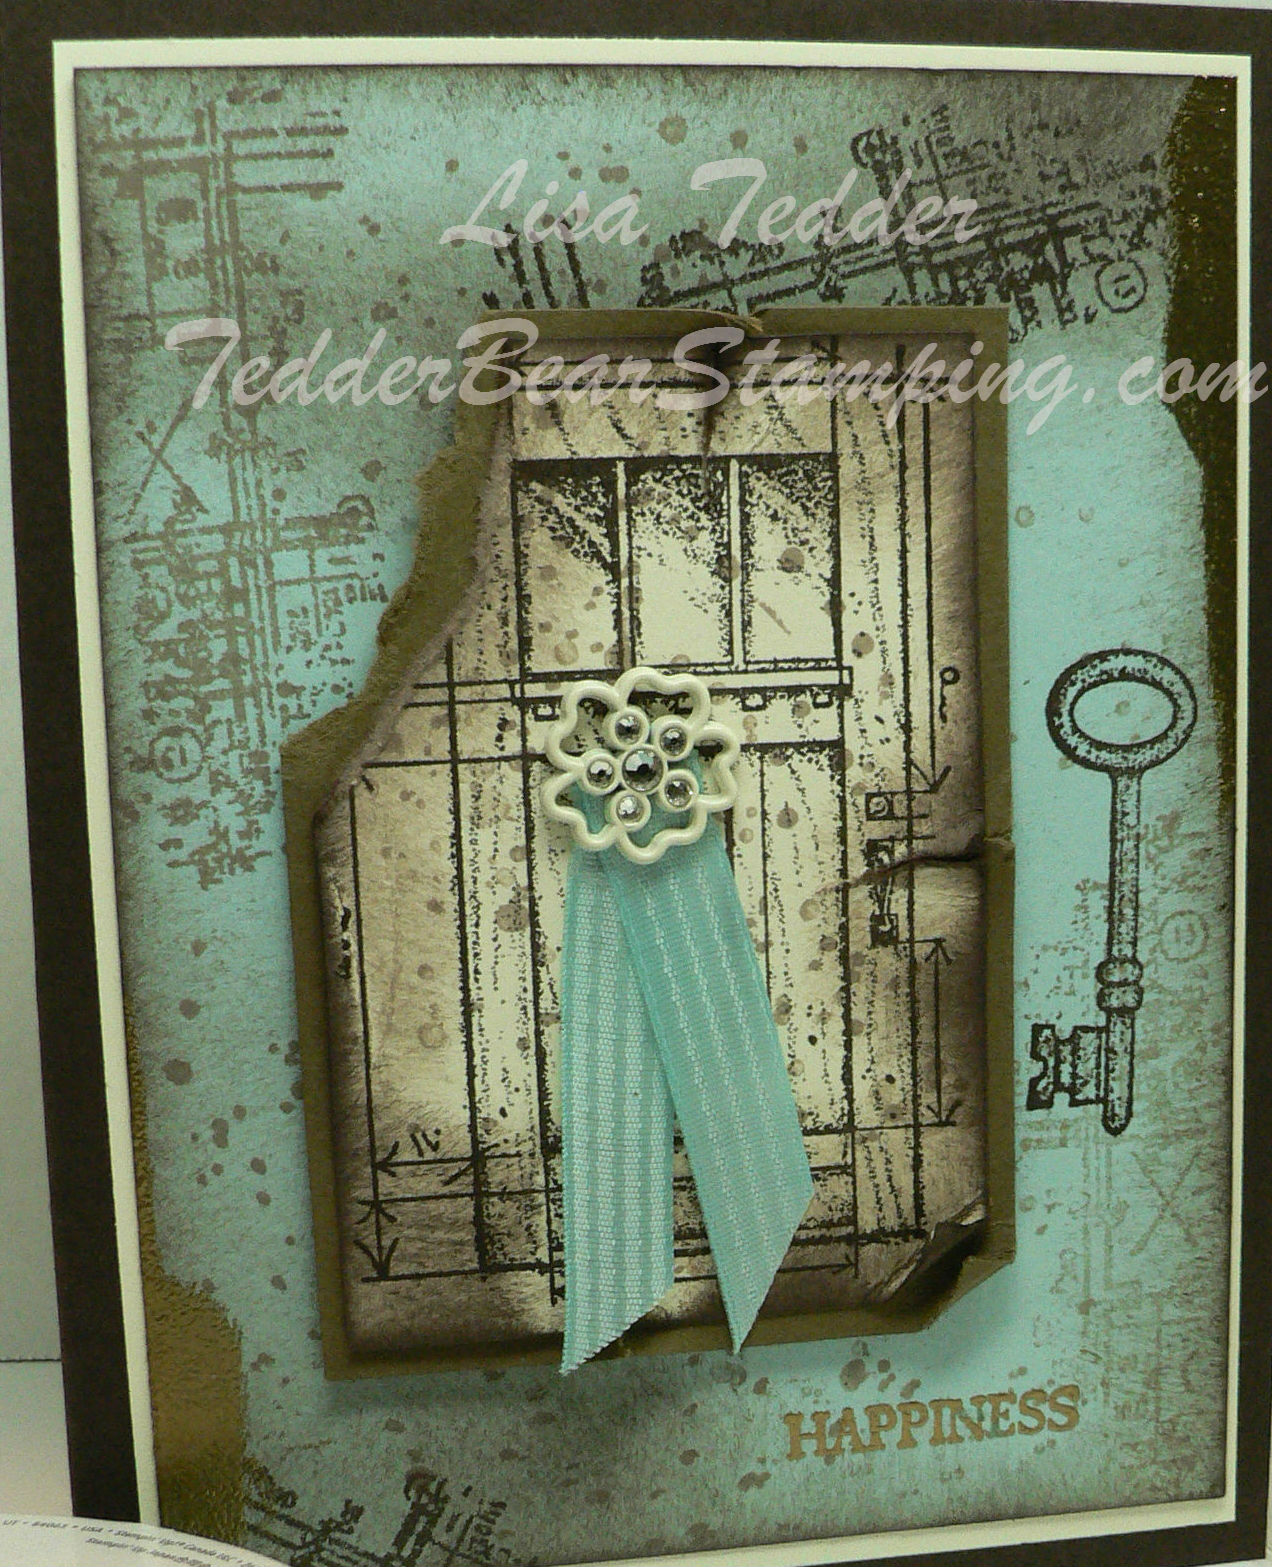
I used almost every Stamp in this set!  The only one I didn’t use is the chair.  And I LOVE the chair, so I will have to come up with something to use that the next time!

I used the stamp from the In This World that has the long strip of dimensions?  I have a question mark there because I’m not sure what to call it!  Do you know?  I stamped that image in Crumb Cake on the top left and bottom right. Then stamped again, along top and bottom left using Early Espresso ink.  I stamped the one on the right bottom once on a scrap and then on the page, so the key will show up.  That is stamped in Early Espresso too!  I then stamped the blotchy stamp (that’s what I call it!) from the Stamp set Gorgeous Grunge using the Crumb Cake all over the card, stamping off every other time.  I then sponged it with Crumb Cake on ALL sides, sponging really well so it went towards the center.  Then sponged SOFTLY using the Early Espresso ink.  Just to give it a dark outer edge.

I stamped the door on Very Vanilla (it doesn’t look like it does it!), that shows how much I sponged it!  I used Early Espresso for the Door, and Crumb Cake for the sponging.  But first I distressed the edges by ripping, bending and tearing , I tore off the corner.  You have to make sure you do the distressing first, and THEN sponge.  This way the edges that bend over are sponged on both sides.  My shoulders were HURTING by the end of this, and I only made 30 cards!  I usually make a LOT more, but I’m glad I didn’t this time!

Here is the inside: 

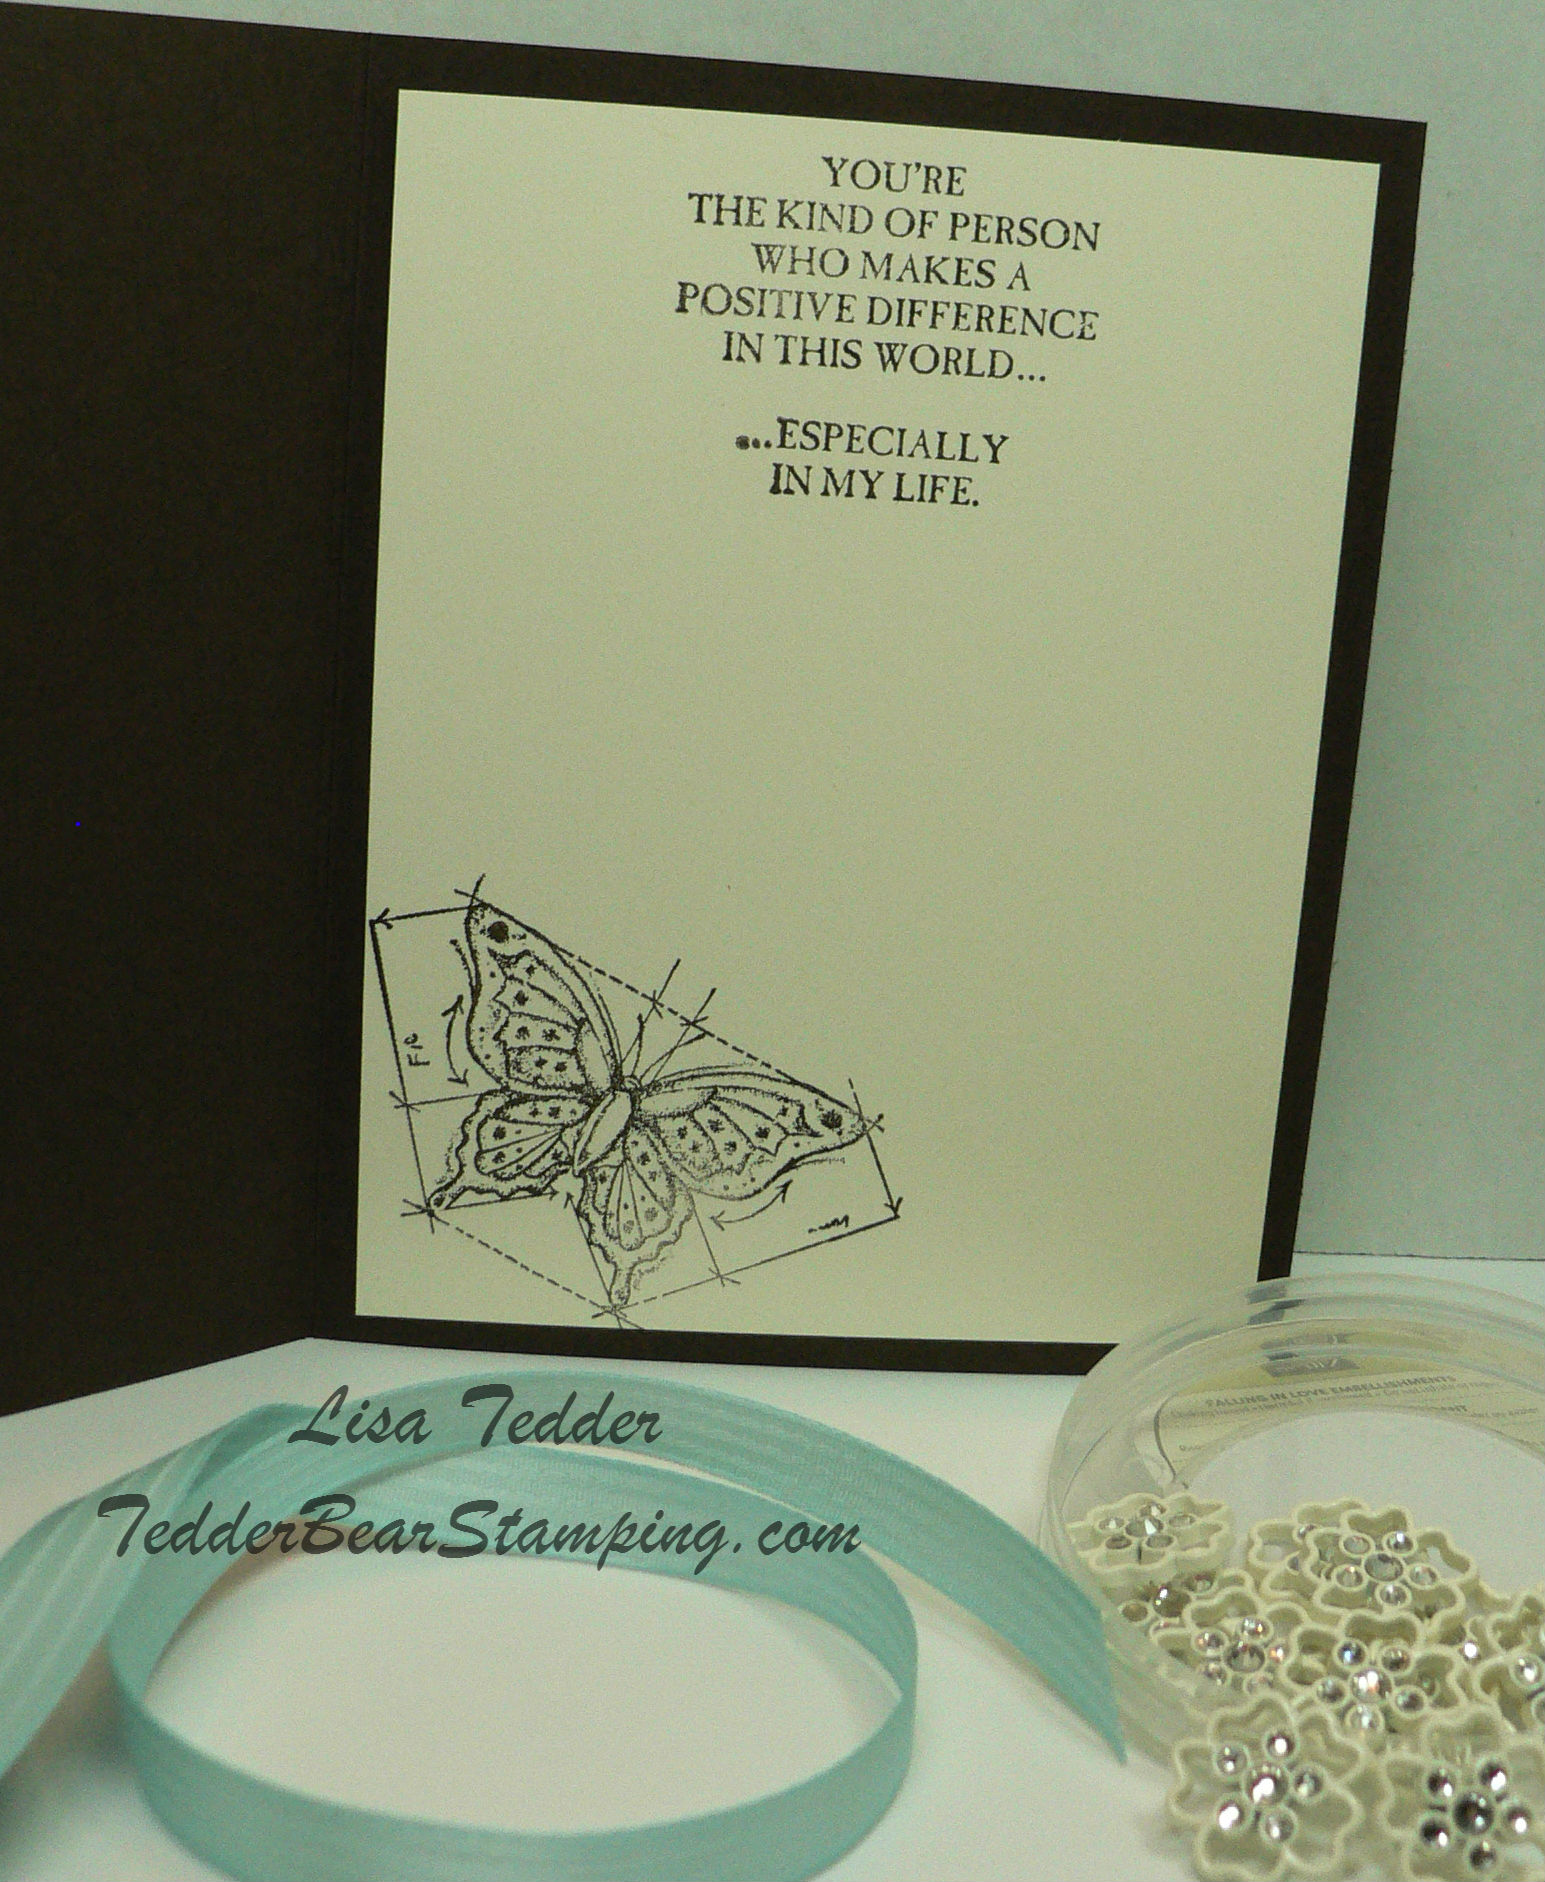
I didn’t sponge the inside because I wanted it to stay pristine, so you can see what is written when sending it.  Would you be happy to get this card?  Or is it too messy?

It’s been awhile since I’ve done a Vintage card, have I forgotten how to do it?  I feel needy today for some reason!  It could be because I was winging it the whole time!  LOL

Here is the Blog Candy that I’m giving away today:

Congrat’s to the Winner:  Sue Root!!

I hope you enjoyed the project today!  Please let me know which one you like more, with or without the Burlap Ribbon.  Sometimes you look at something so long you just can’t be the judge!

Hope to see you again, soon!  Make sure you subscribe so you won’t miss when I post.
Lisa Tedder
A California Girl living in North Carolina

Product List

<!——– TAM

Press’n Seal your thinlits for a beautiful effect

Welcome to the NC Demo Blog Hop!! Happy Spring! I thought these cards looked like Spring has Sprung! Don’t you?

I have seen on other posts where people have taken a thinlit and they pop-up the pieces onto a card and the look is so pretty! The one I went to was Billie Moan and she said in her video that the effect is beautiful but the effort was intense!

I had an idea on how to do this same technique BUT make it much easier!! I made a video showing how to do this very thing! I am not into doing things the hard way and I wanted to figure out an easier way and then share it with you!

Here is the card I made for the YouTube video:

I used the smaller rose thinlit from the Stampin’ Up! thinlit set Rose Garden! I haven’t used that set in a while, but it worked perfectly for this card, don’t you think? I put clear Wink of Stella on the top of each petal and then lined the petals with Gold Wink of Stella. The background is the Petal Burst Embossing Folder, sponged over top with the Peekaboo Peach to make the leaves stand out. I also used the Gold ribbon with the Peekaboo Peach ribbon on top to set it off!

I used the Bigger rose for another card, it took up more room, but still quite stunning!


I put some clear Wink of Stella over the petals to really make them stand out! For the background I used the Embossing Folder Fluttering and sponged the top with Mint Macaron to help the butterflies fly! The glitter paper is from Sale-a-Bration, sorry it isn’t available anymore, but any glitter paper is great!

How did I make this simpler? I worked for HOURS trying to figure out a quick version on how to make this, so it will be easy for everyone!

Have you heard of Press’n Seal? This works miracles!! You cut out your thinlit using the Big Shot and before you take the paper away from the thinlit you put the Press’n Seal over the back (make sure that the sticky part is towards the paper. You can see what I mean when you go to my video on YouTube! It really is quite simple!

Once you have it pressed to the back peal away the parts you don’t want like the excess paper and the outline of the rose. THEN you will leave it on the Press’n Seal but place Dimensionals on the back, put glue on the smaller pieces then remove all the backing on the Dimensionals flip over and push onto your project! Easy Peasy! Here’s a picture before you flip it:

Want to see some more projects using this technique??? Once I started I couldn’t stop!

I moved on to the Butterfly thinlits and made a card using three colors!!

For this one I removed some of the colors, ran it through the Big Shot with another color and when piecing them together on the card, I just laid them on top of each other, you can see the video to get an idea how I did this!

And again, I wasn’t done! I wanted to use the Dragonfly thinlits! Here is what I made with those!

I hope you have enjoyed my cards! I had so much fun making them! You can continue on to the next blog.

Jo Anne Hewins
Michelle Irinyi
Tracie Evans Langley
Sharon Maranich
Laurie Meier
Sue Root
Lisa Tedder <————–You are Here!
Frances Wagner


Don’t forget I have blog candy for those who leave messages on any post on my blog OR on my FaceBook page! The drawing will be on April 4th!


Here is what you can win!

Thanks for stopping by! I would love to hear what you think of these cards!

Lisa Tedder
A California Girl living in North Carolina
Product List