Tag Archives: Beautiful you

Stair Step Card with Blog Candy!

Today I am showing you a really fun and surprisingly simple card!  I’m calling it a Stair Step Card, if you know of the ‘correct’ name,  would love to hear what it is!

I’m using the stamp sets from Stampin’ Up! called Lift Me Up and Beautiful You for the sentiment!  I have a video showing how to do this card, and you can see it HERE!  Please subscribe to my video’s I am having a ton of fun and like to show things that are a Step Up from ‘regular’ cards!

Paper Art is one of my favorite things to do!  Subscribe to my Newsletter that will come each month!

The measurements for the
Whisper White is:  5 1/4″ X 4″ (front), 5″ X 8″ (inside) Score at 2″, 4″ and 6″, or fold back as shown on video.
Island Indigo is: 5 1/2″ X 4 1/4″

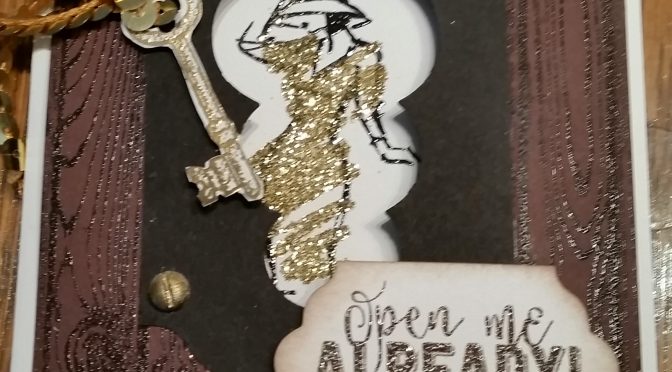
Here is a picture of my card:


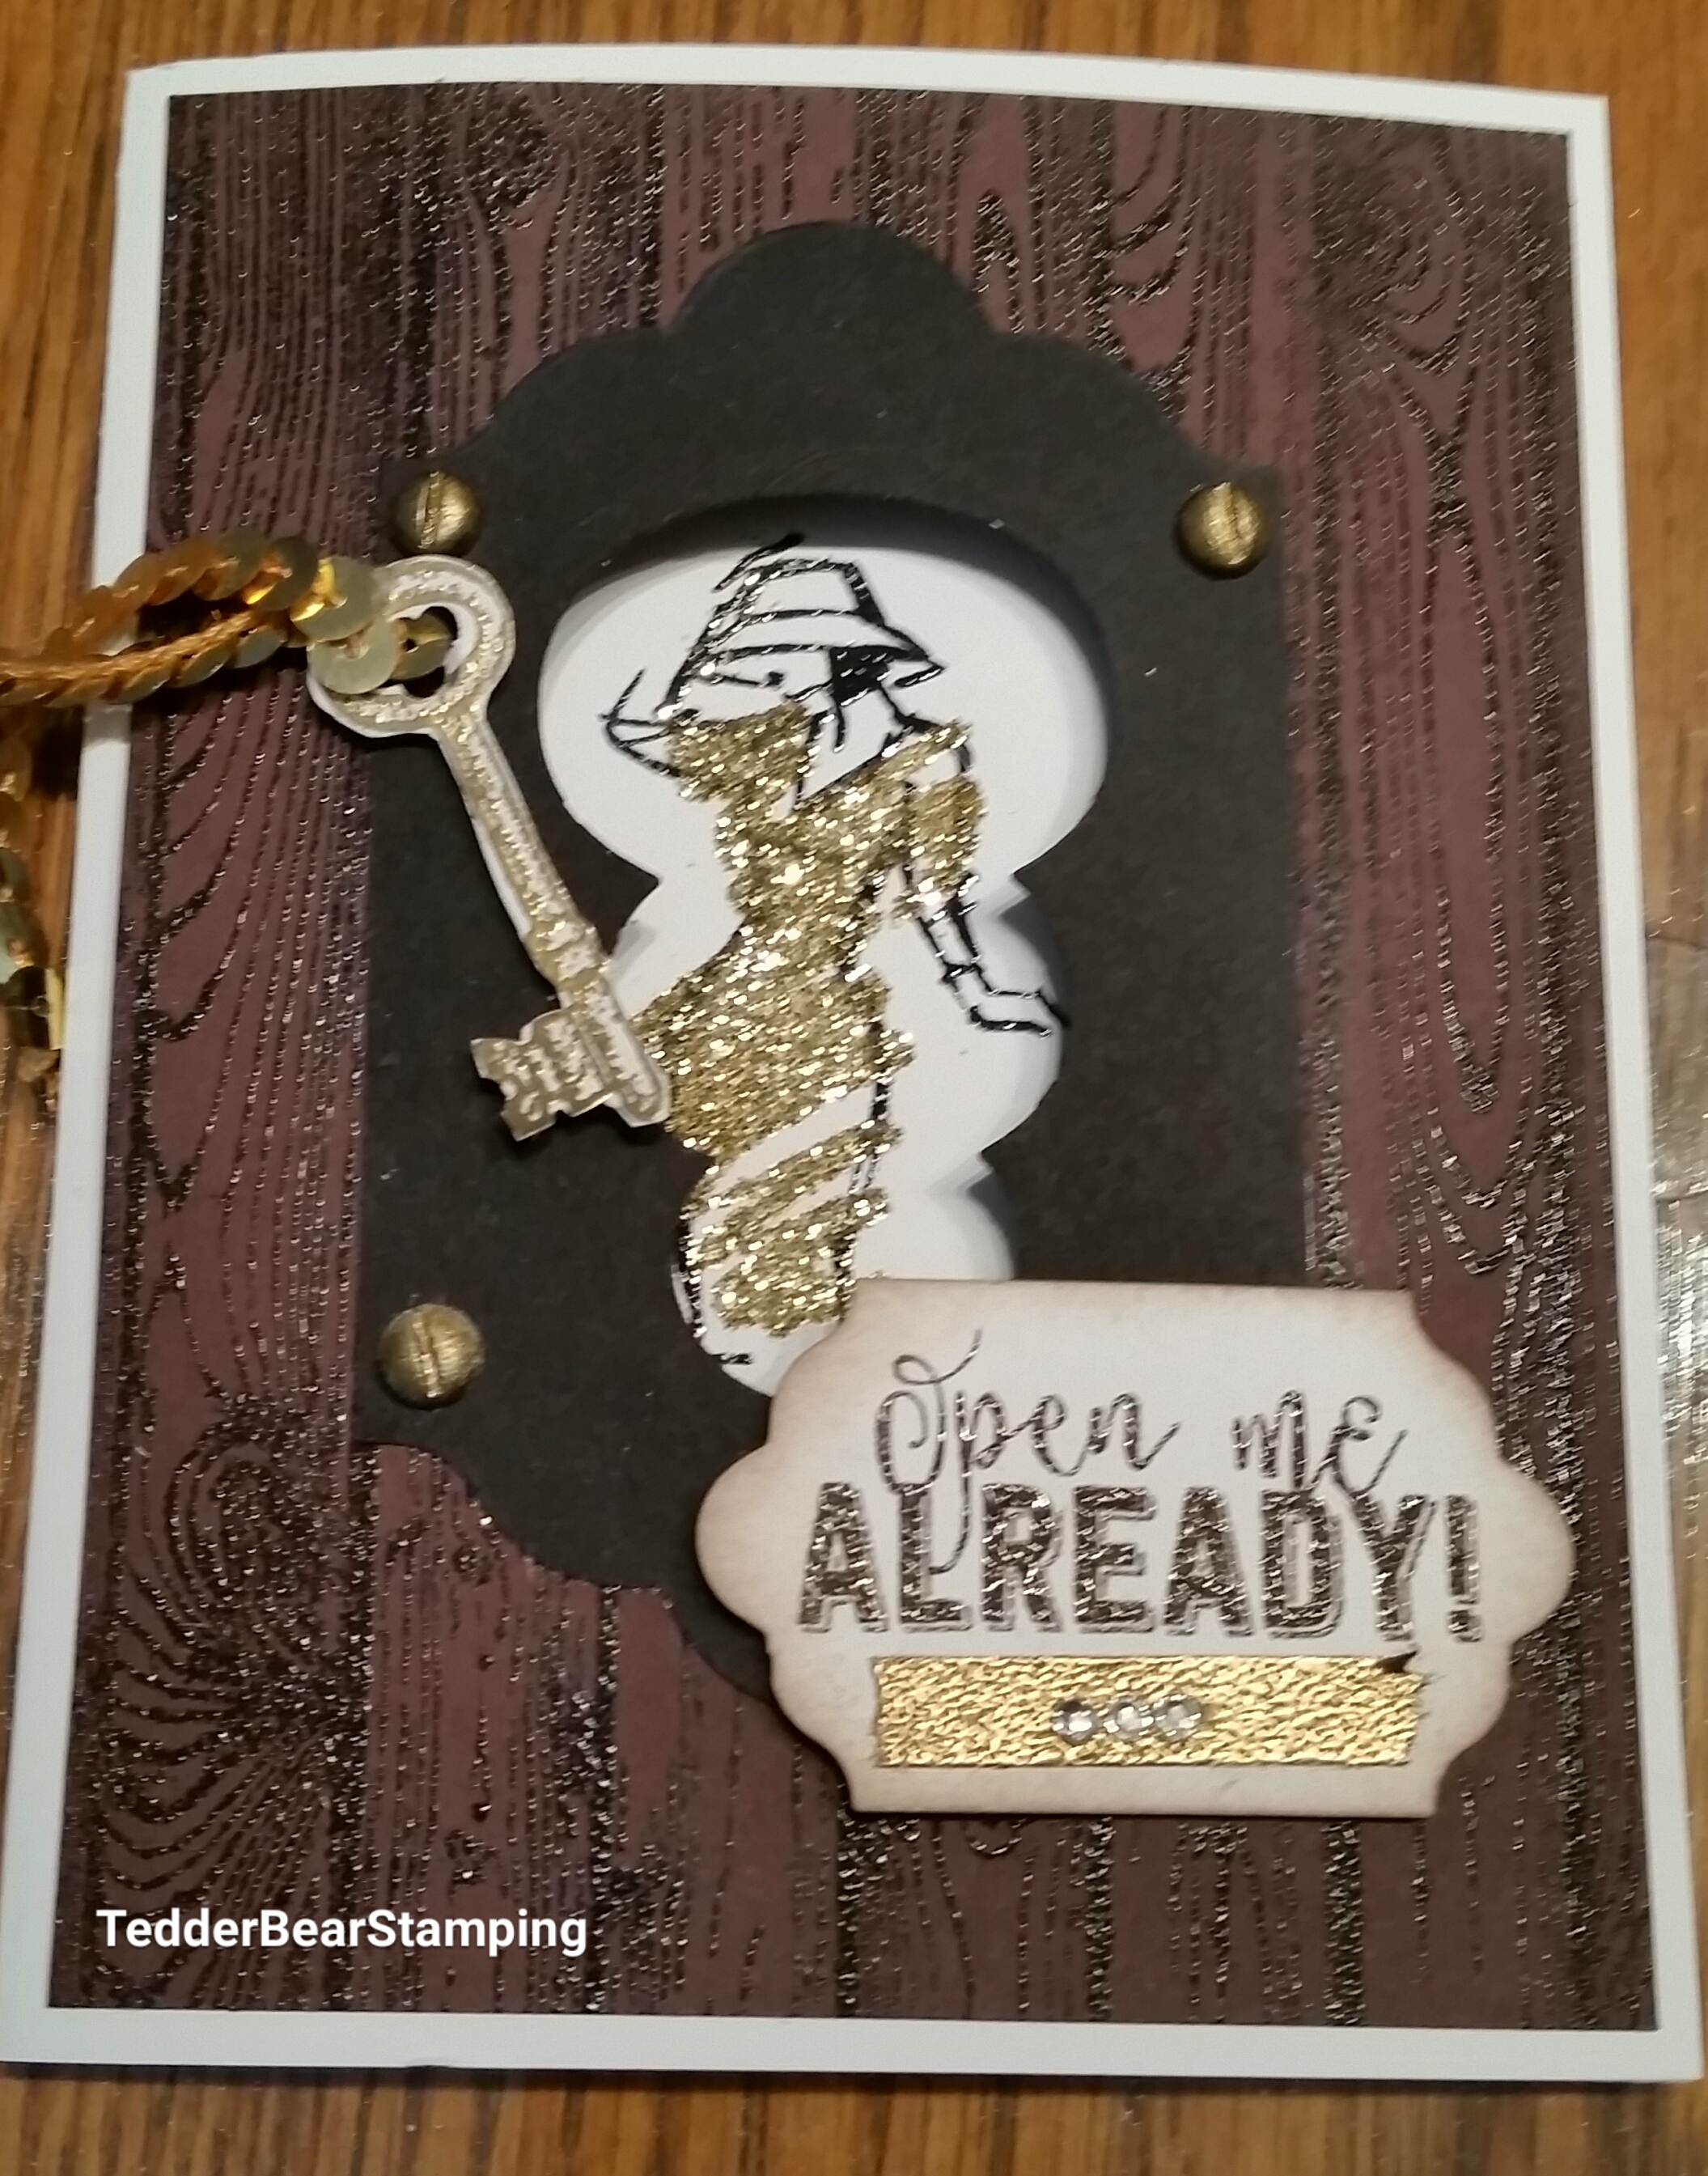
This is what the front looks like.  Pretty right?  Just vision yourself getting this card, it’s such a pretty card, and you go to open it AND…….


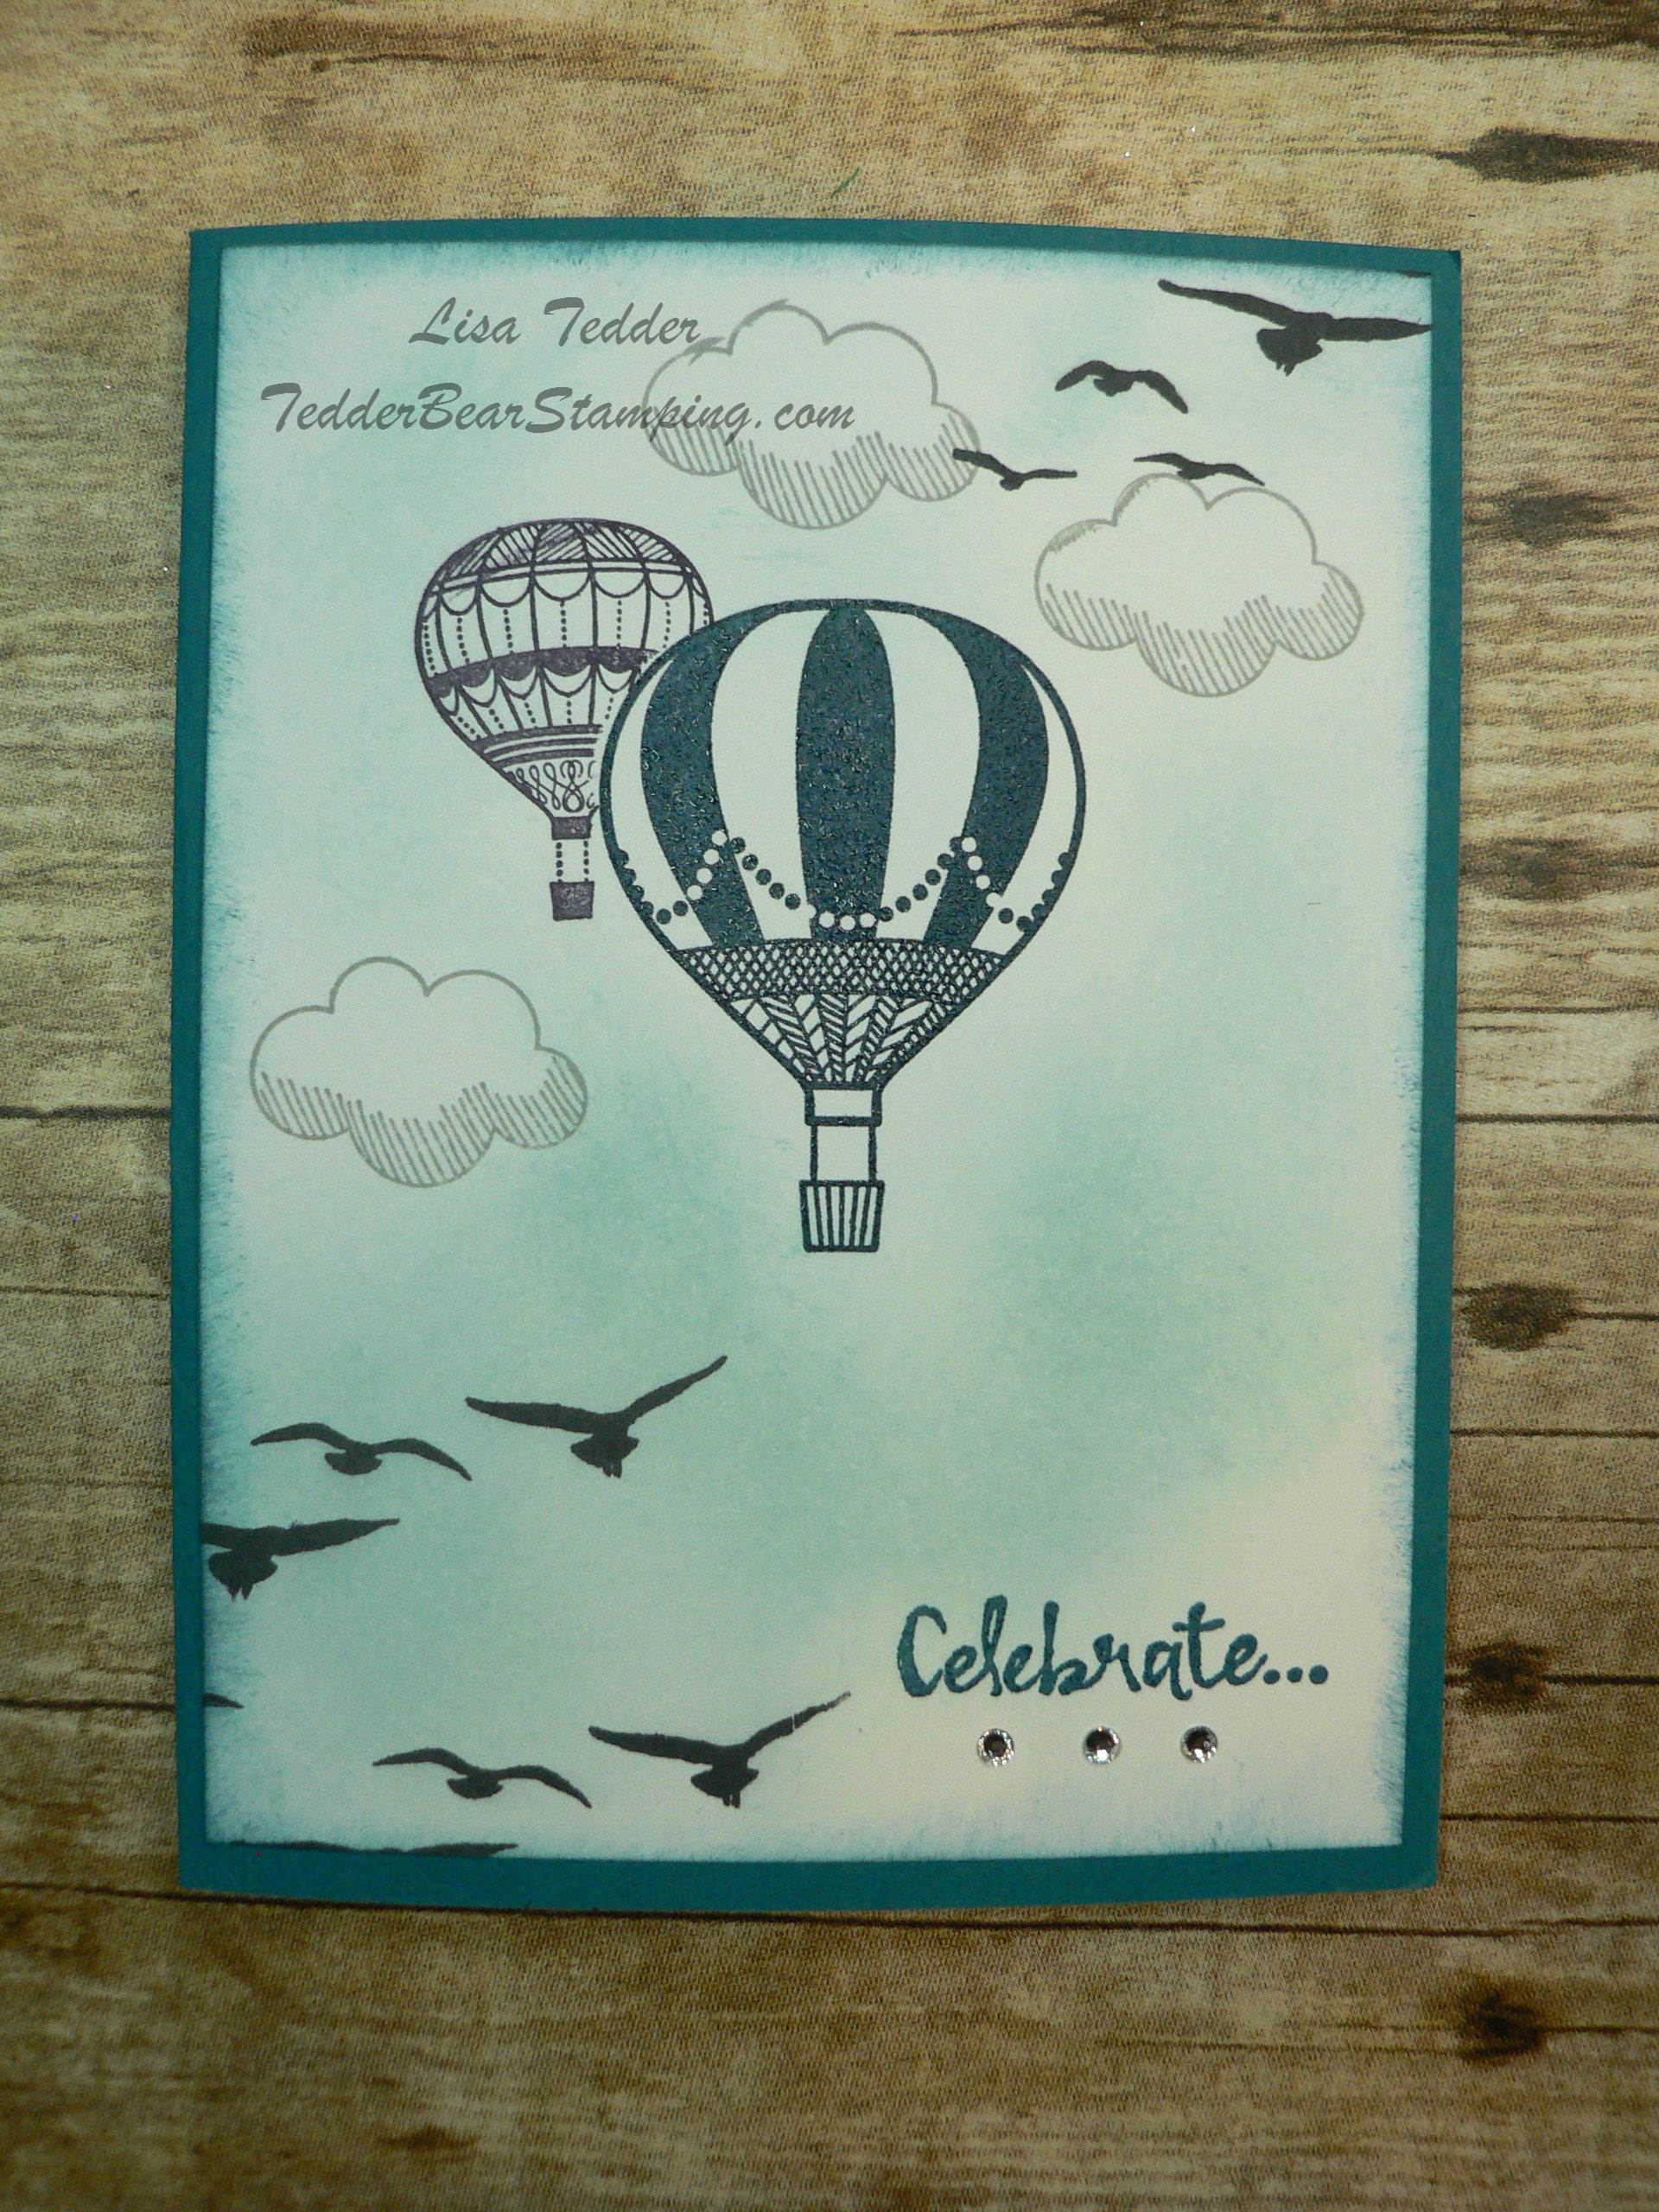
Wow!  It is Really fun and interactive inside!  The Balloons look like they are flying!  This card is super easy to make!  It doesn’t look like it does it?!   It took me all of 15 minutes to make!  That’s with cutting the cardstock too!  If you watch my Video, you can see how much fun it is!  You’ll want to get out any and all stamp sets that you can use this technique with!

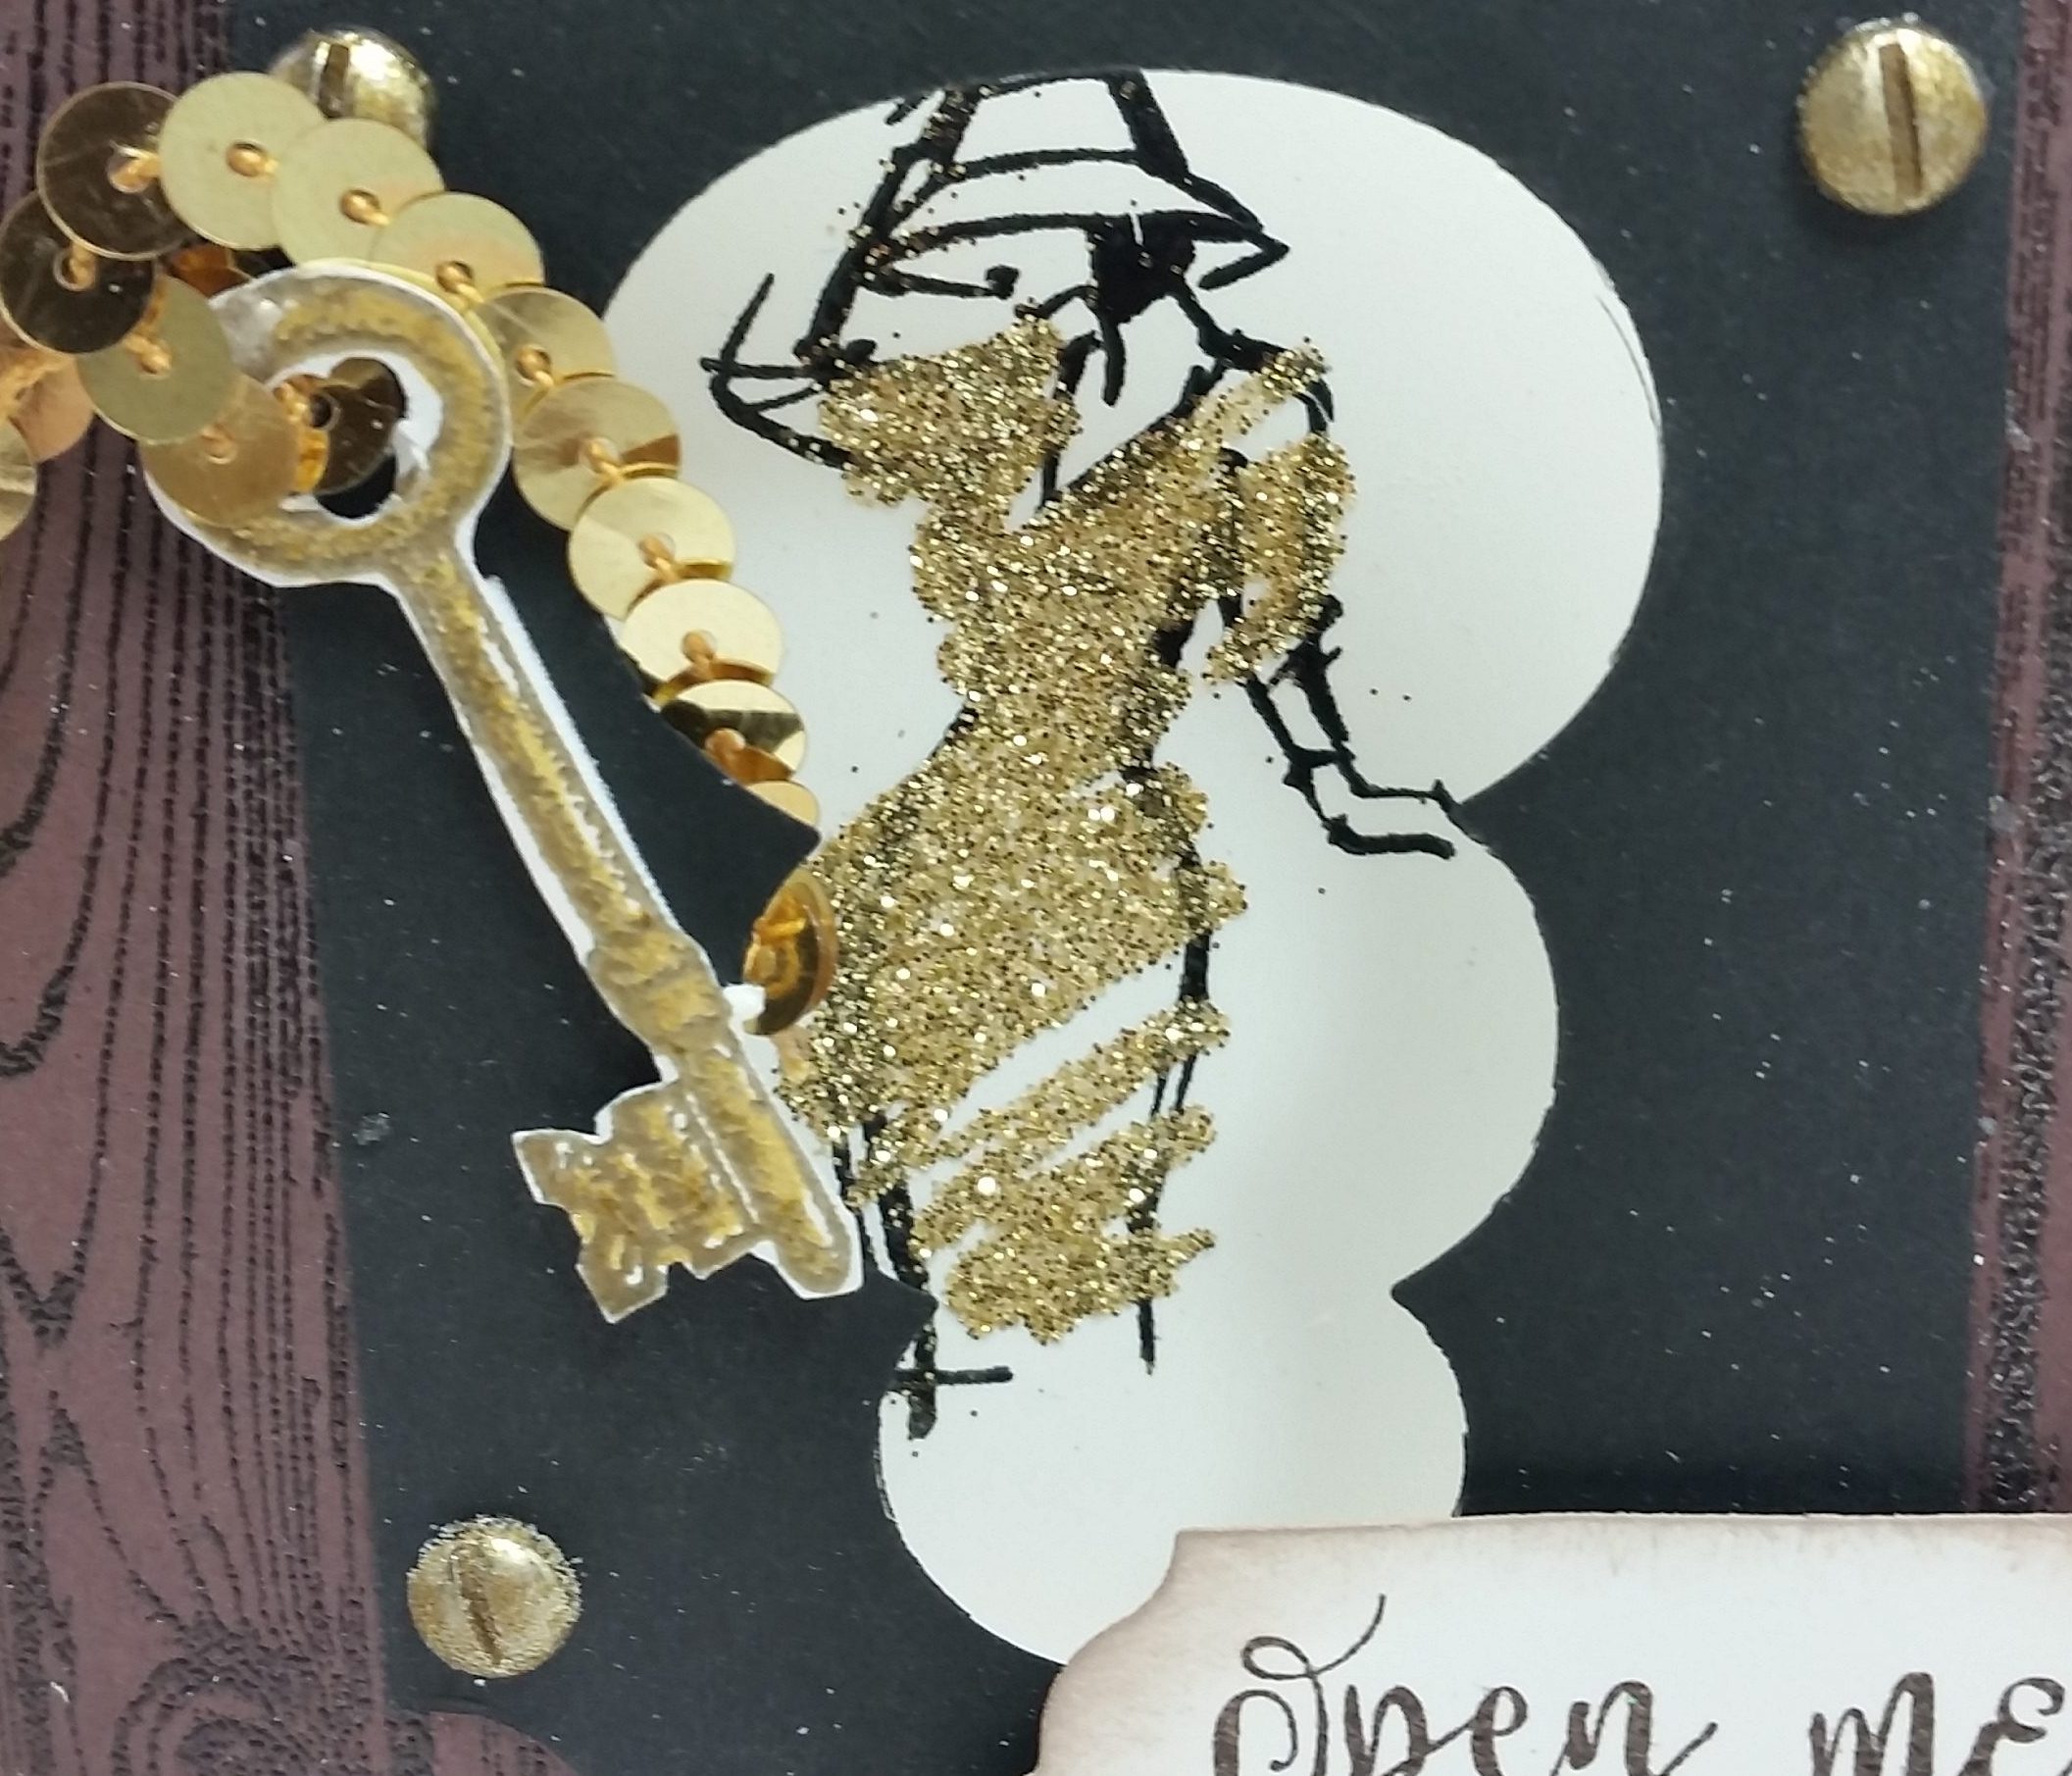
Here is another view, close up!
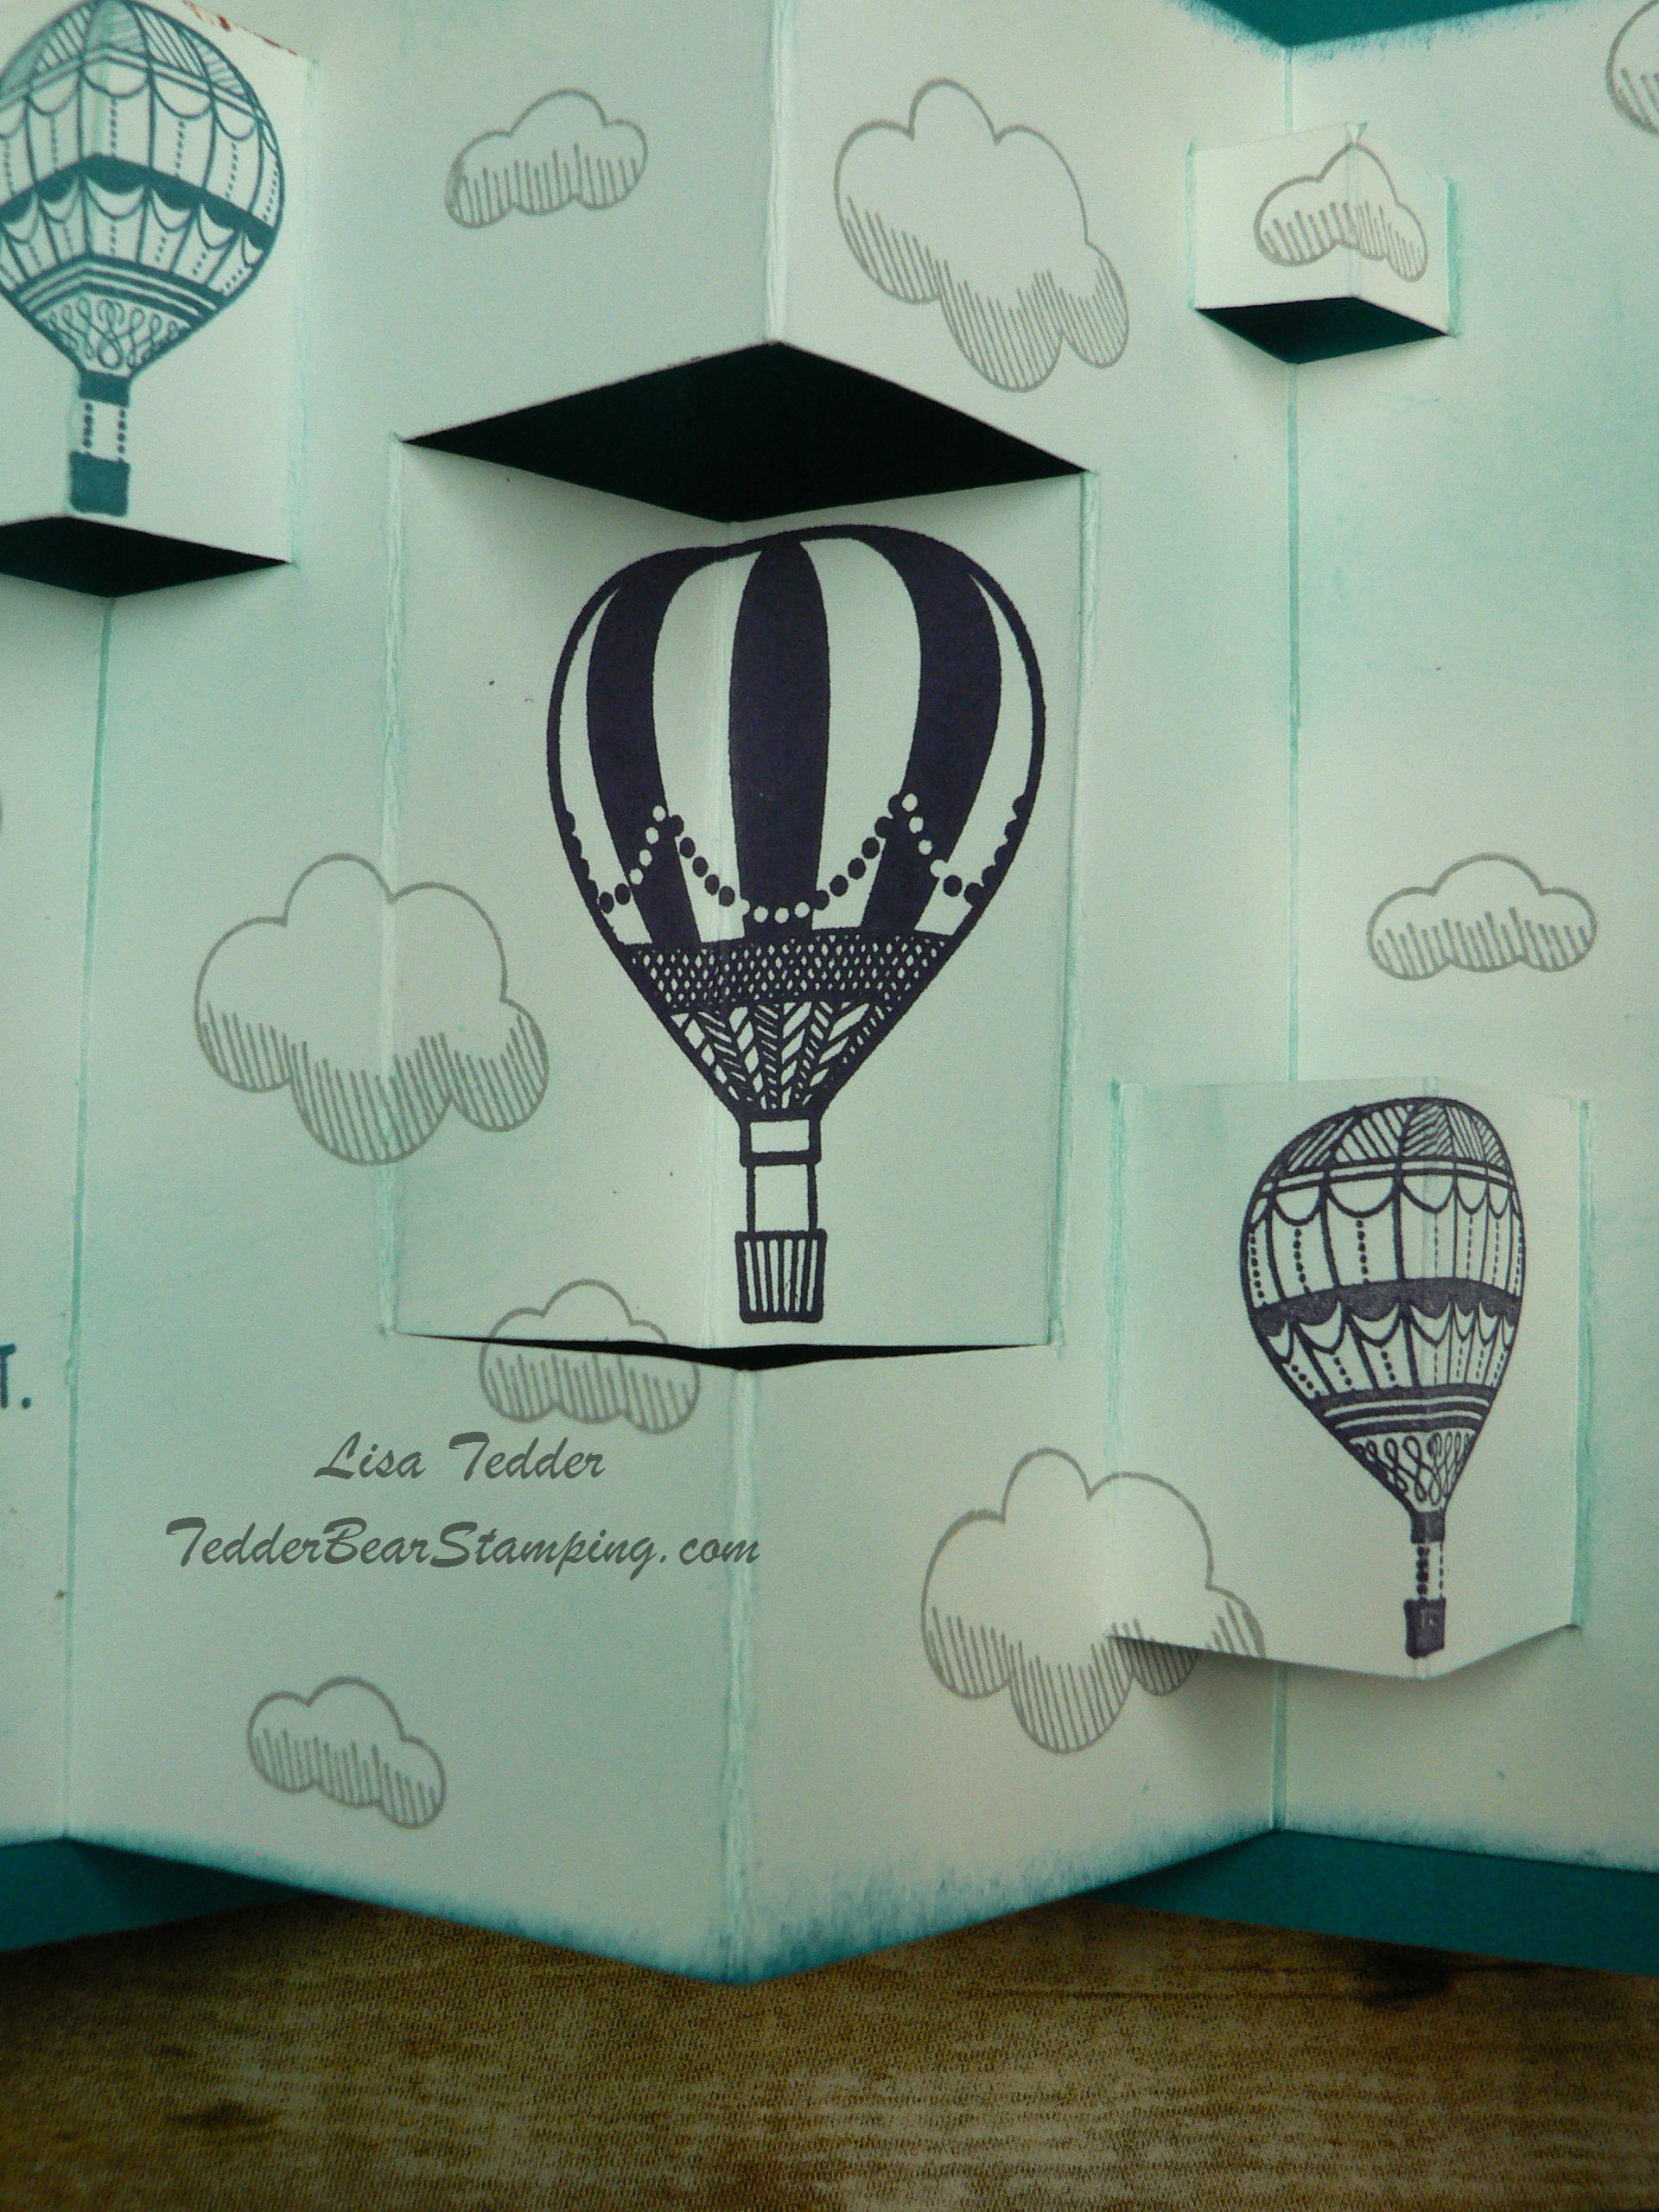
And one more!!
This shows the side view.  Pretty cool right?  What will you be making using this technique!?  I would love it if you could add your links in my comments!  Or just send me a picture!  My email is:
TedderBearStamping@gmail.com

NOW, on to my Blog Candy!!  If you leave me a comment you will get your name put onto a list where I will do a random computer generator to pick who gets it!  I will be doing the drawing April 4th! You can comment as many times as you want!  AND, if you visit my FaceBook Page and make a comment there I will put your name on the list again!

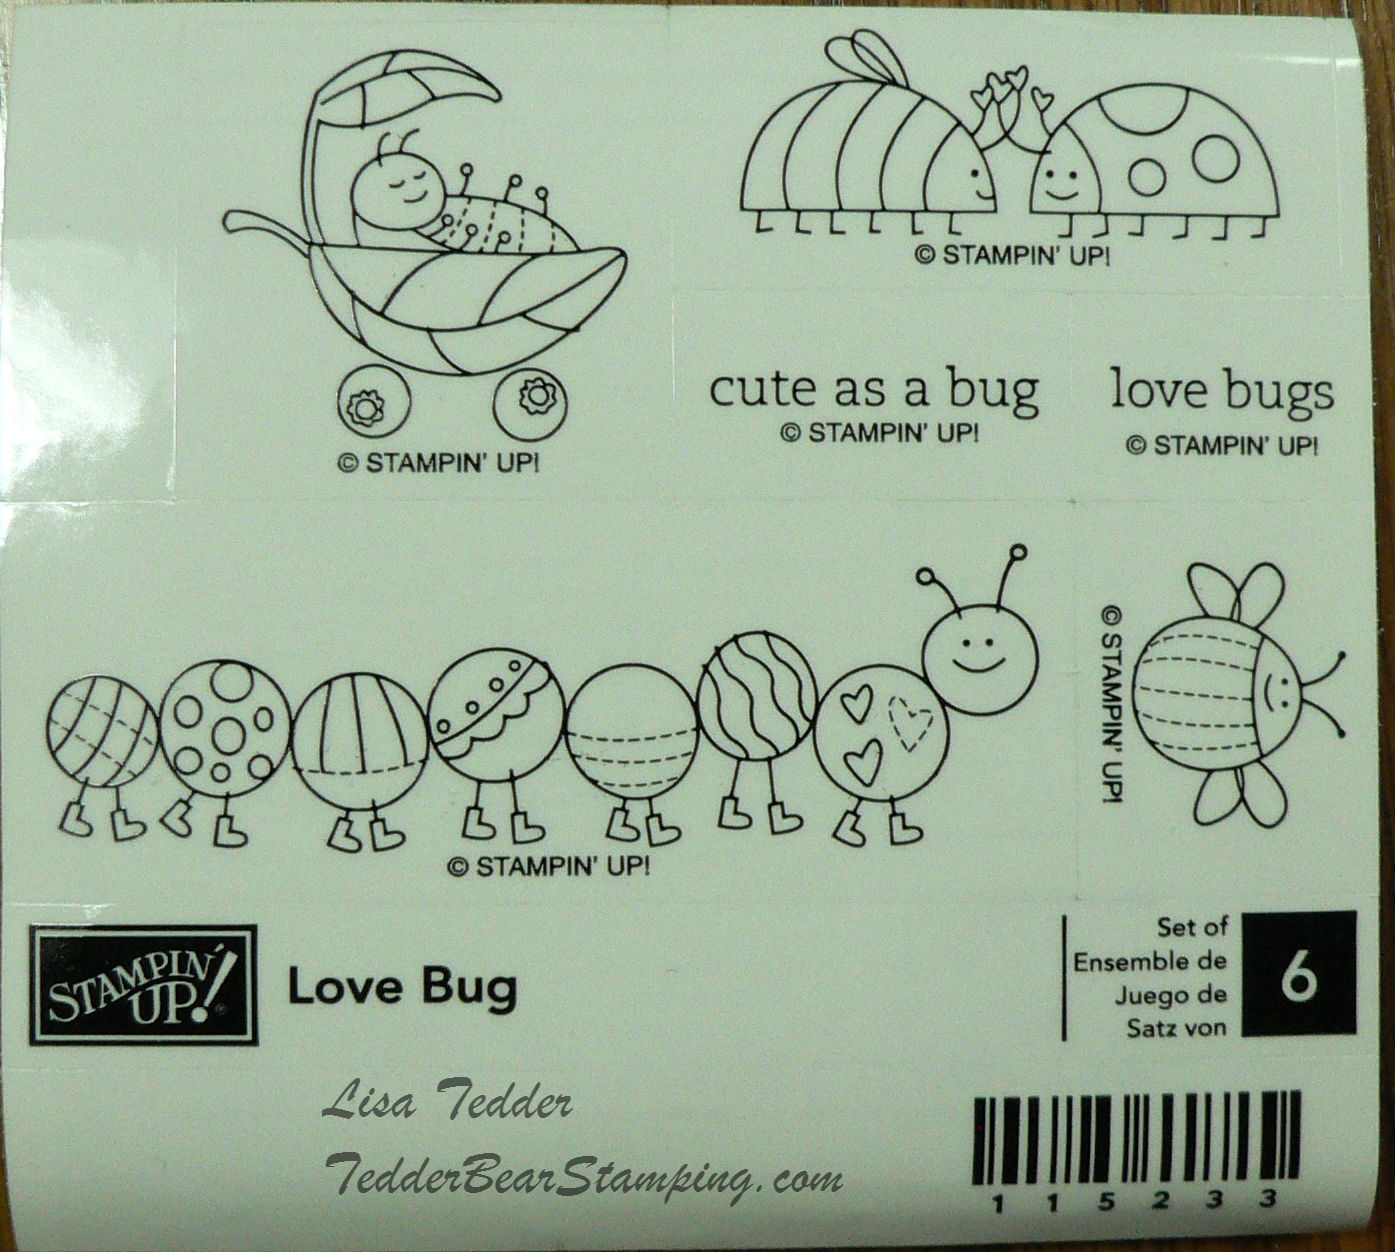
This is a Wood set from quite a while ago, so if you are new to stamping and Stampin’ Up! you will want this set!  It’s so stinkin’ cute!!  Those little bugs can be colored for Easter, a new baby or pretty much any occasion you will want to tell someone you love and care for them!  AND it’s FREE!!  Can’t beat that!

Click on any product below my signature and you will be sent to my online store!
If you purchase from me, I will send you a handmade card or two!

Thank you for stopping by!!  Again, you can watch the video on how to make this card by clicking HERE!   The video isn’t long, I sped it up, but it’s so easy, you can easily pause it to keep up!

Product list below!

Lisa Tedder
A California girl living in North Carolina!

Product List

Unconventional uses for Stampin’ Up! Products!

I have finished my FIRST YouTube video in quite a while!  It’s been years!  I was doing two videos every Tuesday for 3 years!  They are over on Vimeo.  But you can check out my video for this card here.

There are THREE things that I used differently, I’ll put a number by the line where they are, just in case you don’t want to read everything!

I did quite a few things with several products, but switched up their USUAL purpose!  I LOVE coming up with new ideas, especially finding more than one way to use something!!  That just means more bang for our BUCK!

  1.  For this card I used the Hardwood stamp set as a ‘door’ for my keyhole to look authentic.    For the Keyhole, I put two framelits together.  The 2nd from the outside of the Lots of Labels and the snowman from Snow Friends.


BUT for a keyhole I turned it upside down!  Plus, on the card, I put the sentiment over the bottom of the keyhole to ‘hide’ the snowman!  I hope you can see the keyhole and NOT the snowman!!

Then I cut out out the middle of the white cardstock so you can ‘peek’ inside!  For that I used the 3rd framelit from outside in the Lots of Labels so the ‘keyhole’ can stack flat and still be adhered to the front.

2. For the screws on the front of the door around the keyhole I used the screws from the Urban Underground Embellishments (in the Occasions mini), BUT I colored them with the Gold Wink of Stella and immediately embossed with clear, since the color would just wipe off otherwise.  This way I am all coordinating!! I also used the gold embossing powder to emboss the key so you (hopefully) will figure out that it’s a key hole!!  Here is close up of the screws being all gold:

The sentiment is from Balloon Adventure and it says:  Open Me Already!  hahahaha  I got such a kick out of making this card!  Can you tell?
I attached (after fussy cutting the key) the gold sequin ribbon to the key and popped it up on the front of the card!!

3. To make the Gold line under the Sentiment I used the Tear & Tape under, made sure it was stuck down well, then tore off top, poured Gold Embossing Powder on it, and heat it!  And it embossed!  Didn’t know that would happen!  Just thought I would try it.  LOVE it, so glad I tried!

Ok, for the inside, I stamped the girl from Beautiful You, lining her up so she would peek through in the front.  I stamped her with Early Espresso, then embossed with Clear EP (I tend to do that with SU! ink) because it stays wet long enough so I can do it!  And it adds so much texture to your card!

For her dress I stamped it with versamark, then poured Heat & Stick onto the Versamark, heat it only until it gets shiny NO LONGER, or it will loose it’s stickiness!  Once that is done, I poured Gold Glitter onto the Heat & Stick, shook off excess, then heat it ONLY FOR A FEW SECONDS!  This way it really adheres to it!  Watch the video you will see how I rub on it and it stays!!  I don’t use Heat & Stick very often, but I really love how great it works, think I’ll use it more often now!  Here is the inside of the card:

I ran some of the Tear & Tape along bottom and put some more Gold Embossing Powder on it and heat it!  Love how it really adds some shine to the card!  Stamped my two inside sentiments ‘It’s your Birthday’ at the top and ‘Let’s celebrate!’ at the bottom, both in Early Espresso and embossed with clear!

She is so pretty in the gold dress!!  I hope you liked my Unconventional ways of using  product!  Please leave me some feedback on what you think!

And just in case you didn’t get a good picture of the card, here it is again:

I really enjoyed doing this card, I saw the framelits put together like this on Pinterest, but she was making a Snowman Shaker Card.  I saw it, and immediately saw the keyhole and not the snowman!  That’s so weird.  I guess my mind works in mysterious ways!!  LOL

I hope to be making more blog posts and videos, so subscribe and hopefully you’ll catch them!

Lisa Tedder
Kernersville NC

A California Girl living in NC!