Category Archives: Uncategorized

nc demo blog hop freezer paper technique

For this months NC Demo Blog Hop, I have chosen to show you a technique that I am super excited about!

The technique uses Freezer paper, I iron it (shiny side down) onto White Glimmer Paper.  The iron needs to be as hot as it can be, but no steam.  Iron it between towels, so you don’t burn your paper.  But first you need to decide which Thinlit you would like to use to iron onto your paper.  I chose the Hexagon thinlit, because I love the way this thinlit lets the images peek out once I stamp and color the images.

One important part of this technique is that you iron it down until it isn’t pulling up AT ALL, ANYWHERE!  I learned that the hard way, so I’m hoping to save you some frustration. 🙂  Once you make sure it is set, you stamp/color where the freezer paper isn’t ironed down.  The Hexagon thinlit leaves a lot of spaces to do this, but it also shows each and every part of this thinlit!

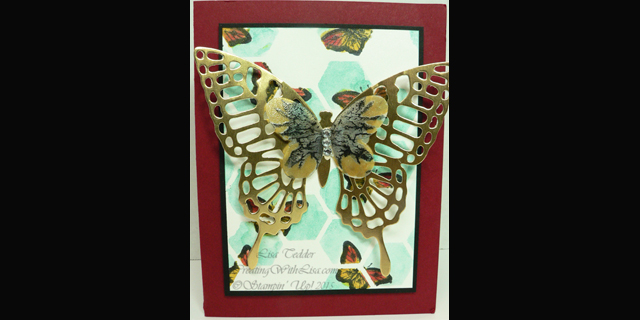
So, now that I explained it, I will try to describe HOW I made this card.  I stamped the butterfly from the Papillon Potpouri in black between the lines and open spaces.  I then colored it using an Aqua Painter with Cherry Cobbler for the top of the butterflies, and Crushed Curry for the bottom part.  Then I colored the rest of the open spaces not covered by the freezer paper using Pool Party, this way you can really see that I used the Hexagon Thinlit!  Once finished with all my coloring I then carefully peeled off the Freezer Paper to reveal my Gorgeous card!  It turned out better on this card, than it did in my mind the night before when I couldn’t get to sleep because I thought this up and should have been sleeping!  Do you ever lay in bed thinking up your next stamp project?  I do it all the time!

Freezer-Paper-Technique1

After making this card, I wanted to do another freezer paper card, wouldn’t you?!

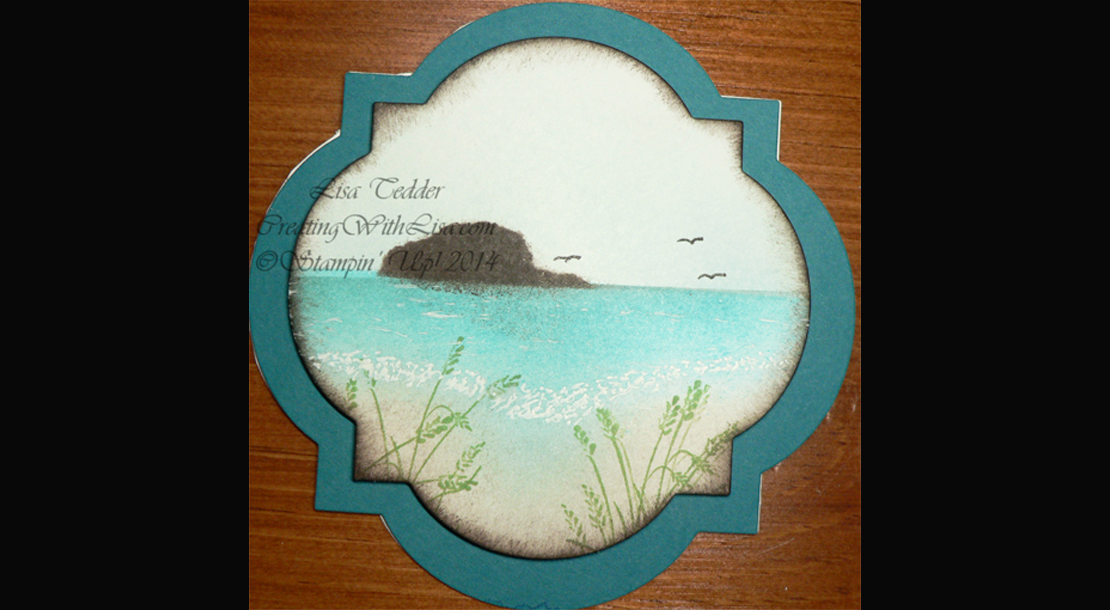
I used the Floral Thinlits, cut out one of the smaller flowers, ironed it onto the Glimmer Paper, making sure that all edges were down!  I then colored the outside edges of the cardstock that wasn’t covered by the Freezer paper, I used Elegant Eggplant and .  I then peeled off the Freezer Paper and then used the next size flower thinlit to cut around the colored outside of the paper, and the smallest flower and cut out the center. If you look at this card, the white in the middle is where the Freezer Paper was.  The Elegant Eggplant underneath is the 2nd from the biggest thinlit I just cut the cardstock to be the same width as one of the flower petals, but I wanted to just have it stick out underneath, I hope this makes sense!  If you have this set, just pick up this thinlit, or look in the catalog, and hopefully it will be more clear on how I made the piece that has the candy dots on it.  The flower part is popped up with Dimensionals so the flower gem in the middle is below the middle flower.

freezer-paper-technique2

The White cardstock and the Black are fun through the Big Shot using the Embossing Folder , I glued them together and then ran it through, if you enlarge this picture you can see the detail!

I absolutely LOVE this technique, and I hope you give it a try!  I made a Periscope video which you can go see by clicking on the word Periscope and at Katch.me

Or go to my twitter and look for Lisa Tedder.  I’m sure all this will be much clearer (including my troubles getting used to doing Periscope…..but I didn’t make any mistakes so you can really see how it is done!), it’s not a hard technique, just hard to describe, which is why I made a video!!  I would love it if you would  subscribe to my Periscope and you will get to see more techniques!!

Thank you for stopping by!  Hope to see you again!!

A California Girl living in NC!

Lisa Tedder

Independant Stampin’ Up! Demonstrator
Blog Hop button
Elaine Brown
Tamra Davis
Jo Anne Hewins
Amy Ingram
Michelle Irinyi
Melissa Kerman
Tracie Langley
Sharon Maranich
Laurie Meier
Sue Root
Pam Staples
Lisa Tedder


Creative Blog Hop!

I have been invited by Frances Wagner to participate in a Monday Creative Blog Hop!  I’m very excited to be asked and I have been creating a bunch of cards for a Class where we get to participate in Sale-a-Bration for one more month!!

We will order in March $50.00 worth of product and then pick out a SAB item for free, then the class will be free!

I plan on Three cards at this event and then I will have a Sale-a-Bration Celebration!  What is that you ask? Well, for those who have received 2-3 SAB items from purchasing through me they get a class for FREE where we will make 5 cards, with door prizes and munchies and LOTS of goodies (presents?) for those who are participating!

This Stampin’ Up! handmade card below uses the stamp set Butterfly Basics, I just HAD to make it once I saw it online, it was made by Erica Logtenberg, the only thing I changed from her absolutely GORGEOUS card was where I put my pearls!  No need in changing a brilliant card!  Make sure you enlarge the picture so you can see how pretty it really is!


blog-hop1


The second card I want to show you is one made from Adventure Awaits!  This SU! card is a great card for a Man!  I used the Dots and Stripes Decorative Masks and the Aquamarine Chalk Pad to make these wonderful stripes!  It is a fast and easy card!  Did you know that you can stamp with Chalk ink and then emboss it with Gold Embossing Powder?  I thought I would try it and it worked great!  That way you have less you need to buy to make this Manly card!  I also used Champagne Glitter Paper and cut banner ends to make the main image Pop.

bog-hop2

For my last card today, I wanted to show you this really pretty card made using the Artisan Embellishment Kit.  It was fun using the rose piece inside as a mask to sponge my color – Rose Red over my ‘mask’ and then I embossed it with Clear Embossing Powder!  Wow is it shiny!  And you just have to touch it, it is a fun card to look at and texturally (is that a word?!)  :-/   a card that once you give it away the person will want to touch it and ask how you did that!!

The cute little Bee is from the Stamp set from SU! ( I LOVE SU! can you tell?) named Baby Bumblebee.  Once I saw this set I just HAD to have it!  I stamped him on So Saffron cardstock using a juicy StazOn pad (I keep it juicy so I can emboss it using clear EP, I LOVE embossing……it’s like magic every time and you won’t get tired of doing it!)  I did have to cut out the bumblebee, that was the hardest part of this card!!  I used a little heart from the Itty Bitty Accents Epoxy Stickers which I colored Red with our Blender pens!  This bee is just so stinkin’ cute!

I also used the stamp set Hello Life for the Sentiment on the bottom of the card.

blog-hop3


I hope you have enjoyed my part of the blog hop!!  I have been asked to answer some questions, so I will do that before I leave and have you continue your journey!

* What are you working on?

I am constantly working on my next class.  I have a few that I do out of my home in NC, and I also have classes at the Senior Center in my town.  I also have classes at my local Parks and Recreation.  I am waiting for the ok to go through classes to teach at my local Battered Womens Shelter!  I’m very excited to do this, as I was in their shoes a LONG time ago before I met my husband who spoils me MORE than I would ever have  expected!  We’ve been married for 26 wonderful years and have 5 kids and 3 grandkids!

* How does your work differ from others in your genre?

I love to create my own cards, but love to see something from Pinterest and recreate it using Stampin’ Up! product, or if they used SU! already then I usually change it up just a bit to put my stamp on it!  Pun not intended!

* Why do you create what you do?

Before I started stamping, my sister was always doing these really creative things, like making china Christmas Tree Ornaments, or painting china dolls.  I thought that I was not granted the gene of artistry.  Then I went to my first SU! party, I made a beautiful card, and then couldn’t mail it out because it was so pretty!  In my classes, I try to have all the dimensions written down so my friends/clients can recreate what we are making!  I REALLY love it when I see the smile on someone’s face who also thought they weren’t artistic.  And the first class they come to they are changing up one of my cards to fit them!  That tells me that I am doing my job and showing them that they can do this too!!

* How does your creative process work?

That’s a hard one!  It’s really funny that I can look at pretty much anything and think of using a part of what I see on a card!  I can see some colors that I like and then think of what SU! colors will match…..then I just need to figure out what stamp to use and then I am almost done!  SU! makes it really easy to make projects, all their goodies coordinate with each other!  I can also use colors from a certain color family and that will make sure that the colors will go together.  Pinterest helps get my juices flowing and so does the other demonstrators who put their designs on Stampin’ Connection where us demo’s can go and see what others have made using a specific stamp set.

Thanks again for stopping by!!  Come back again!

Lisa Tedder

Kernersville, NC

Here are the other people who have posted to this blog hop:

Carol Valentine

Lynn Peters

Deb Paisie

Cindy Fodor

hanniejoy

Anne Matasci

Frances Wagner

Ocean View

This handmade Stampin’ Up! card is inspired by Ingrid Blackburn, I made mine into a card, and it isn’t as good as what she did, but I thought it was a good start!  Here is her post.

This was a fun card to make!  Here’s what I learned while making it:  Use Bigger Post-It’s!  That is pretty much it!!  I think my sea/horizon line could be much sharper, but I really love it!!


Ocean-view1

Here are the supplies:

Window Frames Collection #129021
Big Shot #113439
Wetlands stamp set #126697
Inks: Sahara Sand, Crumb Cake, Early Espresso, Bermuda Bay, Tempting Turquoise and Wild Wasabi.

Keep an eye out, I will be having some Blog Candy soon!!
I am also going to have a ‘specialty’ class where we can make this card and a few others…… I just might post them here!

I love having classes making both SU! handmade cards and Memory Making! I’m FINALLY getting my photos off my computer/phone and out of boxes!
My daughter took one look at how I did my Pages, that she started doing it for her son, my Grandson (one of the cutest little boys out there!!) and she finished, yes I said FINISHED 5 pages in under an hour!! She told me she had to print more pictures out, she had no idea she could get so much done in so little time!

I can’t wait to see them!

I hope to have you visit again soon!!

Lisa Tedder

Kernersville, NC


A Happy Thing

I just got back from Stampin’ Up’s! Leadership and they had this stamp set EVERYWHERE!  Luckily I had already earned it (it’s a Sale-A-Bration stamp set or SAB, which I got FREE for purchasing $50.00), so I decided to come up with my own card!!

I didn’t CASE anyone!!  I love when my creative juices are flowing!  I used the ‘A Happy Thing’ stamp set (139134) along with ‘Crazy about You’ (137137), which is SO versatile, you can use it on just about EVERY card!!

I am always saying these words “Just Sayin'” so this stamp is  PERFECT for me!  I also used the Daffodil Delight (130998) and Old Olive (130999) Blendabilities (Which you can get for FREE!!) and if you come to my class I will walk you through how to shade this wonderful stamp set!!  I also used the Thinlits “Hello You” (137363).

 AND right now until June 2nd you get the BUNDLE that has the ‘Hello You’ thinlits and the Stamp set ‘Crazy about You’ #139325 (clear) Photopolymer #138873 so you save 15%!!  IF you buy this bundle in the clear or Wood #139324, You can get the ‘A Happy Thing’ stamp set that is used in this card for FREE because it is a SAB set!  If you purchase the Photopolymer, which I LOVE, you will need to add another item to your order to get the FREE ‘A Happy Thing’ stamp set, you need $50 in US.

I used the Daffodil Delight ribbon #125583, the Specialty Designer Series Paper ‘Birthday Bash’ #137783 and some dimensionals #104430 which will give you MORE than enough to get ‘A Happy Thing!

So, are you ready to see the handmade card?

A-Happy-Thing

You will need to zoom in to see what I used at the bottom of the stamped image, I ruffled some plastic from a clear envelope!  THAT was really fun to do!

I hope you like my SU! handmade card!!

Lisa Tedder

Kernersville NC


Curvy Keepsake Box CUTE Animals!

I am having a class this weekend, where Moms bring their daughters to come play at my house!

Every month we make between 2-3 projects, and it is so much fun to see the kids bond and show off how much they are learning!

It’s also great that the Moms get to spend QUALITY time with their daughters!!

My daughter started High School this year and I saw that I wasn’t having that much time with her doing something we could both enjoy.  She’s growing up so fast and she’s the youngest of the family and I don’t want to look back with regrets!

If you live near Kernersville NC, Triad area, Winston Salem, High Point or Greensboro send me a message and I can start a class with Your friends and their kids!  I highly recommend that the kids be at least 9, Just don’t look back with regrets! 🙂 Below you will see two of the ideas that they can choose from:

Curvy-Box-Owl-BackCurvy-Box-Owl-Side


Curvy-Box-Puppy


Aren’t these just too cute!!!!  I also have two cats to let them choose from!!  These boxes are so easy and fun!!!  I can just see them sitting on my daughters dresser!!  And hopefully she is thinking about me when she sees it!!

Lisa Tedder

Kernersville, NC

Stampin’ Up! Manager

Holiday Home-Fall

holiday-home-fall-3

I found this hand made card online, sorry can’t recall who did it, but I changed up a few things.  The fun thing I did was use an old Versamark pad that I colored with fall colors with my re-inkers( Crushed Curry, Cajum Craze and Cherry Cobbler!  It stays nice, and as long as you don’t double dip with your stamp, it won’t muddy!!  I used the SU! set Holiday Home and my Stampin’ Up! markers to color it!  The house is cut out with the coordinating framelits from the Holiday Catalog called Homemade Holiday Framelit Dies.  The number for both the stamp set and framelits are:  framelits: 135857, and the Holiday Home is: 135095, BUT you can get 15% off if you buy the Bundle #137631

Here is a picture of what the Versamark pad looks like!!  I got this idea from Sherrill Graff!  I used this for the leaves.  I also used dazzling details for the street lamp and the windows.  Hope you like it!

versamark-pad-re-colored


This stamp set has everything you need to make a Fall, Halloween and Christmas card!  Go to my store and buy yours now!

Lisa Tedder

Kernersville NC

Manager, Stampin’ Up!


Ornamental Pine

Ornamental-Pine


Here is a handmade  card I made for my Downline meeting swap!!  I LOVE that this is a card I can make in under 3 minutes, and make enough to mail out to my family and friends this Christmas!

The SU! set I used is called Ornamental Pine, I Stamped the Pine stamp with Versamark and then put White Embossing Powder on it, heat it and then I stamped the pine cone and sentiment the same way!  This card uses a Hair Pick Bow, it’s so easy!  If you want to make this very Quick and Cute card, write me a note on this post!

I am making it at one of my classes in October, just not sure which one!!

I would love to see you at one of my upcoming classes!!   Check out my Calendar on my Stampin’ Up! site!

I can also have a party for you, just let me know when you would like to have it, and you can earn free stamps and get a gift from me!!

Lisa Tedder

Manager, Stampin’ Up!

Kernersville, NC

Last Chance to get 1/2 off Paper pumpkin, and a gift from me!!

Today is the last chance to get Paper Pumpkin for 50% off the first two months!!  IF you join today, not only are  you going to get two months for the price of one, BUT you will also get a $20.00 Gift Certificate towards anything you want in the catalog from me!


In the past PP wasn’t something I pushed since I didn’t think it was worth the money……BUT I have given it another try and I absolutely LOVE it!!!  SU! has taken it to another level and includes a lot of goodies in each box!


Give it a try, you aren’t losing anything!  You only have till the end of today!


Make sure you put in the code:  HALFOFF2

blogbutton_PP_demo_July1614


Lisa Tedder  

 Check out my Blog:  www.CreatingWithLisa.com  


SU! demonstrator


Very Sparkly Flower Patch

Flower-Patch


My downline and I made this B-You (Tiful) Card today!!  I absolutely love this stamp set from SU!  Not only does it allow you to do layers, but it has the Framelits for the Big Shot TOO!!

I love the new Embossing folder from our NEW Holiday Catalog 2014-2015 called Filigree Frame Textured Impressions!  It makes a quick and beautiful frame for your hand made art work!

I added Dazzling Diamonds and the new In Color Sequin Assortments along with our small silver brads!  I cut out the ‘B’ with the Little Letters Thinlets, they are only 28.95 and they are the perfect size for cards/Memory Making/scrapbooking!

I hope you enjoy this card as much as I have!  And for those of you in the Kernersville NC area, I’m having the class next week!  Let me know if you want to attend!

Lisa Tedder

Blendabilities + Back to Black DSP = GORGEOUS!

10152670368254345

I made this card after seeing one similar online. I love how it came out! I used the Back to Black DSP along with the Coastal Cabana Blendabilities. These alcohol based markers coordinate perfectly with Stampin’Up! Paper, ribbon and brads! Once you pick out your color that you want to use everything falls into place! If you place an order with me for Blendabilities, I will give you a FREE class teaching you how to use them! We could Skype if you don’t live nearby and I can really show you! I would love if you visit my site regularly.

Lisa Kernersville NC