Tag Archives: Very Vanilla 8-1/2″ X 11″ Card Stock

Sneak Peek Animal Outing

Hey guys!

I’m not sure that I’ve told you before, but I LOVE Giraffe!  They fascinate me.  I got to feed one by hand when I visited my daughter in MN!  NOW when I go to  visit we’ll HAVE to go feed them again!

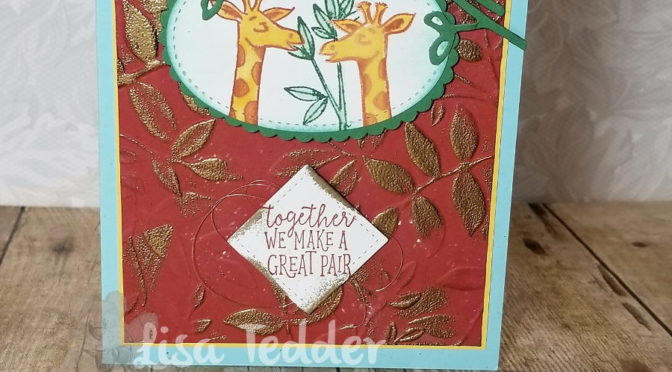
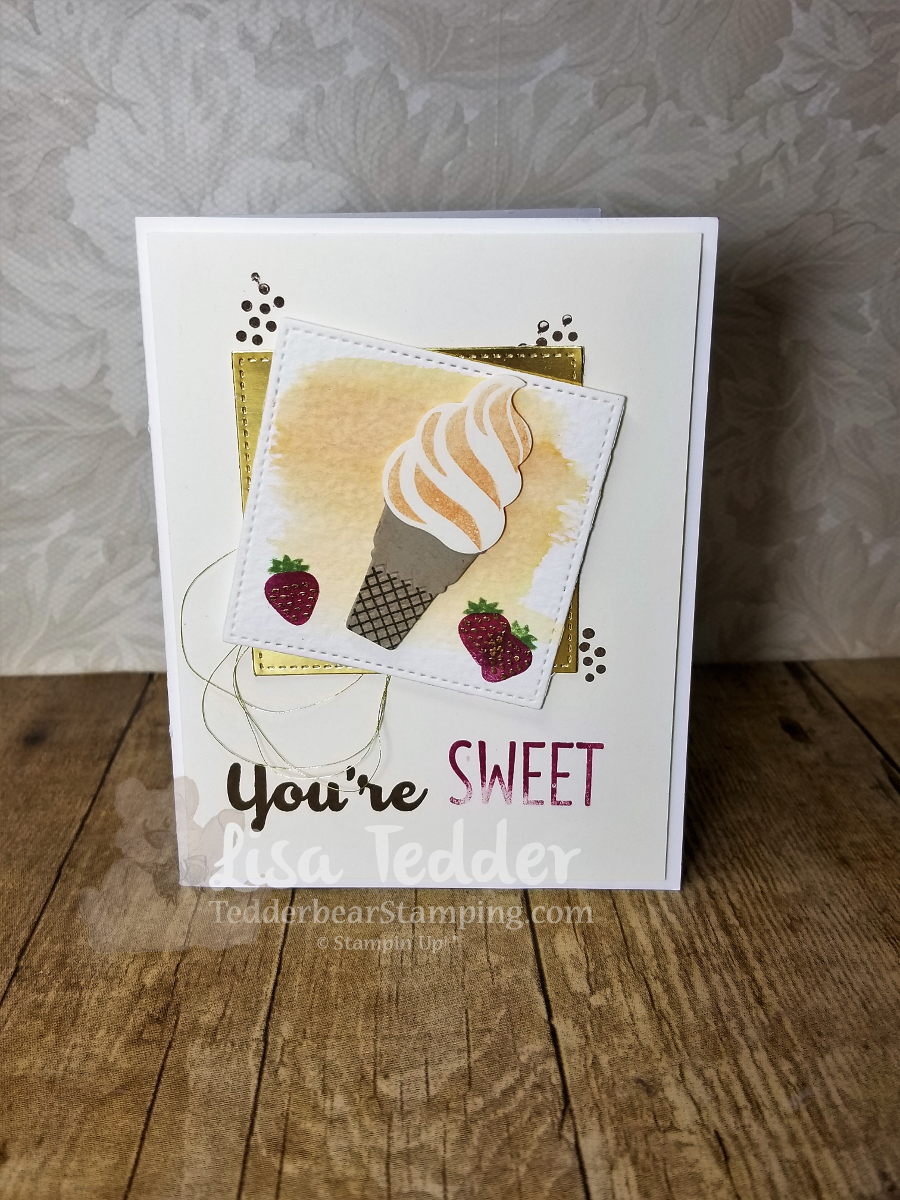
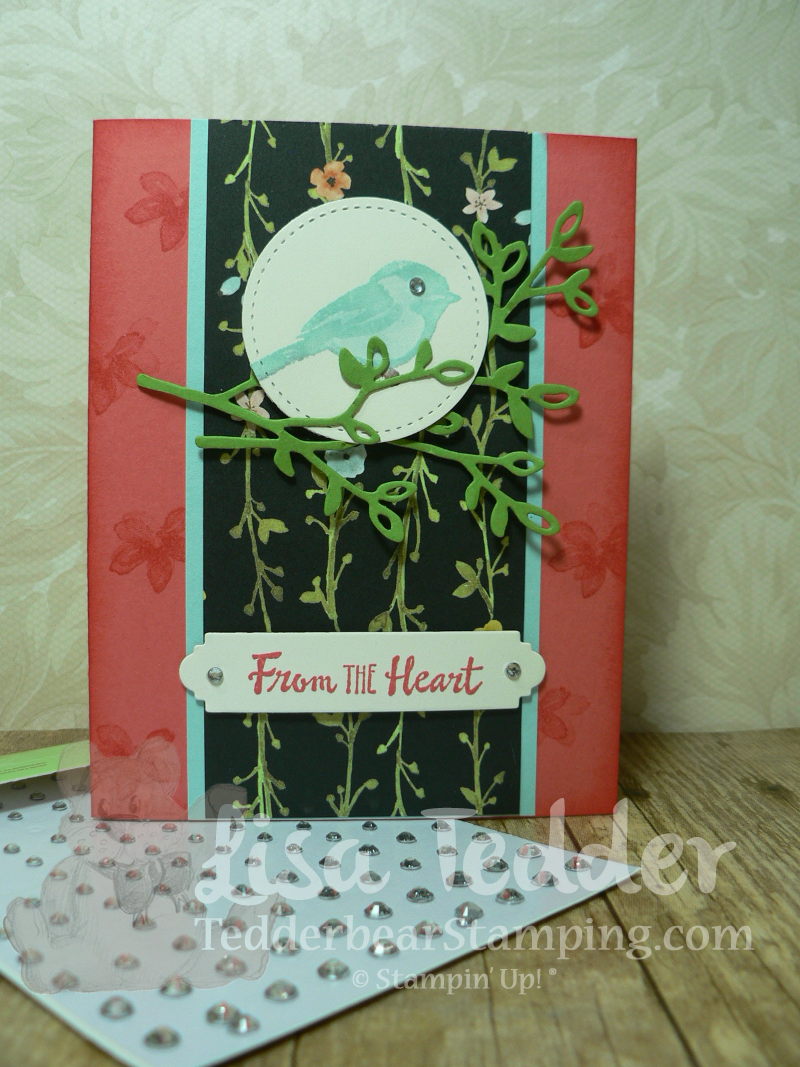
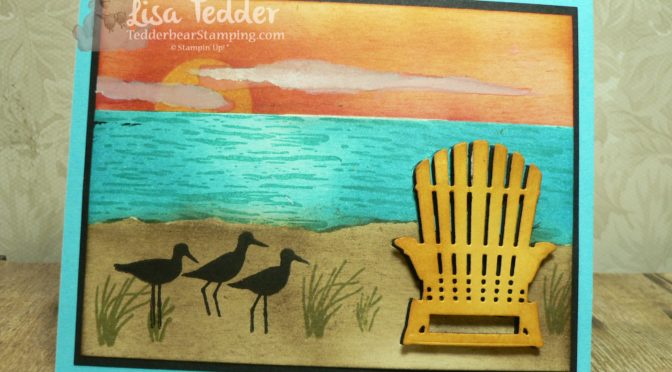
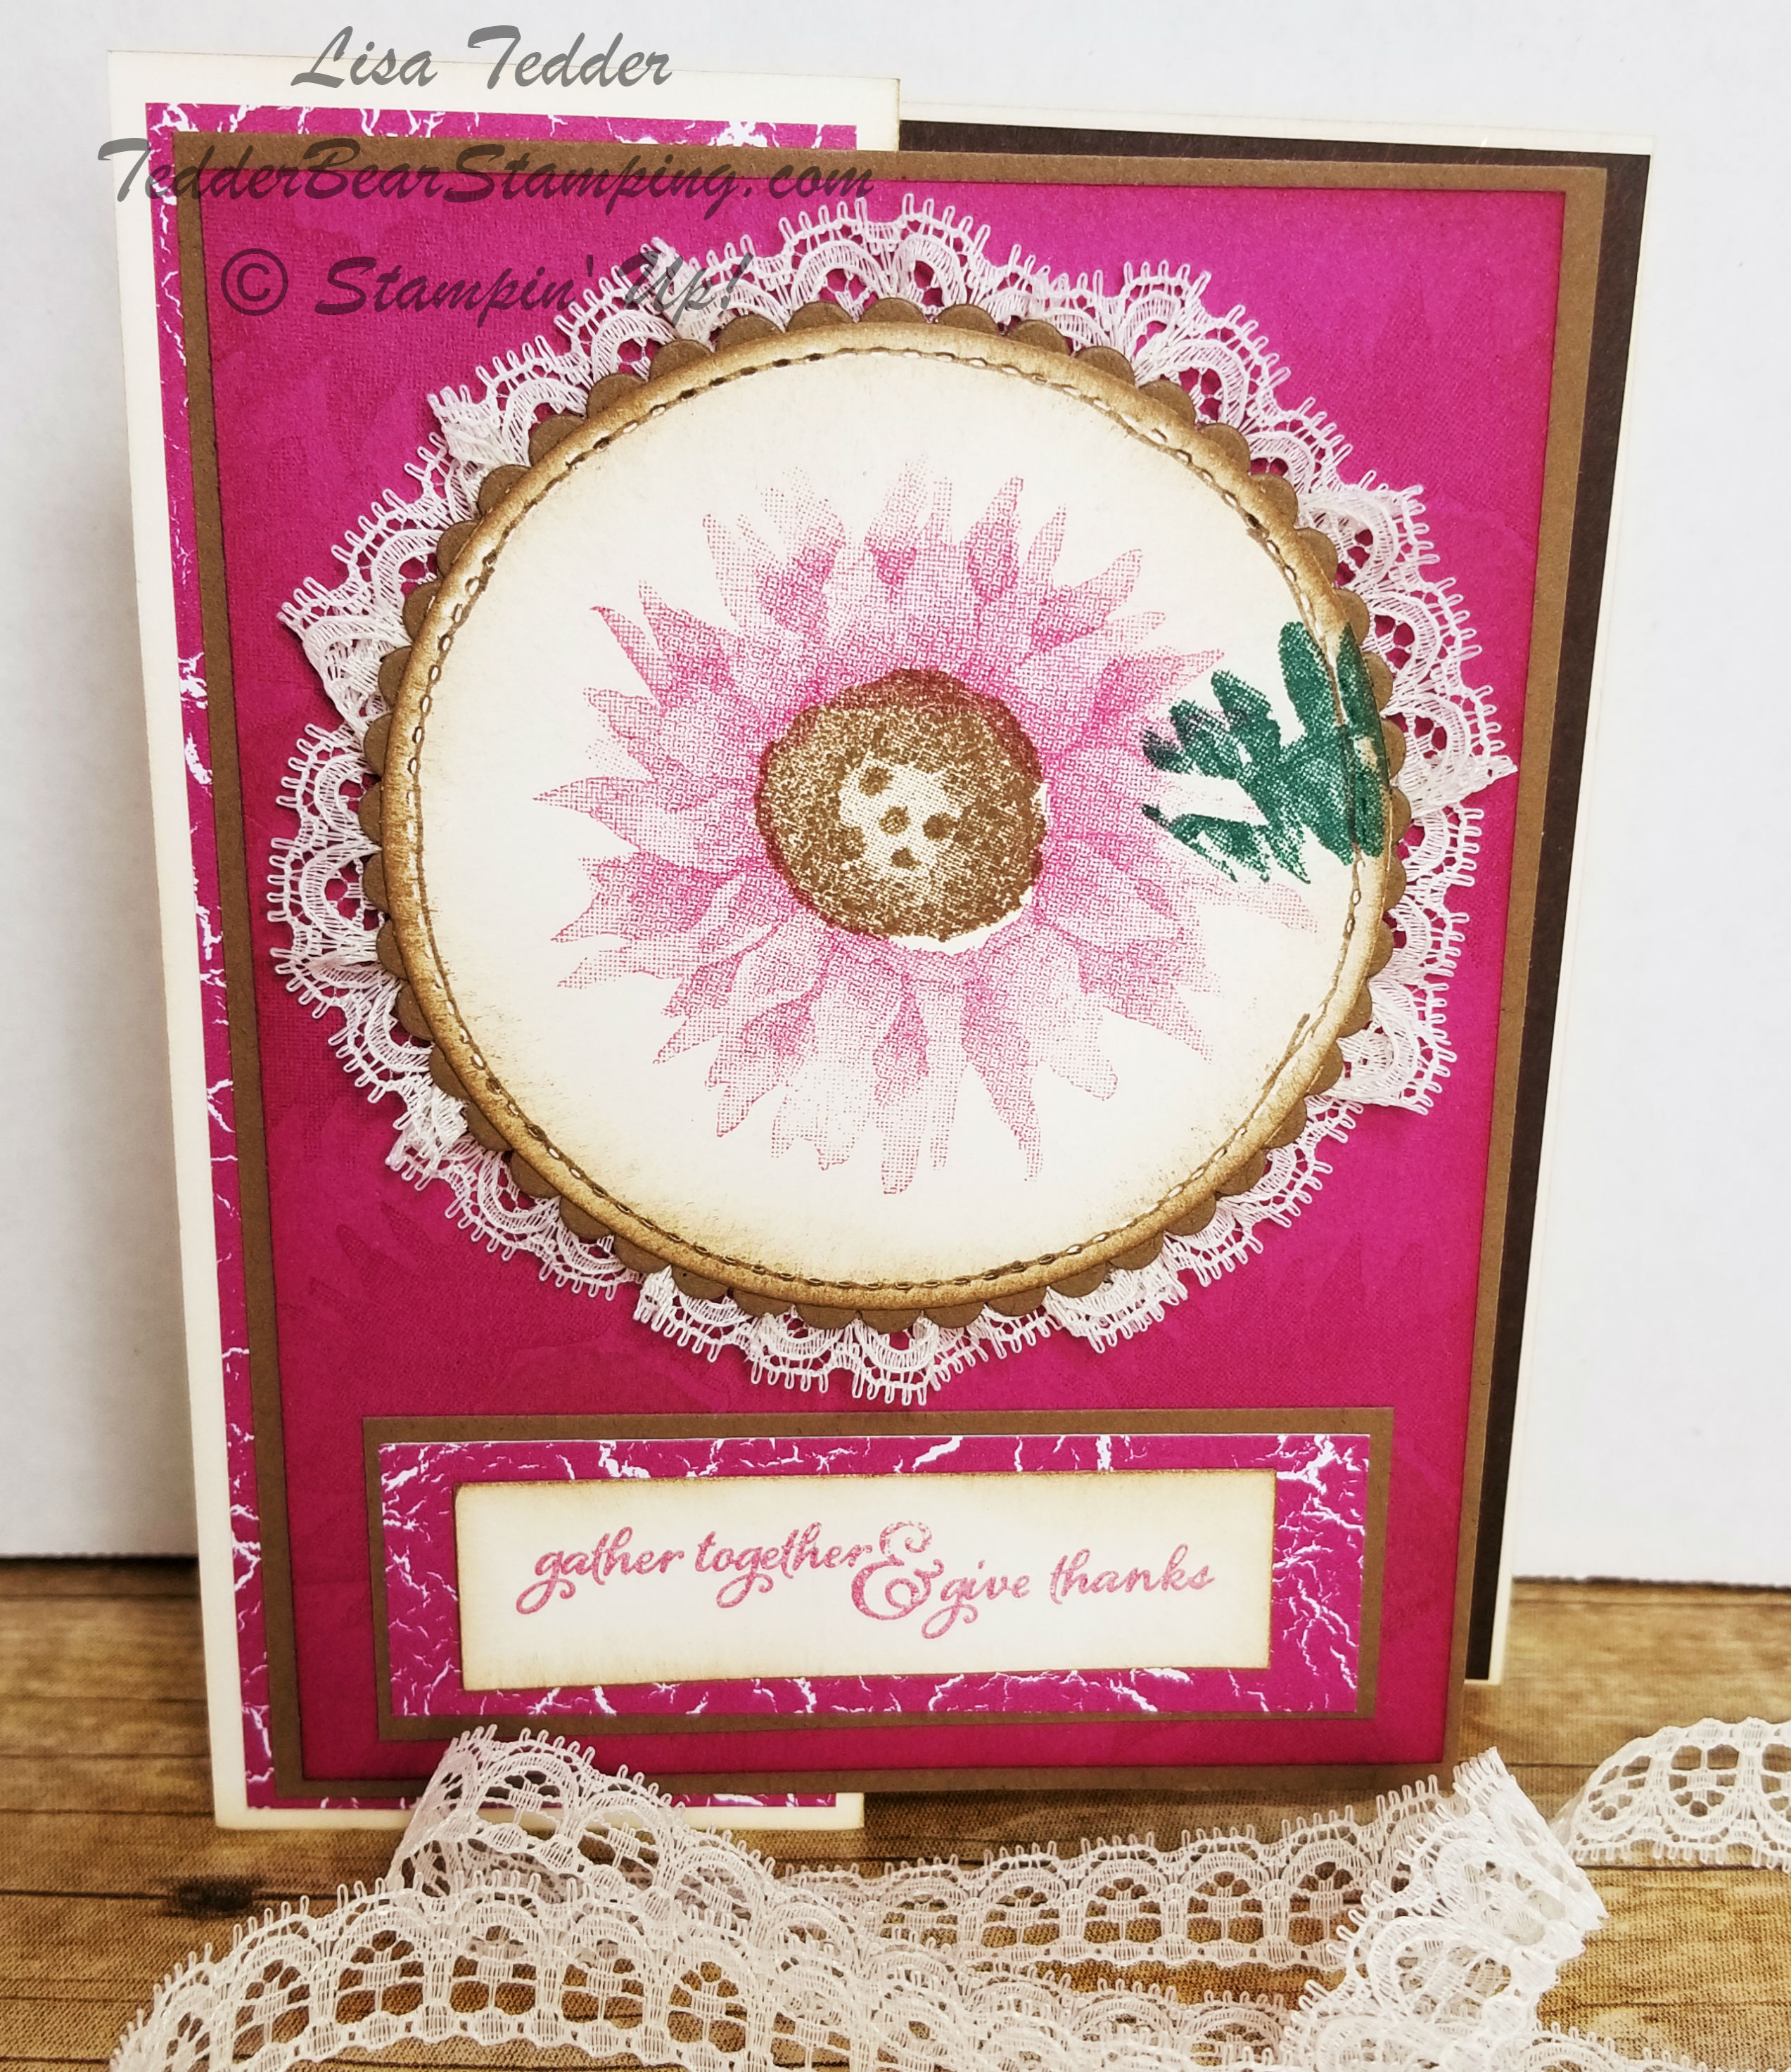
Here is a card I made by creating a second giraffe facing the other way.

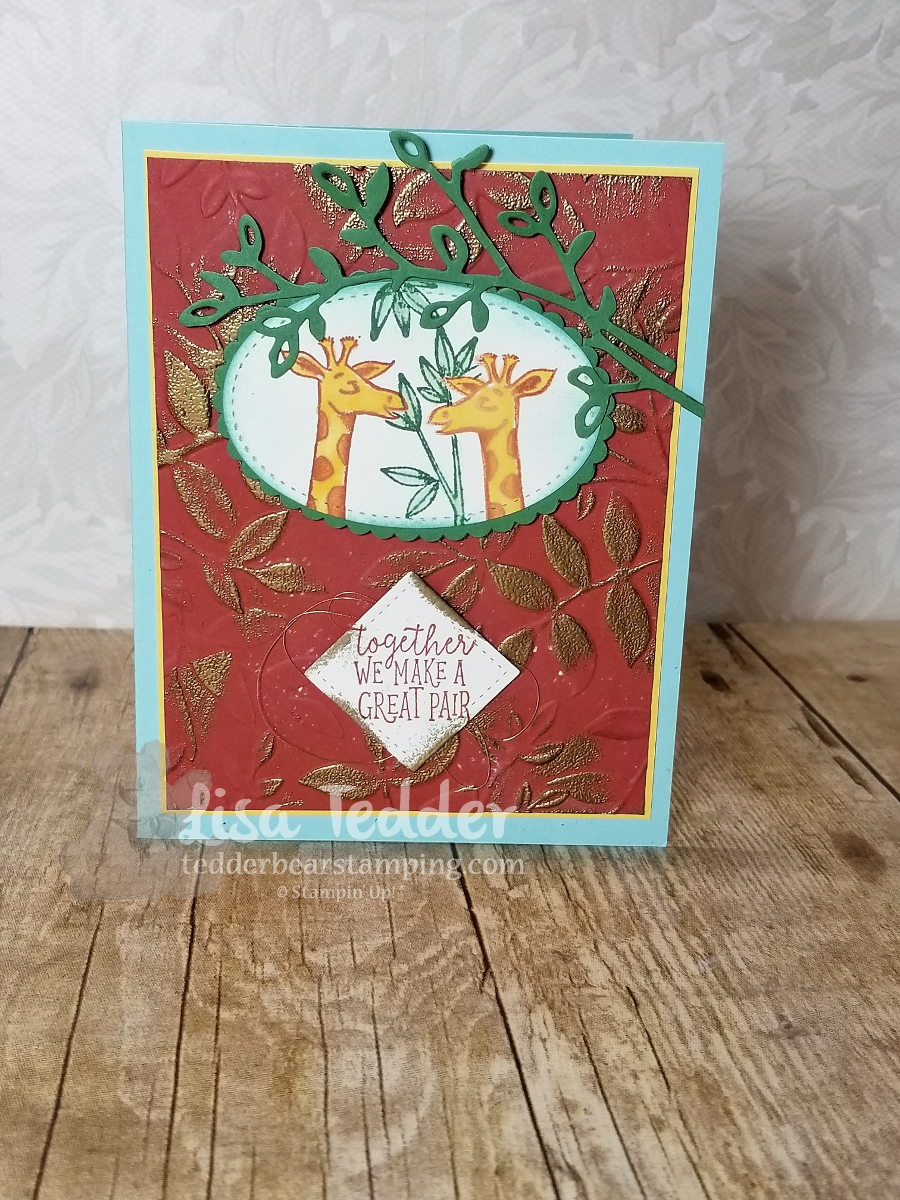
To get the image to face the other way, stamp onto the Silicone Craft Sheet and then immediately turn over and ‘stamp’ the image onto your cardstock.  This works really well, since the image doesn’t dry as fast on the mat.  Then color as usual!  Now, you have two Giraffe facing each other!

Dimensions:

Soft Sky 8 1/2″ x 5 1/2″
Daffodil Delight 3 7/8″ x 5 1/8″ (x2 for inside also)
Cajun Craze 5″ x 3 3/4″
Very Vanilla 5″ x 3 3/4″
Scraps of Garden Green and Very Vanilla

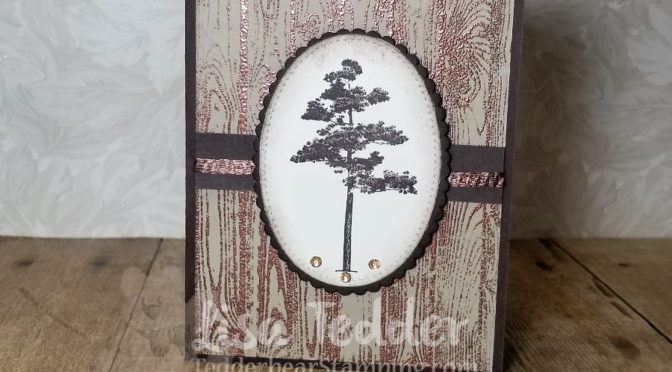
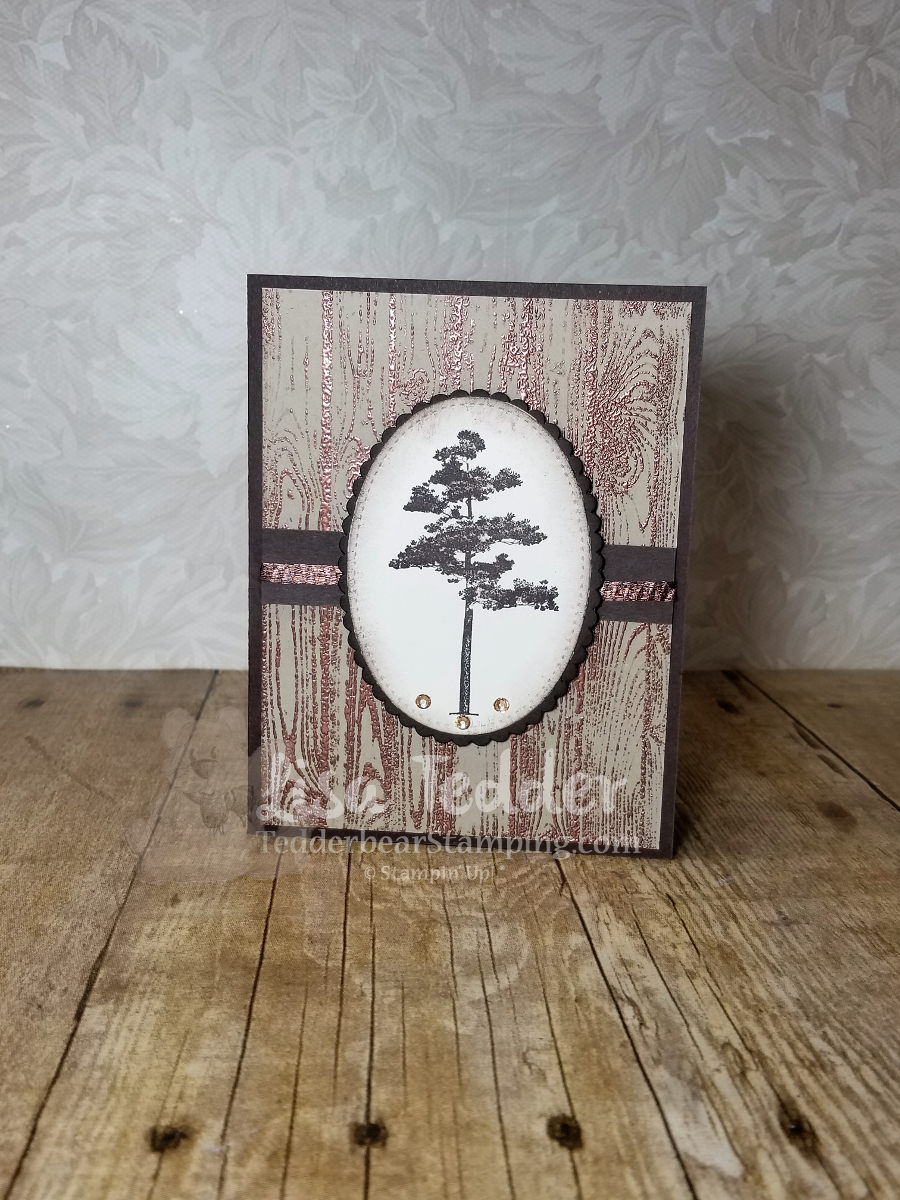
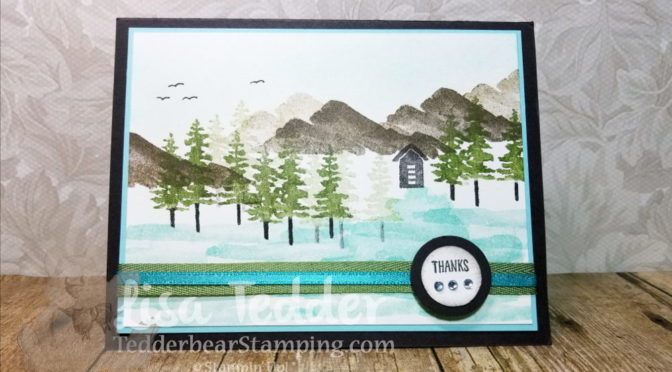
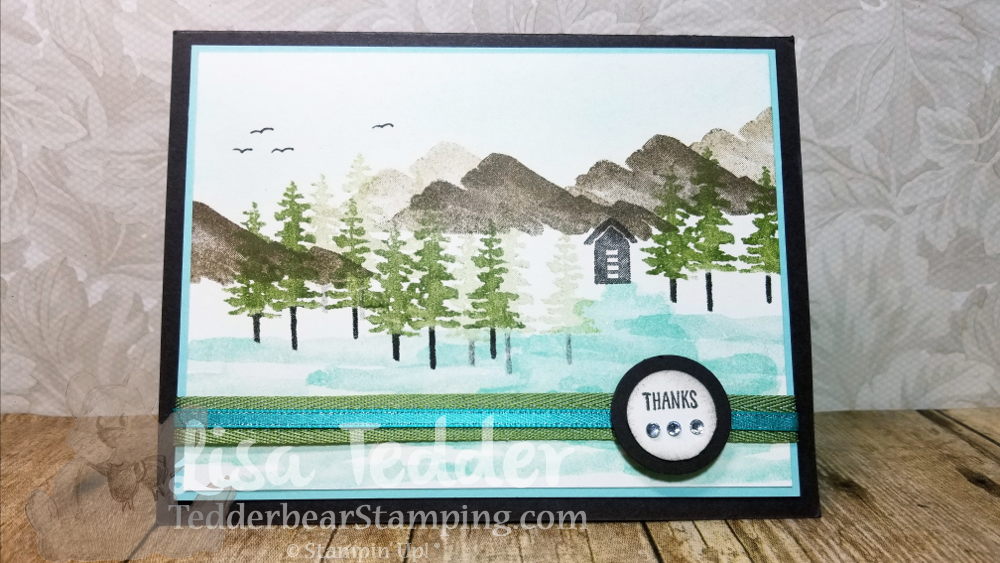
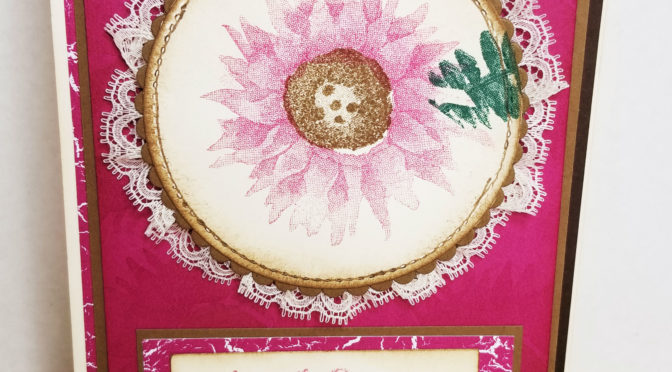
I embossed the Cajun Craze with the Layered Leaves Embossing folder, then ran the Versamark over the images GENTLY to have it only on the raised areas.  Then embossed with Copper embossing powder.

The Stitched framelits is a MUST for any stamper, I use it all the time!

If you would like to choose me as your demonstrator, I would love to have you purchase from me!  Just click on any image below to be taken to my Online Store!

Lisa Tedder
A California girl living in North Carolina
Product List

Elegant any occasion card

Hey Guys!

Today I bring you a handmade card that I just LOVE!  It uses the Stamp set from Stampin’ Up! called  Painted Harvest.

This elegant card has sparkle and dimension.  When I show this to people in person, they just say WOW!  Love when that happens.

Here is the inside:

A simple card with Maximum effect.  I used the Metallic Edge Ribbon to pleat around the sentiment to add to the effect.

Dimensions:

Blushing Bride 5 1/2″ x 8 1/2″
Silver Slimmer paper 5 1/4″ x 4″
Flirty Flamingo 5 1/4″ x 4″ (inside), 5″ x 3 3/4″ (front)
Very Vanilla 4 3/4″ x 3 1/2″ (front), 5″ x 3 3/4″ (inside)

I rounded the corners on the two smallest layers on the front to add dimension.

I would appreciate it so much if you would choose me as your demonstrator if you live in the US!  Click on any picture below to be taken to my OnLine Store!

Lisa Tedder
A California girl living in North Carolina
Product List


Sneak Peek Rooted in Nature

Hey Guys!

While at OnStage, an event that demonstrators attend to learn and get product early, I saw a card that made me make this card.  I don’t know about you, but if I get an idea in my head it is very hard to wait to try and make it!  I have a class that is at the Senior Center here in Kernersville that I bring elegant cards for the participants to make, this is one of the cards that we will be making soon.

I used the background stamp set Hardwood from SU!  I stamped it with Versamark and then poured copper Embossing powder on it and heat set to make this dynamic background!  Very easy (and still fun to do even after 17 years…….I LOVE to watch the magic of embossing!) yet this is a Stunner!  The tree is from the NEW catalog from Stampin’ Up! called Rooted in Nature, that will be coming out in June 2018.

I got this set FOR FREE while at On Stage along with 4 other stamp sets!  If you want a job where you get freebies, get to play every day and meet FANTASTIC people, join my team and become a Demonstrator!

I  colored the Rhinestones using the Bronze Blends so it would all coordinate!  THAT is the reason I decided to join SU!, I don’t have to guess which colors coordinate!  Plus, I got the discount!  hahahaha

Thanks for stopping by, if you like what you see and want to buy from me, just click on any pic below and you will be taken to my OnLine Store!

Lisa Tedder
A California girl living in North Carolina
Product List

Cool Treats – Get yours before it’s gone!

Hey Guys!

I was perusing Pinterest and saw this Beautiful card by Robin Feicht.  I loved it so much I CASE’d it just like it was!

Here is my card:

Here is the inside:

She didn’t show her inside, so this is what I came up with.  I LOVE this set and am sad to see it go.  If you want this set, be sure to check out my OnLine Store to get yours!  Just click on any of the pictures below to be taken there!

Dimensions:
Whisper White 8 1/2″ x 5 1/2″
Very Vanilla 5 1/4″ x 4″ (x2)
Watercolor paper 2 3/4″ sq then cut out with biggest Square (stitched shapes)
Gold Foil same as watercolor paper

I hope you enjoyed my card, if you are in the neighborhood of Kernersville NC, come attend a class!

Lisa Tedder
A California girl living in NC
Product List


Make a Pop Up Card easy by Eyeballing it!

Hey Guys!

I am not much of a Measurer and if it takes me too long to ‘figure it out’ I tend to not want to do it!  That doesn’t mean that I WON’T do it, just that I put it off until I have plenty of time!  I keep seeing these Pop-Up Cards and I wanted to figure out an easy way to make one, that I could teach and show on a video…….
I figured out a quick and easy way to make a Pop-Up card that takes minimal measuring and hardly ANY stress!  Check out my video!

Here is the front of the card:

I absolutely LOVE this Stampin’ Up! set: Waterfront!  It really makes you feel like an artist, and you can make the scenery any way you can imagine!!  I changed the scenery inside, popped up some trees and I am thrilled with the result!

The trees fold down when the card is closed and Stand up when open!  On my video you can see just how easy this card is!

Here is the view from above:

I hope you like this card as much as I do!  The supplies are listed below, just click on any picture to be taken to my OnLine Store!

Until next time!

Lisa Tedder
A California Girl living in North Carolina

Product List

NEW! Occasions 2018 Petal Palette #1

I have two cards using the Petal Palette stamp set from the NEW Occasions 2018 catalog!  Today I am showing you the first card.  I had a lot of fun making this card, I love birds and it’s been awhile since I have found a great bird stamp!  Well, now I have!

The Designer Series Paper (DSP) is called Whole Lot of Lovely and is available from the Main Catalog!  So no worries it is available for quite a while!!  After you purchase the paper and the bundle you will be VERY close to get the Stamp set, Happy Wishes, that I used on the inside for FREE!  This set is a Sale A Bration set that if you spend $100.00 you can get this set for free!  It has 16 stamps that is in TWO of the boxes!  SUCH a great deal!

The Leaves are from the Bundle, so if you like this card, be sure and get the Bundle!

Here is the inside:

I love how intricate this stamp is, don’t you?

Come back so you can see the 2nd card from this set!  I know I will be making a LOT more so stay tuned!

If you click on any of the images below, you will be taken to my OnLine Store!

Lisa Tedder
A California Girl living in North Carolina
Product List

Card #4 – Christmas Cards

Hey Guys!

Can you believe that I have already shared 3 other Christmas cards with you!?  Check out #3 here.

Here is #4!:

I got this idea from Sandi MacIver, you can see her YouTube video here!

Here is what it looks like on the inside!:

Beautiful card!  Thank you Sandi for the great idea!

If you are interested in my 7 page tutorial for all 6 of my Christmas Cards (get instructions, dimensions and color photos) you can get it just by purchasing $50 from my OnLine StorePlease use hostess code CGCDT6ZJ

All supplies are listed below, just click on any picture to be taken to my Store!

Gotta Run!

Lisa Tedder
A California Girl living in North Carolina
Product List


Technique Tuesday Triple Flap Fold Christmas Card

I love when a project comes together! Click here for a video to see the process It took to make this beauty!  The great thing about the video is that I tell you the dimensions and supplies!

I was spending time on YouTube the other day and found this great idea from Dawn, which you can see here.  I loved the idea, but didn’t have her Halloween stamps, even though I LOVE Halloween (need to have new ideas every year for scrapbooking!).  So, I DID have the Christmas stamps from Stampin’ Up! called Father Christmas (I used EVERY stamp!, WooHoo) and Nature Sings.  These Stamp sets are PERFECT for my idea!

When do you use every stamp from a stamp set on ONE project?  I did for this one!  Not sure WHY I am proud of this, but I am.  😉

Here is the project closed:

Partially open:

And now all the way open!:

Isn’t this pretty!?  What I love is other than the front where I colored, there isn’t anything else that needs that much attention!  I DID sponge all the Vanilla pieces but I pretty much sponge everything so this wasn’t a big deal to me.

When I showed this around, I got so many Ooooooh’s and Aaaaaaaah’s!  LOVE when that happens!  Now the question: Who do I send this to?

The next question is what will be my technique for NEXT Tuesday?! Any suggestions? I have a great idea, not sure if I will go with that idea or one YOU give me!

You can click on any of the supplies listed below to be taken to my OnLine Store!

I hope you like this technique, I would love to see a ‘story’ you would like to create using this Fancy Fold!

Until next time!

Lisa Tedder
Tedder Bear Stamping
A California Girl living in North Carolina

Product List

Ghosting with a Twist Technique Tuesday

If you like this card, look below and see how you can have me make you one!  Go to this video to see how this card was made!

I see the ‘Ghosting’ Technique all over, and I wanted to do this with a Twist!  I made a Beach landscape card, and wanted my chair to have a shadow, or ghosting effect, BUT I wanted to be able to see the water and sand behind the chair.  The thinlit from SU!’s Seasonal Layers cuts the entire chair out, and that would leave a BIG hole in my beach scene!  :-O  Can’t have that!!  So, I die cut out 2 images of the chair, one in Crushed Curry and one in Black.  Plus, I had to die cut out the chair directly from my scene!

Once the card was made, I cut out the chair which left a BIG hole in my card, so I had to remake my background on scraps of Very Vanilla to match the colors that I already had on my card.  This is much easier than you would think…….just sponge the colors you used onto Very Vanilla and stamp the waves for the water, tape them onto the back of your card.  It’s that easy!!  Then you will still have the outline to place a black chair, and it will be flat to the card, it looks just like a shadow!

Here is the view of the entire front!

Isn’t this pretty!!?  If you want to see this card from start to finish, just visit my YouTube Page to see this awesome Ghosting with a Twist Technique!

As always the supplies are listed below, just click on ANY picture to be taken to my OnLine Store!  IF you purchase from me using this Hostess code: WNUY3EBP, I will make YOU this card and mail it to you!

Be sure and subscribe to my YouTube channel so you won’t miss the next Technique Video!

I’m off for now!!

Lisa Tedder
TedderBearStamping
A California Girl living in North Carolina

 
Product List

Technique Tuesday-Faux Embroidery using Painted Harvest

Want to receive this card?  Check out below how you can be in a drawing to get this beautiful card mailed to you!

Today I am sharing with you a new Technique that I kind of stumbled on!!  I’m using the NEW stamp set:  Painted Harvest #144783 which will be in the Holiday Catalog coming out in September!  You can see the video on YouTube, I have some great tips and it’s a VERY simple Z fold card!

Here is a picture of the front of the card:

Isn’t it GORGEOUS!?  I was just playing around and was astounded at how great this came out!  This is one of those times when I am sitting at my stamp table (by myself) and I start to talk and say how beautiful it is!  LOL   No-One is there, mind you……..even after 16 years of stamping I STILL get excited that I can make something this pretty!

Here it is open:

Doesn’t Berry Burst work great with this card?   And here is a close-up of the front flower that looks like embroidery:

I popped up this whole piece using the Foam Adhesive Strips since they pop up more than Dimensionals.  The video I made shows a different leaf than the one shown here, and I like it better.  I show you how to mask the flower and put the leaves behind it.  I also show you how to do the ribbon behind this image.  If you go see it, leave me a message and let me know what you think.

IF you leave me a message I will have a drawing in 2 weeks on the 28th for one of you to win this card!  Leave a message either here on my blog or on the video on Youtube.

ALL the dimensions are on the video, so if you want to recreate this go check it out!

All the supplies are listed below, click on any picture to be sent to my On-Line Store!  If you purchase from me I will be sending you a handmade card as a Thank You!

This is a SNEAK PEEK so hope you enjoyed this card as much as I do!  Keep an eye out for MORE Technique Tuesday videos!  Techniques are my favorite.  Anything that will let me use my stamp supplies more are a win win in my book!

Until next time!

Lisa Tedder
TedderBearStamping
A California girl living in North Carolina

Product List