Tag Archives: Stamping Sponges

Cutest Dog Shaker Card

Hey Guys!

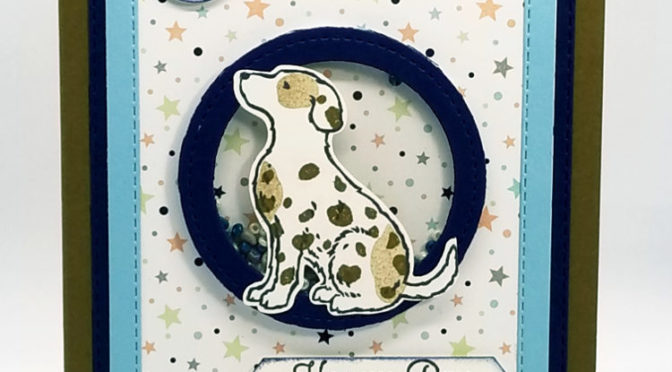
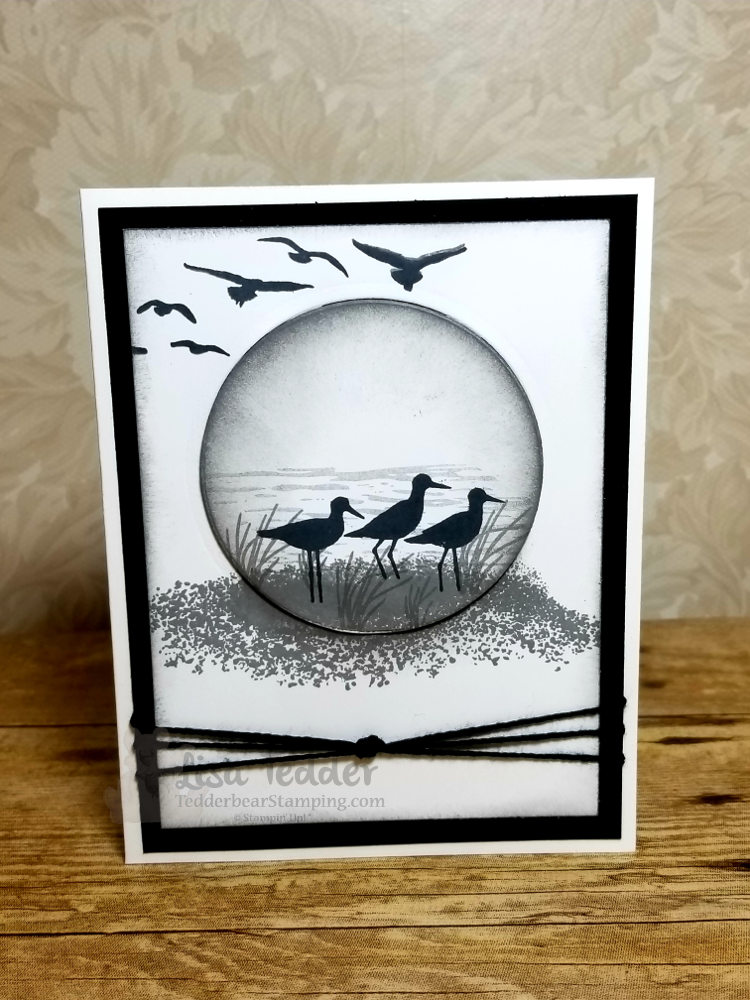
I was wanting to make a shaker card, and I wanted to make a Dog card using the new Stamp set from Stampin’ Up! called Happy Tails, so I put them together!

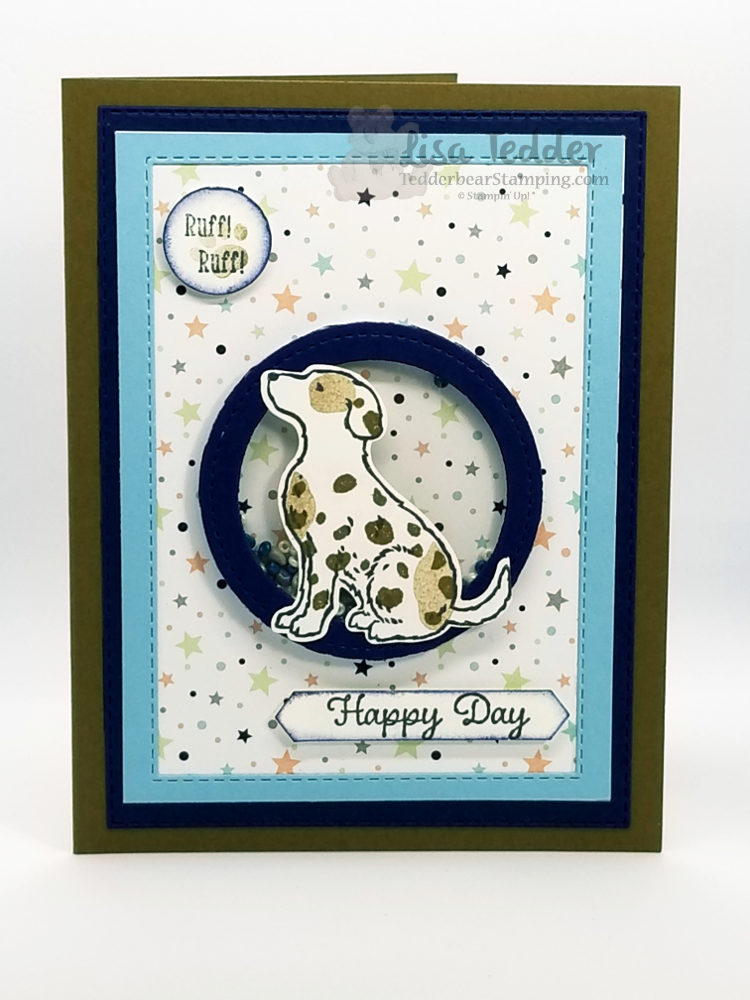
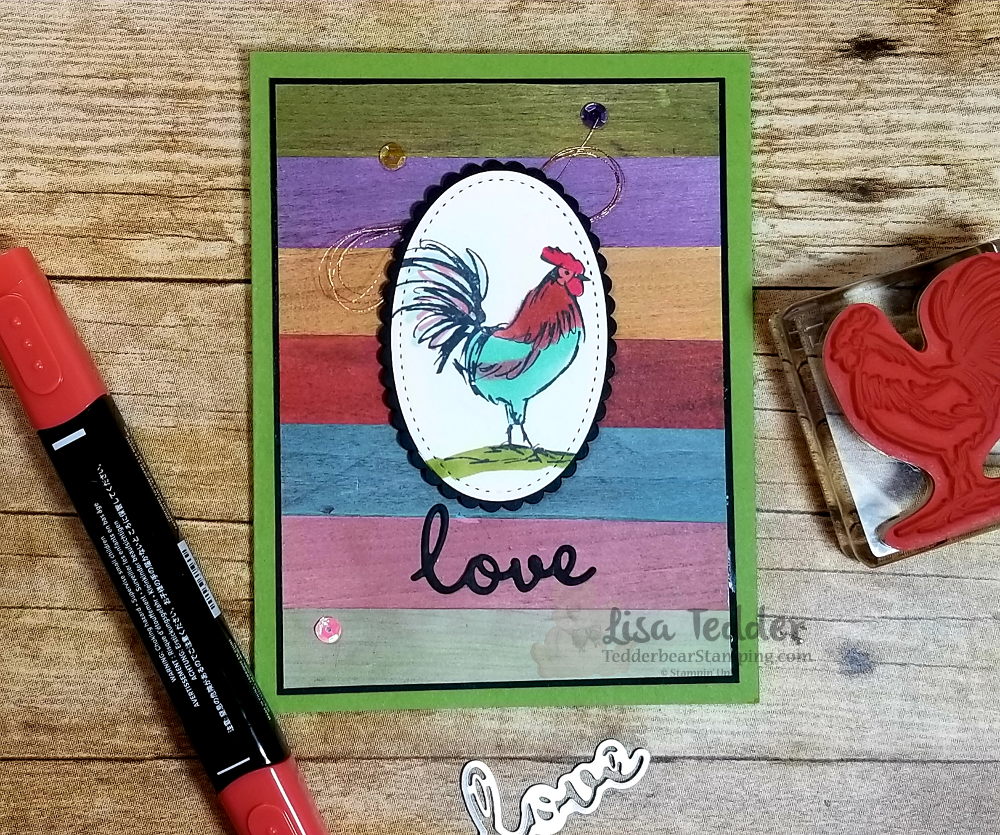
This dog is stinkin’ cute!  Holding a shaker card is so much fun you HAVE to see how it works! The dog fits perfectly in the open area of the shaker that I made using the Stitched Shapes framelits.

Here are the specifics for this card:

PROJECT 1: Dog Shaker
Stamp Sets Pg #
Happy Tails Bundle
Itty bitty birthdays
Paper
Soft Suede 8 1/2″ x 5 1/2″
Night of Navy 4″ x 5 1/2″, 5 1/4″ x 4″, 2 5/8″ sq
Balmy Blue 3 3/4″ x 5″ (x2)
Twinkle Twinkle DSP 3 3/4″ x 5″
Whisper white scraps
Inks
Memento black
Crumb Cake
Soft Suede
Night of Navy
Accessories
Stitched Shapes framelits/Rectangle framelits
1/2″ circle punch
Classic Label punch
Tranquil Textures Sprinkles
Foam Adhesive Strips
Window Sheets

Below are the supplies used for this card, click on any picture and you will be taken to my OnLine Store.  If you purchase from me, I will send you a small gift to thank you!

Thanks for stopping by!

Lisa Tedder
A California girl living in North Carolina
Product List

By the Bay minimal coloring

Hey Guys!

I love searching Pinterest for a card to make.  I found this really pretty one by Susanne Netz and decided to CASE it for a class.

Here is a picture of hers:

Here is my card:

I changed it up a bit by framing it with black and matting that onto a piece of Balmy Blue.  I ran the Balmy Blue through the Big Shot using the Subtles Embossing Folder.  I sponged the edges with Balmy Blue to give it a softer look.

Here are the specifics for this card:

PROJECT 1: Beach house
Stamp Sets Pg #
By the Bay SAB 10
Paper
Black 8 1/2″ x 5 1/2″, 4 1/8″ x 2 3/4″
Balmy Blue 5 1/4″ x 4″ (x2)
Vanilla 4 1/2″ x 3 1/4″, scrap
Inks
Memento Black/Crumb Cake
Pool Party
Balmy Blue
Blends: Balmy blue combo, Crumb Cake light,
Granny Apple green lt
Accessories
Rectangle Framelits
Dimensionals
Subtle Embossing Folder
sponges
Big Shot
NeedlePoint Elements framelits

Isn’t it Amazing that you can earn this set for FREE!!?  Spend $50 on product and get this Stamp set!  I LOVE this set!  Wouldn’t you love to live in that house?

I cut some Window Sheets in the shape of clouds and sponged along the edges of the window sheet to make the clouds.

All the supplies are listed in pictures below, click on any of them to be taken to my OnLine Store. I would love if you would choose me to be your SU! Demo!  If you purchase from me I will send you a small gift to show my appreciation.

I hope you enjoyed this post and that you will visit again!

Lisa Tedder
A California girl living in North Carolina
Product List

High Tide Close Up

Hey Guys!

Today I am sharing with you a card that I HAD to make!  I saw it on YouTube by Esther-Stampin Star Creations.  THIS card was so much fun to make and I LOVE Black and White cards!

The ONLY thing I changed up from Esthers’ card is I added the Baker’s Twine on the bottom.  I also think my white is smaller than the one she used, I didn’t notice it was smaller until after I cut it! So there it stayed.

Here are the specifics for this card:

Stamp sets

High Tide

Paper
Whisper White Thick 5 1/2″ x 8 1/2″, 3 5/8″ x 4 7/8″ (x2)
black 5 1/4″ x 4″ (x2)
Inks
Memento black
Basic Gray
Accessories
Layering Circles (2nd biggest)
Dimensionals
Black Bakers Twine
Sponges

When you look at this card, it looks like it would difficult. Or time consuming.  It’s neither!  Sponging is the main effect and that is easy to do!   I absolutely fell in love with this card and when that happens I HAVE  to make it right away!  I was done for the day, put on a video on YouTube and saw this one while I ate dinner. Normally I would plan on making it the next day, but this called to me and now that I have made it……..I LOVE it!  Thank you Esther!

If you are looking for a Stampin’ Up! Demonstrator, I would love it if you could choose me!  I also have a YouTube Channel, and if you check me out and like the style of cards I make, we could make a great team!

Below are pictures of the supplies that I used, click on any of them and you will be taken to my OnLine Store!  If you purchase from me I will send you a small token of my appreciation!

Thanks for stopping by!

Lisa Tedder
A California Girl living in North Carolina

Stain your Wood Textures paper to get a Rustic Look!

Hey Guys!

Hope you are all well today!  I am sharing with you today a technique I learned when I went to a meeting by North Carolina Demos.  We are from all over the state, and we have Quarterly Meetings where we get together, for an all day event.  We learn new techniques, meet up with friends and most of the time we start on Friday night and continue on Saturday!  LOVE this group!

While at the meeting one of the projects was staining the 6″ x 6″ 1DSP Wood Textures with Reinkers and sponges.  The result is stunning!  I am doing this in my class this month, hope they love it as much as I did!

Here are the specifics for this card:

PROJECT 1: Rooster
Stamp Sets Pg #
Home to Roost
Paper
Old Olive 8 1/2″ x 5 1/2″
Black 3 7/8″ x 5 1/8″ (x2), scrap, 2 1/4″ x 3 1/4″
Vanilla 5″ x 3 3/4″ (x2), 2 1/4″ x 3 1/4″
Wood Textures 6 x 6
Inks
Blends: Real Red dk, Cajun Craze, Pool party, Old Olive
Memento
Reinkers: Blushing Bride, Soft Sea Foam, Pear Pizzazz
Calypso Coral, Highland Heather, So Saffron, Balmy Blue
Accessories
Copper Thread
Layering Ovals
Stitched Framelits
Well Written framelits
Sequins
Dimensionals

Below are pictures of the supplies used, click on any of them and you will be taken to my OnLine Store!  I would love it if you would choose me as your Demonstrator! If you purchase from my OnLine Store, you will be sent a gift from me!

Thanks for stopping by!

Lisa Tedder
A California Girl living in North Carolina

Product List

Elegant Card that has a bonus Tear off Book mark!

Hey Guys!

I was so excited when I saw the Die set Stitched Labels, it has a die that will give you a serrated edge!  I LOVE it when a handmade card is interactive!  THIS card is not only gorgeous, but it has a bookmark that can be torn off and the card is still beautiful! Below is a link to a video that I made showing how to make this!

Here is the front.  And here it is open:

And here is a close up of the bookmark!

Don’t you love it!?

This is very fun, I made a video (click here) so you can see how I made this card!

For a limited time, I will be giving prizes out on my Youtube Channel from my videos.  You only need to Subscribe, Share or give a thumbs up to be in the drawing!  Super easy things to do to get into a drawing for something free!!

I hope you like this card as much as I do!  Below are the supplies needed to make this card, click on any picture to be taken to my OnLine Store!

Thanks for stopping by!

Lisa Tedder
A California Girl living in North Carolina
Product List

Christmas card # 6 Beautiful Blizzard

Hey Guys!,

I am sharing with you my Christmas cards that I am doing with my classes in October.  For my class my girls make 3 cards each of 5 different designs and one special card that they only make 1 of.  They end up going home with 16 Christmas cards!  We make a day of it, everyone brings food to share and we play Christmas songs!  It’s a great way to get your Christmas cards done!

Here is the card that I am sharing with you today:

This is so pretty in person!

I LOVE Pool Party with Silver!

Here are the specifics:

Stamp Sets: Beautiful Blizzard Bundle
Cardstock: Pool Party 8 ½” x 5 ½”, Silver Glitter Paper 5 ¼” x 4”, Whisper White 4 ¾” x 3 ½”, 4” x 5 ¼” (inside), 3 ¼” x ¾”, Sparkle Glimmer scrap for snowflakes
Inks: Versamark, Pool Party
Misc: Embossing Buddy, Heat tool, Silver EP, Pool Party Shimmer ribbon, Fine Tip Glue Pen, sponges

Below are all the supplies used in picture form.  Just click on any of the pics and you will be taken to my OnLine Store!  I would love to be your SU! Demonstrator if you live in the US.

Lisa Tedder
A California girl living in North Carolina
Product List

Elegant any occasion card

Hey Guys!

Today I bring you a handmade card that I just LOVE!  It uses the Stamp set from Stampin’ Up! called  Painted Harvest.

This elegant card has sparkle and dimension.  When I show this to people in person, they just say WOW!  Love when that happens.

Here is the inside:

A simple card with Maximum effect.  I used the Metallic Edge Ribbon to pleat around the sentiment to add to the effect.

Dimensions:

Blushing Bride 5 1/2″ x 8 1/2″
Silver Slimmer paper 5 1/4″ x 4″
Flirty Flamingo 5 1/4″ x 4″ (inside), 5″ x 3 3/4″ (front)
Very Vanilla 4 3/4″ x 3 1/2″ (front), 5″ x 3 3/4″ (inside)

I rounded the corners on the two smallest layers on the front to add dimension.

I would appreciate it so much if you would choose me as your demonstrator if you live in the US!  Click on any picture below to be taken to my OnLine Store!

Lisa Tedder
A California girl living in North Carolina
Product List


Painting with Brusho!

Hey Guys!

Today is Tuesday so that means I have a new video to offer you!!   I wanted to show how easy it is to paint with Brusho.  Brusho gives you such a vibrant color and I am now asking myself why haven’t I done this before!?

Here is the card I made:

Another great thing is that I can make my own colors!  Just mix the yellow with the blue and get a nice green…..add more of one than the other and the hue changes!  I can’t wait to see what colors I can make!

Here are the dimensions to this card:

Dapper Denim 8 1/2″ x 5 1/2″, 3 3/4″ x 5″
Whisper White 3 7/8″ x 5 1/8″
Gold Glimmer Paper 3 1/4″ x 4 1/4″
Watercolor paper 3″ x 4″

I hope that this card encourages you to  try the Brusho!

Thank you for stopping by, I hope you continue to touch base with me!  I enjoy making handmade cards and I hope that I inspire you to do the same!

Below is pictures of the items used for this project, click on any picture and you will be taken to my OnLine Store!

Lisa Tedder
A California Girl living in North Carolina

It’s a MAN card!!

Hey Guys!

If you’re wondering why my title sounds so weird it’s because I remember a cartoon that had the woman in it scream “It’s a MAN!”, in a very high voice, and she always scared that poor man!  LOL   My friend and I were reminiscing the other day about all our fun shows we watched growing up and this just popped in to my head when I was thinking of what Title I wanted.  ‘Manly’ cards are always a challenge for those of us that make handmade cards, for some reason the so-called ‘Girly Cards’ are much simpler to think up!  Hence the title!  LOL  So, now you KNOW just how crazy I am!

For this card I used the Truly Tailored Card from the Occasions 2018 Catalog from SU!  I got this idea from Tami White……I changed it up VERY LITTLE!!  Thanks Tami for your awesome MAN card!

Below you will see pictures of the items used for this card, just click on any picture and you will be sent to my OnLine Store!  IF you purchase from me, I will send you a handmade card as a Thank you!!

Dimensions for this card:

Thick Whisper White:
8 1/2″ x 5 1/2″, 4″ x 4 3/8″, 5″ x 3 3/4″, 2 1/2″ sq

Night of Navy:
2 3/4″ sq, 5 1/4″ x 4″

Basic Gray:
4″ x 4″

Thank you for visiting and putting up with my Childhood memories!  I have a YouTube Channel where I add a video every Tuesday (at least I try to!!) and I would love it if you would visit and subscribe so you won’t miss my next one!

Lisa Tedder
A California Girl living in North Carolina

Product List

Moonlit Scene made with Stamps!

Hey Guys!

I have another technique for you today on making another landscape scene!  This one is for a Moonlit water scene!  To see it done in person, you can watch me make it here!

Here is the card that I show how to make it!

I was so excited on how this card came out!  I even tackled doing a reflection!

Here are some of the cards that I show at the end that you might want to see closer!

I made this one after looking at this photo i found online:

Here’s another card I made:


I saw a card like this online, but couldn’t find it again.  I pretty much copied it!  I did change a little in the sky, but the rest I kept.  If you happen to see this card please let me know so I can give credit.  UPDATE: Thank you for everyone that mentioned where I saw this, Kim Jolley at stampinartfully.blogspot.com is the one that I got the idea from.  Thank you Kim!!

This is also from the same person, this is where I learned HOW to make the Scenes!  Again, if you see or know who made the original, please let me know!  I did add some Glitter & Clear Epoxy Dots to make the rain look more real!

Hope you like this post.  Check back in for my other posts!

Everything listed for my main picture at the top is listed below.  Click on any picture to be taken to my OnLine store!

Talk to you soon!

Lisa Tedder
A California Girl living in North Carolina

Product List