Tag Archives: Pacific Point Classic Stampin’ Pad

Who wants to Jiggle with me?

Hey Guys!

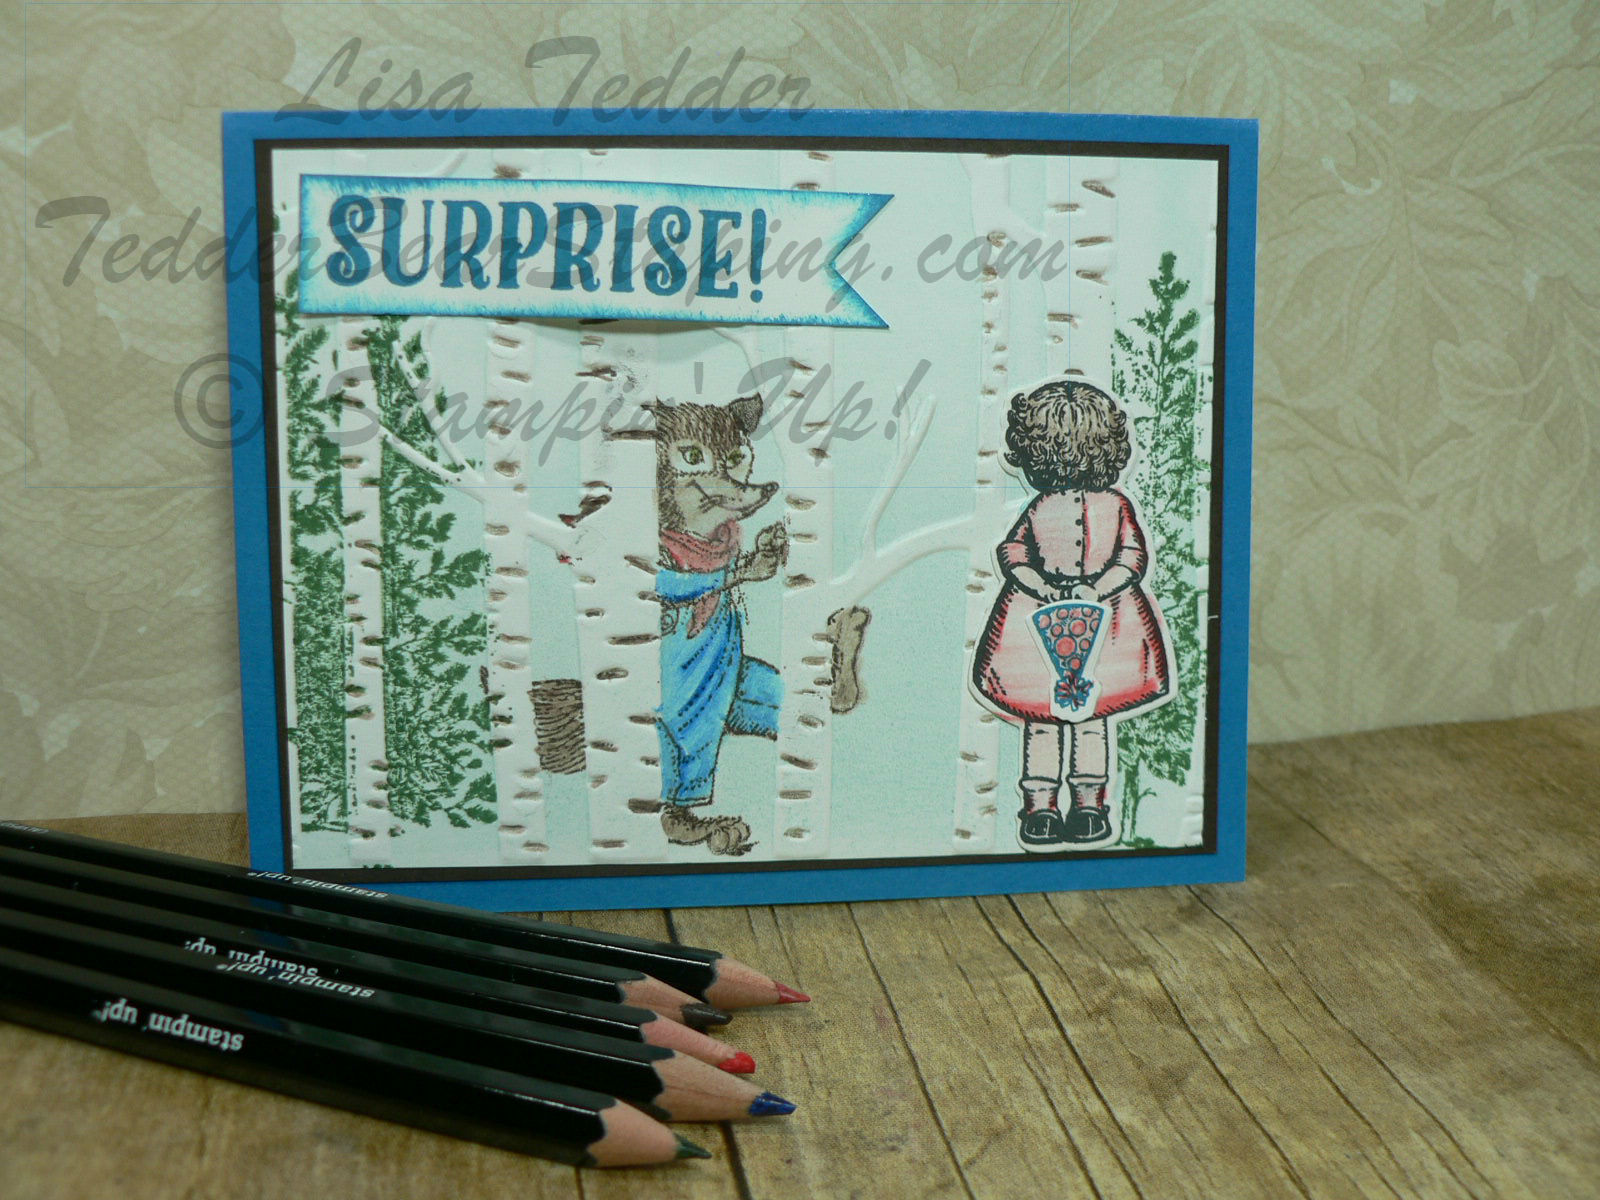
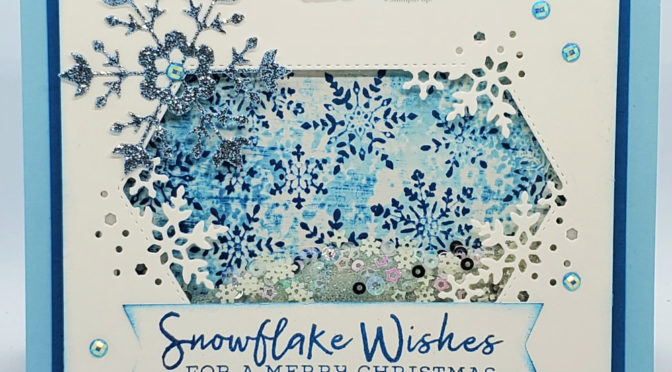
Today I will be sharing with you a Snowflake Shaker Card I made using Snowflake Wishes from the NEW Stampin’ Up! Holiday Catalog!
The NEW Holiday Catalog is out for us Demonstrators with Stampin’ Up! and I made a beautiful card using the stamp set Snowflake Wishes and it’s a Shaker! Amazingly, it is very easy to make, we will be walking through the making of it, but if you want to see it done, I have made a video you can watch! Who wants to jiggle with me?!

Snowflake Wishes Shaker

First, you will make your background for the shaker.
Go to my video Spot On! to see how that was done & see a version of the background. This time we will be using the Foam Brayer to put the color onto the Folder Winter Snow, then spritz with the Alcohol/Champagne Mist. Second, you will die cut out the window & Snowflakes using the dies that comes from the Snowflake Wishes Bundle. Thirdly, you will stamp your sentiment. And Last you will put them all together to make this awesome shaker card!

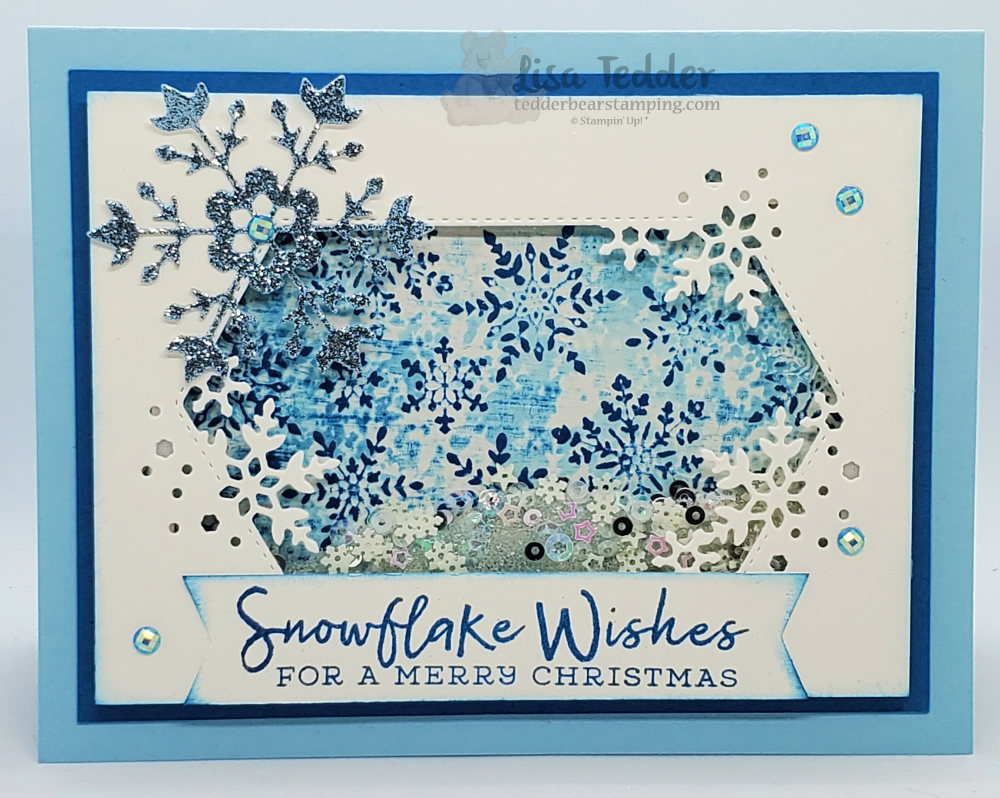
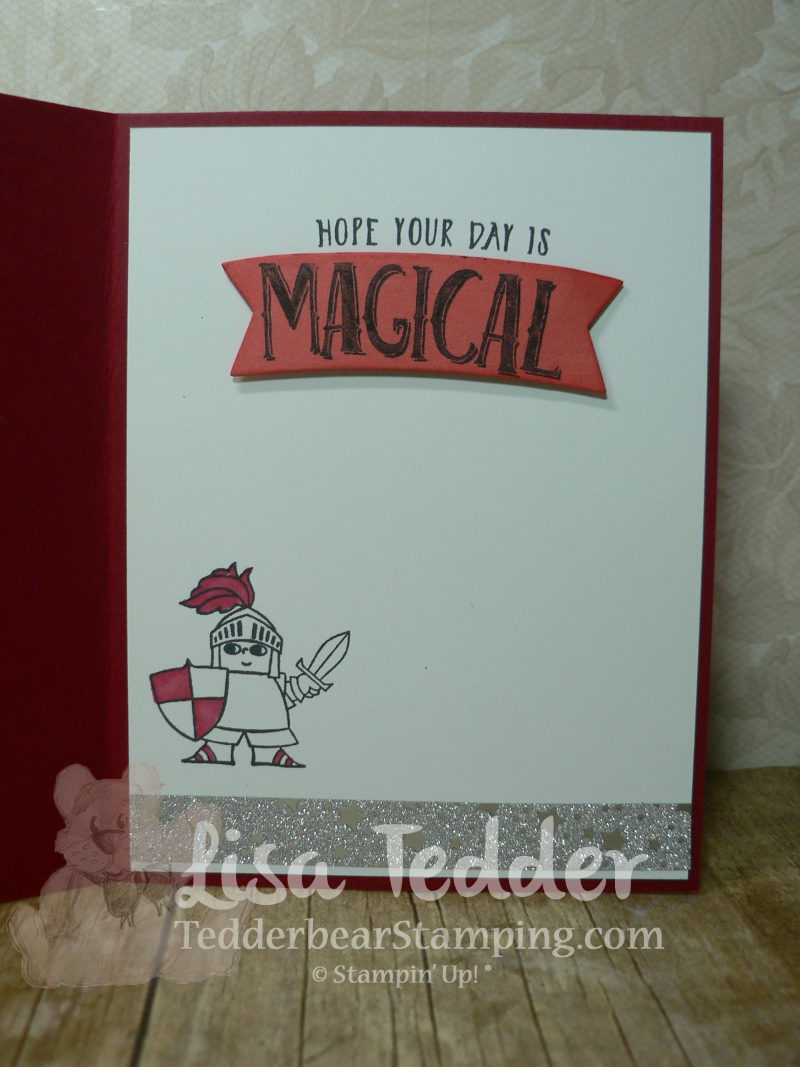
Here is a picture of the inside:

Snowflake Wishes Shaker, inside

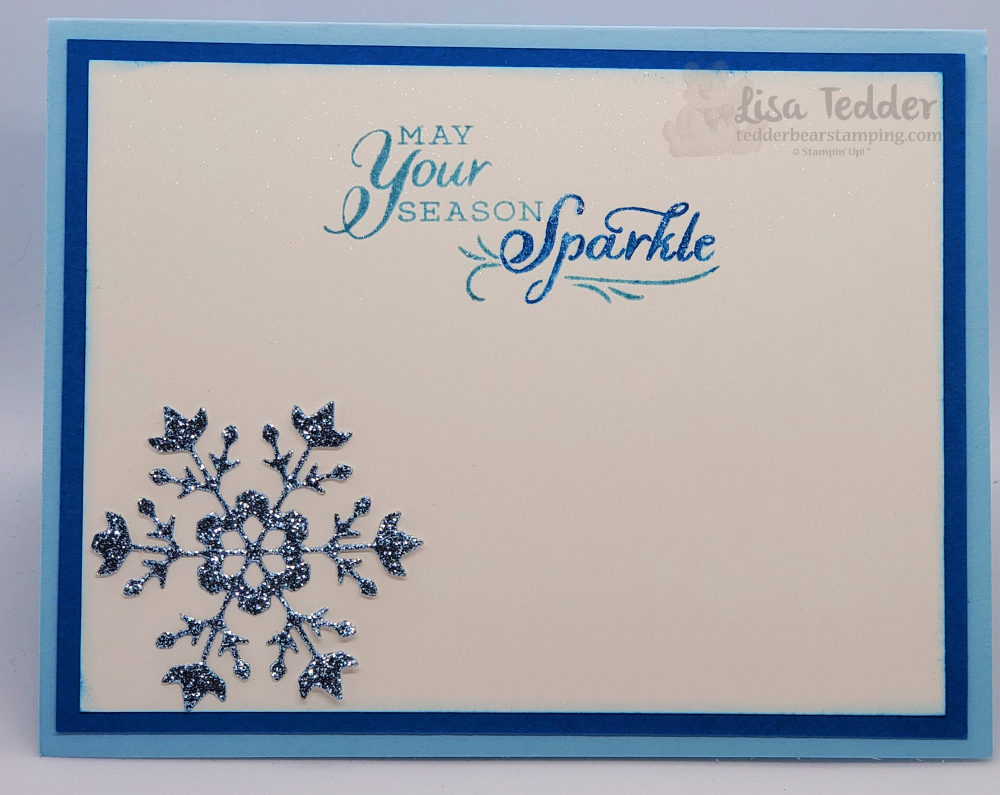
As always here are the specifics for this card:
Stamps:
Snowflake Wishes Bundle
Inks:
Balmy Blue
Pacific Point
Paper:
Balmy Blue 8 1/2″ x 5 1/2″
Pacific Point 5″ x 3 3/4″, 5 1/4″ x 4″ (inside)
Shimmer White 4 3/4″ x 3 1/2″ (x2), 5″ x 3 3/4″ (for inside), scrap for sentiment
Balmy Blue Glimmer paper
Window Sheets
Misc:
Champagne Mist Shimmer Paint
Blue Adhesive Backed Gems
Foam Adhesive Strips
Alcohol
Spritzer
Snowflake Sequins & seed beads
Stampin’ Seal +
Winter Snow Embossing Folder
Stamping Sponges
Banners Pick a punch
Sponge Brayer

Below you will see in picture form all the supplies that I used. Click on any of them to be taken to my Online Store. So, any purchase you make with me for $35 or more, you will then be sent a pdf that has 16 projects with step by step instructions and pictures! Therefore, I would love to be your Stampin’ Up! demonstrator if you live in the United States!

Most people can’t resist a shaker card!
Did you enjoy seeing my Snowflake Wishes Shaker? I absolutely love shakers! Here is another Shaker card for you to see if you missed it! Most sit there and have to pick them up and shake them! I know that anyone you send this handmade card to will love it as much as I do! If you would like to get your catalogs/stampin’ supplies early like I do, you should join my team! I called it LETs Stamp! (Lisa Easterday Tedders Stamp group!) You will love it!

Thank you for stopping by! Be sure and Subscribe to my blog/Newsletter so you don’t miss out on anything!

Lisa Tedder
A California girl living in North Carolina

Product List

Do you like Sequins?

Hey Guys!

Today I am sharing with you a card that I copied from a card I saw on Pinterest by Lali Peach.

Here is my card:

I love this stamp set and when I added the silver Glimmer paper to the back of the sentiment panel, it really popped!

Here are the specifics of this card:

PROJECT 3: Humming Bird
Stamp Sets Pg #
Humming Along Occasions
Well Said Bundle
Paper
Thick White 8 1/2″ x 5 1/2″
White 3 1/4″ x 1 3/4″, 3 3/4″ x 5″ (x2)
Pacific Point 5 1/4″ x 4″
Silver Glimmer 3 1/2″ x 2″
Shimmer White Paper 3″ x 4″, Black scrap
Inks
Pacific Point
Smoky Slate
Granny Apple Green
Momento Black
Accessories
Clear EP
Iridescent Sequins/Metallic Sequins/Fine Tip Glue
Wink of Stella
Dimensionals
Aqua Painters
Big Shot

For his eye I used a teeny tiny black sequin.  This card was for a handmade card class  at my local Senior Center.  They loved it!  Who doesn’t love sequins!?

Below are the supplies used in picture form.  If you click on any of them you will be taken to my OnLine Store.  If you purchase from me I will send you a small thank you gift!

Lisa Tedder
A California girl living in North Carolina
Product List

Home to Roost

Hey Guys!

I saw this picture on Pinterest by Stesha Bloodhart using the Home to Roost stamp set by Stampin’ Up! and had to Case it for a class I was having!

Here is my card:

When coloring with the Stampin’ Blends I used the Color Lifter to give it a watercolor look.  This Rooster is so stinkin’ cute!  I think I will use him for a framed piece for my kitchen!  Did you know that you can Earn this stamp set for FREE!?  Spend $50 on goodies from SU! and you can get this for free.  But, don’t wait!  These are only as supplies last and only until Sale a Bration is over at the end of March, whichever comes first.

Here are the specifics for this card:

Stamp Sets Pg #
Home to Roost SAB FREE
Paper
Pacific Point 5 1/2″ x 8 1/2″
Very Vanilla 5″ x 3 3/4″ (x2)
Grapefruit Grove foil 5 1/4″ x 4″
Black 5 1/4″ x 4″
Inks
Memento Black
Blends: Night of Navy cmb, Cajun Craze cmb,
Blends: Soft Suede cmb, Balmy Blue cmb, Real Red Dk
Color Lifter
Mossy Meadow, Pacific Point and Soft Suede ink pads
Accessories
Braided Linen Trim
Red Rhinestones
Rectangle Framelits
Layering Ovals
Dimensionals & Glue Dots


The supplies are in picture form below, click on any of them and you will be taken to my OnLine Store.  I would love if you choose me as your Stampin’ Up! Demo! When you purchase from me I will send you a small token of my appreciation.

Thanks for stopping by!

Lisa Tedder
A California girl living in North Carolina

Product List

Moonlit Scene made with Stamps!

Hey Guys!

I have another technique for you today on making another landscape scene!  This one is for a Moonlit water scene!  To see it done in person, you can watch me make it here!

Here is the card that I show how to make it!

I was so excited on how this card came out!  I even tackled doing a reflection!

Here are some of the cards that I show at the end that you might want to see closer!

I made this one after looking at this photo i found online:

Here’s another card I made:


I saw a card like this online, but couldn’t find it again.  I pretty much copied it!  I did change a little in the sky, but the rest I kept.  If you happen to see this card please let me know so I can give credit.  UPDATE: Thank you for everyone that mentioned where I saw this, Kim Jolley at stampinartfully.blogspot.com is the one that I got the idea from.  Thank you Kim!!

This is also from the same person, this is where I learned HOW to make the Scenes!  Again, if you see or know who made the original, please let me know!  I did add some Glitter & Clear Epoxy Dots to make the rain look more real!

Hope you like this post.  Check back in for my other posts!

Everything listed for my main picture at the top is listed below.  Click on any picture to be taken to my OnLine store!

Talk to you soon!

Lisa Tedder
A California Girl living in North Carolina

Product List


Another Fun Swap using the Magical Day Stamp set from Stampin’ Up!


Hey Guys!

I was perusing Pinterest the other day and saw this really cute card that had the ‘wind’ from the Christmas Stamp set “Star of Light”  blowing out a candle.  Well, my mind went immediately to the Dragon in the SU! set Magical Day and how cute would it be if he was Lighting a candle!?   This is how my mind works sometimes so I went with the idea!

Here is the card:

As I’ve said before ‘I just love this dragon’!  I love how I colored him this time using Calypso Coral Blends and Cherry Cobbler Blends.  NEVER would I have put these colors together but, again, I saw it done on Pinterest.  It really makes him stand out, doesn’t it?

Here is the inside:

This Stamp set from SU! also has thinlits that cut out not only the characters, but the Banner seen above!  Waves, that I will be using soon, and lots of other goodies!!

For the flags in the front, I used the Myths & Magic Specialty Designer Series Paper.  I sponged the edges with the color that was on the DSP, and also made a banner out of the Silver Glimmer paper and the FREE Shimmer Ribbon pack from the Sale-A-Bration catalog!  This ribbon is so pretty!!  And it comes in THREE colors and sizes!  I also used Rhinestones and the Scattered Sequins Embossing folder.

The Dimensions are as follows:

Cherry Cobbler 8 1/2″ x 5 1/2″
Daffodil Delight 5″ x 3 3/4″
Dapper Denim banner 2″ x 5″
Gray Banner 1 1/2″ x 4 1/4″
Silver Banner 1/2″ x 3 1/2″
Calypso Coral Ribbon 3 3/4″
Scrap of White for Stitched Oval
Scrap of Calypso Coral for Scalloped Oval
Whisper White 4″ x 5 1/4″ (inside)

I really hope that those who received these swaps love them as much as I do!!

The supplies used for this project are listed in pictures below, just click on any picture to be taken to my OnLine Store!

As always!  Have a great day/weekend!

Lisa Tedder
A California Girl living in North Carolina
Product List

NEW Technique Tuesday Making a Scene using an Embossing Folder

I love Tuesday’s!  Techniques are my favorite thing about stamping.  I get to use my Stamps in a totally different way!!  The Technique I am using today had me thinking of what I could put BEHIND trees, but still show what I needed it to show.

Here is today’s card:

I made a YouTube video showing this stamping technique.  I love Birch Trees, I also love the Birthday Delivery Stamp set by Stampin’ Up!  I got super excited about being able to use BOTH!  When you go watch the video it will show you exactly how easy this technique is to do!

Stamping directly onto an Embossing Folder isn’t something you think of normally.  Tips:  1. Stamp on the side that has the negative (dipping down) the part you want as your focal in the folder this will be the part that is raised on your card. 2.  Pick images to stamp on that you will see in the lines available that are the flat parts of the folder.  3.  Use colors that will enhance what you are stamping.  4. Use a brayer to lay down a color that will be behind the images (sky), anything you stamp over the brayered color will be at the top of the cardstock.  5. Make sure that you don’t move the folder once you put all the stamping in (I did NOT follow this rule on my video, but I fixed my mistake!)  6.  Remember that it’s ONLY PAPER, and play with it!

I won’t be able to show you here how to do this technique, it would be too confusing, so please go check out my video and see how fun and easy it is.  You will notice that you will look at stamps in a totally new way!

As always, I will have the supplies listed below, just click on any image to be taken to my OnLine Store!

Thanks for stopping by!  Until next time!

Lisa Tedder
TedderBearStamping
A California Girl living in North Carolina

Product List