Tag Archives: Mini Glue Dots

Stunning Welcoming Windows

Hey Guys!,

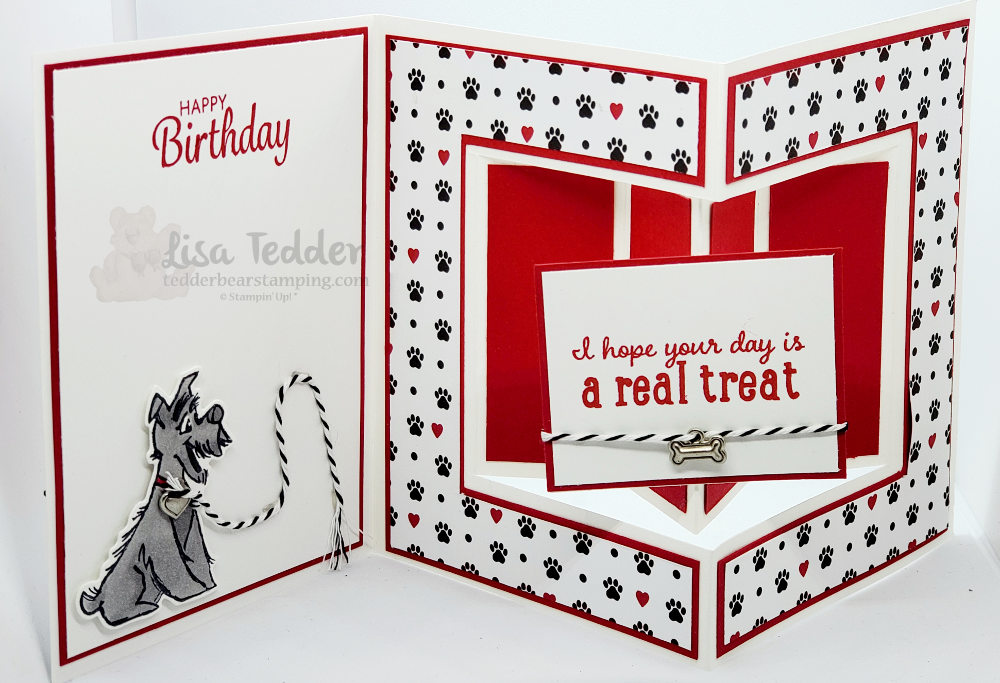
For today’s class I am using the stunning Welcoming Windows stamp set from Stampin’ Up! Every Thursday at 4:00 p.m. (eastern) I have a mini stamp class that I do on YouTube Live! If you missed my blog post sharing last weeks class, you can click here. Of course, if you missed it you can always watch me live the next time, I really love being able to talk to someone OTHER than my husband!! LOL

Stunning Welcoming Window
Stunning Welcoming Windows – card inside
Stunning Welcoming Windows – card 2
Welcoming Windows card 2 inside

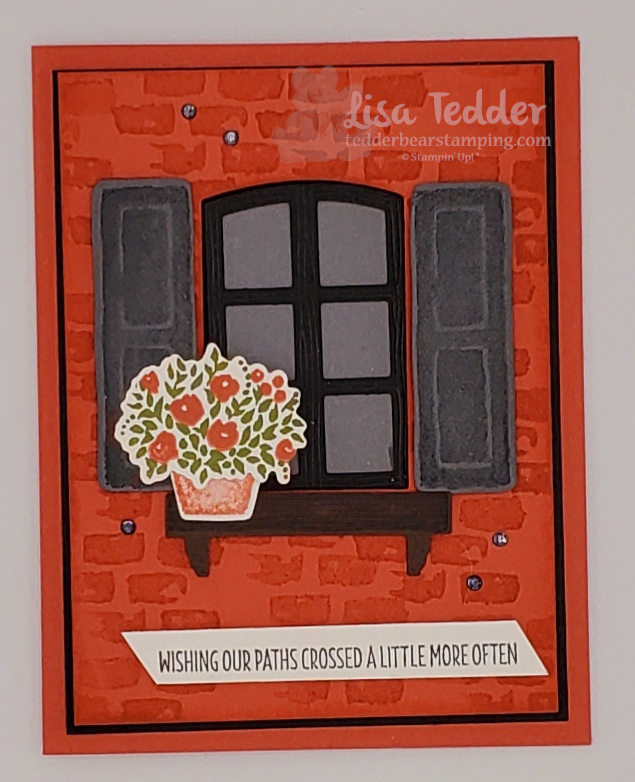
Aren’t those so pretty!! Hence the reason I titled this Stunning Welcoming Windows! I LOVE the bricks and the window! Don’t you!?

As usual, here are the specifics for these cards:

  • Stamps:
  • Welcoming Window Bundle
  • Approaching Perfection
  • Inks:
  • Terracotta Tile
  • Old Olive
  • Basic Gray
  • Memento black
  • Markers:
  • Terracotta Tile
  • Old Olive
  • Stampin’ Write black marker
  • Paper:
  • Terracotta Tile: 8 1/2″ x 5 1/2″, 5″ x 3 3/4″ (x2) (card 1), 5 1/4″ x 4″ (x2) card 2
  • Basic Black 5 1/8″ x 3 7/8″ (x2), scrap for window card 1, 11″ x 5 1/2″ (card 2)
  • Basic Gray scrap for card 1
  • Basic White scraps for BOTH cards, 5″ x 3 3/4″ (x2 card 2), 5″ x 3 3/4″ (inside card 1)
  • Early Espresso scrap card 1
  • Vellum 2 3/8″ x 1 5/8″ (behind the window on card 1)
  • Misc:
  • Basic Rhinestones
  • Matte Black Dots
  • Dimensionals
  • MultiPurpose Liquid Glue

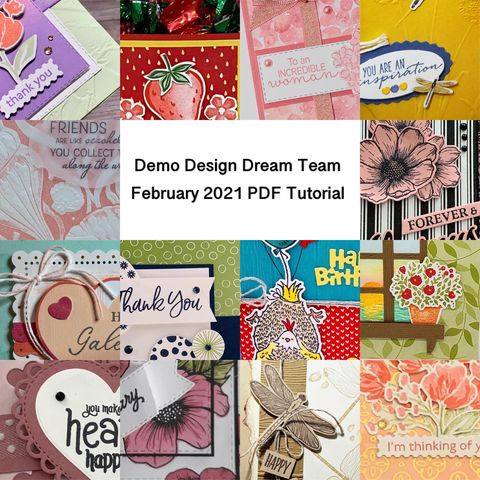
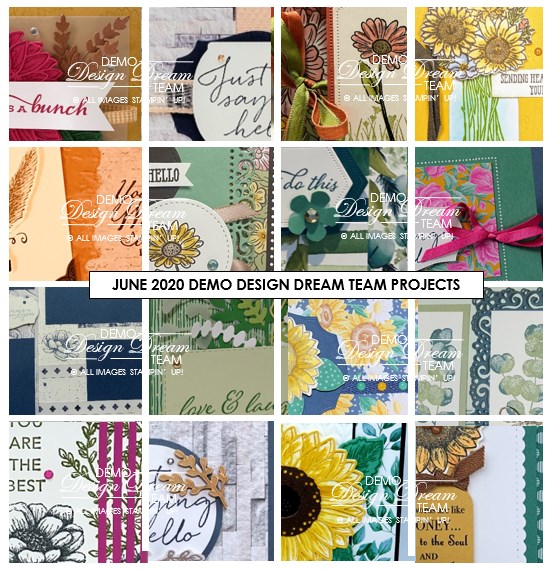
Again, all the product is listed above, but you can also see them in picture form below! Click on any of them to be taken to My OnLine Store! For purchases that qualify ($35 or more) you will get the class packet of the week (you will have a class packet for the 6 days following that video), so if you see something you want to remake on your own, place a Qualifying order and you will get that packet PLUS a PDF of 16 projects with pictures and step by step instruction! Here is a sneak peek of the PDF:

NEXT month you will get a different pdf!

Of course I always have a Pillow Gift to give you on top of the PDF and class packet! What am I giving away this week? Here ya go!

Your Pillow Gift for the next 6 days! YUM!!

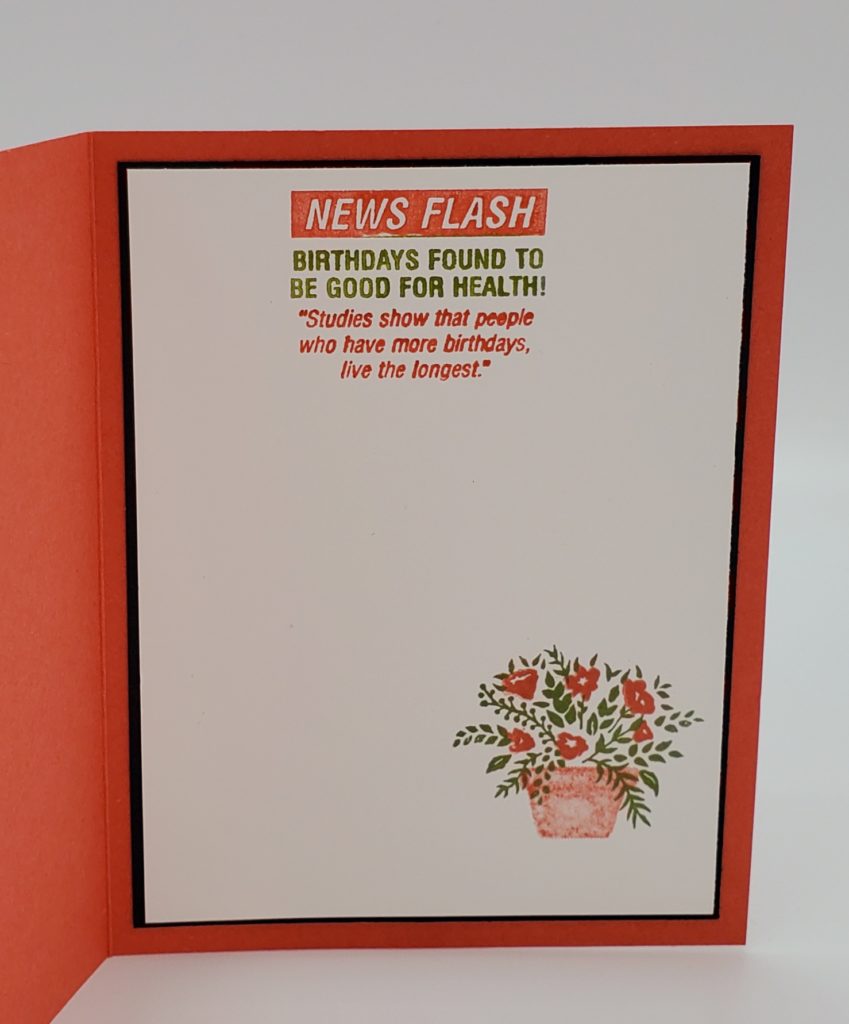
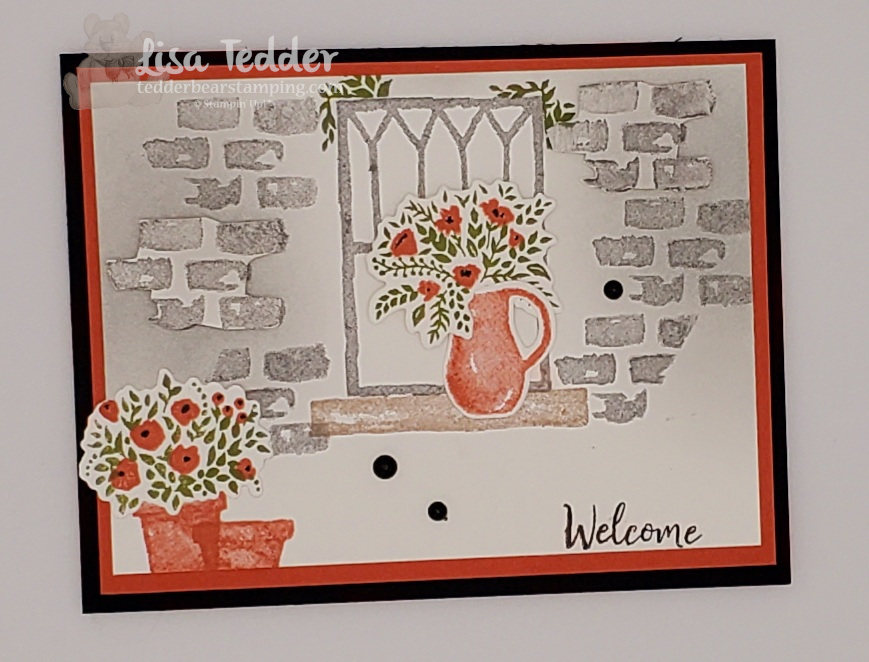
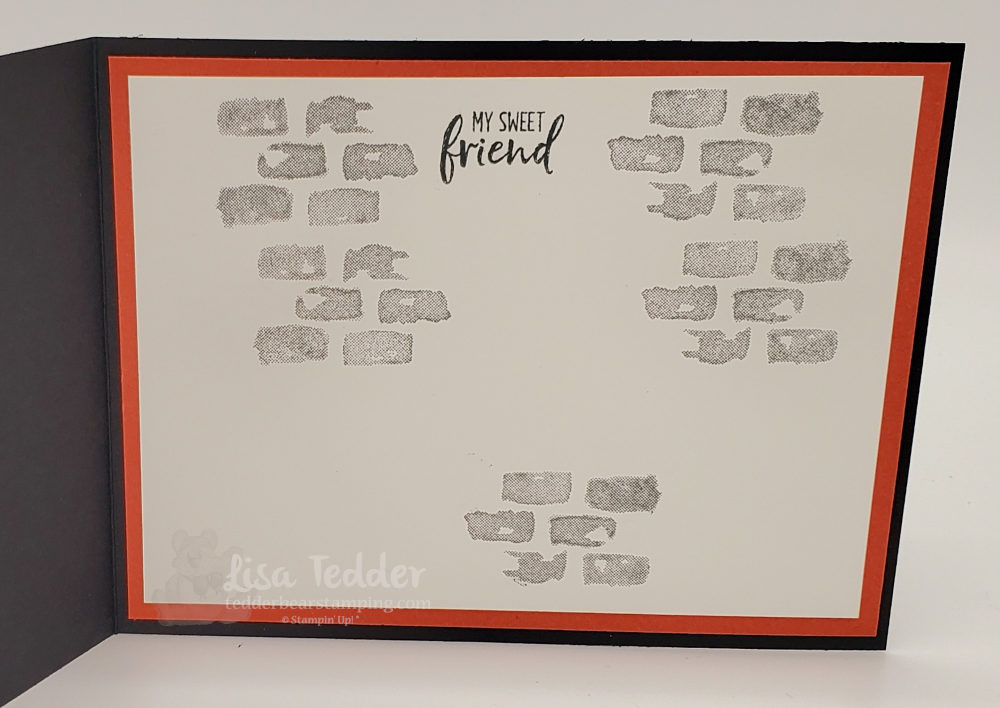
Don’t you LOVE this Bundle?! The stunning Welcoming window set is so much fun to play with! I keep looking at card 1 and am so tickled that it is so pretty! And card 2 is a little out of my comfort zone, it has less layers, but I love it too! LOL I am challenged when it comes to doing things simply.

If you missed my announcement about my Stampin’ Bestie Club, be sure and check it out, you will LOVE it!!

Thank you for stopping by! I hope to ‘see’ you while doing my live videos! See you next week!

Lisa Tedder
A former California girl living in North Carolina

Product List

Hey, Chick Special release

Hey Guys!

Special Release of Hey Chick and Hey Birthday Chick, are out now from Stampin’ Up! Hey Chick is a stamp set that is brought back from a Sale-a-Bration a couple of years back and it was darling! Now, they have a die set that goes with it that’s even CUTER!! Is that even possible? Also there is a coordinating set that goes along with it called Hey Birthday Chick.

I did a YouTube Live in my weekly mini class! You’ll have to go see it, they are super cute!! If you missed last weeks Mini Class, you can still catch it here!

Here are a couple cards I made using the Hey Chick Bundles!

Hey Birthday Chick front
Inside Hey Birthday Chick barn card

I got the idea for the Barn card from Lauren’s Scrap Lot. Thank you Lauren!

Hey Chick front
Hey Chick inside, LOVE that chicken!!

Don’t you LOVE these cards? I did an online Live on my YouTube channel if you want to see how it’s done! I hope you can join me sometime so we can at least get together online!!

Here are the specifics for both cards:

  • Stamps:
  • Hey Chick
  • Hey Birthday Chick
  • Inks:
  • Real Red
  • Memento Black
  • Blends:
  • Real Red
  • Daffodil Delight
  • Smoky Slate
  • Crumb Cake
  • Pumpkin Pie
  • Paper:
  • Real Red 11″ x 3 3/4″ scored at 7″ & 1 3/4″ these will fold up with the top slightly going over the bottom bigger piece. 3 1/2″ sq. (you will cut this in half (corner to corner) for top of barn. 1 7/8″ sq, cut in half from corner to corner (see video) for inside of door. 5 1/4″ x 4″ (x2) for 2nd card, scrap for die cut of barn on 2nd card
  • Basic Black 8 1/2″ x 5 1/2″, 5 1/8″ x 2″, scrap for 2nd card & corn husks
  • Basic White 2 strips of 3 3/4″ x 1/4″ (x2), 4 1/4″ x 1/4″, 3 1/4″ x 3″ (x2) 1st card, scraps to stamp on, card 2- 5″ x 3 3/4″ (for inside)
  • Bumble Bee Scraps for both cards
  • Basic Gray scrap for corn stalk
  • Playful Pets DSP (for front of 2nd card) 1 7/8″ x 5 1/8″
  • Misc:
  • Stampin’ Cut & Emboss machine

As always the list of supplies will again be below in picture form, click on any of them and you will be taken to my Online Store!!

For a purchase of $35 or more you will receive the class packet with everything (but stamps) to make these cards. If you want to recreate them exactly you can purchase the stamps through my store, get a SAB item and get a pillow gift along with the class packet!

I have REALLY BIG NEWS to share with you next week! Be sure to come back, you will love it!! I’m so excited to share it with you, just need to iron out all the details first!!

Please remember to watch one of my Lives on Youtube, it is every Thursday at 4:00 eastern! I look forward to chatting with you!

Lisa Tedder
A former California girl living in North Carolina

Product List

How to copy a card and make it your own.

Hey Guys!,

First off, I got this idea from the Holiday Catalog from Stampin’ Up! I like to get ideas and then change them up to make them my own design. Next, we will take a walk through my thought process! As usual, here is a video showing you how to make this card. Finally, this card on page 43 is the card I wanted to make my own:

The card on the right is the one I am going to make into my own design!

Generally, when looking for a project to do, I first look in Pinterest, but this time I looked at the SU! catalog! Consequently it ended up being an awesome place to get an idea! Furthermore, I wanted to use the In The Pines Bundle and this would work with an idea I had in my head. Unfortunately, I didn’t have the circle that is on the card above. However, I did have the die from the Painted Labels that let me cut out a circle design that would take it’s place! Also, I wanted to use the trees singularly from the stamp set but die cut to have more detail. Likewise, instead of the ribbon that comes out the side of the circle I used gold foil cut into two strips. By the way, I DID use the acorns for my card, here is what I made:

I replaced some things to make this design my own creation!

Usually, I like to have layers on my cards and this time is no exception! Likewise, I love to sponge the edges of my cards and I did that with Crumb Cake and then Early Espresso to add a dark edge that makes the card pop! As a rule, I like to have my insides go with the front using the same layers, this (to me) seems to make the card look more professional.

Notice how the inside mirrors the front?

Finally, here are the details for this card:

Stamps:
In the Pines Bundle
For Unto Us
Inks:
Crumb Cake
Early Espresso
Old Olive
Paper:
Crumb Cake 8 1/2" x 5 1/2", 5" x 3 3/4" (x2)
Old Olive 5 1/4" x 4" (x2), scraps for trees
Gold Foil
Misc: 
Wonder of The Season OR Forever Greenery combo
Jingle Bells OR Acorn Trinkets
Glue Dots
MultiPurpose Liquid Glue
Mini Dimensionals
Painted Labels Dies
Banners Pick a Punch

As always, below will be the same supplies listed in picture form, click on any of them to be taken to my On Line Store! Subsequently, any purchase over $35 you will get from me a PDF with 16 project ideas that include pictures and step by step instructions! So then, this is a thank you from me!

Before I go, I wanted to tell you that I have another card that you can see here that I took from the catalog and made it my own (see page 38). As you can see I like to get ideas and then change them up to make them my own design.

In Conclusion, thank you so much for coming to visit me! Together, we can make things we see into our creations!

Lisa Tedder
A California girl living in North Carolina

Product List

It’s a Mystery Fold!

Hey Guys!

I’m on a roll! I’ve done 4 videos in 4 weeks! You can go to my YouTube channel to see the other videos I’ve done. To see this cards video you can click here. Looking OnLine I saw this fold card from Etsy, she was charging to make that card, and I figured I would try to figure it out on my own. And I did! What is great is that it fits into one of Stampin’ Up!’s envelopes and I made it work! After I saw this on Etsy, I saw someone else from Europe do the same cut but their cards are bigger than the United States so I’m even more proud that I figured it out by myself! Here is my card:

This is the card open. Isn’t that dog stinkin’ cute!? Love that I got the fold idea from Etsy!

And the front of the card:

Here is that Snooty Kitty! I have one of those do you?

And here is my cheat sheet!

Dash Lines are Score Lines, Straight uncut lines is where you cut.

As usual, here are the specifics to this card:

Stamps:
Pampered Pets Bundle #154069
Here’s a Card #149438
Itty Bitty Birthday #148618

Inks:
Memento Black #132708
Real Red #147084
Blends: Real Red #154899, Smoky Slate #154904

Paper:
Whisper White 12 x 12 cardstock #124302 12″ x 5 1/4″ scored @ 4″ & 8″
Whisper White #100730 3 5/8″ x 4 7/8″ 2 3/8″ x 1 7/8″, scraps for dog and sentiment
Basic Black #1210453 7/8″ x 5 1/8″
Real Red #102482 3 3/4″ x 5″ (x4), 1 1/8″ x 2 1/4″ (x4), 2 1/2″ x 2″
Playful Pets DSP #152489 3 5/8″ x 4 7/8″ (x2), 3 3/4″ x 2″ & cut out cat

Misc:
Playful Pets Trim Combo #152466
Playful Pets Trinkets #152465
Paper Trimmer #152392
Brick & Mortar 3D Folder #149643
Tasteful Labels Dies #152886
Dimensionals #104430
Glue Dots #103683
MultiPurpose Liquid Glue #110755

Below you will see these same supplies listed in picture form. Click on any of them and you will be taken to my OnLine Store! Any purchase for $35.00 or more you will receive from me a Tutorial of 16 projects with step by step instructions along with photos! Here is a sneak peek if you buy from me this month.

PDF included with all orders above $35!

Wasn’t this card super cute!!? Loving how it came out! This will probably be sent out to my Grandkids….I think they will love it as much as I do!

Hey, I keep forgetting to tell you that I have a newsletter that I send out each month, be sure and sign up so you can get notified of new things coming out and get ideas for crafting!

Thank you for stopping by! Please leave me a comment so I know you are reading this. Come back again! You can subscribe to my Blog and get notified when I post next.

Lisa Tedder
A California girl living in North Carolina

Product List

Masculine card By the Dock

Hey Guys,

Here’s a Masculine card using the Stampin’ Up! stamp set By the Dock for you! If you missed my last one, check it out here.

The last masculine card had a LOT more sponging and this one has a little sponging and I think it’s much simpler! They are both great cards but this one makes me happier…..not sure why, maybe you can tell me? Here is my card for today:

I LOVE how I colored this!

This is a CASE (Copy And Share Everywhere) from L’atelier De Mag, here is her card so you can see how I changed little things to make it mine:

My shore is more pronounced, but you can definitely see that I got my idea from here! Thank you L’atelier for your inspiration, I love it! The cardstock was changed up too, I LOVE using Early Espresso cardstock as a Base for my handmade cards.

For my inside I wanted to make it just as serene as the front:

Isn’t this card one you would like to receive in the mail? I absolutely love, love, love it!

As usual, here are the specifics for this card:

Stamps:
By the Dock Bundle
A Great Man

Inks:
Early Espresso
Balmy Blue
Old Olive
Blends: Bronze, Combo Crumb Cake, Dk Granny Apple Green, Lt Smoky Slate, Dk Old Olive

Paper:
Early Espresso 8 1/2″ x 5 1/2″
Garden Green 5 1/4″ x 4″ (x2)
Whisper White 5″ x 3 3/4″ (x2), 2 1/4″ sq (for boat)
Crumb Cake scraps for oars (sponge over oars after they are cut out to bring out the texture with either Early Espresso or Soft Suede)

Misc:
Glue dots
Linen Thread
sponges/daubers

Also, you will see all these supplies in picture form under my name, click on any of them to be taken to my OnLine Store. If you choose me as your Demonstrator and purchase from me, I will send you a file that has tutorials for 35 + cards plus a homemade card as a thank you!

Hope you enjoyed your visit and that you come back soon!

Lisa Tedder
A California girl living in North Carolina

Product List