Tag Archives: light up card

Light up card the Easy Way!

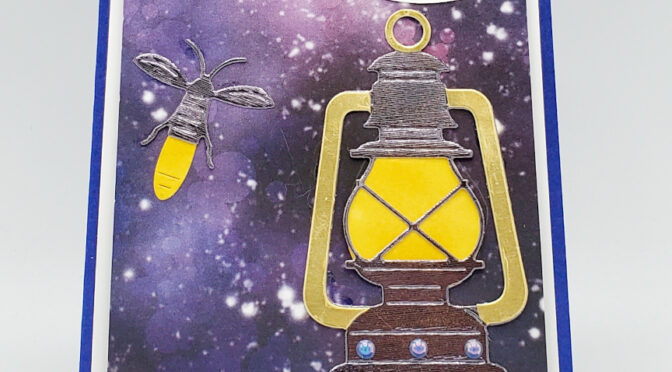
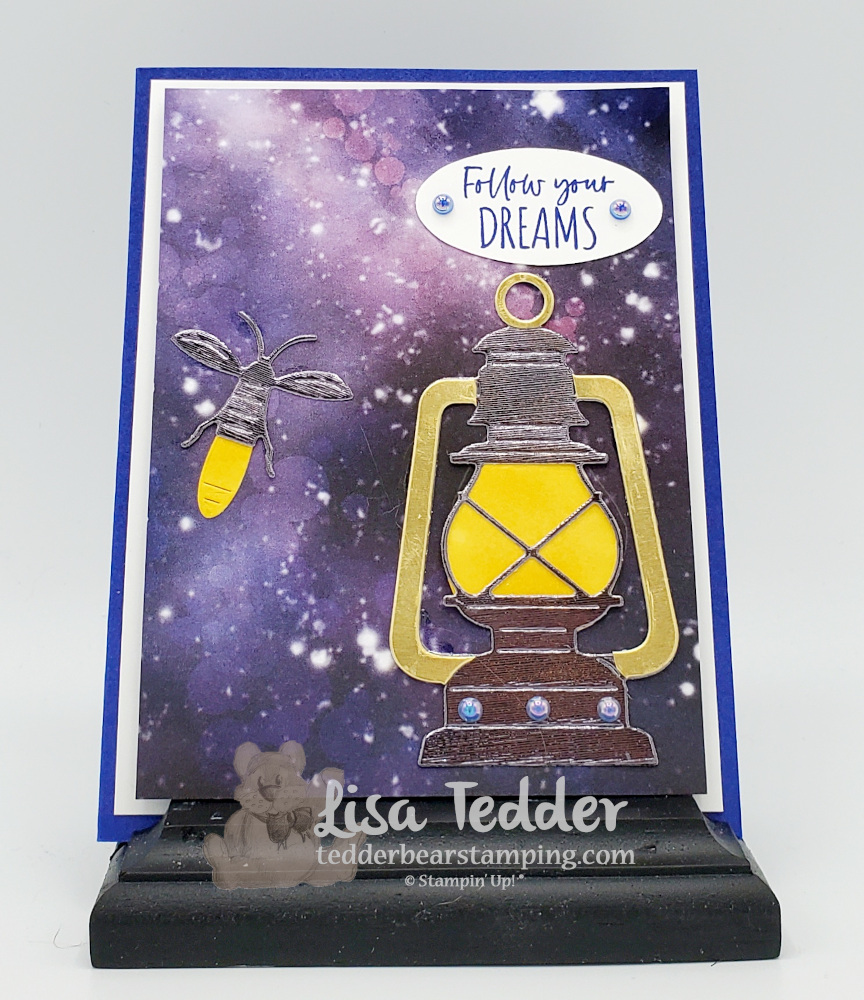
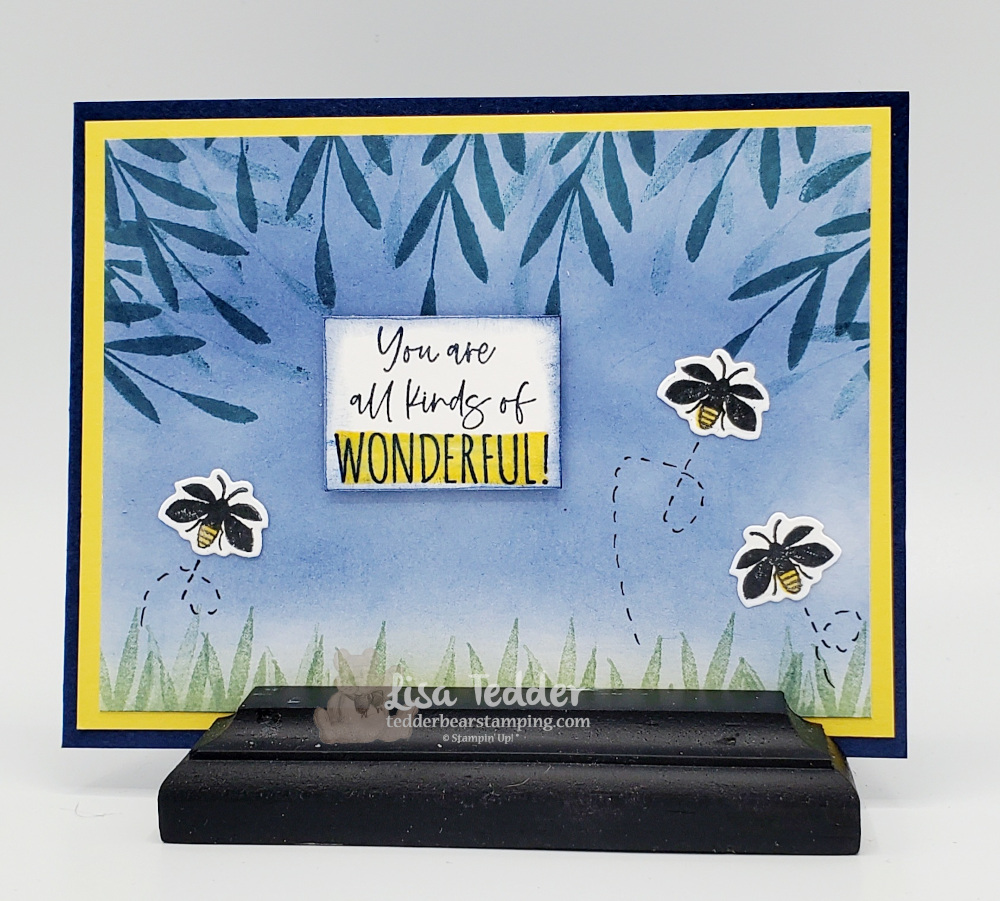
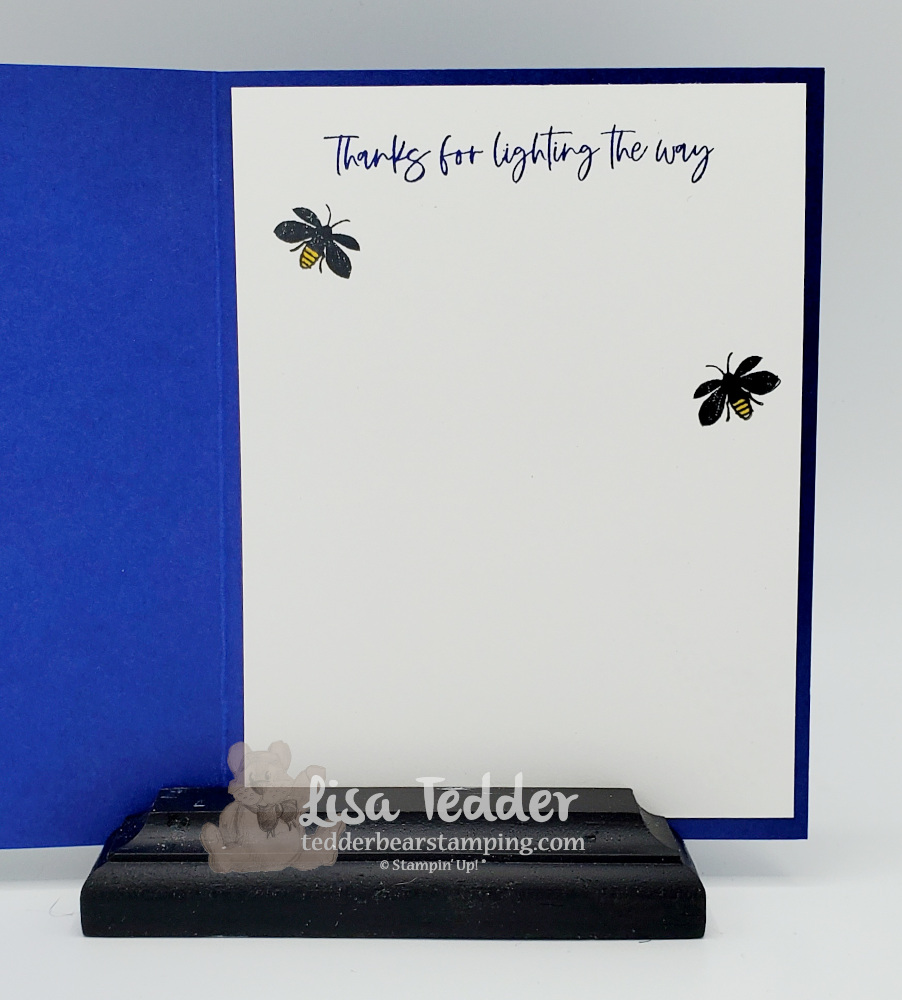
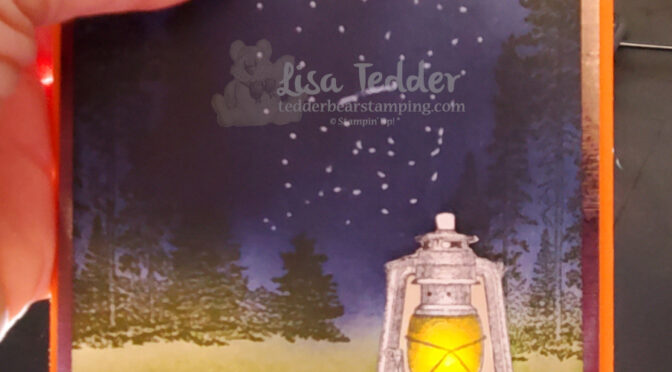
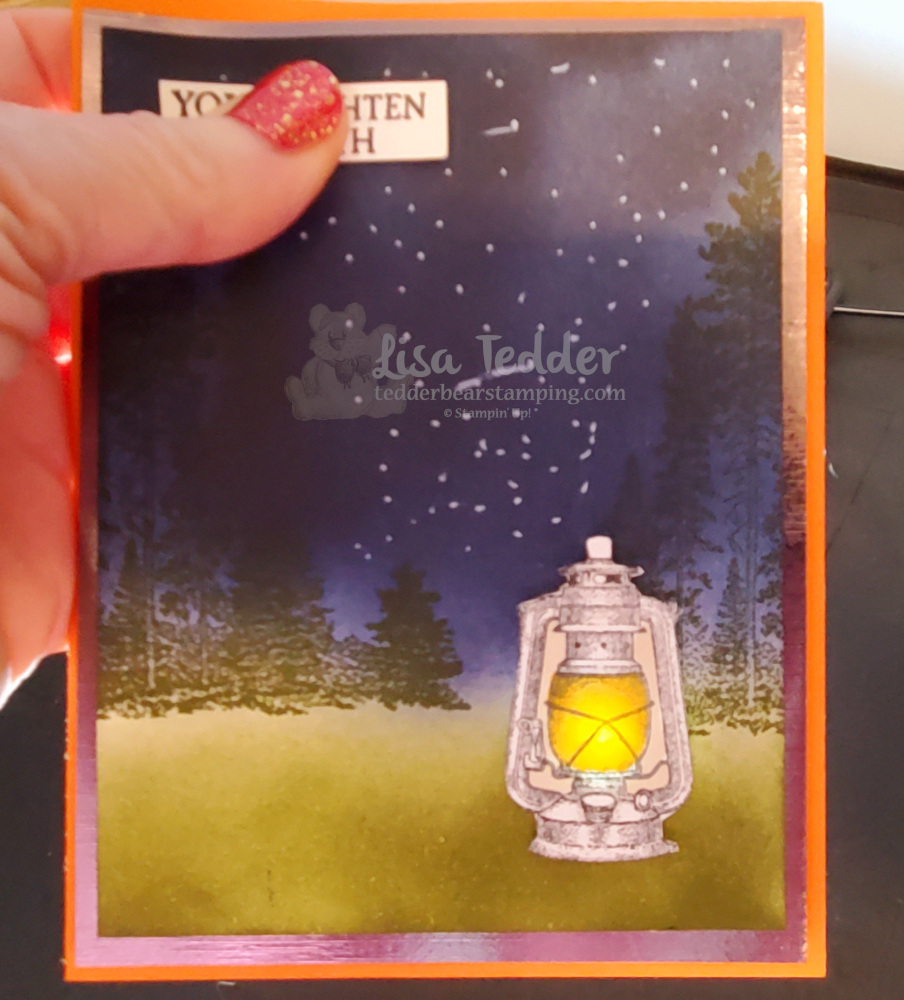
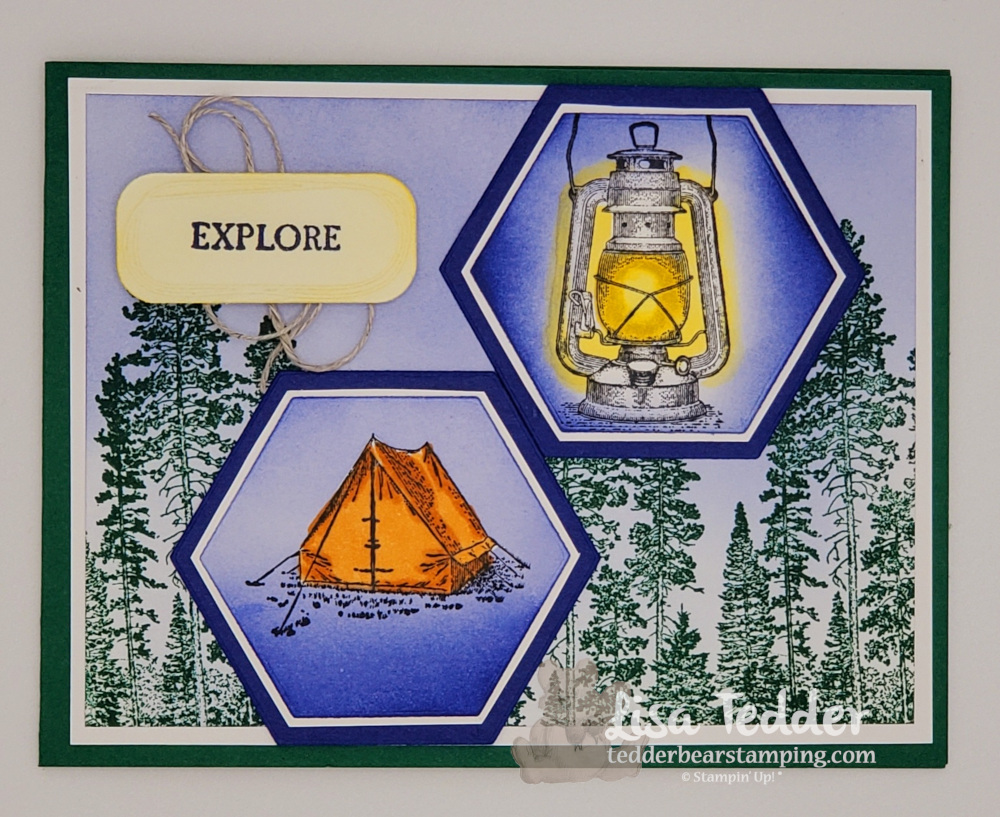
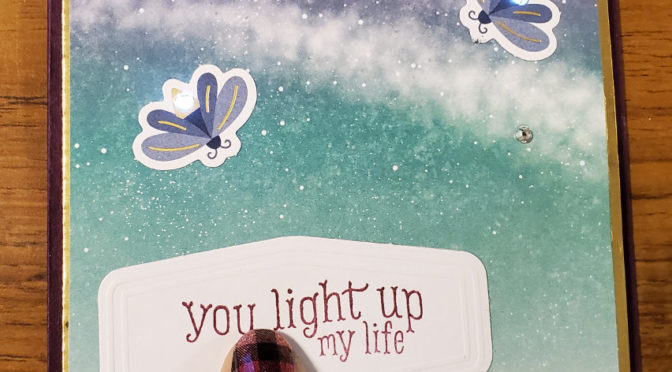
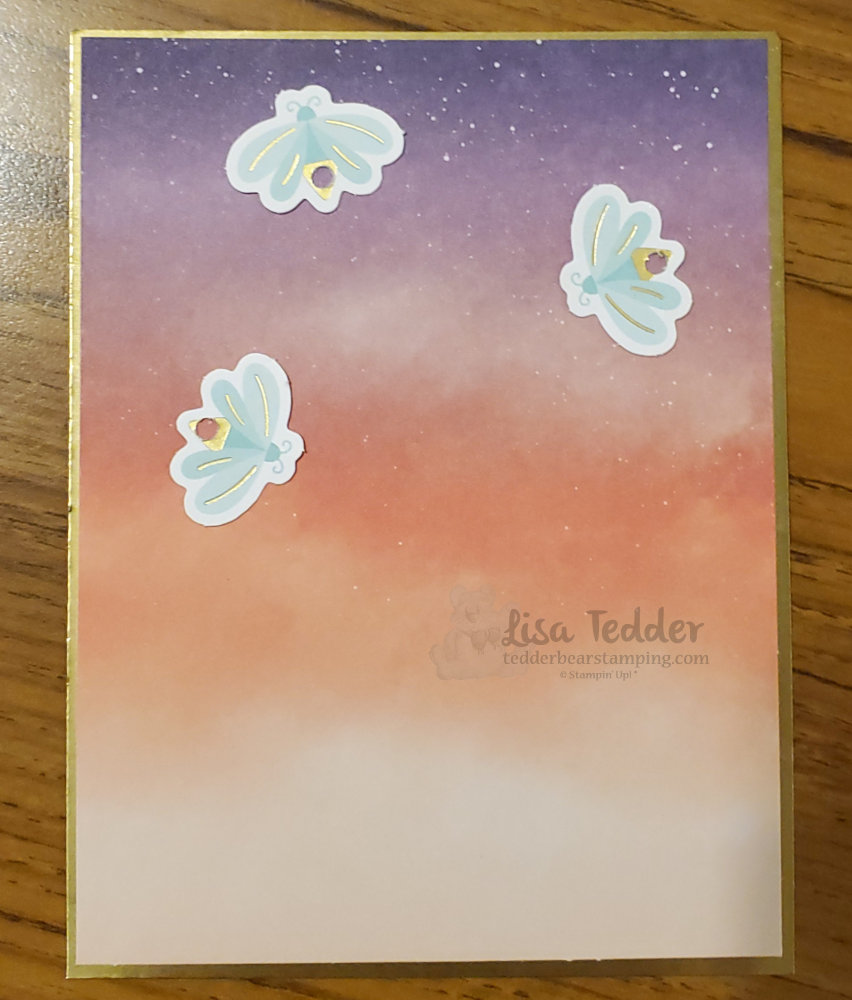
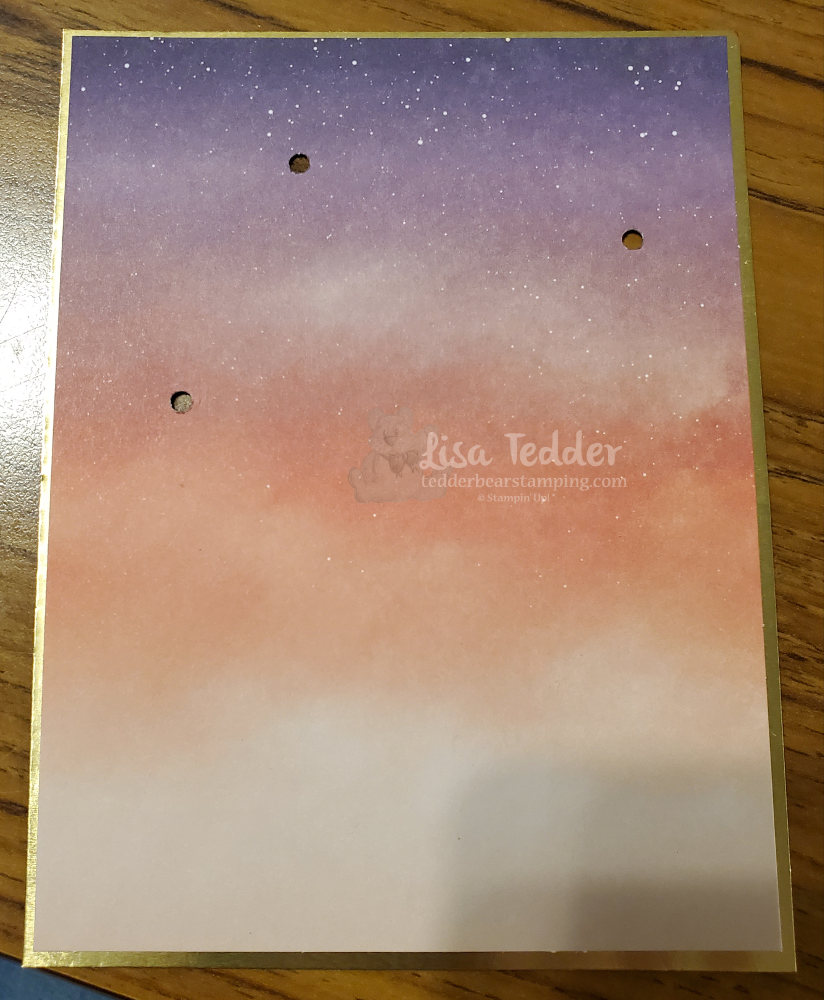
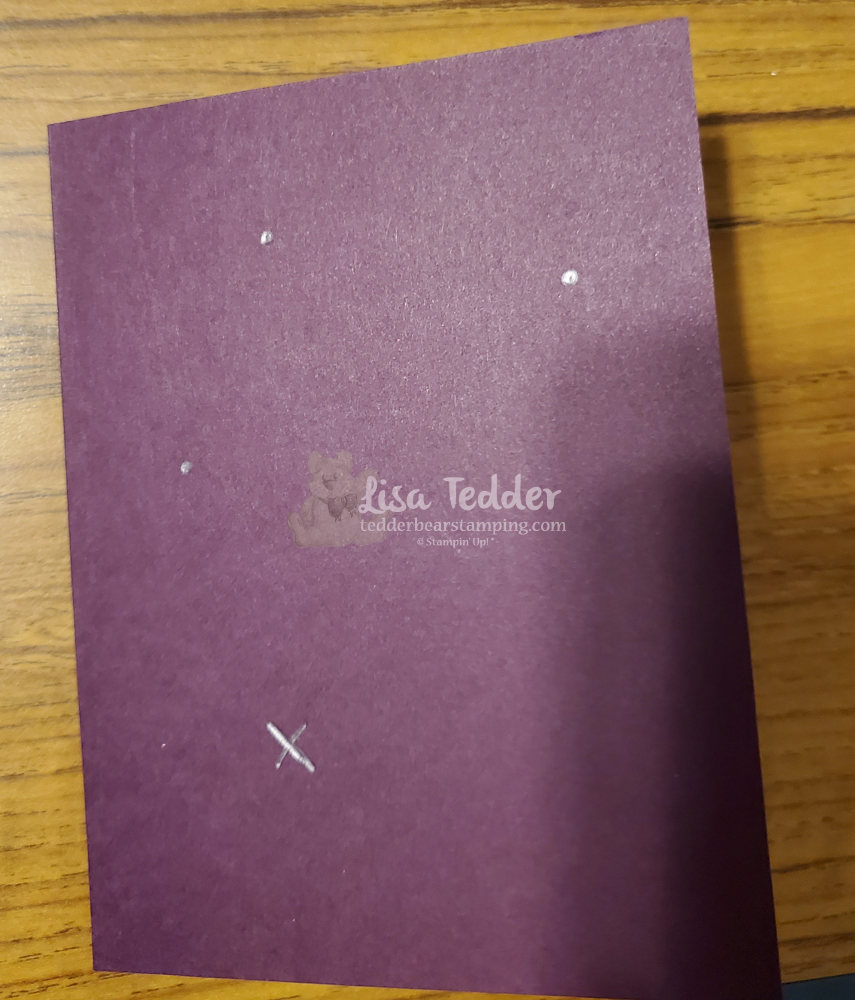
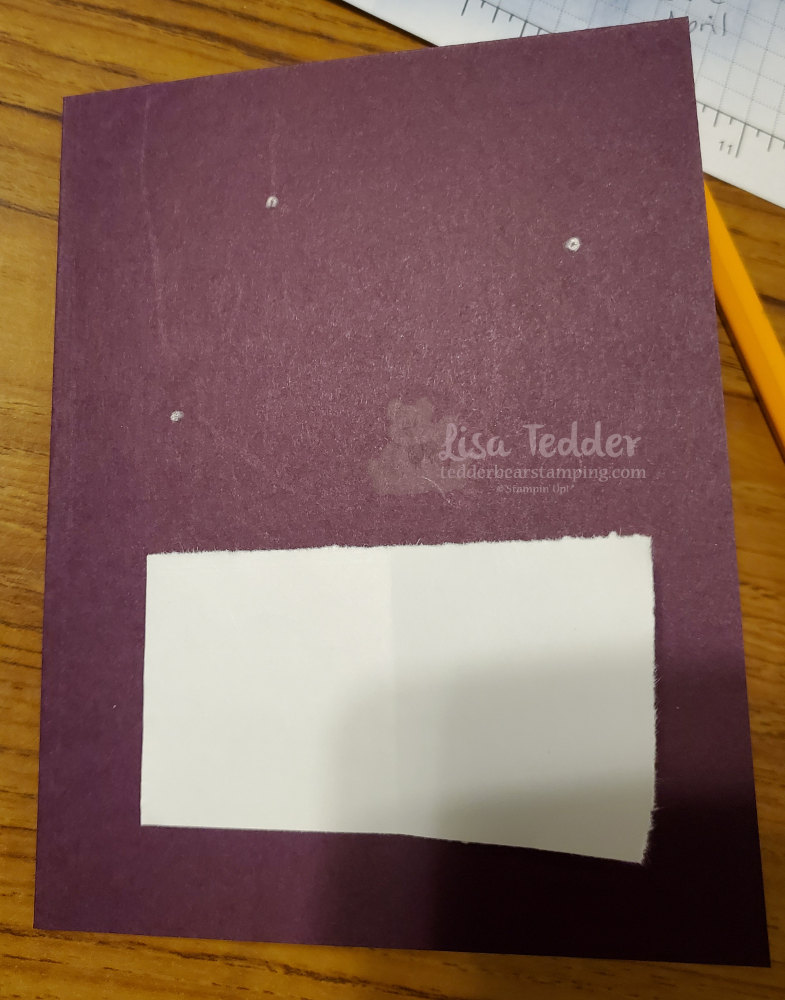
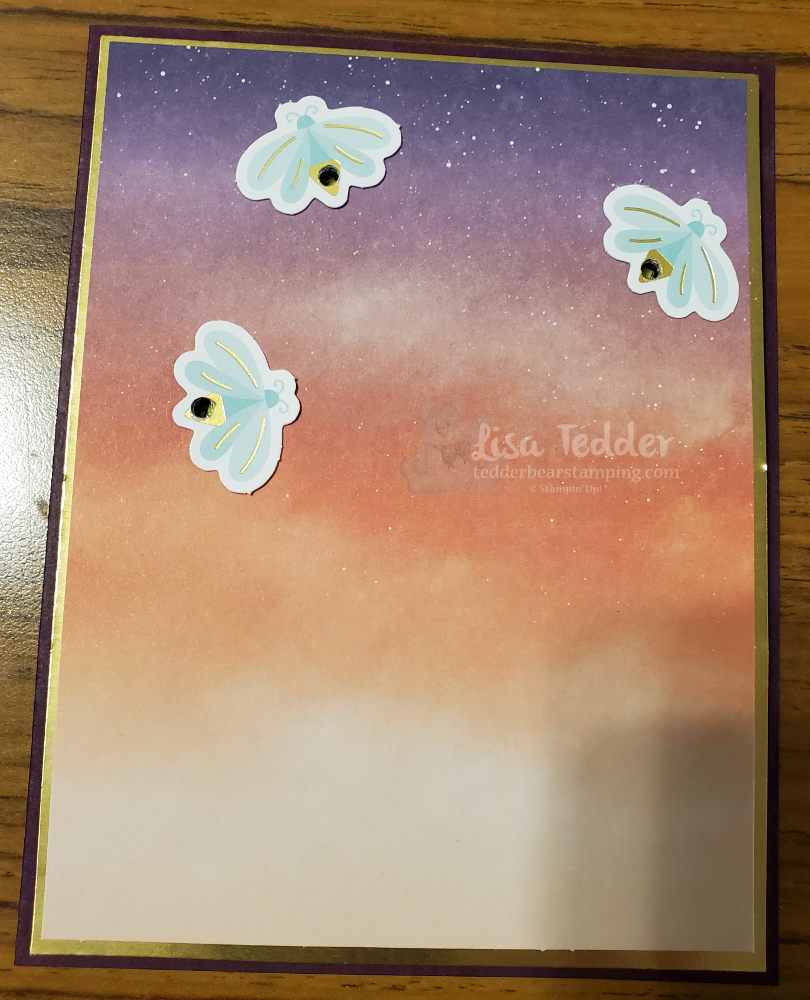
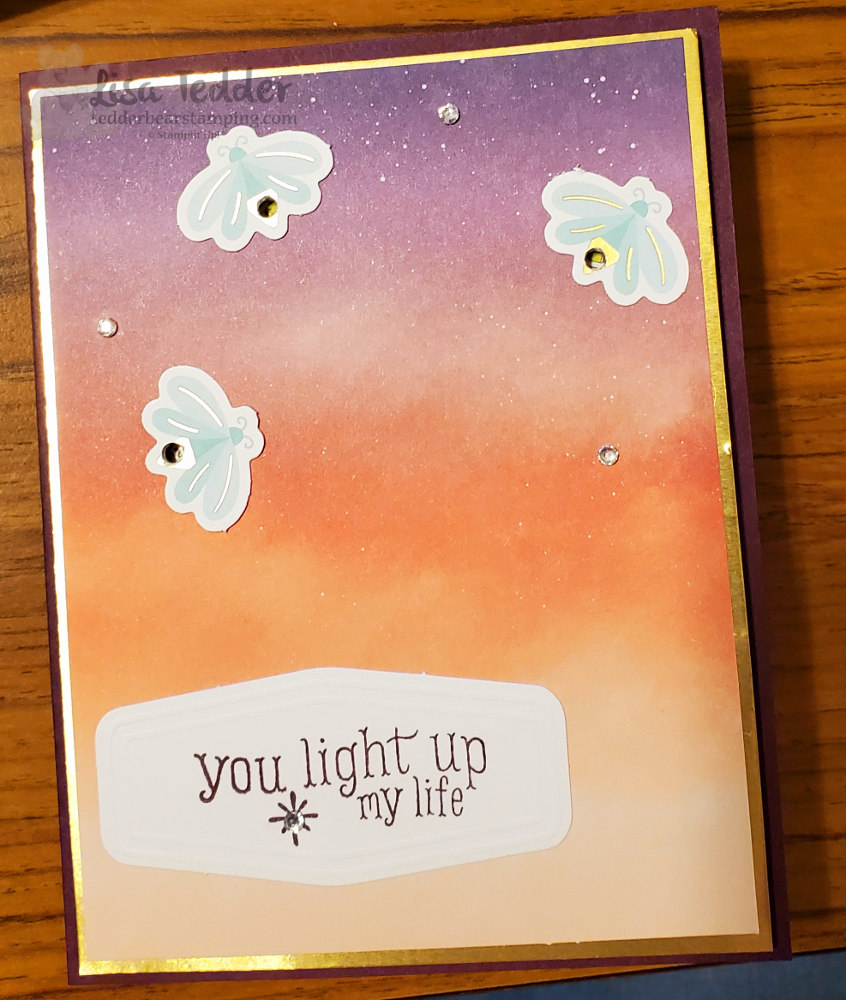
Plus another fun card using Lighting the Way by SU!

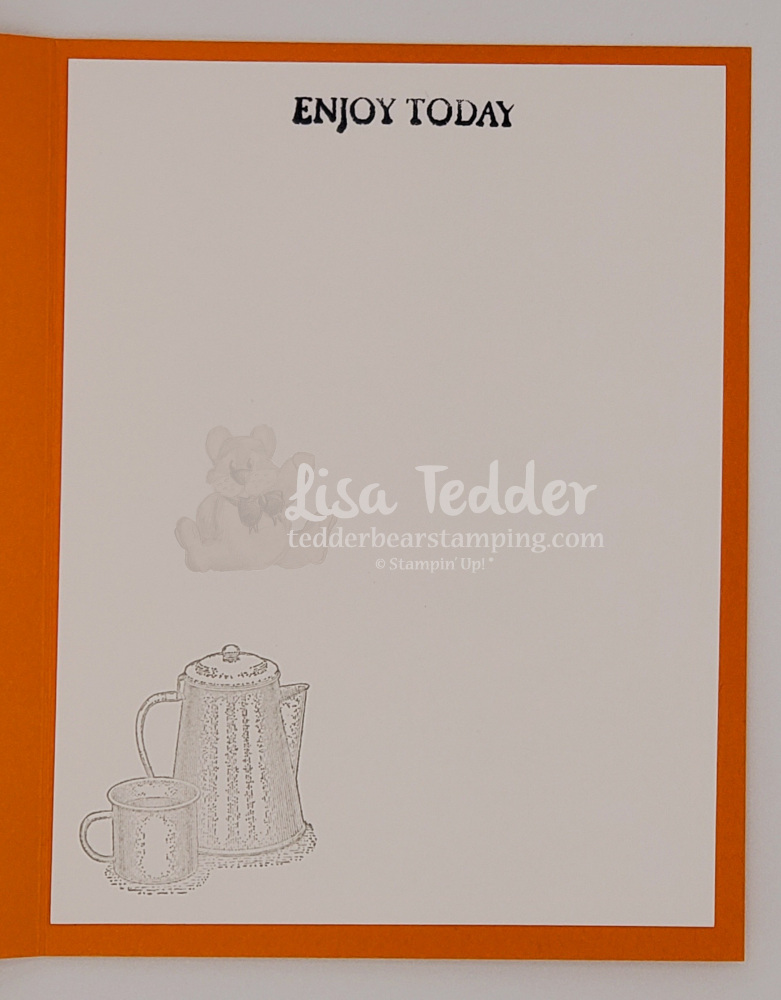
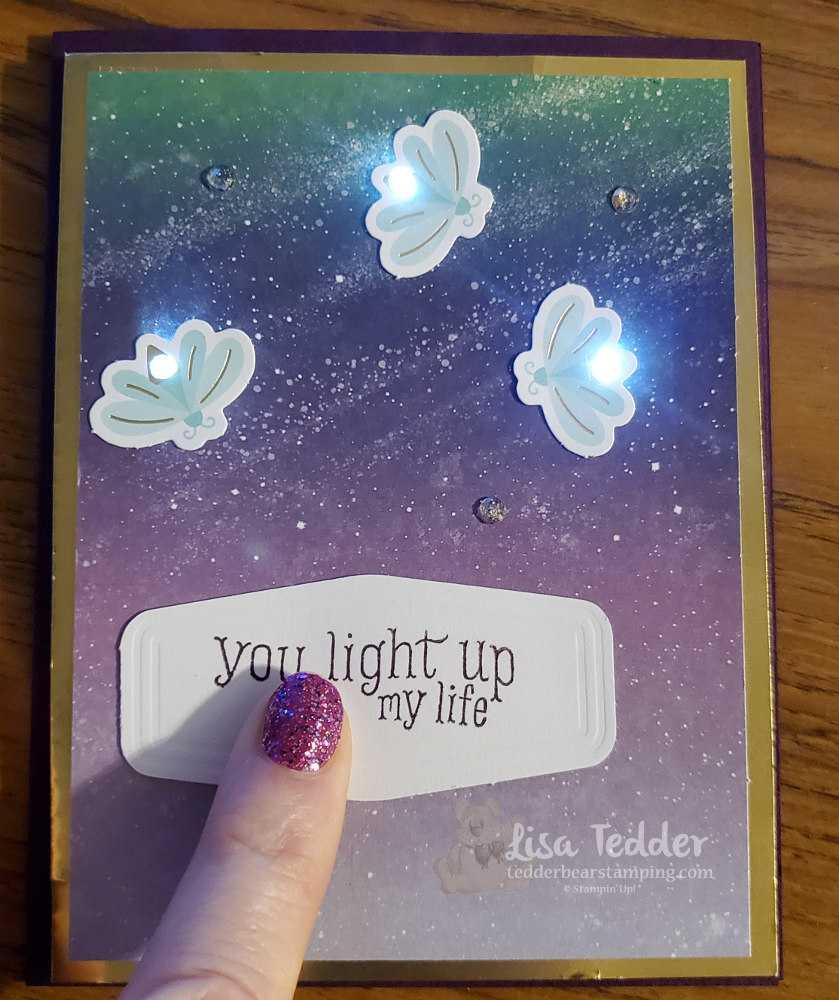
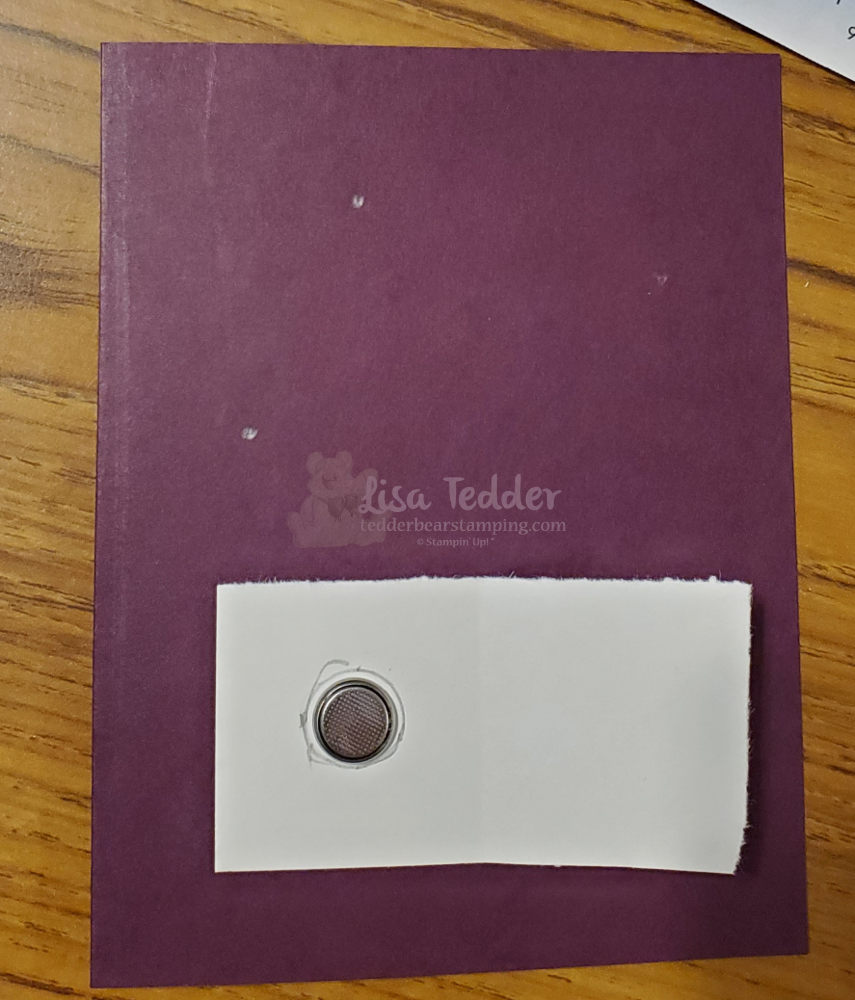
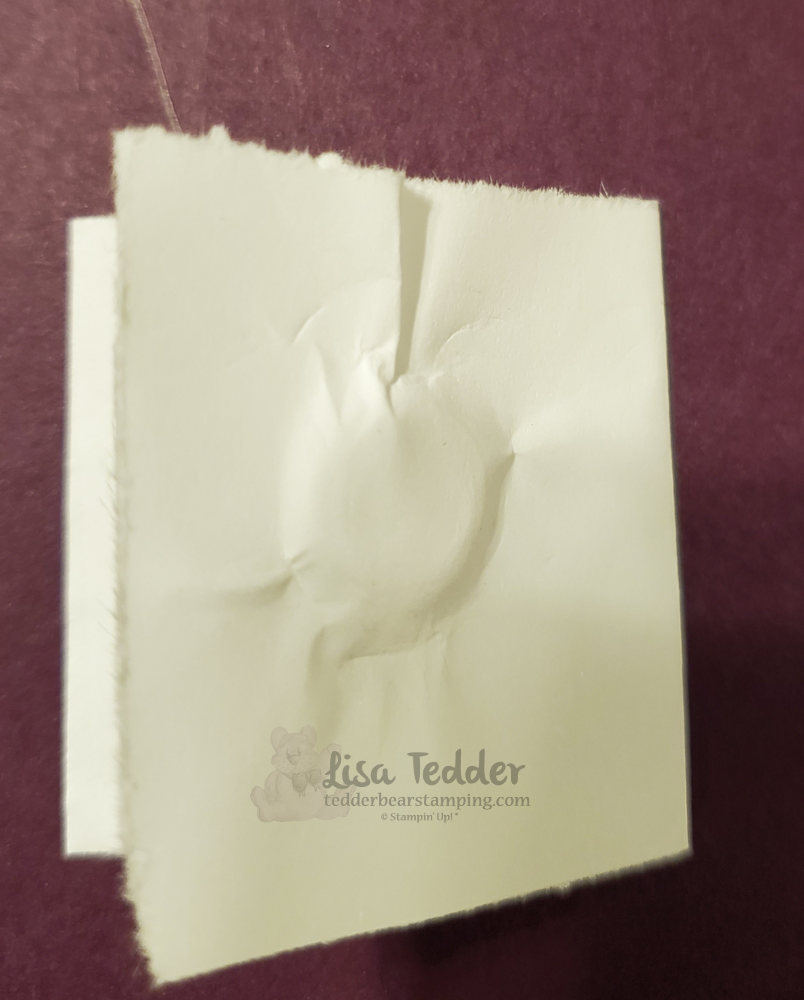
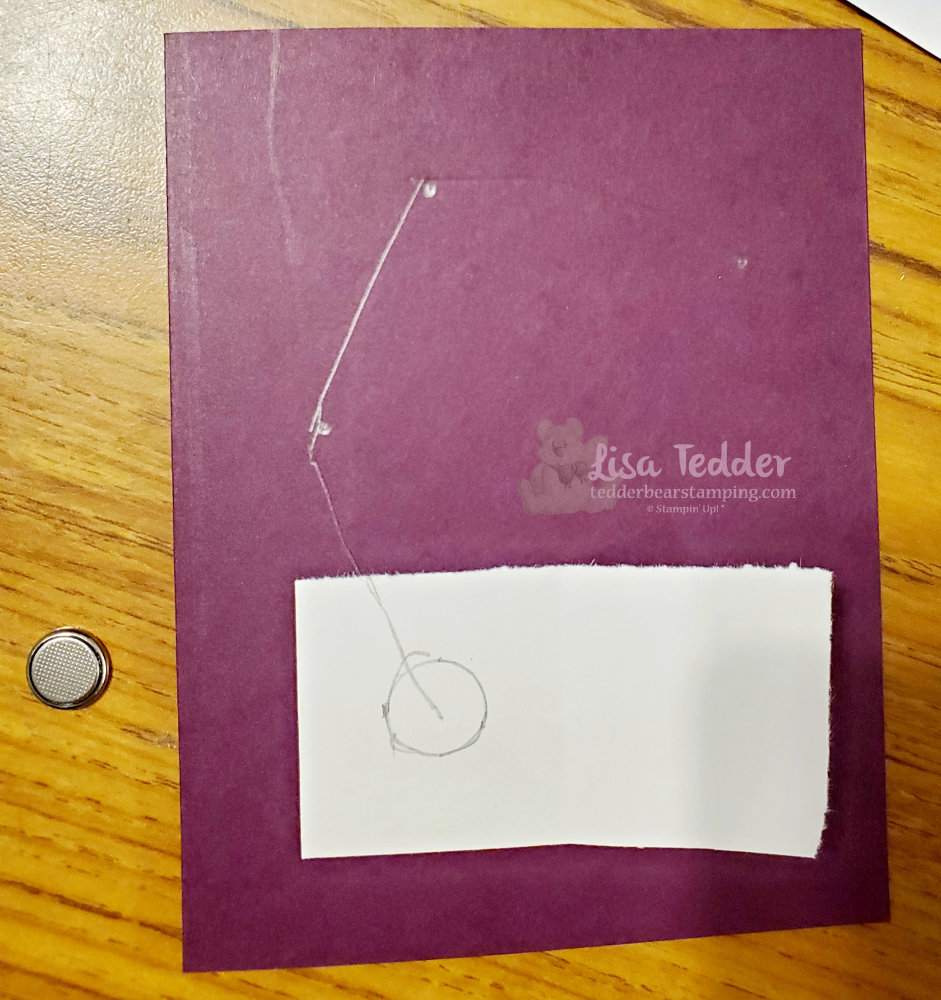
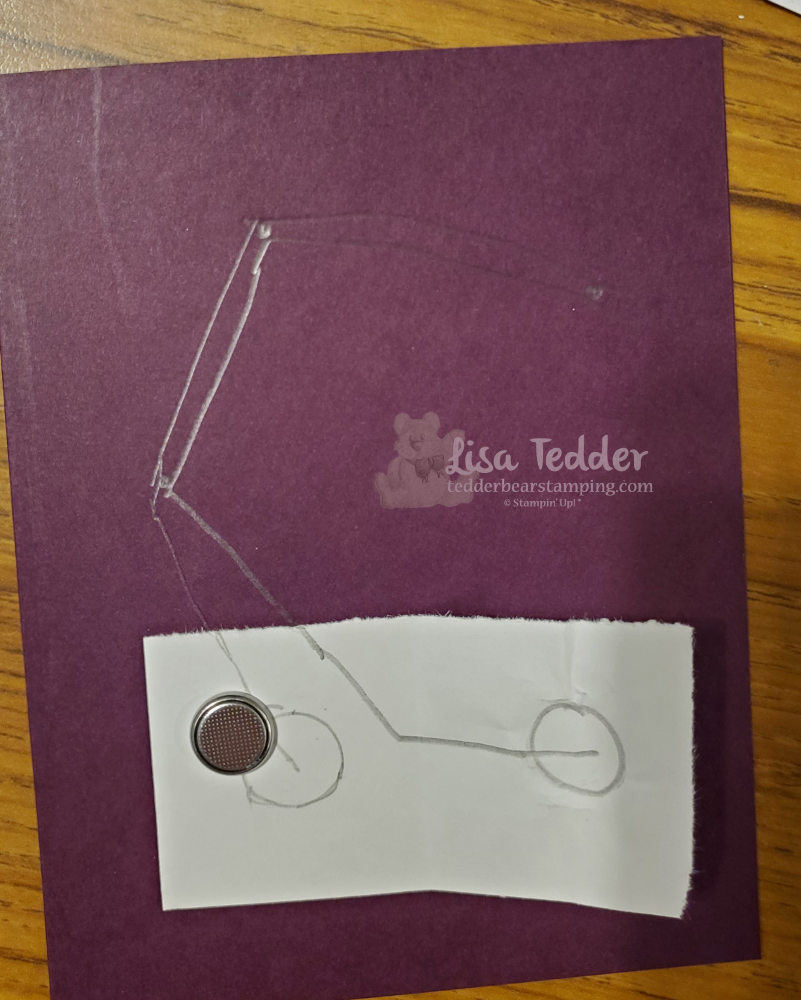
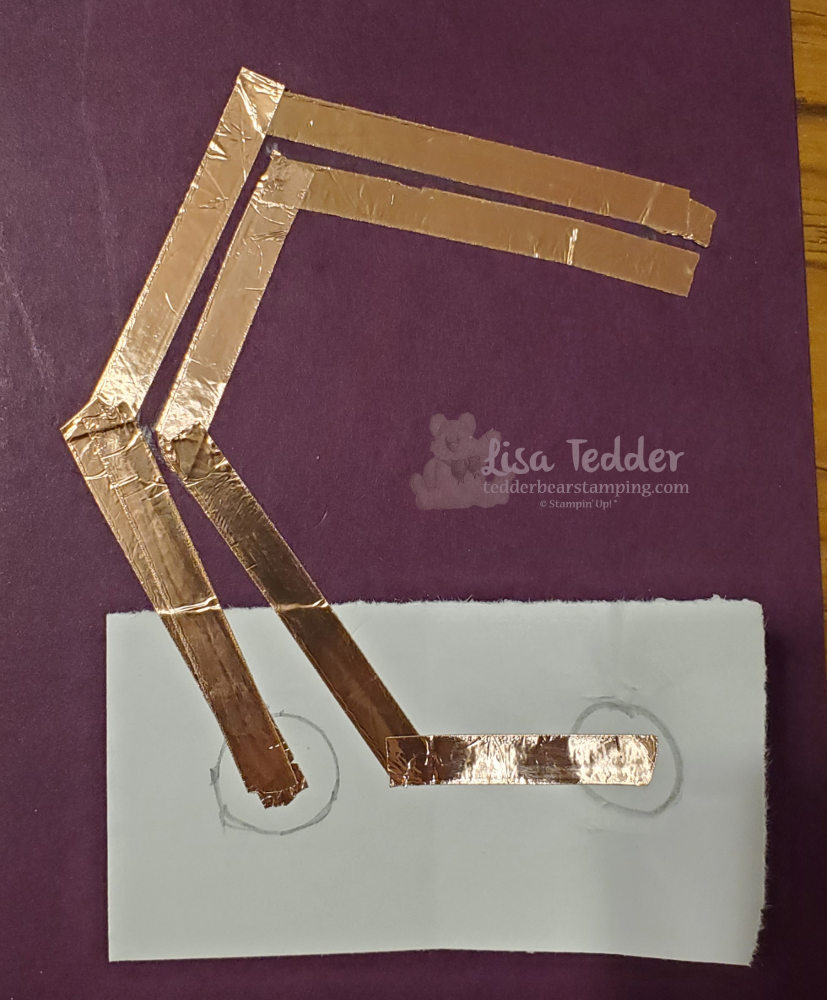
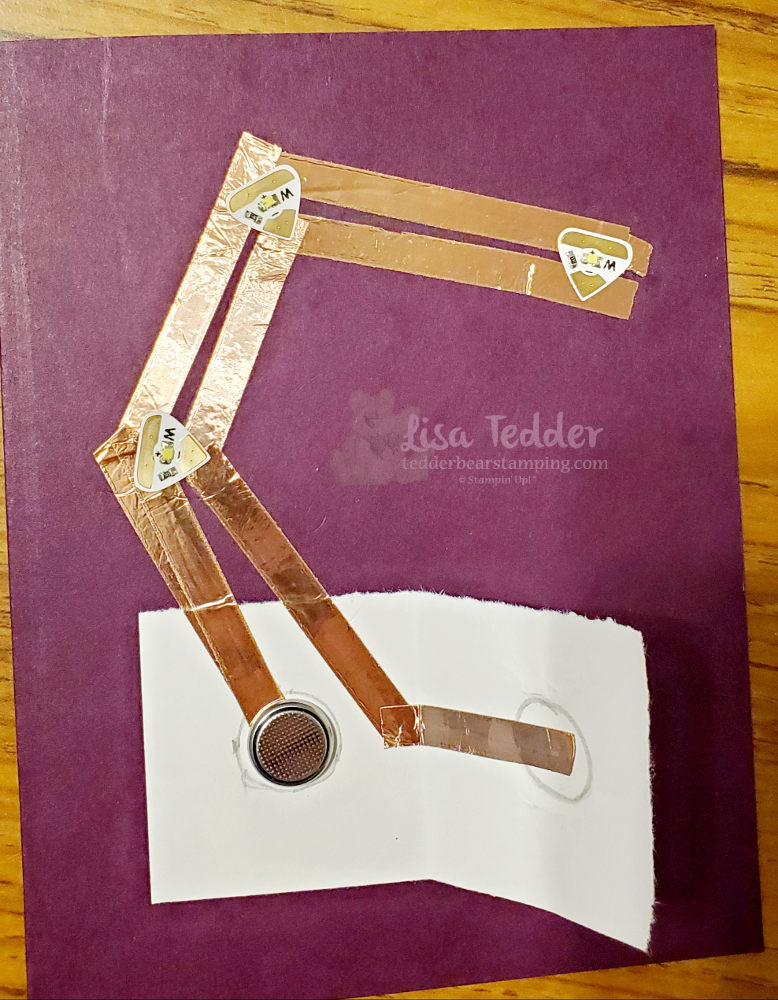
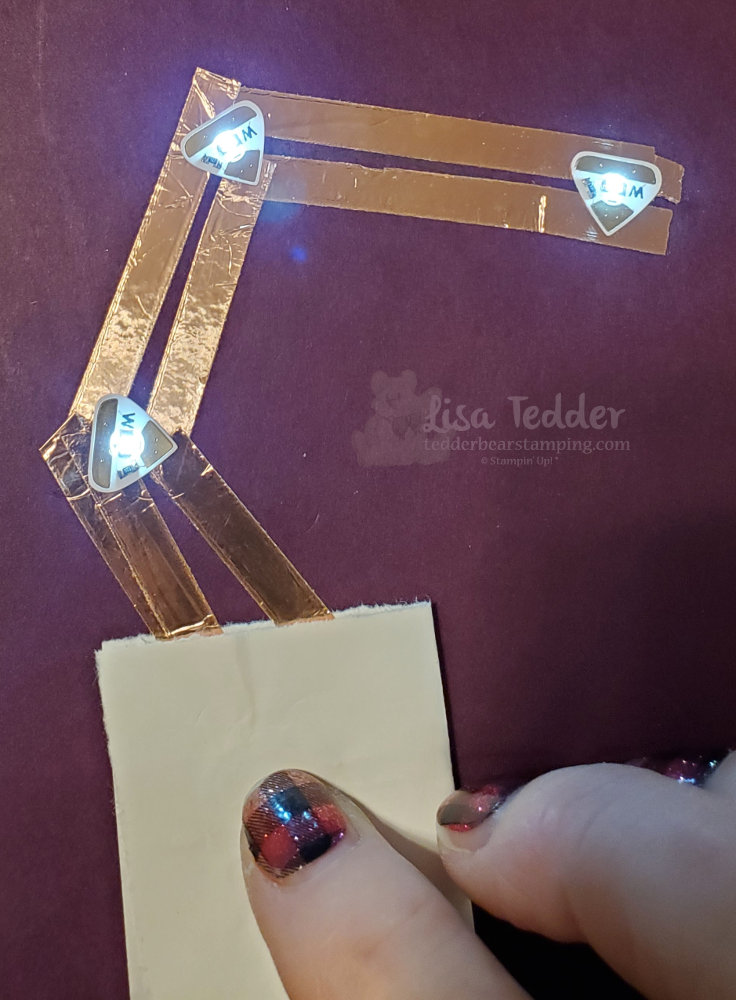
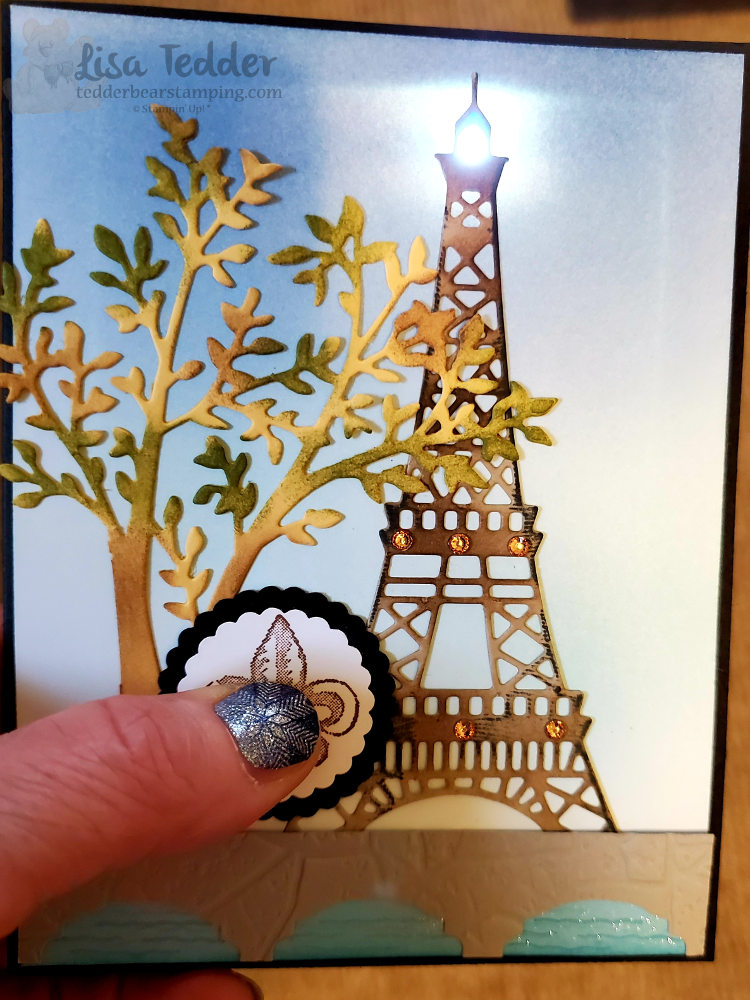
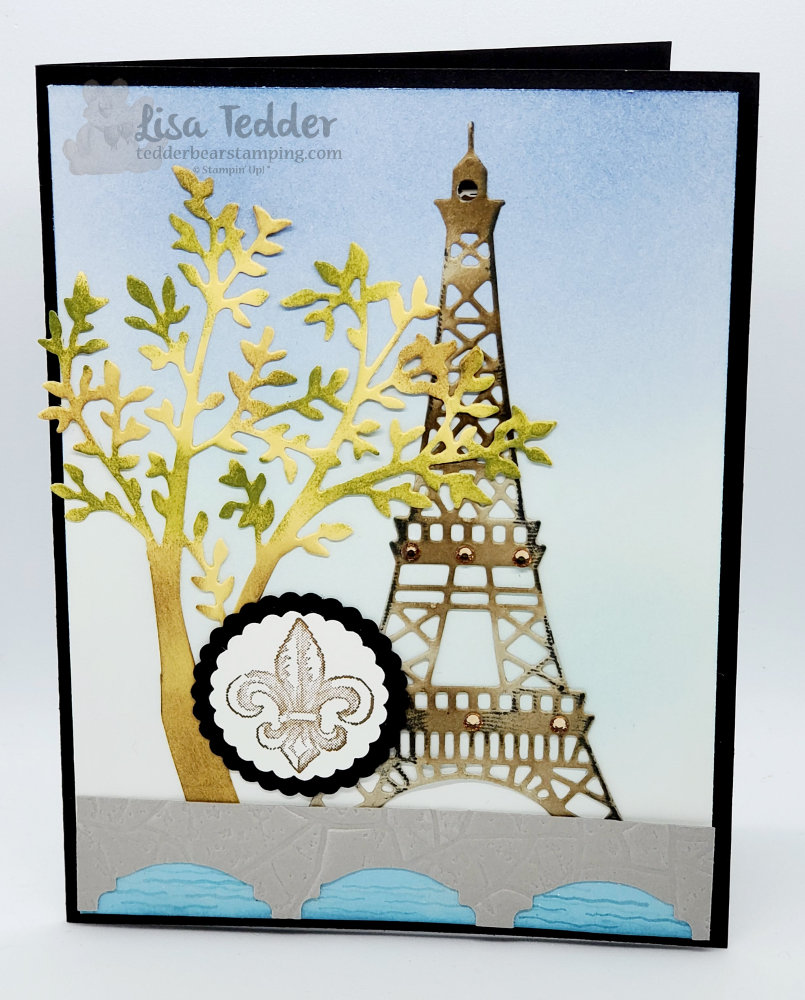
Hey Guys, making a Light up Card isn’t always easy, but I’m going to show you the easy way! If you want to watch my video so you can see how it’s done, click here! As always I walk you through making a handmade card, but this time it is interactive! When you push on the sentiment, the Lantern lights up! Fun!

Light up card the EASY way!

Light up card the easy way, watch the video to see it in action!
inside for light up card
This may not be a light up card the easy way, but it is so pretty!!
inside of 2nd card

Get 15% off ALL stamps in the BIG Catalog, today only!!

Of course I love a sale, who doesn’t!? Today only there is a sale on ALL stamps (no dies) so be sure to click on this link to go to my OnLine Store and get your deal! Moreover you will also get from me the PDF for this month that is exclusively for those who purchase $35 or more! I love giving people things, it is my Love Language. So, please take me up on being able to give you this exclusive PDF with 16 projects!!

Not only do I like Light Up Cards, especially when it’s done the easy way. Also I love creating in general! Not sure I share this enough but I NEVER thought I had a creative bone in my body. It wasn’t until I met Stampin’ Up! that I discovered that I am artistic! My goal for you is to share how easy stamping is and hopefully you can also learn it’s not as hard as either of us had thought!

I’m off to see my grandkids!

As I told you before a couple of weeks ago I went to CA to visit my family. My daughter let us bring back my grandson without his parents, and it went so great!! Now, I am going to DC to meet up with my other daughter and my other two grandkids! Don’t you love Summer!? Overall, I am excited that I got to see ALL my kids AND grandkids!

My hope is that you love this post and that you will share it and my video with your friends, but mostly I would love for you to try your hand at making a Light up card the easy way!

Lisa Tedder
A former California girl living in North Carolina

Product List

Retiring…What!?

I love Campology!

Hey guys, Campology is one of my favorites and it’s Retiring…What. Eventually, new favorites will be found. Nevertheless, be sure and get this set before it’s gone! for my cards today I already had it planned and then saw it was retiring. However, I’ve gotten to look at the NEW Catalog and I KNOW I will have new favorites!

Basically to get this set, click here and you will be taken right there! Of course for my video today I will be using this stamp set, BUT I am also making a Light Up card! Undeniably I love the lantern a lot and the fact I can make it light up is so much fun! Indeed, my videos are every Thursday, I do a live every other week and a recorded one every other week. For one thing I need to have certain days where I can do it ahead of time. Hence the reason I do a Live every other week. Of course, Hope you can join me!

Retiring…What!? Campology cards

Retiring...What!?
Retiring...What
Retiring...What!? Doesn't it look like both images are shining!?
Retiring...What

Get the PDF’s for FREE!

Of course you read that right! It’s so easy to get these PDF’s and more each week! After all, I am making them might as well give them away! Overall, how do you get them, simple! Sign up for my Newsletter and each week I do videos you will receive the PDF’s for them as long as you are on my Newsletter list! Easy Peasy! For this purpose the sign up is on my Blogs sidebar!

Do you like to belong to a Community?

As a matter of fact, I LOVE being included in things. Moreover, once I joined Stampin’ Up! and went to their gatherings, I felt like I belonged! Not only do I have fun seeing/purchasing things earlier than others, but the friends I have made when I joined are the Best! Of course the positive things I get are the reason I’ve been a Demonstrator since 2003! Not surprisingly, imagining NOT being a part of the SU! community makes me sad, so I’ve decided I’m not leaving! Ha! Subsequently If you would like to join, I would LOVE it if you would join under me, click here to sign up! So, Retiring…What!? definitely doesn’t apply to me!

Finally

Emphatically I would like you to know how much I appreciate you taking time out of your day and spending it with me! All in all, If you are ever free on a Thursday at 4:00 (eastern) come visit me on YouTube, where I have HUNDREDS of videos! Overall it’s one of my favorite things to talk with you! Thank you!

Lisa Tedder
A former California girl living in North Carolina

Product List

Lightning Bugs that light up!

Hey Guys,

Today I am sharing with you an Alternative to July’s Paper Pumpkin, my Lightning Bugs that light up! Of course, I have a video if you would like to see it here, otherwise follow along with my pictures! So, if you would like to see another light up card I’ve done click here!

Lightning Bugs that light up for real!

As a result of how I felt when I was a kid, I LOVE seeing Lightning Bugs! We spent the first 8 years of my life in IL and I remember how much I loved looking at them! Usually, My sister would take the lights off the bugs and make a ring, but I couldn’t do that! However, I knew it killed them. Now, she has guilt over that! Therefore when to CA the only ones I saw were in Disneyland at the Pirates of the Caribbean! To this day, that is my FAVORITE part of that ride!

So, when Stampin’ Up! came out with the July Paper Pumpkin I was so happy! By the way, I knew I had to make a light up card and have the Lightning Bugs REALLY light up! Are you ready?! Just in case, I have a lot of pictures showing how I did it. Therefore, if you want to skip the pictures, you can watch my video and see it light up for yourself! As you can see, In the first picture I show that you cut out the center of the gold and then lay it behind your card stock from the kit (which I cut down). Generally, the rest is self explanatory, I hope!!

Generally, I hope this all makes sense, remember the video is there if you need it! As you can see, this was a really fun technique, I hope you liked it!

As always here are the specifics for this card:

Stamps:
July Paper Pumpkin

Inks:
Blackberry Bliss

Cardstock:
Blackberry Bliss 8 1/2″ x 5 1/2″
Gold Foil 5 1/4″ x 4″
Card cut up from kit front is 5″ x 3 3/4″, inside is 5 1/4″ x 4″

Misc:
Chibitronics lights
Batteries
Copper Foil Tape
Rhinestones
Foam Adhesive Tape
Hole punch

As I’ve mentioned before, the supply list will be seen below (except for the lights….) you can click on any of them and be taken to my OnLine Store. Therefore, If you purchase $35 or more from me you will be sent a pdf with 16 projects with step by step instructions and pictures.

In conclusion, Thank you for stopping by! By the way, I hope you come back next week to see what I make next!

Lisa Tedder
A California girl living in North Carolina

Product List

Eiffel Tower all lit up!

Hey Guys!

Today I am sharing with you a light up card! I love these! They are so much fun! Next year, I am planning on going to see the Eiffel Tower (thank God it’s not THIS year!). I saw this card where someone made a bridge with water under it, and the Tower is in the background. I am not sure that they used Stampin’ Up! stamps, so decided to make one using Parisian Beauty. Here is my card lit up:

Not only did I use the Parisian Beauty stamp set, but I used the punch Label Me Fancy! This is what I used to make the bridge. I tried so hard to make them evenly spaced, this is as close as I could get. Also, I used Wink of Stella to highlight the water to give it that bit of sparkle!! If you lay the Smoky Slate piece of cardstock onto a grid sheet or against a ruler, make marks at these spots: 5/8″, 2″ and 3 5/16, then put the punch into these spots and only go part way up (look at picture to see how far) making the marks in the middle of the punch. This way it will make your waterway!

In the light of sharing with you the lit up version, I HAD to show you the card (a little more professional pic) when it’s NOT lit up:

Of course, I used a lot of bling by using Champagne Rhinestones, because you are not always going to have it turned on! The tree came from the die Sweet Silhouettes. Sponging the So Saffron cardstock after it was die-cut with Soft Suede and Garden Green, really makes this ‘tree’ look like the sun is hitting it in spots! Make sure you leave some yellow to give it that sun kissed look!

Furthermore, I also sponged the Eiffel Tower with Soft Suede and then ran the Memento Black pad itself over parts of the sides. This was to make it look like it was antiqued. What do you think? Did I hit it, or is it a miss? For those of you who love light up cards, we are going to be making this card next week! Let me know if you want to attend!

As always, here are the specifics for this card:

Stamps:
Parisian Beauty

Inks:
Soft Suede
Garden Green
Balmy Blue
Memento Black

Paper:
Basic Black 8 1/2″ x 5 1/2″, scraps
Whisper White 5 1/4″ x 4″, scraps
Whisper White Thick 5 1/4″ x 4″
So Saffron scraps (to fit tree)
Crumb Cake to fit Tower
Balmy Blue 4 ” x 1/2″ (for water)
Smoky Slate 5/8″ x 4″

Misc:
1 1/8″ & 1 3/8″ circle punches
Sweet Silhouettes Dies
Champagne Rhinestones
Stone 3d Folder
Foam Adhesive Strips
Tombo Liquid Glue
Batteries/Lights
Label Me Fancy punch

Furthermore, below you will see all the supplies in picture form. Click on any picture and you will be taken to my OnLine Store! If you purchase $35 or more from me, you will receive a handmade thank you card AND two sets of files with 16 tutorials in one and the other has over 40 tutorials! Every month you will get different tutorials with each purchase, I hope you take me up on it!

Thank you for stopping by, please come again!

Lisa Tedder
A California Girl living in North Carolina

Product List