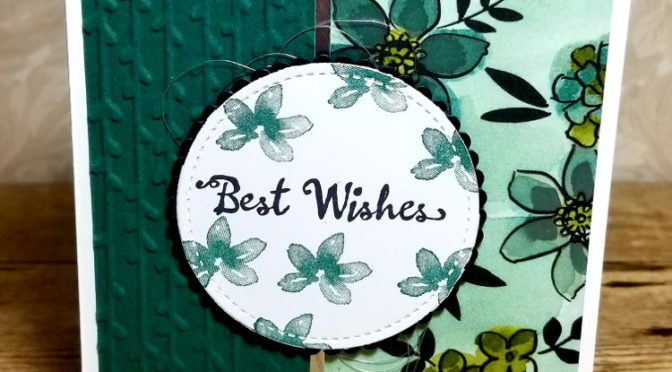
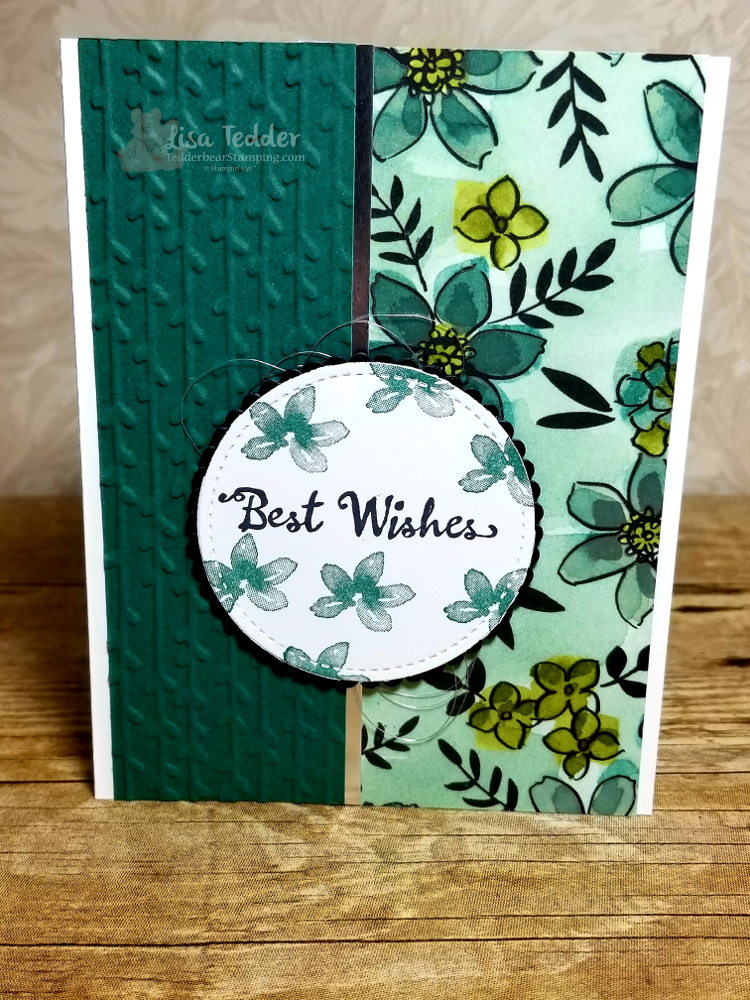
Today I am sharing with you a fast and easy card that uses the Share What You Love DSP. This Designer Series Paper is awesome! It is heavyweight, has a Translucent pearlized finish AND you get FOUR sheets of each design, which means you can make MORE!!
Here is the card that I want to share with you today:
I got this card idea on Pinterest from Craft with Kate. I did a few tiny things differently but for the most part I remade her card. I thought it was so elegant, I HAD to make it!
Here are the particulars for this card:
Stamp Sets
Petal Palette
Paper
Whisper White thick 5 1/2″ x 8 1/2″, 5″ x 3 3/4″,2 3/4″ sq
Tranquil Tide 1 3/4″ x 5 1/2″, 5 1/4″ x 4″
Share What you Love DSP 2 1/4″ x 5 1/2″
Silver Foil 5 1/2″ x 1/2″
Black 3″ sq
Inks
Tranquil Tide
Memento Black
Accessories
Silver Thread
Dimensionals
Stitched Shapes
Layering Circles
Petal Pair folder
Below are pictures of each item used, click on any of them to be taken to my OnLine Store. If you are in need of a Stampin’ Up! Demo I would be honored if you would choose me!
Anyone who orders Online, receives a gift of thanks from me!
Thank you for stopping by!
Lisa Tedder
A California Girl living in North Carolina
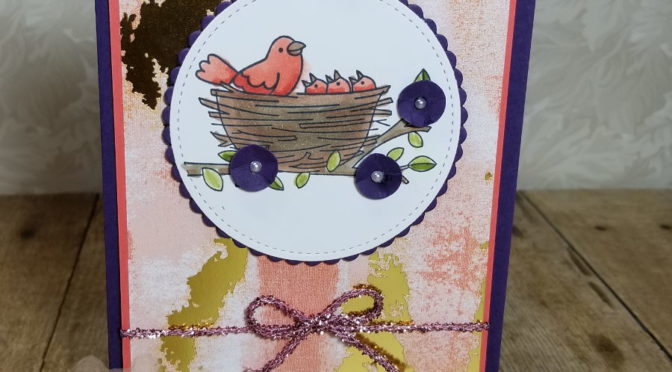
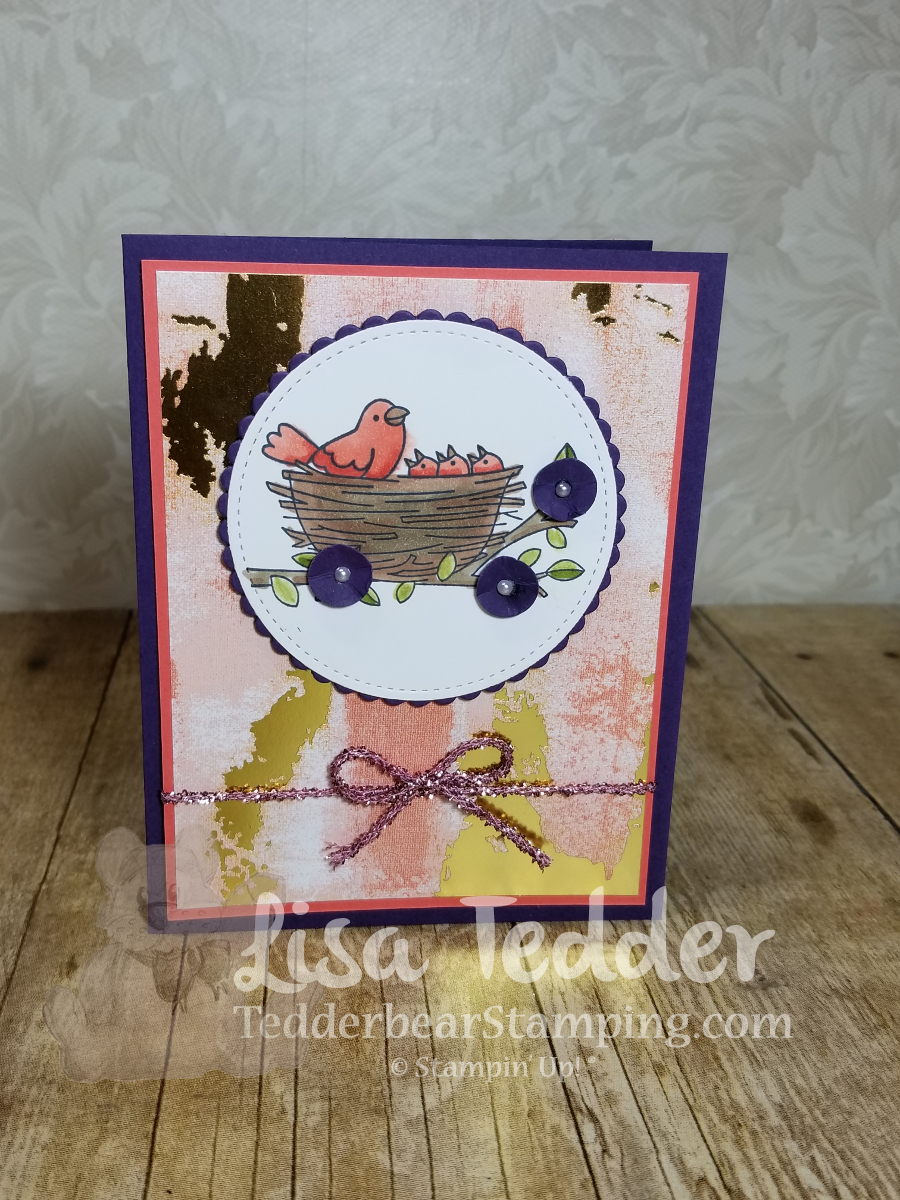
Today I am sharing with you a handmade card I had at my class last month!
I used the Myths and Magic DSP (Designer Series Paper), which you have seen in my post here: I LOVE this paper! I’ve seen a LOT of Designer Paper in my 17 years of stamping, I think this IS my favorite one yet!
The dimensions for this card are:
Elegant Envy: 8 1/2″ x 5 1/2″, 3 1/4″ sq for scallop circle, scraps for the flowers
Calypso Coral: 3 7/8″ x 5 1/8″
Painted with Love DSP: 3 3/4″ x 5″
Whisper White 5 1/4″ x 4″ for inside, and 3″ x 3″ for Stitched framelit
For the flowers, I punched out a 1/2″ circle and then placed it on my Stampin’ Pierce Mat and with the NON pokey side of my paper piercer, I pushed down in the center of the circle and it made it a flower shape! I placed a pearl in the ‘bowl’ that I made to make a matching flower to the cardstock I used!
I hope you enjoyed my project! And that you come back again! If you get the chance go visit my YouTube Channel and see cards/projects that take a little more instruction! My passion is making cards/projects that challenge me, or that STILL delight me that I AM artistic! I thought my sister got all the artistic genes in my family! STILL tickles me when I make something pretty!
Below is everything I used to make this card. Click on any picture and you will be taken to my OnLine Store! If you purchase from me, I will send you a handmade card!
Thanks for stopping by! I hope you come back again!
Lisa Tedder
A California Girl living in North Carolina
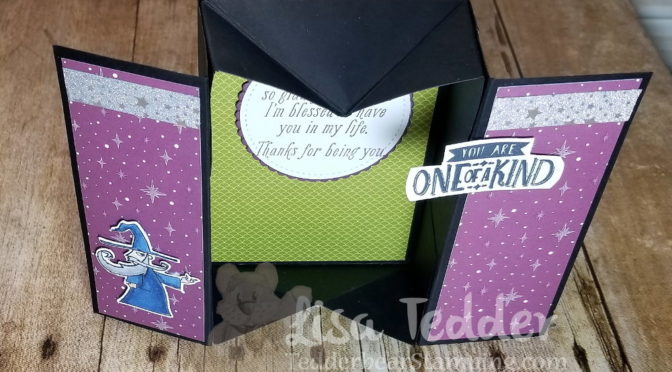
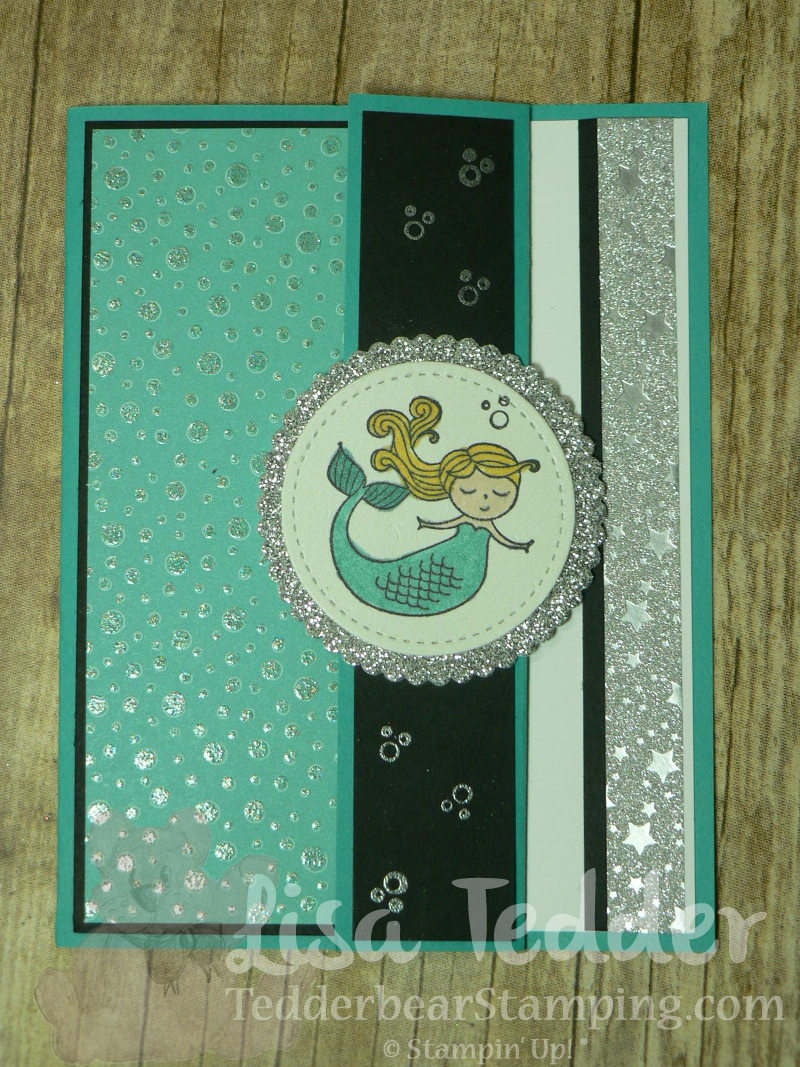
So glad you could join me for this awesome project I have for you today!
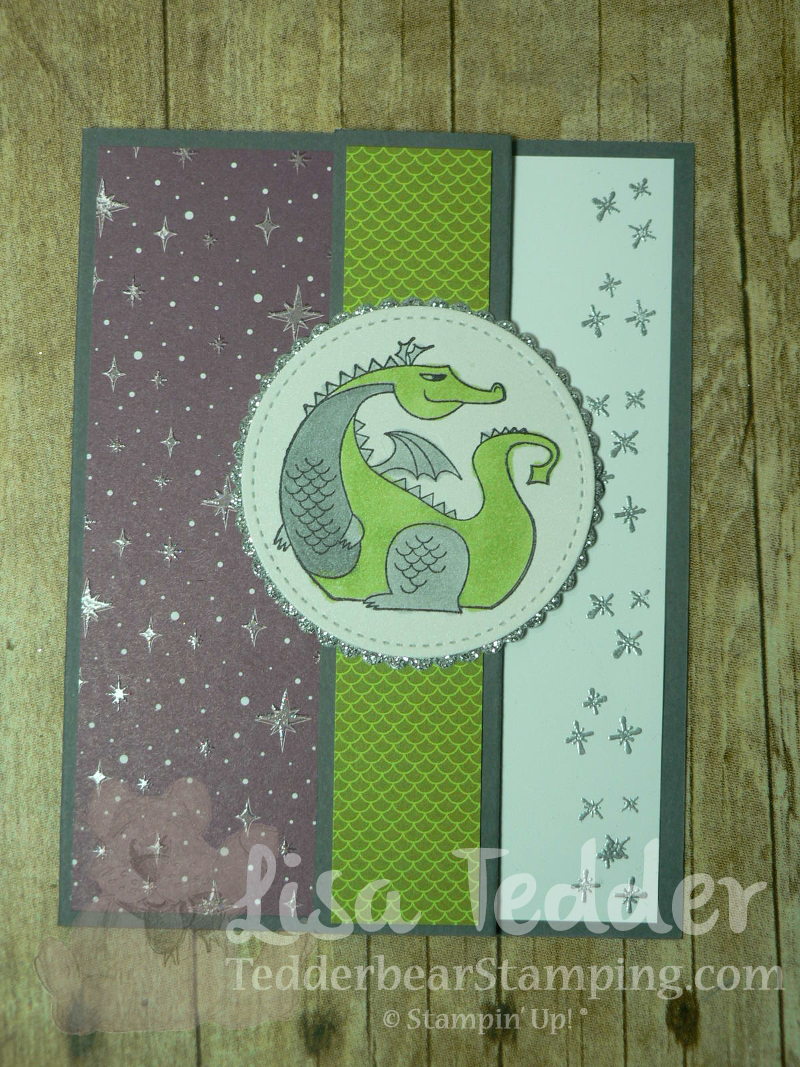
Funny that my nails match!! Just got them done today! This is the card in the closed position
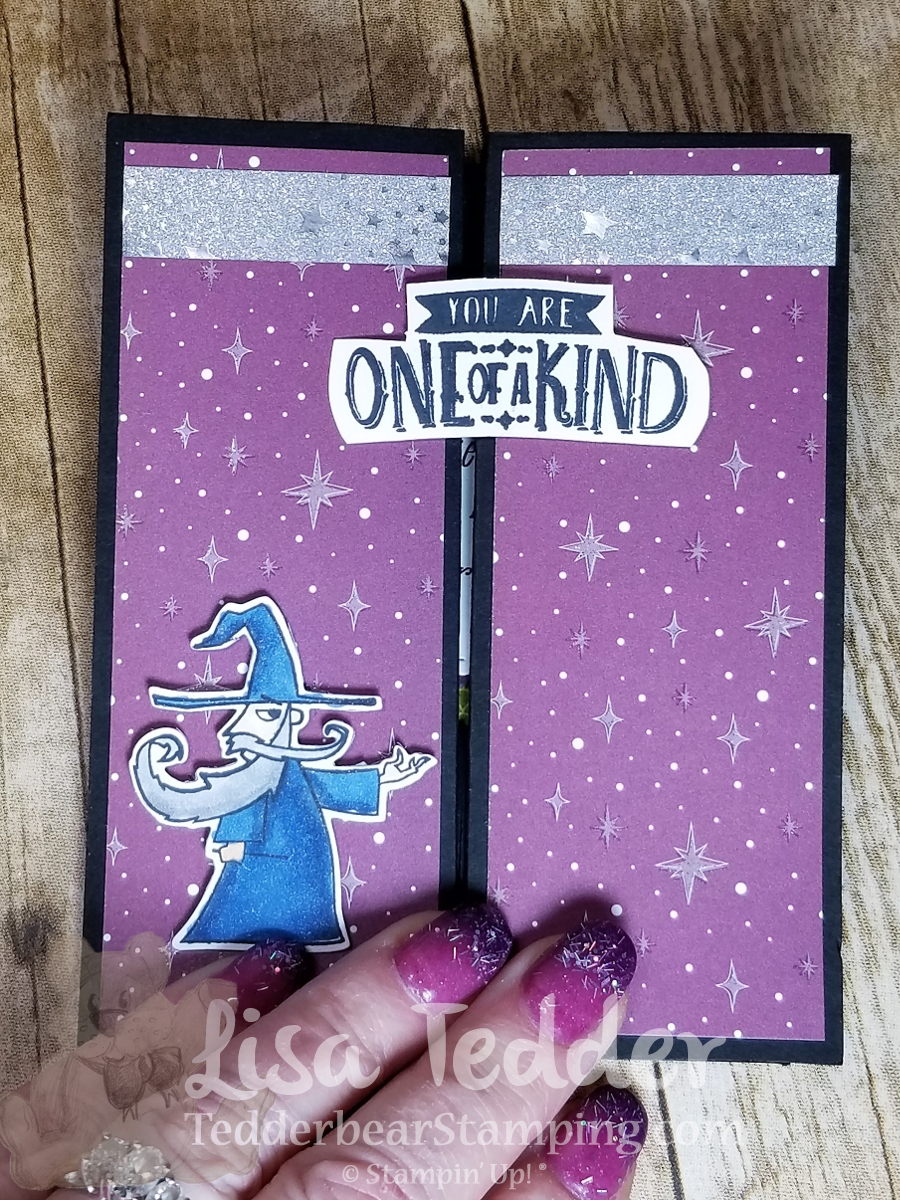
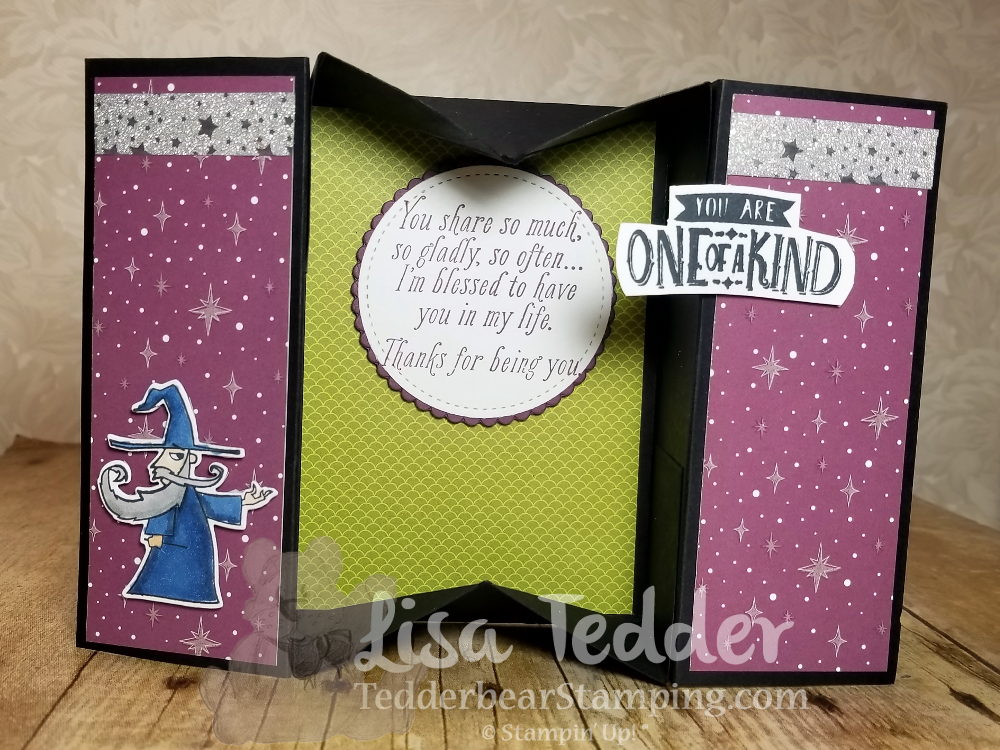
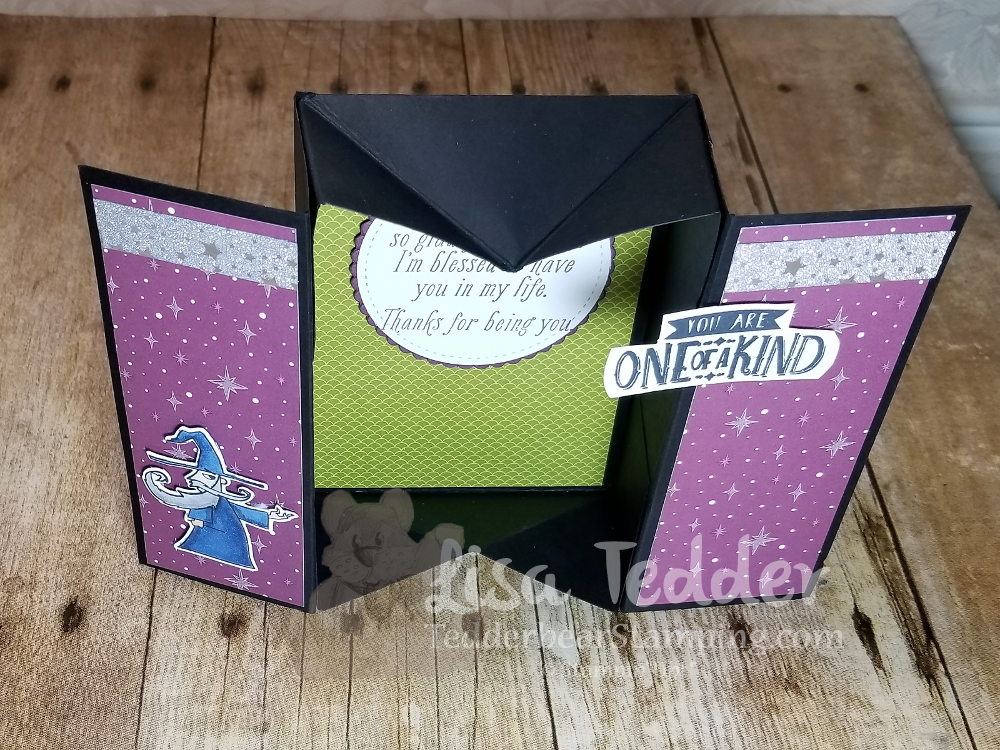
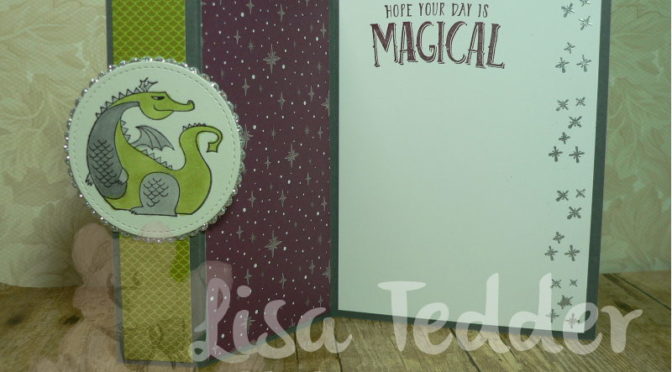
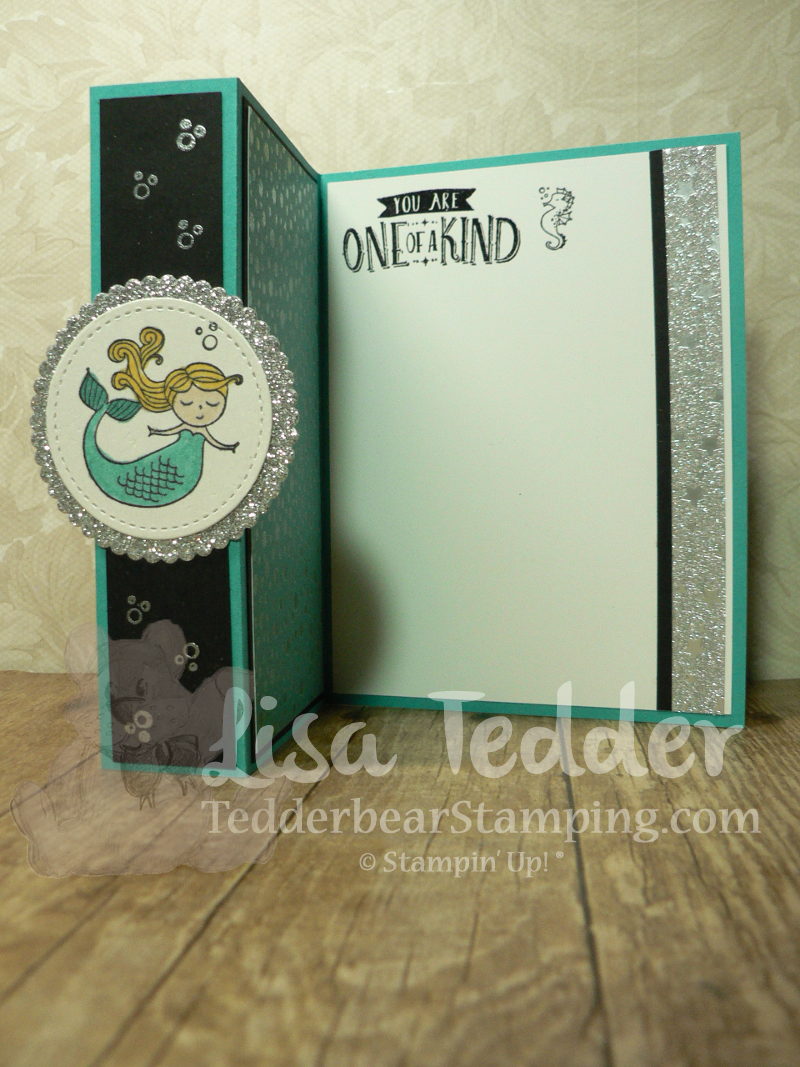
Here it is Open, the next picture shows it from a higher angle so you can really see the ‘box’.
This was super fun! I love the Magical Day Stamp set……I had used EVERY stamp in the set but the Magician, and now I have used them ALL! I colored with the Blends and also used the Magical Day Washi Tape! This entire Suite is awesome!
I got this idea from Natalie Lapakko……..I’m a visual learner so seeing a video would have helped me learn, so I thought I could help you if you also learn by seeing!
This project takes a whole piece of 8 1/2″ x 11″ piece of cardstock. Score Horizontal @ 2″, 3 3/4″, 7 1/4″ and 9″
Score Vertical @ 1 3/4″ and 6 3/4.
Follow along with the video to see where to snip and trim! It was MUCH easier than I anticipated!
Below will be pictures of the items used to make this project. Click on any picture to be taken to my OnLine Store!! If you purchase from me, I will send you one of my handmade cards!
Thanks for stopping by! If you are new to me, I have a YouTube Channel where I TRY to do a video every Tuesday! I would love it if you would subscribe and be alerted when my next video posts!
Lisa Tedder
A California Girl living in North Carolina
Today I am sharing with you a couple of cards that I made for my YouTube Channel. I have a very simple fold but the cards are stunning! You can see the video here!
While I was at OnStage in Salt Lake City in UT I got to see first hand cards that were made using this set!! I fell in LOVE!
Here is the front of my card:
The Designer Series Paper (DSP) is called Myths & Magic, it is embossed and GORGEOUS!! ON the Video you can see how shiny and beautiful they are!
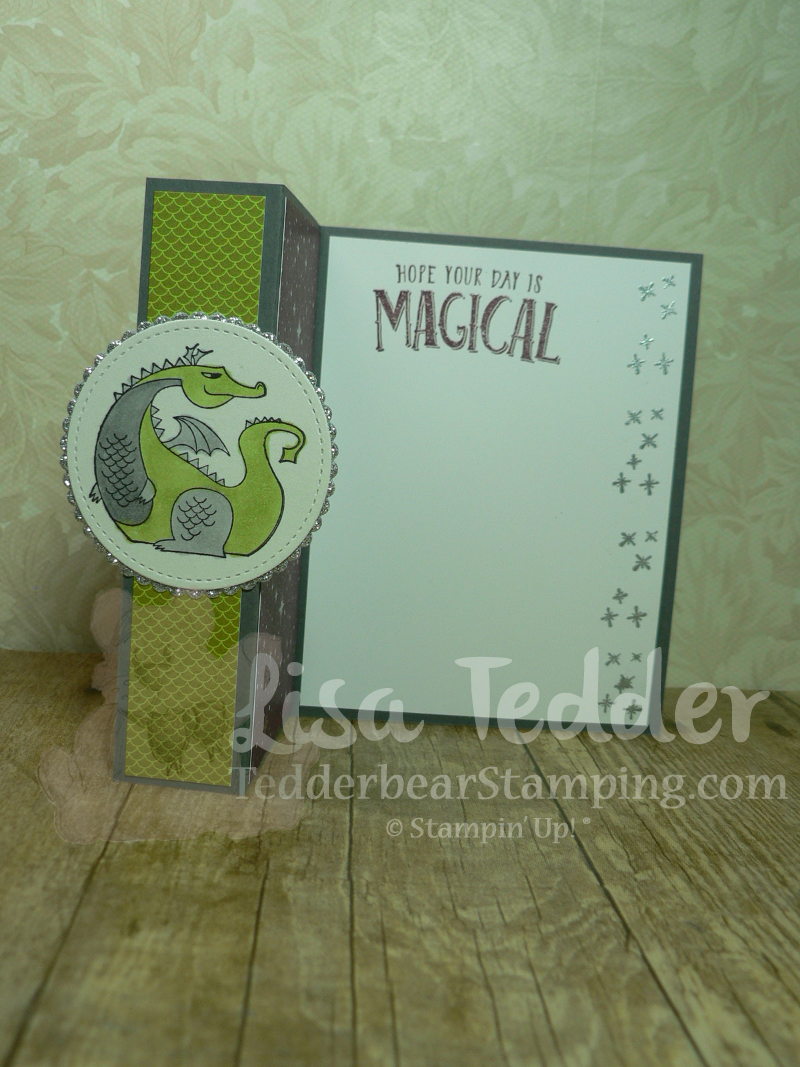
Here it is partially open:
I embossed the ‘sparkles’ on the side using Silver embossing powder.
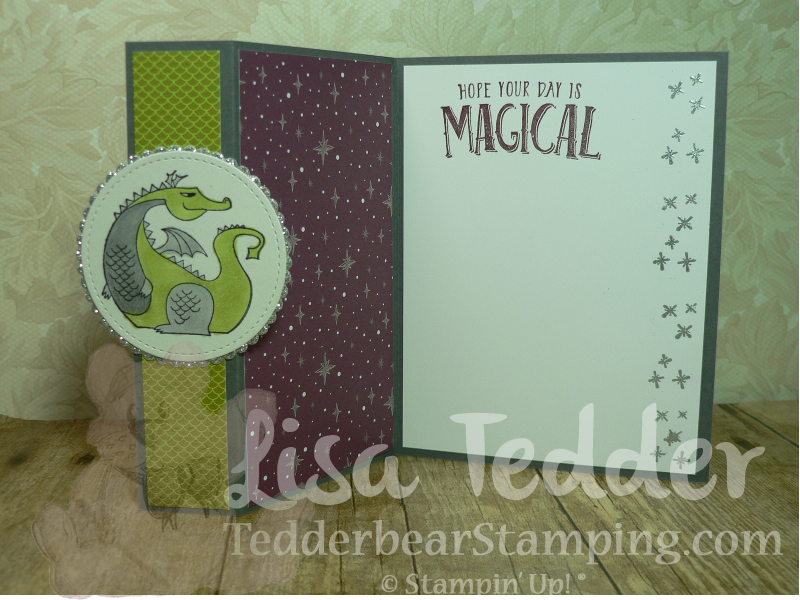
Here is this card open all the way, isn’t it pretty!!?
I used Stampin’ Blends, and just love this card so much!!
Now, here is the other card, same design, different stamps!
I used the Myths & Magic Washi Tape on the side, isn’t it gorgeous!?
I am already planning on ordering MORE of this DSP and Washi Tape!
Well? Do you love it?! If you want a catalog, just let me know and I will get it to you!!
Click on any picture below and you will be taken to my OnLine Store!
Have a great day!
Lisa Tedder
A California girl living in North Carolina Product List
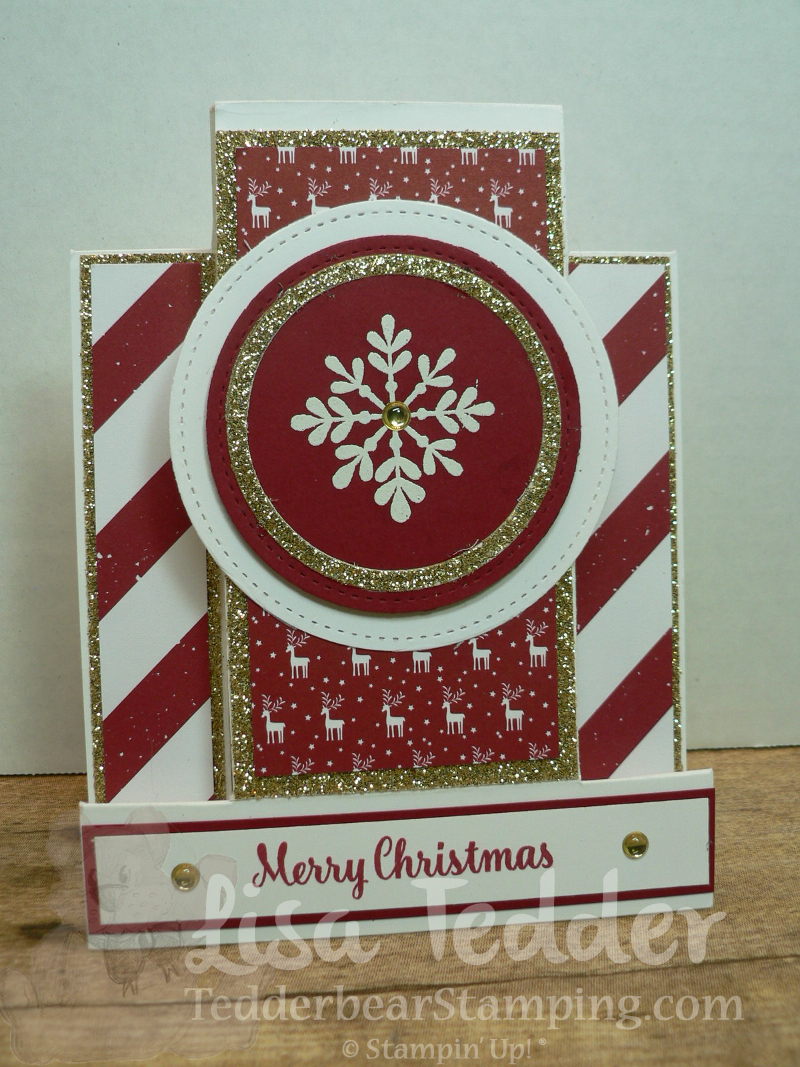
Here is my favorite of all the cards! I am posting this now because I have made a video for this ‘type’ of card….Easel Card. The video is making this fold, but you can see a different card using this same fold! You can watch it on my Technique Tuesday video series!
Here is my Christmas version!
This card design is based on a card that I swapped with Linda Wiencek! Love the design, I did it a little different, I didn’t have everything she used. This is called an Easel Card. It is VERY sparkly in person!
If you are interested in getting my 7 page pdf with Instructions, dimensions and Color Photos of all 6 Christmas Cards, you only need to purchase $50 from my Online Store and I will email it to you! The supplies needed for this card are listed below, click on any picture to be taken to my Store! Please use hostess code CGCDT6ZJ
As for the how-to to make the folds and cuts for this card, you can find an Easel Card on my YouTube channel, my pdf has all the dimensions for each panel!
Off to do some work with my hands, have some Cards to make!
Lisa Tedder
A California Girl living in North Carolina Product List
Want to receive this card? Check out below how you can be in a drawing to get this beautiful card mailed to you!
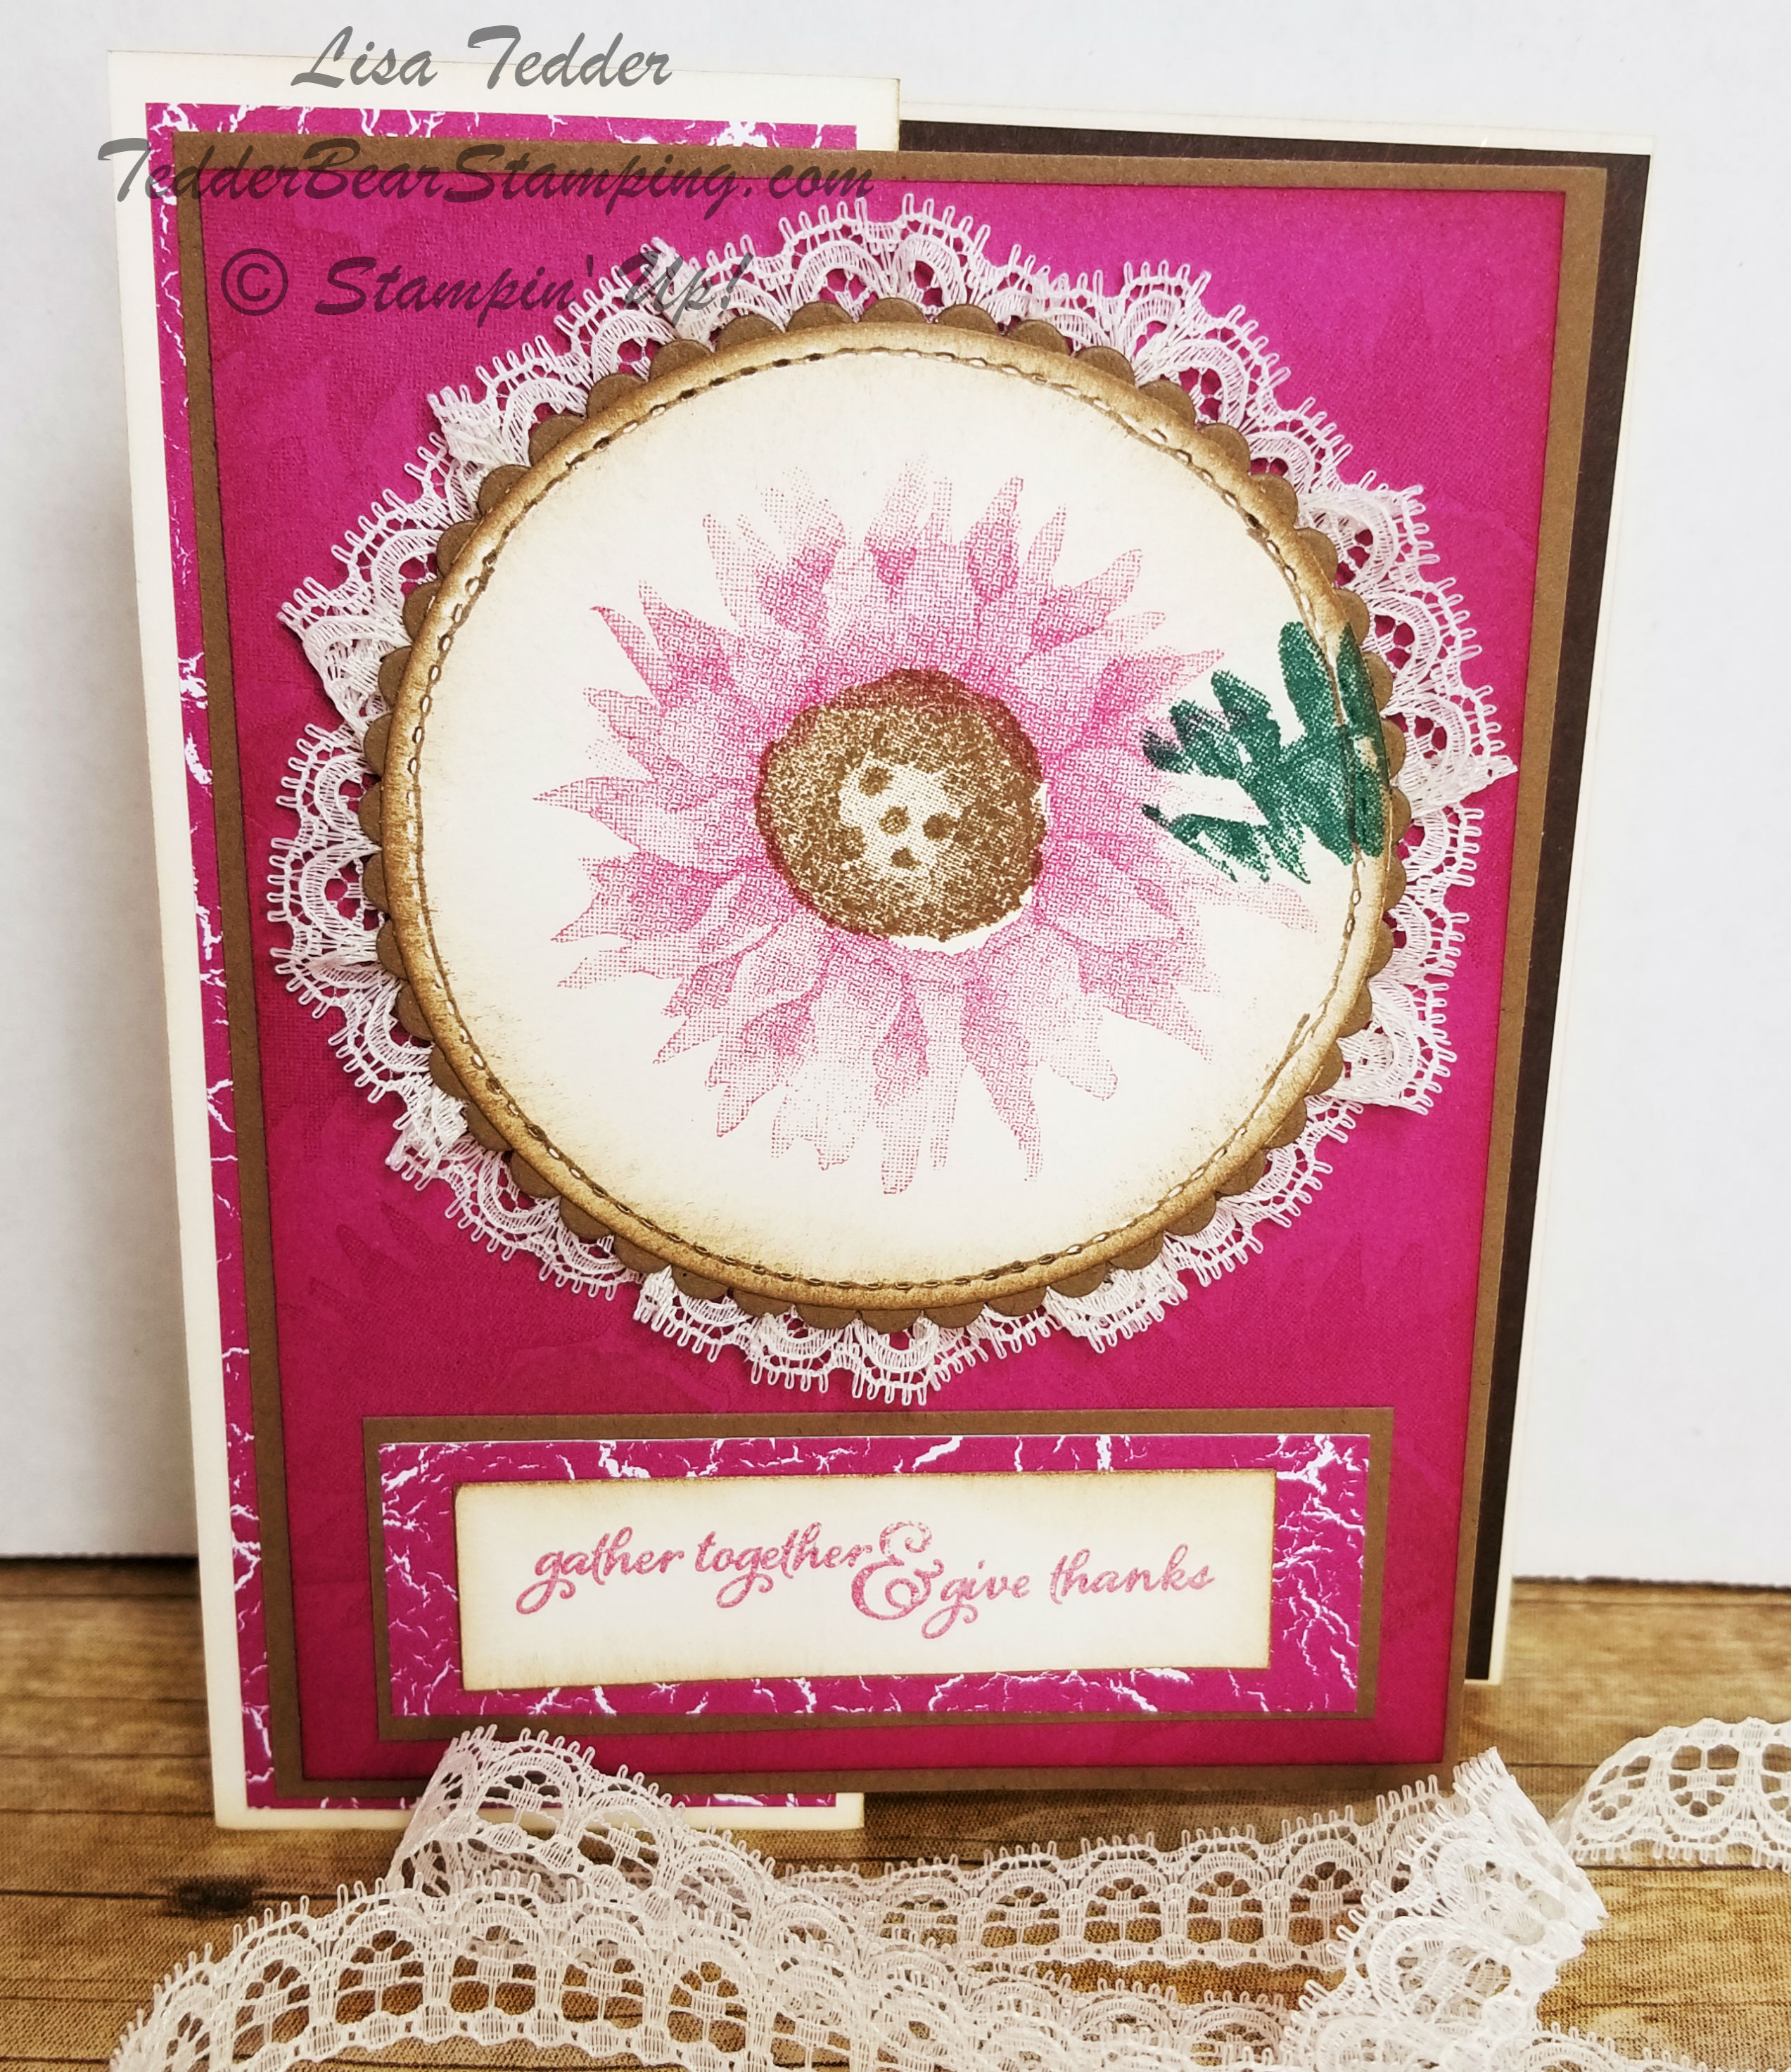
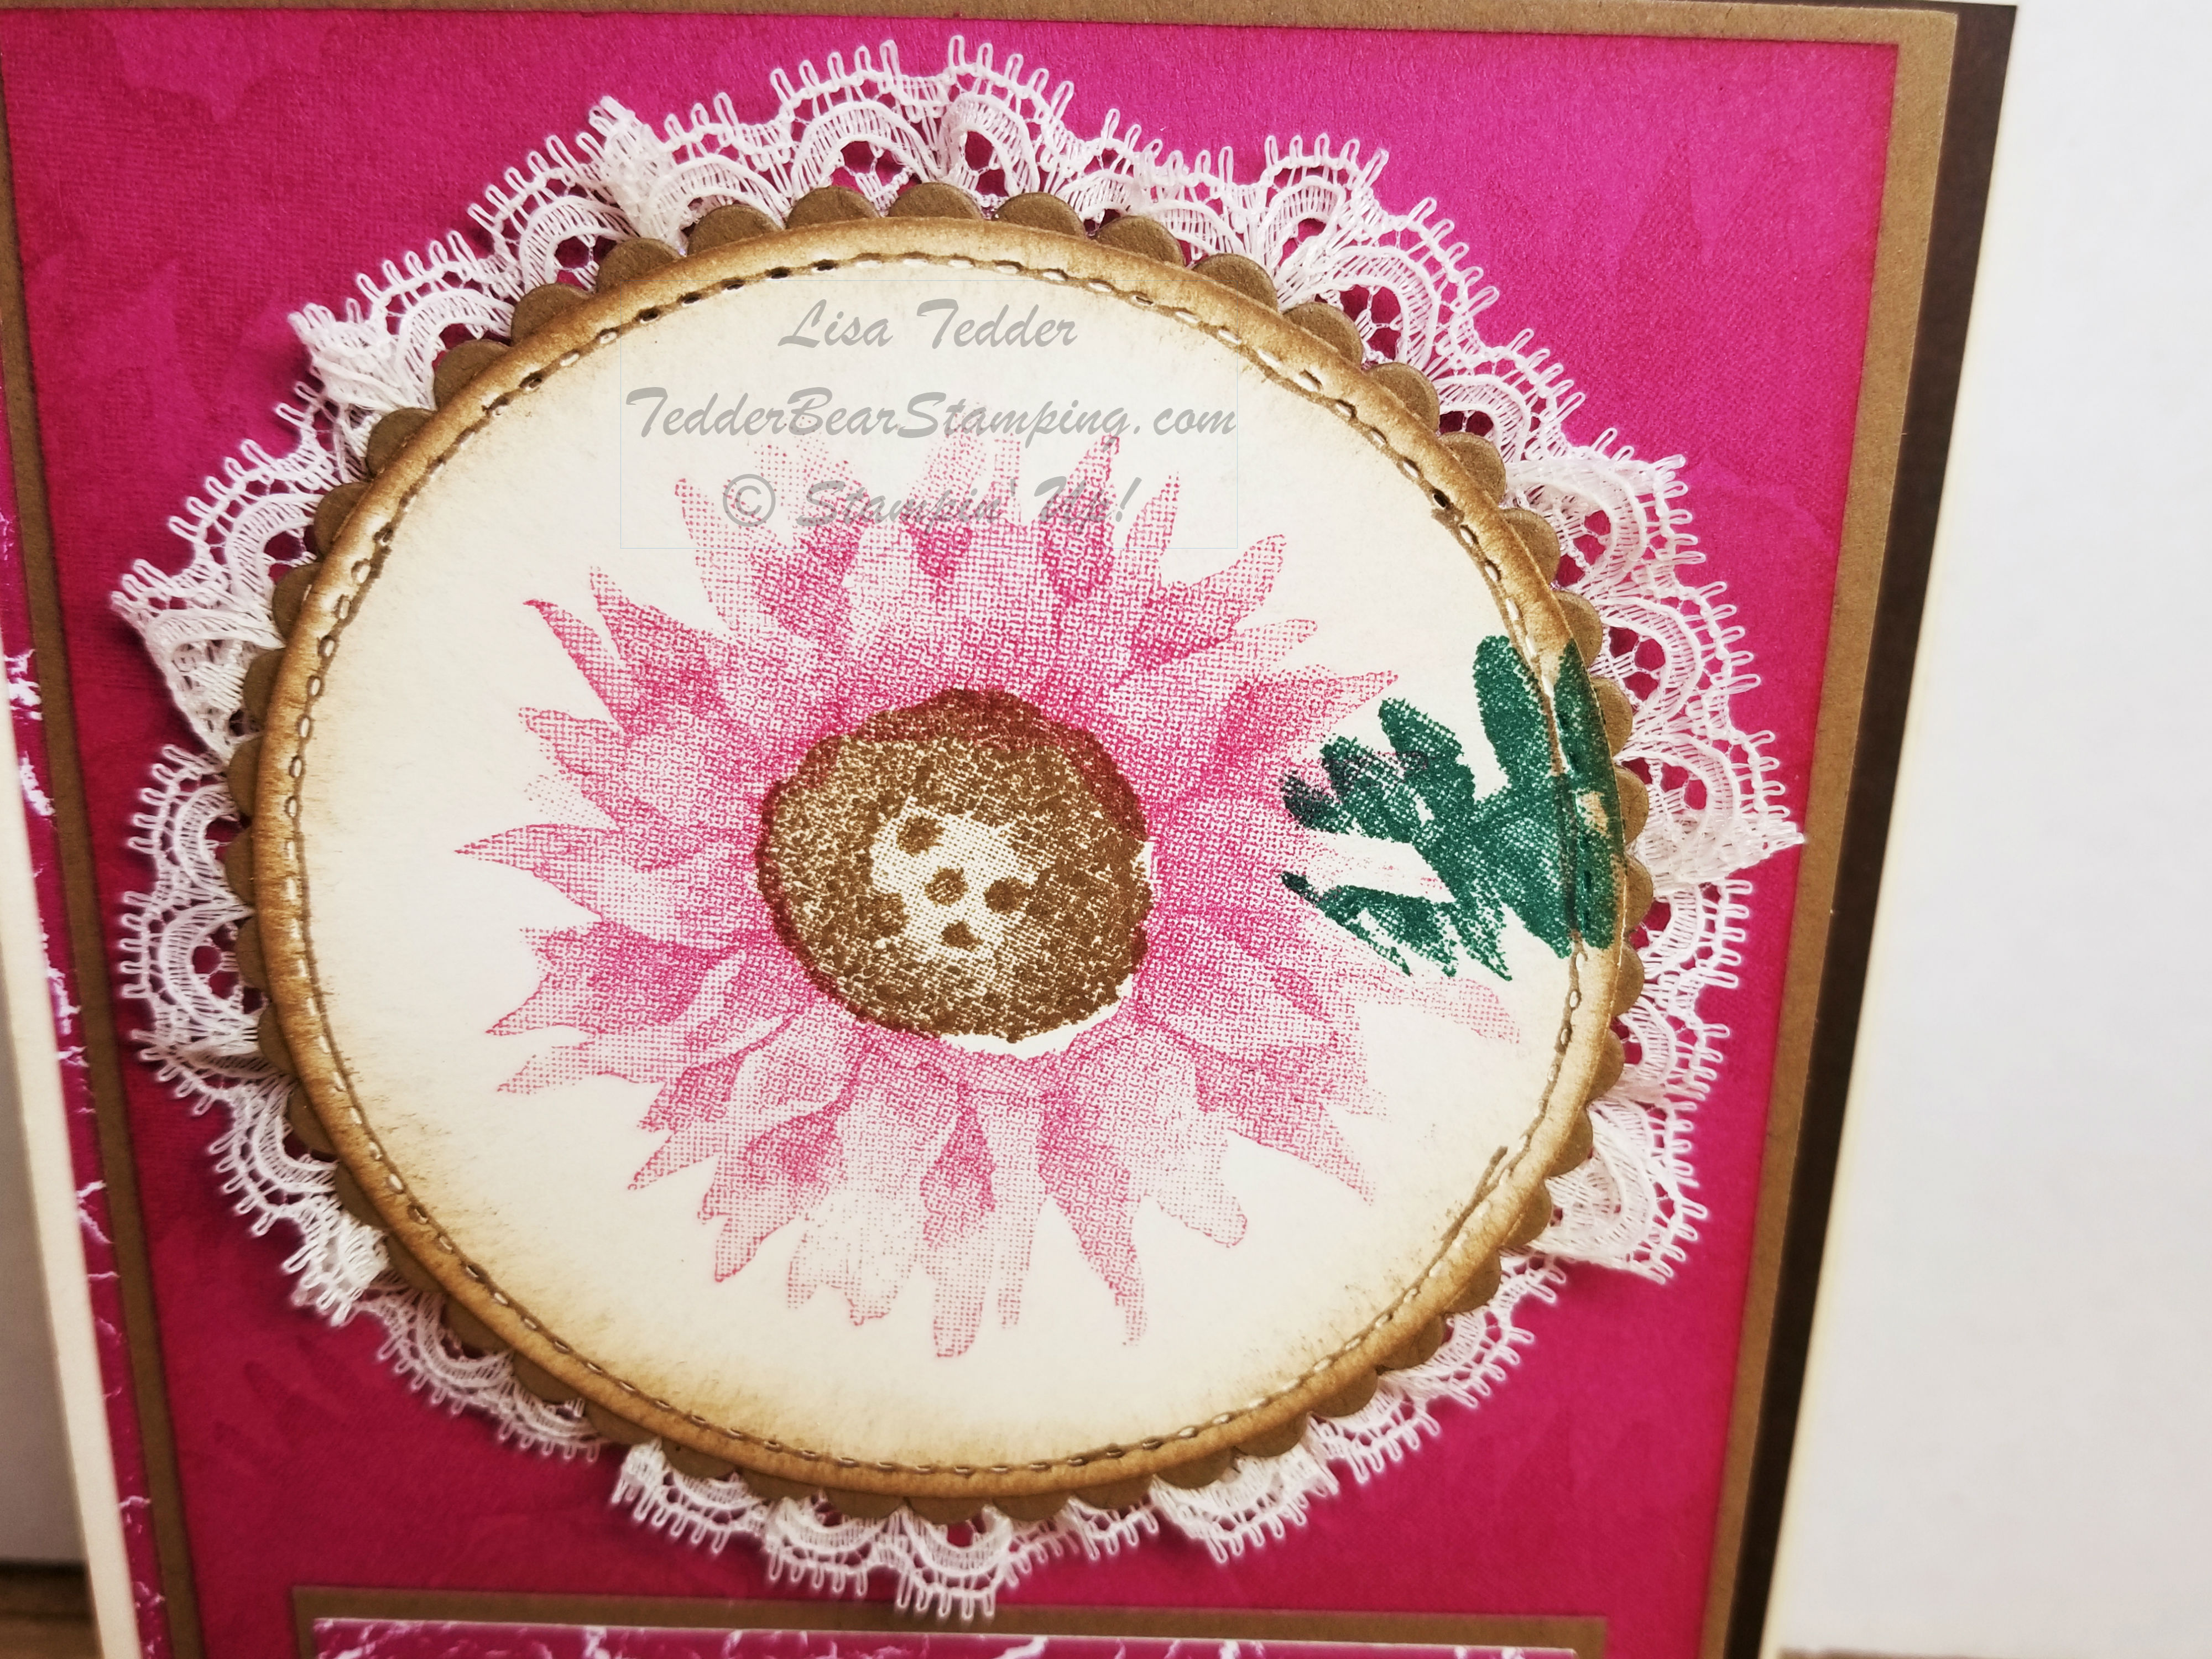
Today I am sharing with you a new Technique that I kind of stumbled on!! I’m using the NEW stamp set: Painted Harvest #144783 which will be in the Holiday Catalog coming out in September! You can see the video on YouTube, I have some great tips and it’s a VERY simple Z fold card!
Here is a picture of the front of the card:
Isn’t it GORGEOUS!? I was just playing around and was astounded at how great this came out! This is one of those times when I am sitting at my stamp table (by myself) and I start to talk and say how beautiful it is! LOL No-One is there, mind you……..even after 16 years of stamping I STILL get excited that I can make something this pretty!
Here it is open:
Doesn’t Berry Burst work great with this card? And here is a close-up of the front flower that looks like embroidery:
I popped up this whole piece using the Foam Adhesive Strips since they pop up more than Dimensionals. The video I made shows a different leaf than the one shown here, and I like it better. I show you how to mask the flower and put the leaves behind it. I also show you how to do the ribbon behind this image. If you go see it, leave me a message and let me know what you think.
IF you leave me a message I will have a drawing in 2 weeks on the 28th for one of you to win this card! Leave a message either here on my blog or on the video on Youtube.
ALL the dimensions are on the video, so if you want to recreate this go check it out!
All the supplies are listed below, click on any picture to be sent to my On-Line Store! If you purchase from me I will be sending you a handmade card as a Thank You!
This is a SNEAK PEEK so hope you enjoyed this card as much as I do! Keep an eye out for MORE Technique Tuesday videos! Techniques are my favorite. Anything that will let me use my stamp supplies more are a win win in my book!
Until next time!
Lisa Tedder
TedderBearStamping
A California girl living in North Carolina
It’s that time again! I’m competing once again in Kylie’s International Blog Hop! Please go vote for me!! Click here to vote.
To vote, click on the heart in my picture #11, and your vote will count!
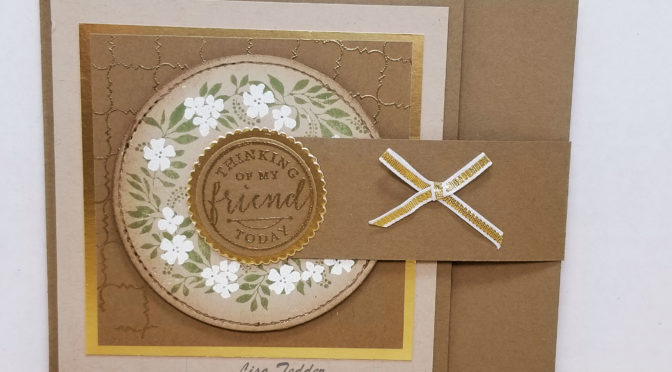
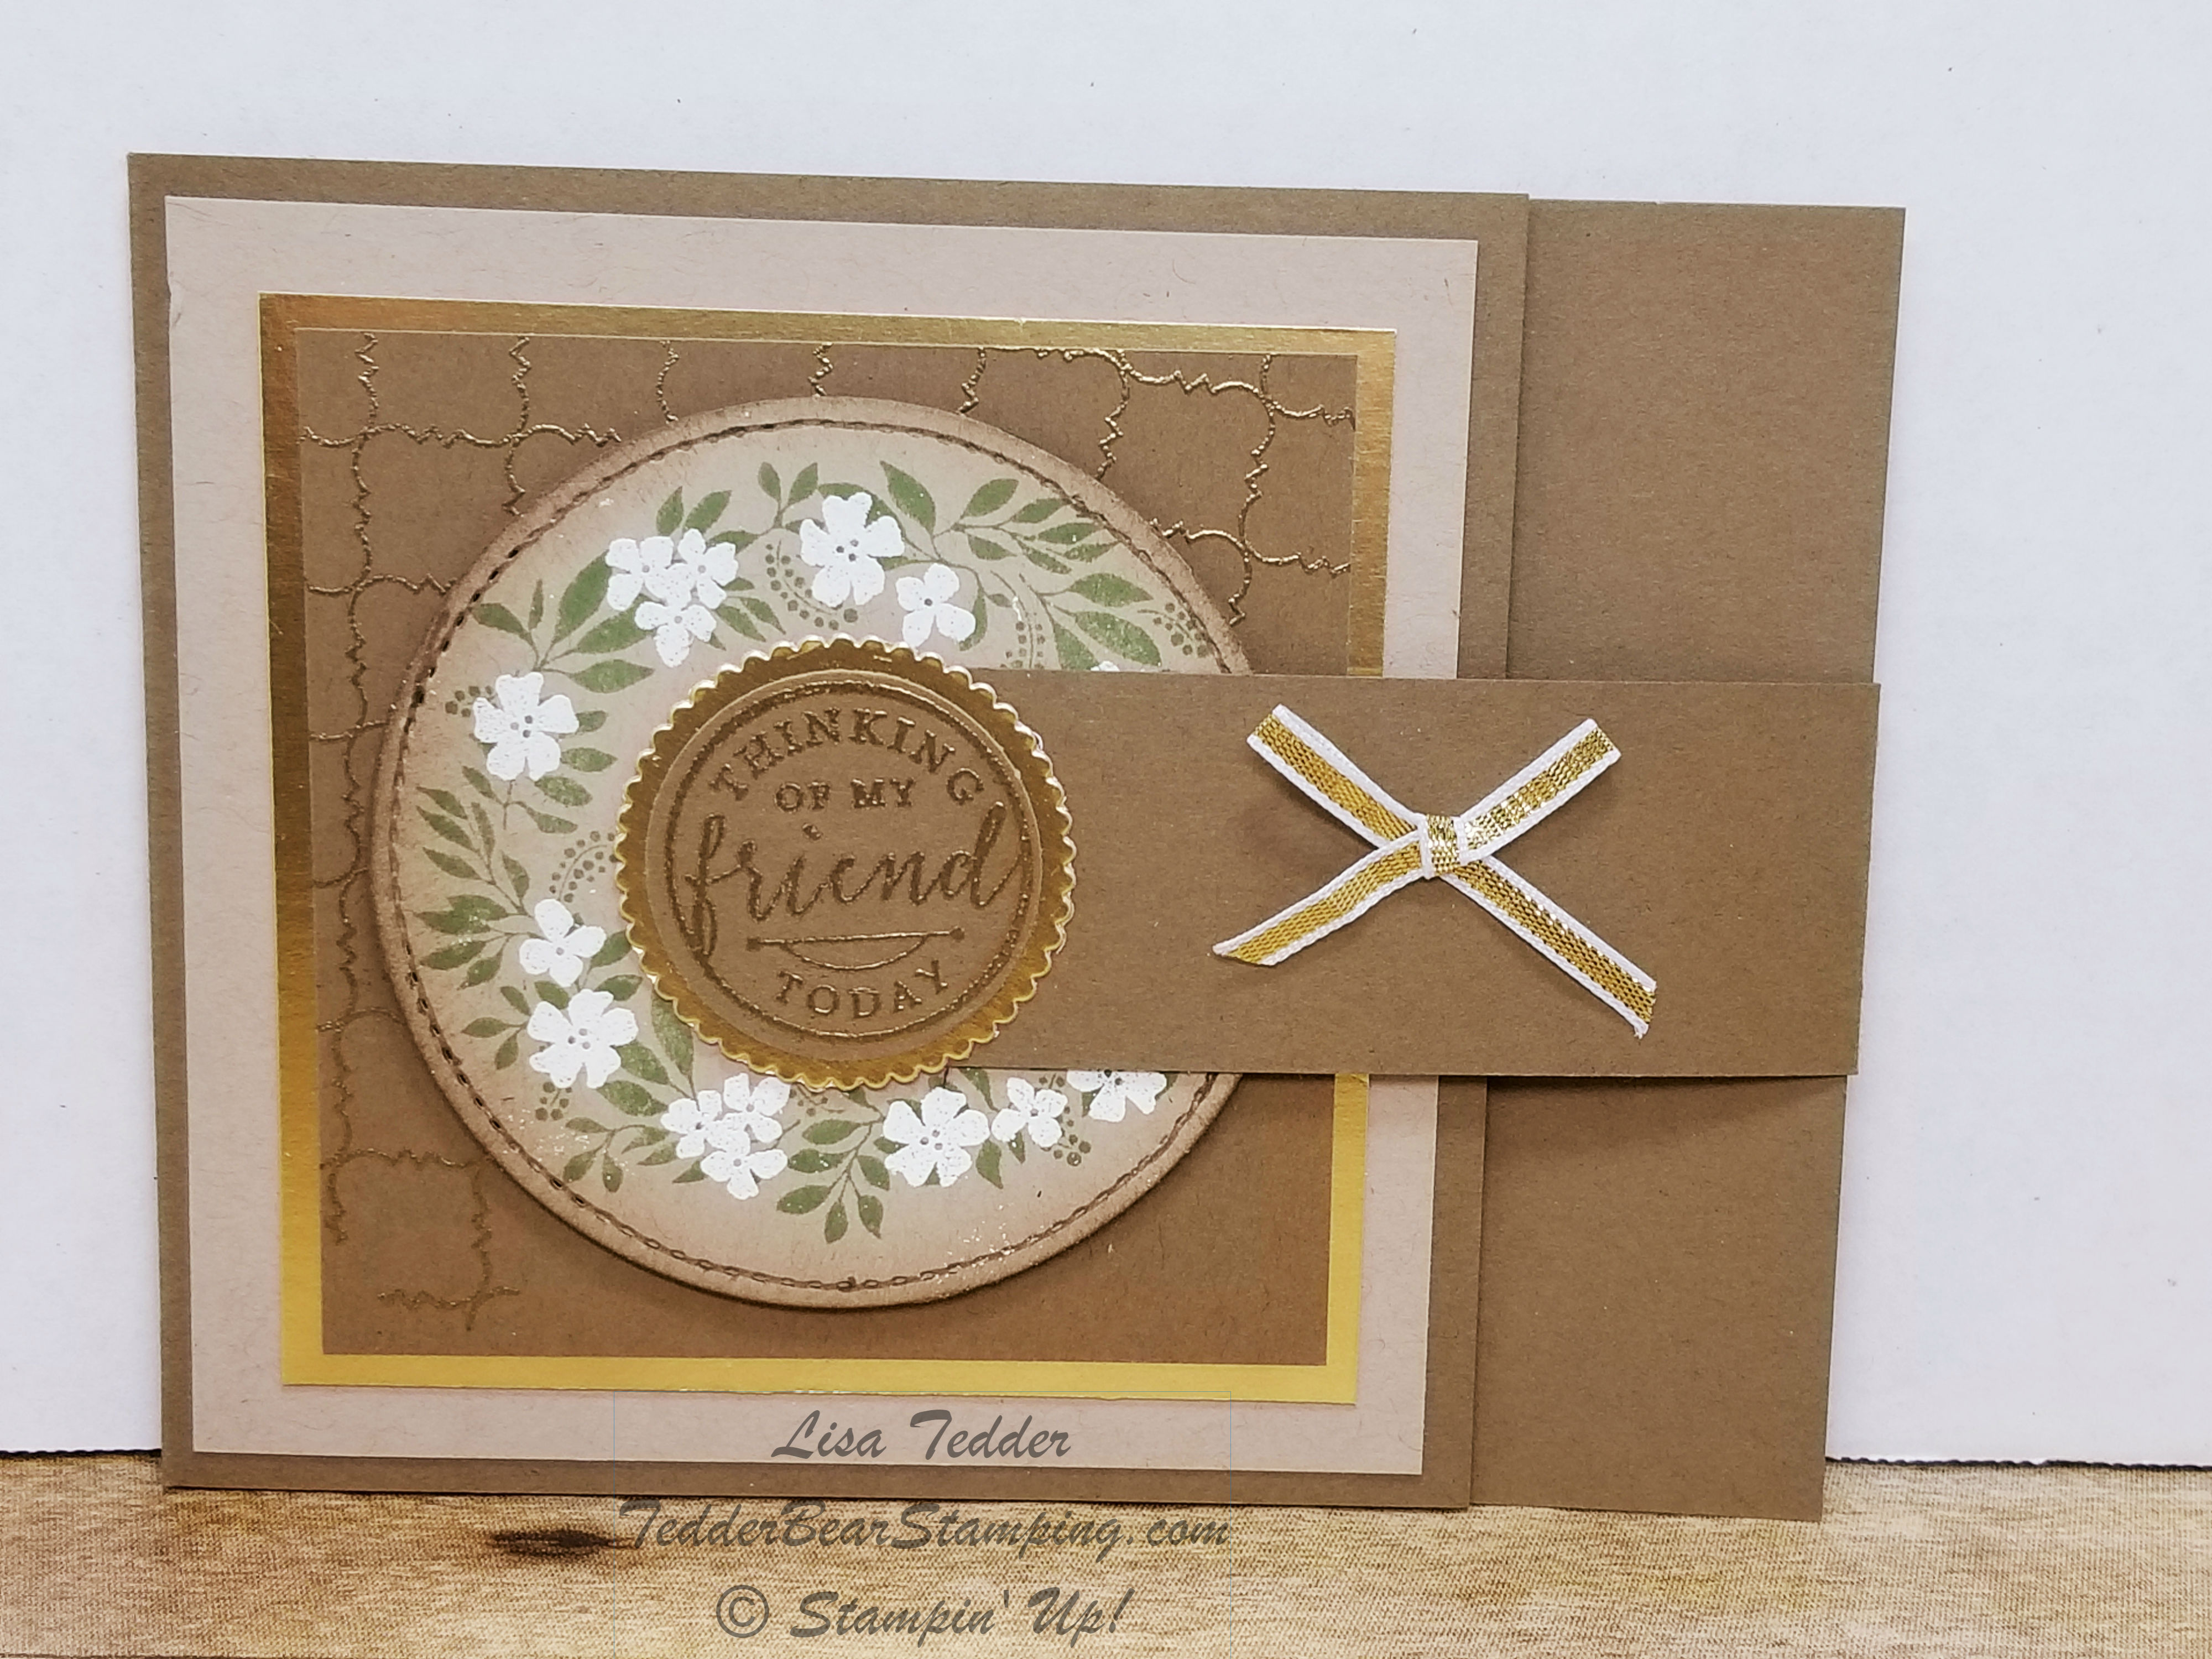
The theme this month is Gratitude! Here is my card:
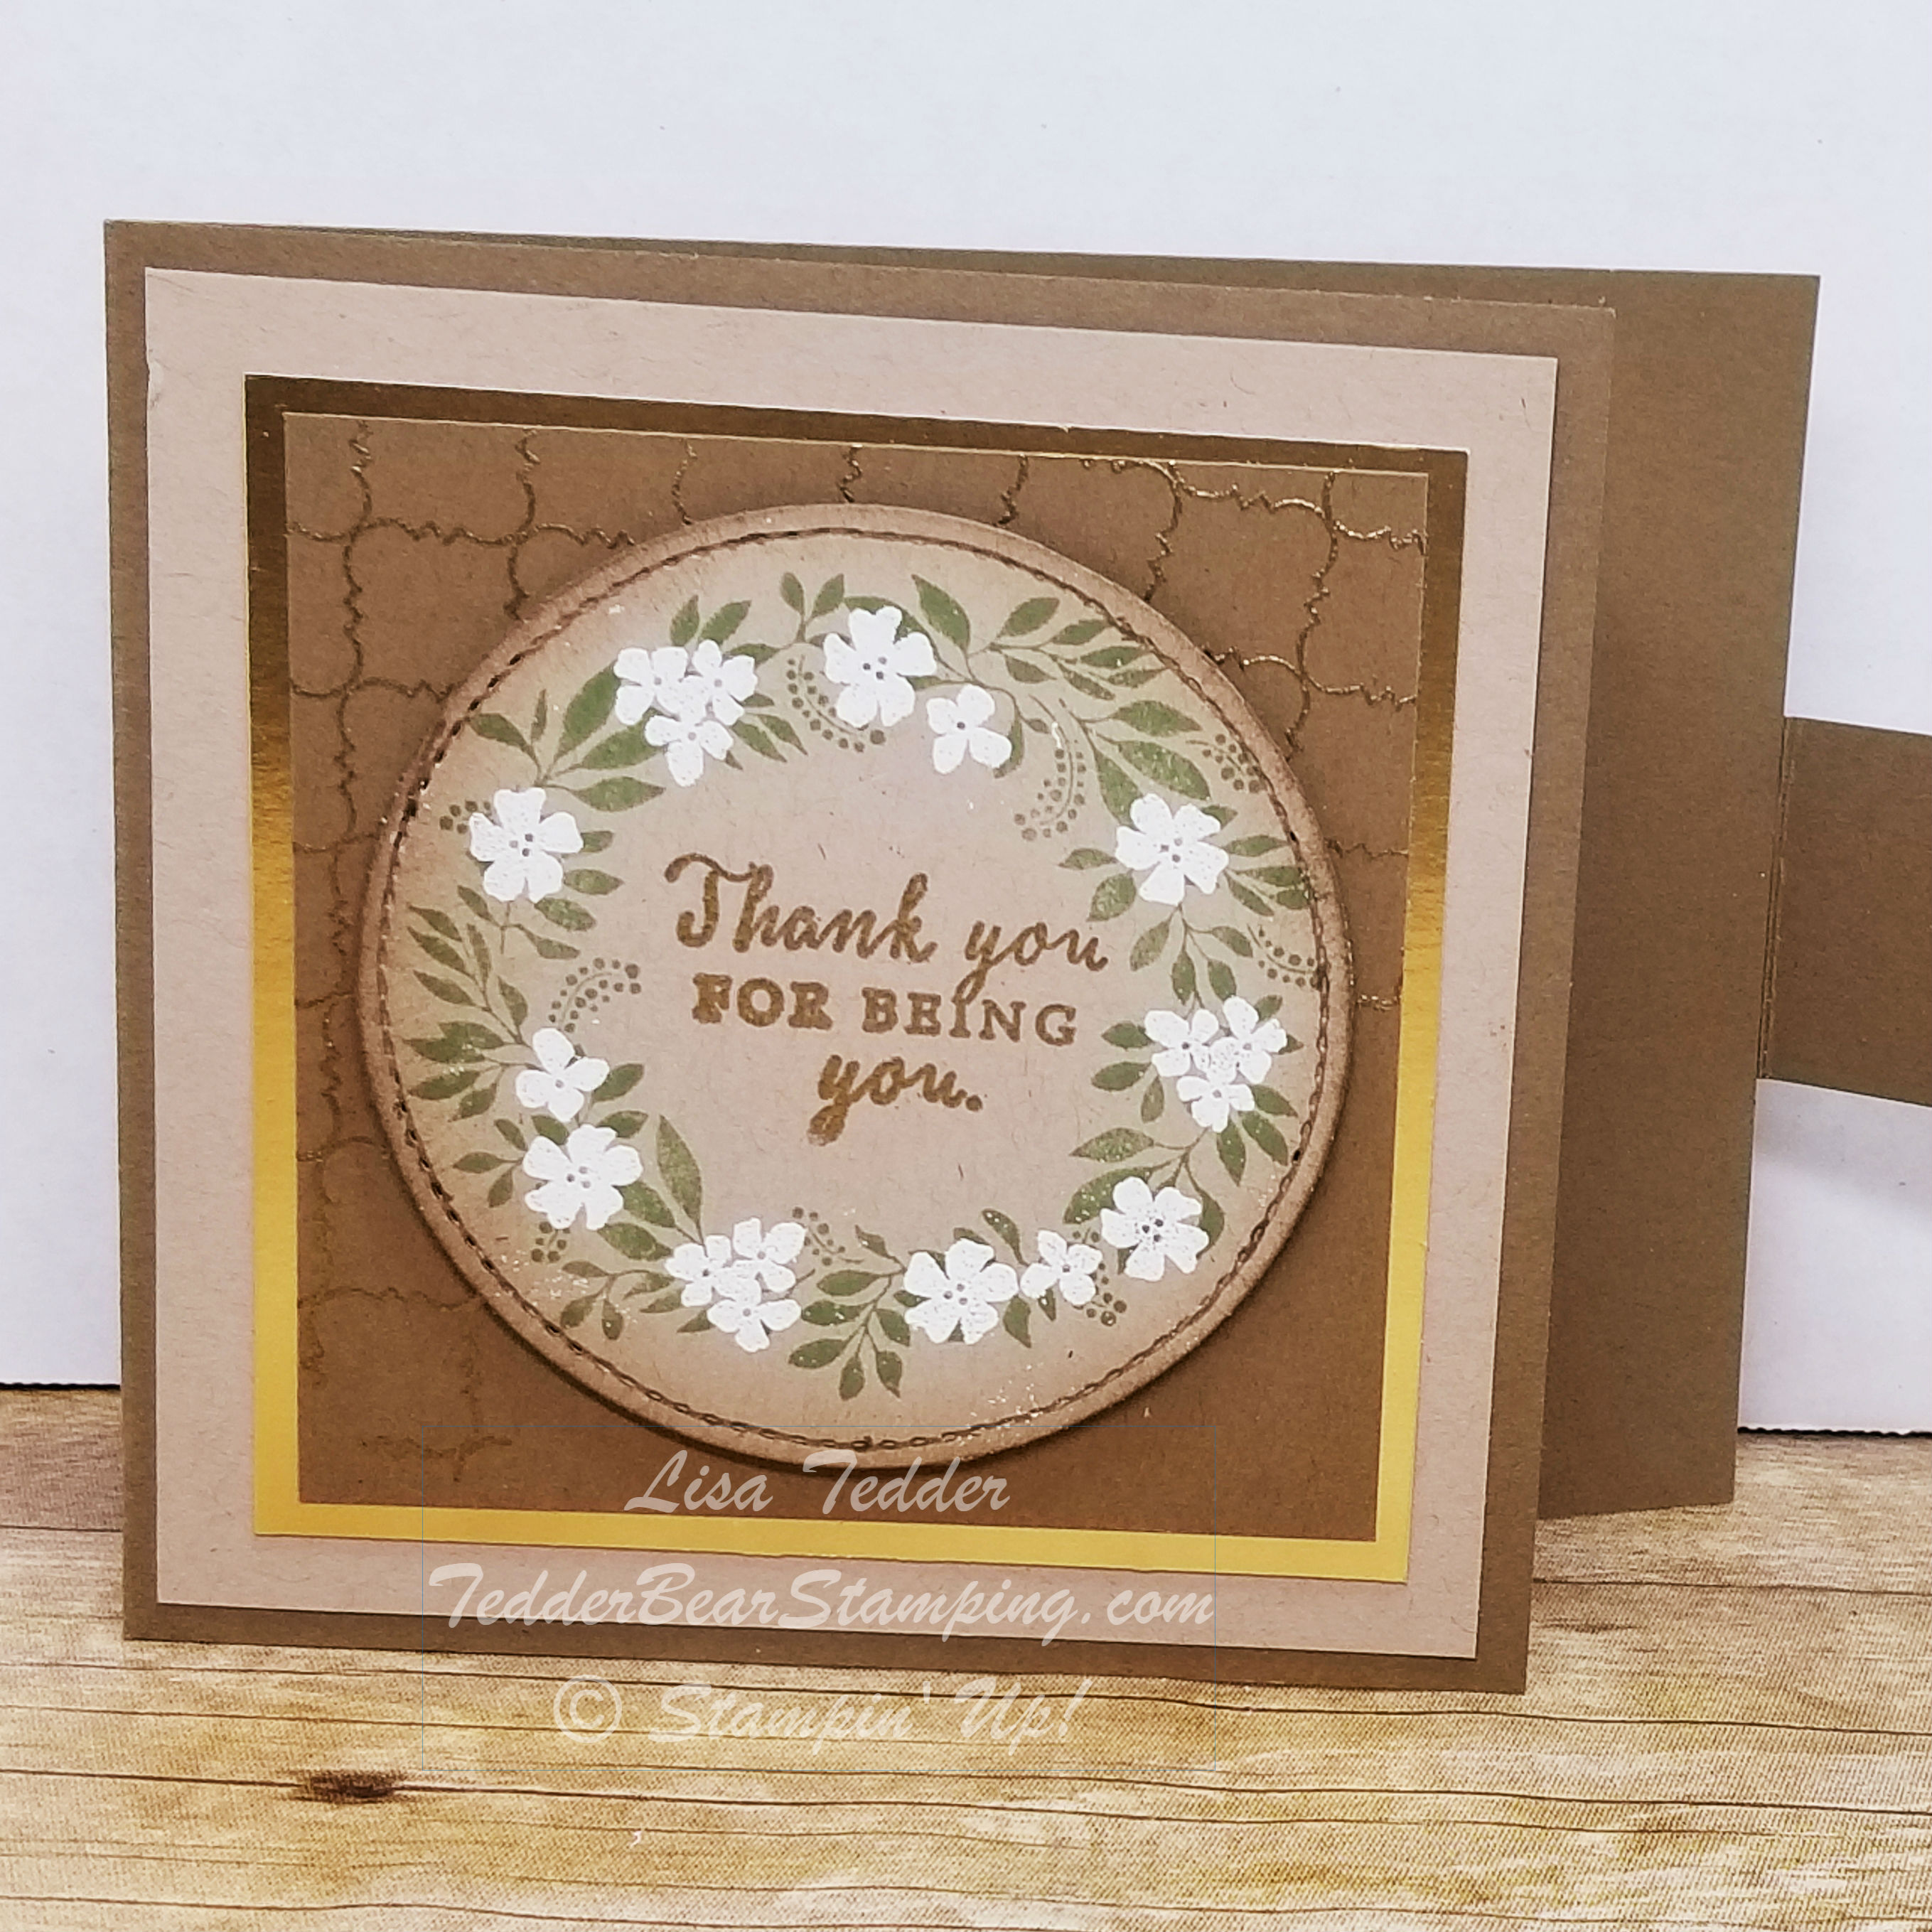
This is a FUN card! I was inspired by BJ Peters, she used this idea but with Eastern Elegance, you can find her card here. I was thinking of other stamp sets from Stampin’ Up! that could be used with this idea of the front flap opening to reveal a sentiment. This is the set that I thought of! Once you pull back the flap, here is what you see:
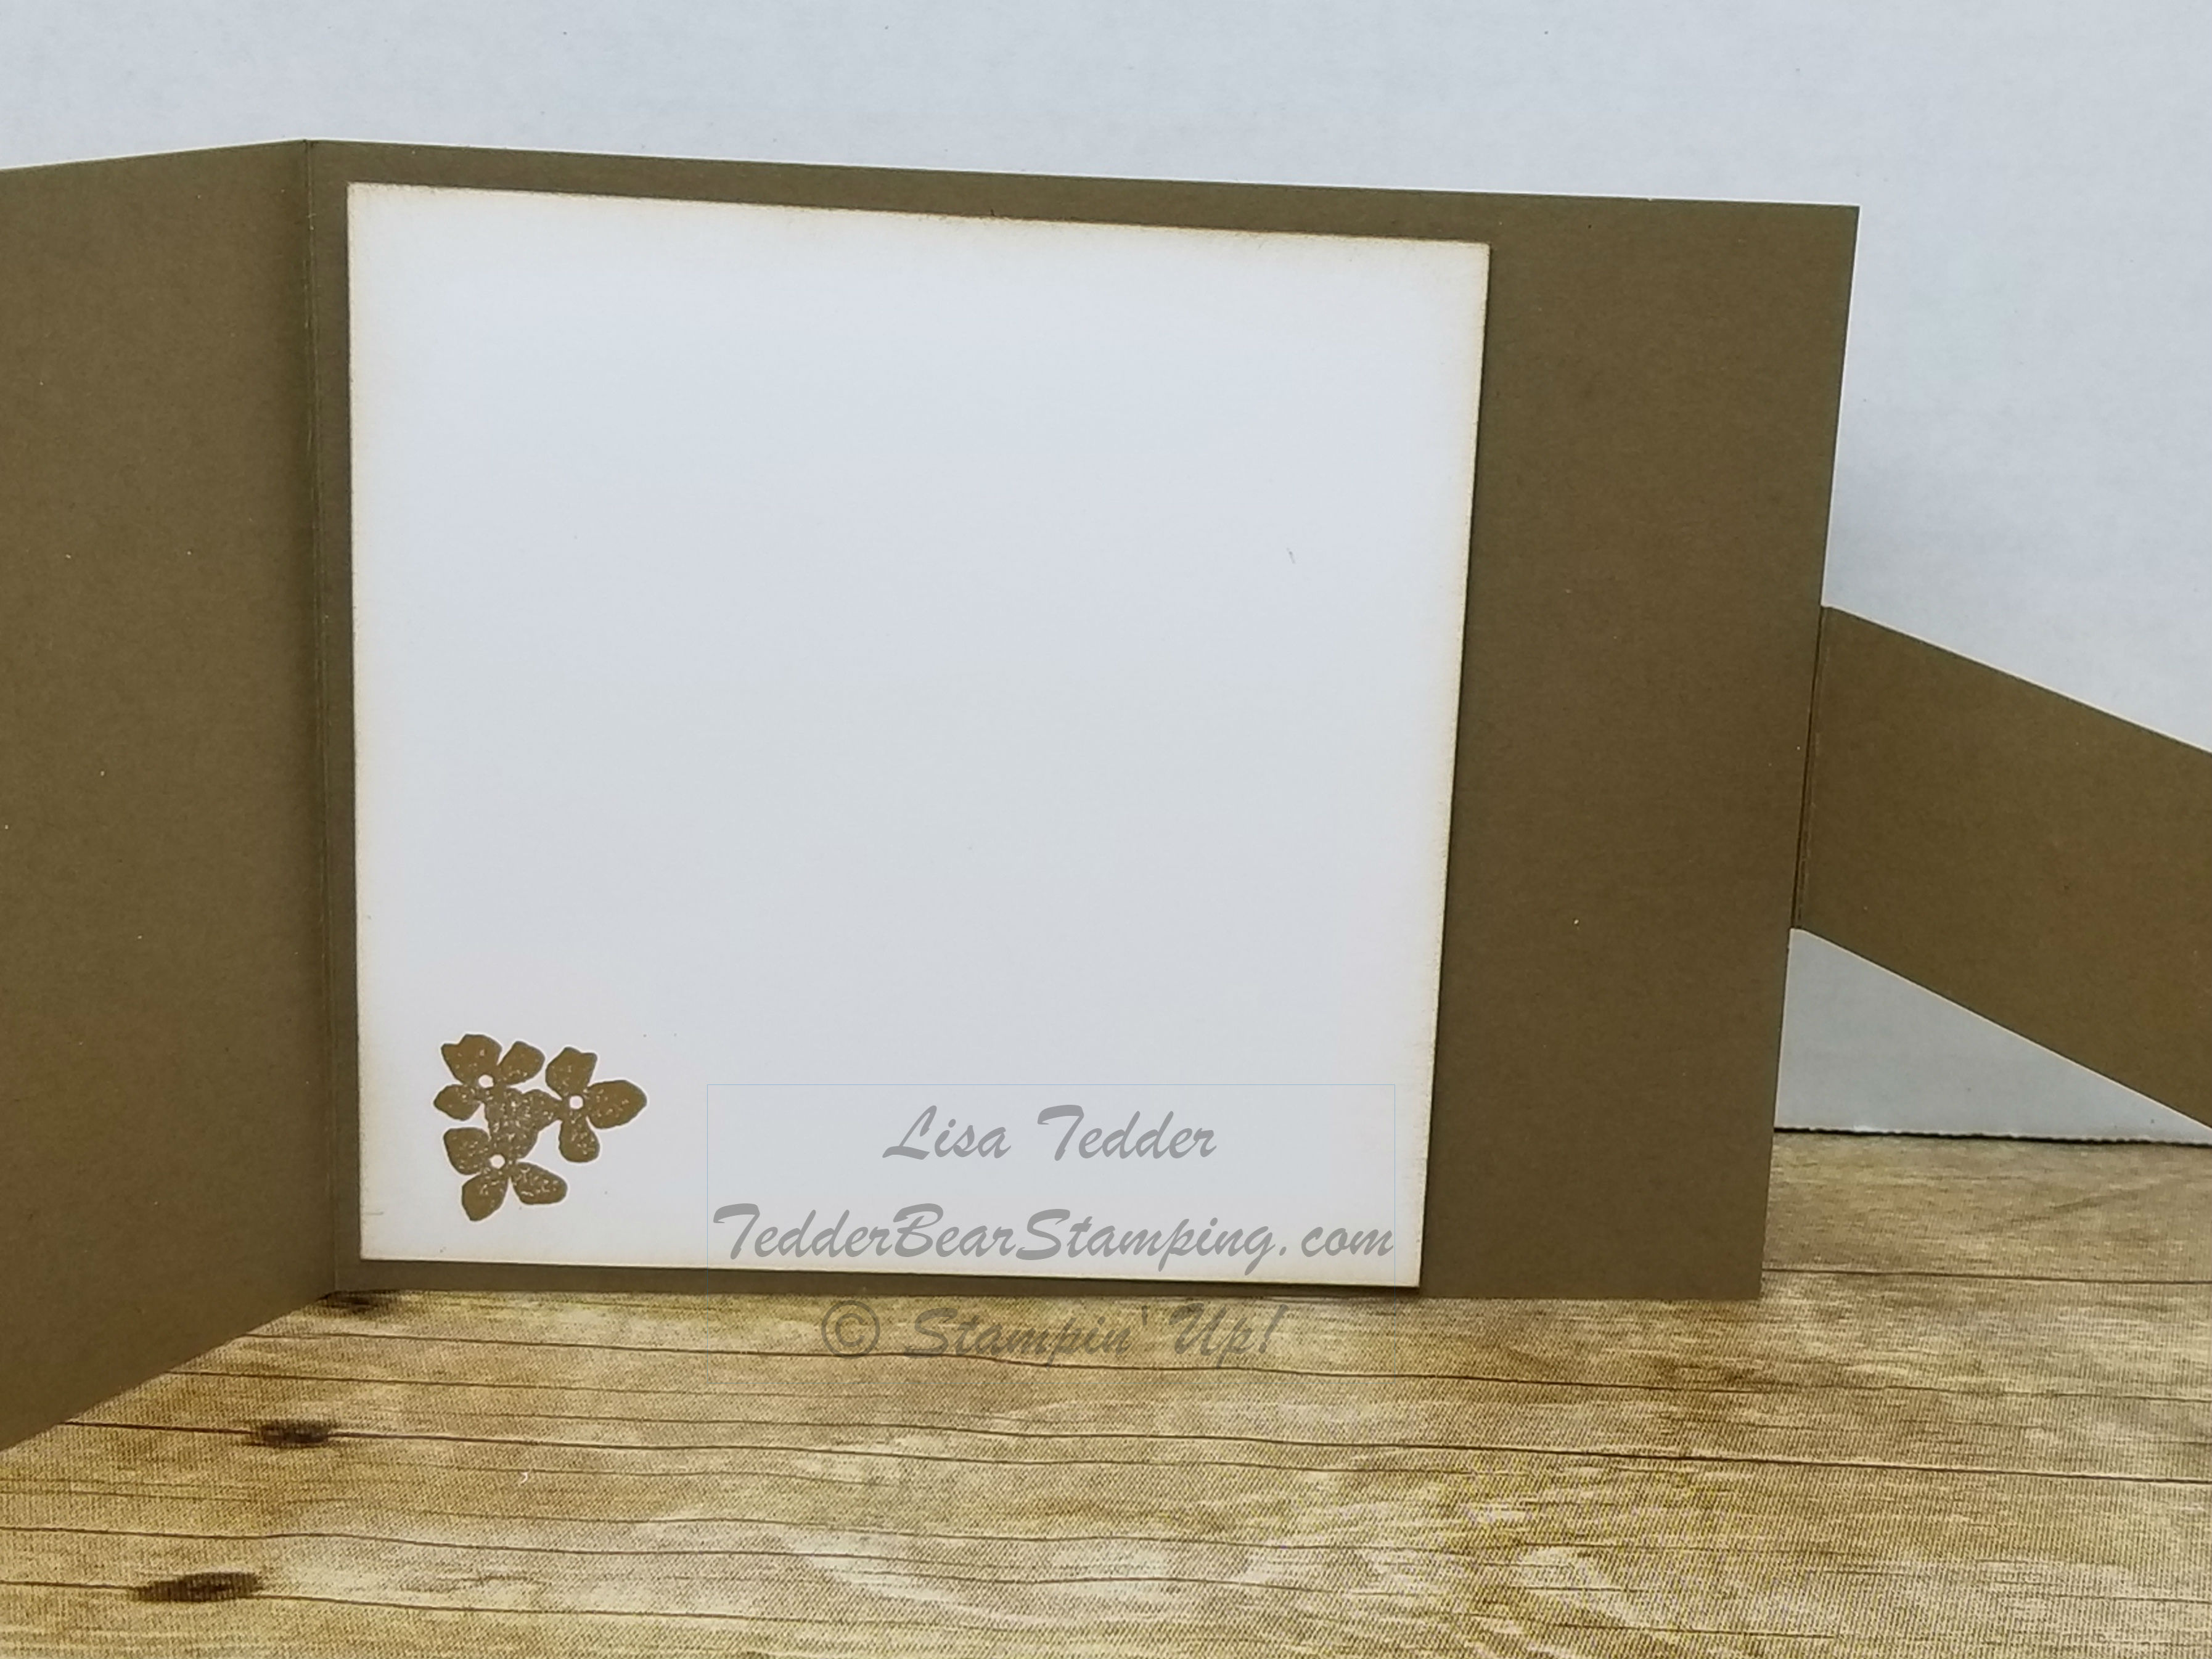
The inside is a simple piece of cardstock:
What do you think? Like it? Here are the details so you can make it if you want!!
*********** Cardstock: Soft Suede 4 1/4″ X 9 3/4″ scored at 4 1/4″, flap is: 1 1/4″ x 9″ scored at 5 1/2″, front piece: 3 1/4″ sq., scrap for front sentiment on flap. Crumb Cake 4″ sq., 3 1/4″ sq. to stamp wreath on, cut with 3″ Stitched Circle Framelit. Gold Foil 3 1/2″ sq. under Soft Suede, and 1 1/2″ scallop circle from Circle thinlits. Whisper White 4″ sq. for inside.
Everything else is listed below, just click on the picture to go to my OnLine Store. When you purchase from my OnLine Store, I will send you a nice Thank you card!
I hope you enjoyed this blog post, I REALLY loved making the card! I love cards that interact, don’t you?
Please subscribe to my blog so you won’t miss out on any posts!
Lisa Tedder
TedderBearStamping
A California girl living in North Carolina
Here is the start of my Christmas cards that I will be making this year! If you receive cards from me and want to be surprised, don’t go any further!! LOL
I am doing a class where we will make 3 each of FIVE Christmas cards, and if you prepay you get to make an extra Bonus card! I’m hoping to get a headstart on my Christmas cards this year, how about you?!
I am going to show you today ONE of my 6 cards so far…….make sure you check back in so you can see the others!
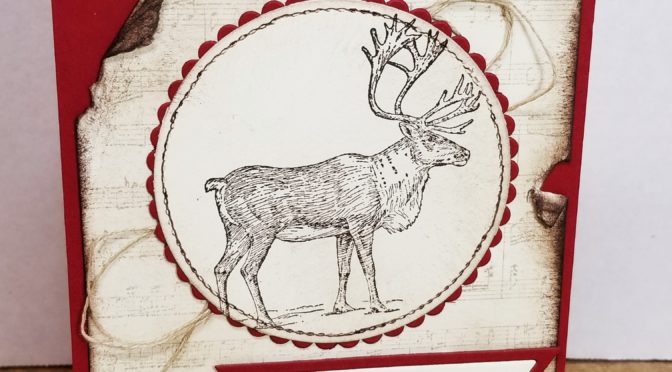
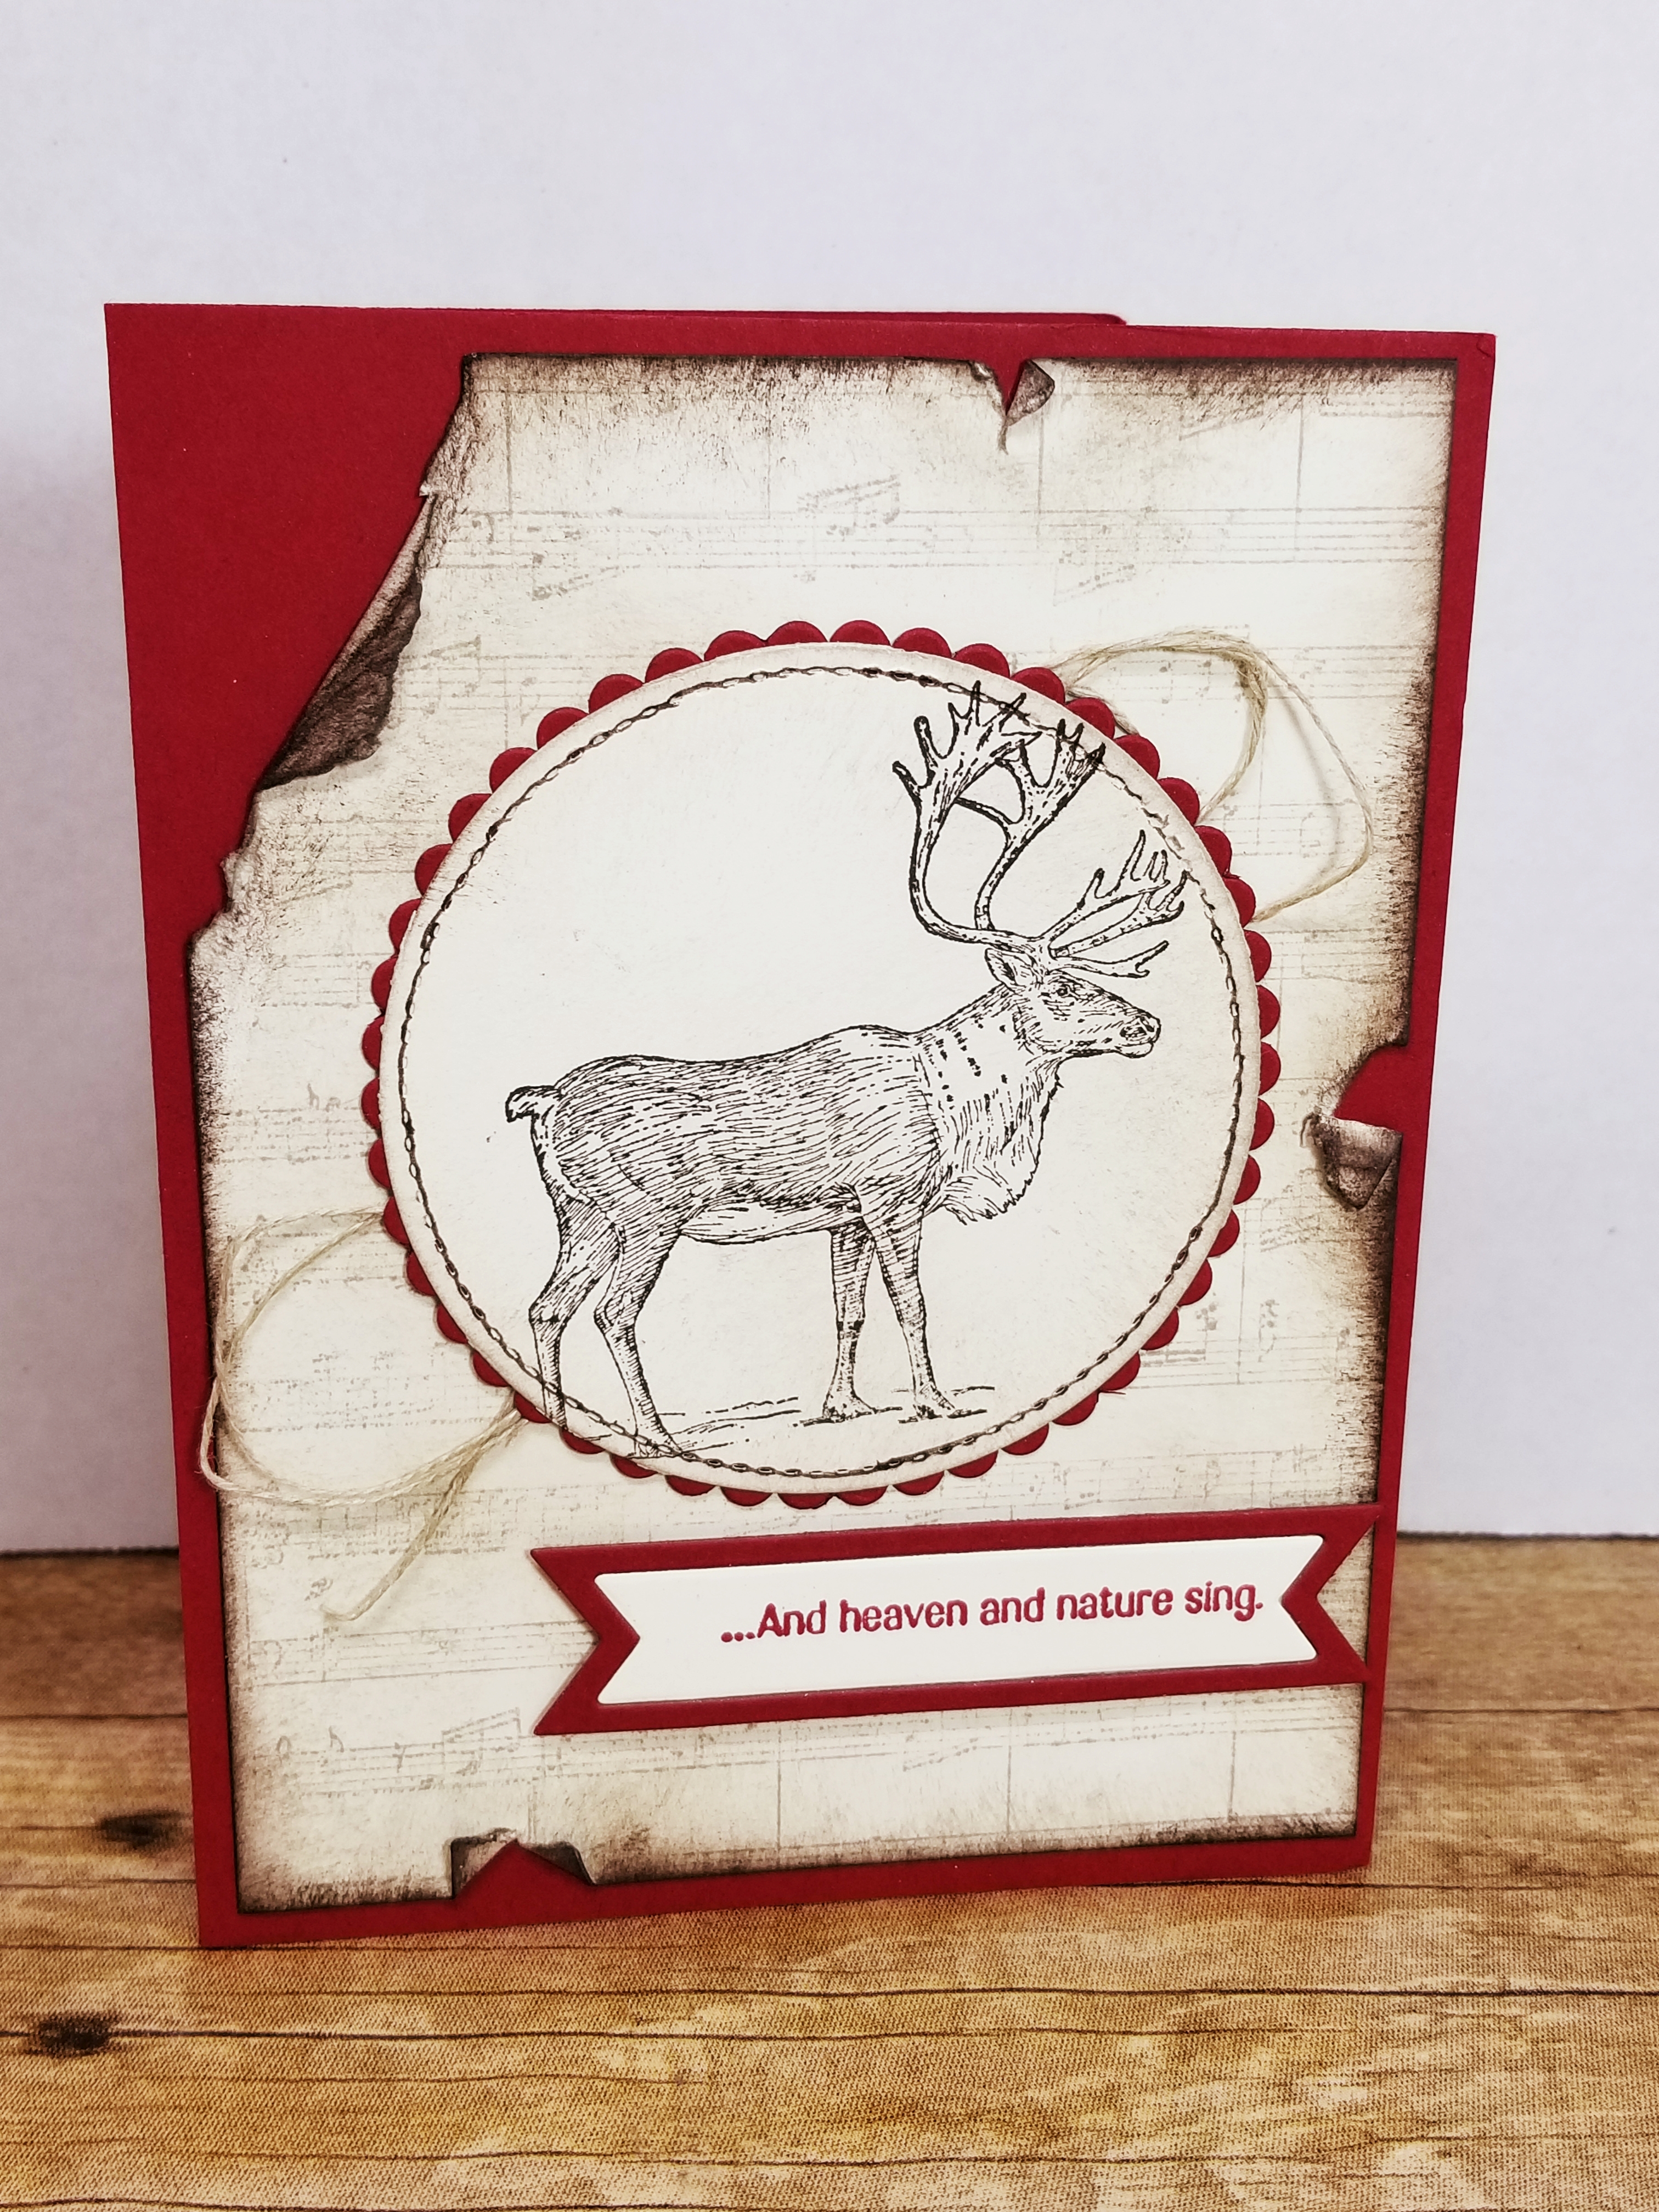
Here is the first one:
I love cards that are weathered and antiquey……..I know that is NOT a word, but that’s the only one that came to mind! LOL
I stamped the Music Notes on the Vanilla piece with Sahara Sand, but stamped off first so it wasn’t so dark. I then tore the cardstock in carefully planned areas, and made it look old. LOVE doing this, don’t you? This card was really simple except that the ageing did tak a little time, but not as much as you would think. I stamped the Reindeer? using Early Espresso ink, didn’t color him in at all, and I think he looks great! I wanted some of my cards to be a little simpler since I will be making these in bulk. I cut him out using the Stitched Framelits and then cut a mat using the Circle framelits using the scallop, cutting this out with Cherry Cobbler. I used my Early Espresso marker to make the stitched edge look stitched!
For the Banner I used the Bunch of Banners thinlits. Did you know that this banner thinlit cuts out BOTH the sentiment AND the border? I hadn’t used this one yet, and was surprised that it did that, so I was able to frame the sentiment in Cherry Cobbler!
I added Linen Thread behind the Reindeer, popped up the sentiment with Dimensionals and I was done! Easy Peasy!
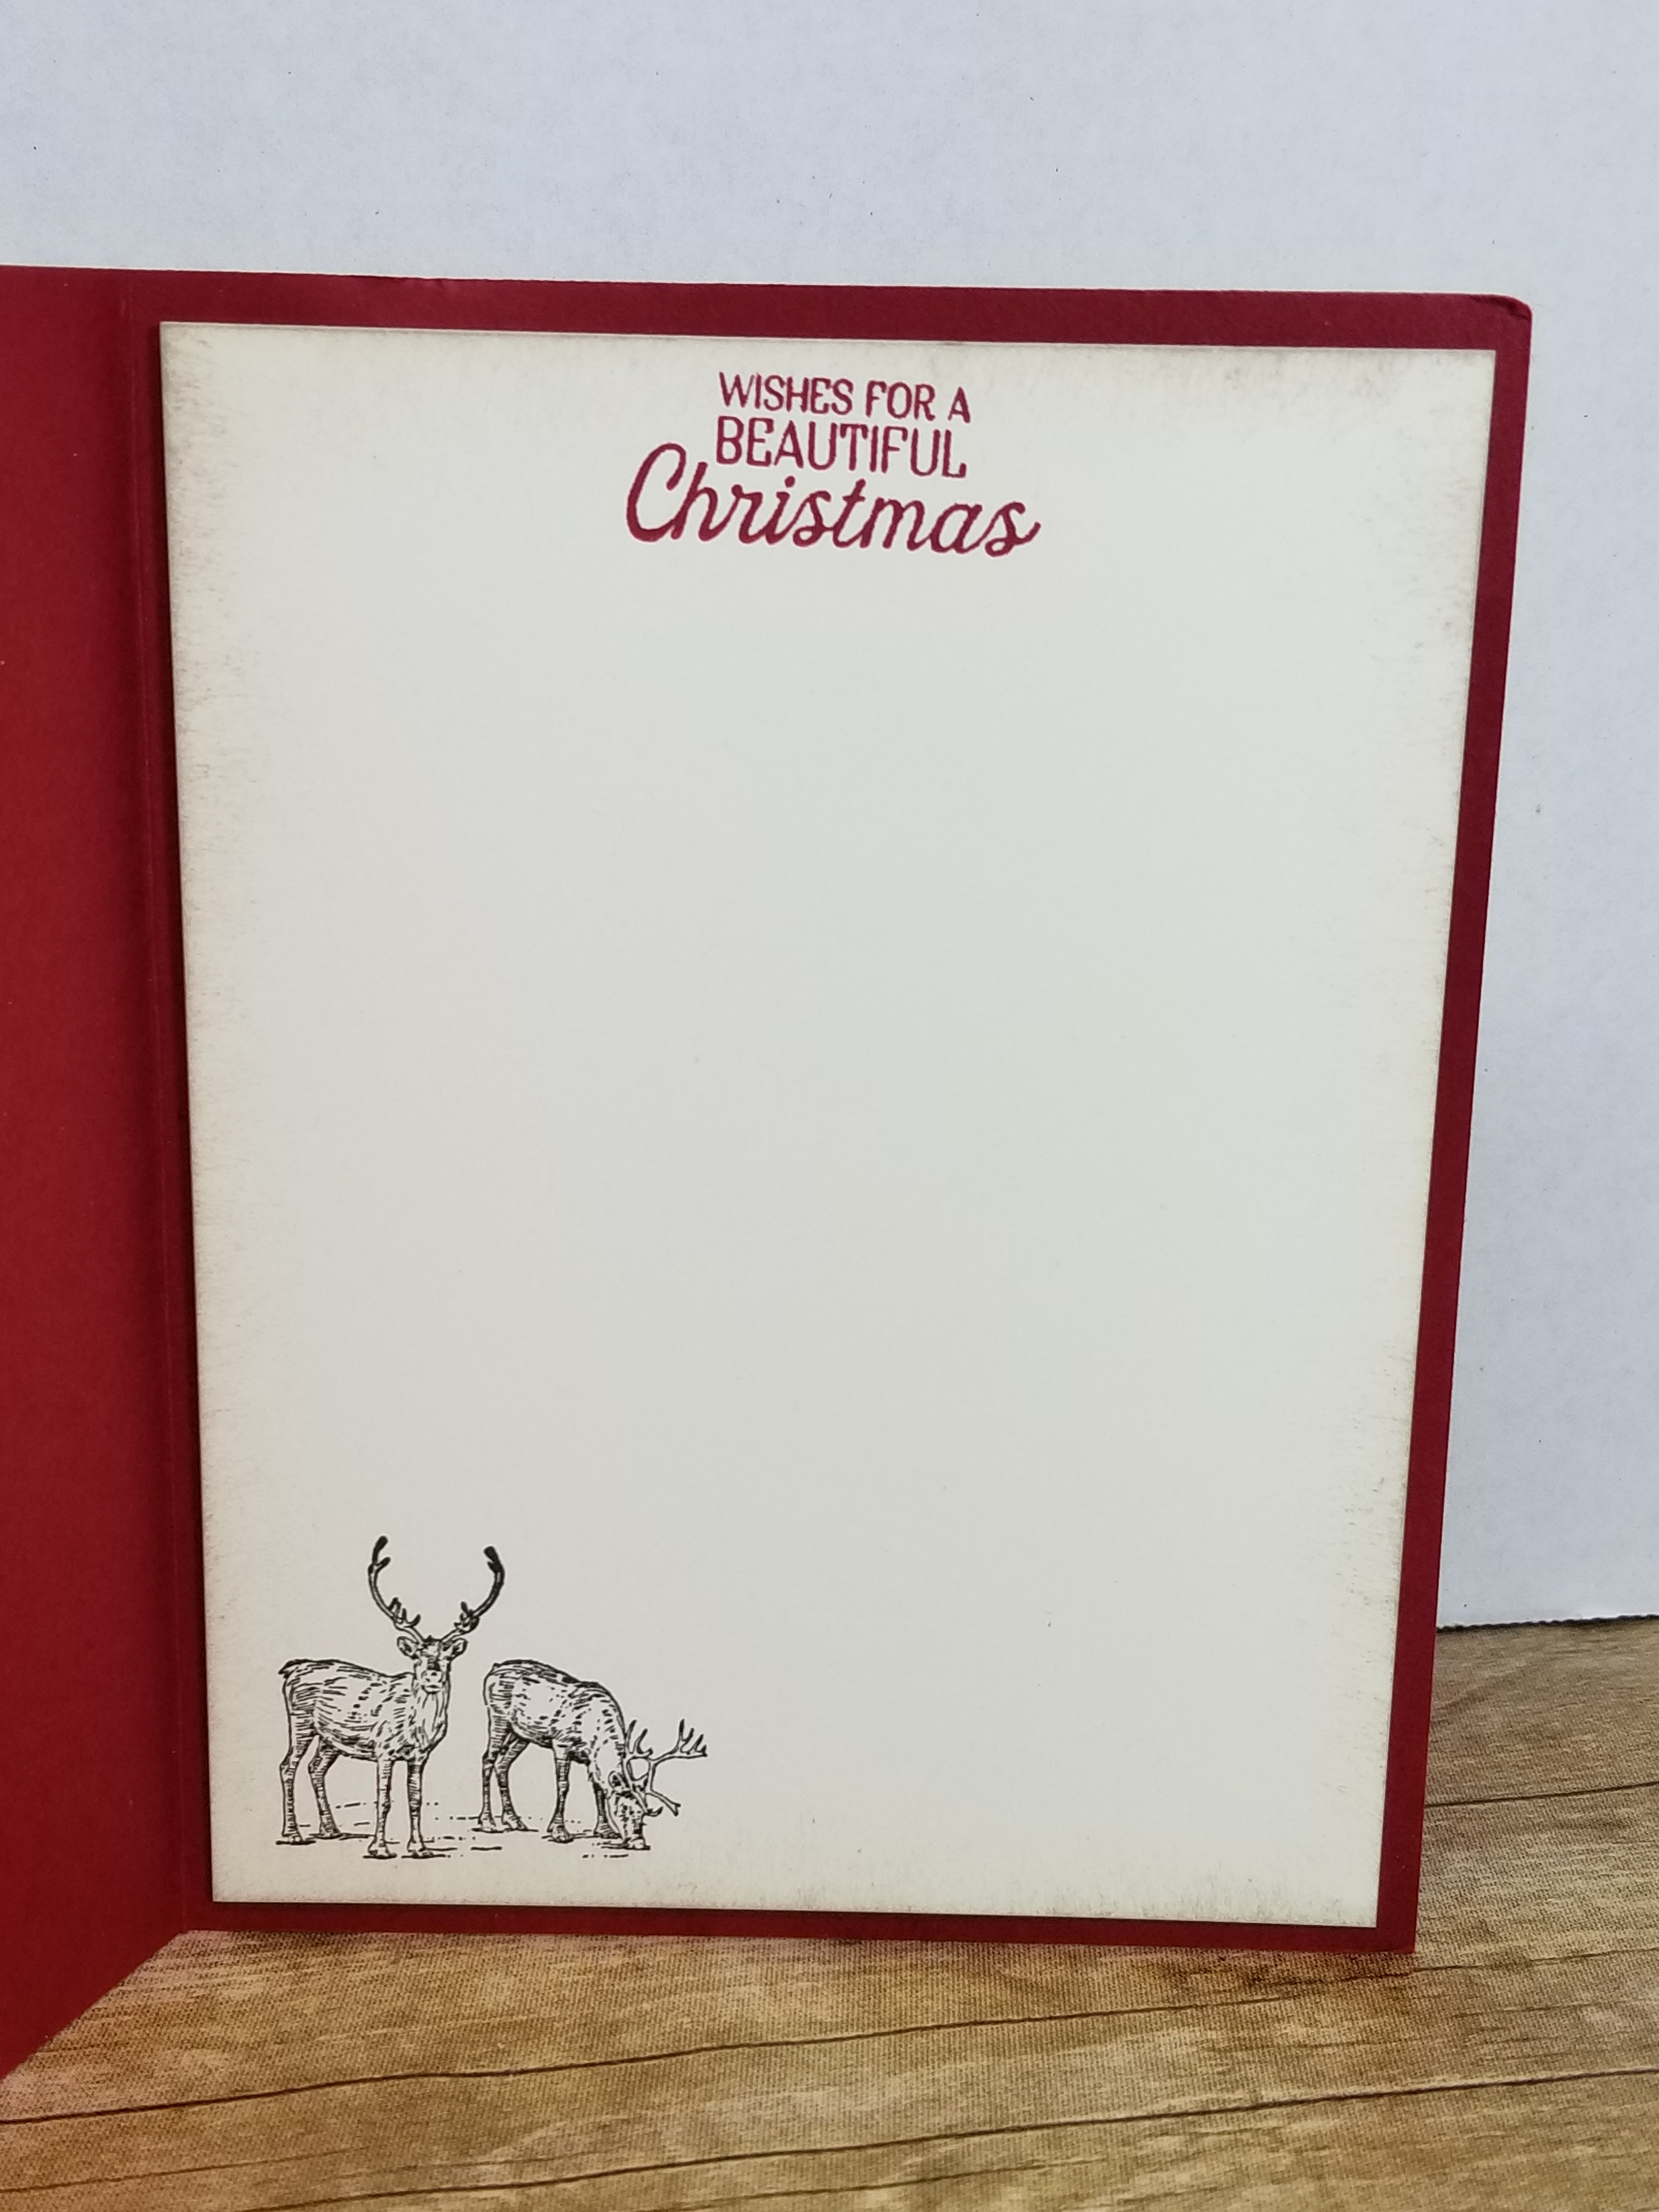
Here is what the inside looks like:
Isn’t it pretty?
Below is a pictorial list of what I used to make this card, click on any picture and you will be taken to my OnLine Store! If you purchase anything from me online I will send you a handmade card!
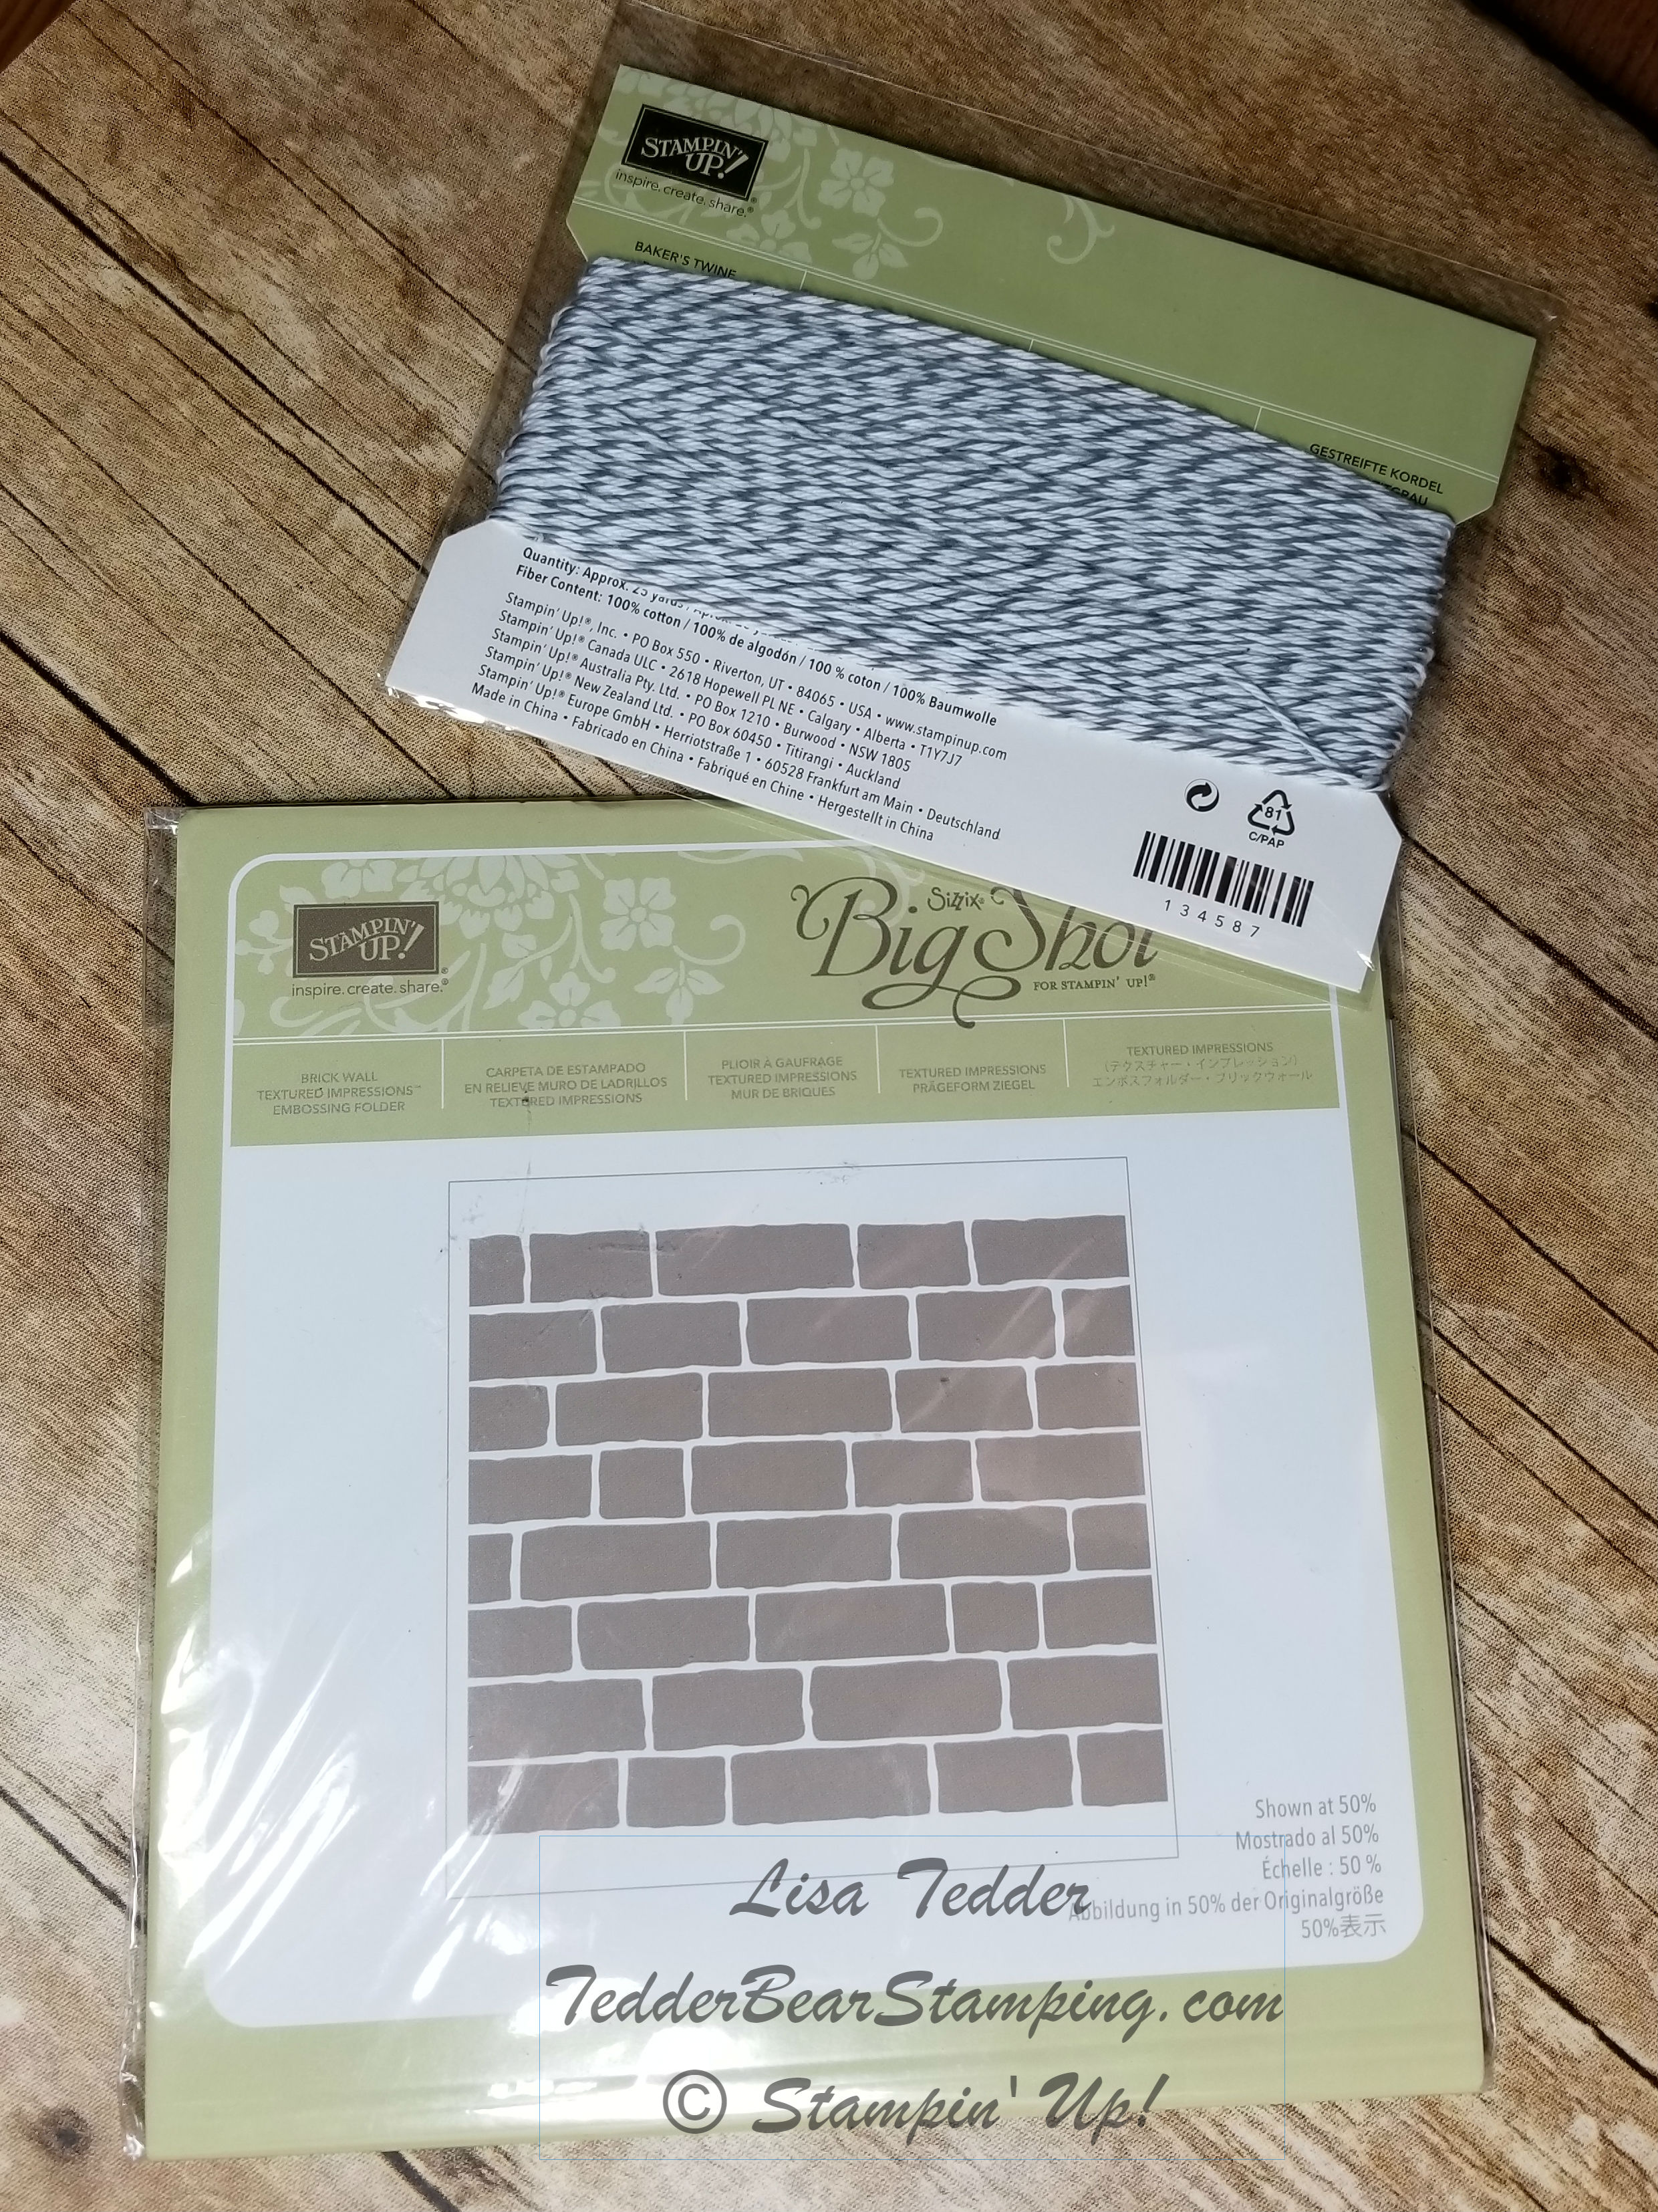
Want some Blog Candy? I have taken a few days off since giving away my last one, so I guess it’s time!!
I LOVE embossing folders and I also love Bakers Twine! This Bakers Twine is Gray, my FAVORITE color! Is Gray a color?
You can get this mailed directly to you if you win the drawing that I will be having in a few weeks on July 29th. How can you win this? Easy! Just leave me comments here on my blog, OR on any of my Social Media places……..Twitter, Facebook or Instagram. ALL comments count, no matter which posts you comment on! You can spend a good amount of time visiting my older posts and commenting and they count!! Not only will you be getting good ideas for you projects, but you will be put in my drawing each and every time you comment! Pretty easy wouldn’t you say?
I’m off, dinner is almost ready!! I’m very lucky, I have a husband who likes to cook and I don’t have to!! WooHoo!
Subscribe to my posts so you won’t miss the rest of this month’s Christmas cards!!
Lisa Tedder
TedderBearStamping
A California girl who lives in North Carolina


 Lace Trim")