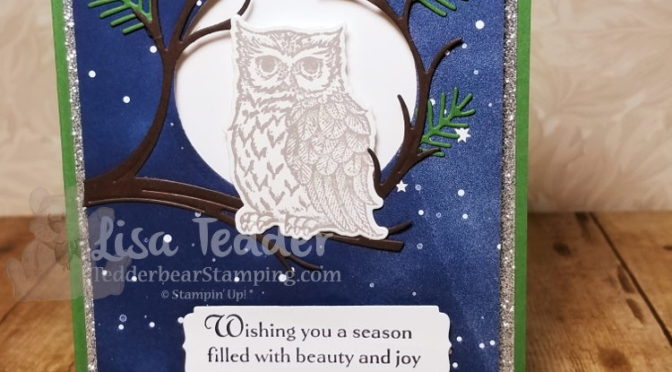
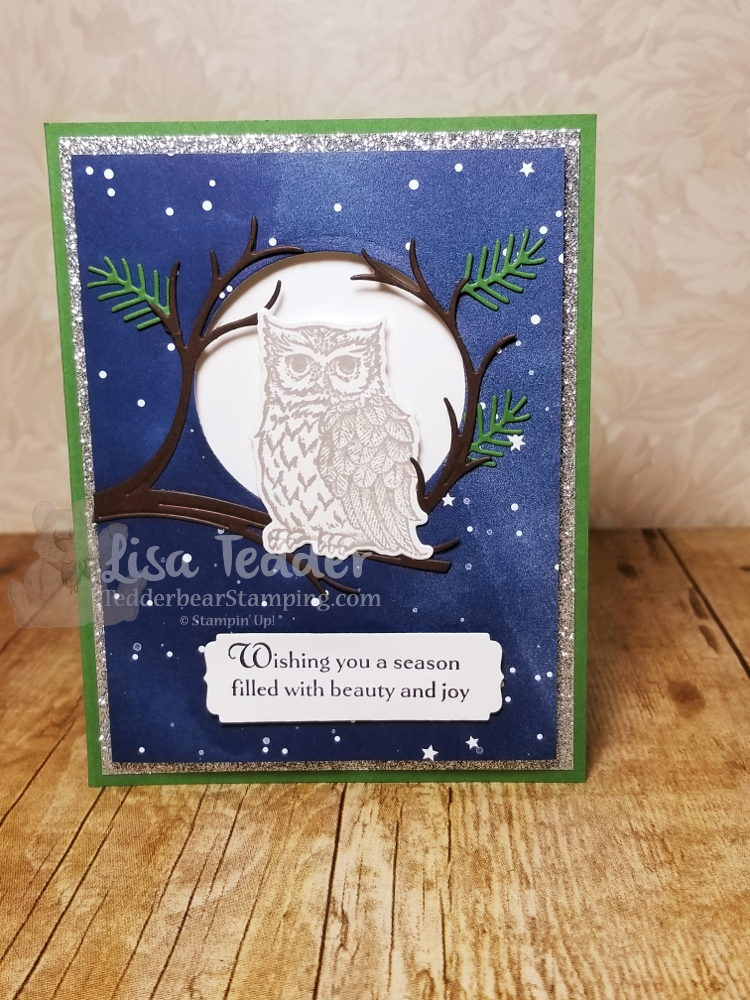
The owl in Still Night is one of my favorites. I love the dies in the bundle because not only does it cut out the owl & branch but it also cuts out pine boughs to make the branch look great! The set has 4 dies to cut out the boughs so you don’t spend all your time cutting one at a time!
Stamp sets: Still Night Bundle, Merry Christmas to All Cardstock: Garden Green 8 ½” x 5 ½”, scrap, Silver Glimmer 5 ¼” x 4”, Twinkle Twinkle DSP 5” x 3 ¾”, white 5 ¼” x 4”, 2 ¾” sq, 1 ¼” x 3” (sentiment), 1 ¾” x 2 ½” (owl) Early Espresso 3 ½”sq Inks: Night of Navy, Gray Granite Misc: Big Shot, Clear EP, Embossing buddy, heat tool, dimensionals, 2” circle punch, glue dots, fine tip glue pen
I would love to be your demonstrator if you live in the US! And you are MORE than welcome to join my team: LETs Stamp!
Below are all the supplies in picture form, click on any picture to be taken to my OnLine Store!
Thanks for stopping by, come again to see my next project!
Lisa Tedder
A California Girl living in North Carolina Product List
I had my 2nd Christmas Card class on Saturday with 12 people attending. I THINK they loved it, at least they told me they did!
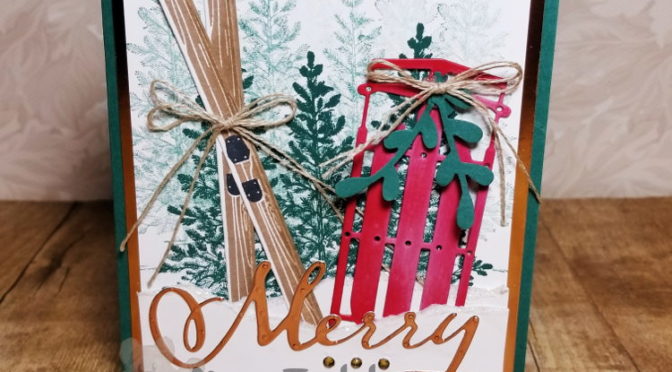
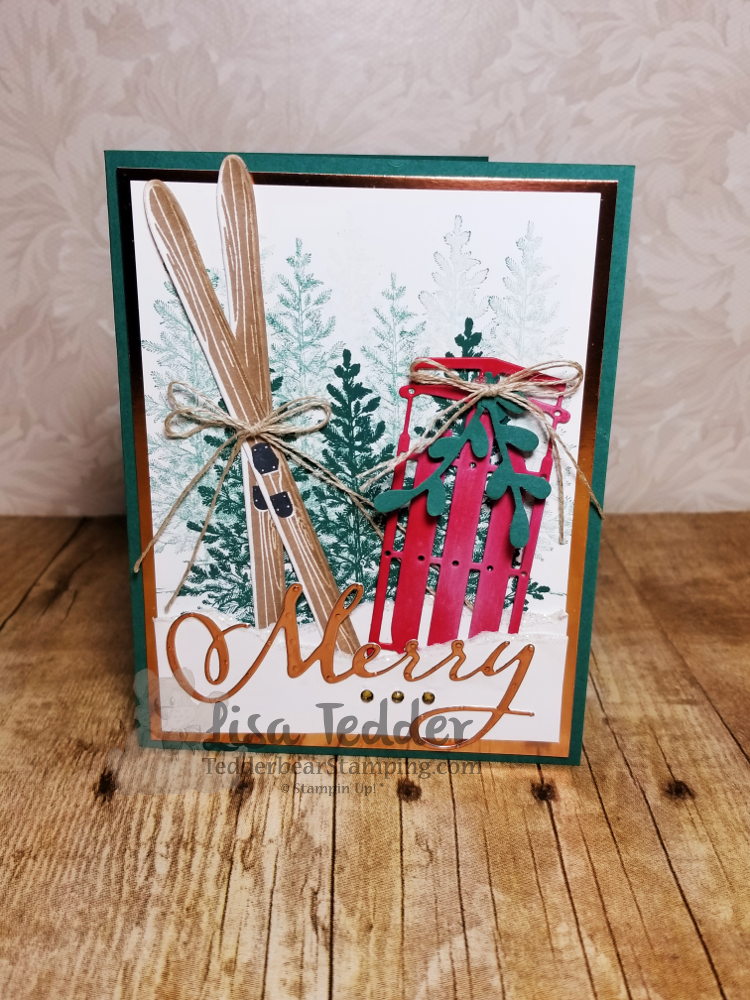
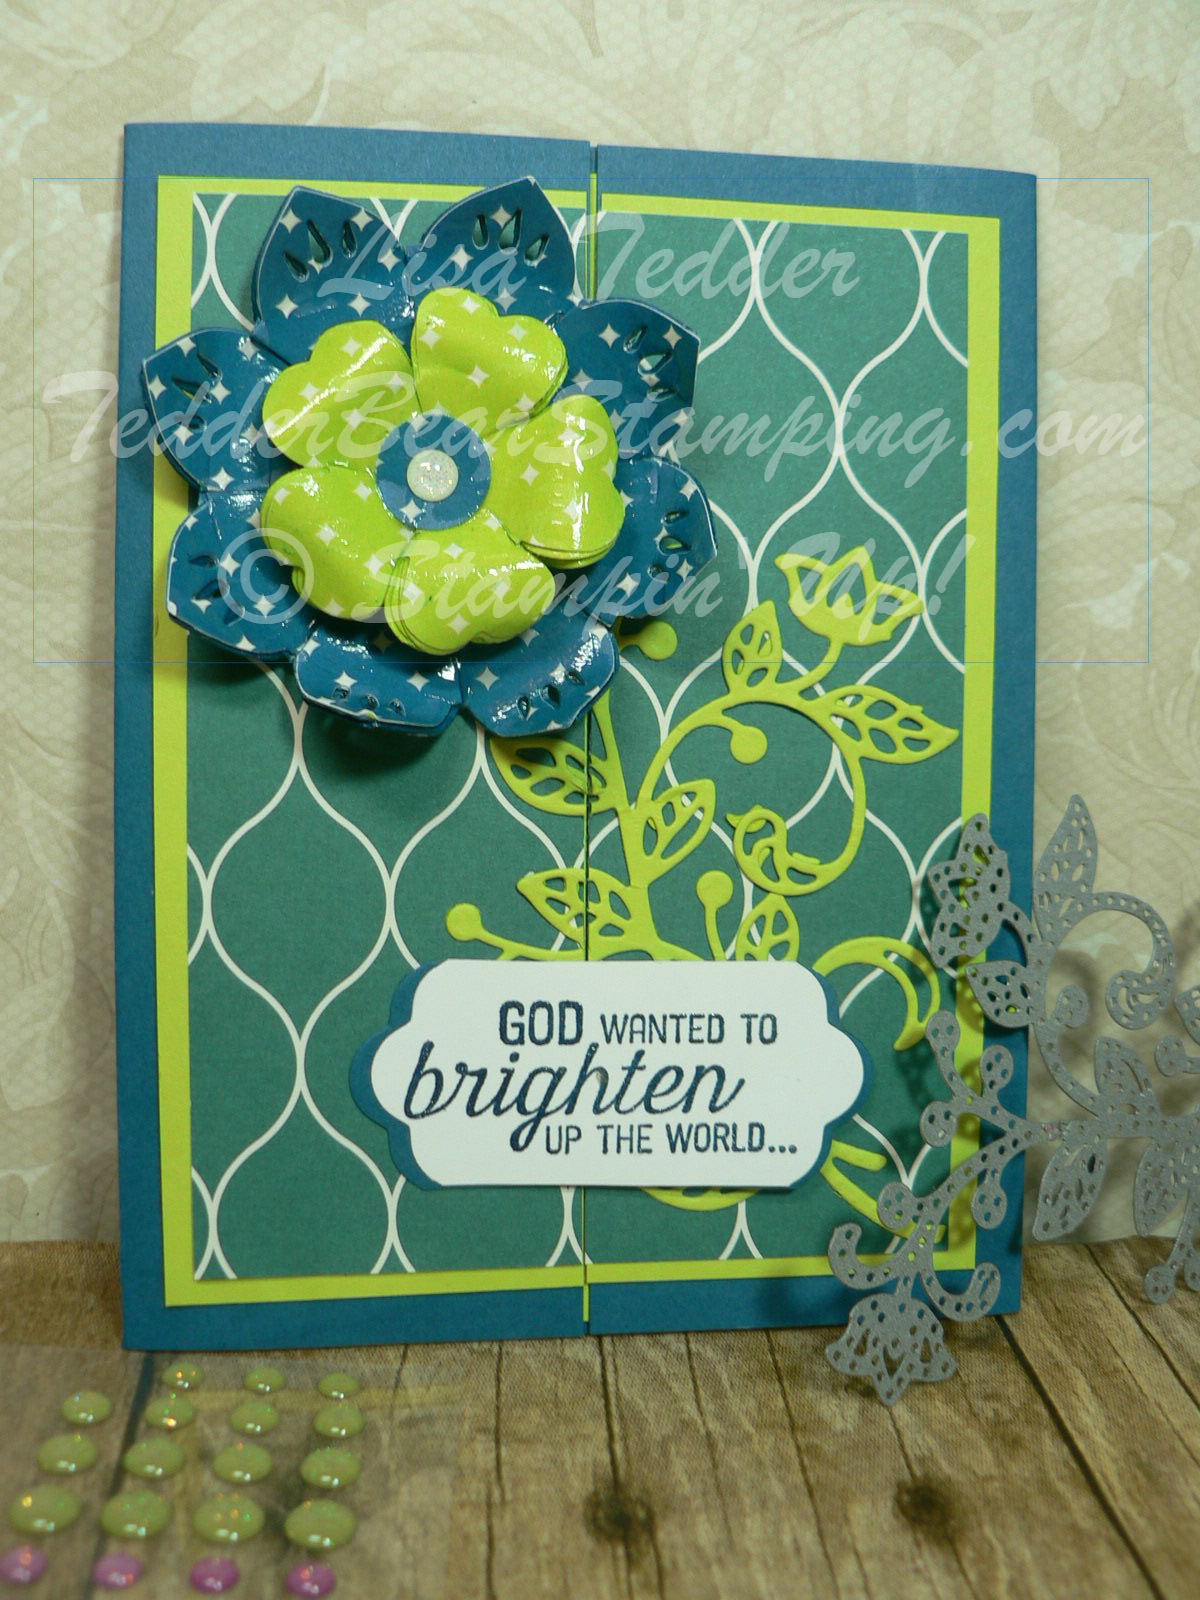
Are you ready to see my next Christmas Card? This one is one I REALLY love!! It uses Stampin’ Up!’s stamp set Alpine Adventure and Lovely as a Tree. Lovely as a tree is a staple for every stamp room! And Alpine Adventure has those cool winter designs that can be used for Christmas.
Here is my card:
Isn’t this the cutest?! I added Wink of Stella to the Sprig on the Sled. This gives it a great sparkly look. You can’t see it in the picture, but it is really pretty in person.
Here are the particulars for this card:
Stamp sets: Alpine Adventure Bundle, Merry Christmas to All bundle, Lovely as a Tree Cardstock: Tranquil Tide 5 ½” x 8 ½”, scrap, Copper Foil 51/4” x 4”, White 3 ¾” x 5”, 4” x 5 ¼”, 5” x 1”, 1 ½” x 3 ¾”, Real Red 3 ¼” x 1 ¾” Inks: Tranquil Tide, White craft, Crumb Cake, Momento Black, Real Red, Cajun Craze Blend Dk Misc: Wink of Stella, Linen Thread, Big Shot, Sprig Punch, Rhinestones, Glue Dots, Fine Tip Glue pen, 2 Way glue pen, Dazzling Diamonds
Below are the supplies used for this card, click on any picture and you will be taken to my OnLine Store! If you live in the US and would like to add me as your Demonstrator I would be thrilled! Or if you would like to join my team ‘LETs Stamp!’ I would welcome you with open arms!
Thanks for stopping by! Check back in to see my other Christmas cards and projects.
Lisa Tedder
A California Girl living in North Carolina Product List
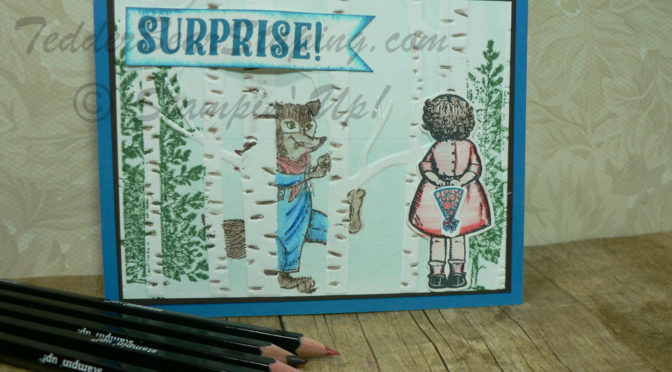
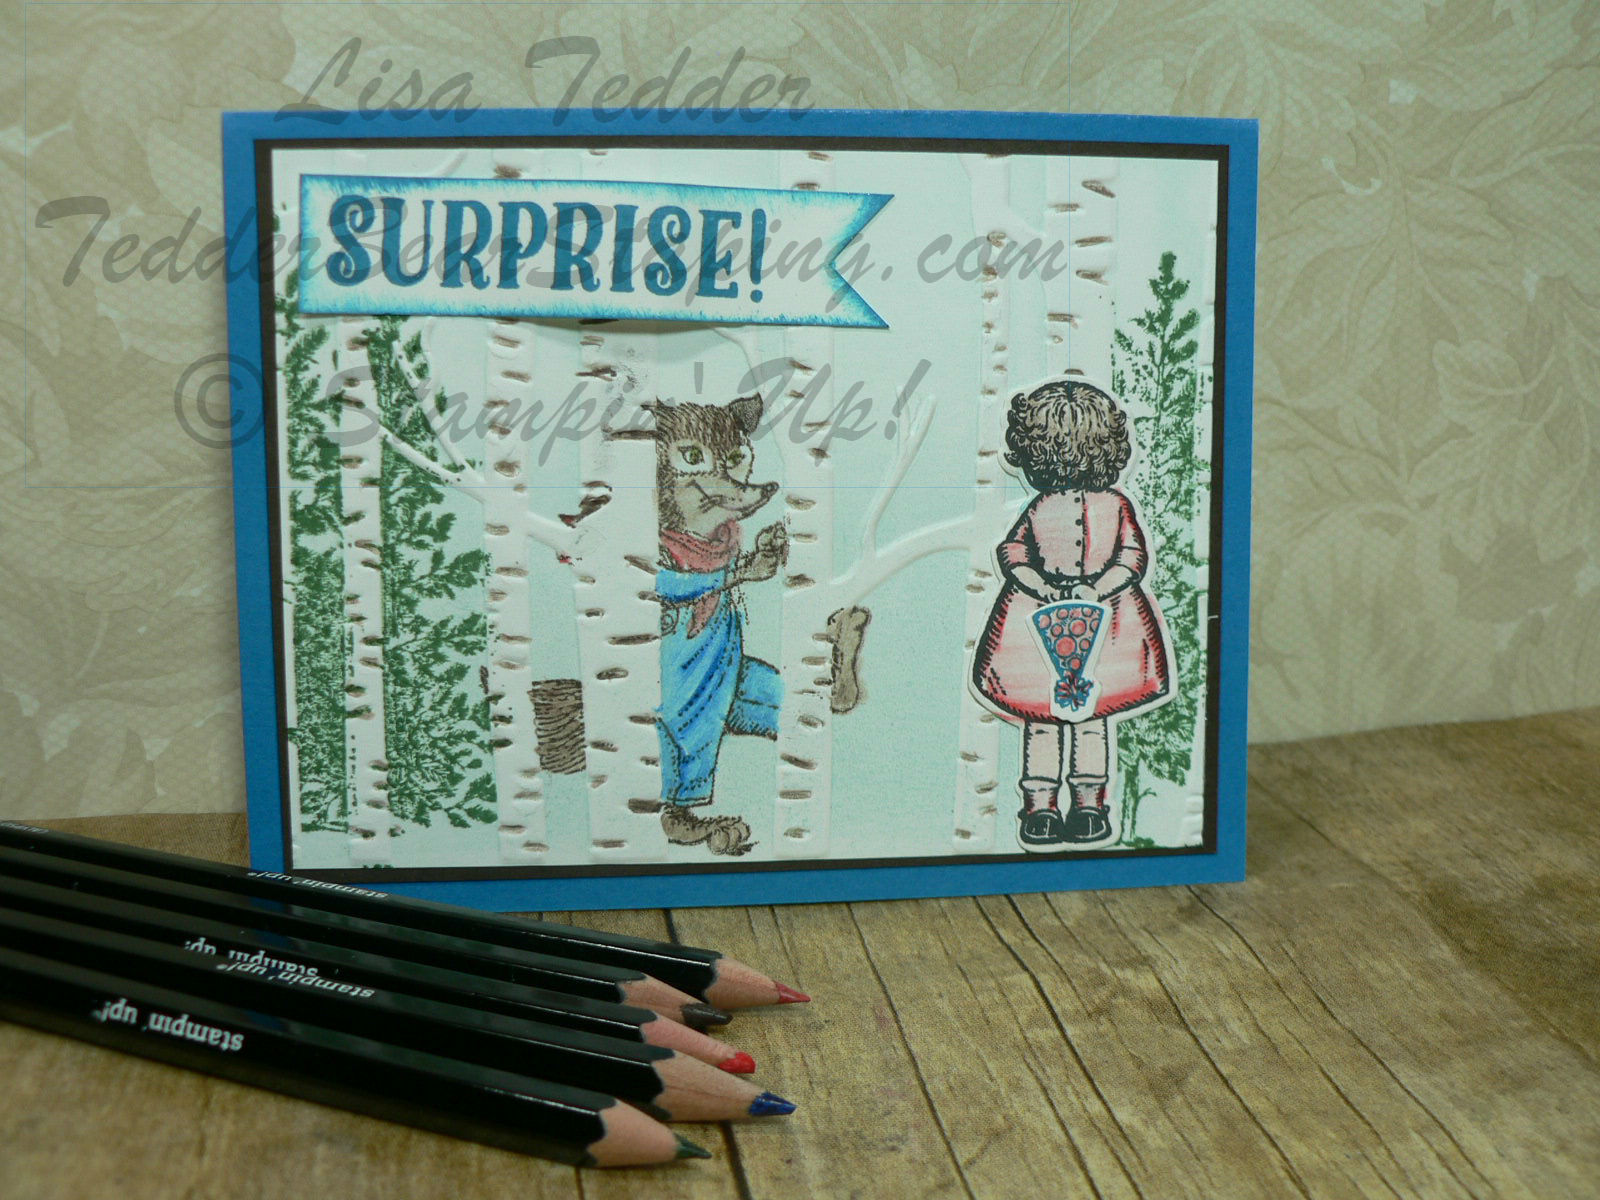
Today it’s time for card #2 out of 6. By this time of year I am excited to do Christmas cards, but by Christmas I am ready to put it aside until July of next year.
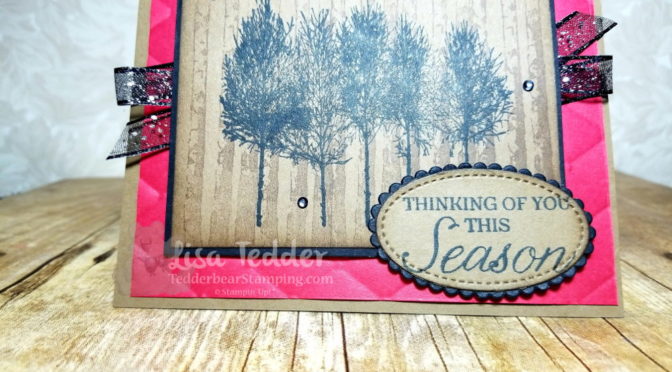
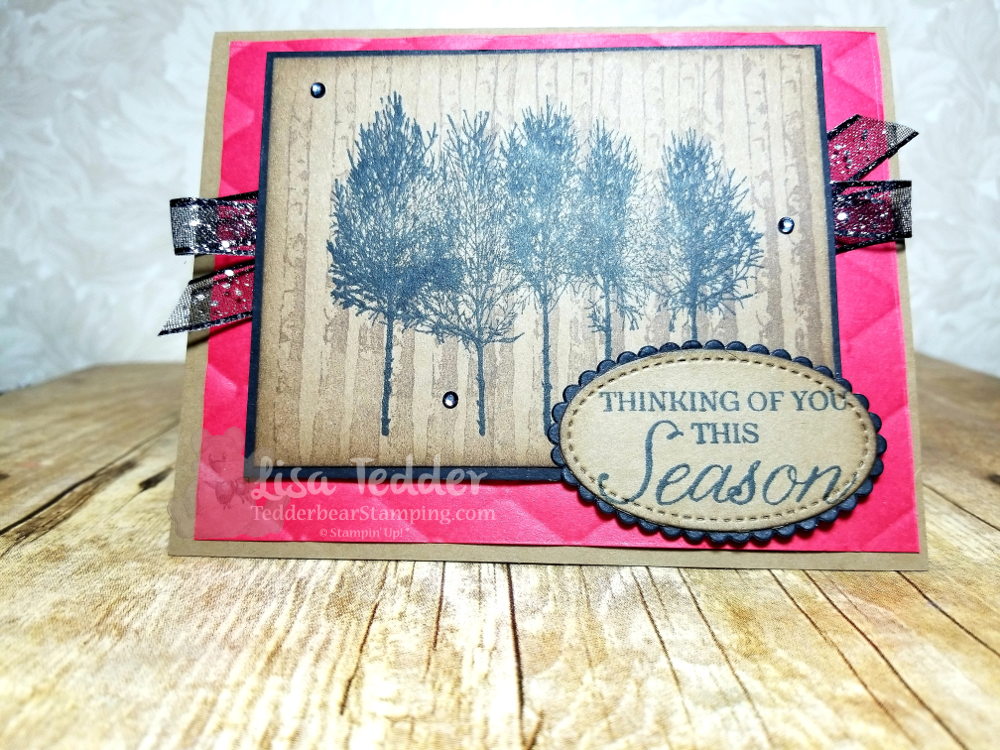
Here is a card using the stamp set Winter Woods and Timeless Tidings from Stampin’ Up!
I saw this on Pinterest, changed up the background by stamping the Birch trees in Versamark first. But the idea came from Linda Vich. Thank you Linda!
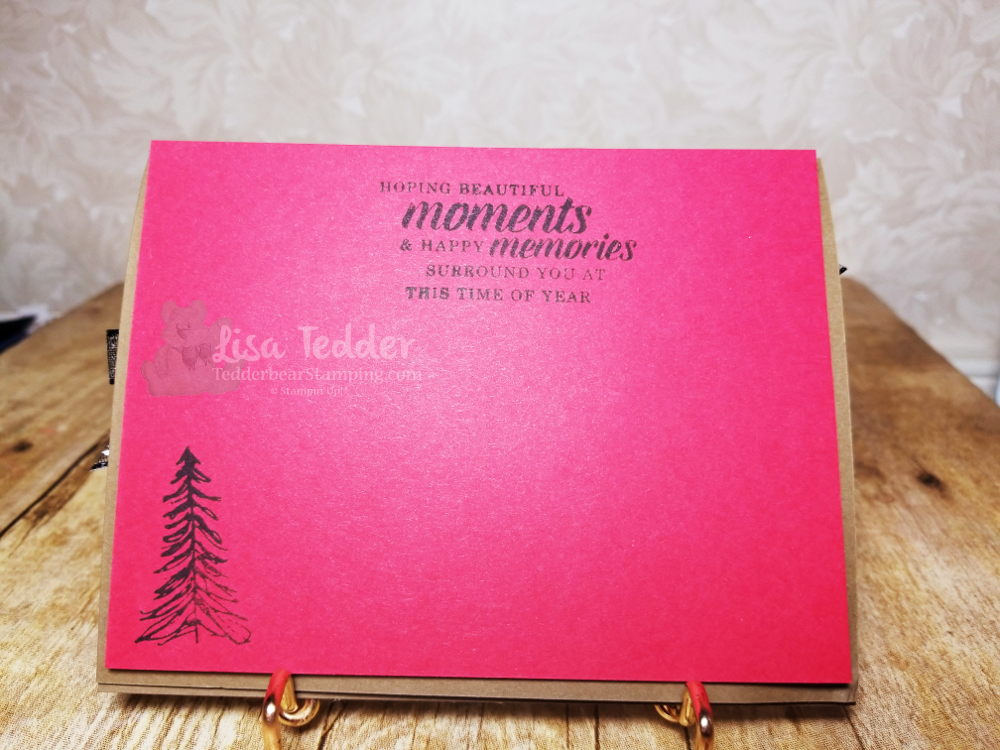
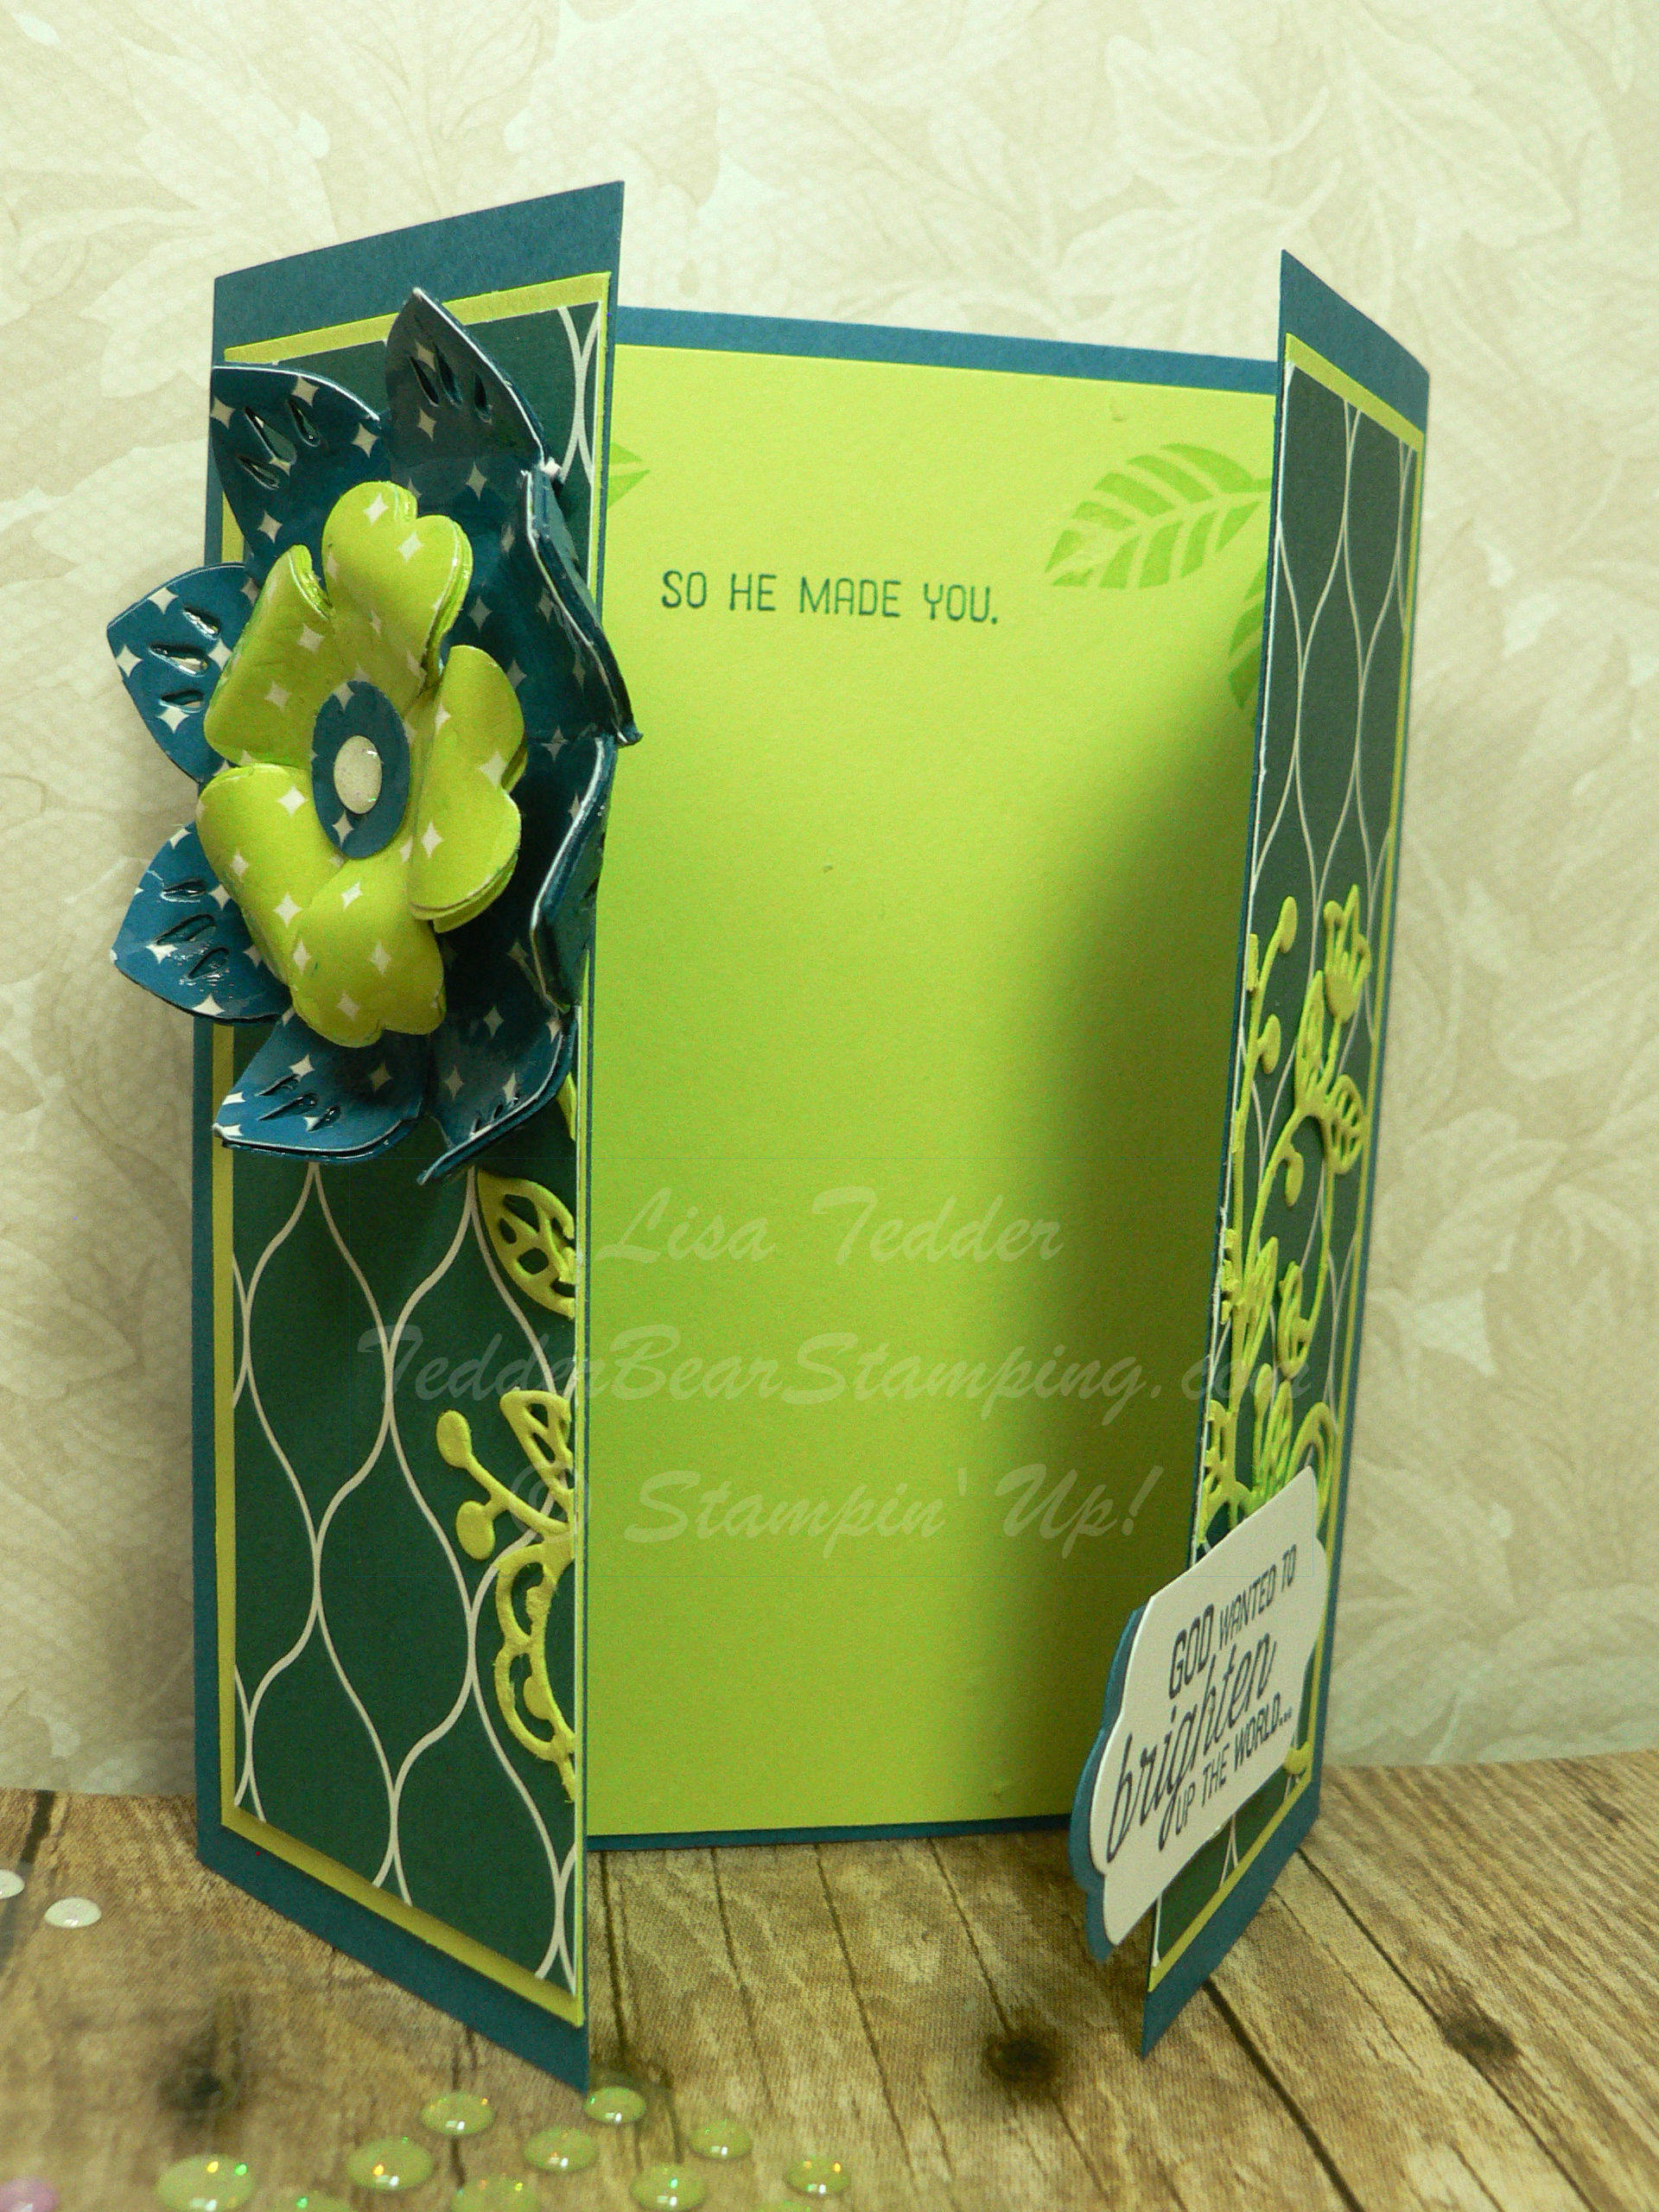
Here is a look at the inside:
Hope you like it as much as I do! The ingredients for this card are pictured below, click on any of them and you will be taken to my OnLine Store!
Here are the particulars to this card:
Stamps: Winter Woods, Timeless Tidings Cardstock: Soft Suede 8 ½” x 5 ½”, 4 ¼” x 3 ¼”, scrap, Black
4 3/8” x 3 3/8”,scrap, Real Red 5 ¼” x 4” (x2) Ink: Memento Black, Versamark, Dk Black Blend Misc: Rhinestones, Black 3/8” Glittered Organdy Ribbon
5 ½” (x2), Tufted Folder, Dimensionals
Thank you for stopping by!
Lisa Tedder
A California girl living in North Carolina Product List
I’ve been getting ready for my Christmas card class that’s next month! I plan on doing 3 Classes with 6 cards each class. That is A LOT of planning! Each person will make 3 of each of the 5 cards and 1 special card! That’s 16 cards that everyone makes at each class!
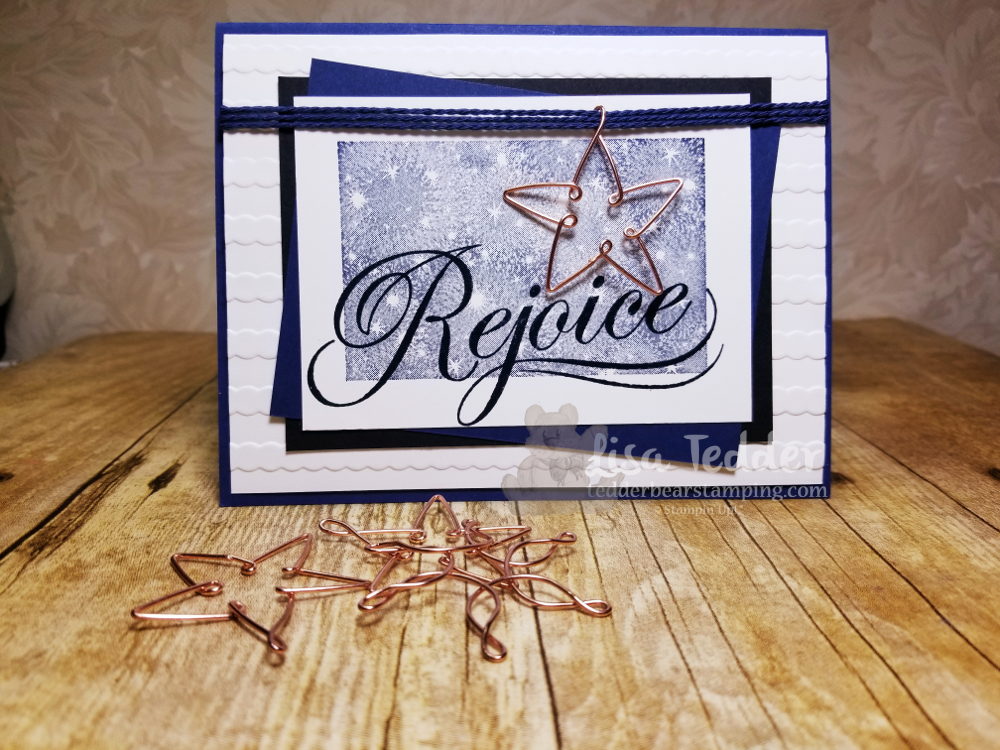
The New Holiday Catalog is here from Stampin’ Up! and I’ve been having fun using all my new goodies! Are you ready to start seeing the 1st of my 6 cards?!
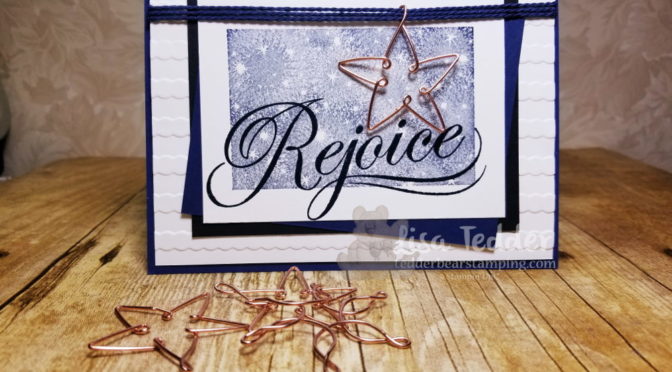
Here is card #1:
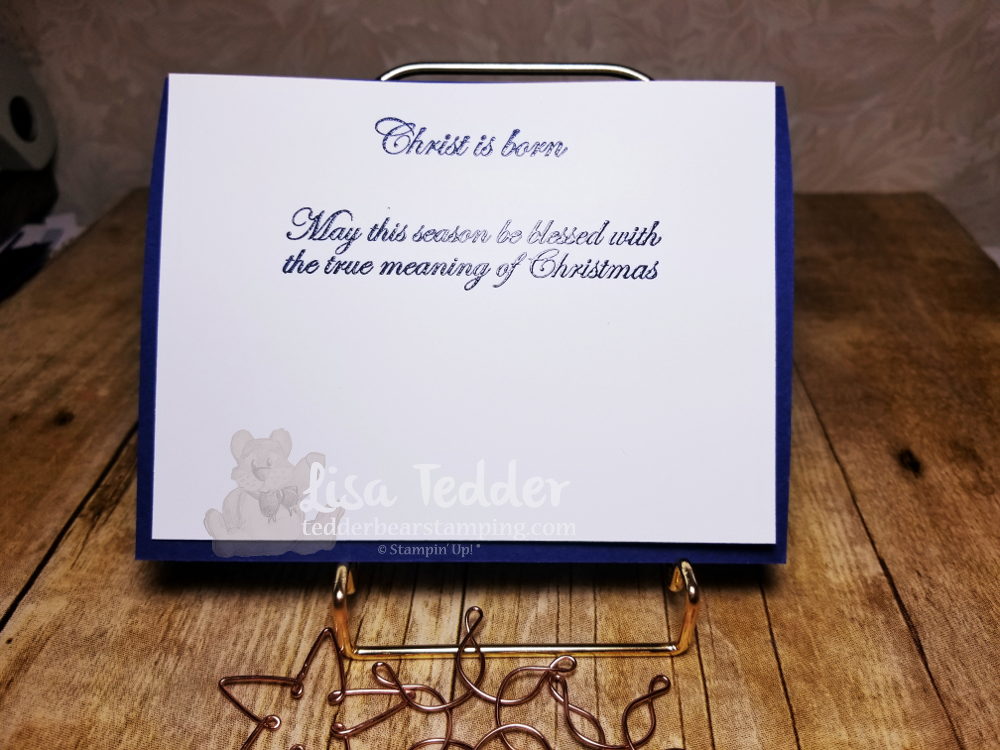
This was VERY fun to make! I used the New stamp set His Light on top of the Bokeh Stamp set, but this isn’t the bokeh it is the star one in the same stamp set. I stamped the Bokeh ‘star’ stamp in Night of Navy, then stamped ‘Rejoice’ in Memento Black. This is SUCH a pretty card in person! Here is the inside:
I love that I can make a card that really tells the true meaning of Christmas!
Here are the Particulars:
Stamp sets: His Light, Bokeh Dots
Card stock: Night of Navy 5 ½” x 8 ½”,3 1/8” x 4 1/8”, Black 4 ¼” x 3 ¼”, White 5 ¼” x 4 (x2), 4” x 2 7/8”. Ink: Night of Navy, Memento Black
Below are pictures of all the items used for this project, click on any picture and you will be taken to my OnLine Store!
Thanks for stopping by!
Lisa Tedder
A California girl living in North Carolina
I’m going to save the inside for next week, but let me tell you that you WON’T want to miss it! All the measurements for this card are on the video. This is a fun and easy technique, I hope you check it out!
Click on any of the supplies below to be taken to my OnLine Store! If you purchase from me I will send you a very nice thank you gift!
Until next time!
Lisa Tedder
Tedder Bear Stamping
A California Girl living in North Carolina
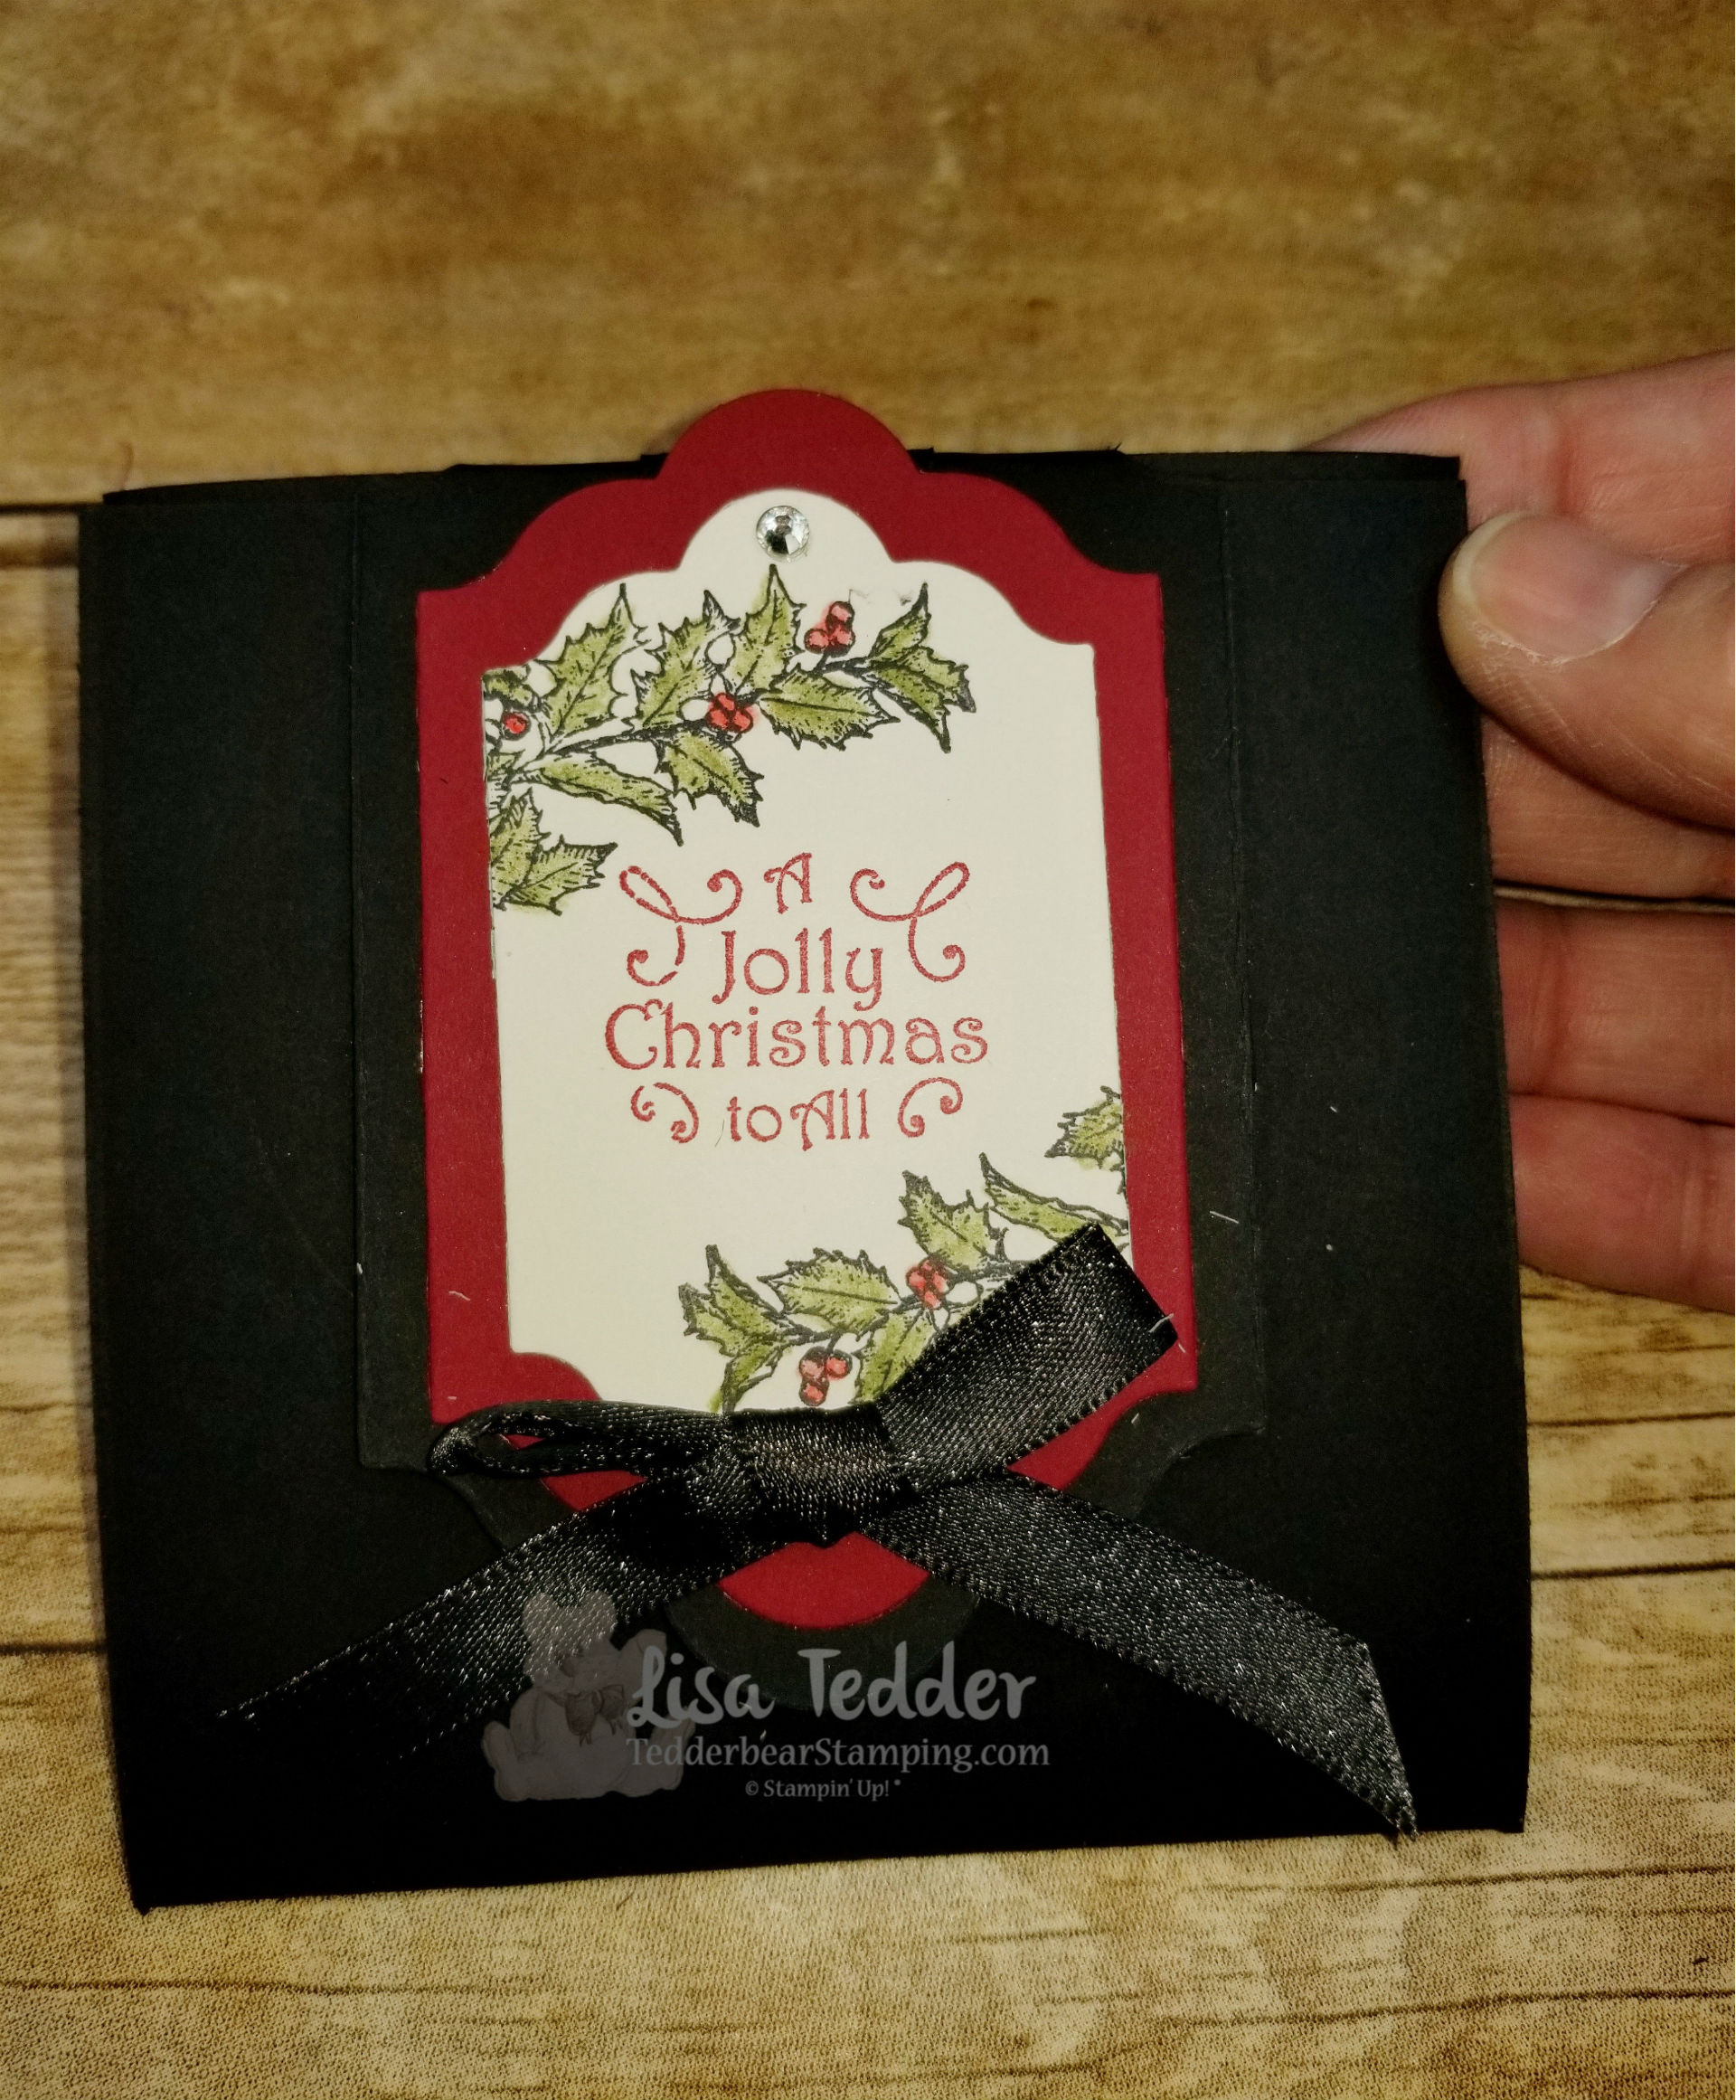
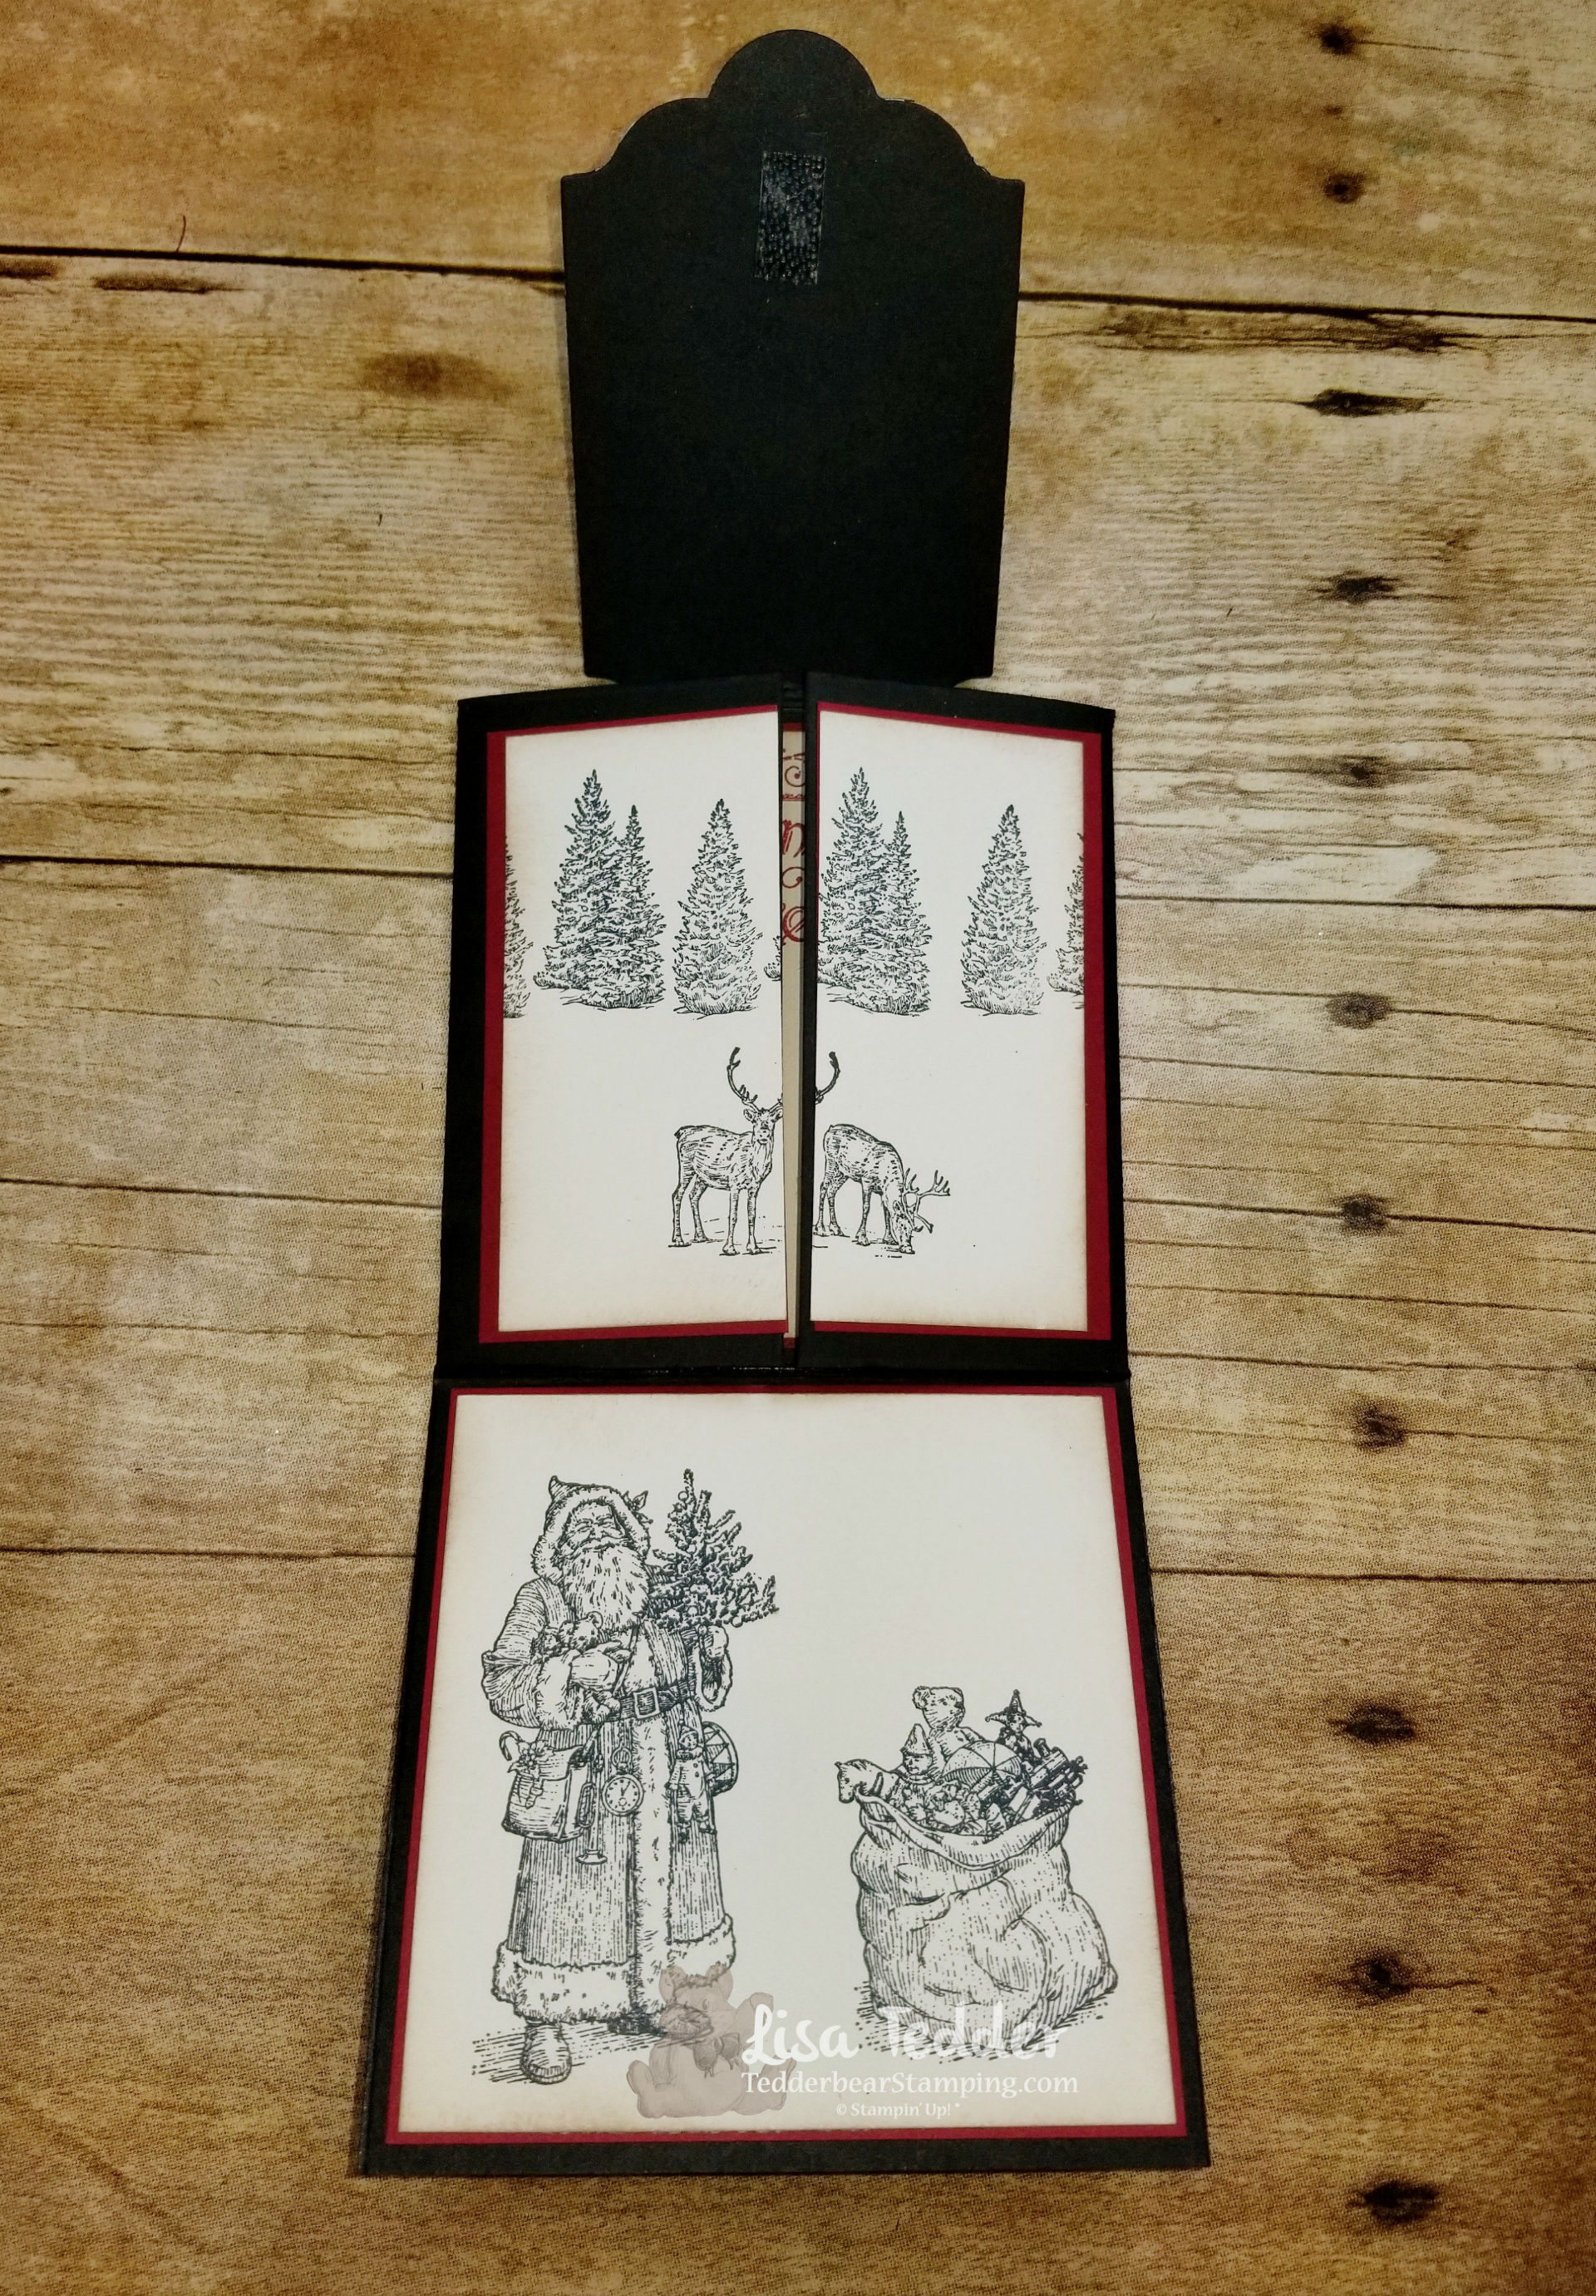
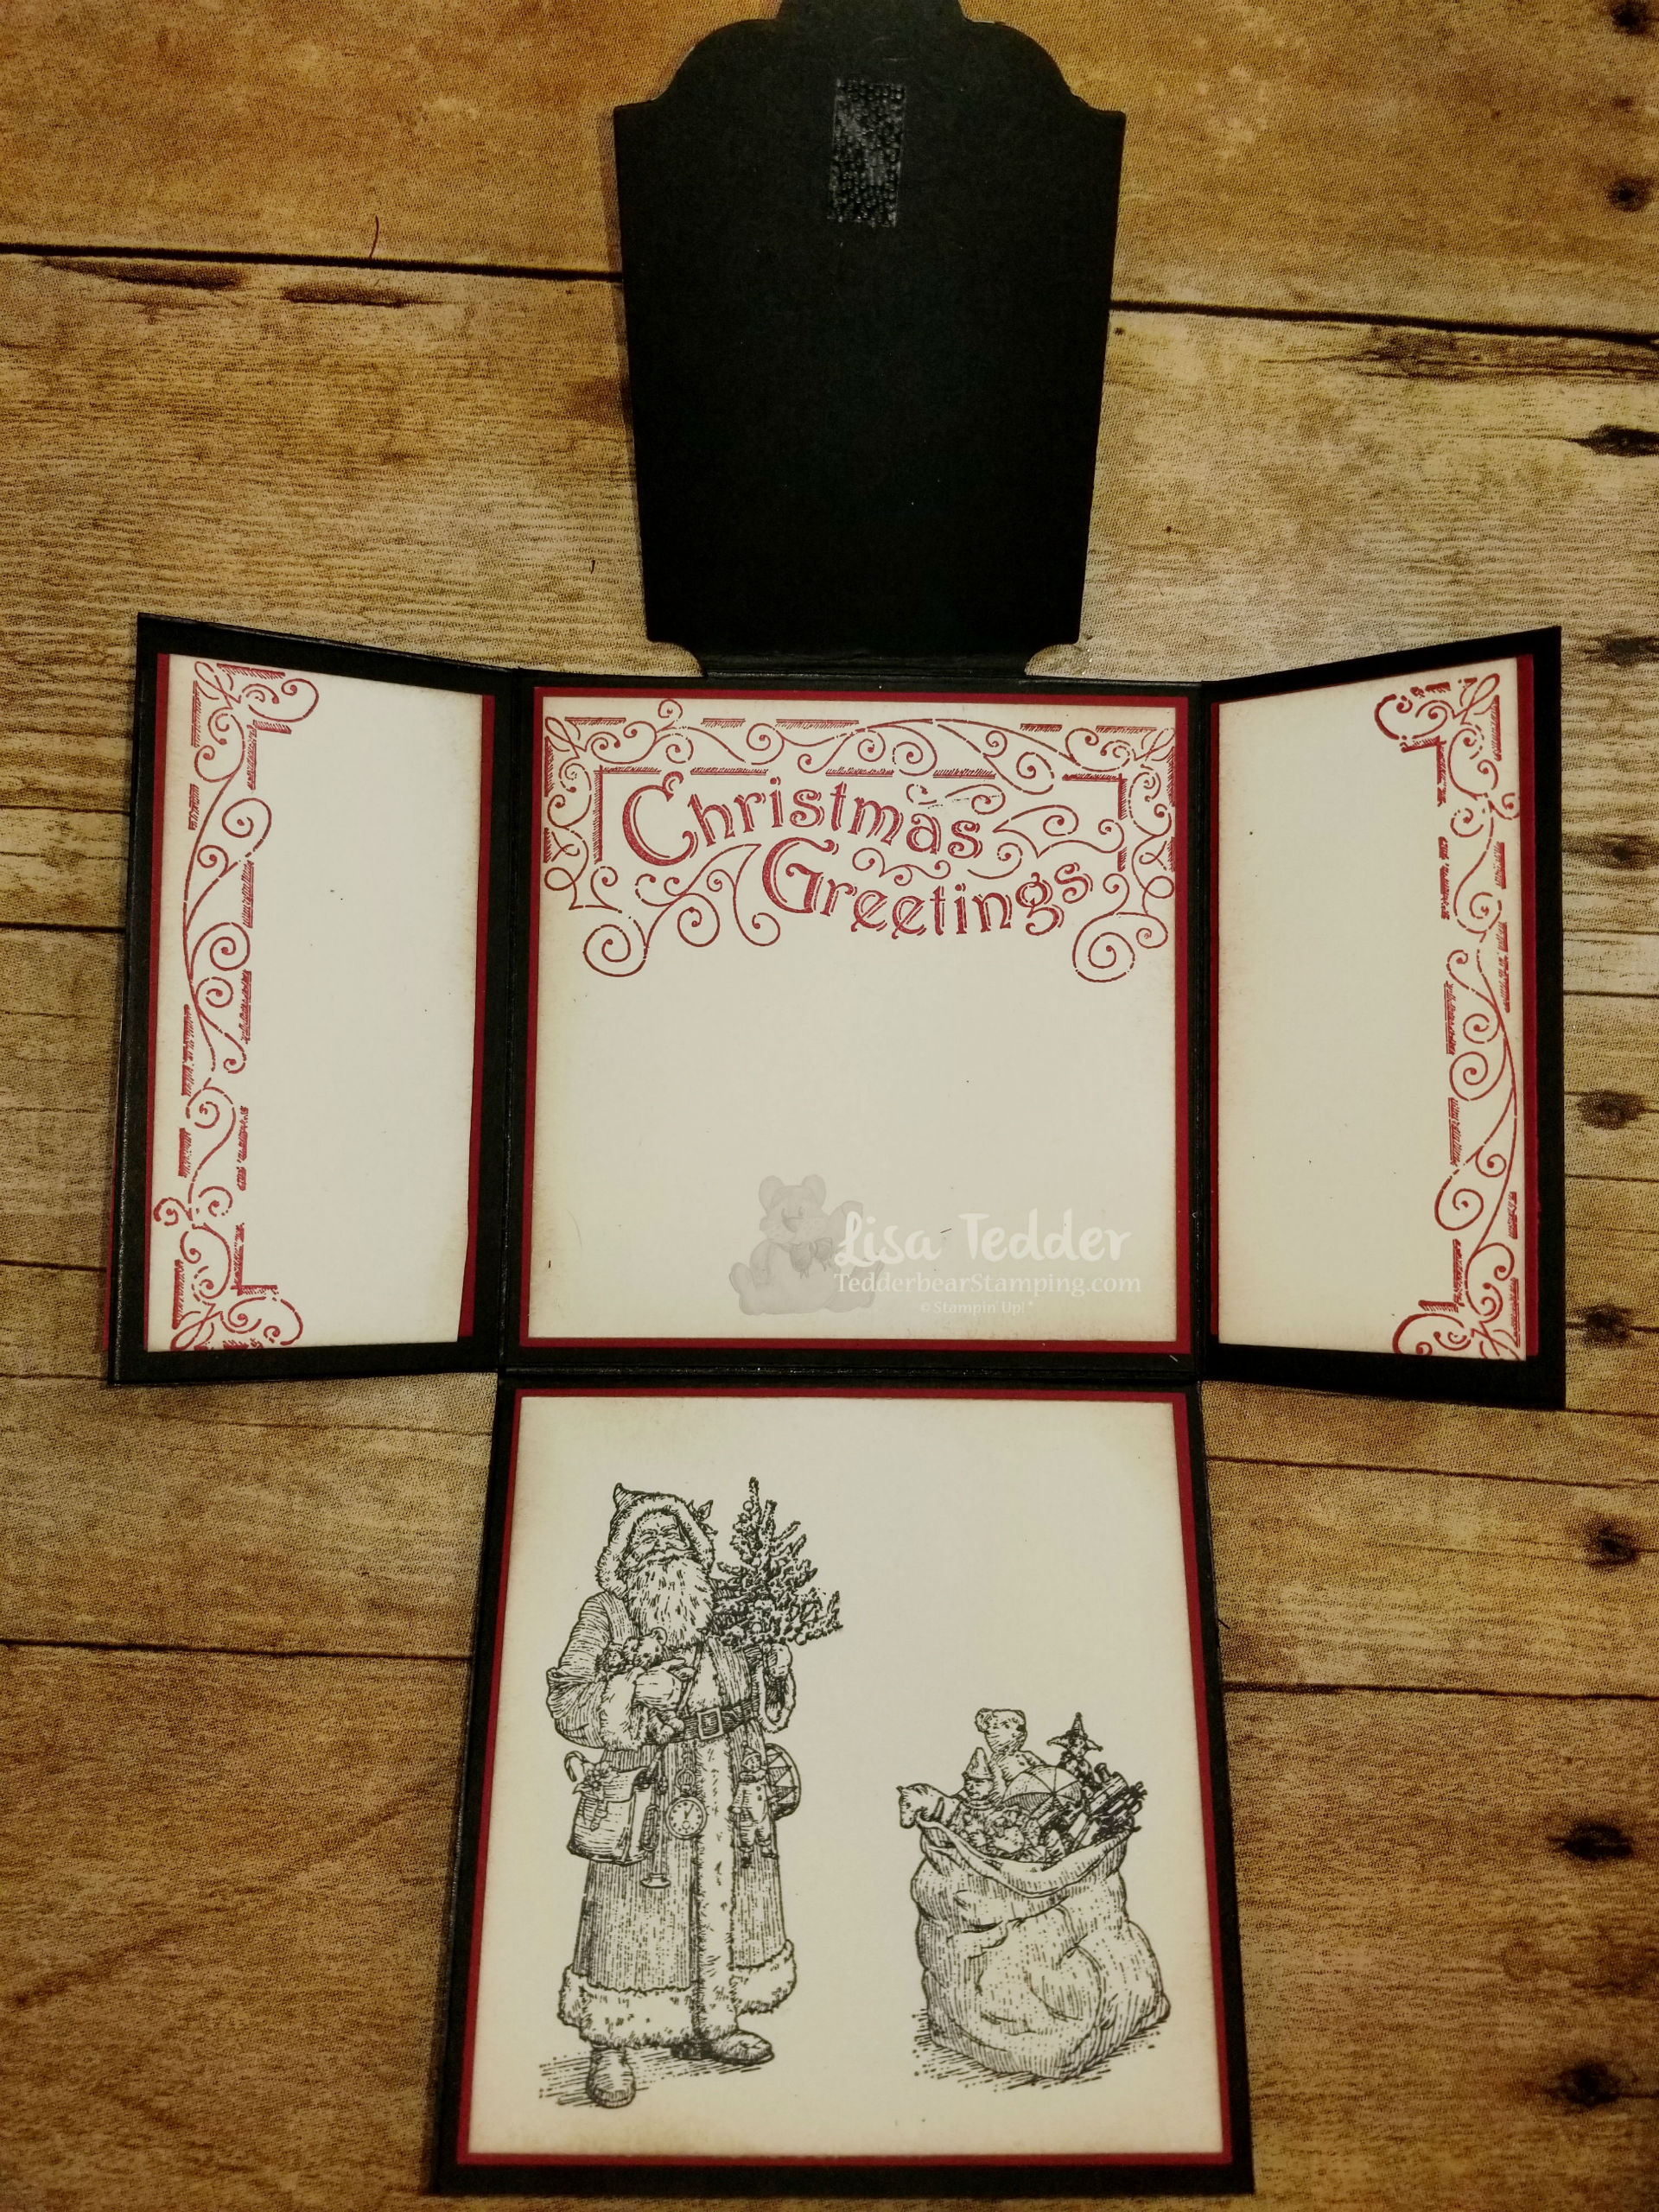
I was spending time on YouTube the other day and found this great idea from Dawn, which you can see here. I loved the idea, but didn’t have her Halloween stamps, even though I LOVE Halloween (need to have new ideas every year for scrapbooking!). So, I DID have the Christmas stamps from Stampin’ Up! called Father Christmas (I used EVERY stamp!, WooHoo) and Nature Sings. These Stamp sets are PERFECT for my idea!
When do you use every stamp from a stamp set on ONE project? I did for this one! Not sure WHY I am proud of this, but I am. 😉
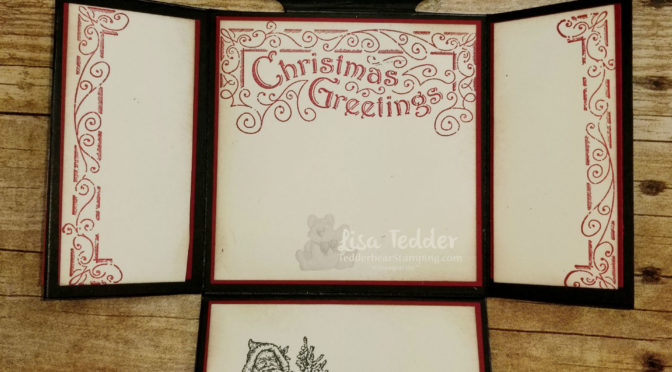
Here is the project closed:
Partially open:
And now all the way open!:
Isn’t this pretty!? What I love is other than the front where I colored, there isn’t anything else that needs that much attention! I DID sponge all the Vanilla pieces but I pretty much sponge everything so this wasn’t a big deal to me.
When I showed this around, I got so many Ooooooh’s and Aaaaaaaah’s! LOVE when that happens! Now the question: Who do I send this to?
The next question is what will be my technique for NEXT Tuesday?! Any suggestions? I have a great idea, not sure if I will go with that idea or one YOU give me!
You can click on any of the supplies listed below to be taken to my OnLine Store!
I hope you like this technique, I would love to see a ‘story’ you would like to create using this Fancy Fold!
Until next time!
Lisa Tedder
Tedder Bear Stamping
A California Girl living in North Carolina
I love Tuesday’s! Techniques are my favorite thing about stamping. I get to use my Stamps in a totally different way!! The Technique I am using today had me thinking of what I could put BEHIND trees, but still show what I needed it to show.
Here is today’s card:
I made a YouTube video showing this stamping technique. I love Birch Trees, I also love the Birthday Delivery Stamp set by Stampin’ Up! I got super excited about being able to use BOTH! When you go watch the video it will show you exactly how easy this technique is to do!
Stamping directly onto an Embossing Folder isn’t something you think of normally. Tips: 1. Stamp on the side that has the negative (dipping down) the part you want as your focal in the folder this will be the part that is raised on your card. 2. Pick images to stamp on that you will see in the lines available that are the flat parts of the folder. 3. Use colors that will enhance what you are stamping. 4. Use a brayer to lay down a color that will be behind the images (sky), anything you stamp over the brayered color will be at the top of the cardstock. 5. Make sure that you don’t move the folder once you put all the stamping in (I did NOT follow this rule on my video, but I fixed my mistake!) 6. Remember that it’s ONLY PAPER, and play with it!
I won’t be able to show you here how to do this technique, it would be too confusing, so please go check out my video and see how fun and easy it is. You will notice that you will look at stamps in a totally new way!
As always, I will have the supplies listed below, just click on any image to be taken to my OnLine Store!
Thanks for stopping by! Until next time!
Lisa Tedder
TedderBearStamping
A California Girl living in North Carolina
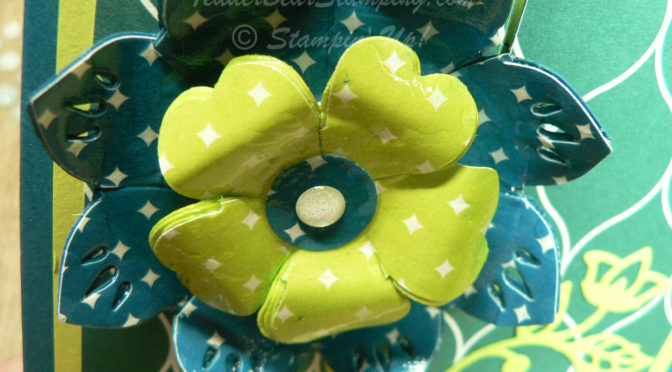
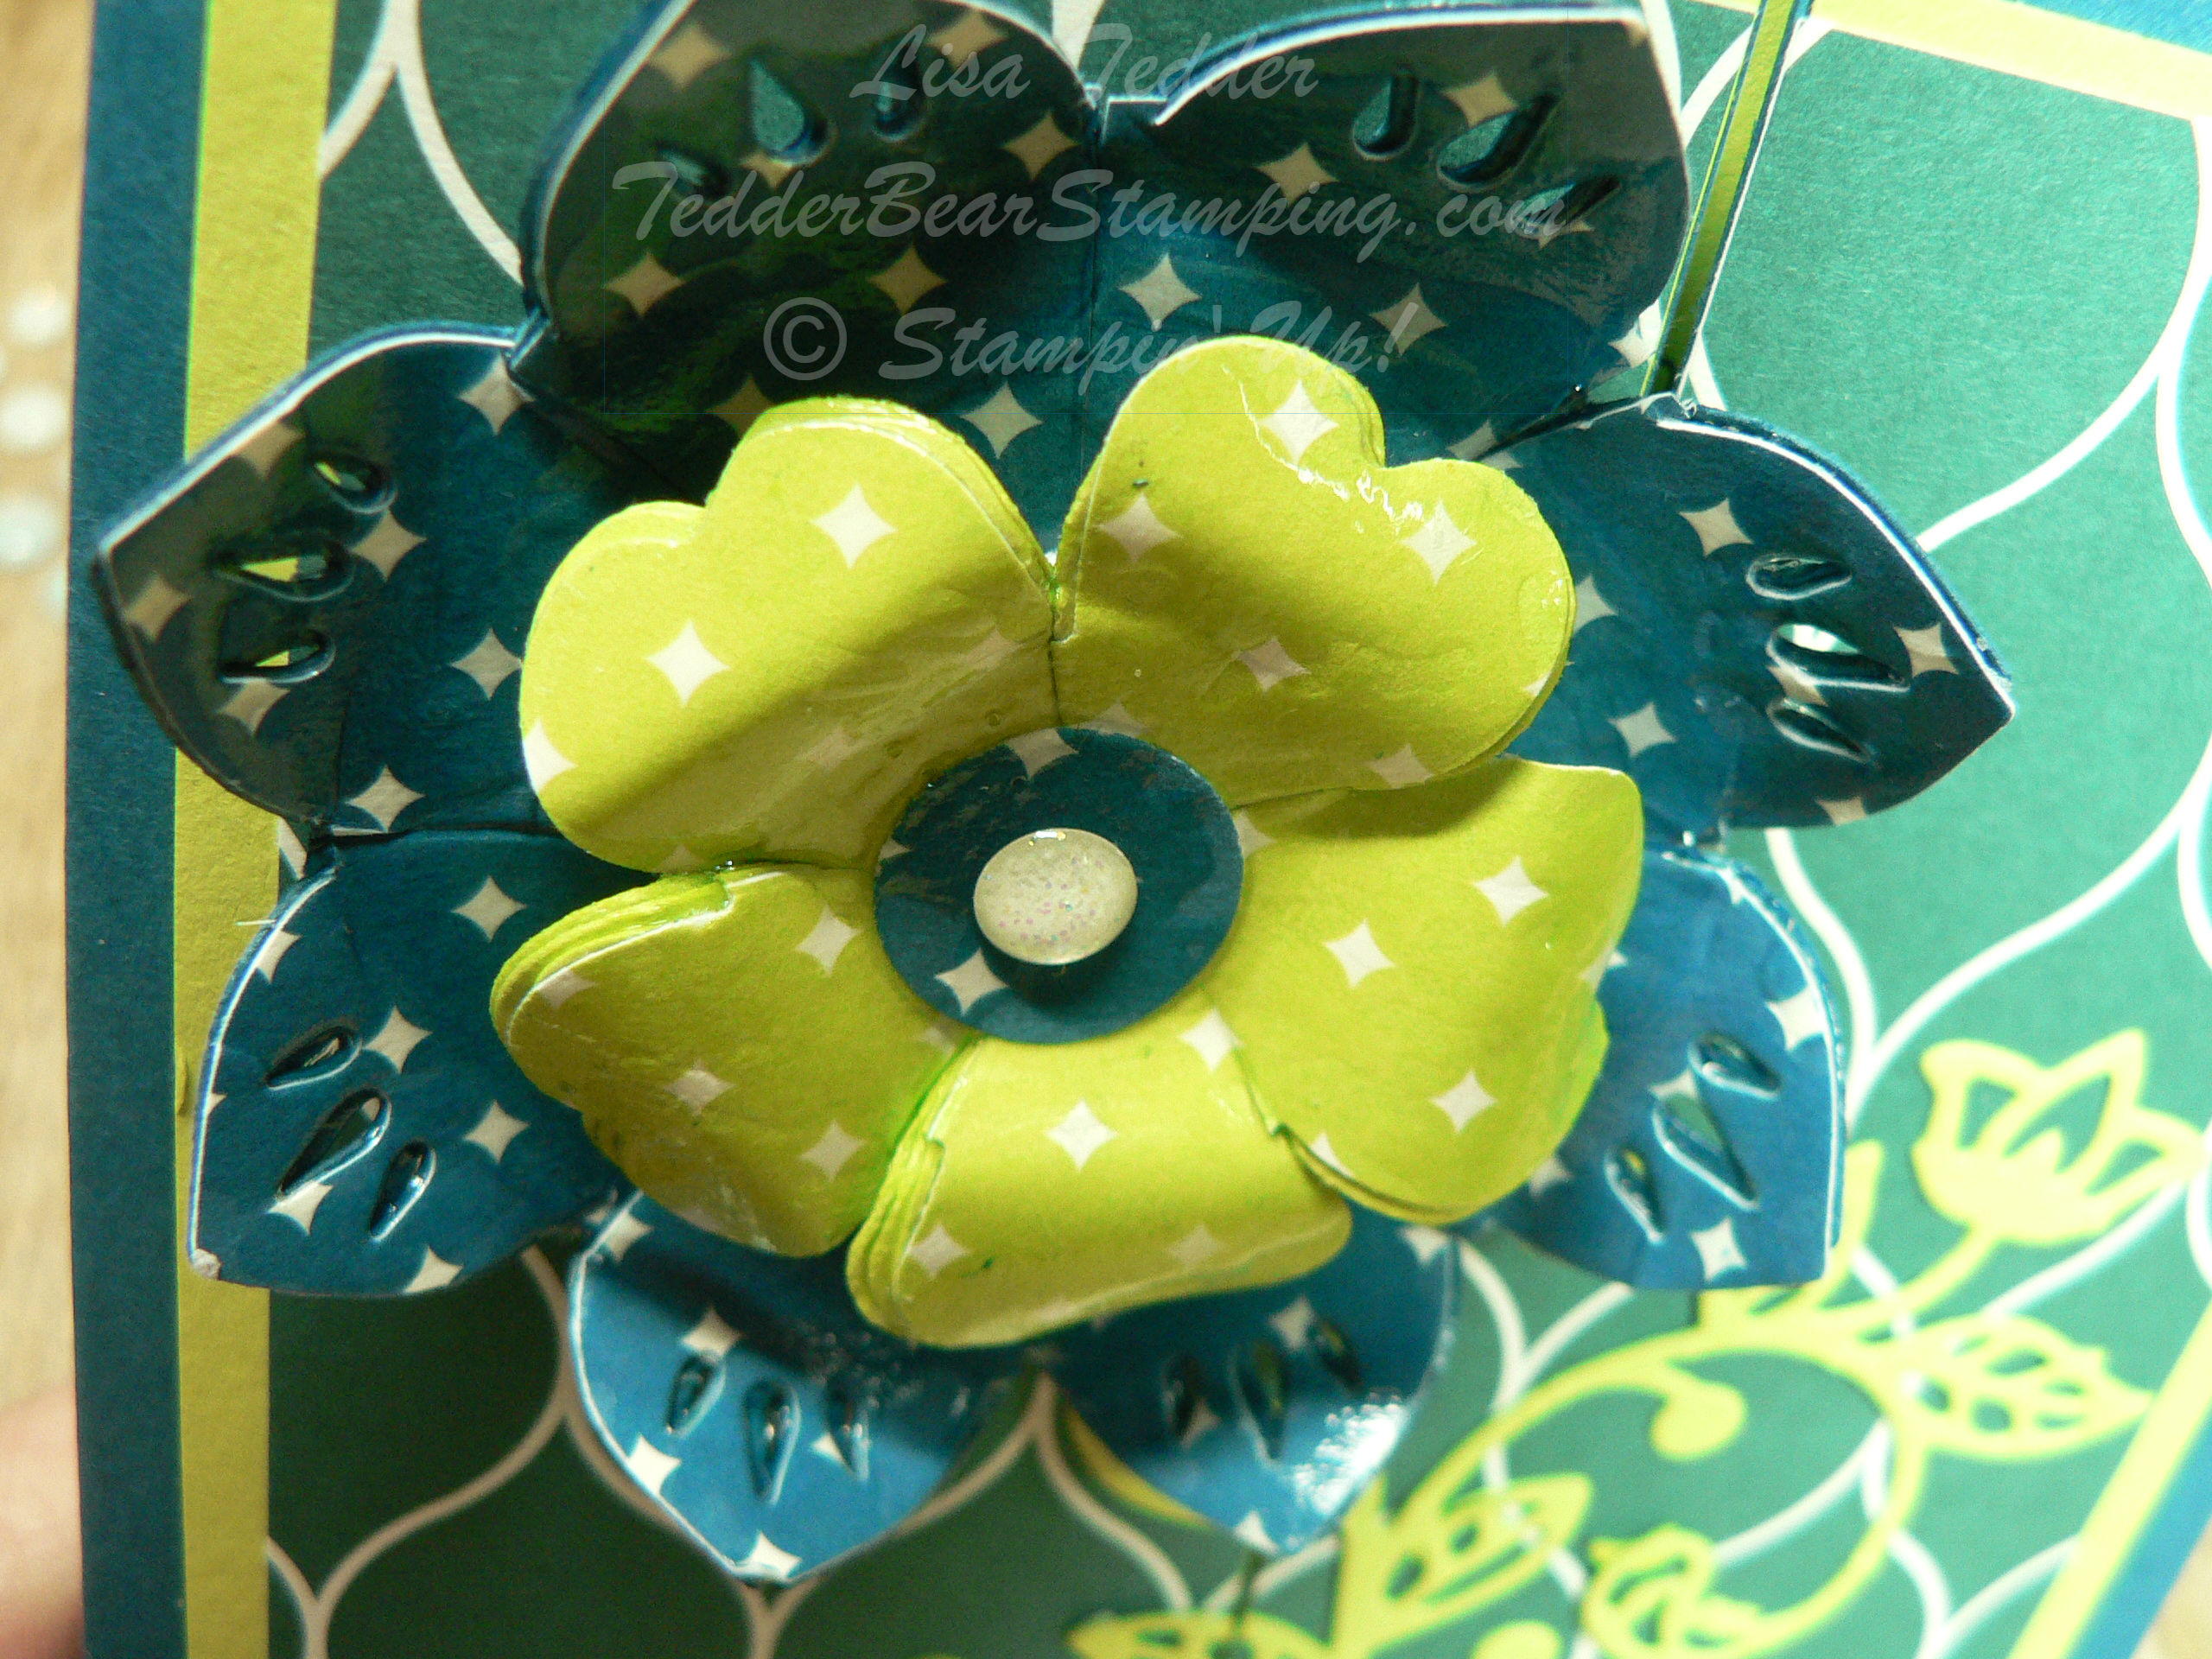
First, you will need to pick a shape you want to transform! I chose two, the Pansy Punch and the flower from Eastern Medallions Thinlits. I punched out 3-4 of each image with another one from DSP. I chose the Eastern Palace since it was so pretty.
Take your Silicone Craft Sheet, a foam brush, Mod Podge and your cut outs. Starting with the colored images, not your one cut from the DSP, spread a thin layer of ModPodge over entire surface with your Foam brush. Then lay another layer of the image on top of that and repeat. You will do this 3 – 4 times ending with the one you cut out of the DSP (do not put ModPodge on top). Then you can cut into all layers if you want to manipulate the paper more than the design allows. Keep working at it until you are happy with the shape. Once done, you will spread Fine Tip Glue over entire surface, set aside to dry.
When dry, put your two pieces together as shown:
This is already attached to my card, but this gives you a close-up of what it looks like when dry.
Here is a picture of the closed card:
In the video I show you how to apply the Flourish Thinlits and how to adhere it to the card!
This is a Fancy Fold card, here it is open:
If you wanted, you could attach the flower on front with a Pin, and then mail it to someone who loves to wear brooches, or use it for a headband! I have done in the past a 3d Rose, and that was gorgeous!
Please subscribe to my YouTube channel to be informed when a New Technique video is ready! Tuesday is the day I chose, since Technique Tuesday has a certain ring to it, don’t you think?
And don’t forget to subscribe to my blog so you won’t miss out on anything here.
TOMORROW I have the drawing for this card:
Today is your last chance to either leave me a message on here, or on my YouTube page, if you click on that link you will be taken to the video where I made this card. You will be AMAZED how much MORE prettier this card is in person!
I am off for now, until next time!! As always I will have the list of the supplies used (below) for the card today, just click on any of the pictures to be taken to my OnLine Store!
Lisa Tedder
TedderBearStamping
A California Girl living in North Carolina
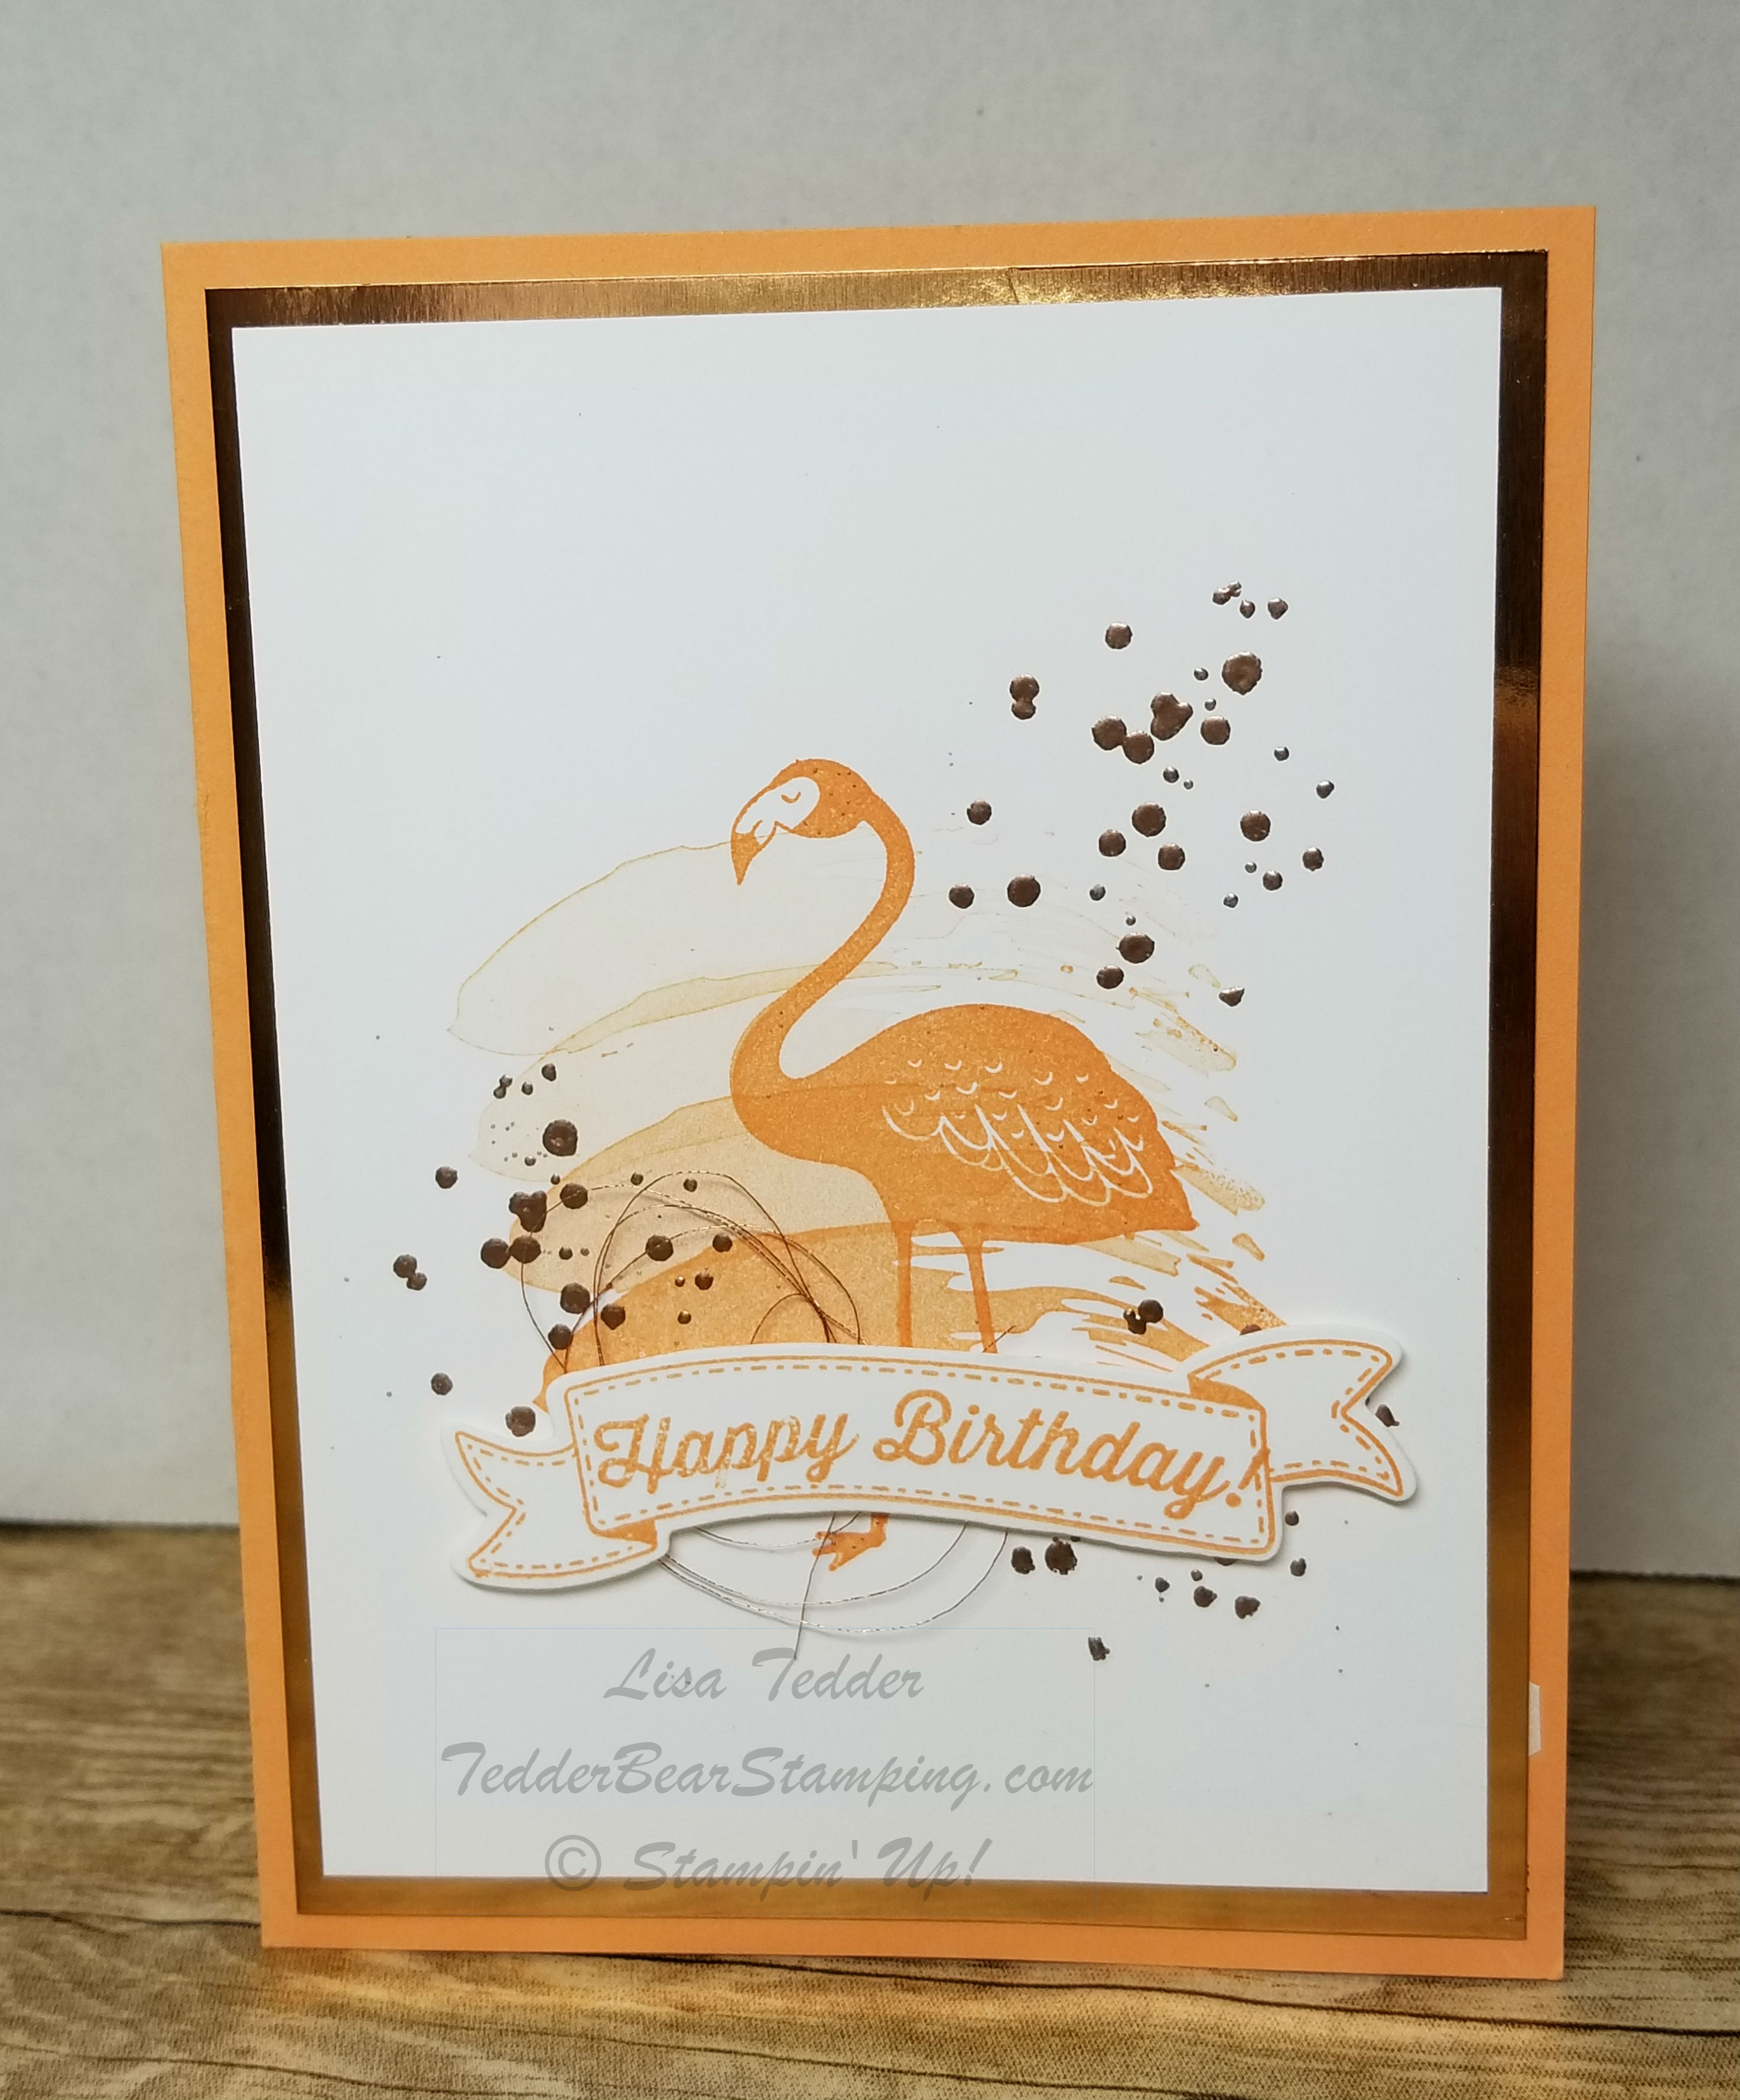
Today I am sharing with you a Clean and Simple card. I have so much trouble keeping things simple, I always want to JAZZ them up. But this one is jazzy without adding more. At least I think so! You’ll have to tell me!
I LOVE the copper embossing powder, and I added some Copper thread. The dots are done in the Copper Powder, it’s hard to see that in this picture. AND I have found that Banners for You works well with other stamp sets!! I used the Happy Birthday from Birthday Banners. Since it is Photopolymer you can bend the stamp to fit the banner!!
Below my name is a list of all the supplies to make this card, just click on any picture to be sent to my OnLine Store! If you buy from my store I will send you a handmade card!
Until next time!
Lisa Tedder
TedderBearStamping
A California Girl living in North Carolina
Want to receive this card? Check out below how you can be in a drawing to get this beautiful card mailed to you!
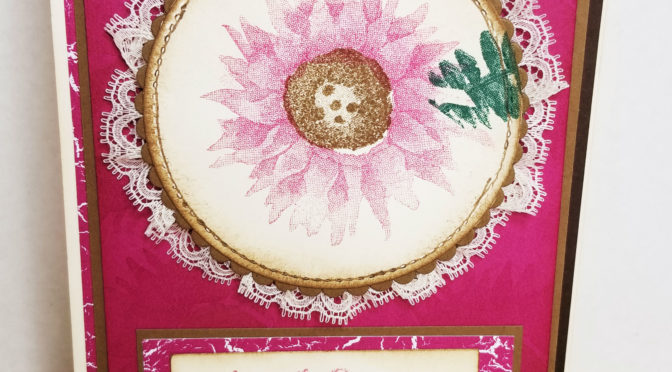
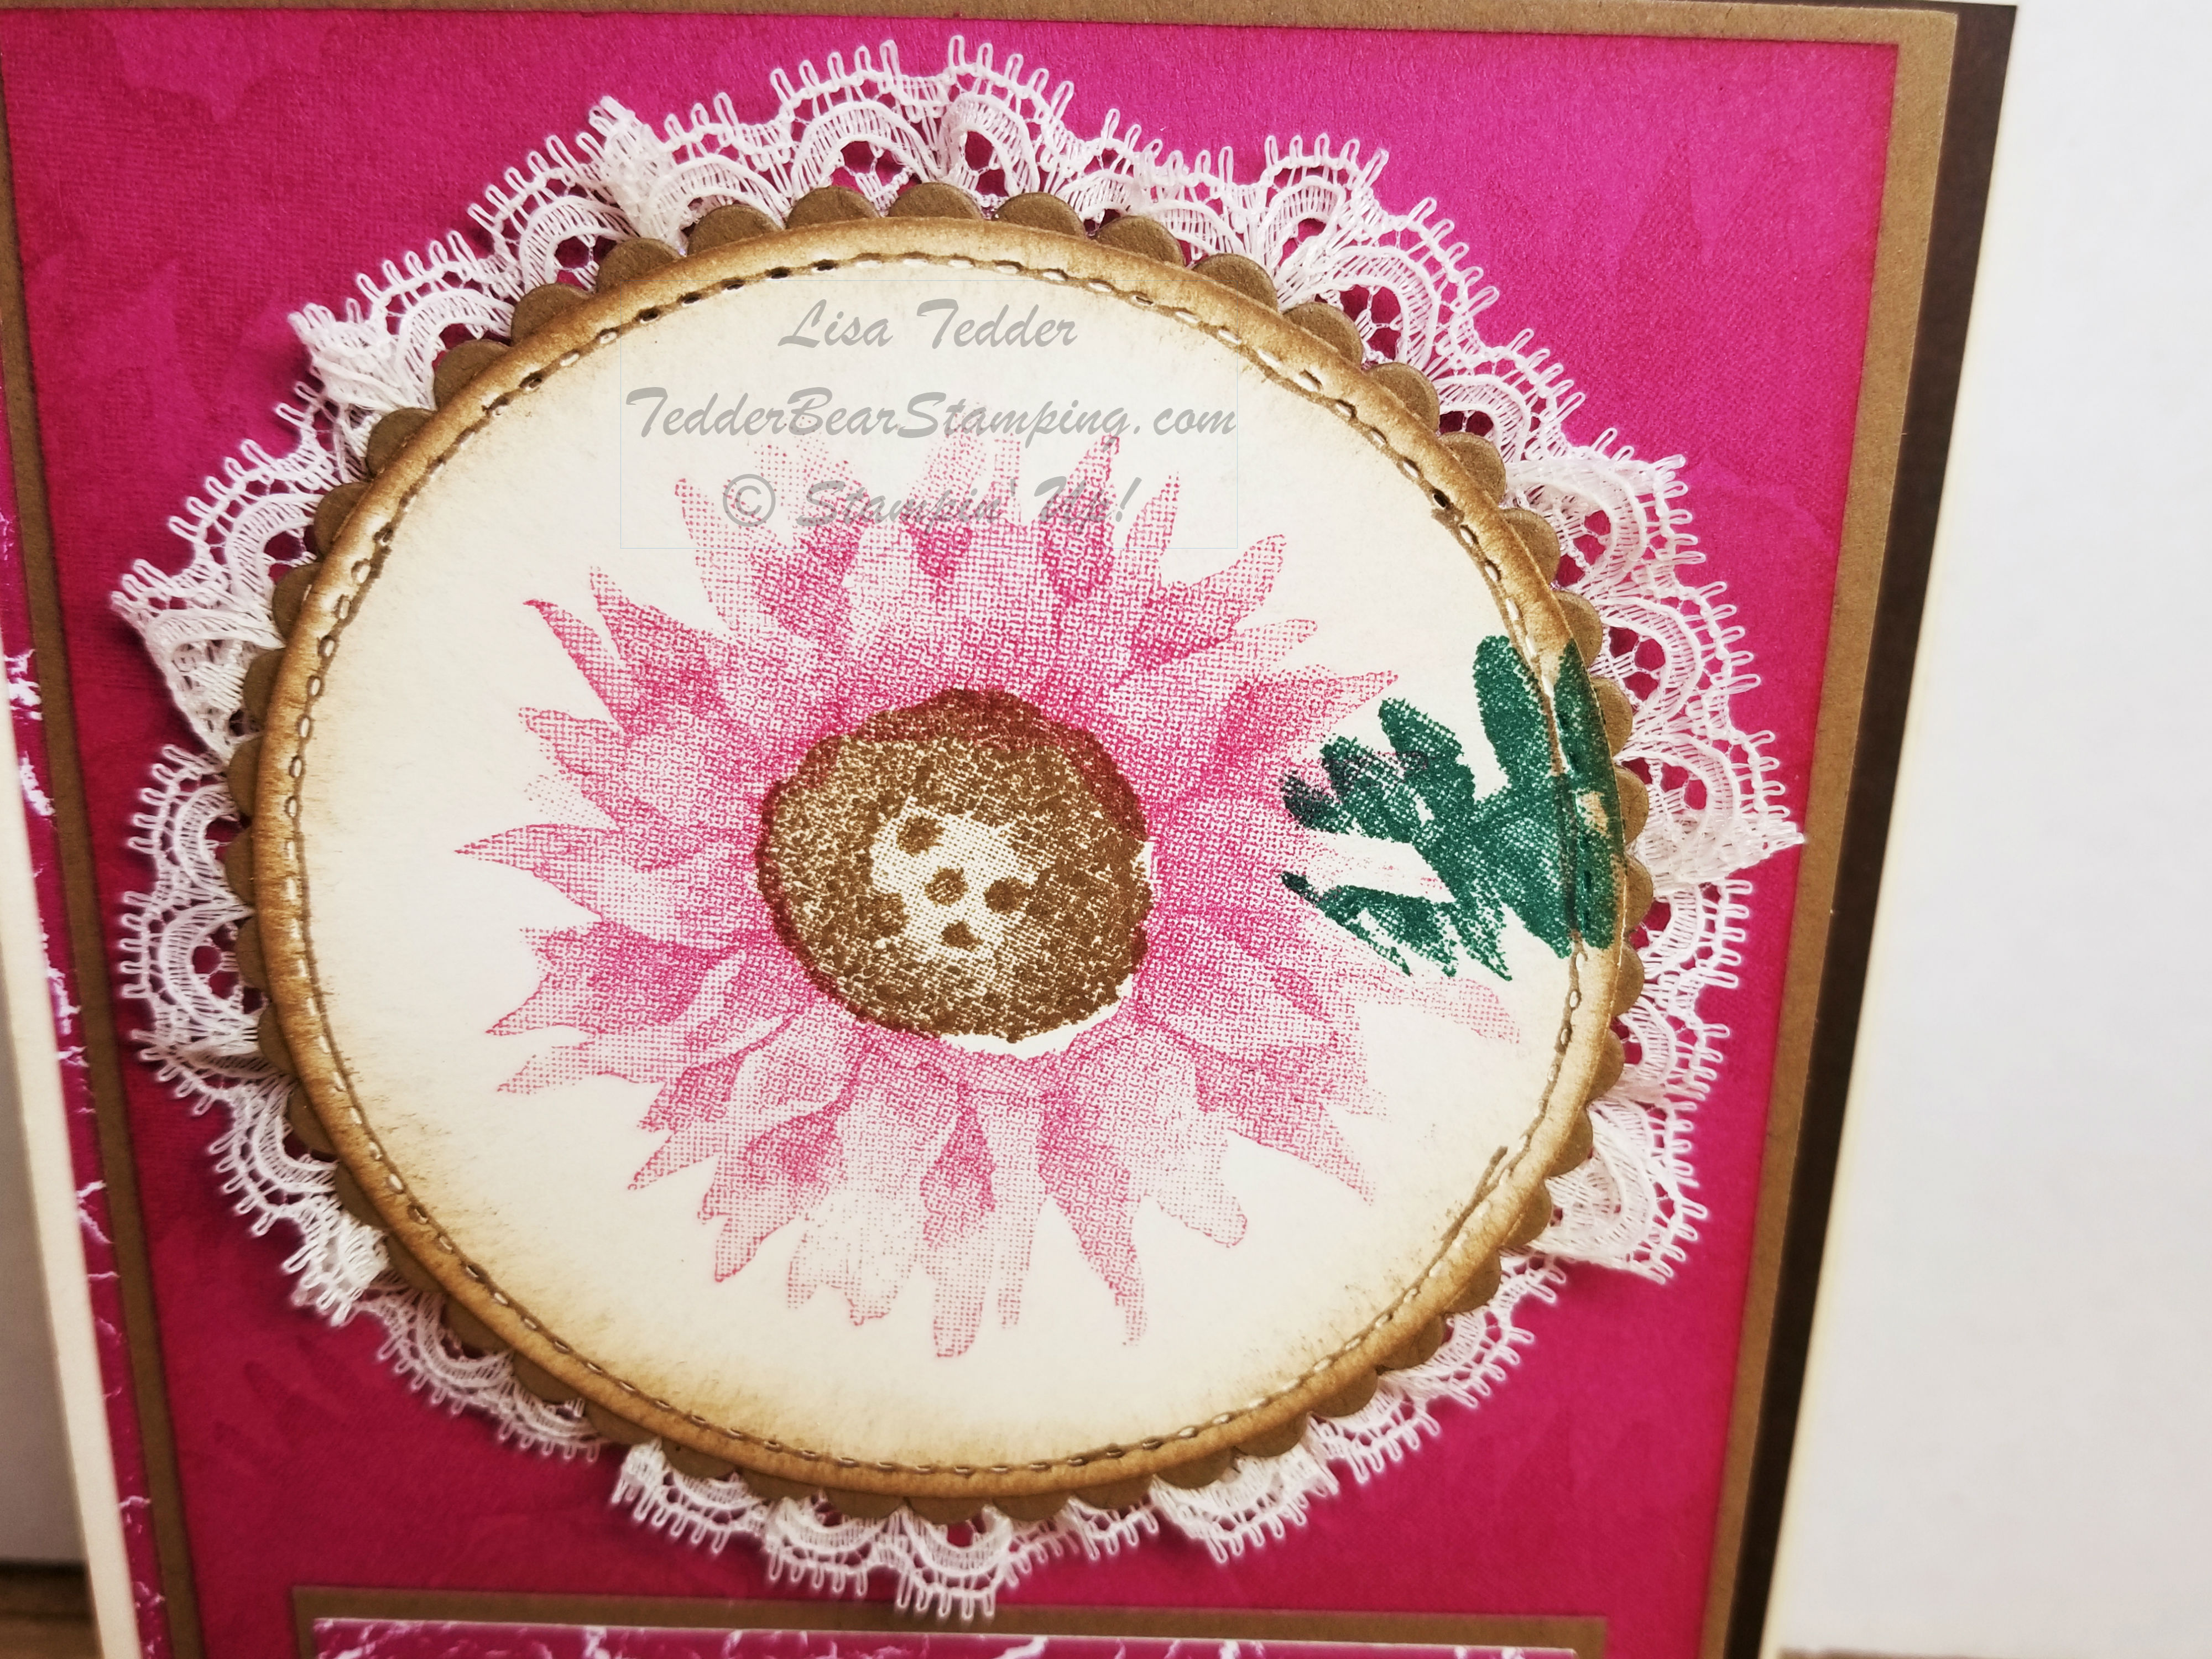
Today I am sharing with you a new Technique that I kind of stumbled on!! I’m using the NEW stamp set: Painted Harvest #144783 which will be in the Holiday Catalog coming out in September! You can see the video on YouTube, I have some great tips and it’s a VERY simple Z fold card!
Here is a picture of the front of the card:
Isn’t it GORGEOUS!? I was just playing around and was astounded at how great this came out! This is one of those times when I am sitting at my stamp table (by myself) and I start to talk and say how beautiful it is! LOL No-One is there, mind you……..even after 16 years of stamping I STILL get excited that I can make something this pretty!
Here it is open:
Doesn’t Berry Burst work great with this card? And here is a close-up of the front flower that looks like embroidery:
I popped up this whole piece using the Foam Adhesive Strips since they pop up more than Dimensionals. The video I made shows a different leaf than the one shown here, and I like it better. I show you how to mask the flower and put the leaves behind it. I also show you how to do the ribbon behind this image. If you go see it, leave me a message and let me know what you think.
IF you leave me a message I will have a drawing in 2 weeks on the 28th for one of you to win this card! Leave a message either here on my blog or on the video on Youtube.
ALL the dimensions are on the video, so if you want to recreate this go check it out!
All the supplies are listed below, click on any picture to be sent to my On-Line Store! If you purchase from me I will be sending you a handmade card as a Thank You!
This is a SNEAK PEEK so hope you enjoyed this card as much as I do! Keep an eye out for MORE Technique Tuesday videos! Techniques are my favorite. Anything that will let me use my stamp supplies more are a win win in my book!
Until next time!
Lisa Tedder
TedderBearStamping
A California girl living in North Carolina


 Glittered Organdy Ribbon")


 Lace Trim")