Tag Archives: handmade cards

Eastern Beauty trying new combinations!

Today I am playing with Eastern Beauty, a NEW stamp set from Stampin’ Up!  This stamp set is so Versatile!!  I have seen so many different ways of stamping  with this set so I thought I would give it a try and just play with it!  I DID end up making a card!  And I love how it came out!

Here it is:

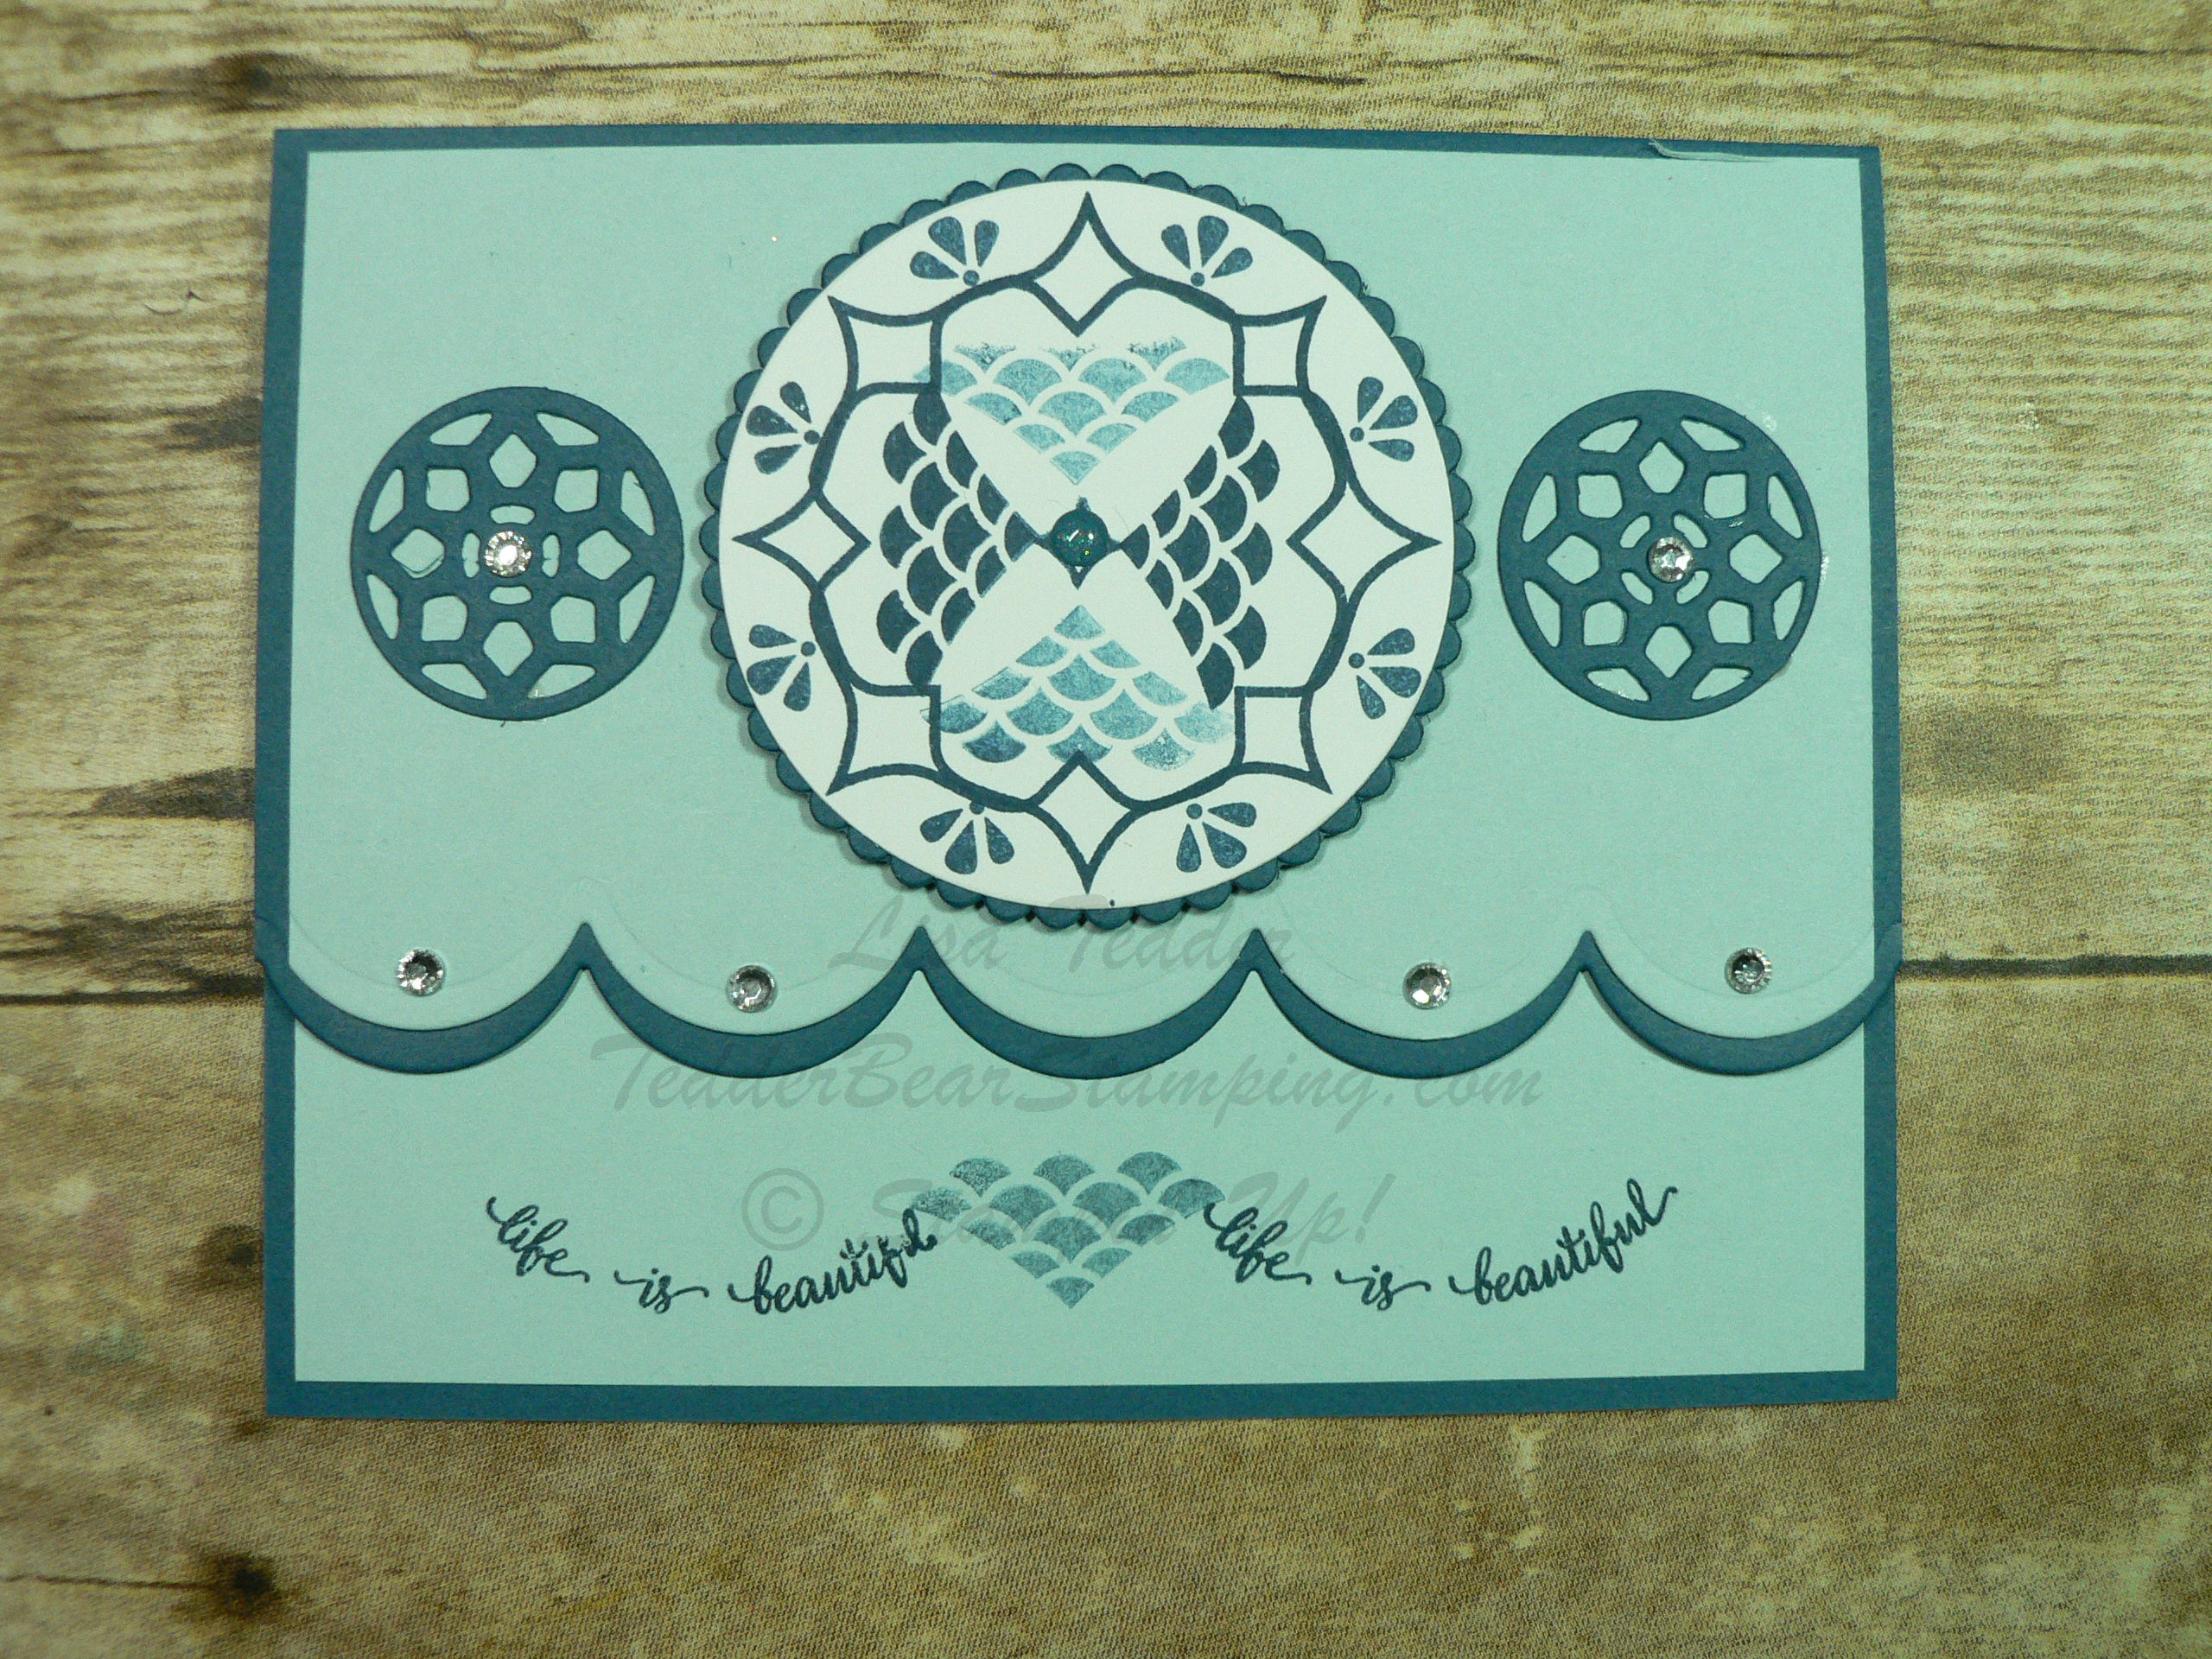
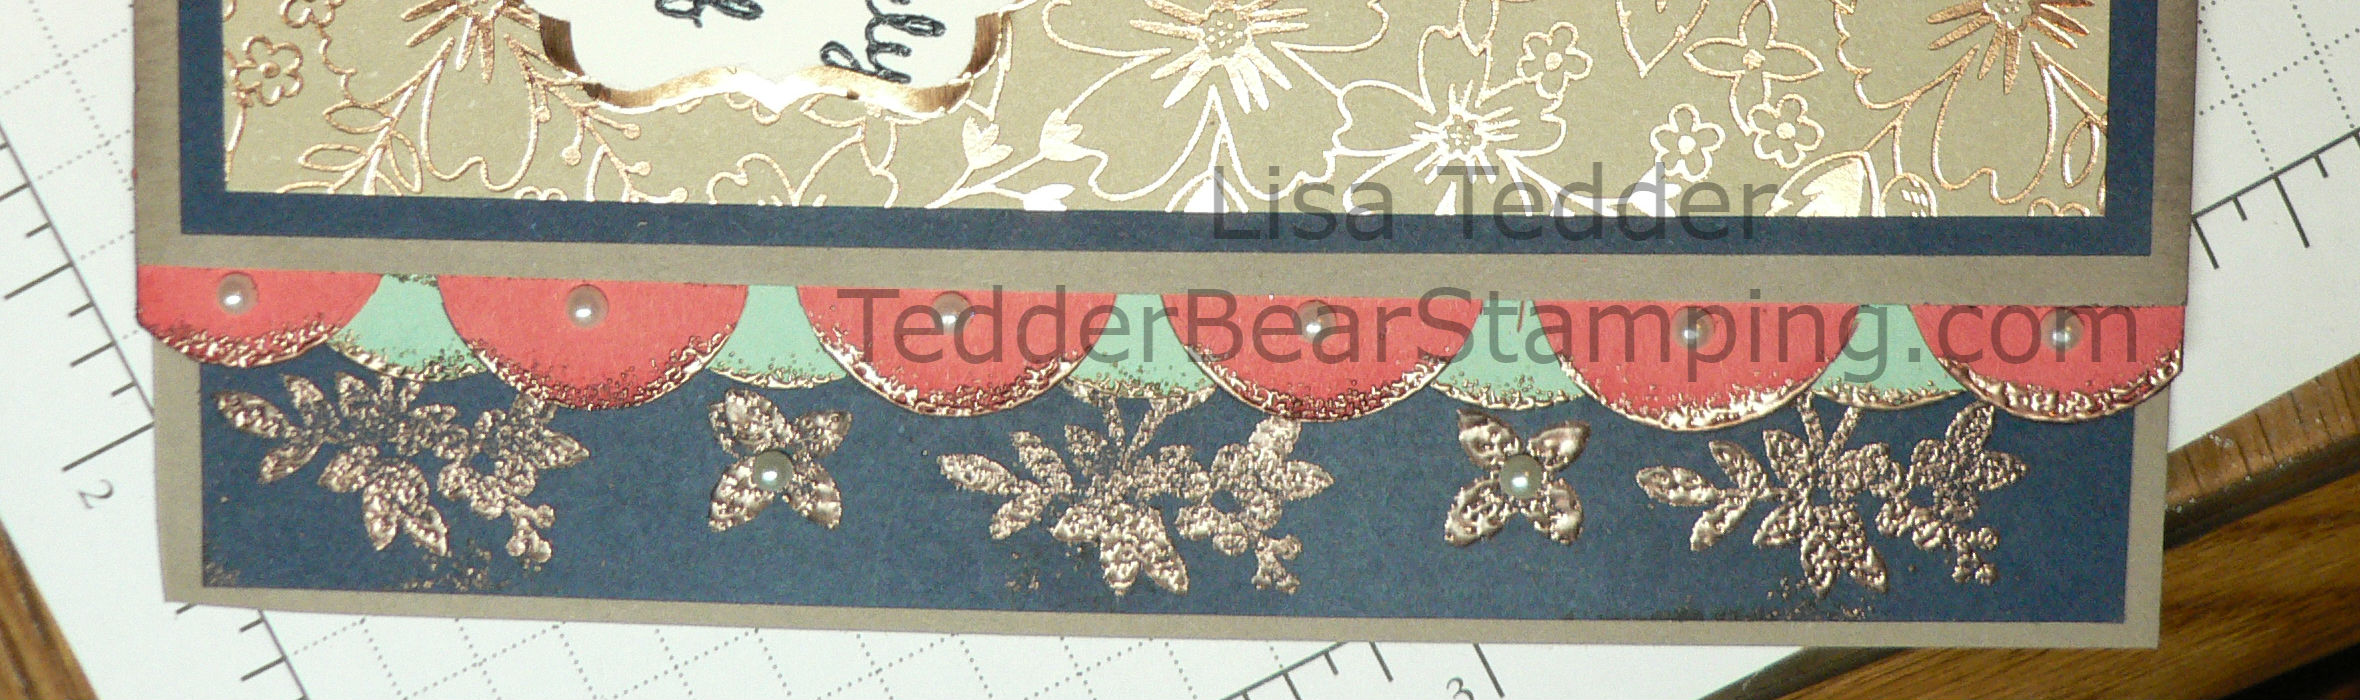
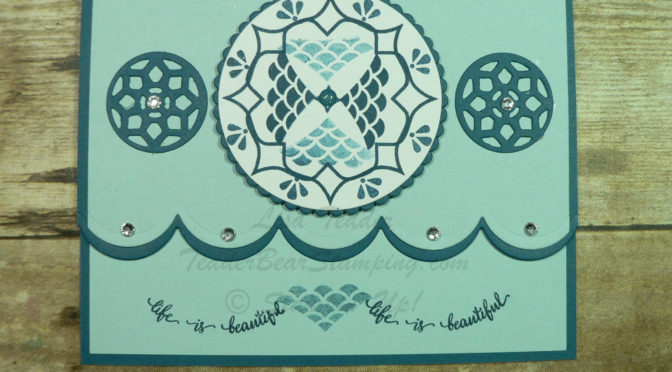
It’s a monochromatic card using ONE ink pad!  The ink I used is Dapper Denim! To get the two different colors I just stamped once on a scratch paper before I stamped on the cardstock.

The cardstock I used is Dapper Denim and Soft Sky.  The measurements are:

Dapper Denim:  5 1/2″ x 4  1/2″, scored at 1 1/4″ and another piece    5 1/2″ x 4 1/4″   (I had to cut it this way since the thinlit won’t fit through the Big Shot from side to side. The flap that I scored fits over the back of the 5 1/2″ x 4  1/4″ )

Soft Sky: 5 1/4″ X 4″ and 5 1/4″ X 3″

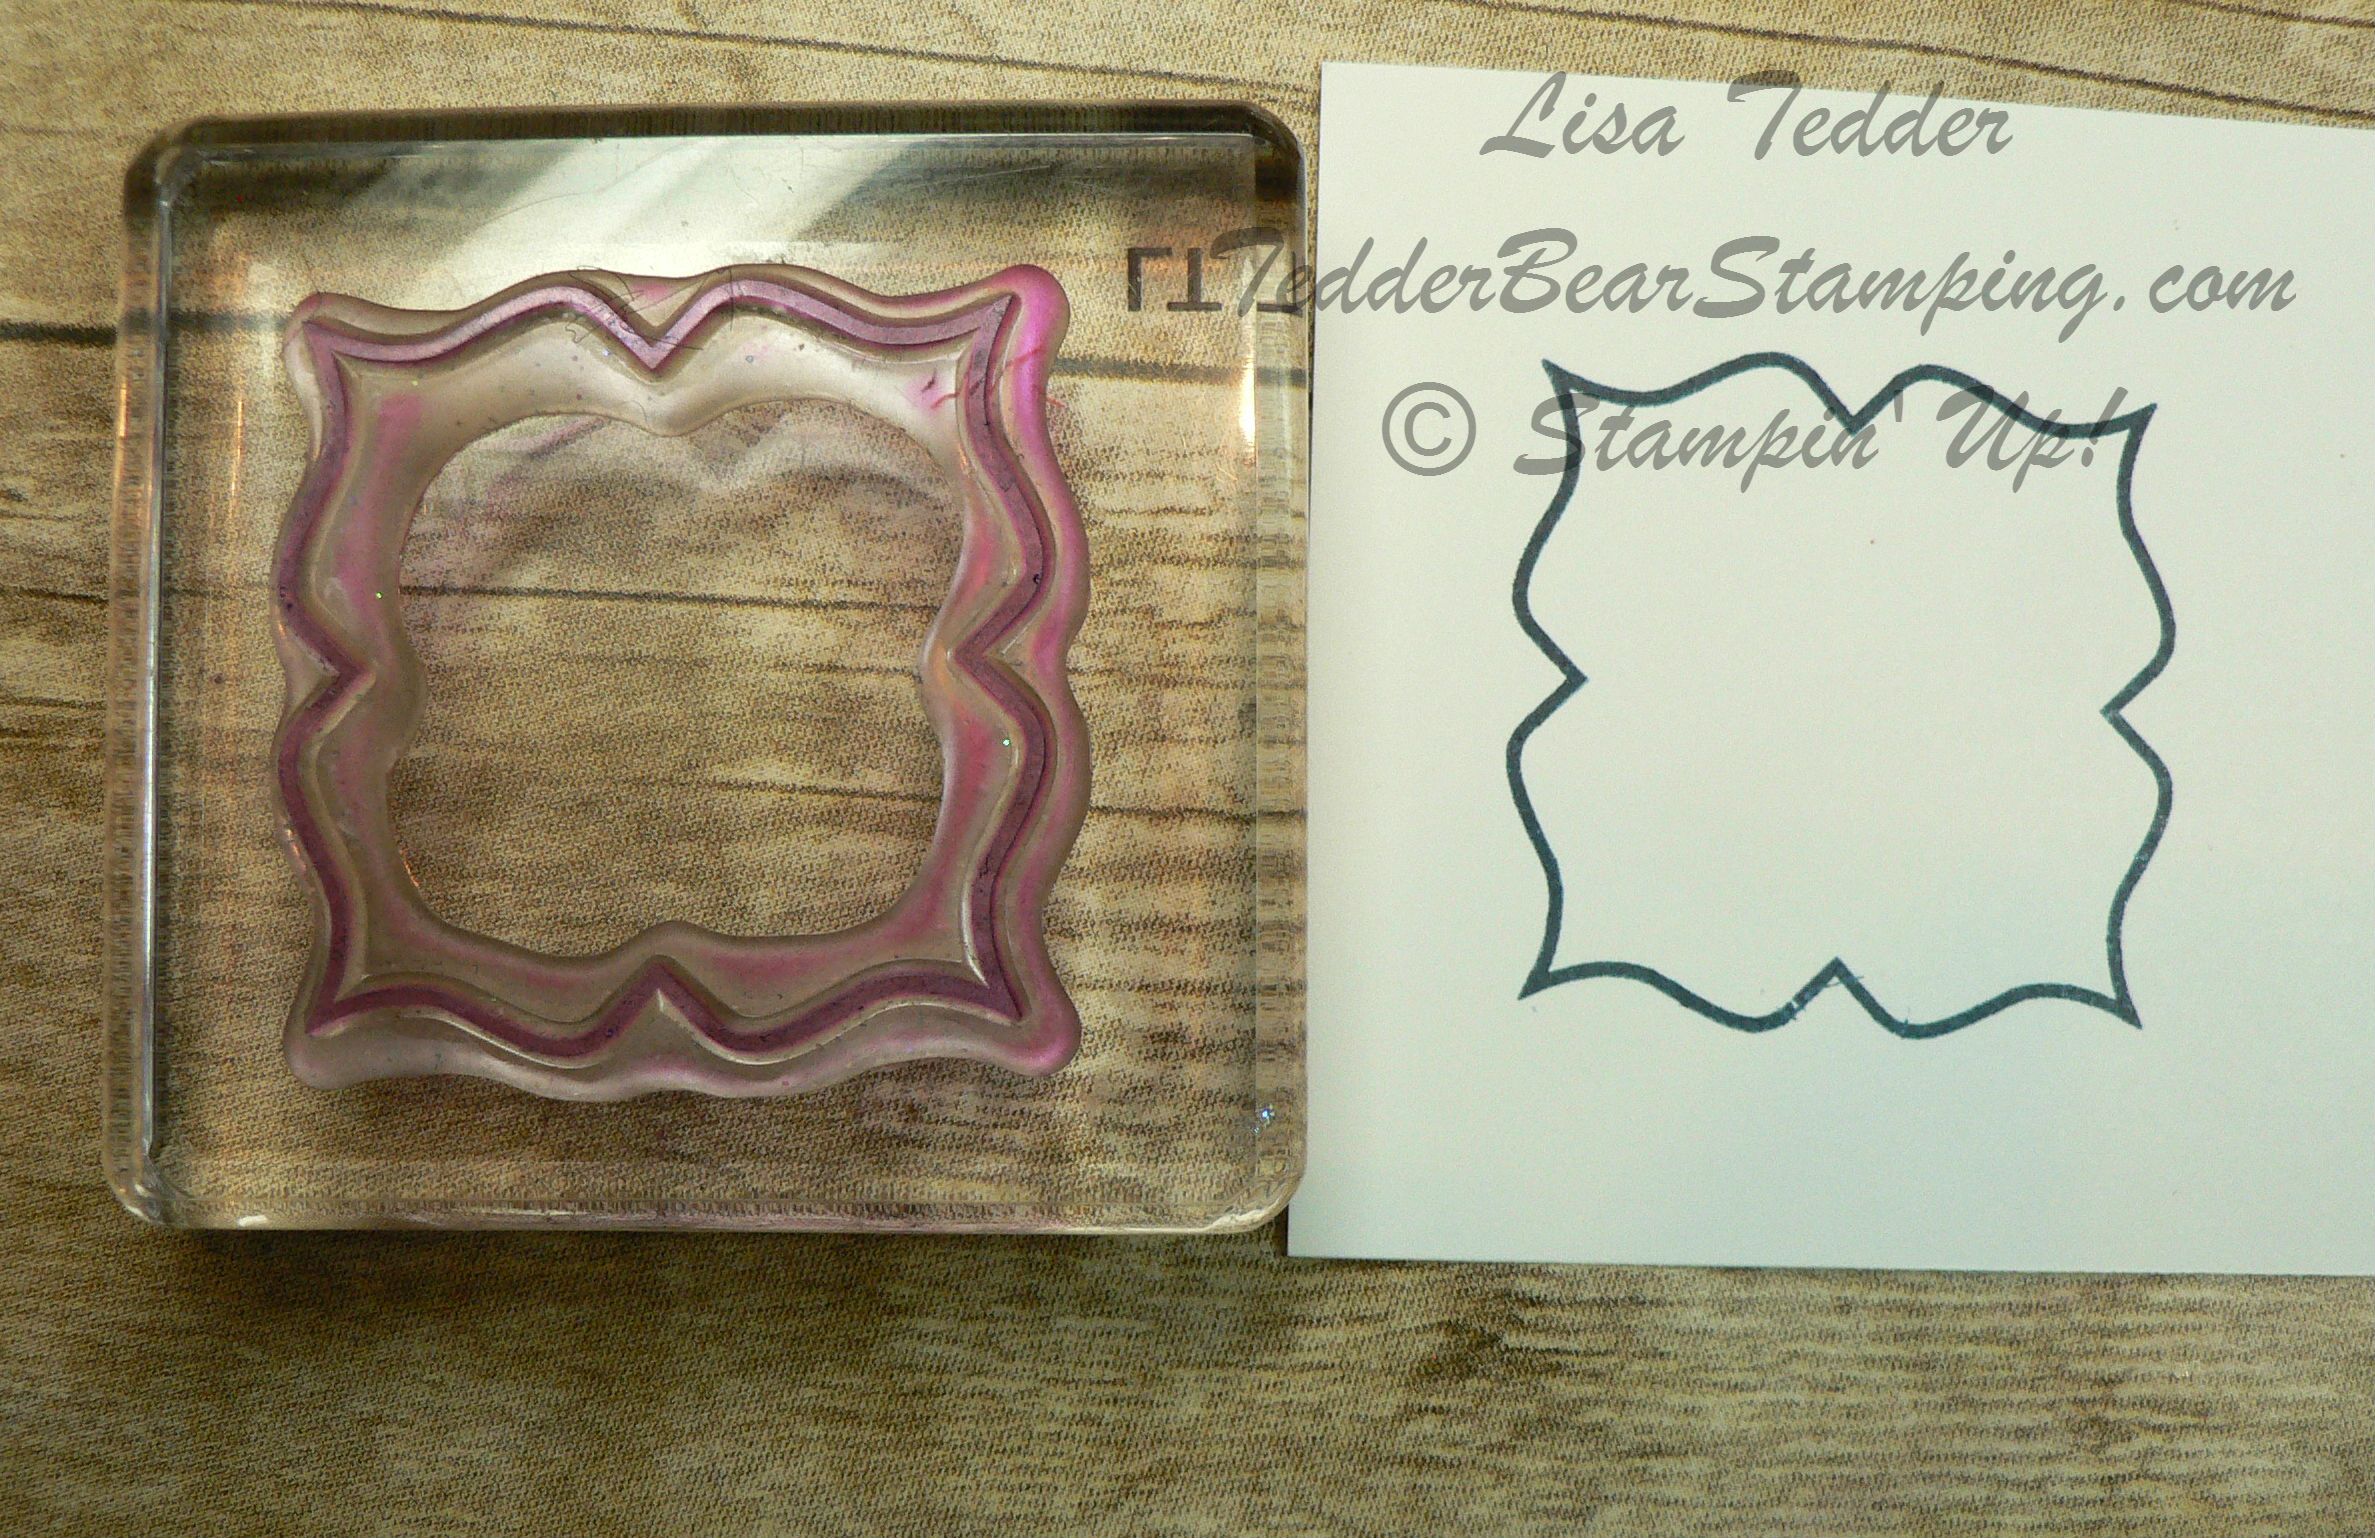
I then placed the curvy Thinlit from Seasonal Layers on the bottom of each piece (away from the flap on the one, and along the smaller Soft Sky)  centering it on each side so it is even.  NOT at at same time though!

Stamped this first:

Then turned stamp….

Then:

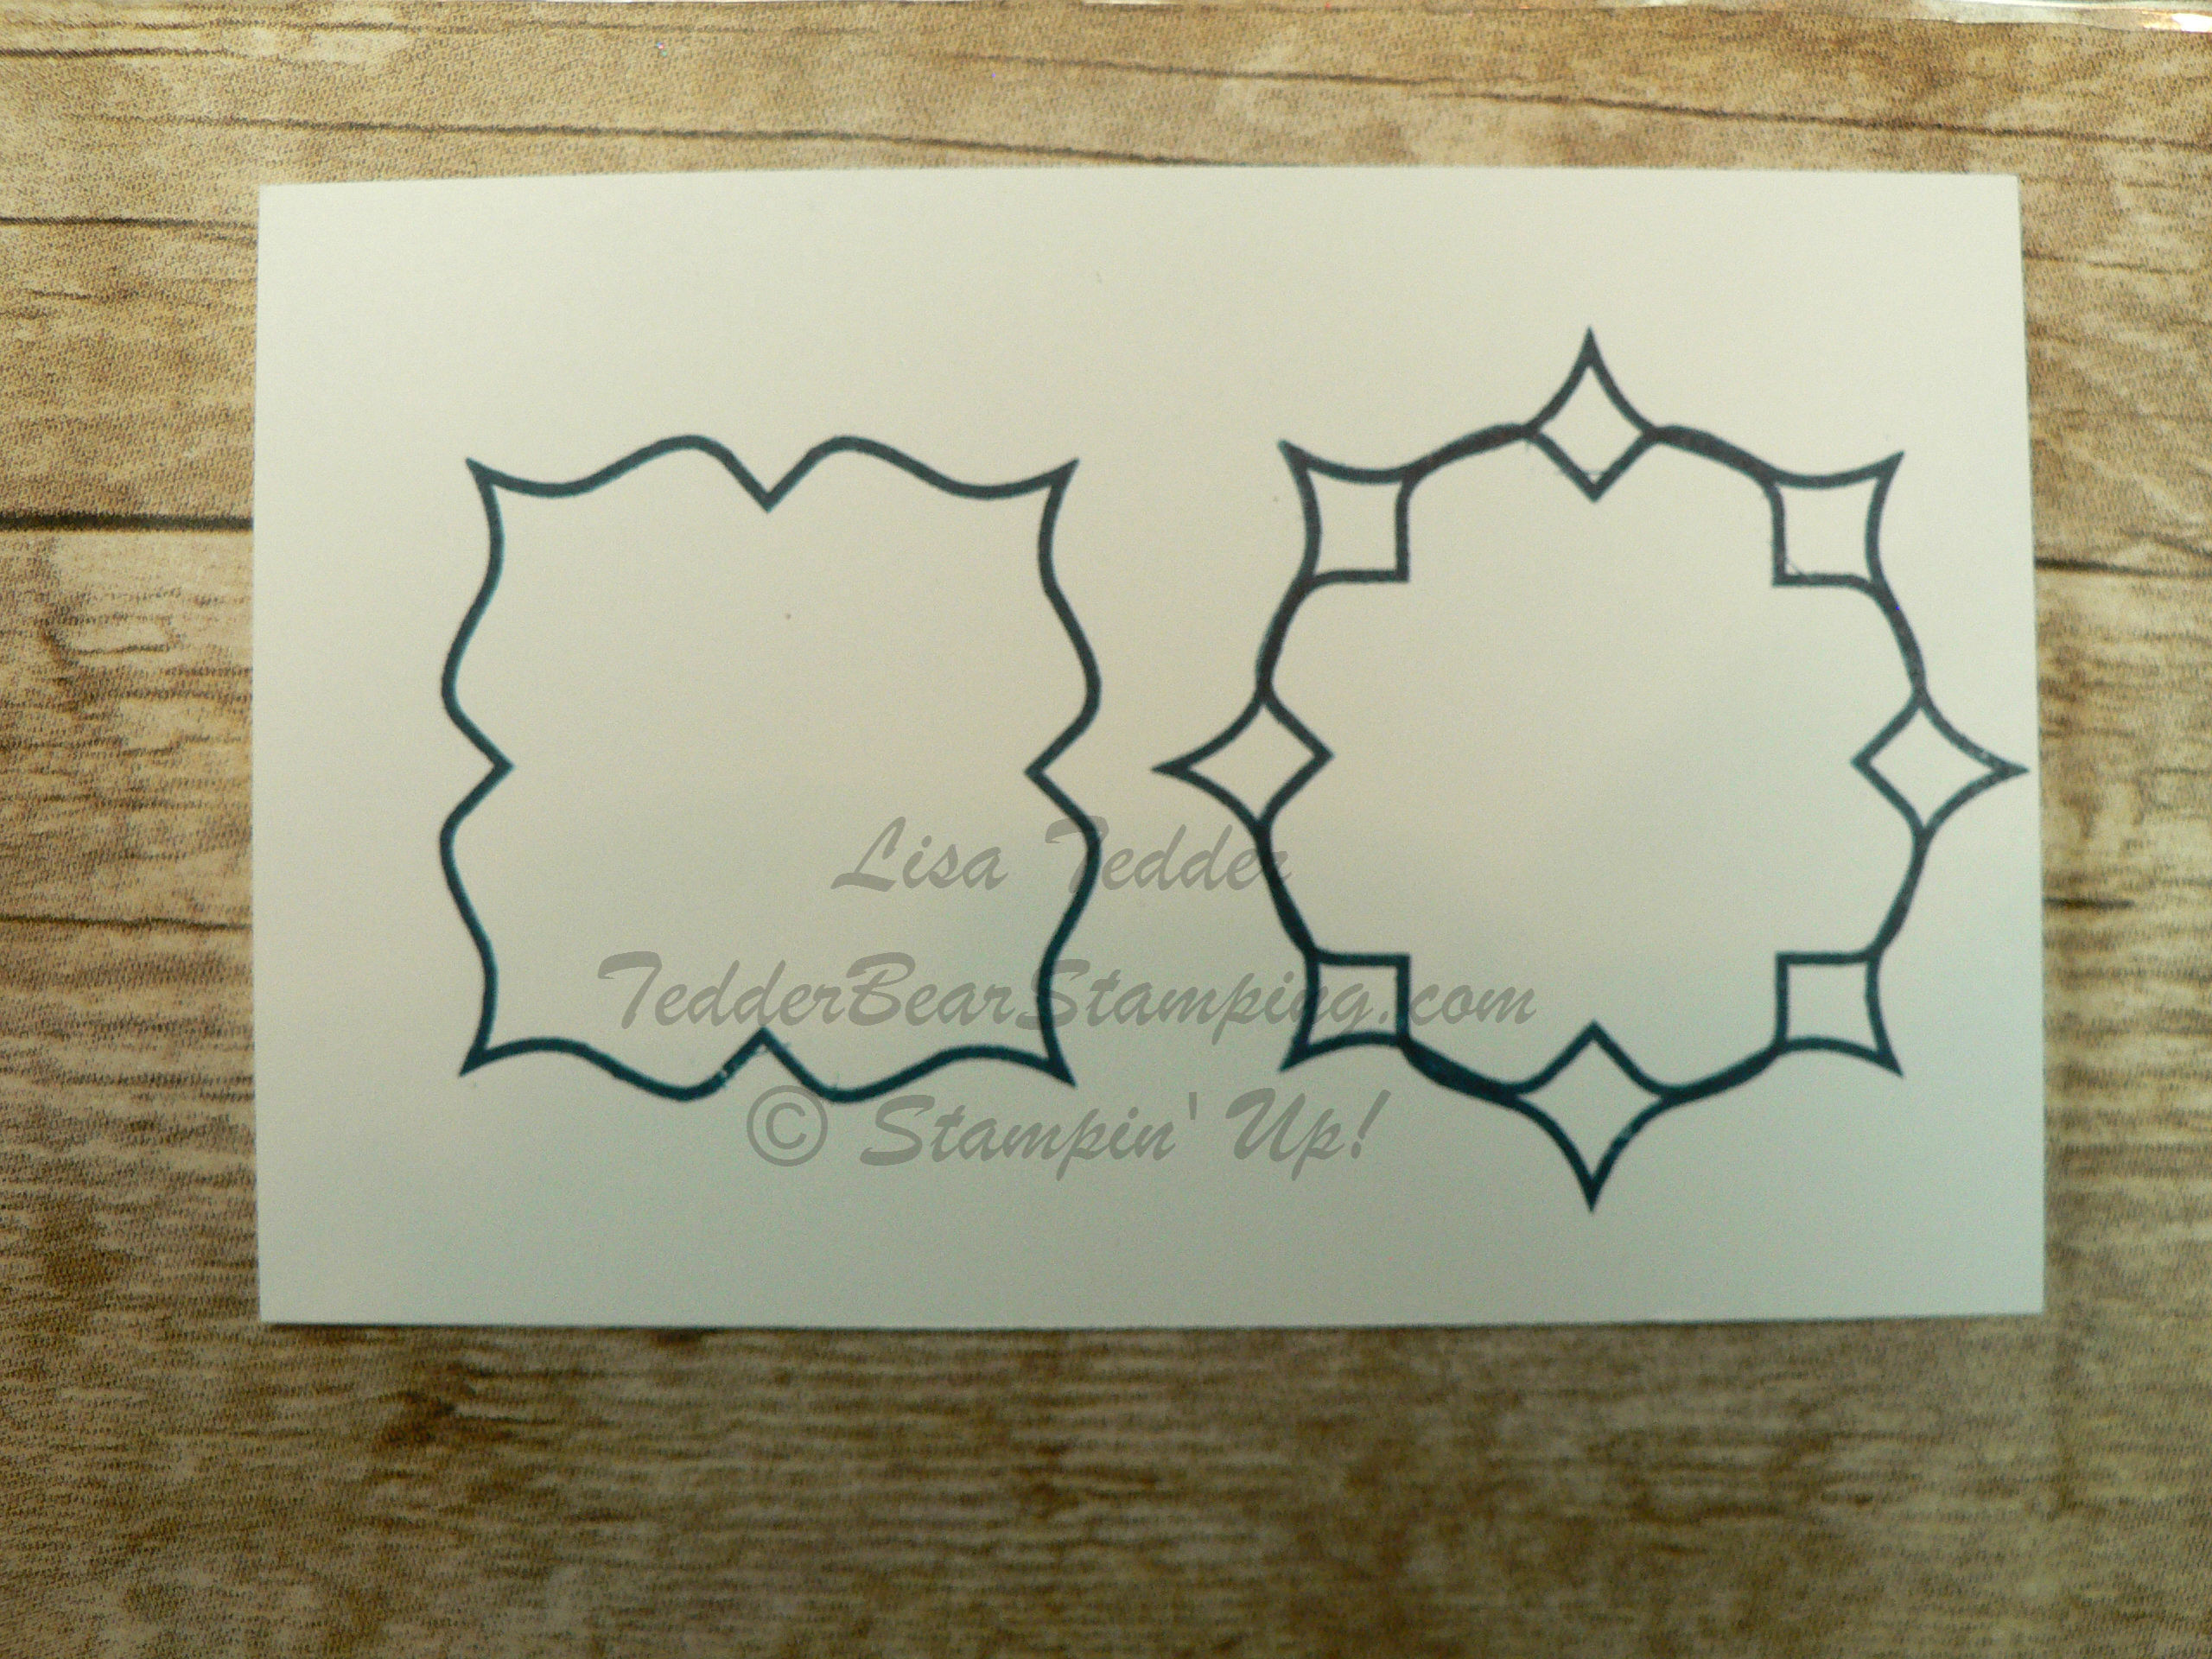
There are all kinds of ways to do this!  You can place the diamond shape further apart and get this:

Then go from there:

I put a different middle on this one!  Plus I stamped that pretty 3 point exclamation (not sure what to call it!) at each curve.

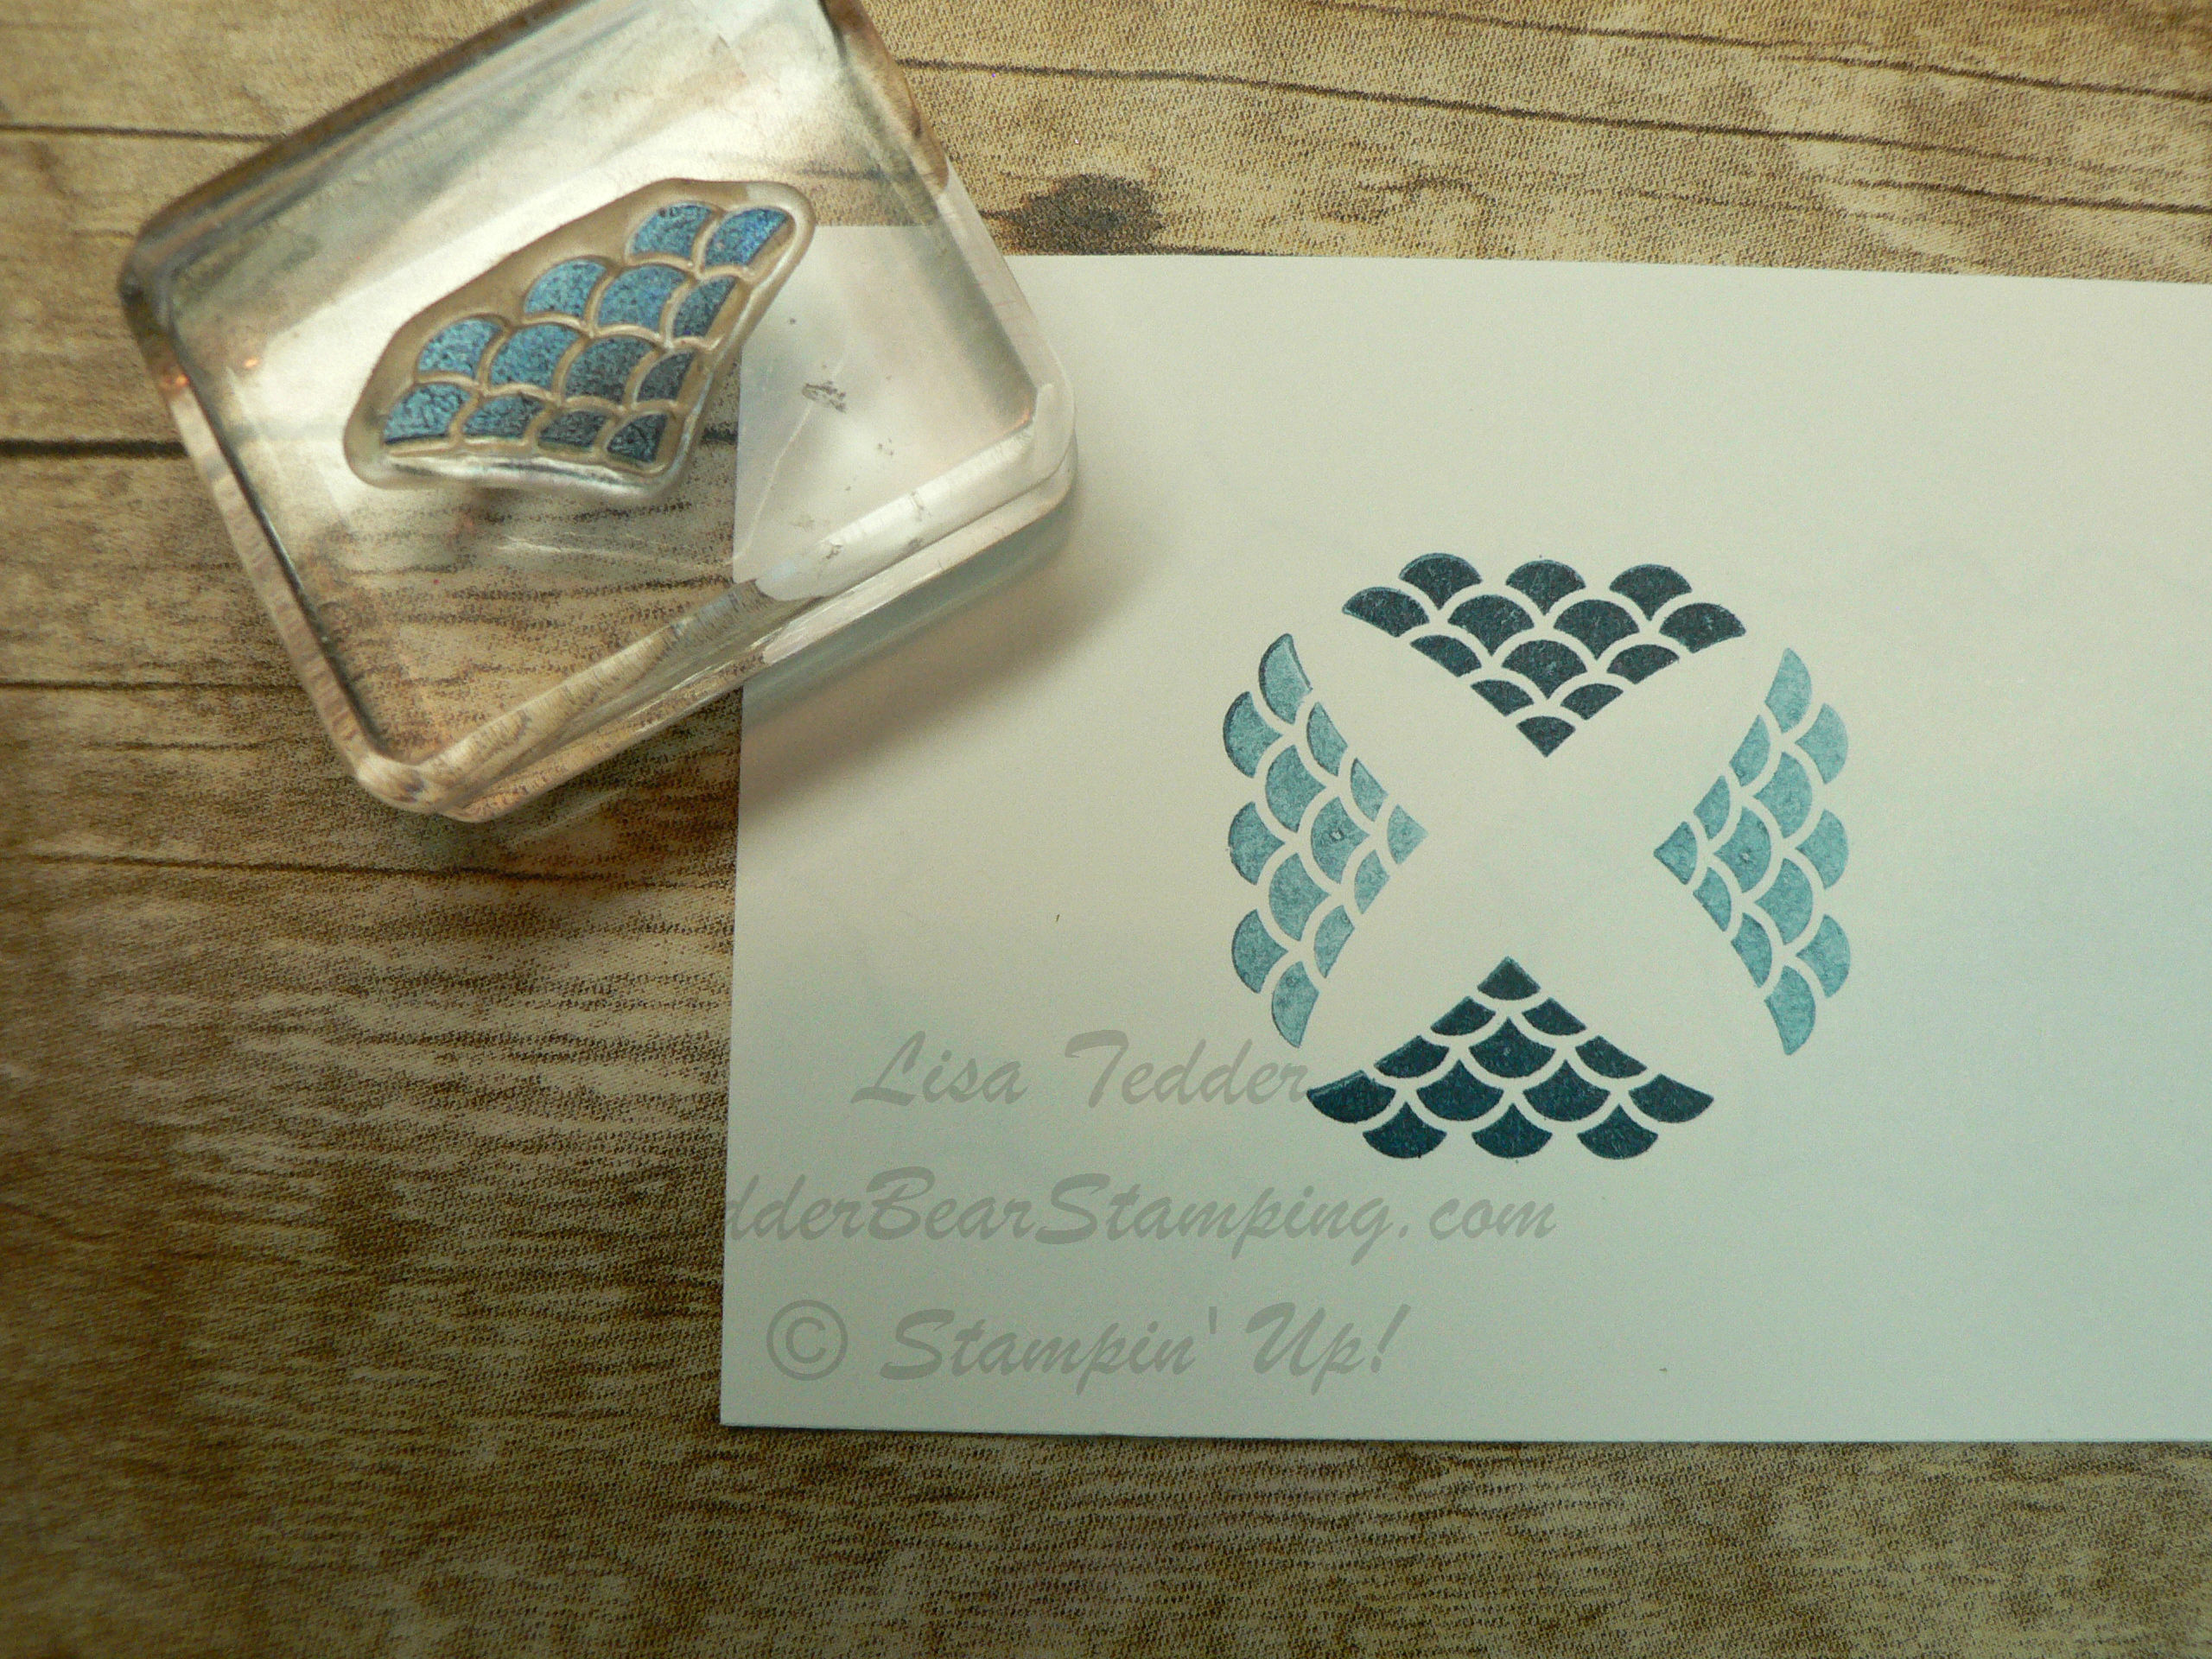
I stamped the Life is Beautiful stamp along the curve at the bottom twice and then once more stamped the ‘diamond’ shape but stamped off since I wanted it to be lighter than the words.

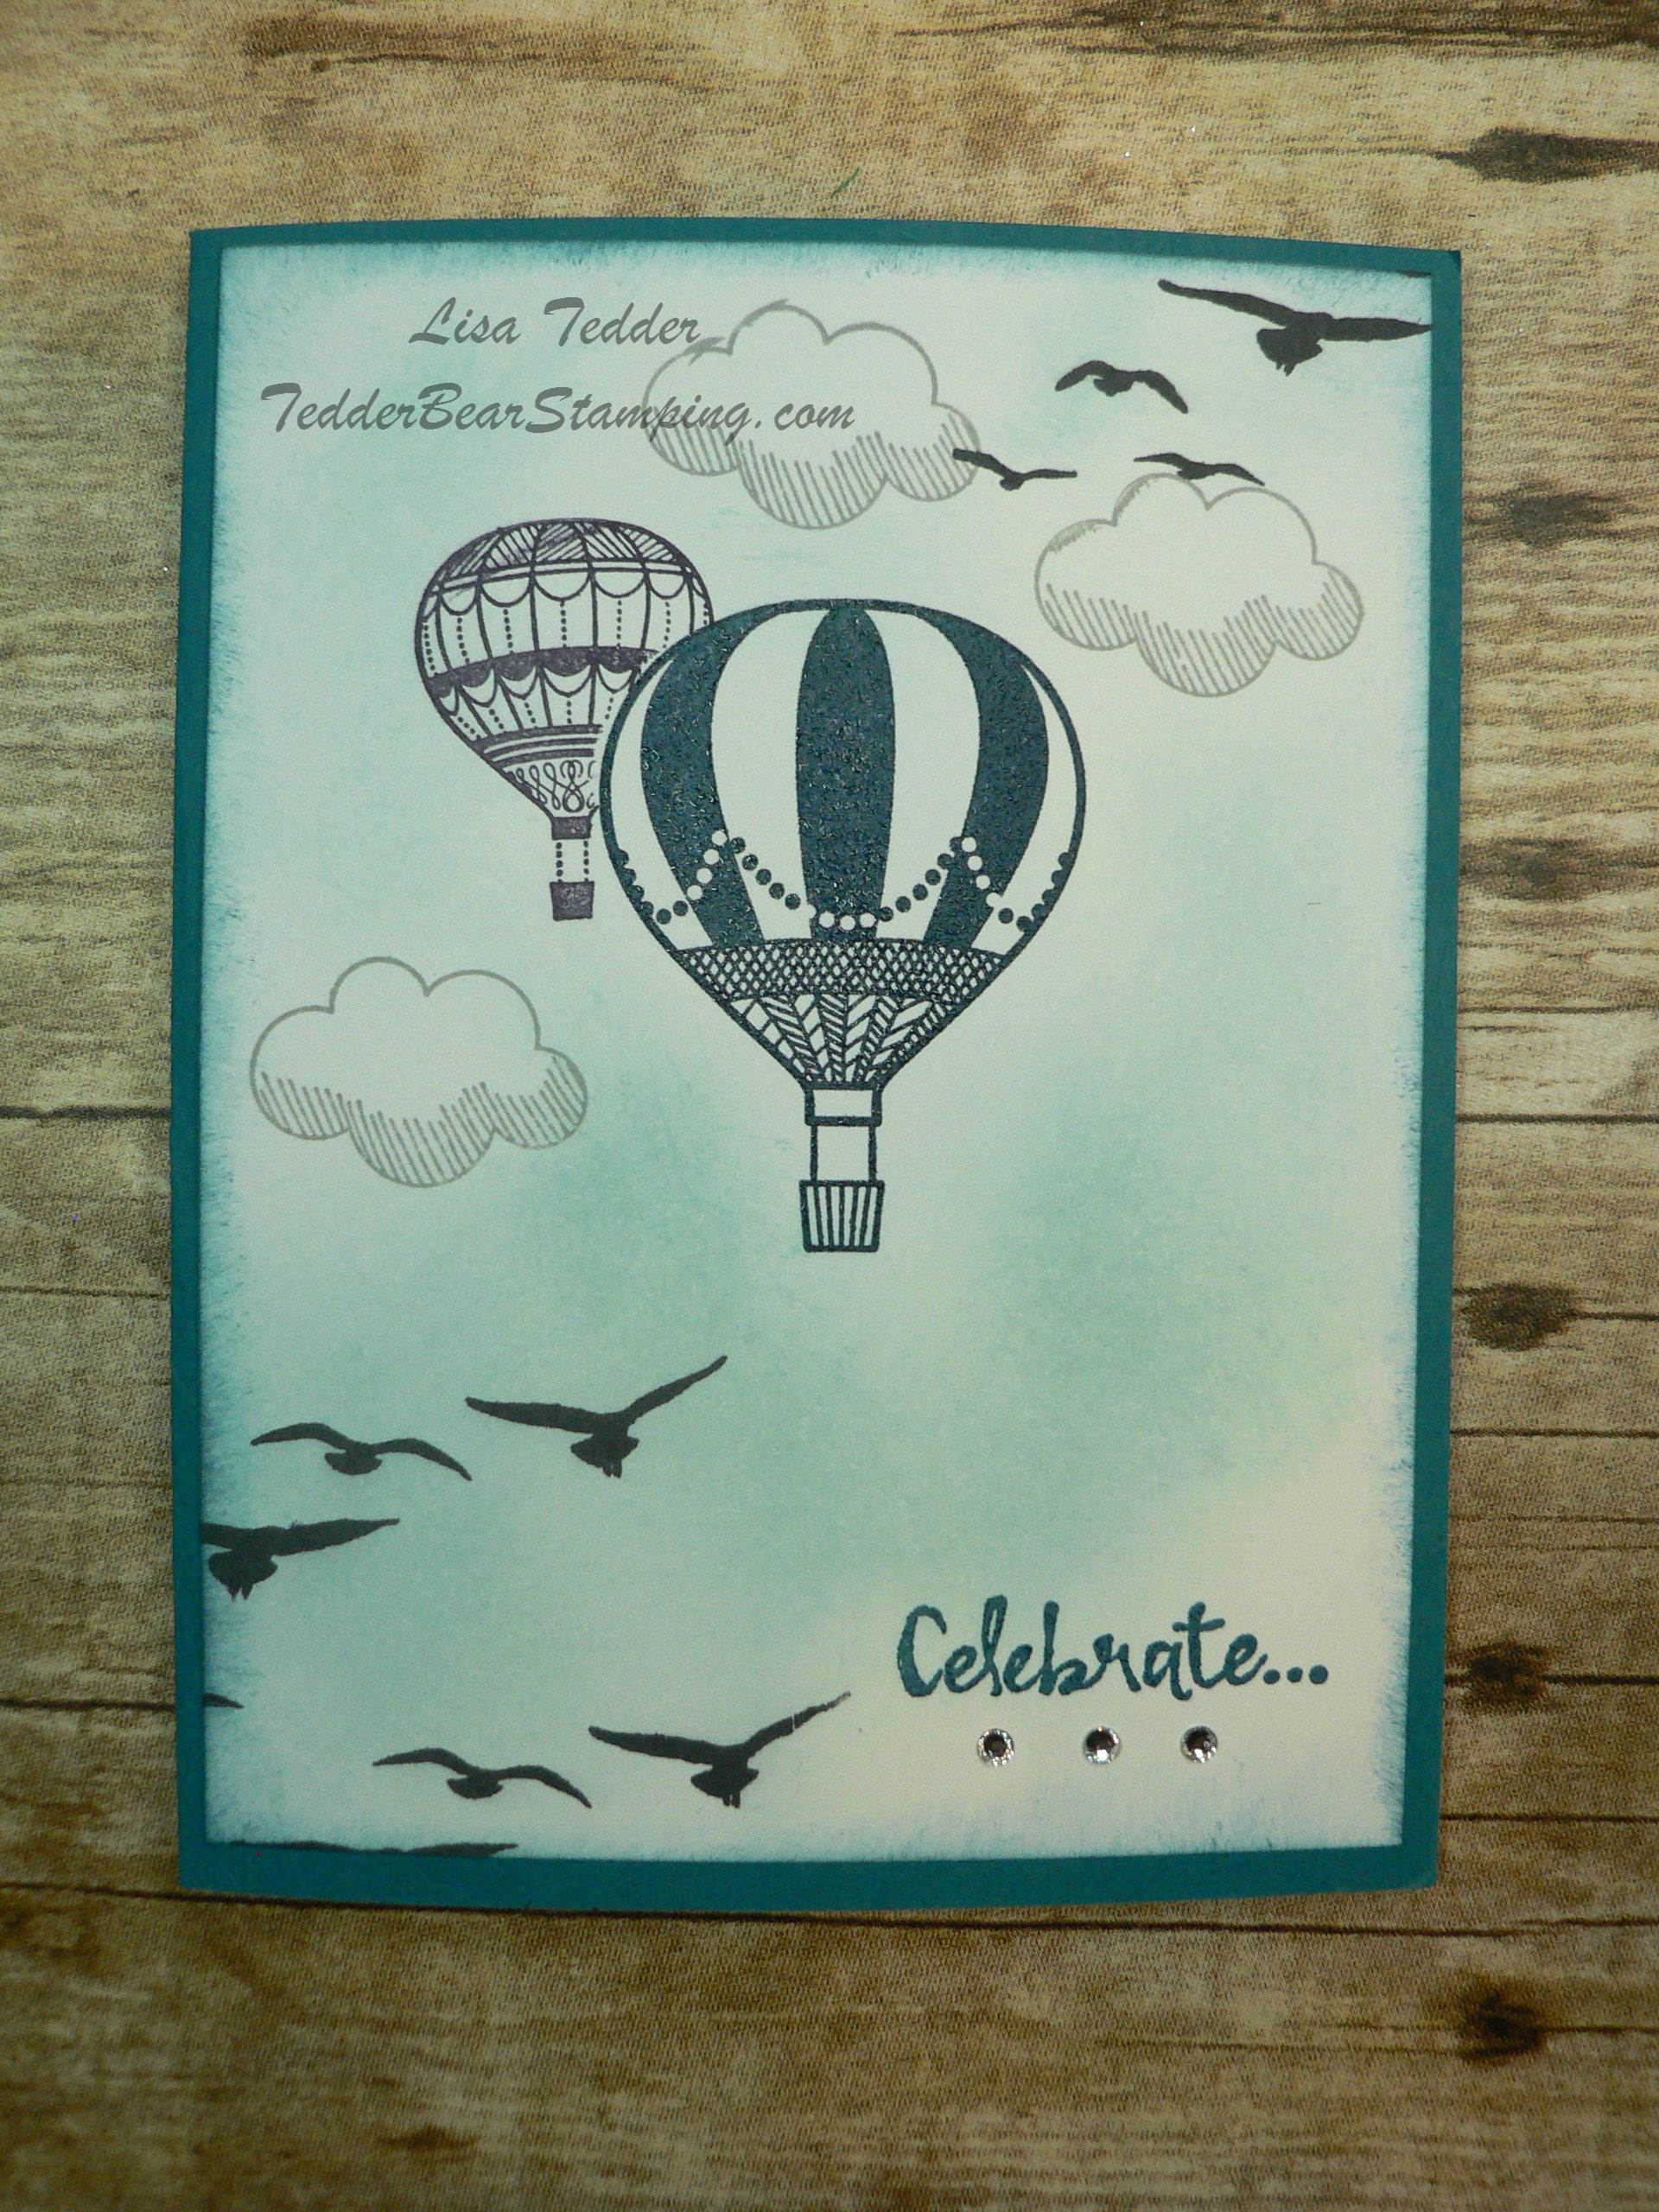
Here’s more images from this stamp set:

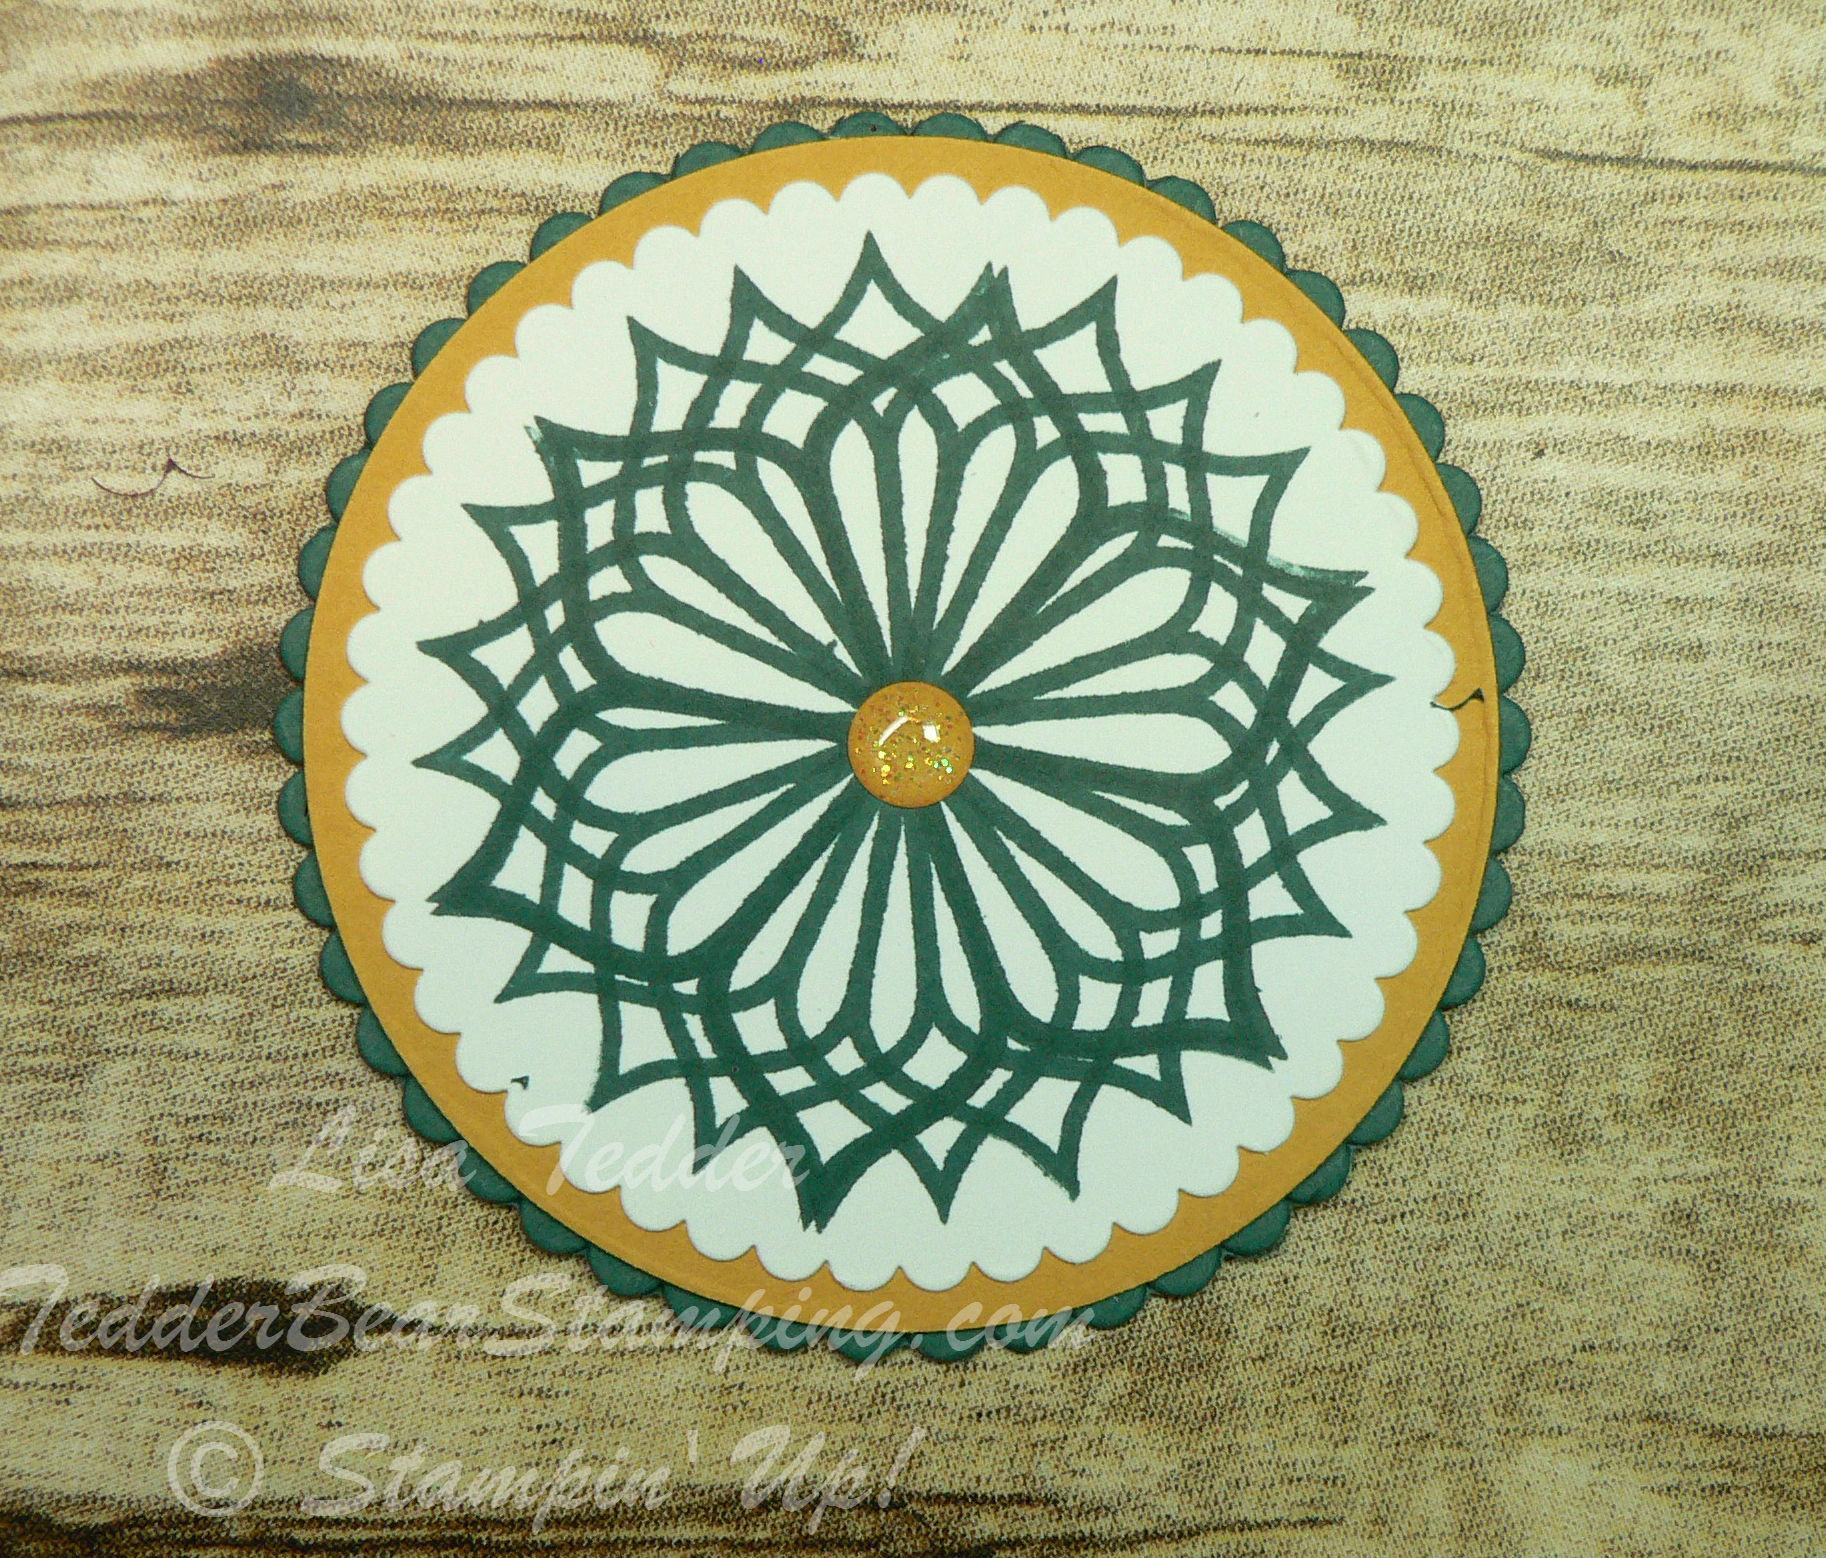
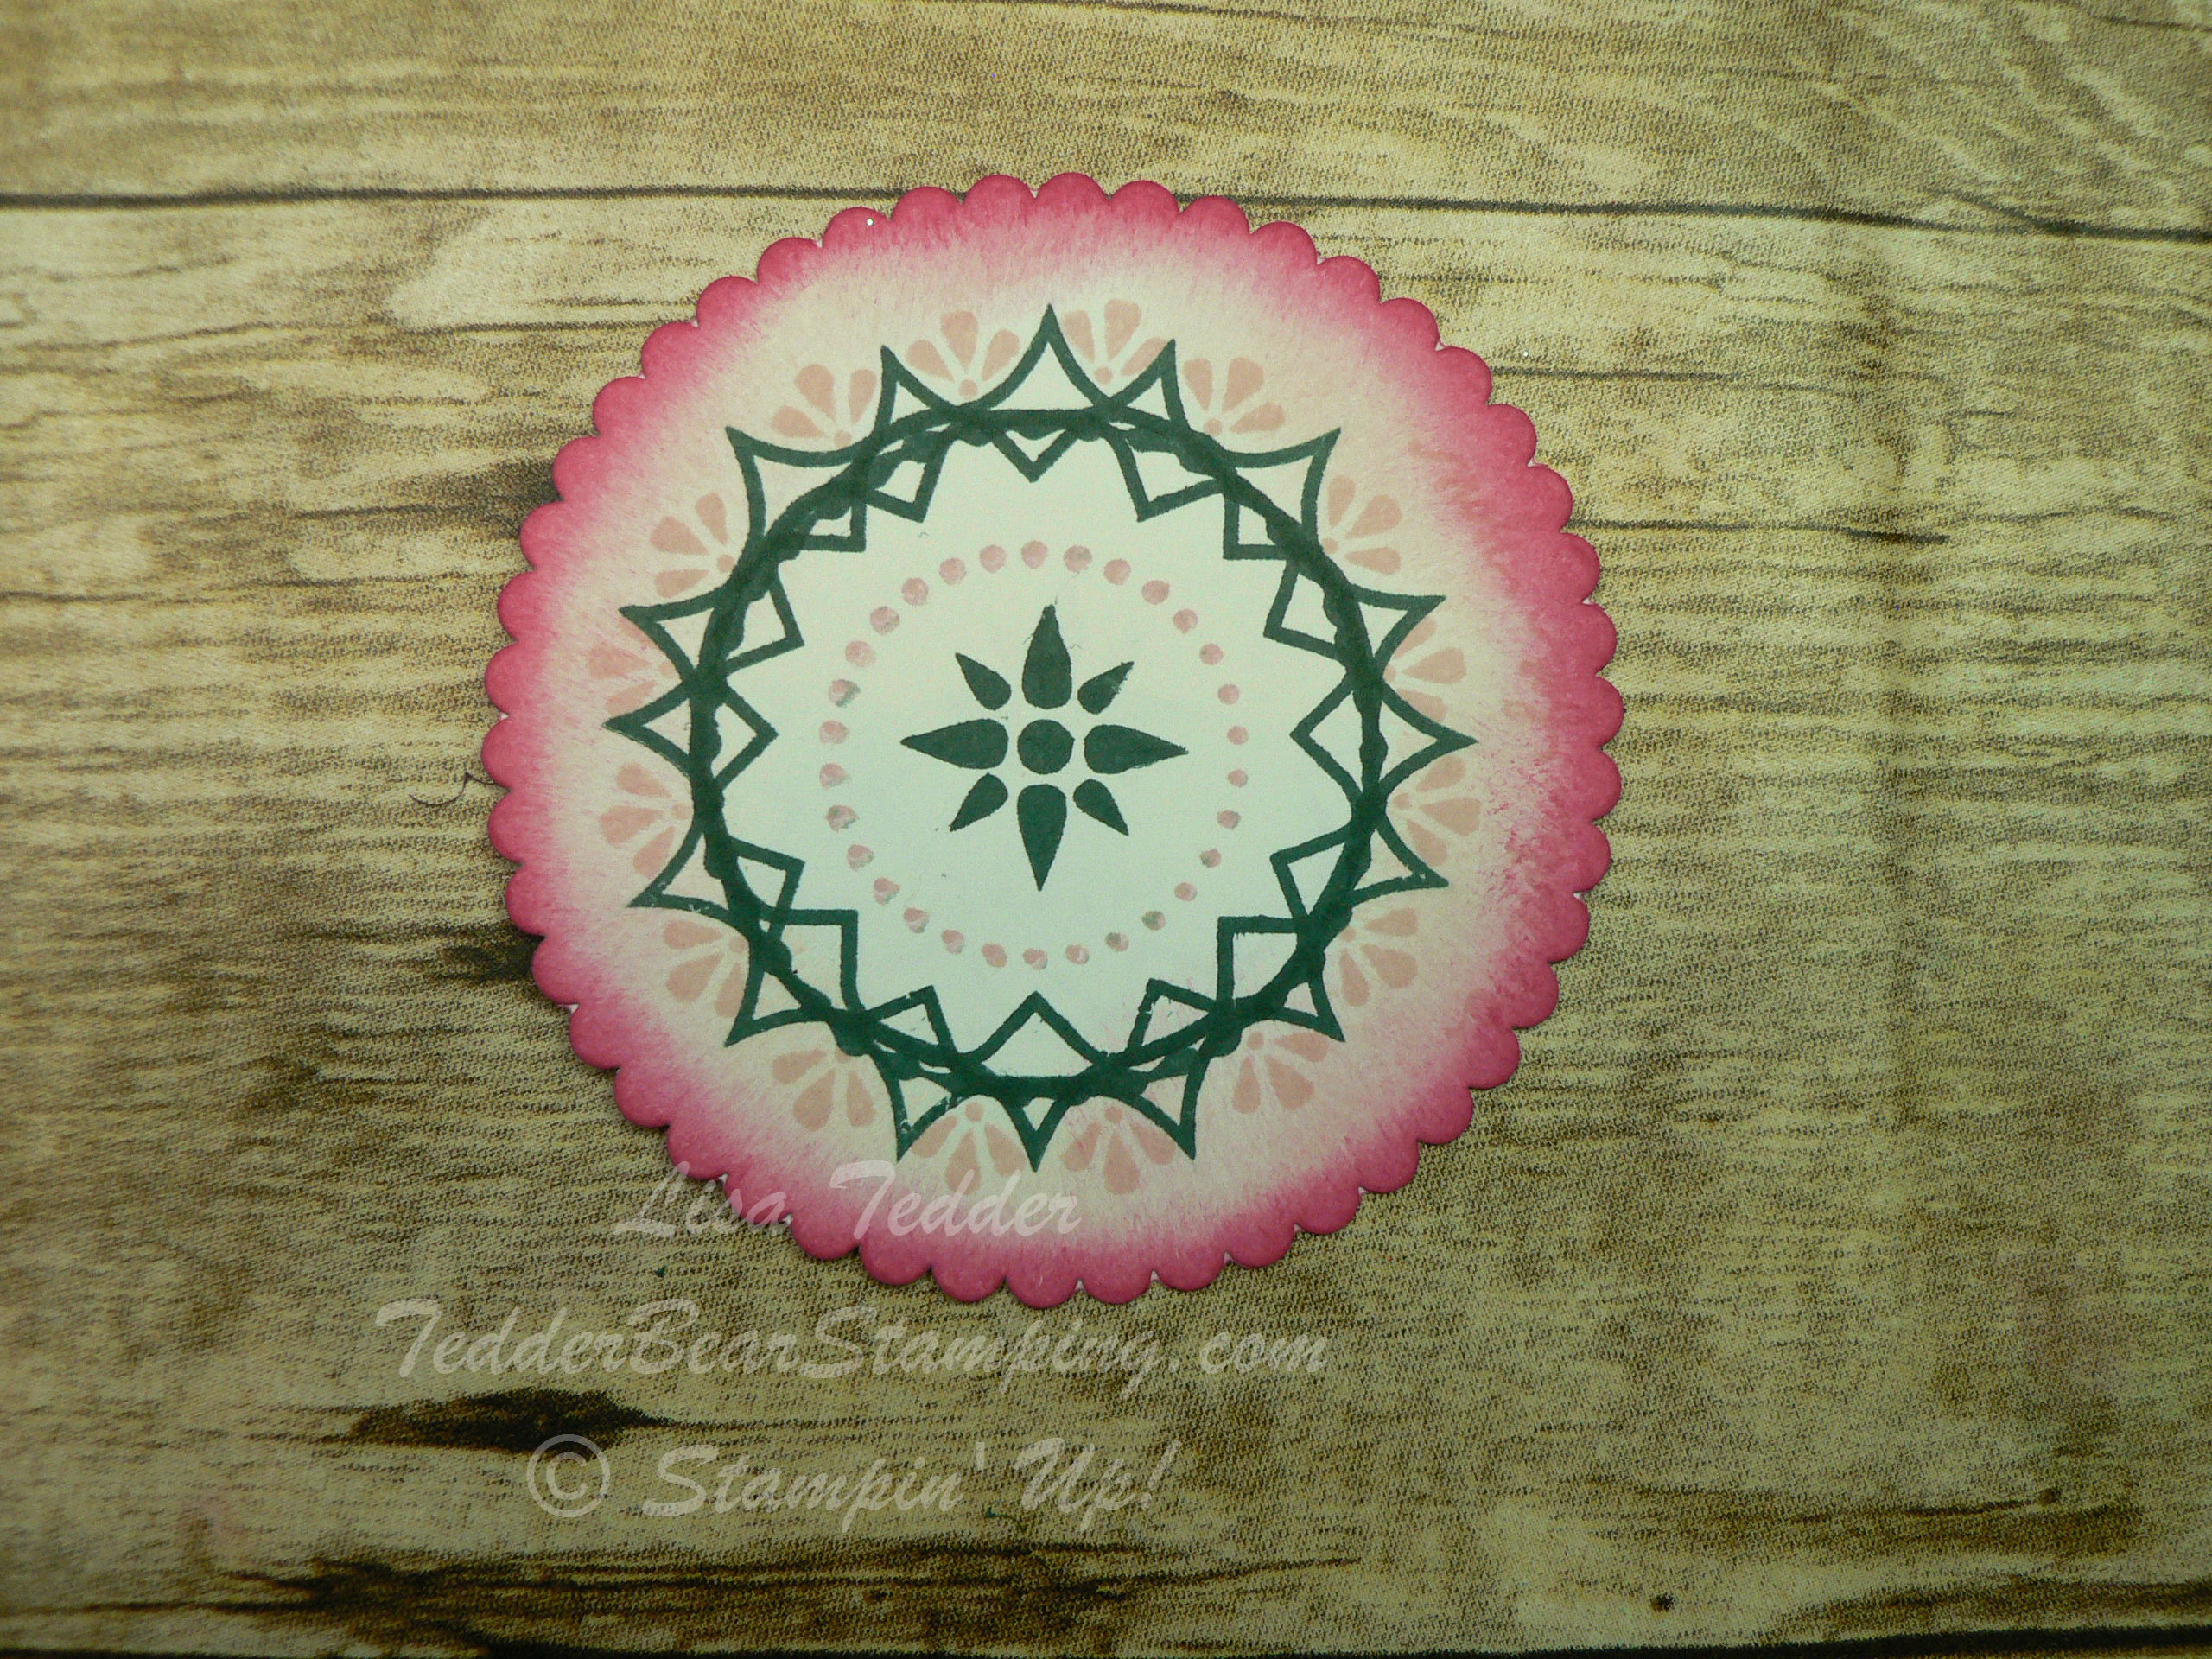
This one uses the stamp from the set that has the point in the middle, just line it up and stamp between each valley and it looks like a Spirograph from when I was a kid!

One more:

Hope you love this stamp as much as I do!  I’ve been having a lot of fun playing with it!  I would love to hear from you which image YOU like best!  Just place a comment here and you will also be eligible for my Blog Candy!  Which is this:

I LOVE Embossing folders, don’t you?!  Comment before May 15th and you might get this in YOUR mail box! You can also put a comment on my Facebook Page TedderBearStamping and I’ll put you in the drawing!

Visit me again, and to be sure you don’t miss anything, subscribe to my blog and you will be notified each time I post!

Lisa Tedder
TedderBearStamping
A California Girl living in North Carolina

Product List

Star Wars handmade Birthday card, PLUS Blog Candy!

How does time get away from me?  I know!  It’s because I get to stamping in my stamp room and time just flies!

As I went to bed last night, I was thinking of what had to be done……….THIS is why it’s so hard to shut my brain off when I go to bed!  I thought I still had plenty of time to come up with a Star Wars birthday card for my Grandson, Isaac.  NOPE!!  I am in North Carolina, he’s in California and his  birthday is in 3 days!  NOT sure it will get there in time, but I’ve been talking and thinking about this card for a MONTH!  🙂  Does that count?

Here is what I came up with (thanks to Pinterest and Carrie Rhodes!):

I am NOT a big Star Wars Fan, so thank goodness for Pinterest!  🙂  Now, don’t get me wrong, I like Star Wars, I’m just not a HUGE fan!  I hope he likes it!  My daughter wants me to make one of each Character, I already made Yoda, so anyone have any pictures of anyone who might have  made the other characters?  I have ONE year to plan!  hahaha  Hope I make it on time!

Here is some of the pieces used to make it, some are retired, but all are from Stampin’ Up!,  (see below for all product) glad I held on to them!


Of course I trimmed all the circles away, BUT you might want to learn from me……..wait until the glue is DRY before doing that!  I had to start over!  Thankfully the mail hadn’t come by the time I finished!

Hope you enjoyed this post, and that you will come to my rescue and send me other Star War cards that I can copy!

If you live in the United States and don’t have a demonstrator I would LOVE to be yours!  Anyone who buys from me will get a handmade card in the mail thanking them for their purchase…..you never know it just might be one you see on my blog!  Also subscribe to my Newsletter and get some great stamping ideas!

Now, onto the Blog Candy!!  I am GIVING AWAY an Embossing Folder!  What do you have to do to be in the drawing to get it?  You just have to leave me a comment here on my blog, any post until May 15th.  I will put everyone in the drawing who comments here and on my Facebook page TedderBearStamping, That’s it!  No buying anything, just commenting!  You can comment as many times as you want on different posts and it will count!

Here is what you can be in the drawing for!:

Hope you enjoyed my post today!  Make sure and Subscribe to get notices when I post again!

Lisa Tedder
TedderBearStamping
A Girl from California living in North Carolina

Product List

Experimenting and getting more from my SU! embossing folders!

Do you ever see things and wonder how it would look if you used it OUTSIDE of it’s usual purpose?  I do it all the time!  I LOVE to experiment with my SU! products!  Anything that will make my tools/stamps be used more is sooooo worth trying!   And if you do try something and it works, then you are so excited to share it!  That’s what I am doing today!

I have Mod Podge in my cupboard and I never use it!  I don’t even remember WHY I bought it!  I’m sure I used it for the purpose I bought it for, but I have totally forgotten why!  So, what to do?!  I know!  Try an experiment and see if I can come up with something new so I use it!!

I decided to put it on my Brick Wall Embossing Folder by SU!  Believe me, I was very nervous, but figured that it will wash off, and I might like what I make!  I LOOOOOOVE how it came out!  You’ll have to tell me what you think!

First let me show you a picture of this handmade card that could be used for a masculine card or it could be for your Western loving girl!:

Can you see all the texture?!  It is so shiny and it makes me just want to pick it up and move it in the light to catch the beauty!  You can watch my video on YouTube to see what I am talking about!  It’s called “Experimenting and getting more from my SU! embossing folders!”  I thought I would keep the name the same as the blog name to avoid confusing MYSELF!  It doesn’t take much ya know?

Get a piece of Very Vanilla 5″ x 3 3/4″, and sponge it with Sahara Sand, Crumb Cake, Soft Suede and Cajun Craze.  Just sponge spots around the cardstock and go from lightest to darkest!  Then you can go over all the spots with your Cajun Craze to lighten it up a bit.

I poured a little of Mod Podge onto the Embossing Folder and spread it out using a piece of chipboard I had.  Don’t use a lot, you don’t want it to squeeze out onto the Cutting plates, or not too much anyway!  Place your sponged Very Vanilla face down onto the Mod Podge.   Once you have run it through the Big Shot, you will immediately place your plates and folder into water until you can get to it to wash off.  It came off very easy!  I then heat set the embossed/Mod Podged piece, since I am not a patient person and didn’t want to wait!  Once dry, you can sponge over again with the Cajun Craze just to make sure that it is covered.  Set aside.

Now onto the loverly (NOT a typo, I’m just goofy) Boots from the Country Livin’ stamp set!  Stamp the boots onto Watercolor paper using Early Espresso, then add clear Embossing Powder which will make it to where the color won’t smudge and add texture!!  If you ever come to one of my classes you will see right away I love texture! Once you have it heat set, then take your Aqua Painter and go over the entire piece of Watercolor Paper, so it won’t hold too much color and you have more control.  Keep layering your Crumb Cake ink (which is what you start with) until it’s dark enough, then come in with Soft Suede where the artist has the ‘folds’ designed in.  Color the tabs at the top and the part that buckles with a Marina Mist marker, and the bottom of the boots with black.  Once done, color the background with Soft Sky and underneath the boots with Soft Suede……..this is where you will love that you made the cardstock a little wet, it just comes out looking so soft!

Using your Big Shot, place largest oval from the Stitched Framelits over your scene and cut out.  Sponge edges liberally with Marina Mist and then SOFTLY with the Early Espresso.  You will want to watch the technique video to see how to make this card from the beginning!

I looped 5 strands of Linen Thread and knotted it twice, one on each side that the oval scene will be over.  Then place this piece onto a
5 1/4″ x 4″ piece of Marina Mist, and then place that onto a piece of Soft Suede!  The colors go so well together!!

I hope you enjoyed this post, and hope you go check out my Technique video with a SU! Embossing Folder!  Let me know what you think?  Do you want MORE techniques?

Lisa Tedder
TedderBearStamping.com
A California Girl living in North Carolina
Product List


I will miss this!

Today I made a greeting card from a Retiring stamp set from Stampin’ Up! called Love & Affection.  I forgot how much I love this set!  I’ll be sorry to see it go!

I used some of the Designer Series Paper called Affectionately Yours that I have HOARDED!  Yes, I can admit it, I hoard paper!  Sigh……

This isn’t just any Designer paper, oh no!  It has Copper embossed in it!  Yes!  It’s true!  Now do you see why I hoarded it?  This card today is made up by me……I don’t do this very often.  I have been wanting to use the Framelit from the Fiesta Time stamp set!  And that’s how my card started!  Ha!  Funny how that worked!  I cut out two of the strips that are the half circles that are attached together to make a banner, I cut out one from Watermelon Wonder (retiring) and Mint Macaron (also retiring).  This is where I started, I thought these colors looked good with Night of Navy, so that is what the center cardstock will be, since those will be resting on that cardstock.

Pretty together, right?  The colors I used are listed below with a link to my Online Store.  The Hostess Code for this month is:  69EGW4G2   If you purchase from me, I will send you a VERY pretty handmade card!

Here are the measurements of my card if you want to try it!

Tip Top Taupe  5 1/2″ X 7 1/2″ scored at 4 1/4″  landscape
Night of Navy (inside) 4″ x 5 1/4″,  (front) 3″ x 5 1/4″
Affectionately Yours Specialty Designer Series Paper (DSP) 2 – 3/4″X 5″
Whisper White Inside:  3″ x 5 1/8″, scraps for sentiment

Here is the card in all it’s Beauty!

I used the Petite Petals punch (retiring) to make a focal flower on the front in Copper Foil.  And cut out the sentiment using the Decorative Label punch (also retiring), I cut out another two of the Decorative Label from the Copper Foil to give a border around the sentiment.  You cut each piece in half and then layer them on the back!

I sponged VersaMark on the edges of the Fiesta Time Framelits to give a little Copper edging to it!  Also along the edge of the Night of Navy I stamped in VersaMark the flowers from the Stamp set and embossed with Copper!  Added some pearls to each half circle on top, and to the small flowers on the inside flap.

Here is a picture of the inside!

I love how elegant this card is!!  So, STOP hoarding your DSP and use it!  Before you know it you’ll be getting new DSP and will forget all about the ones you’ve been hanging onto for a special day!  The day is NOW!

The side of the inside is peeking out on the front,

I am proud of myself!  It’s a little scary to just go with an idea and not know how it will turn out!  Sometimes it doesn’t, but that’s where you learn!  Remember, it’s just paper!  I tell myself that when I am really scared!  heehee  Are you scared when you try something without any idea on where it is headed?   You might just surprise yourself (like I did!) when you give it a try!

I hope you enjoyed your visit here today!  I would love to hear from you, I will be having another Blog Candy drawing soon, I have to figure out what to give away!  What would you rather…….stamp sets, ribbon, accessories, paper?  I want to give out what YOU want!!  Let me know!

Lisa Tedder
TedderBearStamping
A California Girl living in North Carolina!

Product List

Stampin’ Up! Retiring list is out!!

To see the list, just click on image above!  Please use Hostess Code: 69EGW4G2   and you will get a thank you card from me in the mail!  REMEMBER these items are AS SUPPLIES LAST!  So, don’t put it off!!

This is the time of year I both hate and love!  I hate it because some of my favorite sets are leaving!  Waaaaaaaah

Love it because we get brand new YUMMY sets!!  🙂  I absolutely LOOOOOOVE new sets!!  AND new embellisments!  Yippy!!

I will be posting some of the retiring products here to give you ideas! So be sure and subscribe so you don’t miss them!

Thank you for stopping by!

Lisa Tedder
TedderBearStamping
A California Girl living in North Carolina


Stair Step Card with Blog Candy!

Today I am showing you a really fun and surprisingly simple card!  I’m calling it a Stair Step Card, if you know of the ‘correct’ name,  would love to hear what it is!

I’m using the stamp sets from Stampin’ Up! called Lift Me Up and Beautiful You for the sentiment!  I have a video showing how to do this card, and you can see it HERE!  Please subscribe to my video’s I am having a ton of fun and like to show things that are a Step Up from ‘regular’ cards!

Paper Art is one of my favorite things to do!  Subscribe to my Newsletter that will come each month!

The measurements for the
Whisper White is:  5 1/4″ X 4″ (front), 5″ X 8″ (inside) Score at 2″, 4″ and 6″, or fold back as shown on video.
Island Indigo is: 5 1/2″ X 4 1/4″

Here is a picture of my card:


This is what the front looks like.  Pretty right?  Just vision yourself getting this card, it’s such a pretty card, and you go to open it AND…….


Wow!  It is Really fun and interactive inside!  The Balloons look like they are flying!  This card is super easy to make!  It doesn’t look like it does it?!   It took me all of 15 minutes to make!  That’s with cutting the cardstock too!  If you watch my Video, you can see how much fun it is!  You’ll want to get out any and all stamp sets that you can use this technique with!

Here is another view, close up!

And one more!!
This shows the side view.  Pretty cool right?  What will you be making using this technique!?  I would love it if you could add your links in my comments!  Or just send me a picture!  My email is:
TedderBearStamping@gmail.com

NOW, on to my Blog Candy!!  If you leave me a comment you will get your name put onto a list where I will do a random computer generator to pick who gets it!  I will be doing the drawing April 4th! You can comment as many times as you want!  AND, if you visit my FaceBook Page and make a comment there I will put your name on the list again!

This is a Wood set from quite a while ago, so if you are new to stamping and Stampin’ Up! you will want this set!  It’s so stinkin’ cute!!  Those little bugs can be colored for Easter, a new baby or pretty much any occasion you will want to tell someone you love and care for them!  AND it’s FREE!!  Can’t beat that!

Click on any product below my signature and you will be sent to my online store!
If you purchase from me, I will send you a handmade card or two!

Thank you for stopping by!!  Again, you can watch the video on how to make this card by clicking HERE!   The video isn’t long, I sped it up, but it’s so easy, you can easily pause it to keep up!

Product list below!

Lisa Tedder
A California girl living in North Carolina!

Product List

Making a Sunset

I LOVE sunsets, don’t you? I wanted to make one that was easy but still be stunning…….at least I think so, hopefully you do too!!

I have a video on YouTube walking you through this technique, I hope you check it out here. You can also shop for the products you see in this post and on my videos at my Online Store!

Making a Desert scene was my final one, I had to make FOUR cards with Sunsets! Just couldn’t help myself!

The first one is one I posted on my FaceBook page Let’s Stamp!

It features a lighthouse and this is where my Sunset journey started! I saw a video by Tina Zinck on making sunsets, so off I went!

This was so fun and easy (Thanks Tina!!) That I didn’t stop there! But first let me tell you what I used to make this card!

Stamps: High Tide #143006
Inks: Cherry Cobbler #126966, Watermelon Wonder #138323, Night of Navy #126970, Perfect Plum #126963, So Saffron #126957, Crushed Curry #131173, Crumb Cake #126975, Early Espresso #126974, Chocolate Chip #126979, Whisper White #101731, Momento Black #132708, Versamark #102283 and Sahara Sand #126976
Paper: Cherry Cobbler #119685 – 8 1/2″ X 5 1/2″, Whisper White #100730 – 4″ X 5 1/4″
Misc: Project Life Corner Rounder #135346, Cherry Cobbler Baker’s Twine #123125, 1″ circle punch #119868, Gold Embossing Powder #133457

Now, on to the next Sunset Card! This one uses the Lift Me Up Stamp set, but uses the same techniques as on my video.

I love how the Ocean/water came out on this one! This uses the same color palate as the card above. Here are the dimensions for the card stock, since everything else is the same:

Cherry Cobbler 8 1/2″ X 5 1/2″, Crushed Curry #131199 – 3 1/4″ X 4 3/4″, Cherry Cobbler- 3 1/8″ X 4 3/4″, Whisper White – 3″ X 4 3/4″ and 2″ X 1 1/2″ (for the sentiment).
I also used Dazzling Diamonds #133751, and Fine Tip Glue to make the Dazzling Diamonds stick #138309

What else can I make with this Sunset? I just HAD to make more!! So I pulled out my Trusty set of Lovely as a Tree!!! Love this set!
Again, I used the same colors, just used the Stamp set Sending Thoughts #142965 from the Occasions Catty 2017 and I also used the FREE with Sale-A-Bration ribbon Metallic Gold #143601!

Here are those dimensions:
Elegant Eggplant #105126 – 8 1/2″ X 5 1/2″, Whisper White 5 1/4″ X 4″
The Elegant Eggplant Ink # is 126969, Gold Embossing Powder #133457

And now for the Final Card, this is the one I made the video on!!

I had so much fun making this one!! Like I said at the Beginning, I LOVE sunsets, by this time you might just believe me! hahahaha

The supplies for this card are:

Stamps: Birthday Fiesta #141500, Thoughts and Prayers #127805, Here for You # 142164
Inks: Watermelon Wonder #138323, Night of Navy #126970, Crushed Curry #131173, Crumb Cake #126975, Early Espresso #126974, Chocolate Chip #126979, Momento Black #132708, Night of Navy #126970, Black Marker
Paper: Night of Navy #100867 – 5 1/2″ X 4 1/2″ , Watermelon Wonder #138334 – 5 1/4″ X 4″, Whisper White #100730 5″ X 3 3/4″
Misc: Sponges #141337, Big Shot #143263, Up & Away thinlits #142748

If you love these colors together, make sure and stock up on Watermelon Wonder!! It’s one of the In Colors that is retiring this year 🙁 This is a GREAT color to make your sunsets with! The other reds are either too red, or too dark. It’s doable, but this one just makes it easy!

I hope you enjoyed all my Sunsets, and that you will want to visit me again! I will be making more videos, I am really enjoying it! Make sure you sign up on my YouTube page to be notified when I have another one coming out!

Also!!! Click on my Newsletter button, you will receive monthly ideas and keep up to date with my schedule!

Now, click on each name to see the rest of the blog Hop from Demo’s from North Carolina!!

Lisa Tedder
CA girl living in NC!

Debra Ballance-Byrd

Tamra Davis

Jo Anne Hewins

Michelle Irinyi

Melissa Kerman

Tracie Evans Langley

Sharon Maranich

Laurie Meier

Lisa Tedder <———–You are Here!

Frances Wagner


Sheltering Tree Class!

I am having a Stampin’ Up! Sheltering Tree Class next month.  We will be making framed Seasons art (this has a biblical verse inside, you can include it or not), four handmade cards with decorated envelopes inside and out AND the cost of the class covers YOU getting the stamp set and the Envelope Liner paper to take home with you along with the cards and Art!!

You get the class, cards, stamp set and liner paper, and what do you pay?  Only $38!!

IF you already have the stamp set, just buy a stamp that is equal to the price!

Here are pictures of the cards and framed art.  Psssssst!  I even teach you how to make a mixture for the trees in the Winter Season!!

Sheltering-Tree-Class   Sheltering-Tree-Class2


Sheltering-Tree-Class3   Sheltering-Tree-Class4

Sheltering-Tree-Class5


You can click on each photo and see them closer.  Notice the hand stamped Winter card, hopefully you can see the shimmer!  This uses my own concoction from SU! materials!

This is a Pre-Pay class, I want to have the class by the middle of September so the latest you can register is the first week in September!

This was really fun to make, I plan on giving this away for a present!

I can also do a video for each card, if anyone wants to do a class to go, and orders the same amount.  This way even if you don’t live near-by or can’t make it to class, you can still enjoy making it at home in your own time!

Hope to hear from you soon!!

Lisa Tedder

SU! Demo


Monday Creative Blog Hop!

Welcome back to the Blog Hop!

Today I am going to be sharing with you two of my SU! handmade cards that I have done this week!

The first one is one using the White Simply Pressed Clay along with the Alphanumeric Mold, the Clay is in the Big Catalog but you’ll find the Alphabet/numeric mold in the seasonal catalog (pg 32 #137854, for only $9.95), My friend had the mold so I let her do the letters for me, and once they were dry I cut them (there is a little clay around the letter if you did it right, that you can cut away the excess so the image is really bold!), then I colored them using our SU! Write Markers in these colors:  Daffodil Delight, Blackberry Bliss, Wild Wasabi, Pacific Point, Blushing Bride and Rose Red.  I used these colors because those are the colors in the DSP I used – Painted Blooms.

This way as usual with Stampin’ Up! everything coordinates!  After I applied the color I used Fast Fuse on the back of each letter and adhered it to my DSP.  If you haven’t used Fast Fuse, you HAVE to try it #129026, page 204 in the Catalog!  It’s the best adhesive that I have tried that works with EVERYTHING!

Once adhered to the Designer Paper, I went over the letters with my Versamark Pad, just pouncing over top of them, saying to myself…..boink, boink, boink……must be watching too may Disney Movies!  🙂

I then sprinkled Crystal Clear Embossing Powder over where I pounced the Versamark and then tipped the card over and flicked off the extra powder, then I heat set it and WOW!, it made the letters look like they were Ceramic!  Hopefully you can see that in the picture

Simply-Pressed-Clay-Alphabetresized

I stamped the saying “@numberonemother” from the SU! set @SoSocial, LOVE this stamp set, it has just about everything you would EVER need to say in it!  I stamped that saying using Rose Red ink onto Blushing Bride paper and then made it pop out of the side between the Black paper and the Pacific Point Paper.  I also stamped the Chevron stamp using Rose Red ink onto Rose Red paper!  All Coordinating, and a very awesome card to send to your Mom, or a Mom to be!!

The next project I did was almost COMPLETELY Cased (Copy And Stamp Everything) from Sandy at:  StampWithSandy.com I really loved the simplicity of this card, plus it has layers, and diamonds (Rhinestones in SU! speak, but I like calling them DIAMONDS!).  the only thing I changed was I stamped my saying “Just Sayin'” from the Crazy About You stamp set onto Baked Brown Sugar (Sandy used Crumb Cake I think) then cut it out with the arrow from On Film thinlits, and topped it off with the Hello You Thinlits.  I love arrows!  They go with this saying perfectly!!

Crazy About you

I stamped the flower in Cherry Cobbler and stamped off the leaves using Baked Brown Sugar, then Put the white and the Bermuda Bay on top of the Base of Baked Brown Sugar!  I wrapped the white Bakers Twine around the white, I don’t like it when the ribbon shows on the inside.  This was a fun simple card that uses my thinlits (which I LOVE!) and I thank Sandy for the inspiration!

That’s it for me today, it was a long week for me!

Hope your day goes great and hopefully I’ll see you back next week…….maybe with some Blog Candy perhaps, hmmmmm?

Come back again!

Lisa Tedder Kernersville, NC

Here are the other people who have posted to this blog hop:

Carol Valentine

Lynn Peters

Deb Paisie

Cindy Fodor

hanniejoy

Anne Matasci

Frances Wagner

Creative Blog Hop!

I have been invited by Frances Wagner to participate in a Monday Creative Blog Hop!  I’m very excited to be asked and I have been creating a bunch of cards for a Class where we get to participate in Sale-a-Bration for one more month!!

We will order in March $50.00 worth of product and then pick out a SAB item for free, then the class will be free!

I plan on Three cards at this event and then I will have a Sale-a-Bration Celebration!  What is that you ask? Well, for those who have received 2-3 SAB items from purchasing through me they get a class for FREE where we will make 5 cards, with door prizes and munchies and LOTS of goodies (presents?) for those who are participating!

This Stampin’ Up! handmade card below uses the stamp set Butterfly Basics, I just HAD to make it once I saw it online, it was made by Erica Logtenberg, the only thing I changed from her absolutely GORGEOUS card was where I put my pearls!  No need in changing a brilliant card!  Make sure you enlarge the picture so you can see how pretty it really is!


blog-hop1


The second card I want to show you is one made from Adventure Awaits!  This SU! card is a great card for a Man!  I used the Dots and Stripes Decorative Masks and the Aquamarine Chalk Pad to make these wonderful stripes!  It is a fast and easy card!  Did you know that you can stamp with Chalk ink and then emboss it with Gold Embossing Powder?  I thought I would try it and it worked great!  That way you have less you need to buy to make this Manly card!  I also used Champagne Glitter Paper and cut banner ends to make the main image Pop.

bog-hop2

For my last card today, I wanted to show you this really pretty card made using the Artisan Embellishment Kit.  It was fun using the rose piece inside as a mask to sponge my color – Rose Red over my ‘mask’ and then I embossed it with Clear Embossing Powder!  Wow is it shiny!  And you just have to touch it, it is a fun card to look at and texturally (is that a word?!)  :-/   a card that once you give it away the person will want to touch it and ask how you did that!!

The cute little Bee is from the Stamp set from SU! ( I LOVE SU! can you tell?) named Baby Bumblebee.  Once I saw this set I just HAD to have it!  I stamped him on So Saffron cardstock using a juicy StazOn pad (I keep it juicy so I can emboss it using clear EP, I LOVE embossing……it’s like magic every time and you won’t get tired of doing it!)  I did have to cut out the bumblebee, that was the hardest part of this card!!  I used a little heart from the Itty Bitty Accents Epoxy Stickers which I colored Red with our Blender pens!  This bee is just so stinkin’ cute!

I also used the stamp set Hello Life for the Sentiment on the bottom of the card.

blog-hop3


I hope you have enjoyed my part of the blog hop!!  I have been asked to answer some questions, so I will do that before I leave and have you continue your journey!

* What are you working on?

I am constantly working on my next class.  I have a few that I do out of my home in NC, and I also have classes at the Senior Center in my town.  I also have classes at my local Parks and Recreation.  I am waiting for the ok to go through classes to teach at my local Battered Womens Shelter!  I’m very excited to do this, as I was in their shoes a LONG time ago before I met my husband who spoils me MORE than I would ever have  expected!  We’ve been married for 26 wonderful years and have 5 kids and 3 grandkids!

* How does your work differ from others in your genre?

I love to create my own cards, but love to see something from Pinterest and recreate it using Stampin’ Up! product, or if they used SU! already then I usually change it up just a bit to put my stamp on it!  Pun not intended!

* Why do you create what you do?

Before I started stamping, my sister was always doing these really creative things, like making china Christmas Tree Ornaments, or painting china dolls.  I thought that I was not granted the gene of artistry.  Then I went to my first SU! party, I made a beautiful card, and then couldn’t mail it out because it was so pretty!  In my classes, I try to have all the dimensions written down so my friends/clients can recreate what we are making!  I REALLY love it when I see the smile on someone’s face who also thought they weren’t artistic.  And the first class they come to they are changing up one of my cards to fit them!  That tells me that I am doing my job and showing them that they can do this too!!

* How does your creative process work?

That’s a hard one!  It’s really funny that I can look at pretty much anything and think of using a part of what I see on a card!  I can see some colors that I like and then think of what SU! colors will match…..then I just need to figure out what stamp to use and then I am almost done!  SU! makes it really easy to make projects, all their goodies coordinate with each other!  I can also use colors from a certain color family and that will make sure that the colors will go together.  Pinterest helps get my juices flowing and so does the other demonstrators who put their designs on Stampin’ Connection where us demo’s can go and see what others have made using a specific stamp set.

Thanks again for stopping by!!  Come back again!

Lisa Tedder

Kernersville, NC

Here are the other people who have posted to this blog hop:

Carol Valentine

Lynn Peters

Deb Paisie

Cindy Fodor

hanniejoy

Anne Matasci

Frances Wagner