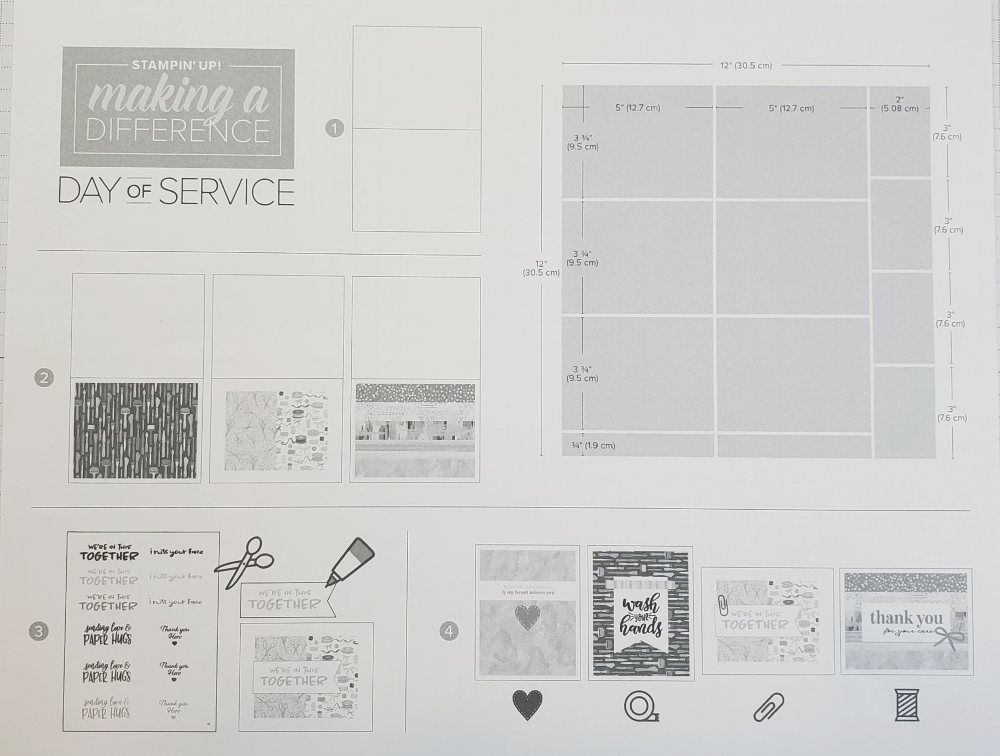
Yesterday we had a Day of Service with Stampin’ Up! Our CEO Sara Douglass was online and she sent out the pdf that will help us make Beautiful handmade cards fast and easy!
THIS was extremely helpful and made my cardmaking go quickly!
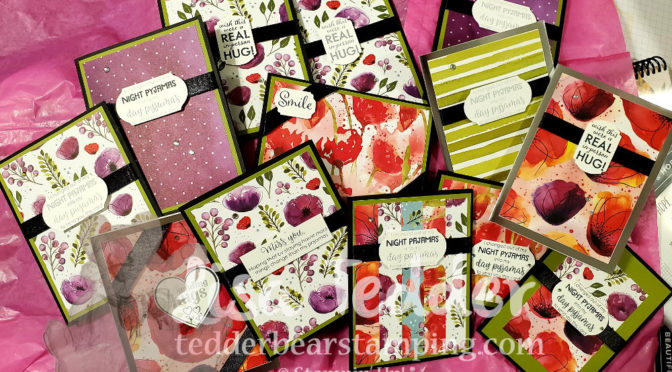
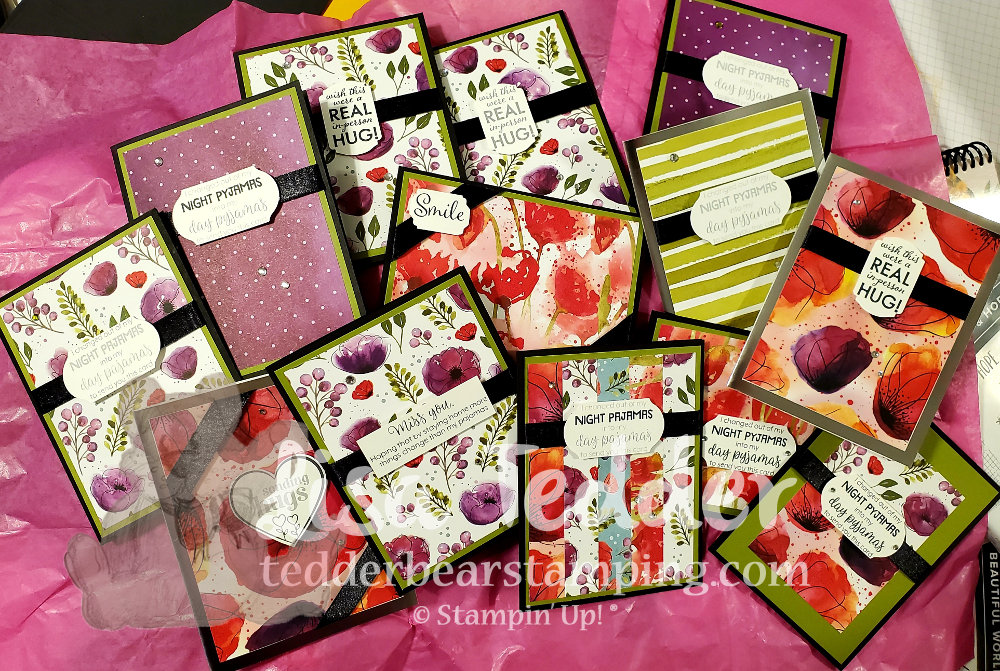
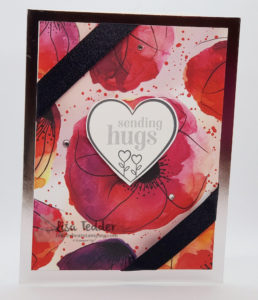
I mailed out all the cards today, wanna see what I sent? Keep in mind that I used retiring product, but YOU still have time to get that DSP, Noble Peacock Rhinestones & Ribbon if they are still available go to my OnLine Store now!
Below I am showing you each one!
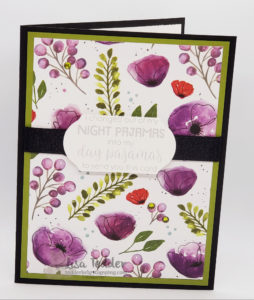
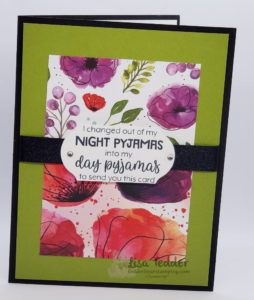
Card 1
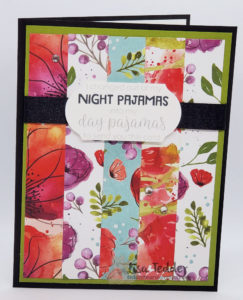
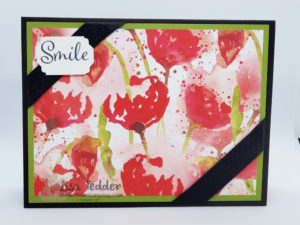
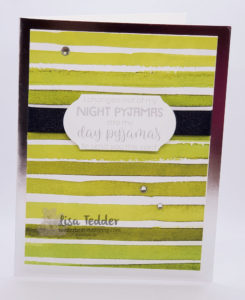
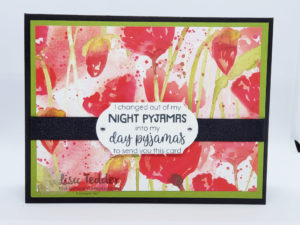
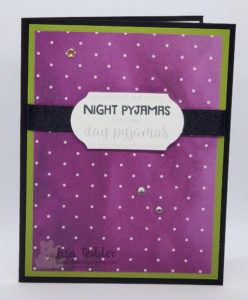
Sorry the Sentiment is light, it says “I changed out of my NIGHT Pajamas into my DAY pajamas to send you this card” All the insides say “Sending you a paper hug”. Card 2, Sending HugsCard 3, sentiment is the same on most of them…Wanted to get a lot done!Card 4, Smile! LOVE this one!Card 5, same sentiment about pajamasCard 6Card 7Card 8
So, I made 20 cards, multiples of the ones above. I am NOT a ‘go quick’ crafting kind of girl! But, this was eye opening for me!! Not only are these beautiful, but I got them done and out in 1 day! THAT is unheard of for me! I also used the Spread Sunshine pdf available here, that you can download, print out and make your own cards! ALL proceeds go to helping with Covid 19!
Below you can see the supplies used in picture form. to get the measurements for the cards see the first picture. The only thing I added was a piece of Old Olive at 5 1/4″ x 4″. Do a card without layers?! Not me! My eyes are wide open, and know this about myself. But I really love how these came out, what do you think?
Thanks for stopping by, give this a try!!
Lisa Tedder A California girl living in North Carolina
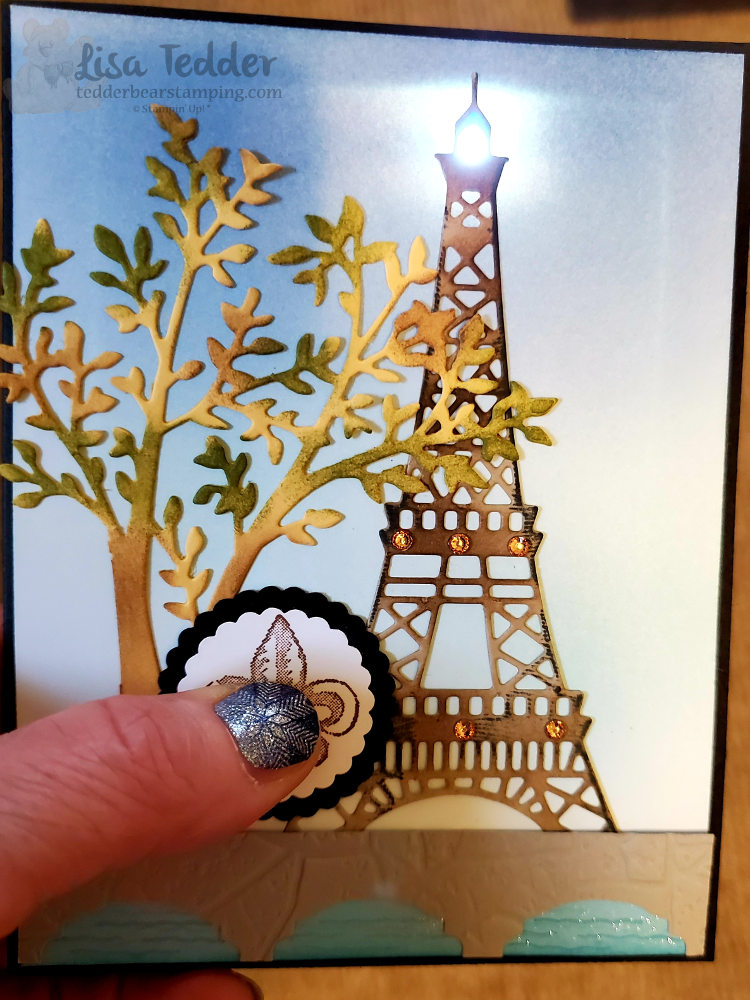
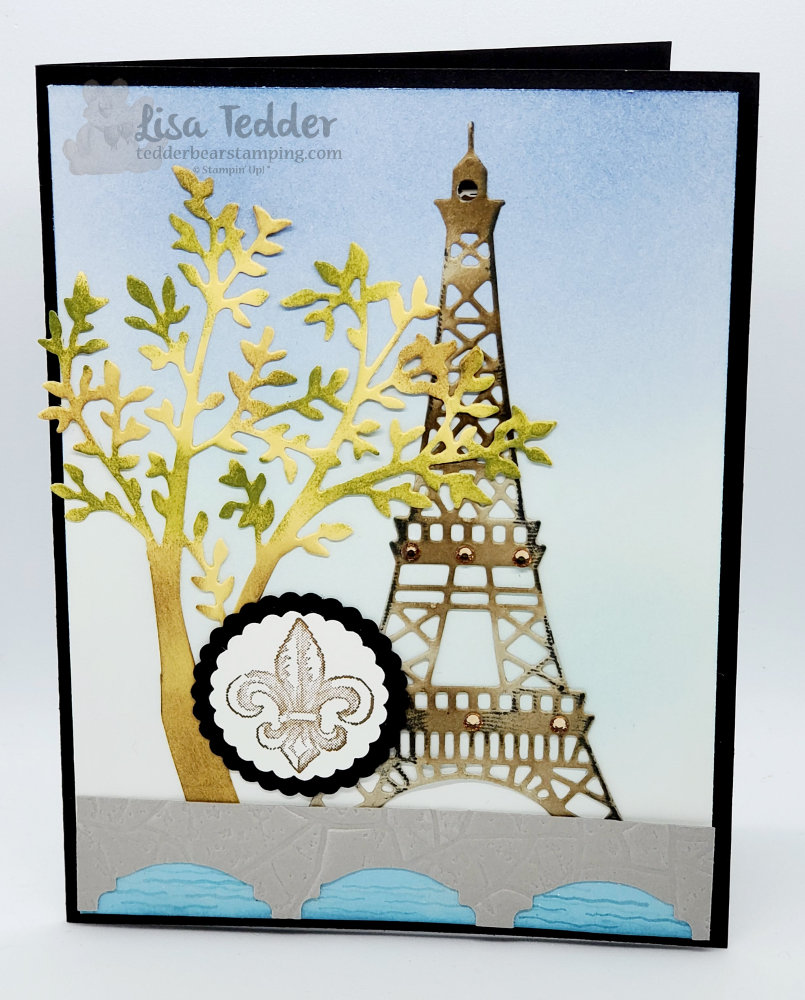
Today I am sharing with you a light up card! I love these! They are so much fun! Next year, I am planning on going to see the Eiffel Tower (thank God it’s not THIS year!). I saw this card where someone made a bridge with water under it, and the Tower is in the background. I am not sure that they used Stampin’ Up! stamps, so decided to make one using Parisian Beauty. Here is my card lit up:
Not only did I use the Parisian Beauty stamp set, but I used the punch Label Me Fancy! This is what I used to make the bridge. I tried so hard to make them evenly spaced, this is as close as I could get. Also, I used Wink of Stella to highlight the water to give it that bit of sparkle!! If you lay the Smoky Slate piece of cardstock onto a grid sheet or against a ruler, make marks at these spots: 5/8″, 2″ and 3 5/16, then put the punch into these spots and only go part way up (look at picture to see how far) making the marks in the middle of the punch. This way it will make your waterway!
In the light of sharing with you the lit up version, I HAD to show you the card (a little more professional pic) when it’s NOT lit up:
Of course, I used a lot of bling by using Champagne Rhinestones, because you are not always going to have it turned on! The tree came from the die Sweet Silhouettes. Sponging the So Saffron cardstock after it was die-cut with Soft Suede and Garden Green, really makes this ‘tree’ look like the sun is hitting it in spots! Make sure you leave some yellow to give it that sun kissed look!
Furthermore, I also sponged the Eiffel Tower with Soft Suede and then ran the Memento Black pad itself over parts of the sides. This was to make it look like it was antiqued. What do you think? Did I hit it, or is it a miss? For those of you who love light up cards, we are going to be making this card next week! Let me know if you want to attend!
As always, here are the specifics for this card:
Stamps: Parisian Beauty
Inks: Soft Suede Garden Green Balmy Blue Memento Black
Paper: Basic Black 8 1/2″ x 5 1/2″, scraps Whisper White 5 1/4″ x 4″, scraps Whisper White Thick 5 1/4″ x 4″ So Saffron scraps (to fit tree) Crumb Cake to fit Tower Balmy Blue 4 ” x 1/2″ (for water) Smoky Slate 5/8″ x 4″
Misc: 1 1/8″ & 1 3/8″ circle punches Sweet Silhouettes Dies Champagne Rhinestones Stone 3d Folder Foam Adhesive Strips Tombo Liquid Glue Batteries/Lights Label Me Fancy punch
Furthermore, below you will see all the supplies in picture form. Click on any picture and you will be taken to my OnLine Store! If you purchase $35 or more from me, you will receive a handmade thank you card AND two sets of files with 16 tutorials in one and the other has over 40 tutorials! Every month you will get different tutorials with each purchase, I hope you take me up on it!
Thank you for stopping by, please come again!
Lisa Tedder A California Girl living in North Carolina
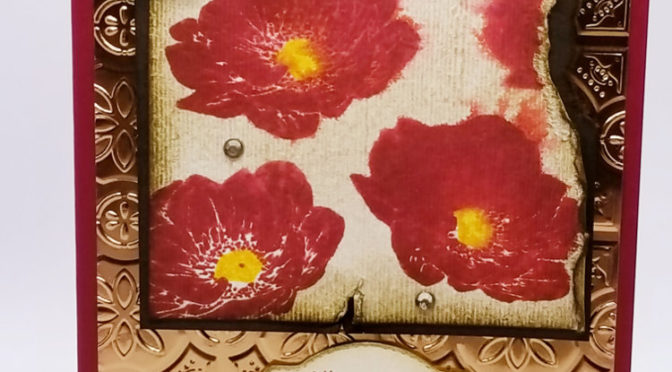
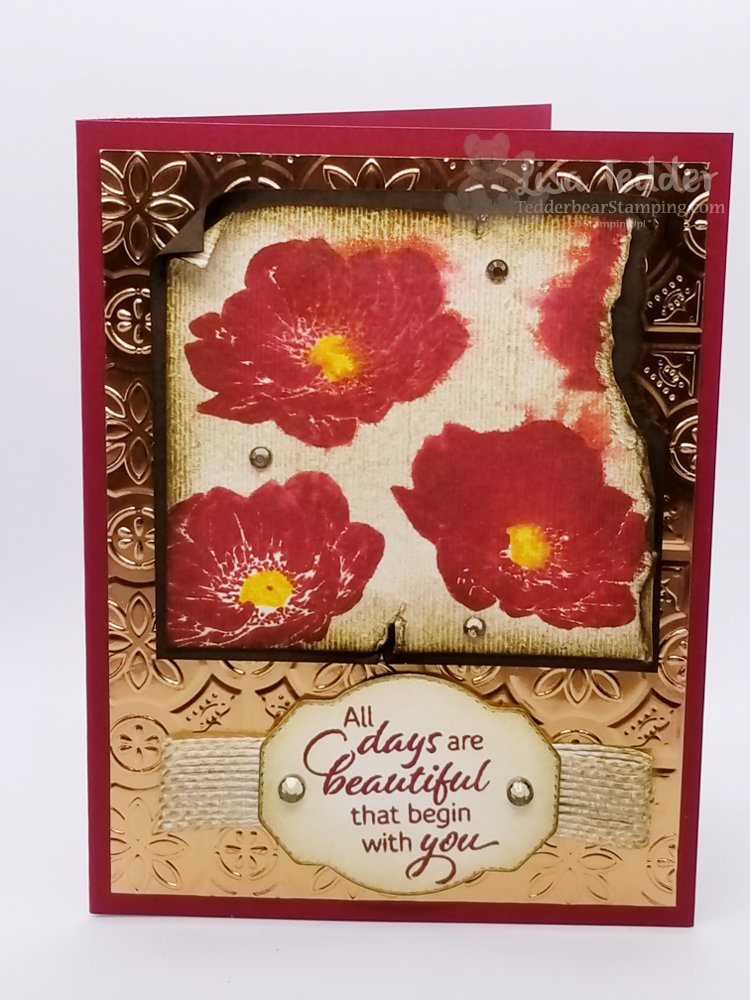
Today I am sharing with you a BRAND NEW stamp set from Stampin’ Up! called Floral Essence. I wanted to come up with something on my own, since there weren’t many samples out yet.
I haven’t done Shabby Chic in SOOOOO long I am hoping I got it right.
Here is my card:
The Tin Tile Folder on Copper really makes this look aged.
Here are the specifics for this card:
PROJECT 2: Shabby Chic
Stamp Sets
Pg #
Floral Essence
108
Paper
Cherry Cobbler 8 1/2″ x 5 1/2″
Copper Foil 5 1/4″ x 4″
Early Espresso 3 3/8″ x 3 1/4″
Watercolor paper 3″ x 3 1/2″
Very Vanilla 5 1/4″ x 4″, 2 1/2″ x 2″
Inks
Cherry Cobbler
Mango Melody
Soft Suede
Accessories
Rhinestones
178
Bronze blend
179
Shimmer Paint Champagne Mist w/alcohol
180
Tin Tile Folder
199
5/8″ Flax Ribbon
174
Smooth Sailing Die for sentiment
195
After I was done I spritzed the entire card with Champagne Mist (4 drops in Alcohol), to give it a shimmery sparkly look.
All the supplies are listed below in picture form, click on any of them to be taken to my OnLine Store. If you buy from me, I will send you a free gift as a token of my gratitude for you choosing me to be your Stampin’ Up! Demonstrator.
Thank you for stopping by!
Lisa Tedder
A California girl living in North Carolina Product List
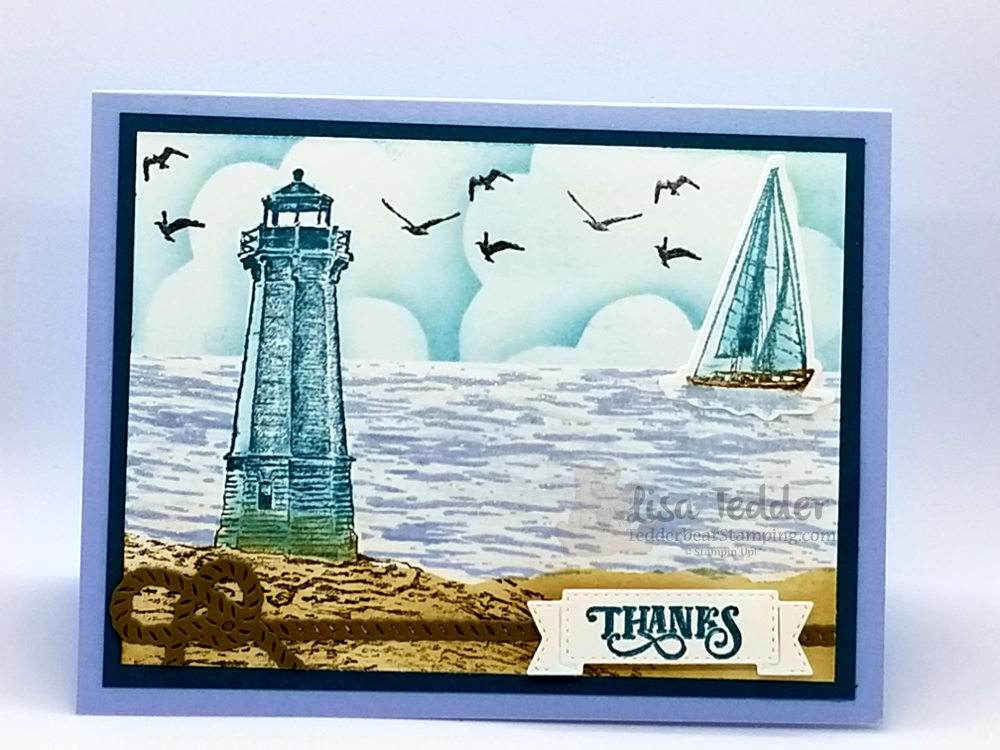
I LOVE when the new CAtalog comes out by Stampin’ Up!! I was drawn to the set Sailing Home as soon as I saw it! If I had my way, I would go visit every Lighthouse! Since I can’t do that I will stick to making cards using them!
Here is a card I did NOT CASE, I came up with it! Hope you like it! Here it is:
I did a video showing how I made this card, you can find it here. I made my own cloud template and am offering it to those who order from me! This uses a LOT of new goodies! Sailing Home comes in a Bundle (which if you buy you will get 10% off!!). The rope knot is a die, the die the Thanks is stamped on is included, plus the sailboat is cut out with a die. There IS a die for the Lighthouse but I stamped and masked it. Go check out the video to see how I got the texture on the sand.
Here are the specifics for this card:
PROJECT 1: Lighthouse
Stamp Sets
Pg #
Sailing home Bundle
Paper
Seaside Spray 8 1/2″ x 5 1/2″
Pretty Peacock 5 1/4″ x 4″
White 5″ x 3 3/4″, scrap for sailboat and sentiment
Inks
Crumb Cake
Soft Suede
Pretty Peacock
Balmy Blue
Memento
Accessories
Big Shot
Wink of Stella
Dimensionals
window sheets for clouds
I hope you like my card! I always get so excited when I make something without CASE’ing it. I know the reason I don’t do it more often is that I am swamped with classes and don’t have the time. The nice thing is that YOU don’t have to come up with anything either. There are so many ways to get ideas that we don’t NEED to try and do it alone.
Below are the supplies used for this card in picture form, click on any of them to be taken to my OnLine Store! If you purchase from me OnLine, you can get the cloud template that I used for this card for a thank you! Or you can pick a card you like, I will add a little something from my favorites to send you also! It’s like a Grab Bag!! 🙂
Thank you for stopping by!
Lisa Tedder
A California girl living in North Carolina Product List
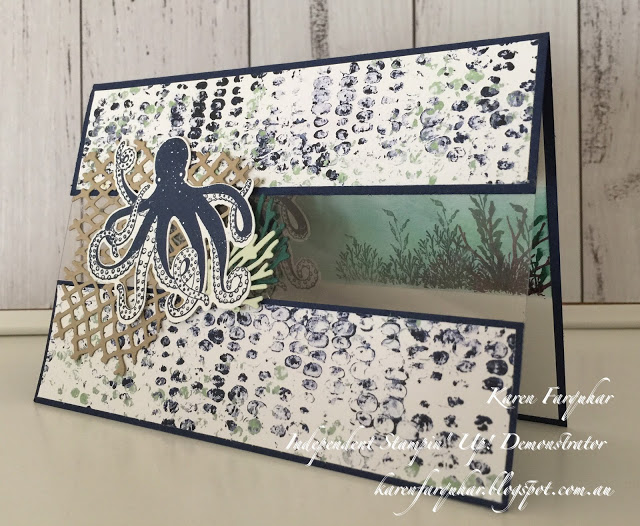
The card I am sharing with you today is another CASE’d card from Pinterest by Karen Farquhar. Here is her card:
I made my inside a bit different, and didn’t add the coral die cut to the front. When doing a class, I need to cut down on what I use since it will make the class too long otherwise.
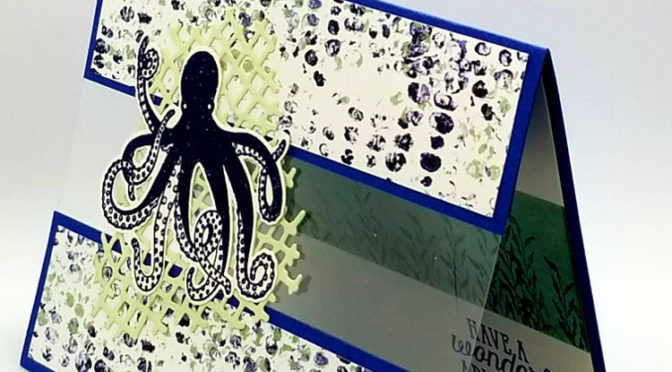
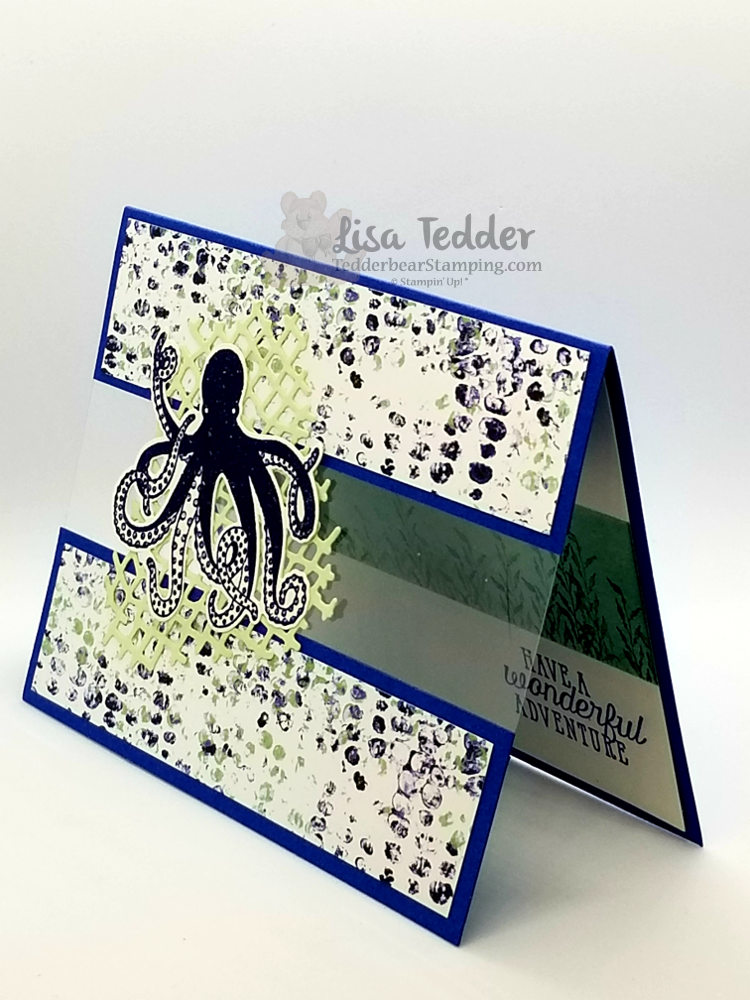
Here is my card:
Side view:
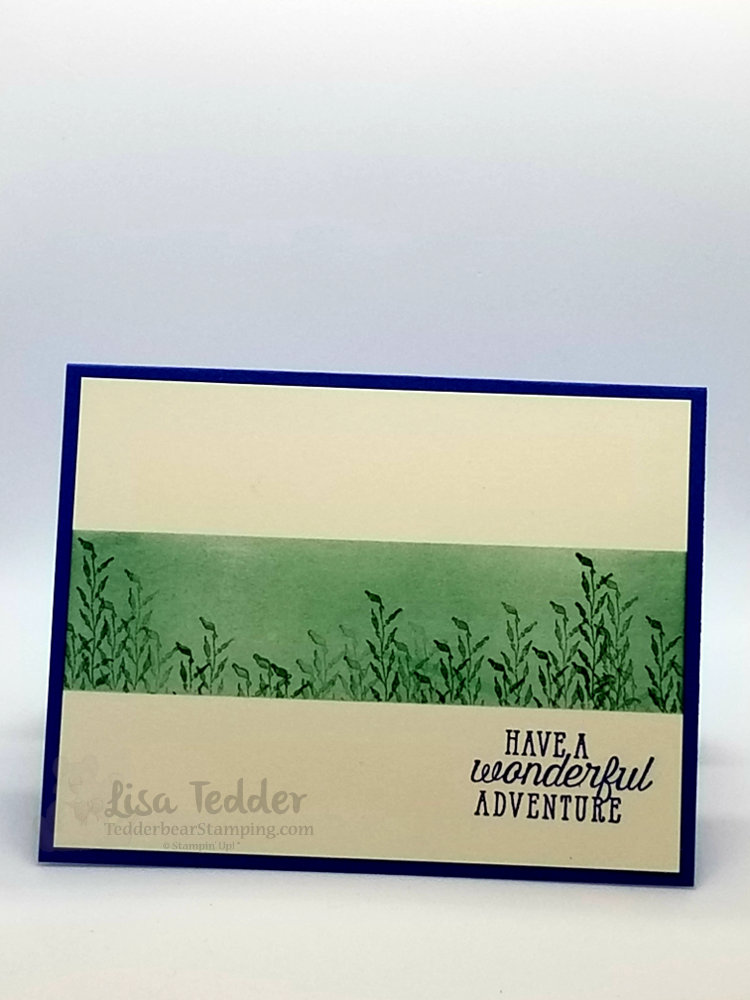
Inside:
Here are the specifics for this card:
PROJECT 1: Octopus
Stamp Sets
Pg #
Sea of Texture Bundle
Paper
Blueberry Bushel 5 1/2″ x 5 3/4″ scored @ 4 1/4″
blueberry Bushel 1 1/2″ x 5 1/2″ (x 3)
Whisper white 5 1/4″ x 4″, 3″ x 2 3/4″
DSP Tranquil Textures 1 1/4″ x 5 1/4″ (x2)
Soft Sea Foam 3 1/4″ x 3″/ Window Sheet 2″ x 5 1/2″
Inks
Blueberry Bushel
Tranquil Tide
Accessories
Clear EP/embossing buddy/heat tool
Big Shot
sponges
Below are the supplies in picture form, click on any of them to be taken to my OnLine Store. If you need a demonstrator and you live in the U.S. I would love to be her! If you purchase from me OnLine, I will send you a small gift……I know you will love it!
Thank you for stopping by!
Lisa Tedder
A California Girl living in North Carolina Product List
I love my Job! I get to make beautiful handmade cards AND show others how to do it! After my classes everyone is so happy with what they have made!
I got this idea from Cindy Elam, I found it on Pinterest and changed up a little, here is her card:
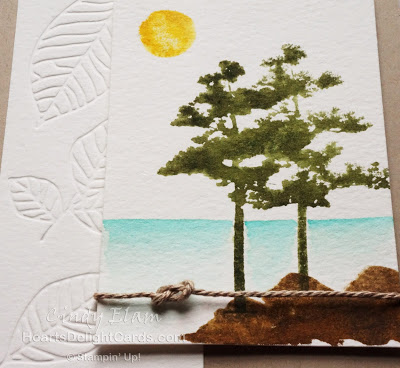
I LOVE layers, I wanted to add to this beautiful card. Here is what I came up with:
Here are the specifics for this card:
PROJECT 3: Watercolor trees
Stamp Sets
Pg #
Rooted in Nature
Waterfront
Paper
Soft Suede 8 1/2″ x 5 1/2″
Early Espresso 3 1/8″ x 4 1/8″
Watercolor paper 3″ x 4″
Very Vanilla 5 1/4″ x 4″, 2″ x 4 3/4″
Inks
Crushed Curry
Soft Suede
Early Espresso
Mossy Meadow
Pool Party
Accessories
Spritzer
Braided Linen Trim
Layered Leaves folder
Sponges
Big Shot
I spritzed the stamp after inking it then stamped it on Watercolor paper. It really has a great effect. I love how the trees look different each and every time! I also love to use the Aqua Painter to make a background. I taped off a straight line then using the Aqua Painter to make the water.
Below are all the supplies used to make this card. Click on any picture and you will be taken to my OnLine Store. I would love if you would choose me as your Stampin’ Up! Demonstrator!
Thanks for stopping by!
Lisa Tedder
A California girl living in North Carolina Product List
Today I am sharing with you a card I found on Pinterest and I CASE’d it. I can’t find it to show you, if you have seen it and know where I got this idea I would love if you would let me know.
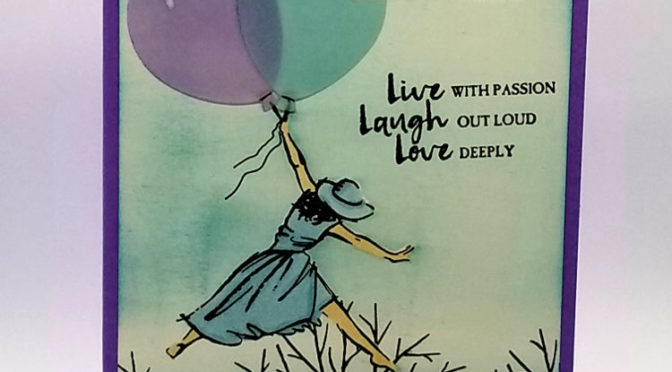
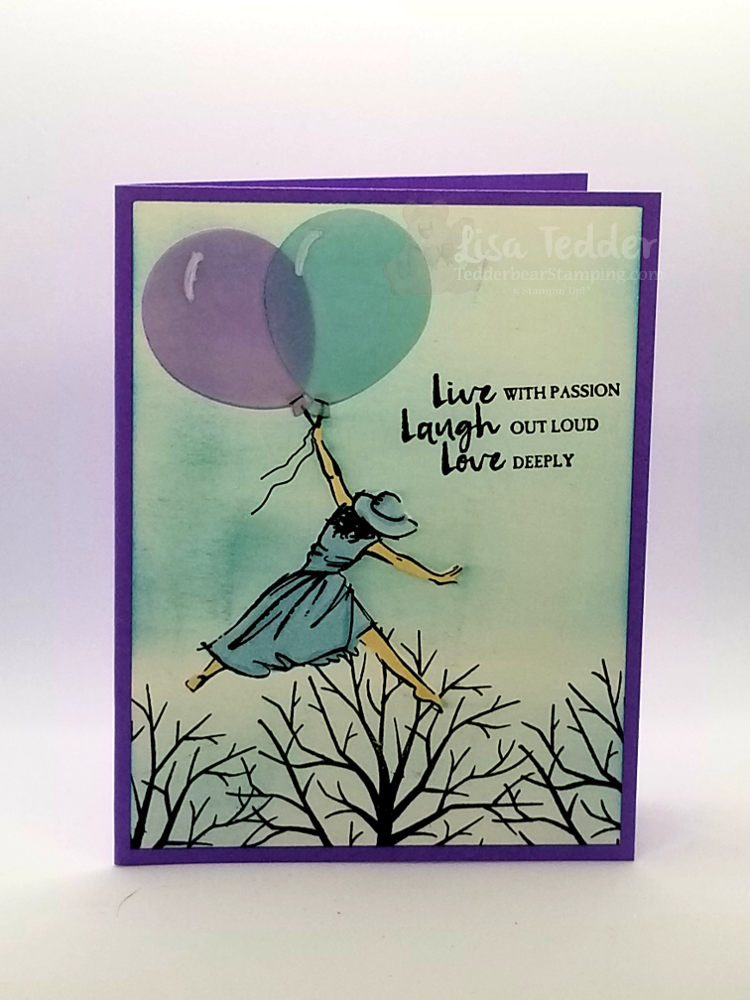
Here is my card:
I masked the Lady after stamping her, then sponged the sky and stamped the trees. I then colored her, this makes it look like she is in front of the trees. The balloons were punched out with the balloon punch using Vellum which I then sponged with the color I wanted. I put the white line in the balloon with the Chalk Marker, I placed a glue dot behind this chalk line to attach. You can’t see it! Of course I put another glue dot behind the black line for the ‘string’. It’s a challenge to find spots to put your adhesive with Vellum because you don’t want it to be seen.
This was a really fun card, and my class loved it!
Here are the specifics for this card:
Stamp Sets
Beautiful You
Sheltering Tree
Colorful Seasons
Paper
Highland Heather 8 1/2″ x 5 1/2″
Whisper White 5 1/4″ x 4″ (x2)
Vellum
Inks
Highland heather
Memento
Balmy Blue
Blends: Balmy Blue, Ivory
Black marker
Accessories
Glue dots
Chalk marker
Balloon Bouquet punch
Below are pictures showing these supplies, click on any of them to be taken to my OnLine Store. If you don’t have a Stampin’ Up! Demonstrator, I would love if you would choose me to help you with your creative needs!
I send those who order OnLine a small gift to say thank you. If you’ve been following my blog you know that I offer a LOT of different goodies!
Thank you for stopping by!
Lisa Tedder
A California girl living in North Carolina Product List
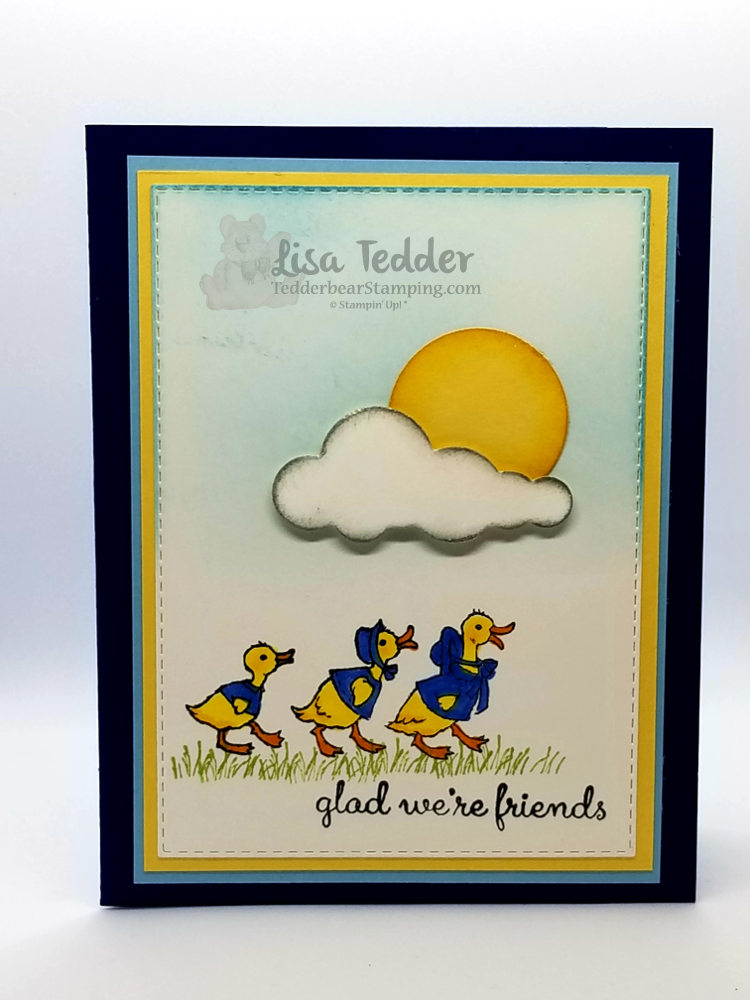
Today I am sharing with you a card I made that reminds me of my childhood! I always loved to read, I would look through books ALL the time! I also love to see baby ducks….well let’s be honest, I love all babies!
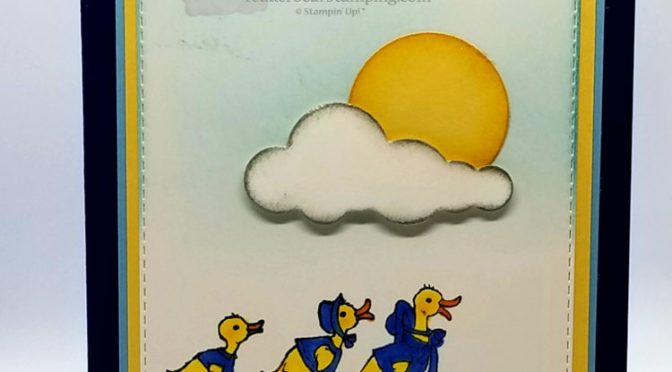
Here is my card:
I got the idea from Heidi Weaver, you can find her original card here. I like to make my cards 100% Stampin’ Up! and I don’t use retired stamps to show you……I use the ones I keep that retired for Scrapbooking.
I love the colors of this card! I used the blends to color the ducks and their outfits. My girls absolutely LOVED this card!!
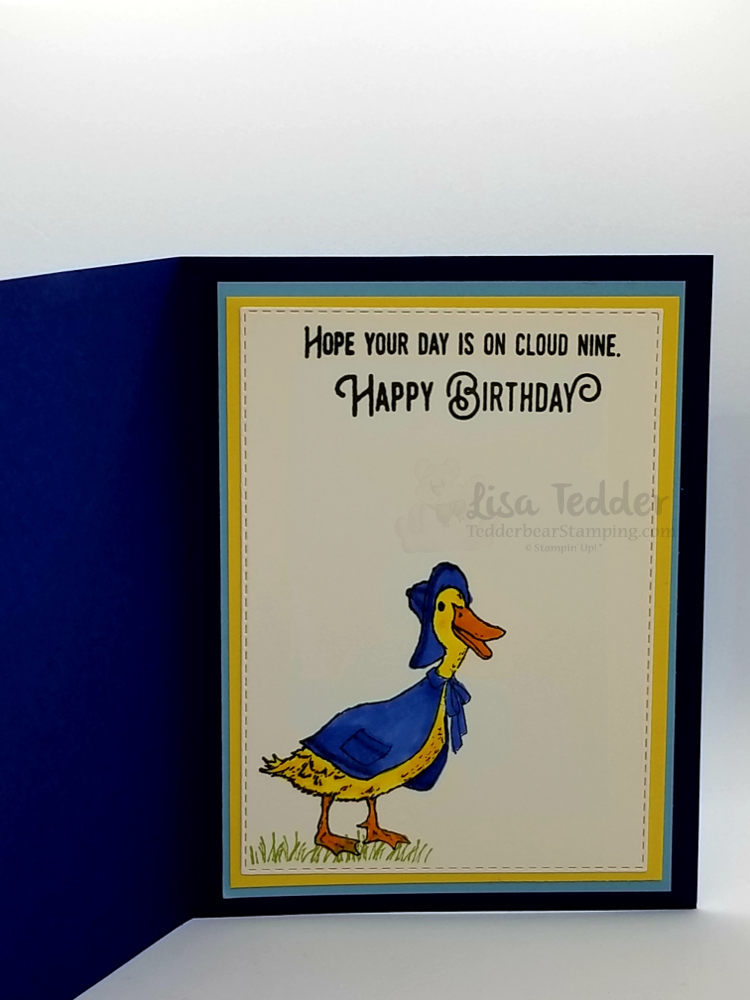
Here’s the inside:
The momma is just waiting for them to catch up! 🙂
Here are the particulars for this card:
PROJECT 2: Ducks
Stamp Sets
Pg #
Fable Friends
Lift Me Up
Paper
Night of Navy 8 1/2″ x 5 1/2″
Balmy Blue 3 3/4″ x 5 1/8″ (x2)
So Saffron 3 5/8″ x 4 15/16″ (x2)
white 3 3/4″ x 5″ (x2), 2 1/4″ x 1 1/4″
So Saffron scraps (sun)
Inks
Memento Black
So Saffron, Balmy Blue
Pear Pizzazz
Smoky Slate
Blends: Night of Navy, Mango Melody, Pumpkin Pie dk
Accessories
Rectangle thinlits
1 1/4″ circle punch
Wink of Stella
Dimensionals
Up & Away thinlits
Sponges
All supplies are listed in picture form below. Click on any of them to be taken to my OnLine Store! If you choose to have me be your Stampin’ Up! Demonstrator I would love that! Every OnLine order gets a small gift from me as a thank you! Let me know if there is anything you have seen on this site that you like and I will try to send you the card you picked. I also can make cloud templates or scissor charms.
Thank you so much for stopping by!
Lisa Tedder
A California girl living in North Carolina Product List
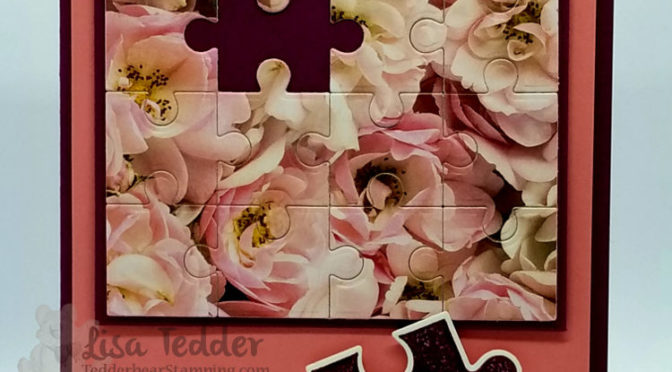
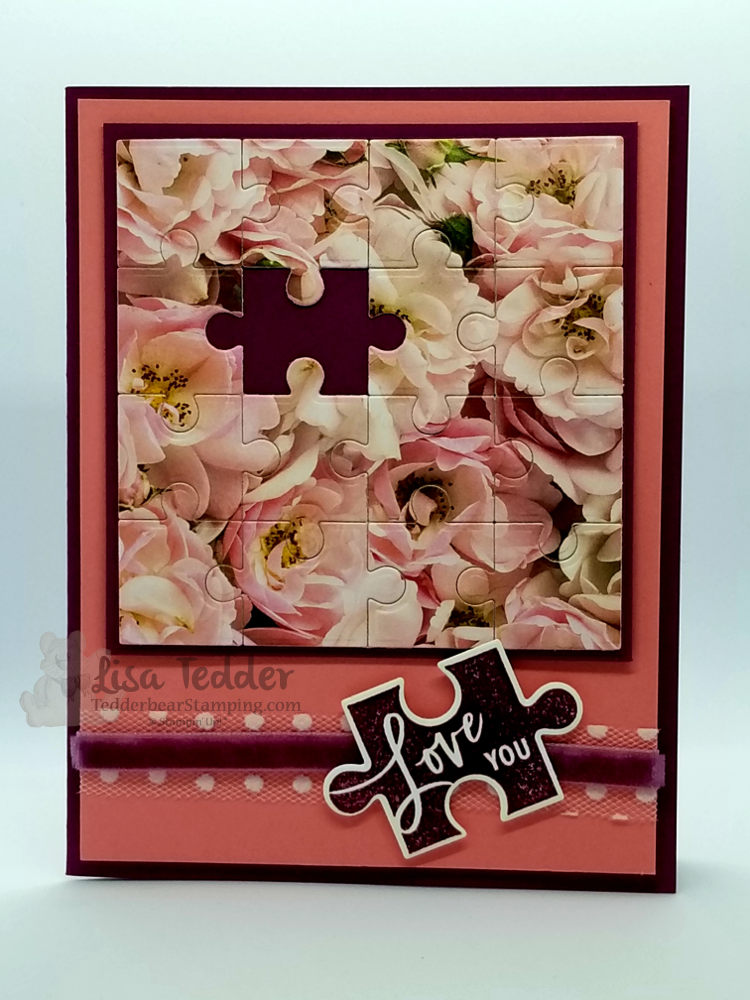
I was on the fence a long time before I decided to get the Love You To Pieces stamp set from Stampin’ Up! I really love it, the sentiments are too cute!
Here is my card:
I used Designer Series paper for the main picture, you can’t beat the Petal Promenade Paper!
I recommend putting the DSP onto a piece that’s the same size of thick Whisper White. This helps it not be so fragile when you run it through the Big Shot with the Puzzle Die. Then turn it over, put Tear N Tape on the back to help hold it together, but skip the one piece you want to be missing.
Below are the supplies that I used to make this card, click on any picture and you will be taken to my OnLine Store! I would LOVE to be your SU! Demo if you live in the U.S.! For every OnLine order I send you a small gift as a token of my appreciation! You can pick this card if you would like it! If I still have it in my possession I will send it to you! Just let me know which card you want.
Thanks for stopping by!
Lisa Tedder
A California Girl living in North Carolina Product List
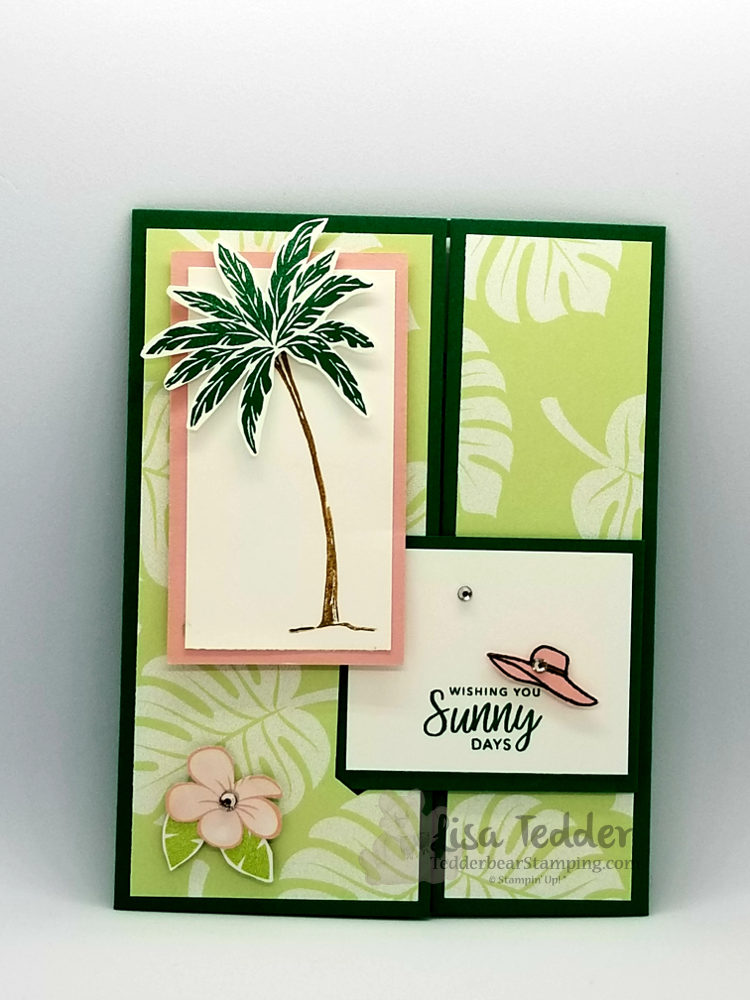
Today I am sharing with you a card that has a special Fold. I used the Stamp set from Stampin’ Up! called Beach Happy. This is retiring at the end of the month, so if you want to get it, don’t dilly dally!!
I really love this set…….I don’t usually hang onto my retiring stamps but this one I am not letting go! 🙂
Here is my card:
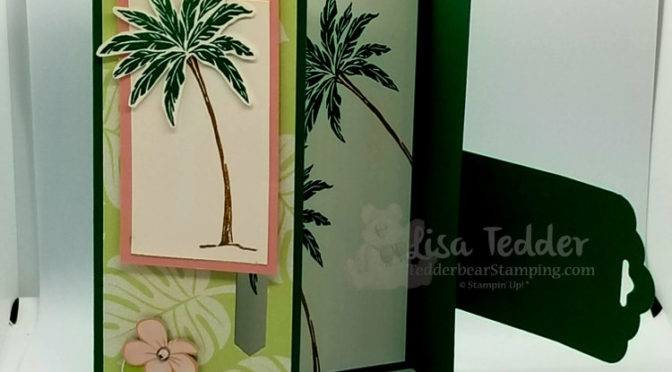
The white Sentiment is really a tab that sticks into the other side of the card and it holds the card closed.
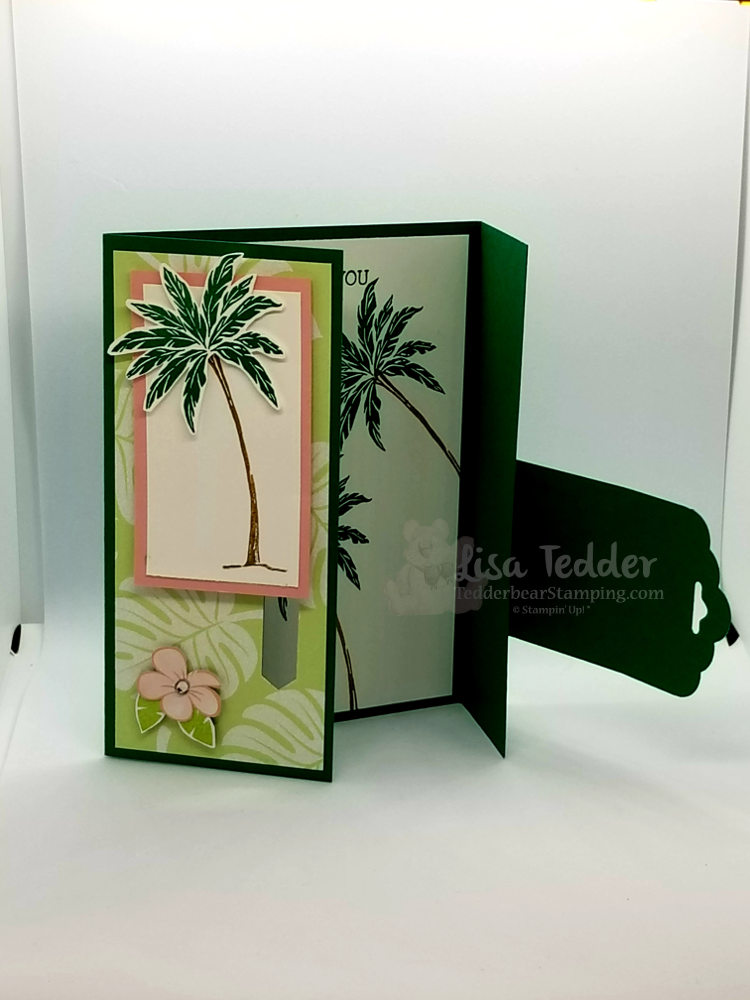
Here you can see how it looks partially open.
Isn’t this is so pretty!!? I got this idea from Debbie Naylor, you can see her card here. Debbie’s is a little different, she adhered her flap to the back, I wanted mine to open up fully.
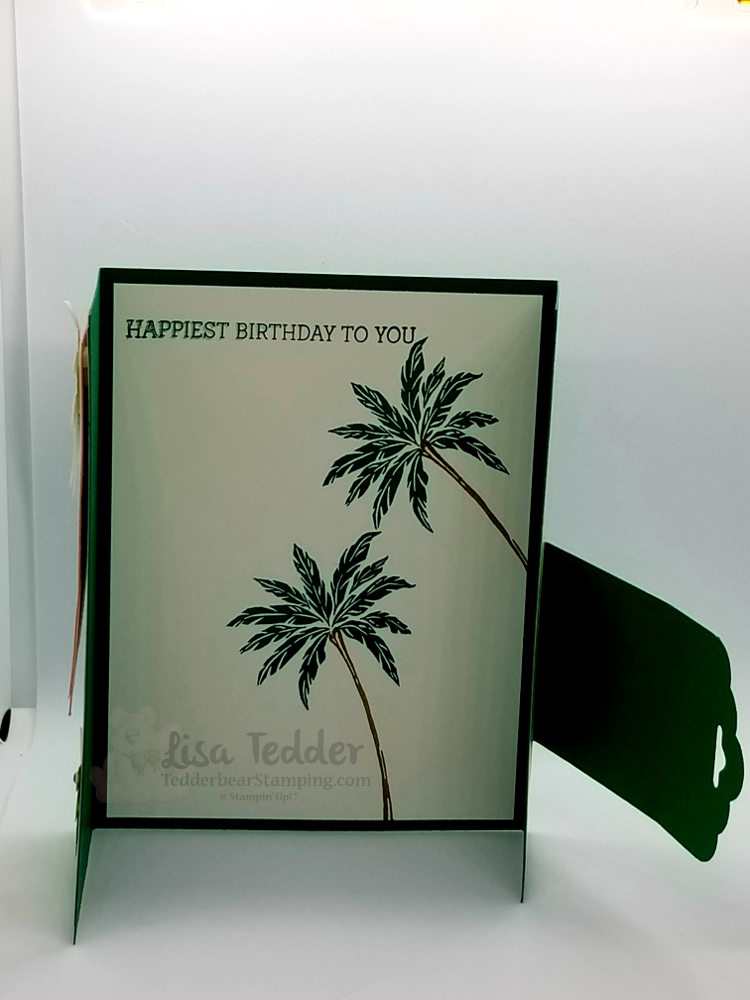
I LOVE palms, seeing them makes me happy! Probably because I took them for granted while growing up in SoCal I never appreciated them until I don’t have them everywhere! My hubby has some in our yard to bring me joy!
Tropical Escape DSP 2 1/4″ x 5 1/4″, 1 1/2″ x 5 1/4″
Whisper White 5 1/4″ x 4″, 1 5/8″ x 3″, 1 3/4″ x 2 1/4″
Blushing Bride 1 7/8″ x 3 1/4″
Inks
Shaded Spruce
Soft Suede
Memento black
Accessories
Classic Label punch
Tag Topper punch
Dimensionals
Rhinestones
paper snips
Below are the supplies in picture form, click on any picture and you will be taken to my OnLine store! I would love if you would choose me to be your Stampin’ Up! Demo if you live in the U.S.
For every OnLine purchase I give the person a gift to thank them for ordering ! If you see a card you would like from my blog, send me a note and I will see what I can do!
Thanks for stopping by!
Lisa Tedder
A California girl living in North Carolina Product List


 Satin Ribbon")


")


 Scallop Circle Punch")
 Scallop Circle Punch")


 Flax Ribbon")


 Braided Linen Trim")


 Polka Dot Tulle Ribbon")
 Velvet Ribbon")


 Designer Series Paper")


