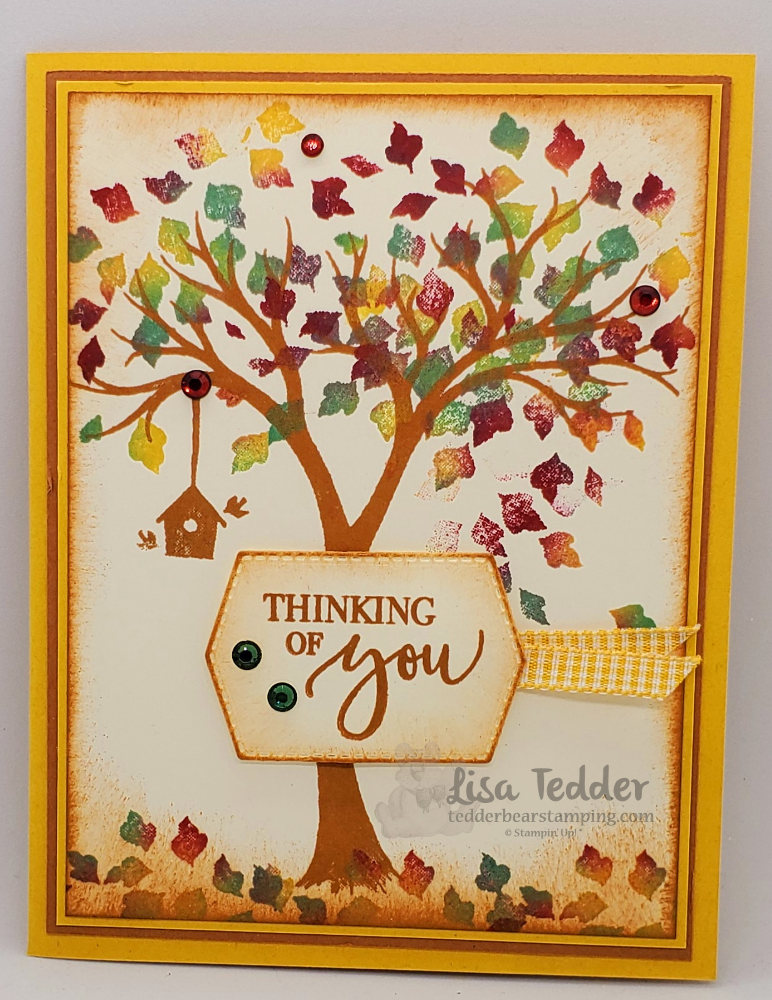
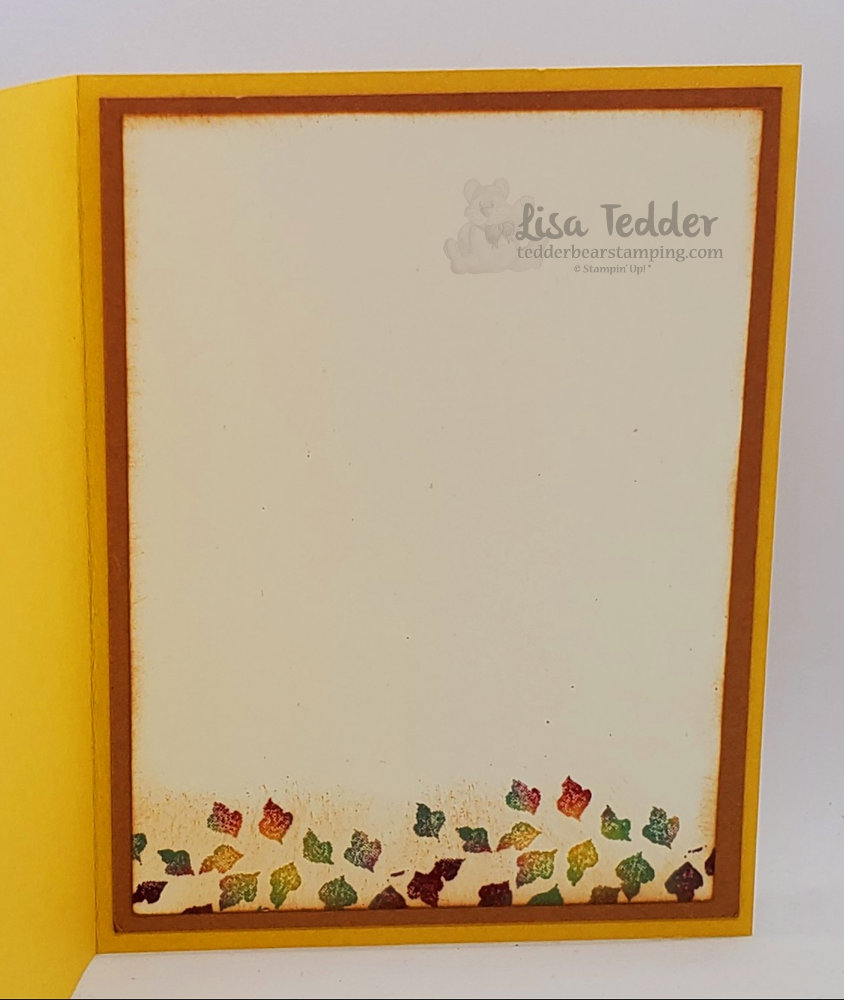
Tag Archives: hand made

My favorite set

Just in case….

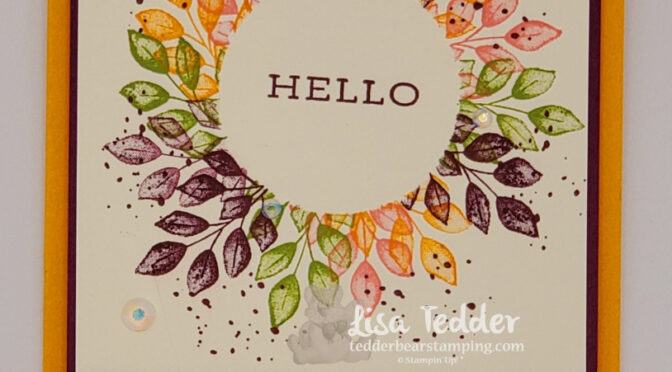
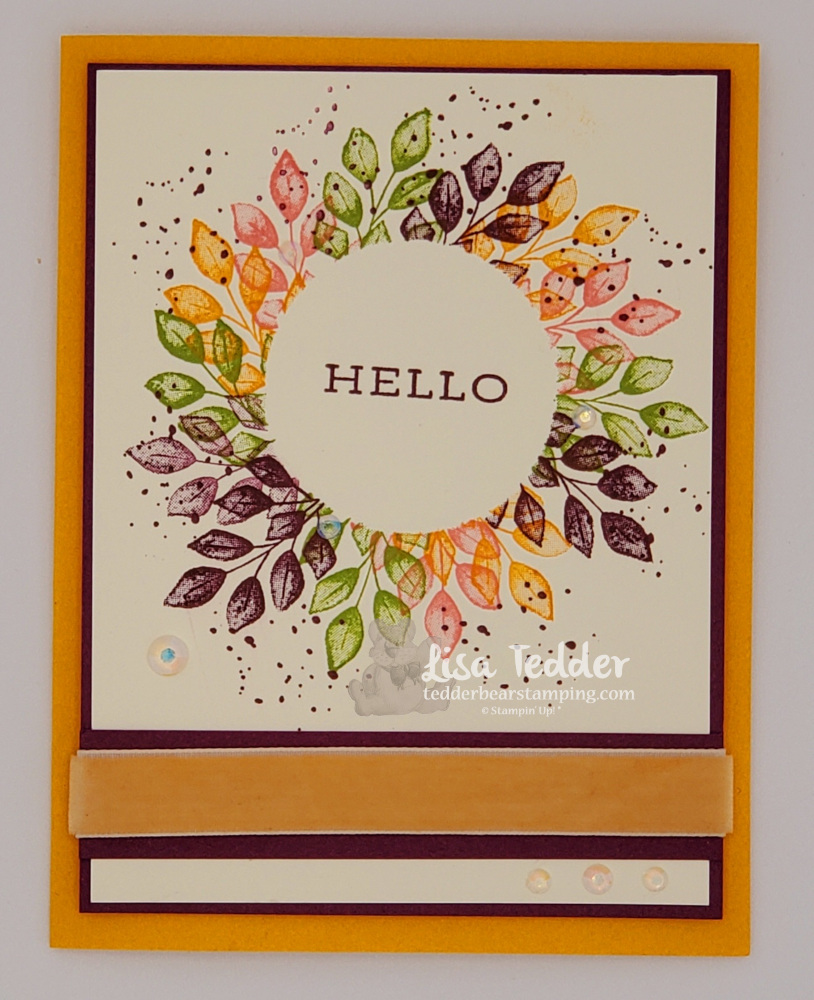
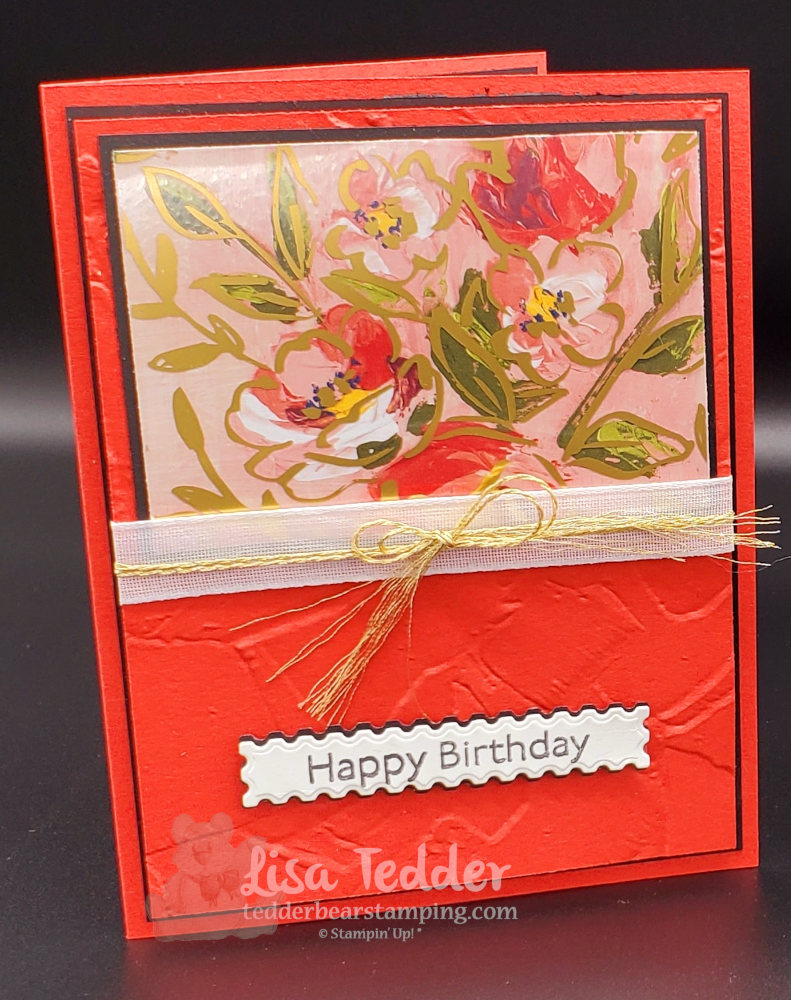
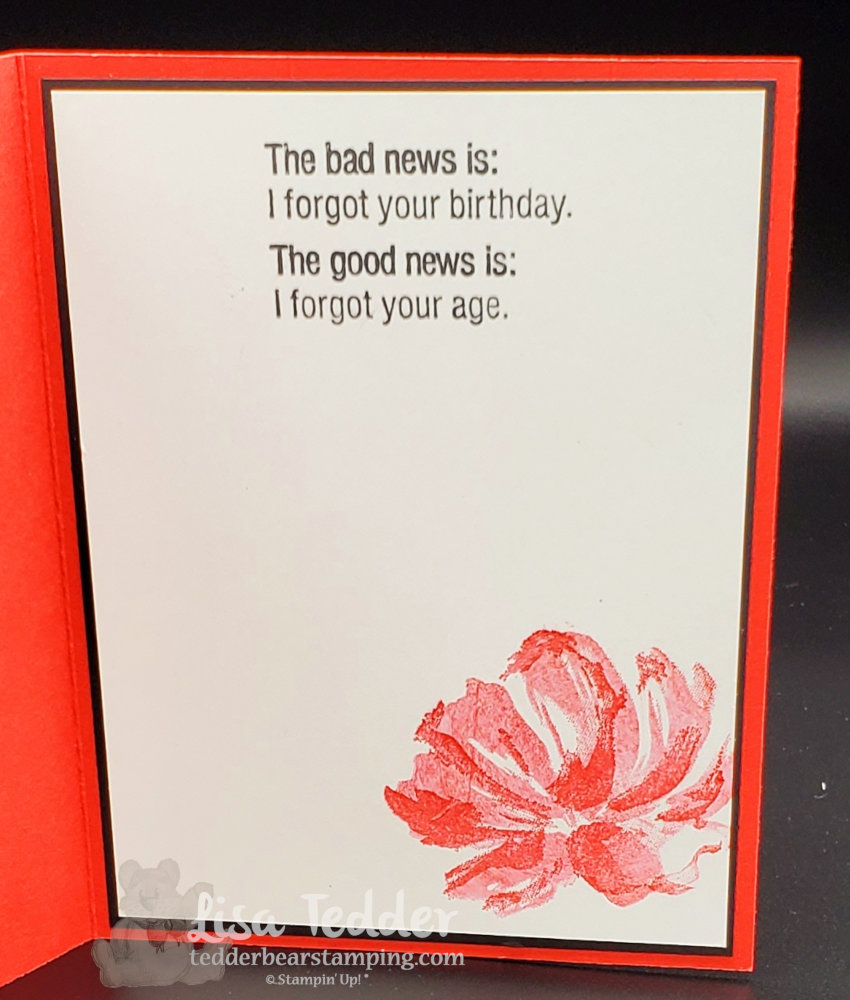
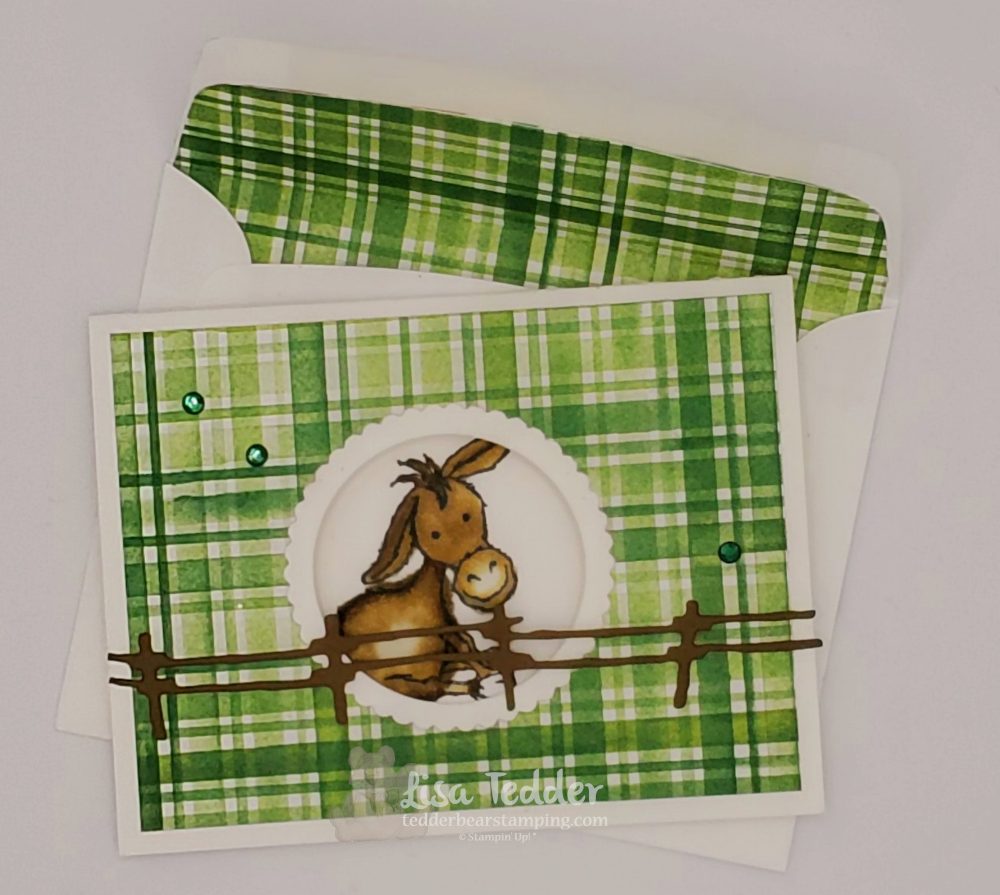
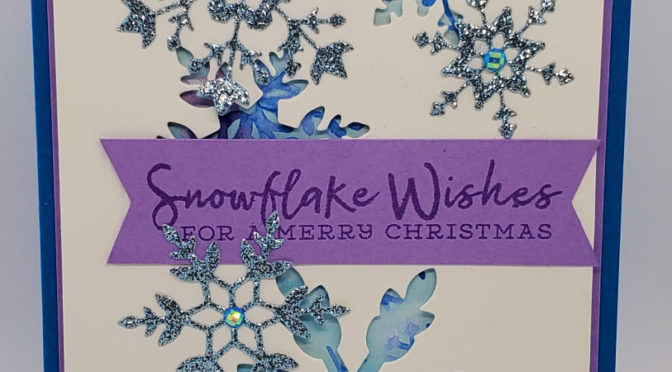
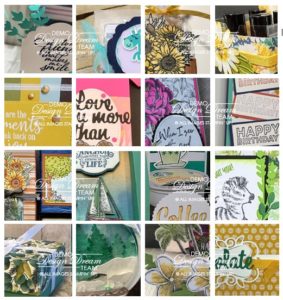
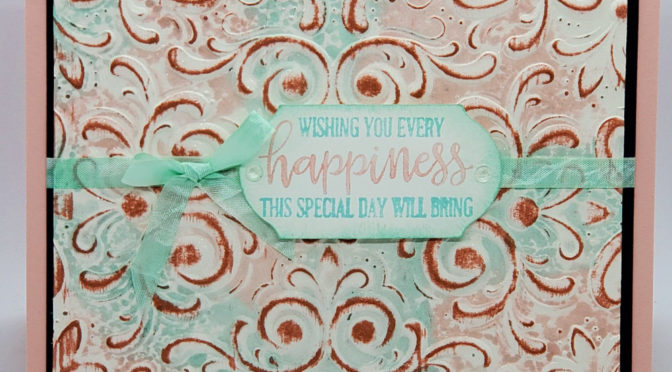
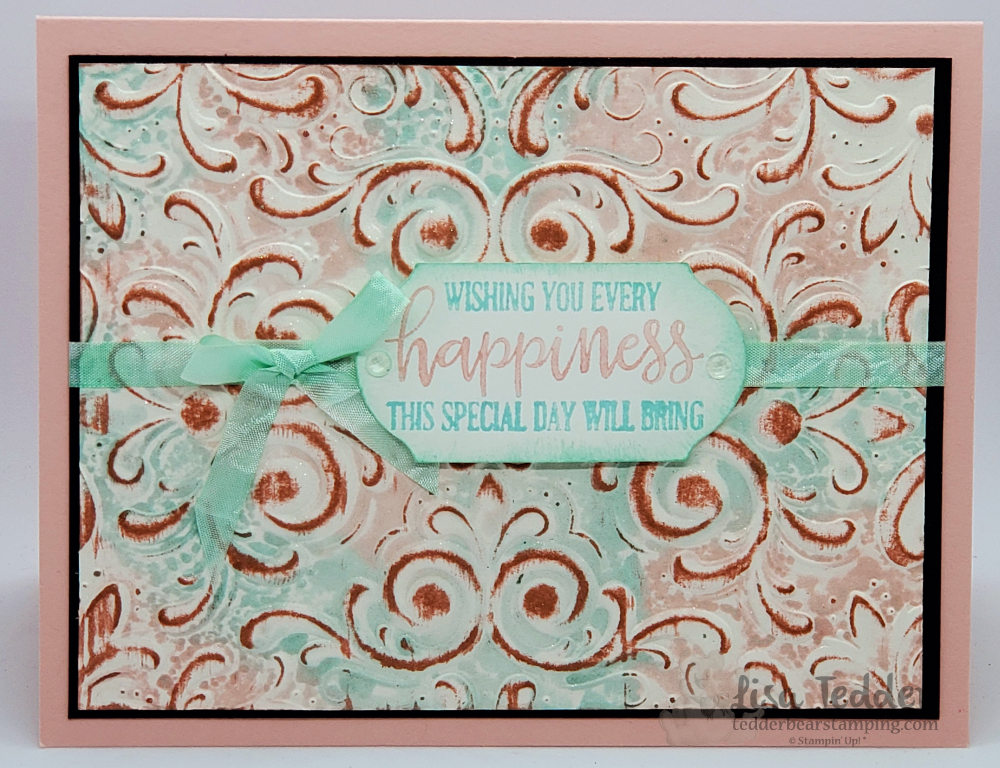
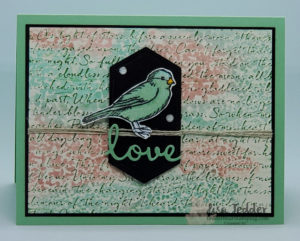
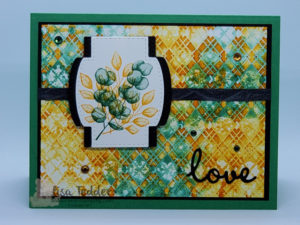
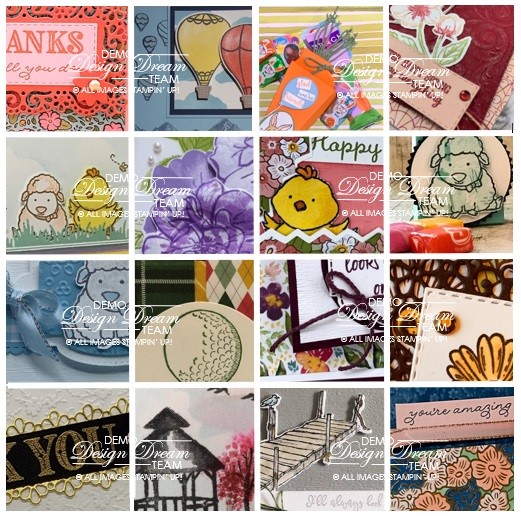
Hey Guys, My favorite set, or one of them is Forever Fern. Worrying that it was going to retire in the next few months, I felt the need to play with it! There is a YouTube video where this card is being made click here to see it. And don’t forget that if you signup for my Newsletter you get to have my PDF’s as I make them for all my designs for Free!! Why do I call Forever Fern my favorite set? Because every time I make a card with it, I am amazed that no matter what color I stamp it with it is always stunning.

My favorite set = Forever Fern

My favorite set

NEW Free Product!

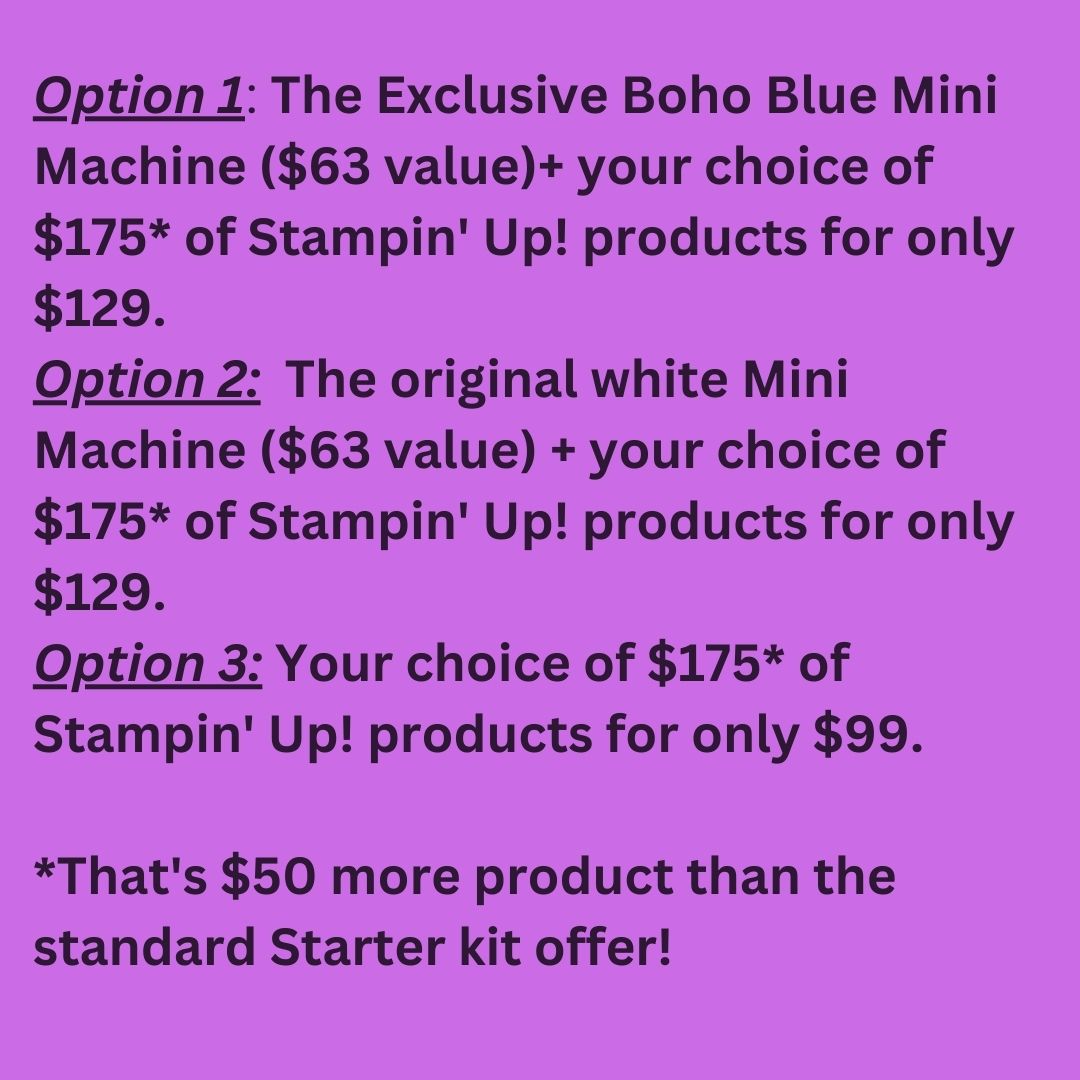
Sale a Bration is over half way over for this year. Stampin’ Up! wanted to be sure that there was plenty we could pick at the beginning, but now they have added more!!

xr:d:DAFaMvCbXUA:23,j:46774493666,t:23021019

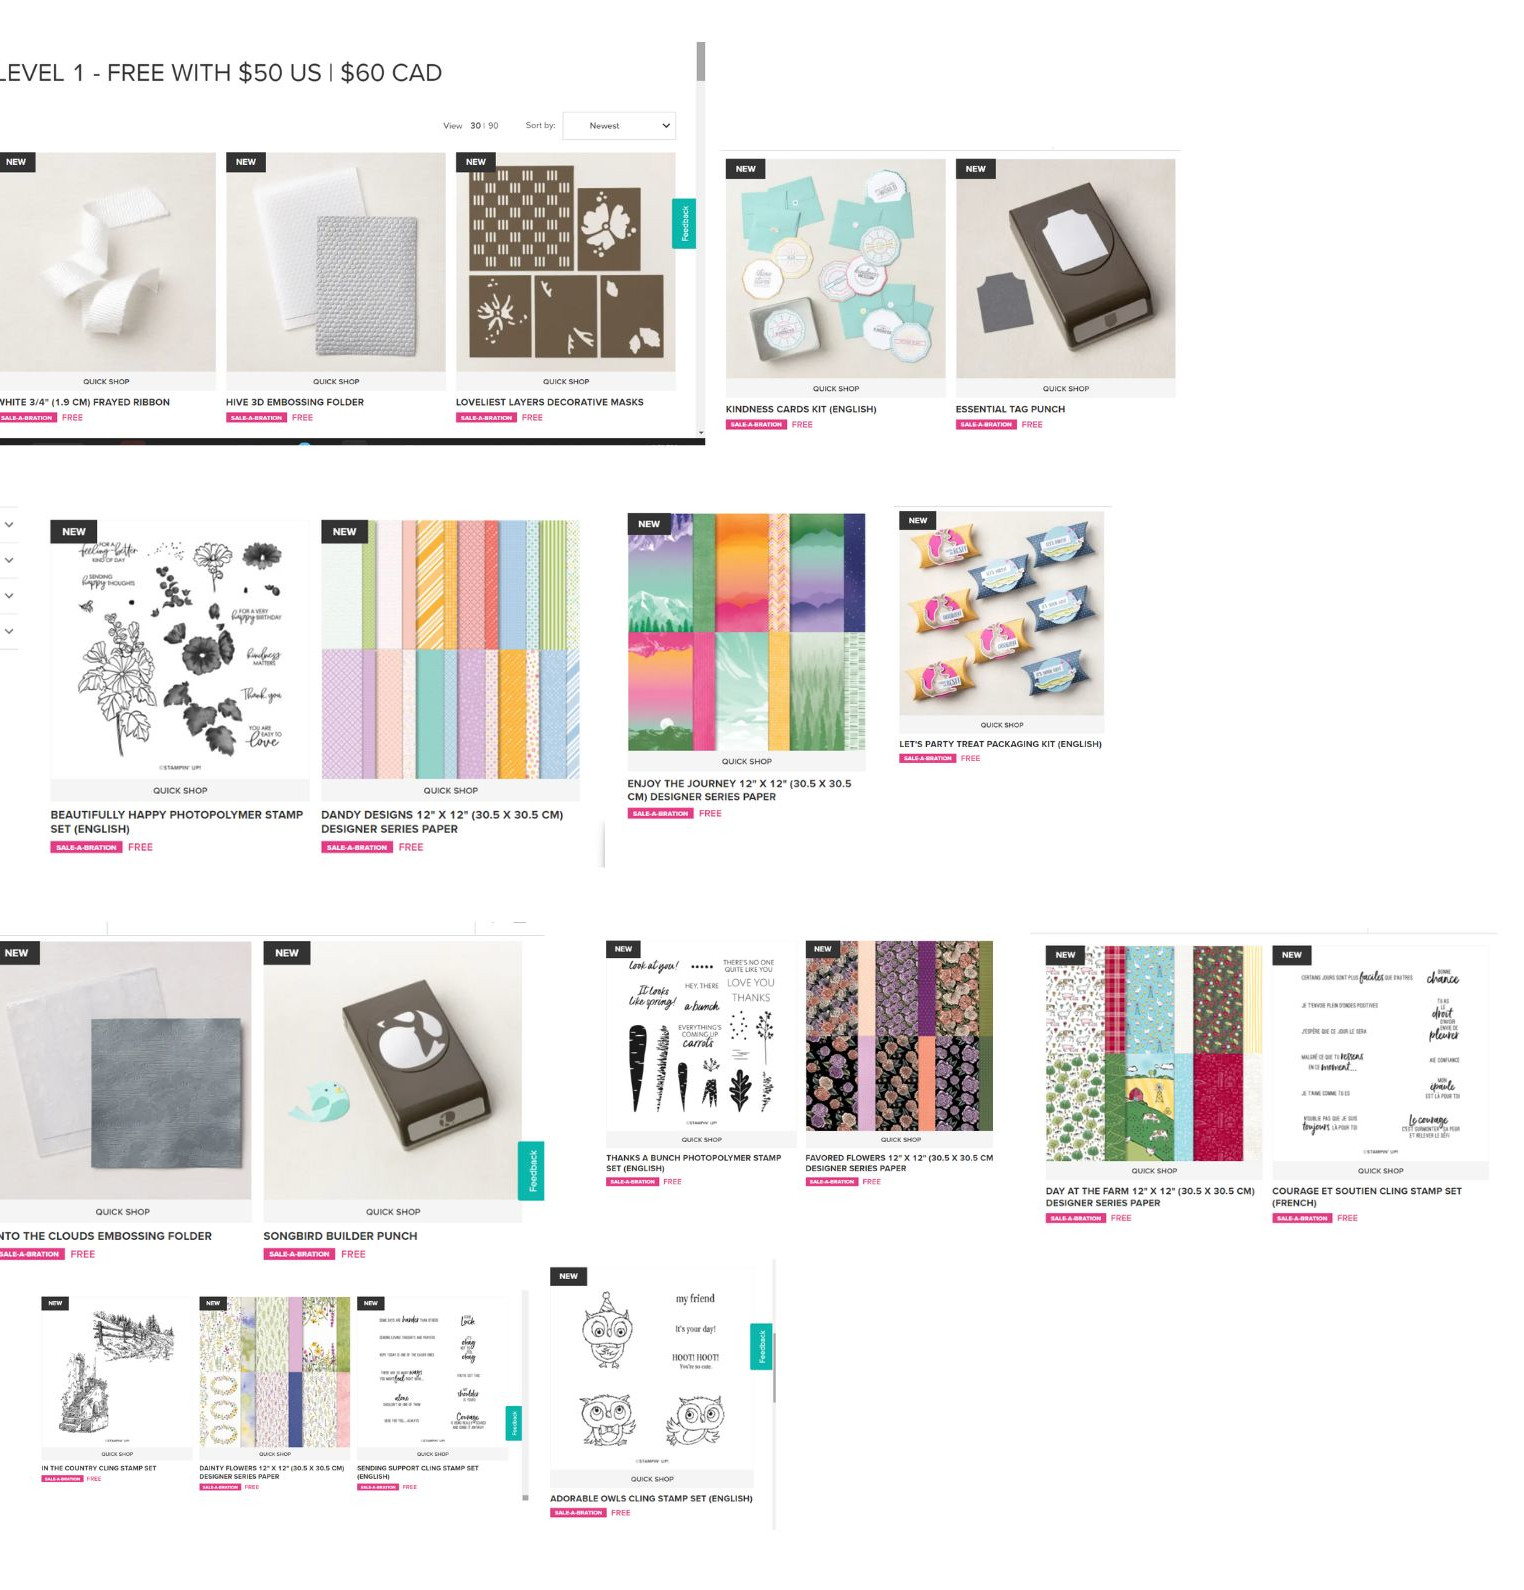
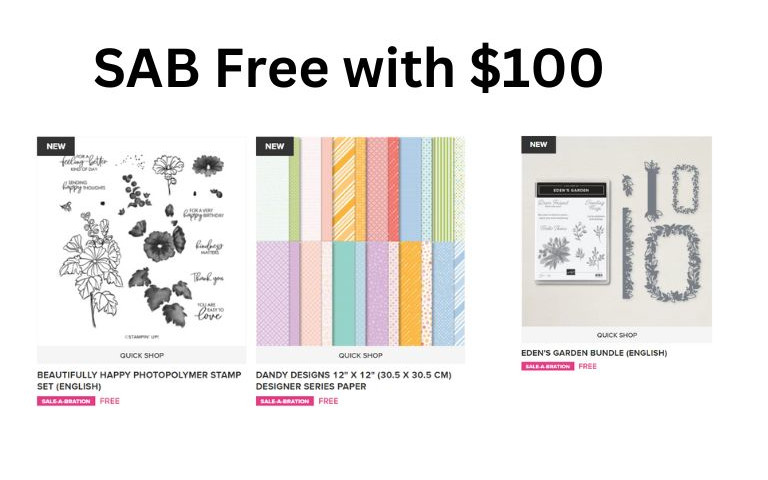
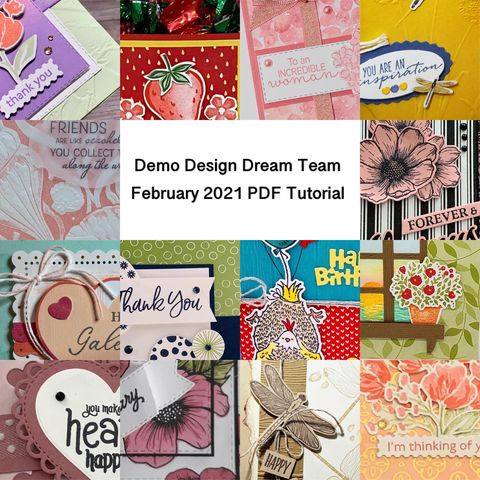
So, I bet there is a LOT here that you would like to get. Don’t wait, Sale a Bration ends in 2 1/2 weeks at the end of February!! I would love it if you would choose me as your Demo, I’ve been one since 2003! Also, if you purchases $35 or more you will also get a PDF with 16 projects that have step by step instructions along with Pictures!

Join while you still can & get a Bonus!!

Overall, joining SU! is a great deal, but if you join during SAB you also get to spend MORE money at the same cost!! Of course everyone loves a deal, so be sure and check out this one, you are running out of time! Every month my Team Lets Stamp! gets together and and makes projects, it’s either by Zoom or in person. Also, each month I buy one of my team members a stamp set of their choosing, the only thing I ask is that they make cards with the set and share with us! Easy, right! Who doesn’t like FREE!? Choose me as your Team Leader and I would be so honored!!

Finishing Up

Thank you so much for coming, hopefully you found things you like! Please leave me a comment and sign up to get notifications when I post. Don’t forget to sign up for my Newsletter so you too can get a Free PDF!

Lisa Tedder
A former California girl living in North Carolina

Product List

Art Gallery with Gilded Leafing!

Hey Guys,

For my Mini class this week I am using Art Gallery with Gilded Leafing! I hadn’t used it up until this card, and I have to tell you I LOVE it! Here is my first card:

Isn’t this gorgeous!?
Inside
Card 2, Art Gallery with Gilded Leafing
inside

Here are the specifics for both cards:

  • Stamps:
  • Art Gallery Bundle
  • Approaching Perfection
  • Inks:
  • Poppy Parade
  • Memento Black
  • Flirty Flamingo
  • Paper:
  • Poppy Parade 8 1/2″ x 5 1/2″, 5 1/8″ x 3 7/8″ (Card 1)
  • Basic Black 5 1/4″ x 4″ (x2), 3 5/8″ x 2 5/8″, scrap (Card 1)
  • Basic White 5 1/8″ x 3 7/8″ (Card 1), 5″ x 2″ (Card 2), 5 1/8″ x 3 7/8″ (Card 2)
  • Golden Garden Designer Specialty Acetate 3 1/2″ x 2 1/2″ (Card 1), 5 1/4″ x 4″ (Card 2)
  • Fine Art Floral Designer Series Paper (DSP) 3 1/2″ x 2 1/2″ (Card 1)
  • Flirty Flamingo 5 1/4″ x 4″ (Card 2)
  • Misc:
  • Tear & Tape
  • Gilded Leafing Embellishment
  • Stamping Sponge
  • Flowers for every Season ribbon combo Pack (I used the white)
  • Forever Greenery Trim Combo Pack ( I used the gold trim
  • Painted Texture 3D Folder
  • Dimensionals

As always, the list of supplies I have above can be seen below in picture form. Click on any of them and you will be taken directly to my OnLine Store! Any order of $35 or more you will receive 1 PDF of 16 projects with pictures and step by step instructions! Here is a sneak peek:

You get each of these in a detailed pdf

Also you will receive for your $35 order is all the class supplies for that weeks video: (cardstock cut, DSP, ribbon, die cuts) along with a Pillow Gift from me!! For each video I do, you have the Thursday I do my Live up until Wednesday of the following week to place an order for that video ‘fixin’s’…..I live in the South, so might as well talk like it! 🙂

Also, I have some exciting news to share!! EEEEEE! It has been a dream of mine since I began in Stampin’ Up! And it is now a reality!! I have teamed up with my two Besties that I have met through SU!, we have been getting together for 10 years and having so much fun together! Carol Hickman is from AZ (other side of the states from me) and Hetty Jones lives in BC Canada. WE are starting a club that you can join for monthly fun and be a part of the Bestie experience! If you would like to learn more, click on this link and you can be as excited as I am!!

As you hopefully know I also do weekly YouTube Lives on Thursdays at 4:00 p.m. (eastern), if you can watch live you will be put in a drawing to possibly win one of the cards I make on my Live! All you have to do is comment so we know you are there! I will mail it to you even if you live out of the States! Hope to see you there! Today I worked on these cards, you can re-watch it here.

Thank you for supporting my Small Business! I really appreciate it!

Lisa Tedder
A former CA girl living in North Carolina

Product List

Ride the Range

Hey Guys!

Guess what today is…..it’s my YouTube Live day! For my stamps today I am going to use Stampin’ Up!’s Ride the Range and Mountain Air. I am always looking for something for a guy or a non girly girl. If you enjoy my cards I would love it if you would join me for one of my LIVE videos! Every time I do a Live if you are there with me, all you need to do is comment and you will be put in a drawing to win one of the cards I make! Of course, you can access all of my videos at my YouTube channel!

Lately, I make sure that not only do I make a video for my classes, but I also do a post giving all the measurements and links to what I used. If you missed my post from last week, you can catch it here!

Here is my first card:

Ride the Range
Ride the Range inside
Ride the Range 2nd card
Ride the Range card 2 inside

As always, here are the specifics for these cards:

  • Stamps:
  • Ride the Range
  • Mountain Air
  • Inks:
  • Early Espresso
  • Memento Black
  • Crumb Cake
  • Crushed Curry
  • Balmy Blue
  • Smoky Slate
  • Pear Pizzazz for sponging
  • Versamark
  • Blends:
  • Soft Suede
  • Balmy Blue
  • Crumb Cake
  • Smoky Slate
  • Cinnamon Cider
  • Paper:
  • Cajun Craze 11″ x 4 1/4″, scored @ 5 1/2″
  • Early Espresso 5 1/8″ x 3 7/8″ (x2)
  • Crumb Cake 5″ x 3 3/4″
  • Very Vanilla 5″ x 3 3/4″, scrap for sentiment
  • Basic Gray 11″ x 4 1/4″ scored @ 5 1/2″
  • Basic Black 5 1/8″ x 3 7/8″ (x2)
  • Basic White 5″ x 3 3/4″ (x2)
  • Soft Suede scrap for fence
  • Pear Pizzazz scrap for grass
  • Misc:
  • Linen Thread
  • Braided Linen Thread
  • Stamping Sponges
  • Dimensionals
  • Stitched with Whimsy
  • Paper snips
  • Liquid Glue

Again, I will let you know that everything listed above will be in picture form below, click on any of them to be taken to my OnLine Store. I would love to have you choose my small business to buy your stamping supplies. For every $35 or more you will earn a PDF that has 16 projects with pictures! Below you can get a sneak peek of the projects. But, that isn’t all you get for supporting me, I will send you the ‘fixin’s’ for these cards if you order before Wed of the following week, you will need to spend $35 or more for that too, but you will get BOTH for the $35!

EVERY Thursday I am Live on YouTube showing you another class for certain stamp sets, that you can earn that week’s card class fixin’s. If you would like to see a stamp set used, send me an email or post your comment here and I will try and do that for you!!

Sneak Peek of the PDF projects
Your Pillow Gift for placing a Qualifying order!
Num!! Chocolate!

If you need to see how I made the cards, be sure and check out my video!!

Thank you so much for stopping by!! Please come back!

Lisa Tedder
A former California girl living in North Carolina

Product List

Donkey Fancy Fold

Hey Guys!

Yesterday I posted a Live YouTube video doing a Fancy Fold using the Darling Donkey stamp set! You can get this set FREE with a $50 purchase! Love, Love, Love this set!! I have been using it a lot ’cause I love it so much! If you missed my last Live you can catch it here! Also, I did a Blog post and that can be found here!

Free Donkey set Fancy Fold!

Of course I did a SECOND card for my Mini Class! And I also used the Free Donkey set!

Free Donkey stamp set on Memories & More gift card

First off, I wanted to tell you that I also used, along with the Donkey, the dies from the Bundle Ride the Range. I will be using this bundle for my next YouTube Live on Thursday January 14th! I hope you can join me. Also, I used some Free Designer Series Paper that comes in the Sale-a-Bration catalog as a bundle itself called Berry Blessings Stamp set + Berry Delightful Stamp set.

Secondly, as usual I am providing all the details needed to make BOTH projects:

  • Stamp sets:
  • Darling Donkeys
  • Many Messages
  • Inks:
  • Memento Black
  • Garden Green
  • Granny Apple Green
  • Blends:
  • Soft Suede
  • Smoky Slate
  • Color Lifter
  • Paper:
  • Basic Black: 12″ x 5 1/2″ (base), 5 1/2″ x 2 18″ (for panels) For Base you will lay it on your cutter/trimmer portrait and place the edge along the 3/4″ line and cut from the 1″ to 5″, pick up cutter and cut from 7″ to 11″, repeat for other side. Then place on trimmer Landscape and you will SCORE only on the outside edge (between the cut and edge), score on 1″, 5″, 7″ & 11″. Keep in Landscape and score ALL THE WAY across on 2″, 4″ 8″ & 10″. You will fold them on the outside edges mountain, valley, mountain valley (this is the same on both sides working towards the middle) Do both top and bottom. Inside flap gets folded mountain, valley, valley, mountain.
  • Granny Apple Green: 3 7/8″ sq. (back panel), 8″ x 3 7/8″ for middle scene, 5/8″ x 7/8″ (x8) for bottom and top small edges, 4 1/8″ x 3 1/8″ (for gift card)
  • Berry Delightful Designer Series Paper: cut 4″ x 5 3/8″ (turn and cut @ 2″ in half so they will line up), 4″ x 5 3/8″ for front panels when card is closed. 5/8″ x 1 7/8″ for adding to the tip and bottom small panels. And 4 1/4″ x 2″ for envelope flap
  • Memories & More Cards & Envelopes: I used a gift card/Envelope for small Donkey card.
  • White: 4″ x 3″ inside the Gift card
  • Misc:
  • Open Range Dies
  • Many Messages Dies
  • Layering Circle Dies
  • Stitched Shapes Dies (for sentiment donkey is kicking)
  • Holiday Rhinestones
  • Liquid Glue
  • Paper Trimmer

As you already know if you follow me and my blog, all the supplies will be listed below, click on any of the pictures and you will be taken to my OnLine Store! For any purchase of $35 or more you will receive from me the class packet for the class I am detailing today, which will include all the cardstock, die cuts (not the sentiments since that is not allowed per SU!) but I can send you the one die cut for the sentiment that the donkey is kicking since that is stamped with the stamp set and not the Many Messages. Also, you will get the Rhinestones and I will pre cut/score for the main card and die cut the circle for the gift card! The one thing I can not do is stamp anything.

BUT the great thing is it’s Sale-a-Bration now and you can get MORE than you would normally! Spend $50 and you can pick out that CUTE Darling Donkey set for FREE! This is while supplies last, so don’t wait! Furthermore, you will get the 16 project ideas in a PDF that has step by step instructions and pictures….hint, my Home decor item is what I made!! So you will have the measurements for that too!

Thank you for all your support! I so appreciate you joining me on my Live classes and for those who can’t watch live I appreciate you watching it later!

If you are in need of a catalog, let me know and I will get one right out to you!

Love ya!

Lisa Tedder
Formerly a CA girl now living in North Carolina

Product List

I made my own Fall Ink Pad, you can too!

Hey Guys!

Today I am going to show you how I made my own Fall ink pad so that leaves on my tree look natural, when I am done you’ll be able to also!! Of course, I made a video you can go here if you would like to SEE how I made it! Naturally, I tend to look at pictures and if I have questions a video helps me out a lot. As an example, here is a picture of my card:

See how the leaves are THREE different colors! That’s my own Fall ink pad!
My own Fall ink pad was used for the inside too!

So, how did I make my fall ink pad? To begin with I had a dirty, yucky Versamark pad that I never used and thought of chucking it in the trash……but no, I could make my own Fall ink pad so my tree will look gorgeous AND match the colors I was using for this card!

My own Fall ink pad made from an OLD Versamark pad!

Since I wanted the colors to match my card I used Bumble Bee, Cherry Cobbler and for the green I went with Just Jade. Already I knew that I wanted to use the Holiday Rhinestones and those used Cherry Cobbler for the red, and a yellow that looked a lot like Bumble Bee but the green was Shaded Spruce so I went with a lighter shade of color and used Just Jade instead. It’s funny how I go about figuring out which colors I use in my crafting, this time it was all about the Rhinestones……gotta have that BLING!

For a different fall project that I made a few years ago, click here!

As always here are the specifics for this card:
Stamps:
Life is Beautiful
Inks:
Bumble Bee
Cinnamon Cider
Cherry Cobbler re-inker
Just Jade re-inker
Bumble Bee re-inker
OLD Versamark pad (you can use new!)
Paper:
Bumble Bee 8 1/2″ x 5 1/2″ (scored at 4 1/4″), 3 7/8″ x 5 1/8″
Cinnamon Cider 5 1/4″ x 4″ (x2)
Very Vanilla 5″ x 3 3/4″ (x2), scrap for sentiment
Misc:
Holiday Rhinestones
Stamping Sponges
Dimensionals
Tasteful Labels Dies
Bumble Bee Gingham ribbon

As you know, all the supplies will be listed below in picture form. Consequently if you click on any of them you will be taken to my OnLine Store, for every purchase at or above $35 you will get from me 16 projects in a pdf with pictures and step by step instructions!

Sneak Peek for projects you will get in your pdf!

To summarize, I am a ‘give the facts and be done’ kind of girl, so I will let you go for now, check back in next week for a new card/video! If you want to know when I post, subscribe and you can also receive a Newsletter from me by subscribing to that too! Thanks for stopping by and supporting me!

Lisa Tedder
A California girl living in North Carolina

Product List

Christmas in July Blog Hop!

Hey Guys!,

It’s July! You know what that means! I usually do Christmas in July. This year is no different. Today I am participating in a blog hop! I don’t usually do this, so you’ll have to let me know if you enjoy it!

Today I am sharing with you a card I did using Stampin’ Up!’s Bundle Snowflake Wishes! I LOVE this Suite to be honest! I bought the whole thing! The Glimmer Balmy Blue paper is sooooo pretty! There are only two things in the Suite I didn’t use on this and that is the Snowflake Splendor 1/4″ ribbon and the Winter Snow embossing folder. I’m adding it to the pictures below so if YOU want to use it for this card you can!

Here is my card:

Snowflake Wishes Christmas in July
Snowflake Wishes Suite Christmas in July

Doesn’t the Highland Heather just make this pop! I love all the sparkle this card has in person! It’s too bad you can’t see it, oh!, wait! you can! I made a video showing this card! You can see the video here!

For another Christmas card in July using this same Suite you can see it here. I also made a video doing that card which you can catch here.

Here is the inside to my card:

Christmas in July Blog hop inside

As usual, here are the specifics for this card.

Stamps:
Snowflake Wishes Bundle

Inks:
Highland Heather

Paper:
Pacific Point 8 1/2″ x 5 1/2″
Highland Heather 5 1/4″ x 4″ (x2), scrap 7/8″ x 3 3/4″, 1 3/4″ x 2 3/4″ (for inside)
Snowflake Splendor DSP 5 1/8″ x 3 7/8″
Whisper White 5 1/8″ x 3 7/8″, scraps for the snowflakes
Balmy Blue 5 1/8″ x 3 7/8″
Balmy Blue Glimmer Paper scraps for snowflakes

Misc:
Dimensionals
Simply Scored
Blue Adhesive-backed Gems
Wink of Stella
Everyday Label Punch
Banners pick a punch

You will also see the supplies in picture form below, click on any of them to be taken to my OnLine Store. If you purchase $35 or more from me you will receive a pdf that has 16 projects with pictures and step by step instructions!

For the scores on the sides of the white cardstock (can’t see in the picture, but it really makes this card) I started at 3/8″ and then did three lines in a row, turned the cardstock and did the same on the opposite side. It really adds some interest, don’t you think? I also popped up this layer since it makes the DSP underneath really shine! Of course I had to add the Blue Adhesive backed Gems!

I hope you have enjoyed this post! Please stop back in, I will be posting regularly now! Don’t forget to sign up for my Newsletter! I send out good ideas!

Lisa Tedder
A California girl living in North Carolina

Powered by Linky Tools

Click here to enter your link and view this Linky Tools list…

Product List

You Can Emboss with that?!

Hey Guys!

Did you know that you can emboss with water?! What!? I didn’t think it was possible, but I accidentally dripped water on a project I was Gold embossing, as I poured the powder, the water took it too and it embossed along with the Versamark!

So, of course I HAD to try it with JUST water, and you guessed it……it embossed! You can see the video of this card here. Here is a picture of my project:

The Gold spots are where I embossed with WATER!
The inside of my Water embossed card!

To get the ‘silver’ look on the background, I used a Sponge Brayer and the Frost White Shimmer Paint and applied it to the Birch Background stamp from Stampin’ Up! On black the ‘white’ looks more silver, therefore this card has both Silver & Gold! Every time I say that, I want to break into song singing “Silver & Gold, Silver & Gold”! I ‘think’ it’s from Rudolph the cartoon, do you know?

I also embossed the tag with Gold and used the Banners Pick a Punch to get the tag perfect! For the Stamp set, I used the Beautiful World Bundle. LOVE this set!

If you would like to see another embossing technique you can check it out here!

As always, here are the specifics for this card:

Stamps:
Beautiful World Bundle
Birch

Inks:
Versamark
Misty Moonlight
Blends: Misty Moonlight (light)

Paper:
Misty Moonlight 8 1/2″ x 5 1/2″, scrap for behind the map
Gold Foil 5 1/8″ x 3 7/8″
Silver Foil
Basic Black 5″ x 3 3/4″ (x2), scrap for map, 2 strips for behind sentiment & behind cut out on the inside
Whisper White 4 3/4″ x 3 1/2″

Misc:
Frost White Shimmer Paint
Dimensionals
Banners Pick a Punch
Sponge Brayer
Gold Embossing Powder
3/8″ Metallic Edge Ribbon (Gold)
Heat Tool

You can click on any of the supplies in picture form below and you will be taken to my OnLine Store! If you decide to purchase from me, any time you spend $35 or more you will receive from me a pdf of 16 projects with pictures and step by step instructions! Here is a sample of what you will get in July:

Any purchase from my Store for $35 you get a PDF with these projects!

Finally, what do you think? Did you know that you can emboss with WATER? I sure didn’t! I hope you liked learning something new. Please be sure and come back (subscribe to my blog & Newsletter) so you can see my next project! Thank you for supporting me by visiting! I appreciate you!

Lisa Tedder
A California girl living in North Carolina

Product List

NEW Technique: Spot On!

Hey Guys!

Today I am sharing with you a New technique that I discovered that I am calling Spot On! Have you ever wondered what, if anything you should do with your Stampin’ Spots other than take them on the road? This technique is for you! It’s really easy and really packs a punch (which is why I love it!) Want to see it?

Rub the stampin’ spots onto the Folder spritz and that’s why I called this technique Spot On!

Go see my video if you haven’t seen it yet so you can see how to make this! Every card will be different, and you can make it really bold by changing the color of the spot’s you use! This Technique I am calling Spot On! because the name fits! Take your stamping spots and rub on the side of the folder that is indented, being sure to cover the surface with two – three colors (I only used two for all my samples). I spritzed it with an Rubbing Alcohol/Champagne Mist mixture to give it sparkle and to get the color to spread.

Then I put my cardstock in the folder (I used Shimmer White because it is slightly thicker and can handle the wetness without pilling). Heat set it when you get it out (you can spritz once more to get the color to run a bit more)…..once dry, run one of the colors you used over the raised portion from the Folder to pick up the design. EAsy Peasy! If you would like to see other Techniques click here.

Here are two other ideas I used:

Technique Spot On! Using Free as a Bird and Scripty Folder 3D.

And one more:

Another Spot On Technique using Absolutely Argyle Folder & Forever Fern Stamp set.

As always here are the specifics for my Main card:

Stamps:
Peaceful Moments

Inks:
Spots: Pool Party & Blushing Bride
Markers: Pool Party & Blushing Bride
Pool Party for sponging
Blend: Pool Party

Paper:
Blushing Bride 8 1/2″ x 5 1/2″
Basic Black 5 1/8″ x 3 7/8″
Shimmery White 5″ x 3 3/4″, scraps for sentiment

Misc:
1/4″ Crinkled Seam Binding
Elegant Faceted Gems
Stampin’ Seal adhesive
Dimensionals
Parisian Flourish 3D folder
Spritzer, you can use Stampin’ Spritzer
Shimmer Paint: Champagne Mist
Alcohol

Below you will find a pictorial list of the supplies used, click on any of them to be taken to my OnLine Store. If you purchase from me $35 or more you will receive from me in your email a pdf with 16 tutorials for projects with pictures! I would love to be your Stampin’ Up! Demonstrator, let me know what I can do to make your crafting life easier!

Lisa Tedder
A California girl living in North Carolina

Product List

Simple Stamping Beauty

Hey Guys!

Today I am sharing with you a card that uses Simple Stamping, and Simple Stamping can be beautiful! I DID have it have layers, because I can’t do a card that doesn’t have layers! Here is another ‘Simple Stamping’ card that I have done in the past!

Here is a pic of my card:

Simple Stamping Beauty!

Simple Stamping means that you aren’t doing anything special to the card other than stamping. I added ribbon because it needed it! Another thing I added is the New In Color 2020-2022 Enamel Dots. There isn’t any Die Cuts on this card, which I hardly ever do! I hope you like it!

As always here are the specifics for this card:

Stamps:
Beautiful Friendship
Inks:
Highland Heather
Just Jade
Magenta Madness
Paper:
Magenta Madness 8 1/2″ x 5 1/2″
Basic Black 5″ x 3 3/4″, small strip to place over ribbon
Whisper White 4 3/4″ x 3 1/2″
Misc:
2020-2022 In Color Enamel Dots
Magenta Madness 1/4″ In Color Ribbon

It’s not often that I do Simple Stamping! You’ll have to let me know if you want to see more of that or you prefer my usual style. I get bored making too easy cards hence the reason I go a little over and above. 🙂

Hope you enjoyed your visit! Below you will see the supplies listed in picture form. Click on any of the pictures and you will be taken to my OnLine Store. Any purchase of $35 and you will be sent a pdf file with 16 tutorials with step by step directions and Photos! If you are in need of a Demonstrator from Stampin’ Up! you can choose me!

Lisa Tedder
A California living in North Carolina

Product List

A new way to Color!

Hey Guys!

Today I am sharing with you a New (to me) way to color, I have really never liked to color using Markers, it always seemed too…….much. I love to color straight onto my stamp sets using markers, but not to actually color an image once stamped. Stampin’ Blends are my go-to for coloring because they are easy. Moreover, they let you shadow really well, the only problem with Blends is when you use Embossing Powder on your project. For some reason they get muddy when they touch the embossed part. Even though I try to NOT touch the embossed part, inevitably I always do. Here is my card so you can see why I had problems with Blends.

Colored with Markers

As you can see, this is a pretty busy stamp, It’s called Ornate Style, the embossed parts are close together. Now, I could have stamped and not embossed, but I love the way the embossing is shiny and really lets the image stand out. Furthermore, I never thought of blending with markers! So, I used two different colors to make it look like it did when I used Blends. It came out MUCH better than I thought it would, in fact I love it! Now I will have to do this more often! I then sponged the white cardstock with Crumb Cake and then the edges were sponged with Early Espresso.

Also, I used other items from the Suite in the upcoming 2020-2021 Annual Catalog from Stampin’ Up! The dies I used are called Ornate Layers and the other stamp set is called Ornate Thanks & I am in love! Doesn’t everyone like playing with new goodies?! The great thing about this Suite is that you can get it now, (some of the dies are on backorder) and it will be good until the end of the Upcoming catty and possible longer! For those of you who like getting the discount when you order bundles, I will honor the bundle price and give you 10% off your dies when you can order them. Since it will be around a long time, there will be lots of time to create projects using it! Plus, there are a TON of project ideas on Pinterest, you will be kept busy for sure!!

As usual, here are the specifics for this card:

Stamps:
Ornate Style
Ornate Thanks

Inks:
Versamark
Crumb Cake/Early Espresso for sponging edges
Markers: Balmy Blue/Pacific Point, Mango Melody/Pumpkin Pie, Calypso Coral/Flirty Flamingo, Old Olive/Mossy Meadow & Soft Suede for stems

Paper:
Balmy Blue 8 1/2″ x 5 1/2″
Night of Navy 5 1/2″ x 4″, scrap for sentiment
Whisper White 4 3/4″ x 3 1/4″

Misc:
Embossing Buddy
Heat tool
Black Embossing Powder
White Embossing Powder
Ornate Layers Dies
Ornate Frames Dies
Noble Peacock Rhinestones
Basic Rhinestones
Wink of Stella
Dimensionals
Stampin’ Sponges

Also, you will find the same supplies listed below in picture form, click on any of them to be taken to my OnLine Store! Purchase $35 or more from me and you will Receive not one but TWO sets of project files with over 50 (combined) tutorials with pictures! Here is a sneak peek of just one set:

Tutorials with pictures/supplies

I really hope you are taking this ‘down time’ at home and are playing with your stamps. When I woke up this morning I felt down…….I told myself to go down to my office and make something pretty, THAT always makes me happy. I hope that you are taking care of yourselves and making pretty things too!

Please stay safe, do something creative and send some Happy Mail! Come back soon!

Lisa Tedder
A California girl living in North Carolina

Product List