Tag Archives: Gold Foil Sheets

Sympathy card using Bokeh stamp

Hey Guys!

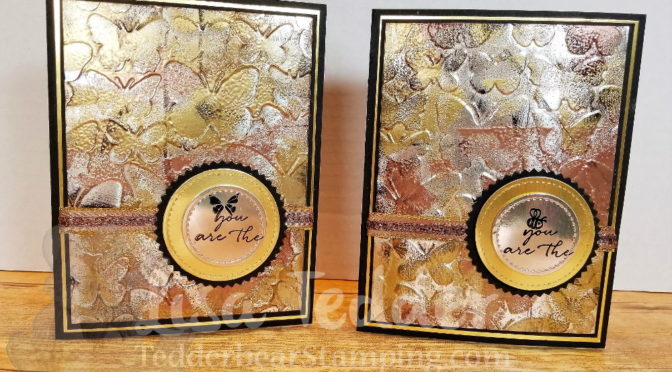
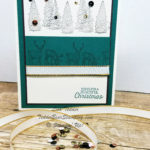
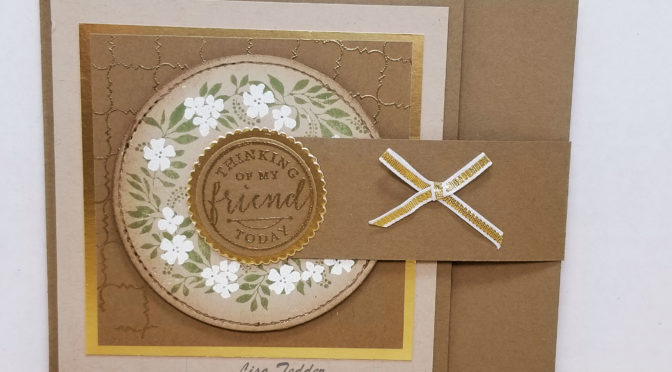
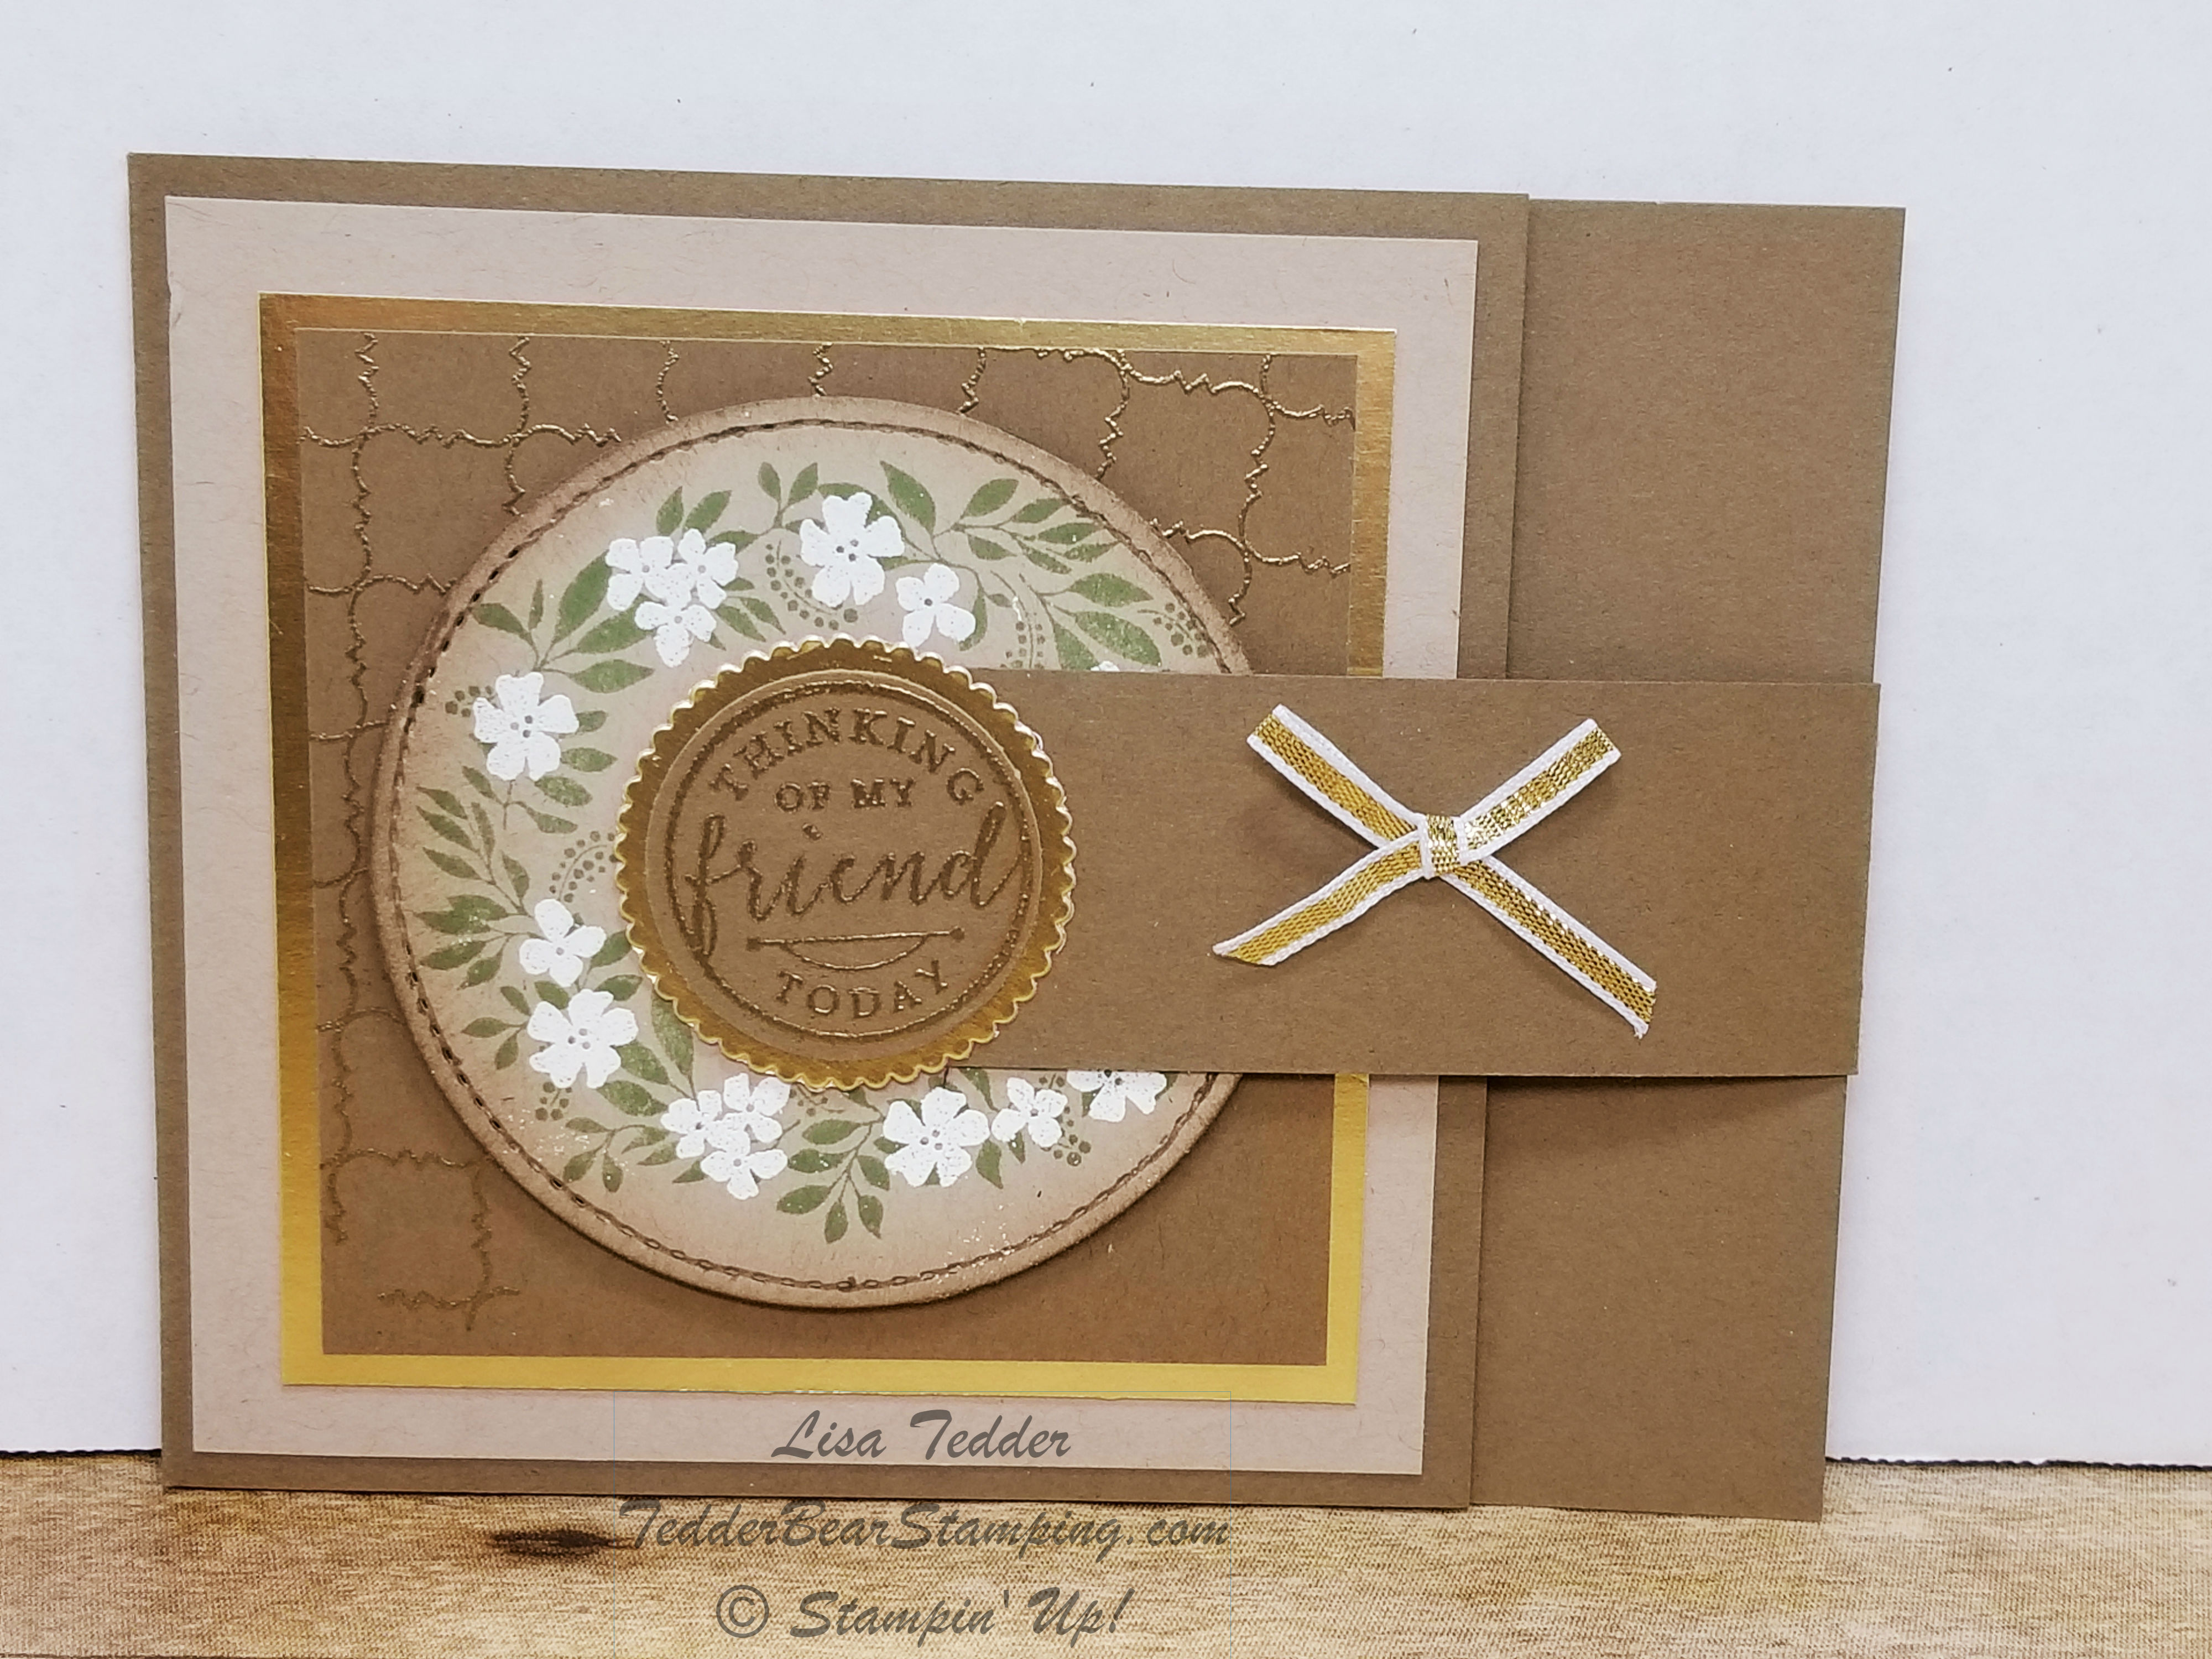
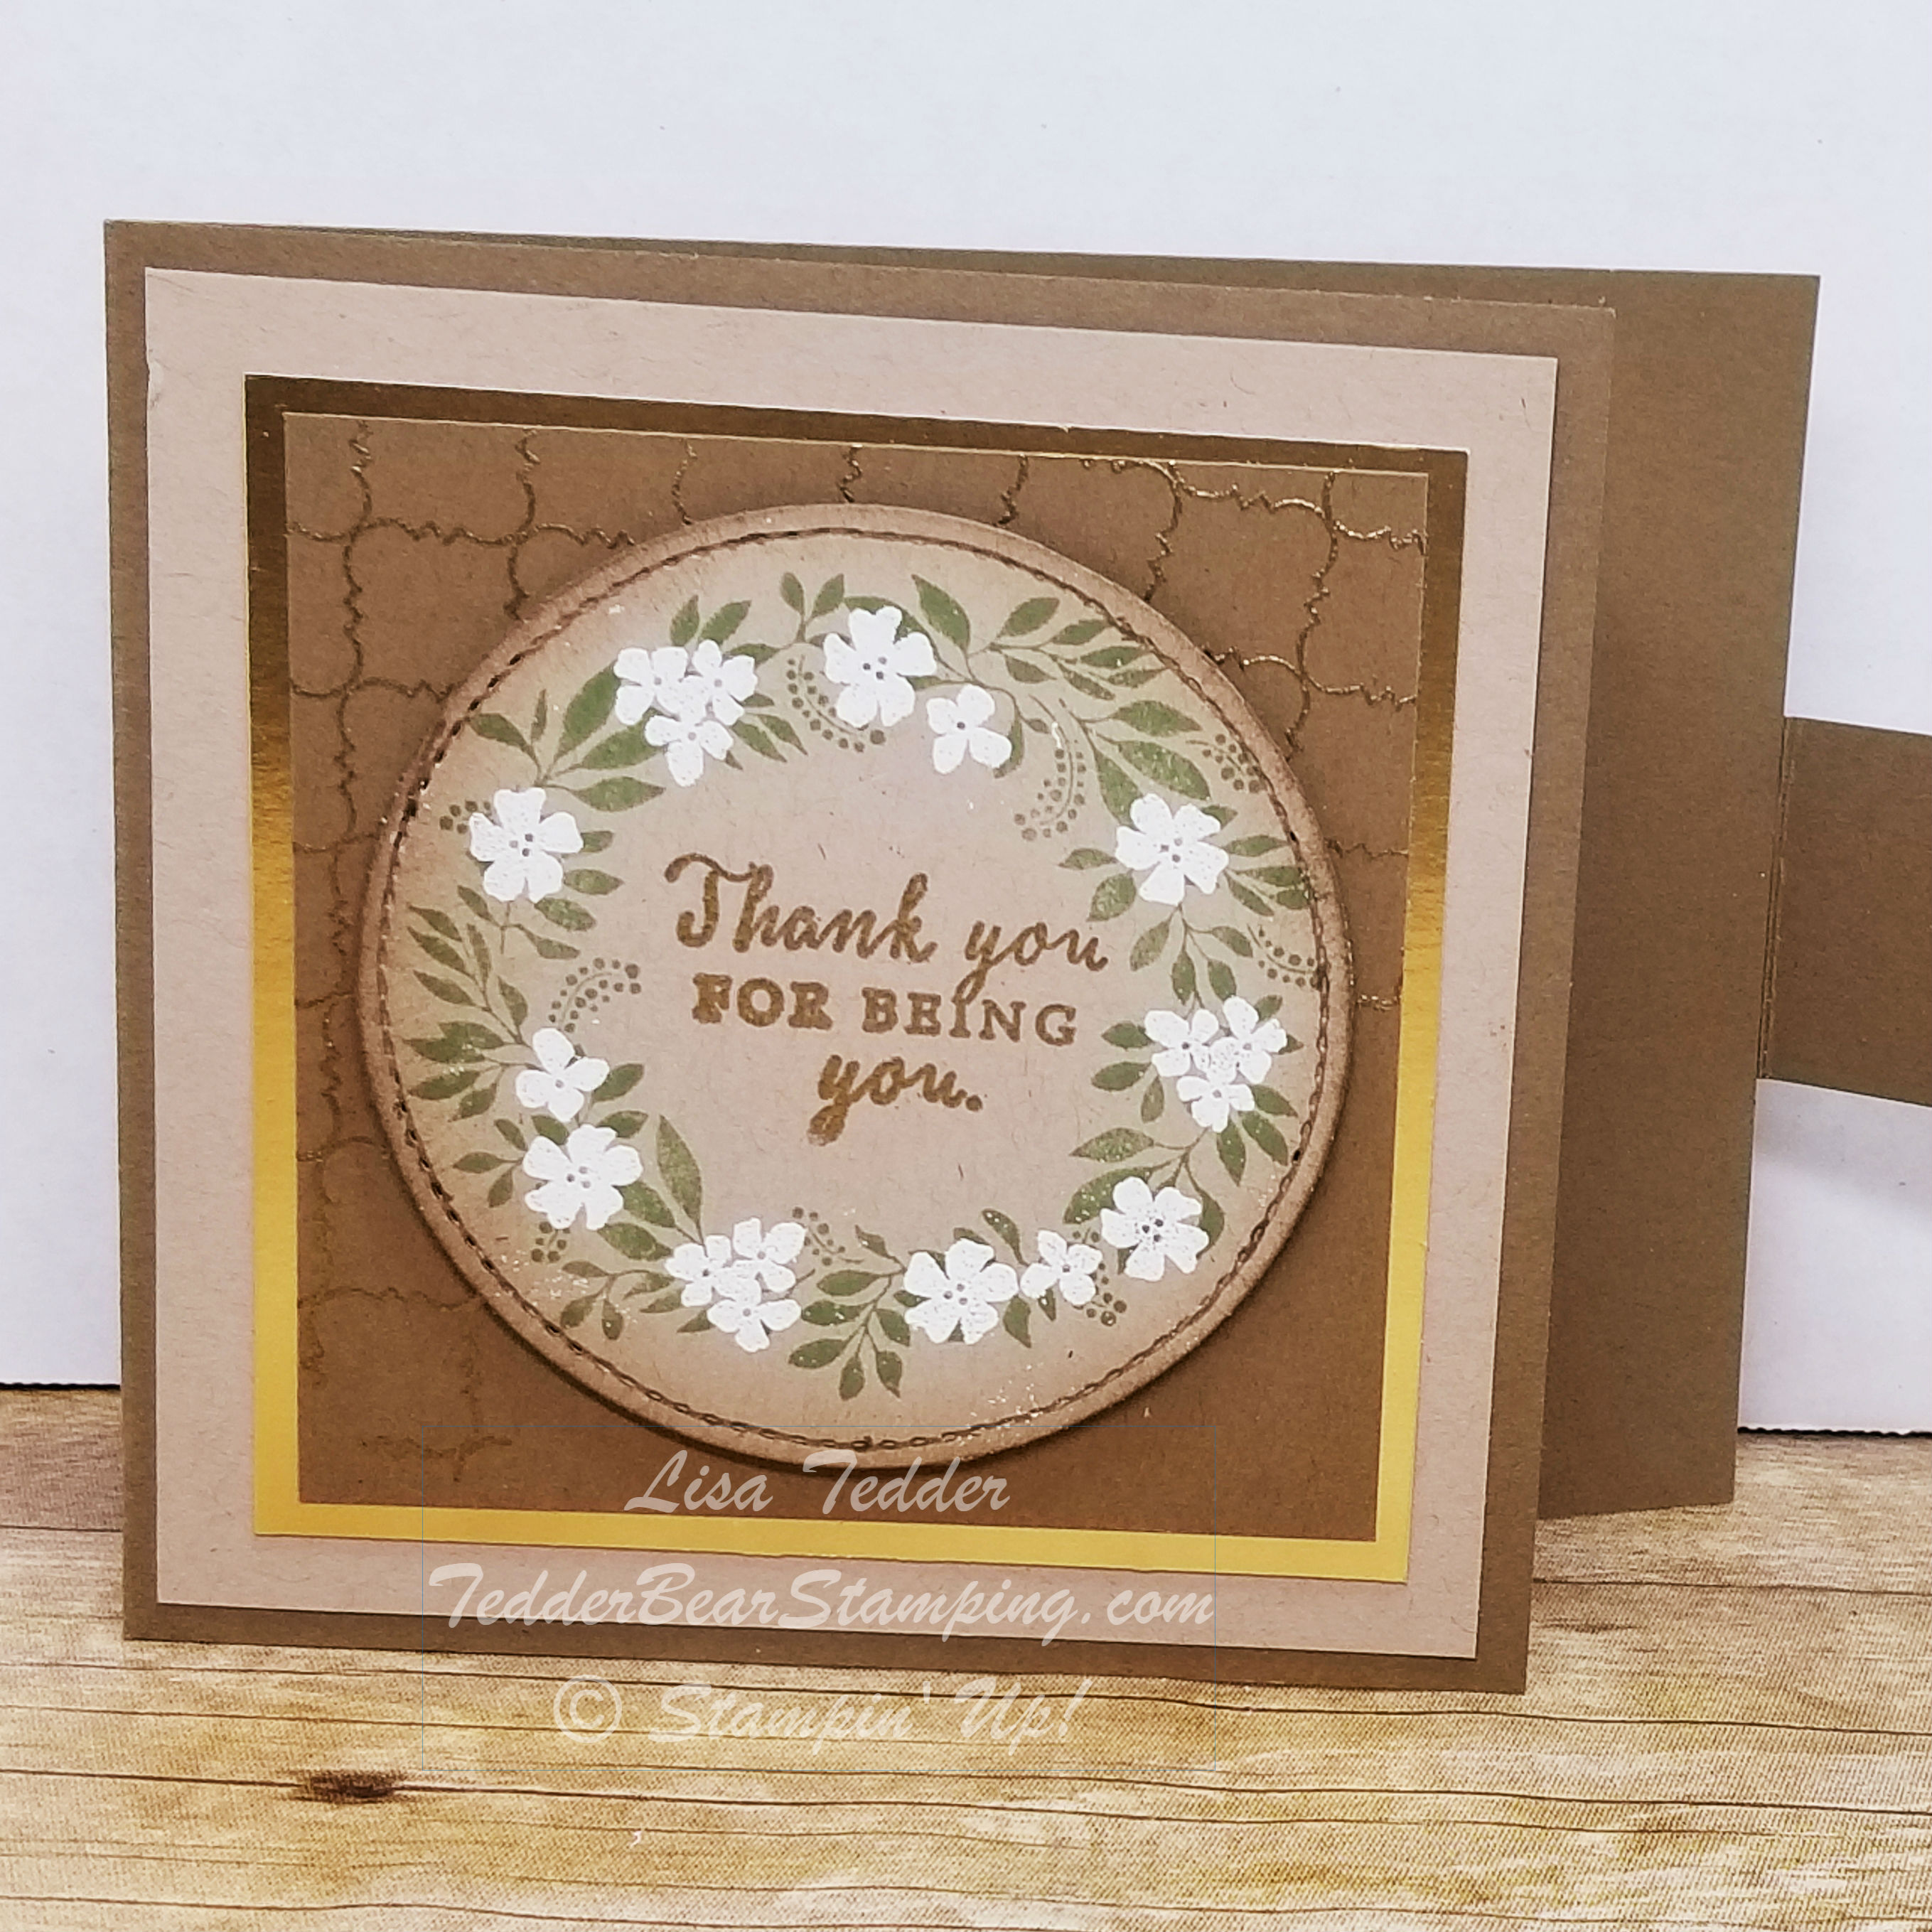
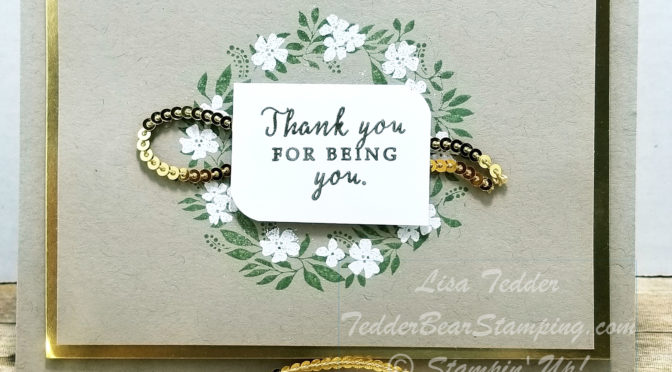
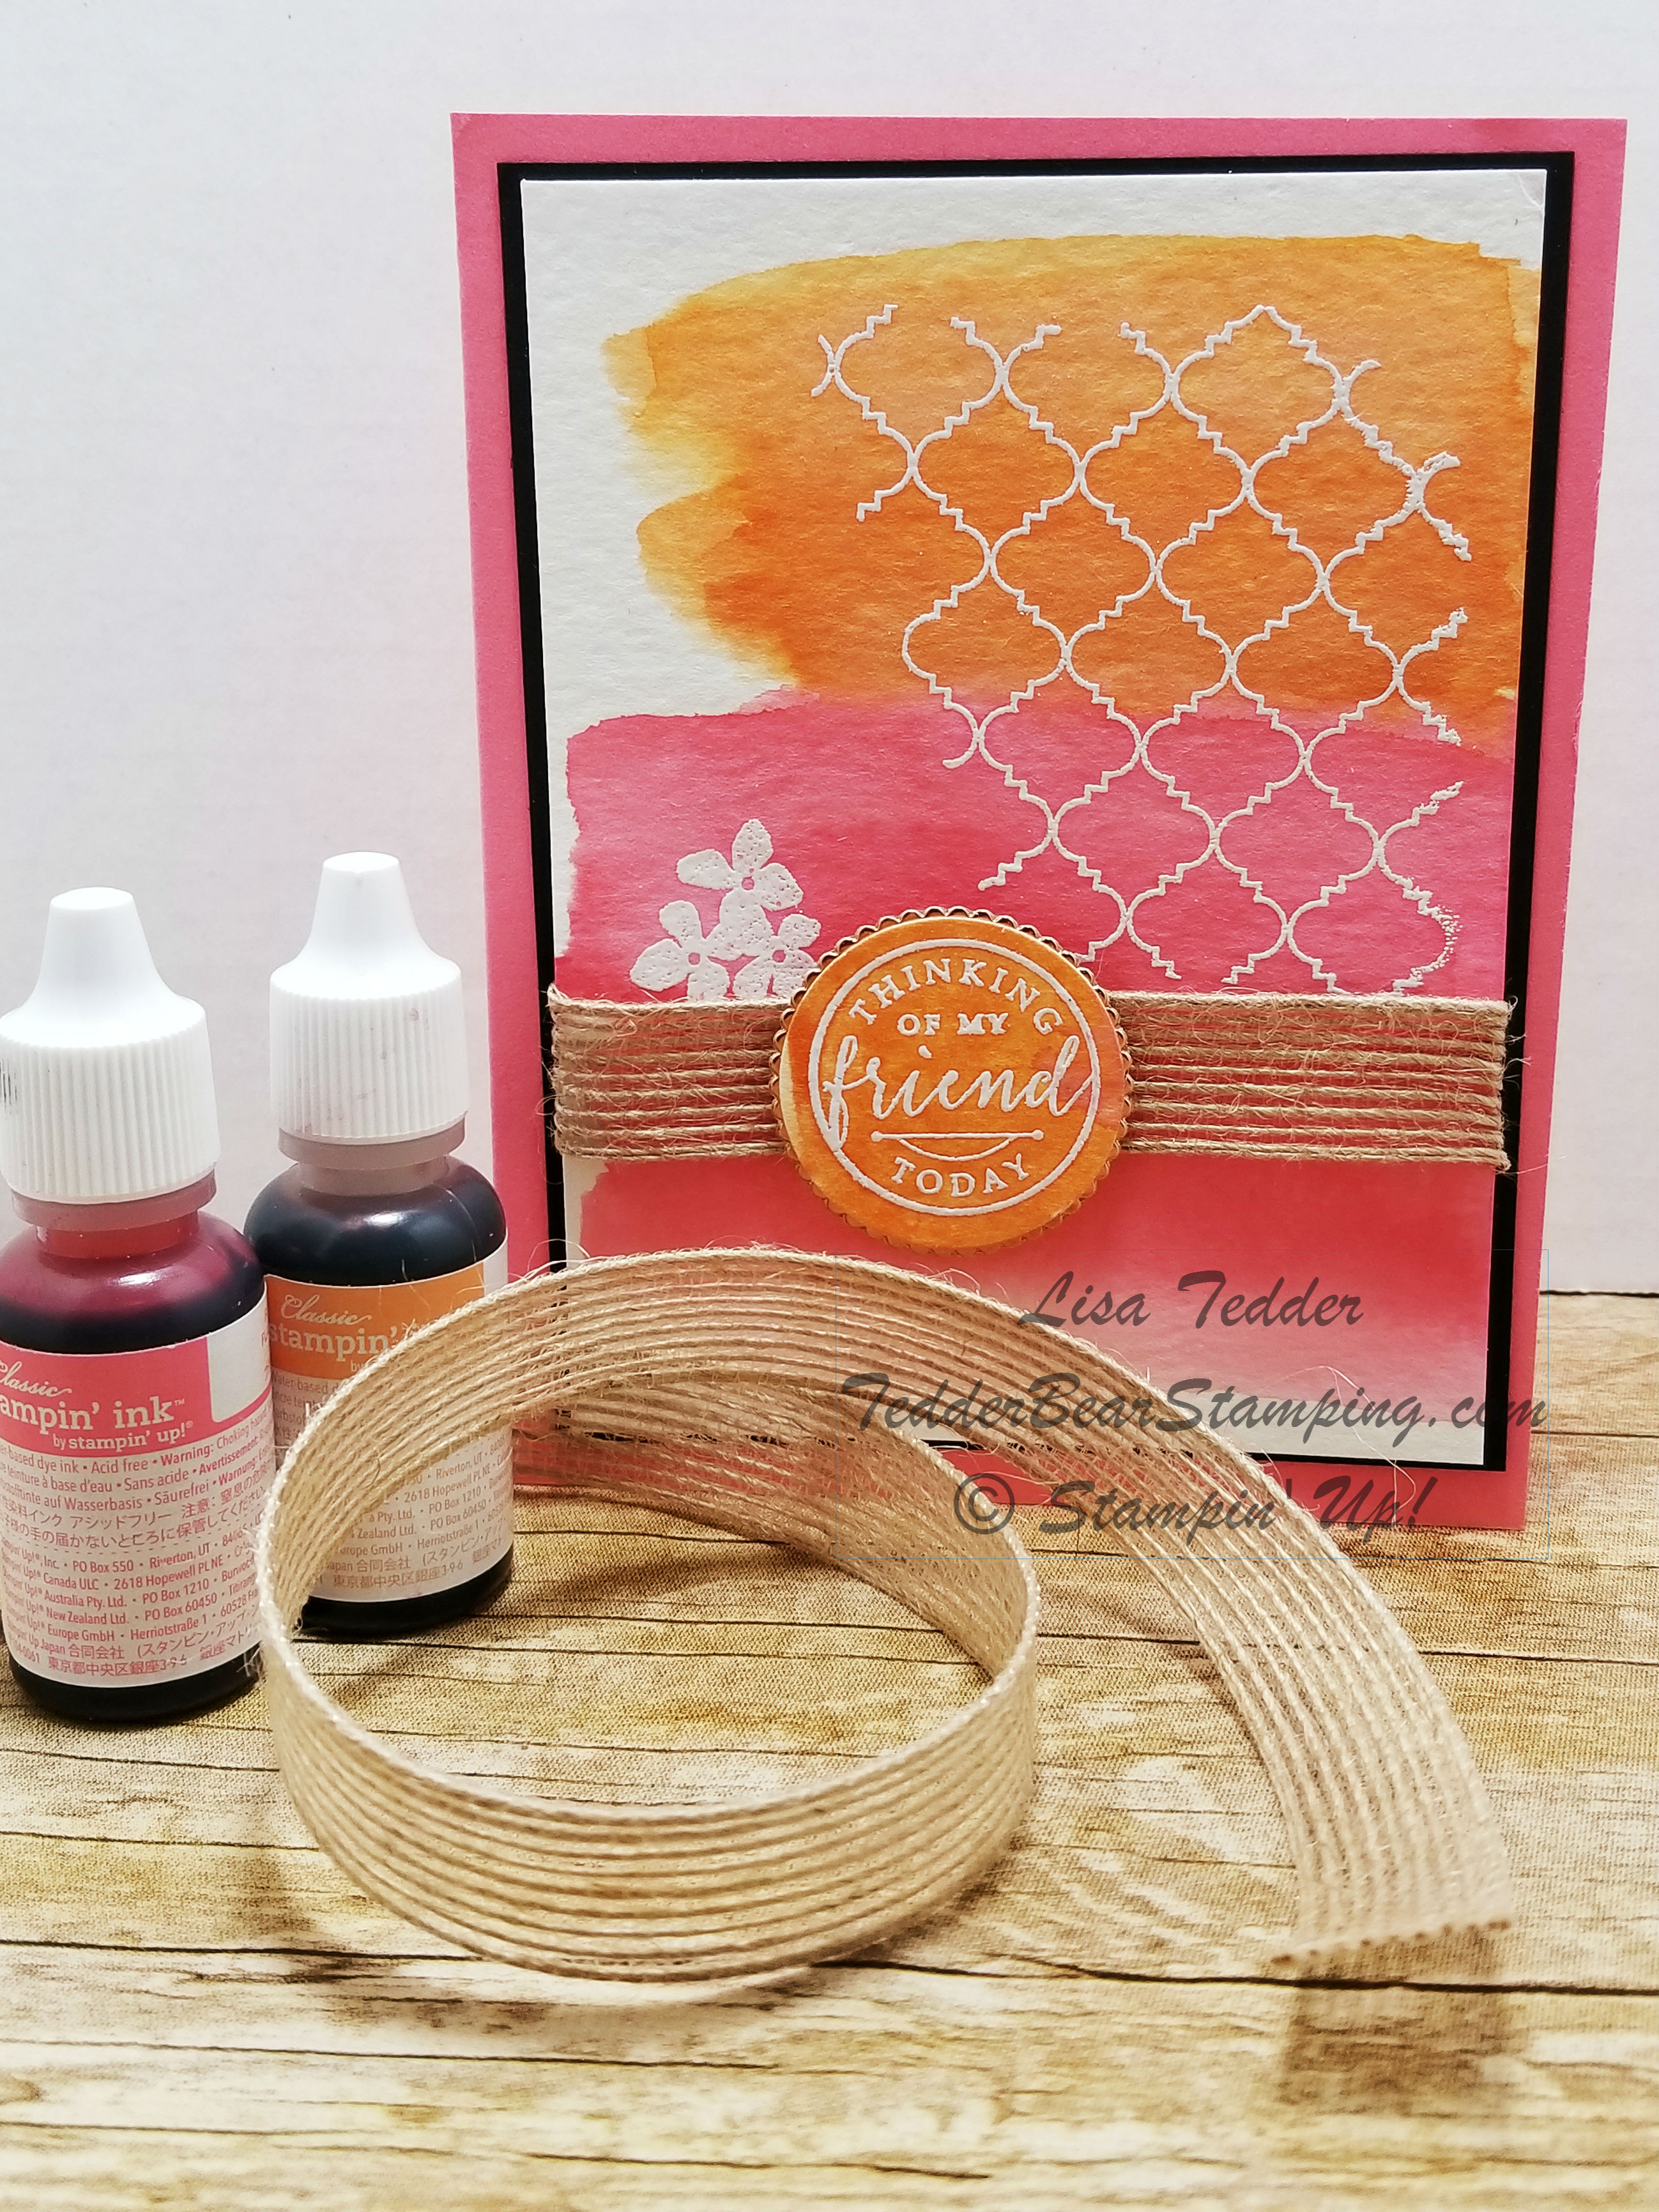
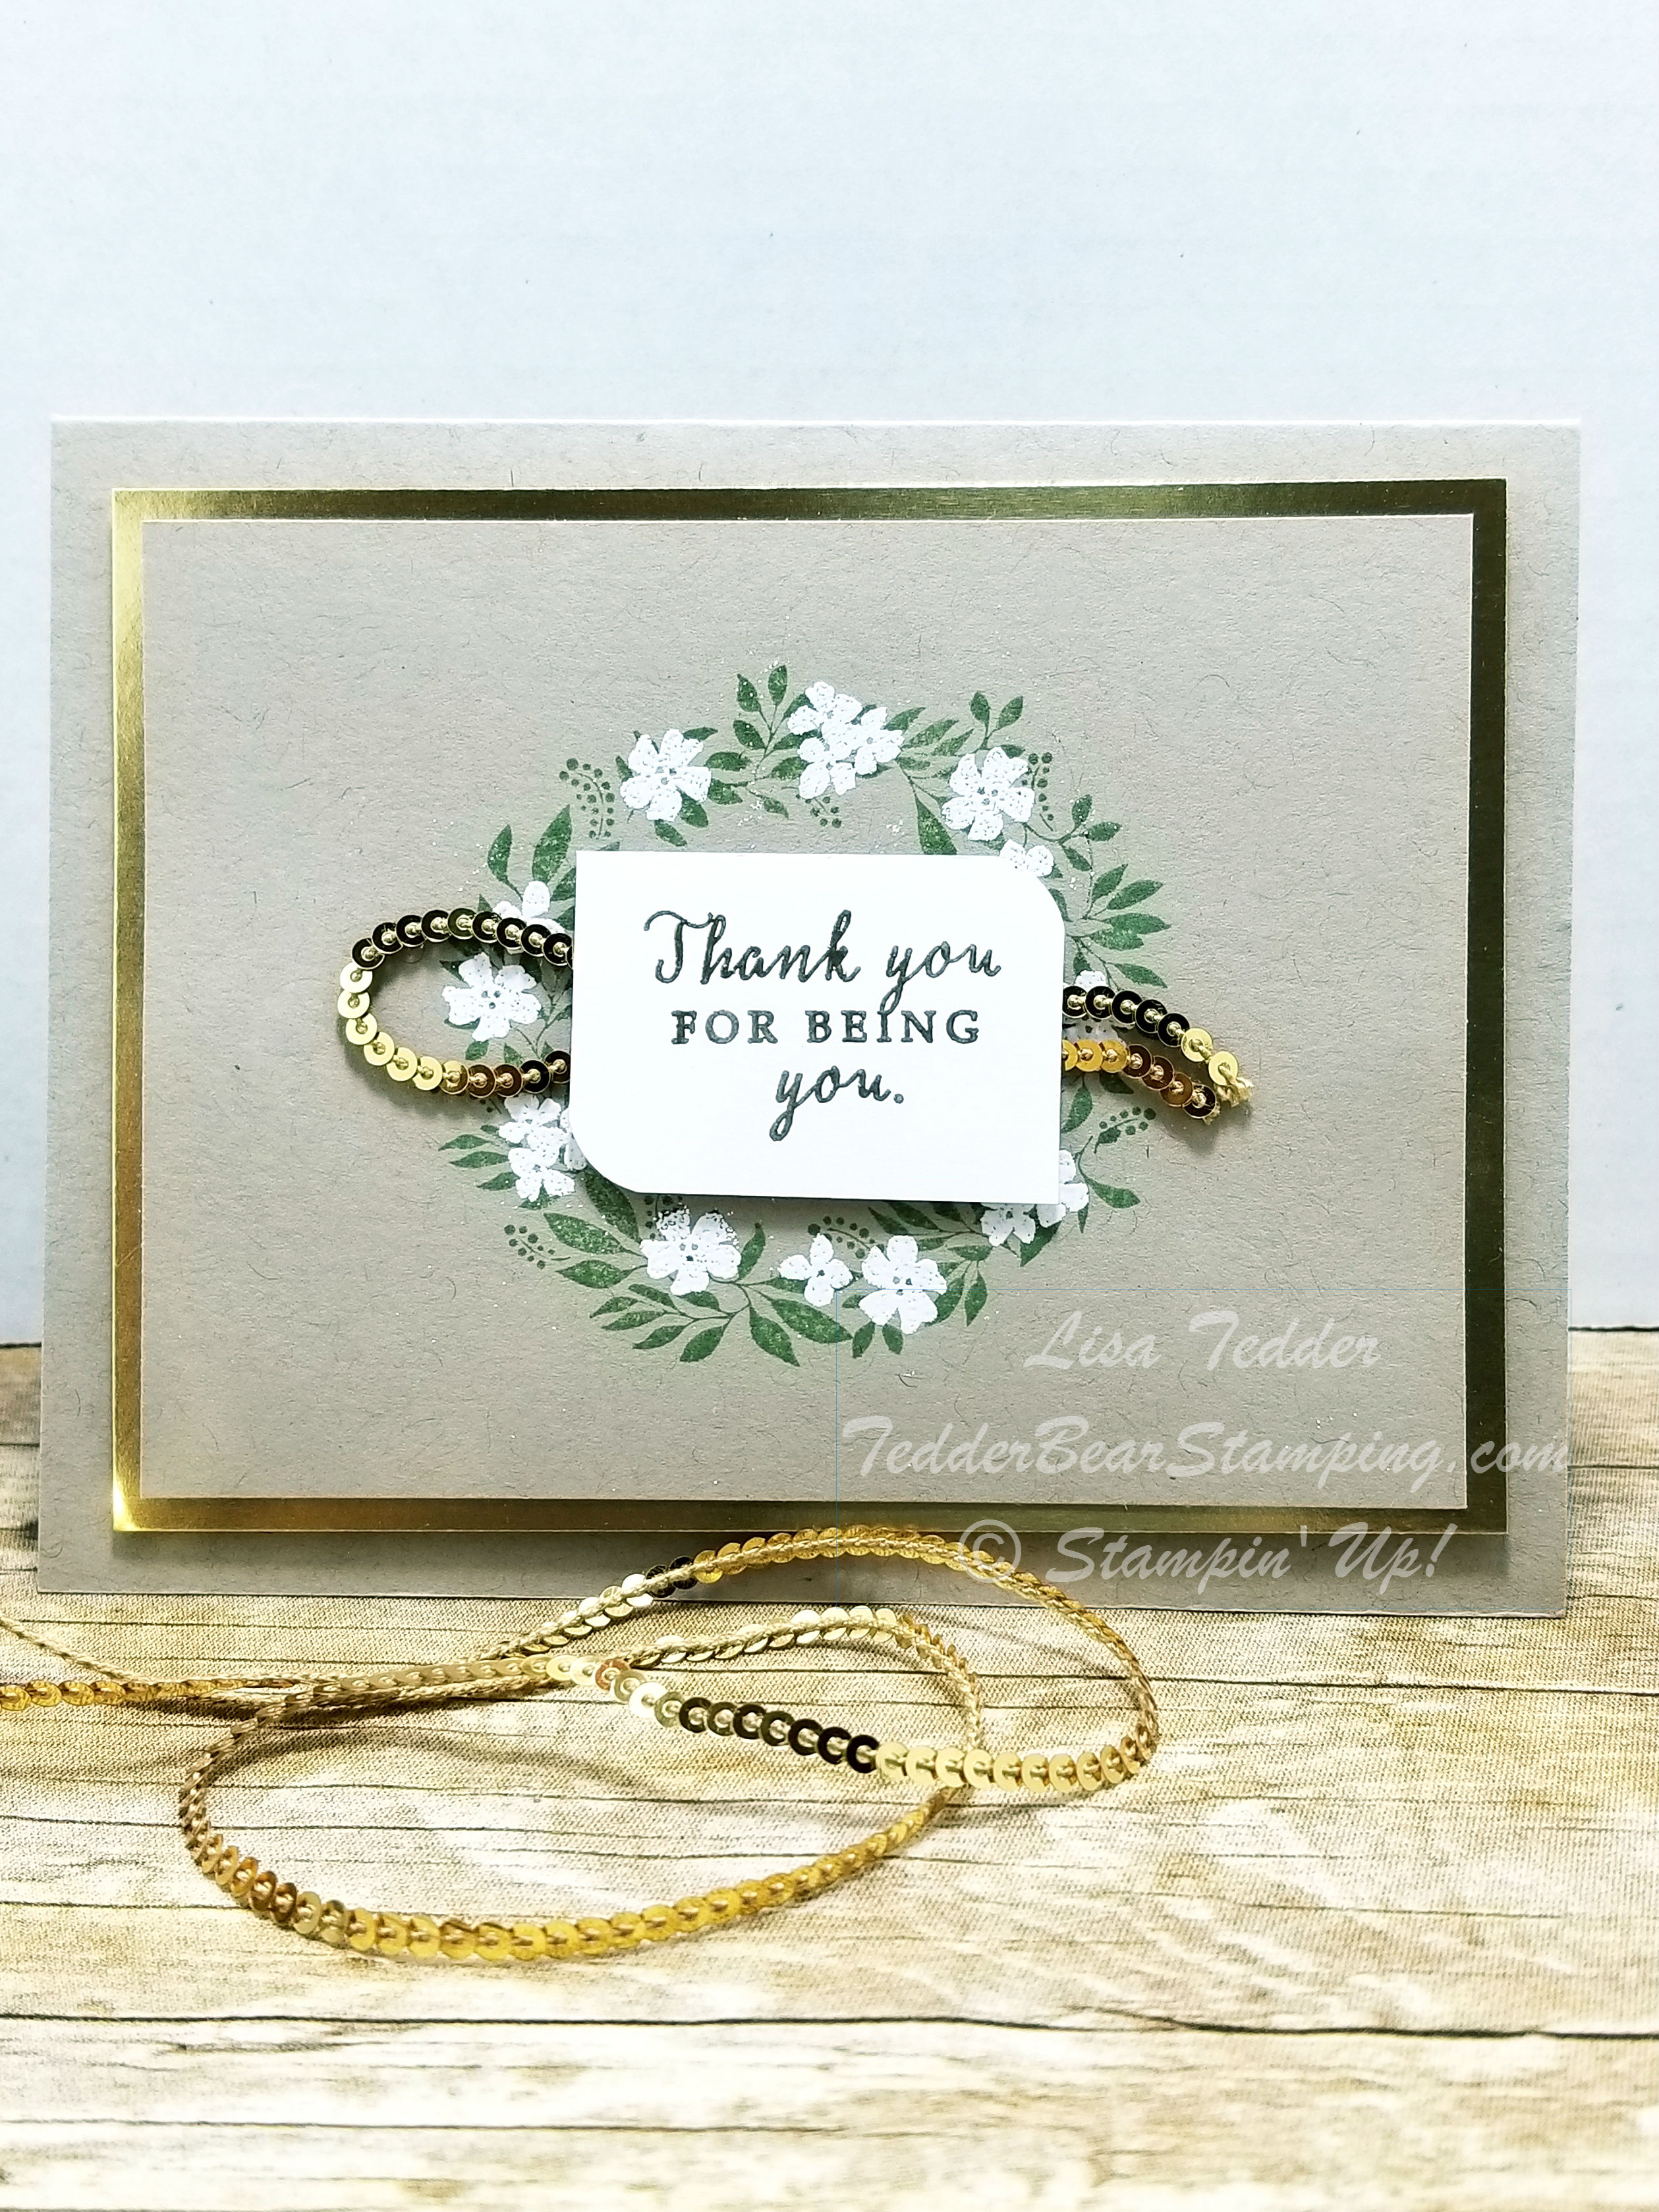
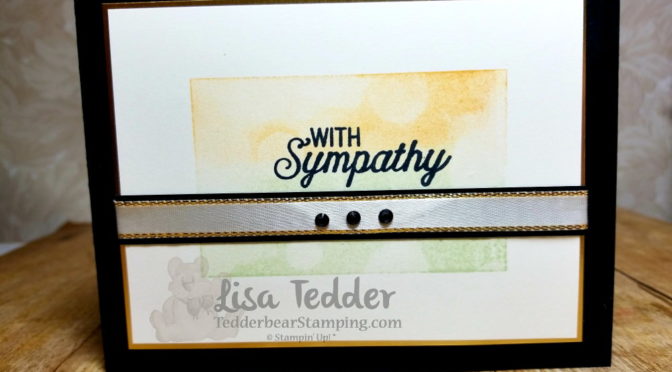
I love the Bokeh stamp from Stampin’ Up!  When I stamp with it, just looking at it makes me smile.  It is very subtle and makes me relax for some reason.  For this card I inked the image using So Saffron on one side and Soft Sea Foam on the other, then I huffed on it and stamped it in the middle of a piece of Very Vanilla.  I then stamped ‘With Sympathy’ from Flourishing Phrases in Black in the middle.

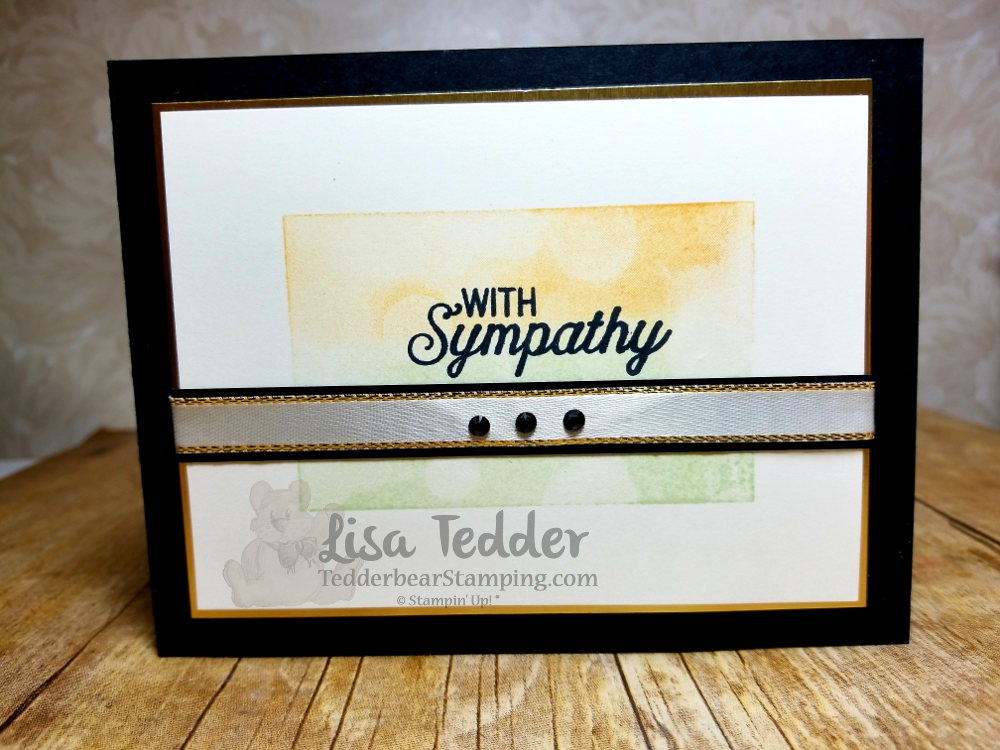
I will be teaching this in a class at our Local Senior Center in Kernersville on Wednesday.  The Gold Foil paper surrounding the Very Vanilla sets off not only the stamp but the black background.

Hope you like this card!!  All the supplies used for this card are listed below, click on any picture to be taken to my OnLine Store! I would love if you would choose me as your Stampin’ Up! Demonstrator if you live in the US!

Thanks for stopping by!
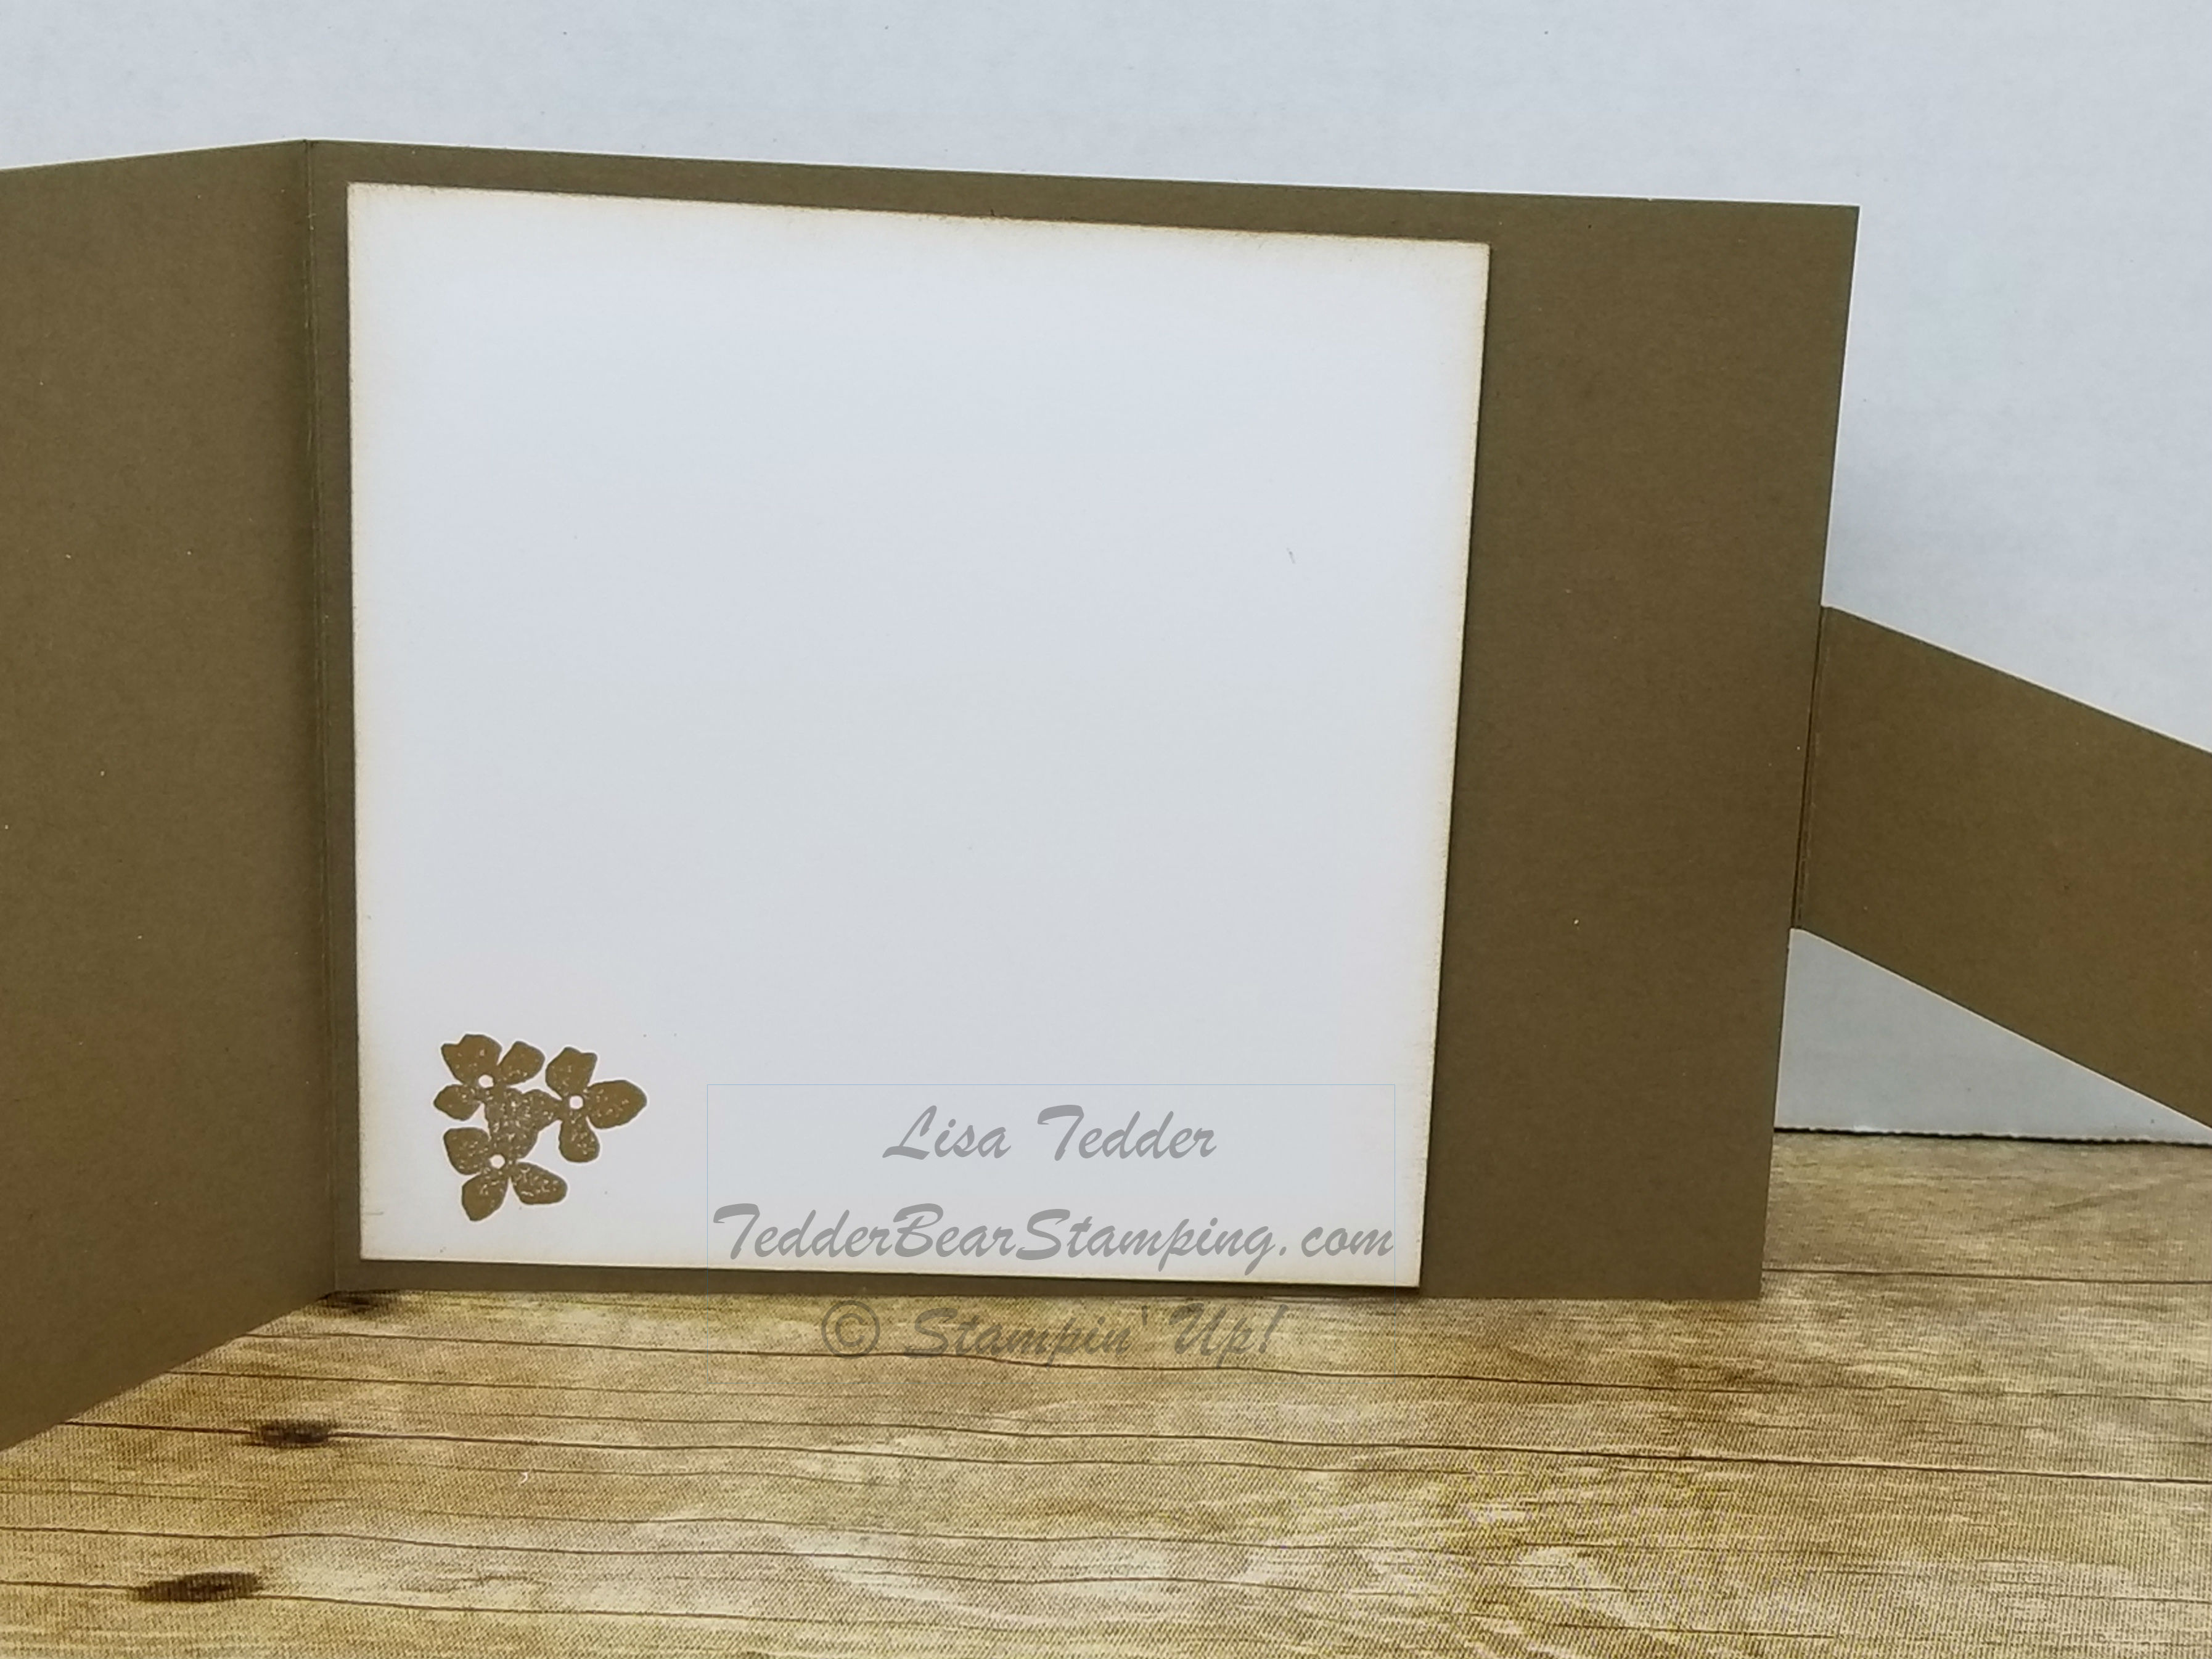
Lisa Tedder
A California Girl living in North Carolina
Product List

Christmas Card #4 Let it Snow Alpine Adventure

Hey Guys!

I fell in love with the Alpine Adventure stamp set from Stampin’ Up!, as soon as I saw it!  I HAD to get it and this card is one that I have come up with:

This is a fun set.  It really got my imagination going.  The embossing folder is SOOOOO pretty!!  Using it with the Gold Foil makes even more of an impact!  I found that it looks just as pretty no matter what side of the Tin Tile Dynamic folder you emboss with.

Here are the particulars:

Stamp sets: Alpine Adventures Bundle
Cardstock: Cherry Cobbler 5 ½” x 8 ½”, 2 1/8” x 5 1/8”, Gold Foil 5 ¼” x 4”, White 2” x 5”, 5 ¼” x 4”
Inks: Soft Suede, Cherry Cobbler, Garden Green
Misc: Frosted & Clear Epoxy Droplets, Big Shot, Wink of Stella, Dimensionals Mini/Reg, Fine Tip Glue Pen, Tin Tile Folder

Here’s a look at the inside:

The inside:

I LOVE the Wreath, don’t you?

Here are the particulars:

Stamp sets: Alpine Adventures Bundle
Cardstock: Cherry Cobbler 5 ½” x 8 ½”, 2 1/8” x 5 1/8”, Gold Foil 5 ¼” x 4”, White 2” x 5”, 5 ¼” x 4”
Inks: Soft Suede, Cherry Cobbler, Garden Green
Misc: Frosted & Clear Epoxy Droplets, Big Shot, Wink of Stella, Dimensionals Mini/Reg, Fine Tip Glue Pen, Tin Tile Folder

There’s only a couple of die cuts, so this card is pretty simple! I hope you like it!

Below are pictures of the supplies used for this card, click on any of them and you will be taken to my OnLine store!  I would love to be your SU! demonstrator if you live in the US!

Lisa Tedder
A California girl living in North Carolina
Product List

Tarnished Foil Technique

Hey Guys!

It’s been a while since I was last here!  Sorry, life got a bit busy.  I had my trip to Salt Lake City Utah for Stampin’ Up!’s OnStage event, and WOW I had so much fun! I met up with my SU! Besties and we room together every time!

I came home and 4 days later we went to Vero Beach for a much needed break!  It was so nice to sit and read on the beach!!  I was under the umbrella and the only thing that would have totally made it better was to have a Beach Boy bring me some drinks!  hahaha

Now I am home and I jumped right back in to my ‘work’.  I put the apostrophes there because I have so much fun creating it is sometimes hard to remember that I get PAID!  Love my job, if you want to join my team, just let me know!

On to the Tarnished Foil technique, thanks to my Besties Carol and Hetty for telling me all about it!  I HAD to come home and try my hand at it!

Here are the cards I did on my YouTube video:

Aren’t they stunning?!!  This is a fun and easy technique and no two are alike!  I Love stacking my ribbons, can you see it?  I ‘colored’ my gold edged ribbon with the Bronze Stampin’ Blends so it would go with my project and stacked it with the copper ribbon!  Go check out my video for all the dimensions.

I hope if you live in the States you choose me as your demonstrator!  IF you purchase from me, I will send you one of my cards that I use for my videos!  Shop Now!

As always, the items used for this post are listed below, each picture will link you to my OnLine Store!  I DO have some SAB items for a sneak peek, can’t list them below, but the one I used is called Happy Wishes, and I KNOW you will want it as much as I did!

I’m back to my ‘work’, I am making my Christmas cards, I’ll share those with you next time!!

Lisa Tedder
A California girl living in North Carolina

Product List

Bonus Christmas in July Card

Here is the Final Christmas card for my Christmas in July class! You get to make this Bonus card in my class if you Pre-Pay for the 15 cards! 3 each of 5 designs, to be done in a fun filled atmosphere where everyone is bringing a snack to share!! I’m so excited!

Of course I requested certain things…… Potato Chips with Dean’s Onion Dip (EEEEE!), and homemade Chicken Salad with crackers! YUMMMM! It really will be like Christmas in July!!
I was requested to bring my Brownies, so I am not out of the baking party!

Here is a picture of my card:

Inside:


LOVE the Deer from Nature Sings!  And the verse above the JOY comes from Christmas Pines!  The J and the Y are from Letters for You.

Some Christmas Cards you want to be simple, so you can crank those babies out and get them in the mail……this is one of those!  The wreath is the new Boxwood Wreaths on page 197!  I added Metallic Metal Shapes and the Brights Enamel Shapes to make the ‘ornaments’ on the front of the wreath!  Isn’t it pretty?!!

*****
Measurements:
Cardstock:

Cherry Cobbler 8 1/2″ x 5 1/2″
Garden Green 5″ x 3 3/4″ (x2)
Gold Foil  4 3/4″ x 3 1/2″
Whisper White 4 1/2″ x 3 1/4″ (front),  5″ x 3 3/4″ inside

*****

Here is a glimpse, if you missed the other 5 cards!!

Click on Picture to see post


Click on picture to see post
Click on picture to see post.

And Another reminder of the Blog Candy!!


Just post on any of my Social Media (below) to be entered into the drawing!  The drawing is on July 29th, each and every comment counts towards the blog candy….I use a Name Generator to pick the names, this way everything is fair!

Click on the names of my Social Media in this sentence to be taken to those venues………. Facebook, Twitter, Pinterest, and Instagram

Good Luck!  I always love to hear from you, it assures me that I am not talking to myself!!  LOL

Click on any of the product pictures below to be taken to my OnLine Store, when you purchase from my OnLine Store I will send  a handmade card to you!  Please send me your address so I have it!

Stay tuned for my next blog post…….I used the New Pattern Party Decorative Masks to make a really pretty summer card!!

Lisa Tedder
TedderBearStamping
A California Girl living in North Carolina

Product List

Christmas in July Card #5, Plus Blog Candy

Are you ready for my Christmas in July card #5?  This one was CASE’d (Copy, Share/Stamp *I don’t  know the original ‘S’*, Everything) from StampinMak.

I didn’t change a thing because this was perfect!  I really try to make cards I see my own, but when I see something that really touches me, I go with it!

Here is my 5th card:

I LOVE the Gold Foil on the Cherry Cobbler and Early Espresso!  The Cable Knit Embossing Folder ties the whole card together!!  What do you think?  Need anything?

Inside:

Fun!!  Now who is ‘card worthy’ to receive this wonderful card?!  When you put your heart into making a card, you have to make sure that the recipient will appreciate your efforts!  I really send them to all my family and friends, I just hope they know how much hard work and love goes into each and every handmade card!

Measurements for this card:
******
Cardstock:  
Tranquil Tide – 8 1/2″ X 5 1/2″
Early Espresso – 5 1/4″ x 4″ , 3 1/2″ x 2 1/2″ (for front), scrap for oval
Cherry Cobbler 5″ X 3 3/4″ (front), 5 1/4″ x 4 (inside)
Very Vanilla 5″ x 3 3/4″ for inside
Gold Foil 3 1/4″ X 2 1/4″, plus scrap for pinecone

TIP:  Use Envelope maker to corner round the small Early Espresso
******

To remind you, here are the other cards that have come before:

Click on picture to see post
Click on picture to see post.

Does this make you want to attend my class?  There is ONE more Christmas Card to go!! The one I post next is the one my attendees get if they pre-pay for the class!  Stay tuned.  Subscribe to my blog so you don’t miss the next post.

AND now the Blog Candy!

You can be put in the drawing to win the Brick Wall Embossing Folder AND Basic Gray Bakers Twine, just by commenting on any of my Social Media Outlets!  Click on the names of my Social Media in this sentence to be taken to those venues………. Facebook, Twitter, Pinterest,  and Instagram .  Easy way to get something for free……the only thing I hope is that you find something NICE to say about what you see!  🙂  Any and ALL comments count, even if you comment on things that aren’t current, and you can comment on multiple posts!  The drawing is on July 29th, so stay tuned and Good Luck!

All product for this card will be listed below, just click on any of the pics to be taken to my OnLine Store!  If you purchase anything from me, you will receive a handmade card in the mail, so be sure and send e your address!!

I’m off to play in my Stamp Room!  I’ll be back soon!!

Lisa Tedder
TedderBearStamping
A California Girl living in North Carolina
Product List

Wanna WOW your friends card for Kylie’s July International Blog Hop

It’s that time again!  I’m competing once again in Kylie’s International Blog Hop!  Please go vote for me!!  Click here to vote.  
To vote, click on the heart in my picture #11, and your vote will count!
The theme this month is Gratitude!  Here is my card:

This is a FUN card!  I was inspired by BJ Peters, she used this idea but with Eastern Elegance, you can find her card here.   I was thinking of other stamp sets from Stampin’ Up! that could be used with this idea of the front flap opening to reveal a sentiment.  This is the set that I thought of!   Once you pull back the flap, here is what you see:

The inside is a simple piece of cardstock:

What do you think?  Like it?  Here are the details so you can make it if you want!!

***********
Cardstock:
Soft Suede 4 1/4″ X 9 3/4″ scored at 4 1/4″, flap is: 1 1/4″ x 9″ scored at 5 1/2″, front piece: 3 1/4″ sq., scrap for front sentiment on flap.
Crumb Cake 4″ sq., 3 1/4″ sq. to stamp wreath on, cut with 3″ Stitched Circle Framelit.
Gold Foil 3 1/2″ sq. under Soft Suede, and 1 1/2″ scallop circle from Circle thinlits.
Whisper White 4″ sq. for inside.

Everything else is listed below, just click on the picture to go to my OnLine Store.  When you purchase from my OnLine Store, I will send you a nice Thank you card!

I hope you enjoyed this blog post, I REALLY loved making the card!  I love cards that interact, don’t you?

Please subscribe to my blog so you won’t miss out on any posts!

Lisa Tedder
TedderBearStamping
A California girl living in North Carolina

Product List


Another Easy but wow card straight from the Catalog!

The card I am sharing with you today is from the stamp set Hello Friend!  I shared this card with you last time:

I, once again, looked in the Catalog for Inspiration!  This is the image that struck me as something I wanted to try:

This is using the kit on page 16 & 17:  Hello Friend Heat Embossing Project Kit.  I don’t have the kit……….yet, but have the stamp set and wanted to give this a try.  I DID have the Gold mini sequins!  Those are just too stinkin’ cute!!  I was giggling when I got them!  It doesn’t take much (in the card making world) to make me happy!

I didn’t have the kit, but I loved the way the wreath looked on Crumb Cake, so I was using that.  I wanted a lighter green (than pictured) so I used Wild Wasabi as my green.  LOVE how the flowers are so white so I wanted to use Versamark and White Embossing Powder.  Here is what my card looks like:

Isn’t it pretty?  And not too many steps, sometimes simplicity is the best way to go!!

The sentiment is on Whisper White 1 3/4″ x 1 1/4″, then I used the Envelope Punch Board to round two opposite corners, to give a really pretty look!  I popped this up with dimensions after putting some adhesive on the card in the middle of the Wreath and laid down the Gold Mini sequin ribbon.  The ribbon is free to move on both ends, only the middle is stuck down.

The Gold Foil Paper is 5″ x 3 3/4″, but I cut around the inside edges to make a frame since you can’t see it and I didn’t want to waste any of it!!  The top Crumb cake is 4 3/4″ x 3 1/2″.

Easy but definitely stunning!  In person, it’s even better!!

I have blog candy that I’m giving away too!  Here is what you can win:

To be in on the drawing on July 4th all you need to do is comment here on my blog, any post!  Or comment on my Facebook page, Instagram,  or Twitter!  I will put all the names into a Random Name Generator and I will announce the winner!  Who doesn’t want something free for just posting nice things?!!

Once again, I hope you have enjoyed this post as much as I enjoyed making it!  Please subscribe to my blog so you won’t miss out on my posts in the future!

The pictures of the products used will be below, just click on any picture and you will be taken to my Online Store!  If you purchase from me, you will receive a handmade card from me plus a little than you gift!

Until next time,

Lisa Tedder
TedderBearStamping.com
A California Girl living in North Carolina

Product List

August Paper Pumpkin

August 2015 PP

I played with my Paper Pumpkin today!!  It was so much fun, I just went to the Pinterest Paper Pumpkin site after I did the handmade cards and box straight from the PP directions, I wanted to do some different ones, and this site helped me pick out what I wanted to do!

The SU! card in the middle uses the new Gold 3/8″ glitter ribbon #139614 from the Holiday Catalog (2015) .  I cut up one of the cards with the stripes so I could get more from that one sheet (since it is printed front and back, I can make a lot of cards by piecing it.)

I also paired the saying with the Metallic Foil Doilies #138392 behind it to make it POP!  Adding dimensionals underneath really made it stand out!

The card to the right of the middle I used the cut up piece (from the middle card) and layered it onto Gold Foil Sheets #132622, and used the ribbon from the kit I was inspired by one of the cards on the site listed above.

Don’t forget to take advantage of the 1/2 off deal that Stampin’ Up! is offering now until the 10th of September, you get TWO months for the price of one!!  Just go to PaperPumpkin.com site and sign up!  Just remember to put me down as your Demonstrator!

Lisa Tedder

Kernersville, NC