Tag Archives: Gold Foil Sheets

How to copy a card and make it your own.

Hey Guys!,

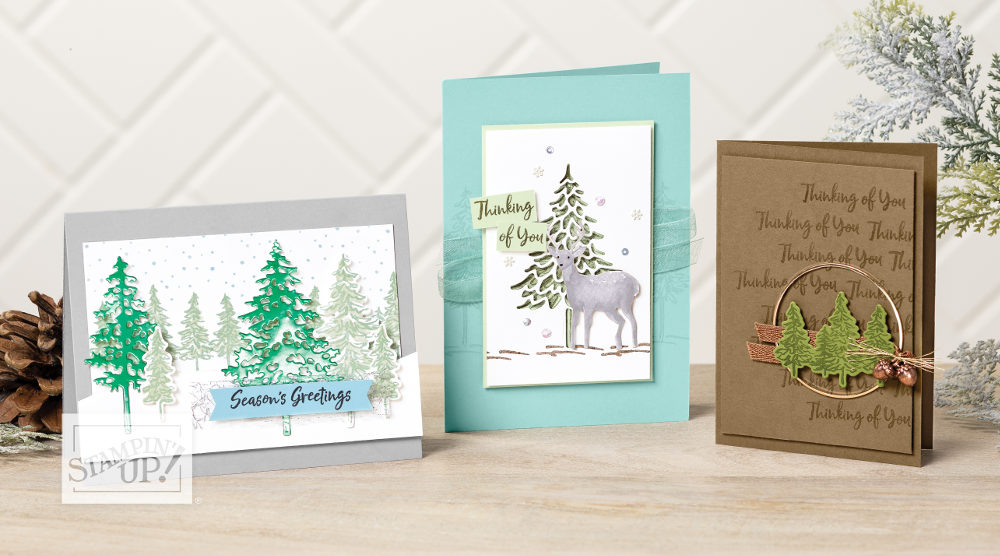
First off, I got this idea from the Holiday Catalog from Stampin’ Up! I like to get ideas and then change them up to make them my own design. Next, we will take a walk through my thought process! As usual, here is a video showing you how to make this card. Finally, this card on page 43 is the card I wanted to make my own:

The card on the right is the one I am going to make into my own design!

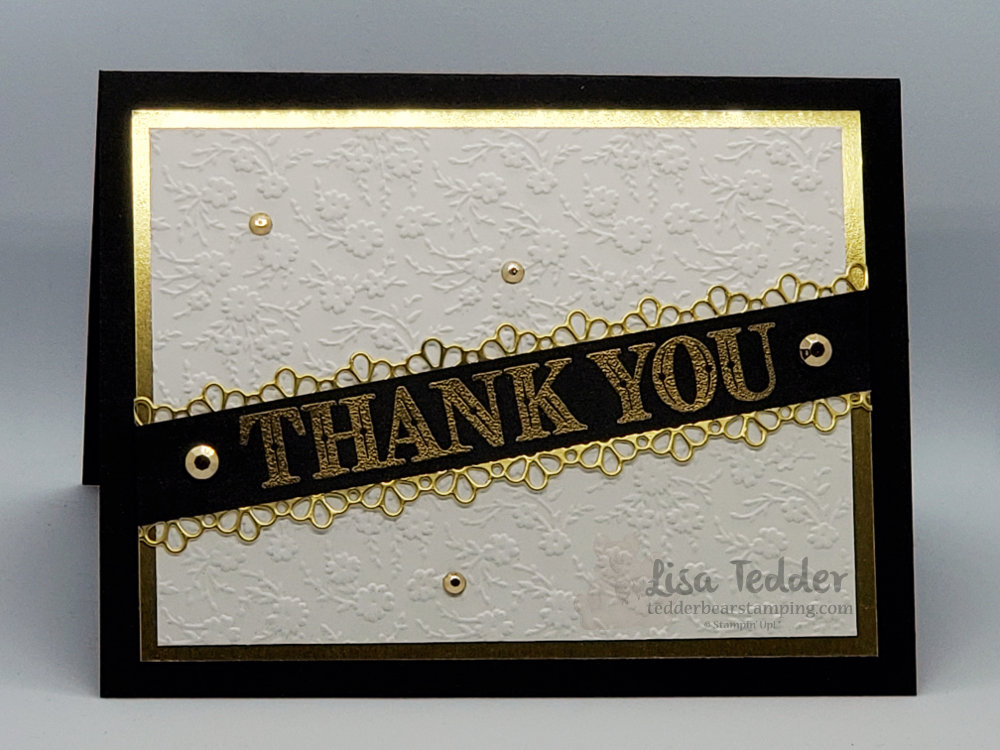
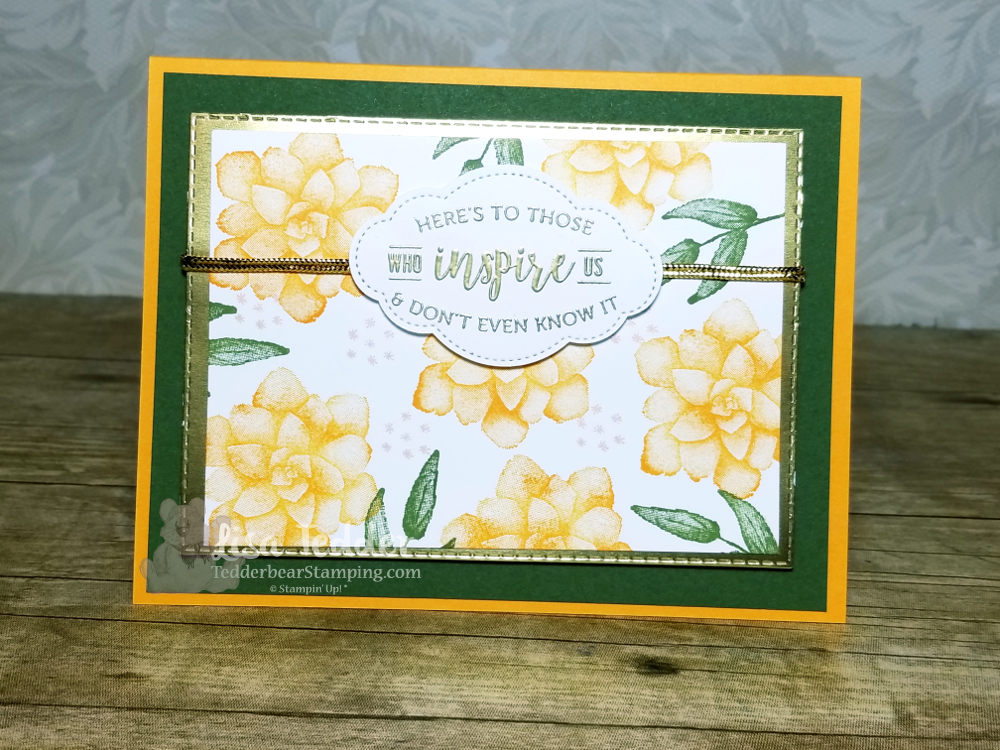
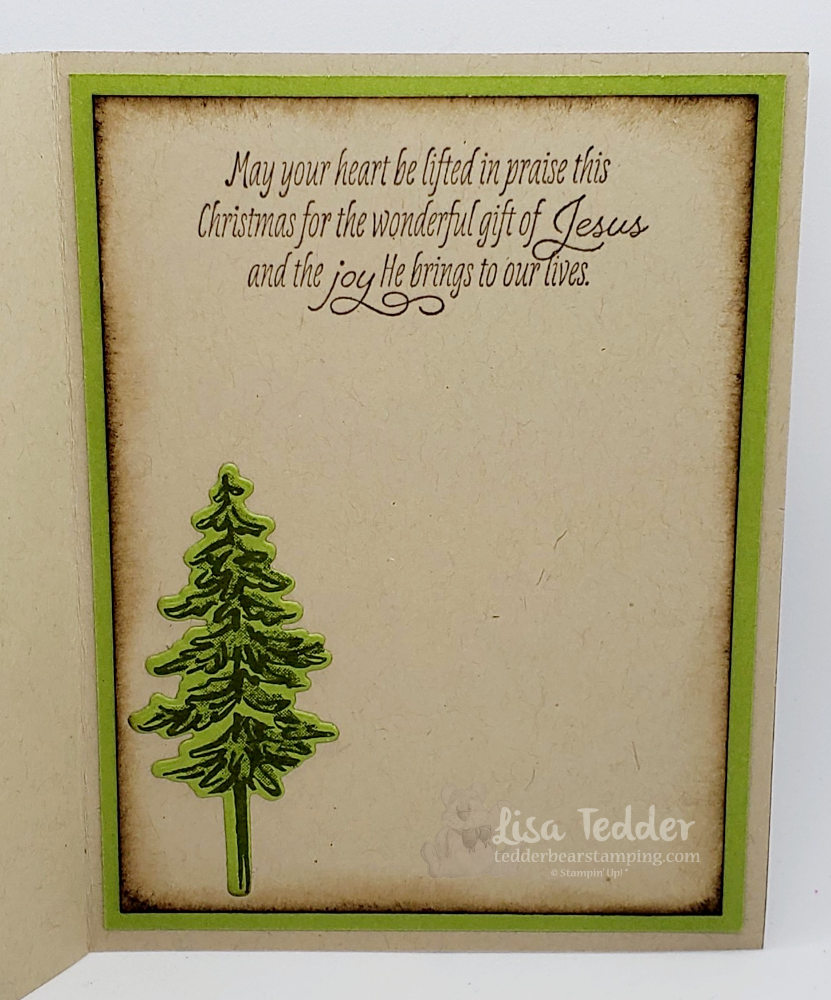
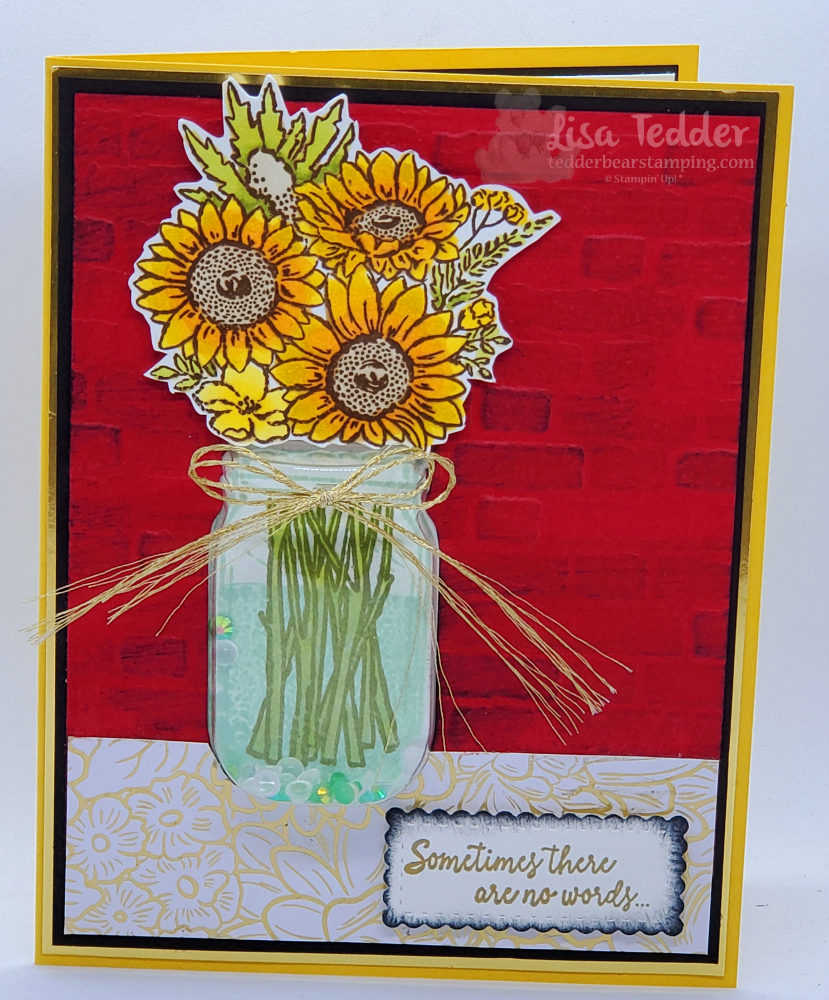
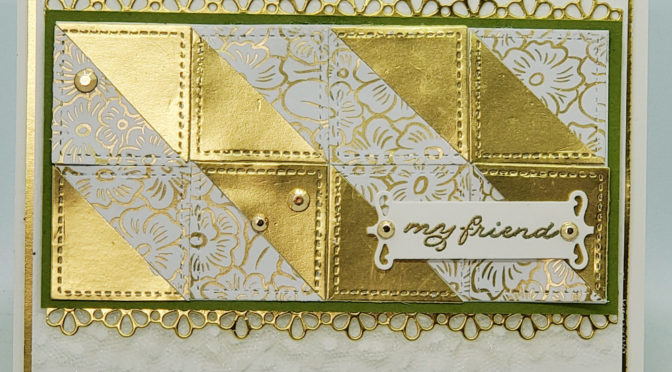
Generally, when looking for a project to do, I first look in Pinterest, but this time I looked at the SU! catalog! Consequently it ended up being an awesome place to get an idea! Furthermore, I wanted to use the In The Pines Bundle and this would work with an idea I had in my head. Unfortunately, I didn’t have the circle that is on the card above. However, I did have the die from the Painted Labels that let me cut out a circle design that would take it’s place! Also, I wanted to use the trees singularly from the stamp set but die cut to have more detail. Likewise, instead of the ribbon that comes out the side of the circle I used gold foil cut into two strips. By the way, I DID use the acorns for my card, here is what I made:

I replaced some things to make this design my own creation!

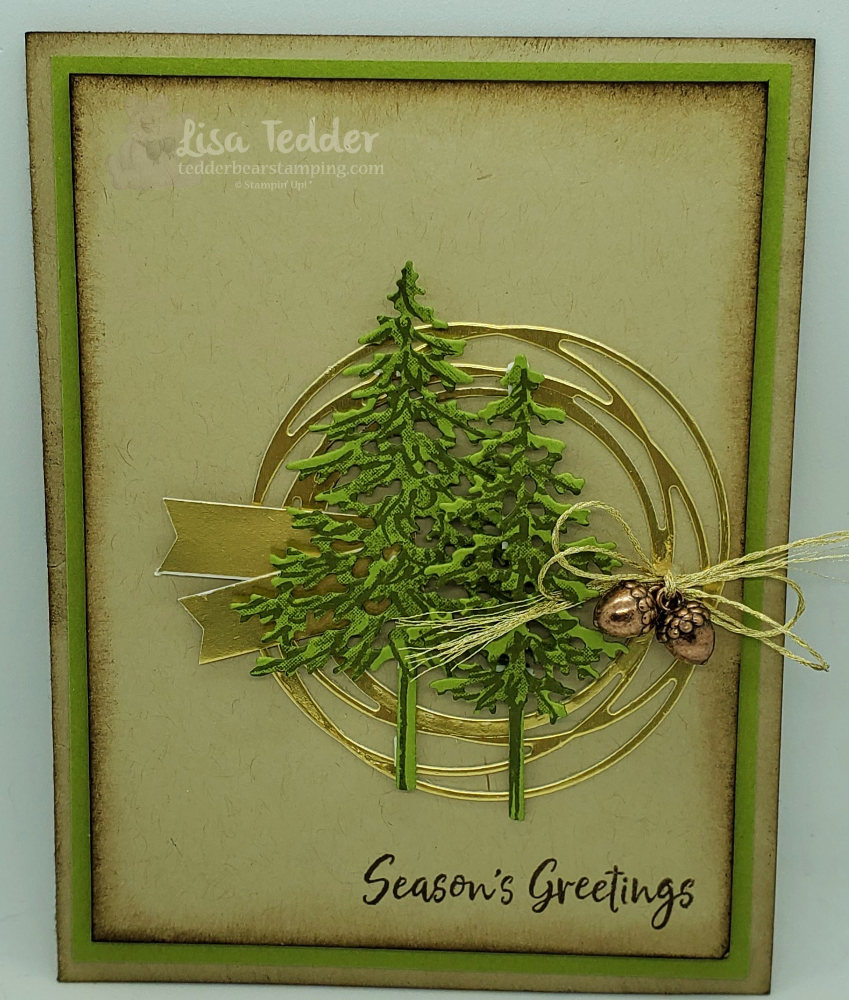
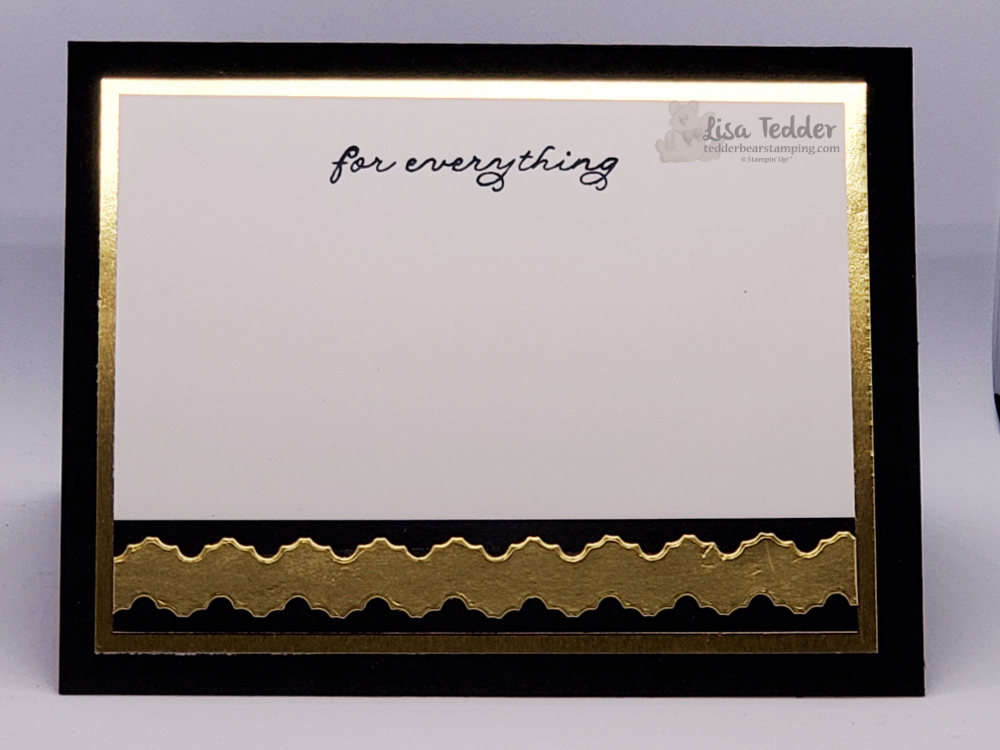
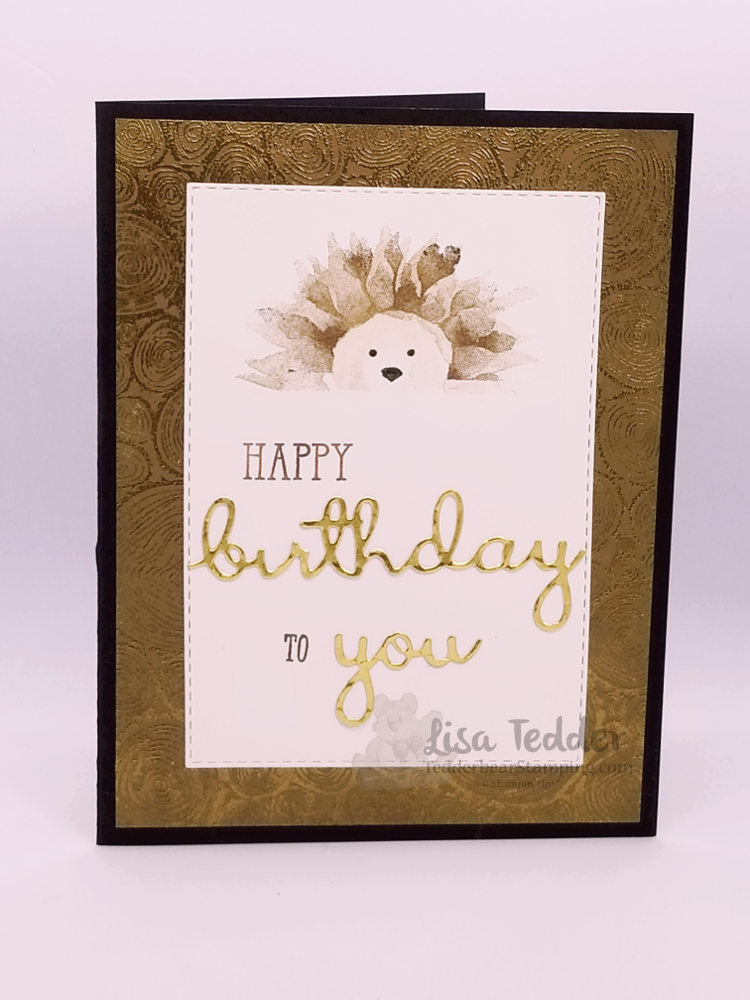
Usually, I like to have layers on my cards and this time is no exception! Likewise, I love to sponge the edges of my cards and I did that with Crumb Cake and then Early Espresso to add a dark edge that makes the card pop! As a rule, I like to have my insides go with the front using the same layers, this (to me) seems to make the card look more professional.

Notice how the inside mirrors the front?

Finally, here are the details for this card:

Stamps:
In the Pines Bundle
For Unto Us
Inks:
Crumb Cake
Early Espresso
Old Olive
Paper:
Crumb Cake 8 1/2" x 5 1/2", 5" x 3 3/4" (x2)
Old Olive 5 1/4" x 4" (x2), scraps for trees
Gold Foil
Misc: 
Wonder of The Season OR Forever Greenery combo
Jingle Bells OR Acorn Trinkets
Glue Dots
MultiPurpose Liquid Glue
Mini Dimensionals
Painted Labels Dies
Banners Pick a Punch

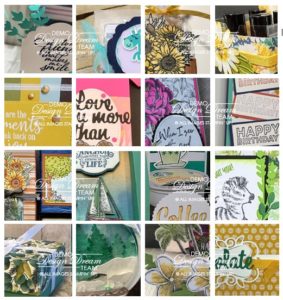
As always, below will be the same supplies listed in picture form, click on any of them to be taken to my On Line Store! Subsequently, any purchase over $35 you will get from me a PDF with 16 project ideas that include pictures and step by step instructions! So then, this is a thank you from me!

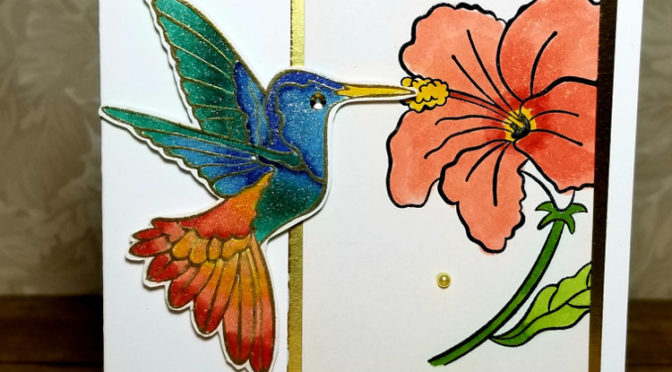
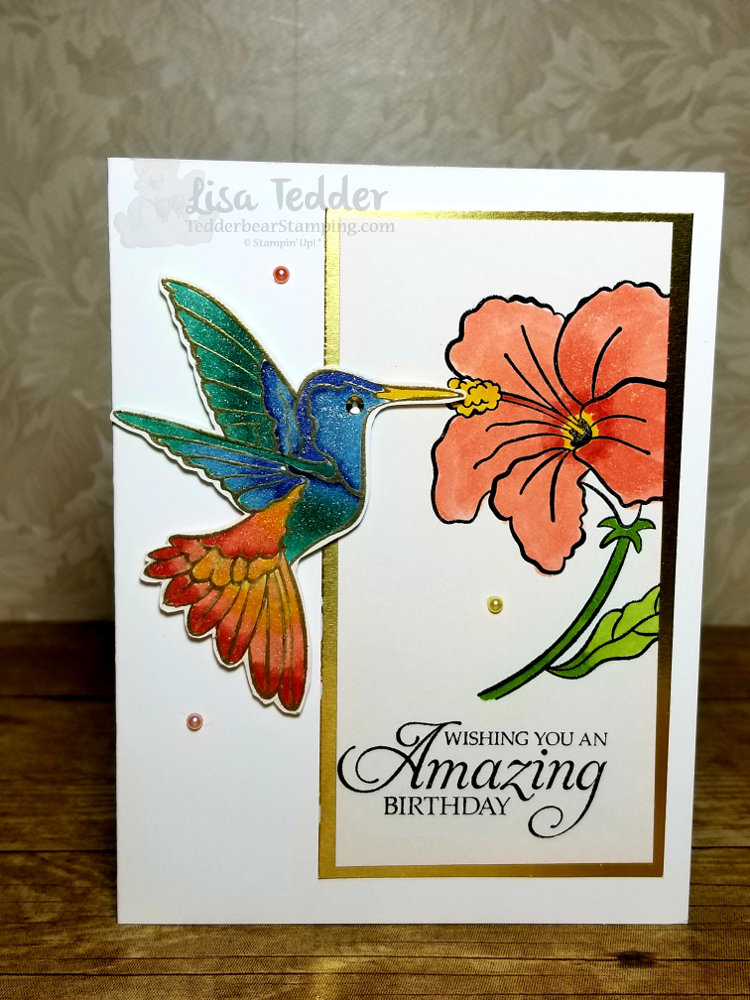
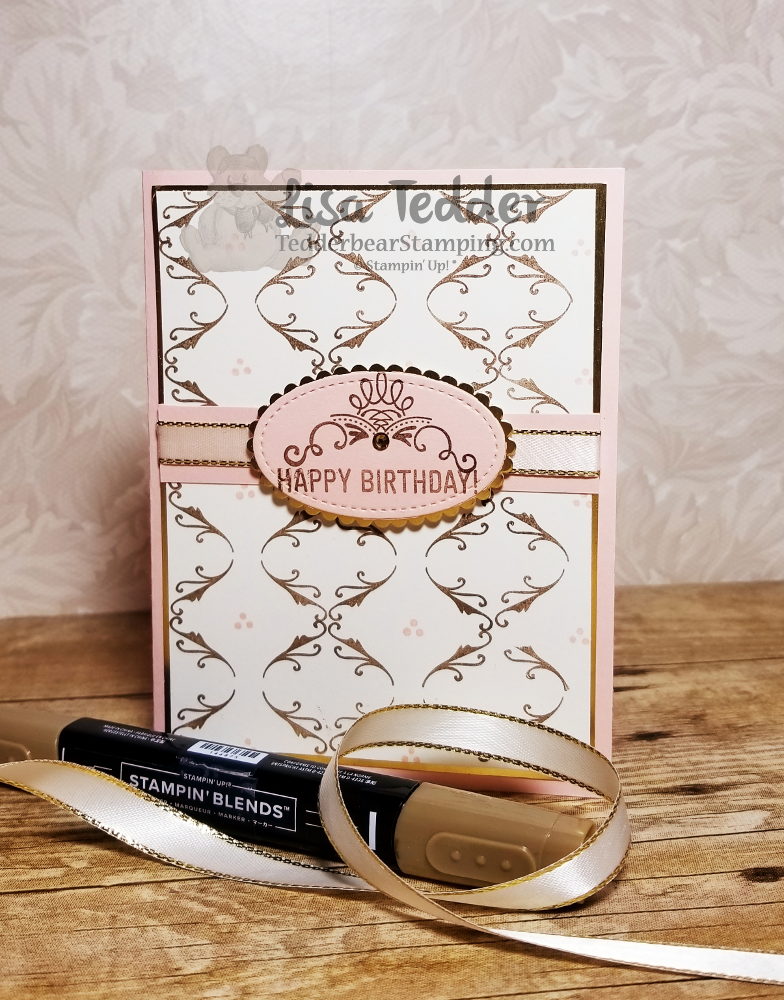
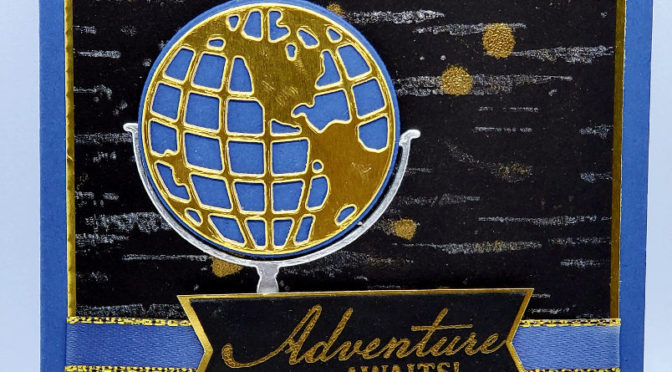
Before I go, I wanted to tell you that I have another card that you can see here that I took from the catalog and made it my own (see page 38). As you can see I like to get ideas and then change them up to make them my own design.

In Conclusion, thank you so much for coming to visit me! Together, we can make things we see into our creations!

Lisa Tedder
A California girl living in North Carolina

Product List

You Can Emboss with that?!

Hey Guys!

Did you know that you can emboss with water?! What!? I didn’t think it was possible, but I accidentally dripped water on a project I was Gold embossing, as I poured the powder, the water took it too and it embossed along with the Versamark!

So, of course I HAD to try it with JUST water, and you guessed it……it embossed! You can see the video of this card here. Here is a picture of my project:

The Gold spots are where I embossed with WATER!
The inside of my Water embossed card!

To get the ‘silver’ look on the background, I used a Sponge Brayer and the Frost White Shimmer Paint and applied it to the Birch Background stamp from Stampin’ Up! On black the ‘white’ looks more silver, therefore this card has both Silver & Gold! Every time I say that, I want to break into song singing “Silver & Gold, Silver & Gold”! I ‘think’ it’s from Rudolph the cartoon, do you know?

I also embossed the tag with Gold and used the Banners Pick a Punch to get the tag perfect! For the Stamp set, I used the Beautiful World Bundle. LOVE this set!

If you would like to see another embossing technique you can check it out here!

As always, here are the specifics for this card:

Stamps:
Beautiful World Bundle
Birch

Inks:
Versamark
Misty Moonlight
Blends: Misty Moonlight (light)

Paper:
Misty Moonlight 8 1/2″ x 5 1/2″, scrap for behind the map
Gold Foil 5 1/8″ x 3 7/8″
Silver Foil
Basic Black 5″ x 3 3/4″ (x2), scrap for map, 2 strips for behind sentiment & behind cut out on the inside
Whisper White 4 3/4″ x 3 1/2″

Misc:
Frost White Shimmer Paint
Dimensionals
Banners Pick a Punch
Sponge Brayer
Gold Embossing Powder
3/8″ Metallic Edge Ribbon (Gold)
Heat Tool

You can click on any of the supplies in picture form below and you will be taken to my OnLine Store! If you decide to purchase from me, any time you spend $35 or more you will receive from me a pdf of 16 projects with pictures and step by step instructions! Here is a sample of what you will get in July:

Any purchase from my Store for $35 you get a PDF with these projects!

Finally, what do you think? Did you know that you can emboss with WATER? I sure didn’t! I hope you liked learning something new. Please be sure and come back (subscribe to my blog & Newsletter) so you can see my next project! Thank you for supporting me by visiting! I appreciate you!

Lisa Tedder
A California girl living in North Carolina

Product List

Sunflower Shaker Card

Hey Guys!

Today I am sharing with you a card I made using the Jar of Flowers stamp set AND the Mason Jar Shaker Domes! I LOVE shaker cards, and this one was so fun! The stamp of the Mason Jar is so cute! These are REVERSIBLE stamps! So, you stamp the image in Pool Party to mimic a Real Mason Jar turn the stamp over and you can shade it with the same stamp!

Here is my card:

No one can resist a shaker card! You just HAVE to shake it!

The Designer Series Paper (DSP) is supposed to be a table with the brick being the wall. Do you see that? I wasn’t so sure how to make it look like a table, so this is what I came up with.

When I did the brick, I used real red cardstock and then ran the Memento Black ink over it to look more weathered and real. For the double bow ribbon I used the Forever Greenery Combo pack, the gold really sets off the gold in the DSP. And for the inside of the jar I used the Flowers for every season Gems. Really fun to to shake!

Here are the specific for this card:

Stamps:
Jar of Flowers
Comfort & Hope

Inks:
Early Espresso (for flowers)
Memento Black (for brick and Sentiment)
Pool Party (for water and for the jar)
Old Olive (for stems)
Blends: Old Olive, Daffodil Delight, Pumpkin Pie, Crumb Cake

Paper:
Bumble Bee 8 1/2″ x 5 1/2″
Gold Foil 5 3/8″ x 4 1/8″
Black 5 1/4″ x 4″ (x2)
Real Red 5″ x 3 3/4″
DSP 1 1/4″ x 3 3/4″
Whisper White 3″ x 5″ (for flowers AND inside jar) 5″ x 3 3/4″ (for inside)

Misc:
Forever Greenery Trim (gold )
Flowers for Every Season Gems
Stampin’ Seal
Brick & Mortar 3d folder
Dimensionals
Stitched So Sweetly Dies
Mason Jar Shaker Domes

Below my name are the products in picture form, click on any of them to be taken to my OnLine Store. ANY order over $35 will get you a pdf of 16 cards with step by step instructions including pictures! Here is a sneak peek:

PDF included with all orders above $35!

Thank you so much for stopping by!  Please leave a comment so I know you like what you saw AND that you saw it!  LOL  For all I know I am writing this is as private journal and nobody is reading it!  LOL

Lisa Tedder
A California girl living in North Carolina

Product List

Ornate Garden Quilt Card

Hey Guys!

Today I am sharing with you a card where I have used the Ornate Garden Designer Series Paper (DSP), cutting it up with Square dies to make a Quilt card! Also included in the Quilt part is Gold Foil!

Hard to see, but I have ruffled ribbon on the bottom of the focal piece.

Starting out, I cut the Ornate Garden DSP and Gold Foil using the Stitched Shapes Dies (Squares). Then, I cut each square in half, lay them opposite each other until I had a pattern that made me happy. Once I had that done, I cut a piece of Whisper White to fit under and glued them into the desired Quilt shape I wanted. There are so many ways to manipulate the squares, but this is the way I liked it the most.

For the border on the top and bottom, I used the Ornate Borders Dies also using the Gold Foil. But first, I layered the quilt pattern onto Old Olive, to make it pop! Once I had all that done, I used some Polka Dot Tulle Ribbon along the bottom and ‘scalloped’ it so it had a ruffled edge. This turned out so pretty!! It’s very subtle in the picture but in real life it stands out!

After more white cardstock and Gold Foil, my Quilt card is almost done! I needed a sentiment to add to the front so I used ‘my friend’ from the Stamp set Ornate Thanks from Stampin’ Up! NOT sure if you have noticed by now but I LOVE SU! This company has added so much fun/creativity and Friends to my life, not sure what I would do if I didn’t have Stampin’ Up! in my life!

Of course I had to top off my card with some bling! I chose Gilded Gems to add that final touch. So? What do you think? Could it be for a wedding, birthday, pick me up or all of the above!?

As usual, here are all the specifics for this card:

Stamps:
Ornate Thanks

Inks:
Versamark

Paper:
Whisper White Thick 8 1/2″ x 5 1/2″
Whisper White 5 1/8″ x 3 3/4″, 4 3/4″ x 2 3/8″ (for under Quilt)
Gold Foil 5 1/4″ x 4″, 5″ x 3/4″ (x2) for border, scraps for squares
Ornate Garden DSP scraps for squares

Misc:
Ornate Borders Dies
Ornate Frames Dies
Polka Dot Tulle Ribbon (white)
Gilded Gems
Dimensionals
Gold Embossing Powder
Embossing Buddy
Heat tool
Subtle 3D Folder

Also as usual, all the supplies will be listed below in picture form. Click on any of them to be taken to my OnLine Store. If you purchase $35 or more from me, you will receive from me two different tutorial bundles that will have step by step instructions PLUS pictures! Here is a sneak peek of one of the bundles:

One Bundle you will get if you purchase $35

Hope you are doing well! I’m still eating birthday cake from yesterday so of course I am doing well! LOL

Please come back and see me again soon! Don’t forget to sign up for my Newsletter, if you have done it in the past do it again, all the info was deleted! :-O I will be sending out the Newsletter around the 10th of each month.

Lisa Tedder
A California girl living in North Carolina

Product List

New Ornate Suite, You can buy now!

Hey Guys!

Today I am sharing with you again, the Ornate Suite that you can get early! Yes, Stampin’ Up! released new product from the upcoming New Catalog (out in June!!, let me know if you want a catalog!). I have made three cards, so far from this suite, and I am sharing with you the first one I came up with! If you missed it, here is another card I made using this set.

I love it when we get new product! It’s so fun to let your creativeness flow! There aren’t many samples out there, so you need to come up with it on your own……..scary? Yes! But it feels so good when you make something that you want to show off! Here is what I made:

Aren’t the new Rhinestones so pretty?!

This is pretty simple for me, but when you add the Rhinestones, Gold Foil and Embossing (both ways) it really adds up to something very elegant! I am so excited that I get to share this with you!

And the inside:

The squiggly gold on bottom is from the two scallops on front (cut them out across from each other to get this)!

As usual, here are the specifics for this card:

Stamps:
Ornate Thanks

Inks:
Versamark
Memento Black

Paper:
Basic Black 8 1/2″ x 5 1/2″, 3/4″ x 4 3/4″ (inside), 5/8″ x 5 1/2″ (trim after you place on front)
Gold Foil 5″ x 3 3/4″ (x2), cut out inside to use on a different project, 5 1/2″ x 1 1/4″ (give or take, depending on how wide you want your squiggly)
Whisper White 4 3/4″ x 3 1/2″ (x2)

Misc:
Ornate Borders Dies
Gilded Gems
Ornate Floral 3D Embossing Folder

Below you will see these same supplies listed in picture form, click on any of them to be taken to my OnLine Store so you can purchase any or all of them! If you purchase from me, you will receive not only one but two tutorials each made up of fabulous ideas with pictures & measurements! These have over 50 ideas each month for you, you only need to purchase $35 from me to have these sent to you! Don’t wait for the New Catalog, get this early release product and the tutorials. It’s a great deal and fun to create with something new!

Thank you so much for stopping by! I hope you are staying safe and that you are getting some crafting done in this time of Social Distancing. Believe me, crafting really helps keep you sane!

Lisa Tedder
A California girl living in North Carolina

Product List

Humming Along Glitter

Hey Guys!

Here is another card that I saw on Pinterest that I decided to CASE.

This was done by Mikaela Titheredge, absolutely stunning but I wanted mine to be a standard size.  Here is what I came up with:

If you look close, you can see all the glimmer on the bird.  I did this with blends and then went over with the Wink of Stella.  I LOVE the colors used on this gorgeous hummingbird!

Here are the specifics for this card:

PROJECT 1: Humming Bird
Stamp Sets Pg #
Humming Along  Occasions Bundle
Itty Bitty Birthdays Occasions
Paper
Thick White 8 1/2″ x 5 1/2
White 3 3/4″ x 5″
Shimmer White 2 3/8″ x 4 5/8″, 3″ x 4″
Calypso Coral 5 1/4″ x 4″
Gold Foil 2 5/8″ x 4 7/8″
Inks
Momento Black
Blends: Granny Apple Green, Calypso Coral,
Night of Navy, Bermuda Bay, Dk Daffodil Delight
Accessories
Wink of Stella
Share What you Love Artisan pearls
Dimensionals
Big Shot

I LOVE when I can find a card that other than size I don’t have to change anything!

Below are the supplies in picture form.  Click on any of the pictures to be taken to my OnLine Store.  If you choose me as your SU! Demo I will send you a small gift as a thank you!

Lisa Tedder
A California Girl living in North Carolina
Product List


HedgeHog Cutie

Hey Guys!

I made a Hedgehog with a flower stamp!  I’ve seen this done over a year ago, and FINALLY decided to make one.  These are so cute it was always on my list to make one.  So happy with how it came out! Here is my card:

I thought that embossing the Tree Rings on Soft Suede using Gold Embossing Powder would be really pretty. This is so stunning in person!  This is a card we’ll be doing in my kid card class. This, in my opinion, would be great for a teen girl.  I would love getting this, wouldn’t you!?

Here are the specifics for this card:

PROJECT 3: Hetty the Hedgehog
Stamp Sets Pg #
Painted Harvest
Well Said Bundle
Rooted in Nature
Tree Rings
Paper
Basic Black 8 1/2″ x 4 1/4″
Soft Suede 5 1/4″ x 4″
White 5″ x 3 3/4″, 3 1/4″ x 4 1/2″
Inks
Versamark
Soft Suede
Crumb Cake
Early Espresso marker
Gold Foil 1 3/4″ x 3 1/4″
Accessories
Embossing Buddy/Gold EP/Heat tool
Rectangle Framelits
Big Shot
Post-It’s
Fine Tip Glue Pen

Below are pictures of the supplies for this card click on any picture and you will be taken directly to my OnLine Store.  If you purchase from me, I will send you a small gift to thank you!

Please stop back and see me!

Lisa Tedder
A California girl living in North Carolina
Product List

Painted Season in all its glory

Hey Guys!

Today I am sharing with you a card I made using the NEW Painted Seasons set from Stampin’ Up!  This is ONLY available during March!  Don’t miss out!  Want to get if for FREE?  Purchase $100 and you can pick this stamp set along with a pack of 12″ x 12″ Designer Paper and pay nothing for this set and paper!  Here is my card:

This card just makes me happy!  The colors are so pretty and with the Gold Foil and Gold Embossing Powder the card looks very elegant!

Here are the specifics for this card:

PROJECT 3:  Painted Seasons
Stamp Sets Pg #
Painted Seasons SAB
Part of my Story SAB
Paper
Mango Melody 8 1/2″ x 5 1/2″
Mossy Meadow 5 1/4″ x 4″ (x2)
Gold Foil 5″ x 3 3/4″
white 4 3/8″ x 3 1/8″, 3 1/4″ x 1 7/8″, 3″ x 2 1/4″
Inks
Mango Melody
Old Olive
Petal Pink
Accessories
Gold Cording
NeedlePoint Elements Framelits
Pretty Label Punch
Dimensionals
Rectangle thinlits

Below are the supplies used to make this card in picture form.  Click on any of them to be taken to my OnLine Store!  I would love it if you would choose me as your SU! Demo!  If you purchase from me, I will send you a small thank you gift!

Thanks for stopping by!

Lisa Tedder
A California Girl living in North Carolina

Product List

Beauty Abounds-STUNNING

Hey Guys,

Sorry it’s been a while!  But, I am back and hopefully you are happy with it!  LOL

Today I am showing you a CASE I got from Liz Yuille, you can see her video here.  I bought the Crackle Paint stamp JUST to do this card!  But, of course now I am in love with it!

Here is my card:

The only thing I changed from hers is the Rhinestones and the sentiment.  I love adding the gold Embossing powder to the sides of the Sentiment.  Take out your Versamark, touch each side of the Sentiment to it, then dip into the powder heat and you are all set!

Here are the specifics to make this card:

PROJECT 3: Hello
Stamp Sets Pg #
Crackle Paint Occasions 44
Beauty Abounds Bundle 13
Paper
Bermuda Bay 8 1/2″ x 5 1/2″, 5 1/8″ x 3 7/8″ (x2)
Gold Foil 5 1/4″ x 4″
Black 5 1/4″ x 4″
Very Vanilla scrap
Black Foil 5 1/2″ x 4″
Inks
Memento Black
Versamark
Blend: Bermuda Bay Dk
Accessories
Tea Room Ribbon
Rhinestones
Dimensionals
Embossing buddy/Gold Embossing powder/heat tool
Fine tip Glue Pen OR Green Glue (Tombo)
Glue Dots

As Always, if you purchase from me, you will get a gift!  I would LOVE to be your Demonstrator, if you would like to see what I do……you can check out my YouTube Channel and see if we are a good fit!

Below are pictures of each of the supplies used for this project, click on any photo to be taken to my OnLine Store!

Thank you for stopping by!

Lisa Tedder
A California Girl living in North Carolina

Product List

Sneak Peek!! Amazing Life

Hey Guys!

Sorry it’s been a couple weeks, ok maybe longer…… I went to Orlando to attend the Stampin’ Up! ON Stage get together that SU! Demo’s attend.  I had such a great time! It was great rooming with my ‘SU! Besties’ (my girl friends and I only meet up at SU! functions) and learning/seeing all the new things coming out in January!!  I then spent a week with my Husband in Orlando for our 30th Anniversary!  The bummer is that I got sick the day after he got there. 🙁  I am STILL sick, and it’s been a MONTH!  Hence the reason why I haven’t been posting!

The card I am sharing with you today is from a stamp (Amazing Life) that we got for FREE while at OnStage!   I came up with this all on my own!!  I LOVE making my own designs, but time allowances don’t always make it to where I can do it.

I used this stamp from the set:

Doesn’t look like much right?

Well, I stamped it along the bottom with the two swirls going down, in Soft Suede ink. Repeated it along the bottom, lining up the swirls so they touched, then flipped the stamp over and lined up the two lines that are in the middle of the stamp.  I repeated this on top of the ones I stamped along the bottom and then flipped the stamp so the swirls were on the bottom again, and started all over to make a pattern!

After making the pattern, I stamped the 3 dot stamp in Petal Pink between the stamped pattern.  Don’t you LOVE how it came out!?  I was so tickled to see the beautiful pattern that this stamp made!!  If you watch the video I made you can see how It was done, if this doesn’t make sense.  I used other stamps for other designs, so be sure and check it out!

Here are the particulars for this card:

Paper
Petal Pink 8 1/2″ x 5 1/2″, 3/4″ x 3 7/8″, scrap
Gold Foil 4″ x 5 1/4″ (x2), scrap
Vanilla 5 1/8″ x 3 7/8″ (x2)
Inks
Soft Suede
Petal Pink
Versamark
Blend: Soft Suede dk, Petal Pink light
Accessories
Big Shot
Layering Ovals
Stitched Shapes
3/8″ Gold edged ribbon
Rhinestones
Gold EP/ embossing buddy/heat tool

If you live in the US and are in need of a Demonstrator with Stampin’ Up! I would love to be yours!  If you are looking into joining SU!, join my team!  We have a lot of fun and I would love to have you be part of my SU! family!

I hope you enjoyed this post, please leave me a comment below and let me know what you thought!

Check back, now that I am getting better I will be posting more!

Below are pictures of everything I used in the card, click on any of the pictures and you will be taken to my OnLine Store!

Lisa Tedder
A California Girl living in North Carolina

Product List