Tag Archives: embossing

Happy Tails masculine card

Hey Guys!

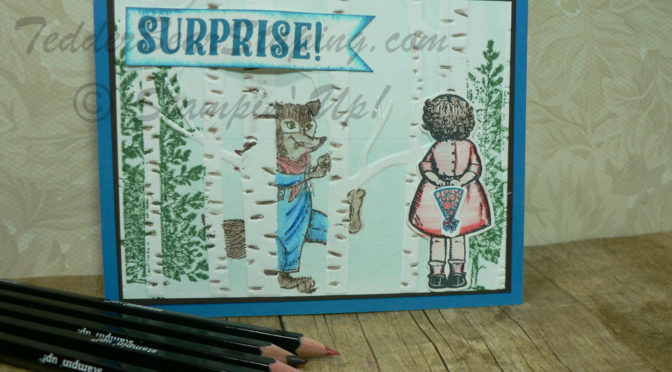
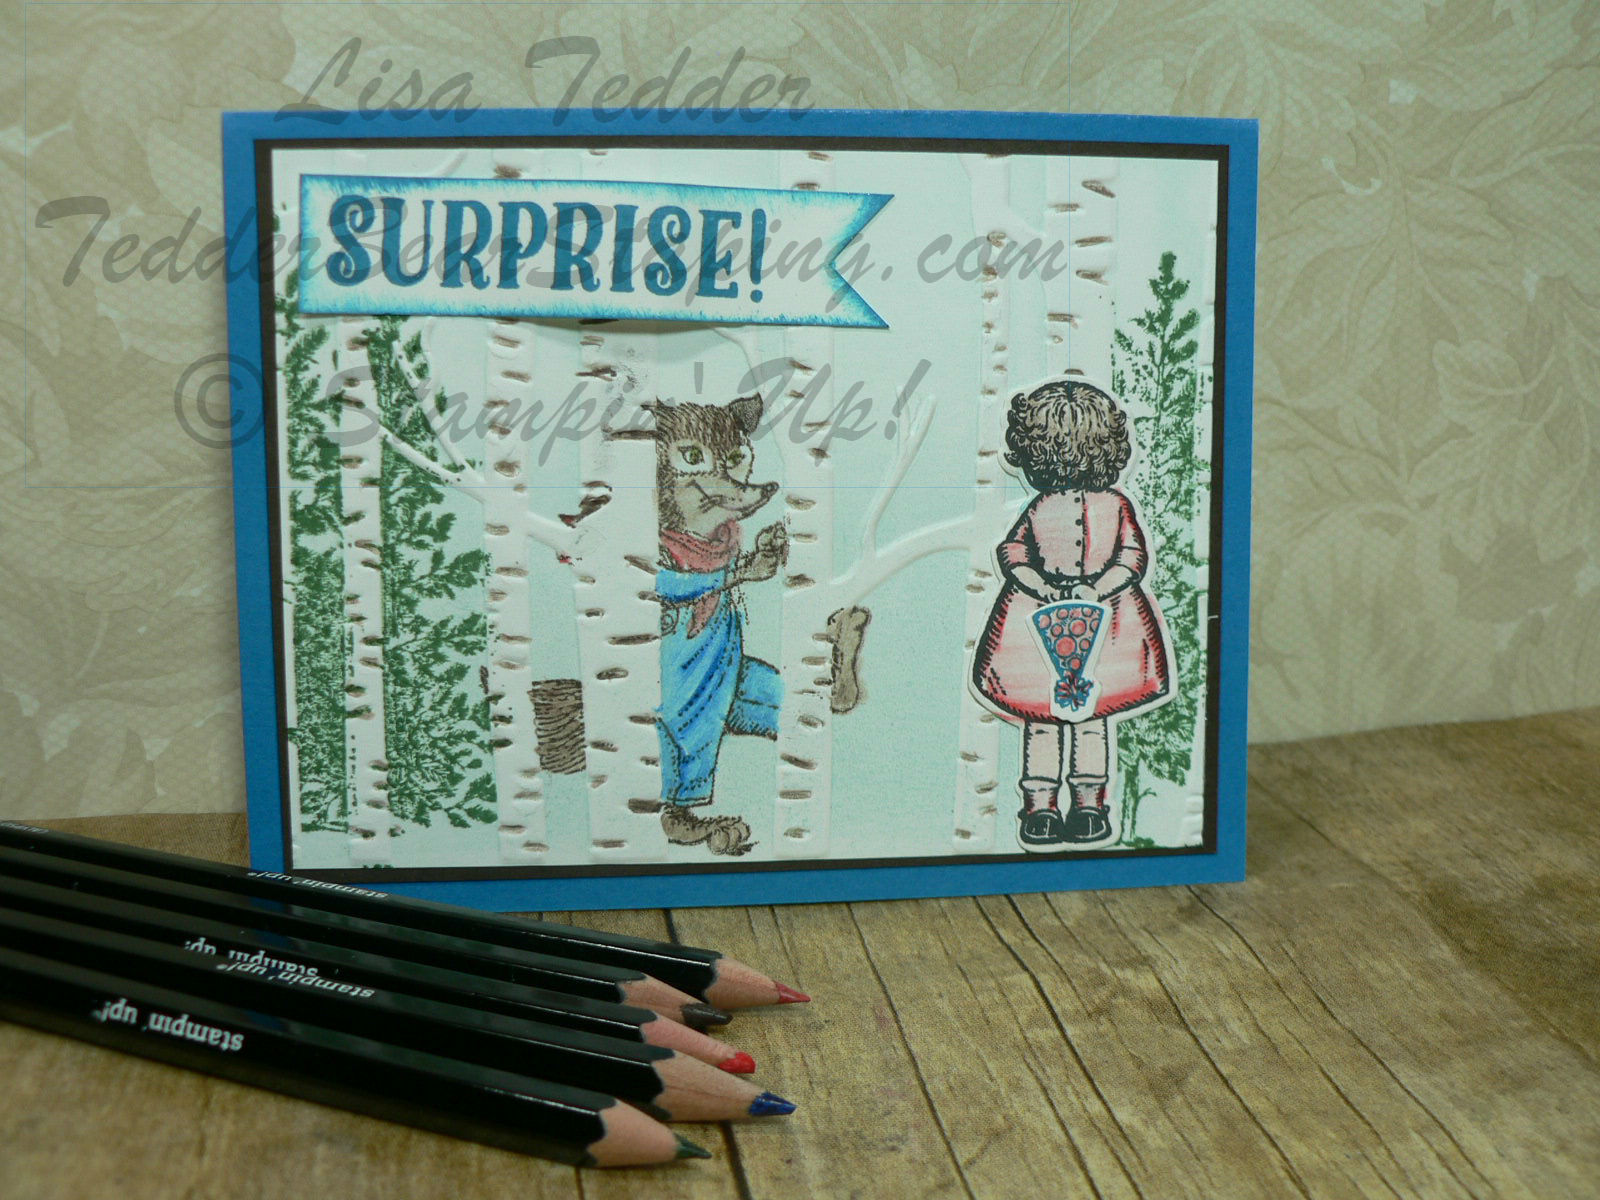
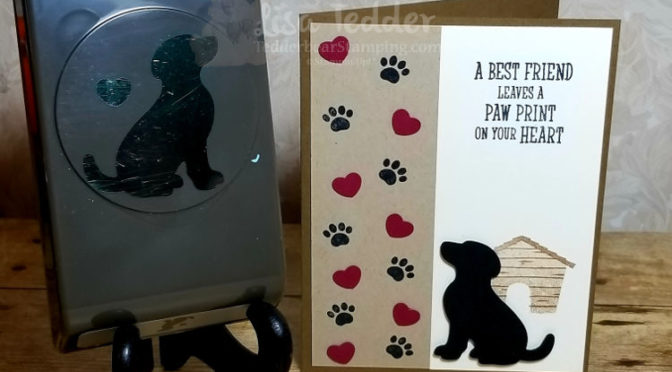
Today I am sharing with you a card that I will be doing in an upcoming Masculine card class.  It uses the Stamp set from Stampin’ Up! called Happy Tails!  This is such a super cute set!  You can buy the Bundle and get the punch with the stamp!

This card was a CASE by Carol Arneson.  I was going to change it up, but once I got started, it was perfect the way it was!  LOVE this card!

Here are the specifics for this card:

PROJECT 1: Dog
Stamp Sets Pg #
Happy Tails Bundle 33
Paper
Soft Suede 8 1/2″ x 5 1/2″
Very Vanilla 5 1/4″ x 4″, 2 1/4″ x 5 1/4″
Crumb Cake 1 3/4″ x 5 1/4″
Black scrap
Merry Merlot scrap
Inks
Memento black
crumb cake
soft suede
Accessories
Glue Dots

This is one you would call Simple Stamping.  Very straightforward, easy to do but still is gorgeous!

If you are in need of a Stampin’ Up! Demonstrator, I would love it if you would choose me!  I have a YouTube Channel where I do free weekly (most of the time) videos.  If you like what you see, just let me know if there is anything I can help you with!

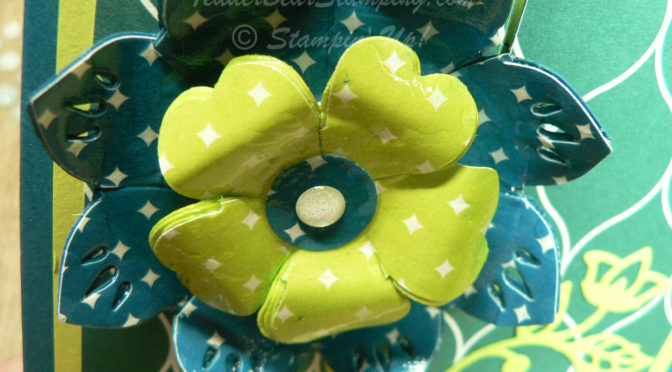
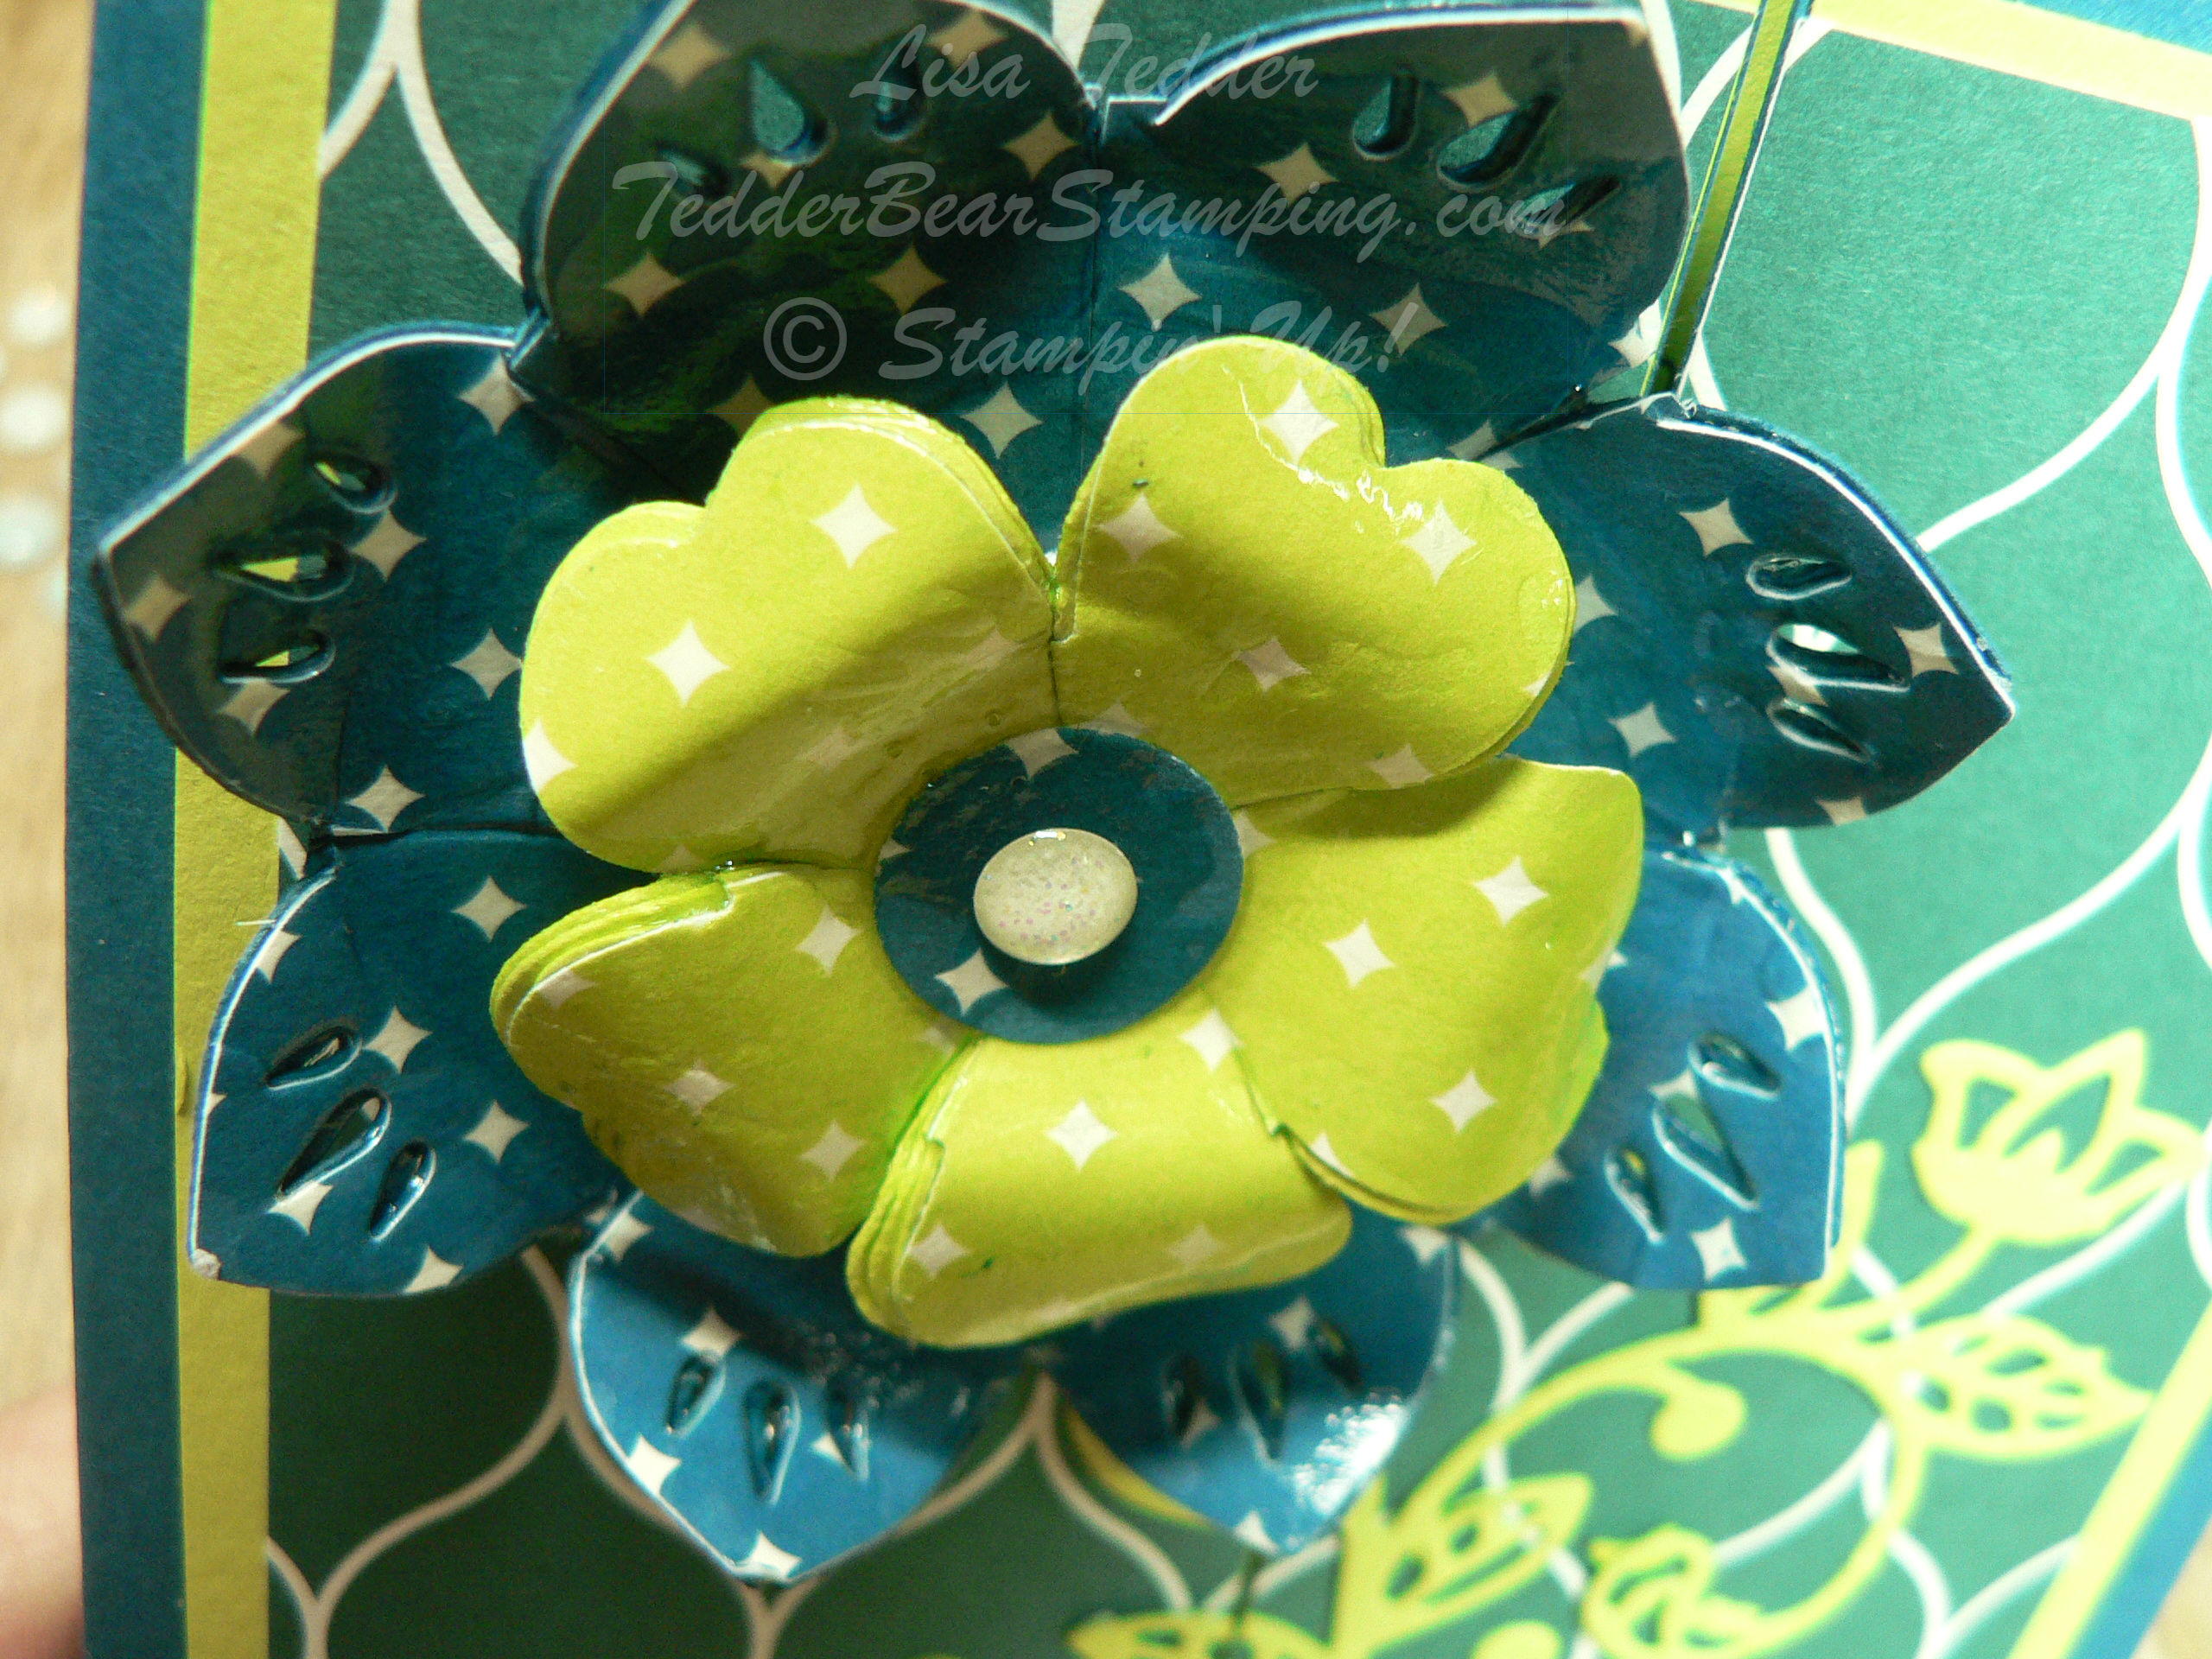
Below are pictures of the supplies I used to make this card.  Click on any of them and you will taken to my OnLine Store!  If you order from me, I will send you a small gift!

Hope you enjoyed your visit, please visit with me again!

Lisa Tedder
A California girl living in North Carolina
Product List

Petal Promenade show off card

Hey Guys!

Another card from Pinterest!  I saw a card by Gail Ellis and  decided to CASE (Copy and Share Everything) it.

Here is hers:

And here is mine:

This card was for a class so I made a few changes to make it not tooooo hard!  I think it’s very pretty, never thought to combine embossing folders on one card.

Here are the particulars for my card:

Stamp Sets
Petal Palette Bundle*
Paper
Whisper White Thick 8 1/2″ x 5 1/2″
Whisper White 5″ x 3 3/4″, 1″ x 5″, 7/8″ x 5″, 1 1/2″ x 5″
scraps, 3 1/2″ sq
Silver Foil 4″ x 3″
Gorgeous Grape 5 1/4″ x 4″ (x2)
Inks
Gorgeous Grape & Granny Apple Green markers
Accessories
Corrugated, Tin Tile, Subtle folders
Wink of Stella
Dimensionals
Rhinestones
Classic Label Punch
White Bakers Twine

I hope you like my version as much as I liked hers.  Everything needed for this card is pictured below, click on any of the icons and you will be sent to my OnLine Store!  All Online purchases get a gift from me!

Thanks for stopping by!

Lisa Tedder
A California Girl living in North Carolina

Product List

My “simple” card

Hey Guys!

I saw a card on Pinterest by Amy Koenders that made me want to make it right away!  Here is her card:

I did the main focal picture the same, but changed colors.  I couldn’t make it EXACTLY like hers!

Here is mine:

I used Bermuda Bay and Old Olive for my main image, PLUS the new Linen Thread that is in Old Olive.  I am always so excited to play with my new goodies that we can pre-order, BUT this was for a December class, otherwise I would have  broke out all my goodies!

Here are the particulars for this card:

Stamp Sets
Beautiful Promenade Bundle
Paper
Whisper White Thick 8 1/2″ x 5 1/2″
Whisper White 2 1/4″ x 2 1/8″, 3 1/2″ x 4 3/4″ scraps
Old Olive 3 5/8″ x 4 7/8″ (x2)
Bermuda Bay 3 1/2″ x 4 3/4″
Inks
Old Olive
Markers:  Old Olive, Bermuda Bay
Memento
Accessories
Pearls
Big Shot
Tufted Folder
Dimensionals
Old Olive Linen Thread NEW!!  SNEAK PEEK

Click on any of the pictures below to be taken to my OnLine Store.  Every Online order gets a free gift from me!

Thanks for stopping by, hope you stop by again real soon!

Lisa Tedder
A California Girl living in North Carolina

Product List

Sophistication meets Simple equals Perfection!

Hey Guys!

I got this idea from Pinterest, but for the life of me I can’t find it again to give credit! If you know who made this first, please let me know.

I’m not sure if this would be as stunning if I had used White paper, but who cares!?  it is so pretty!  I love how the bird sits at the opening of the circle and is dimensional.  The pearls gave a great touch too, right?

Here are the particulars for this card:

Stamp Sets
Petal Palette Bundle* (not sold as a bundle)
Butterfly Gala (SNEAK Peek!)
Paper
Very Vanilla Thick 8 1/2″ x 51/2″,4″x 5 1/4″(x2)
3″sq ,scraps
Inks
Basic Gray
Accessories
Pearls
Starburst Punch/ Petal Pair Embossing folder
Fine Tip Glue
Dimensionals

Below are pictures of the supplies used, click on any of them and you will be taken to my OnLine Store!  All Online orders receive a gift from me!   I would also love it if you could consider joining my SU! family!  It is the best decision (other than marrying my hubby and having my kids) that I have made!  I thought I better put that in there in case my kids or hubby are reading this!  LOL

Hope you enjoyed my project today, and will come back again soon!

Lisa Tedder
A California girl living in North Carolina

Product List

Beautiful Promenade with Silver

Hey Guys!

Happy New Year!  Hope you had a great Christmas and New Year.  I’m excited to see what the New Year Brings, are you?

Here is another card that I saw on Pinterest that I HAD to copy! The idea came from Robyn Cardon, I added the ribbon/changed the color, but the rest of the idea came from her!

This is my first time using the New Lovely Lipstick in the In Colors. I really like it!  The picture makes it look more like Melon Mambo, but it has more red than pink to it.

I used Silver Embossing powder to make it pop, and added the ribbon.

Here are the particulars for this card:

Stamp Sets
Beautiful Promenade Bundle
Paper
Whisper White Thick 8 1/2″ x 5 1/2″
Lovely Lipstick 5 1/4″ x 4″ (x2), 3″ sq
Silver Glimmer 3 1/2″ sq
Silver Foil 1 1/2″ x 5 1/4″
Whisper White 5″ x 3 3/4″, scrap flower
Inks
Versamark
Lovely Lipstick
Accessories
Silver EP/ Embossing Buddy/ Heat tool
Big Shot
Poppy Parade Mini Striped Ribbon
Dimensionals

All of the pictures below show the supplies used, click on any of them and you will be taken to my OnLine Store!  All Online purchases receive a gift from me!

If you are considering joining the SU! Family, I would love to be your Team Leader!

Hope you enjoyed my share for today!  Hope to see you back soon!

Lisa Tedder
A California Girl living in North Carolina

Product List

Christmas Card #15 Farmhouse Christmas

Hey Guys!

This card was made after looking at two different cards using this set on Pinterest by two different people.  I loved the idea of having snow in the backyard and the truck in the front, plus using the die as a mailbox.  I added the ‘door’ on the mailbox, which made me so tickled with myself!  LOL


I uses a LOT of blends, which are listed below.  If you would like the dimensions and particulars for this card here they are:

Supplies
Stamp sets:
Farmhouse Christmas Bundle, Merry Christmas to all
Cardstock: Poppy Parade 5 ½” x 8 ½”, scraps for bows, Basic Black 5 3/8” x 4 1/8”, Whisper White 5 ¼” x 4 (x2),
5 ¼” x 2 ¾” (trimmed for snow), 1 ¾” x 4 ½”, 5 ¼” x 4 for stamping house, tree, truck, Wood Textures DSP 3” x 1 ½”
Inks: Memento Black, Versamark, Balmy Blue, Old Olive, Poppy Parade, Blends: Poppy Parade combo, Light Mango Melody, Old Olive combo, Soft Suede combo, Black Lt, Smoky Slate combo
Misc: White EP, Embossing Buddy, Dimensionals, Foam Adhesive strips, Fine tip Glue pen, Big Shot, Wink of Stella

This card is layered, the snow in the back only go on the bottom half of card, and if you look the fence is popped away from the base of the card.

I hope you like this card as much as I do!  We made this in my Christmas card class at the beginning of October!  Everyone loved making it, and I look forward to my other classes.

If you click on any of the pictures below (supplies used for this card), you will be taken to my OnLine Store! I would love to be your Demonstrator if you live in the US!

Check back with me, so you can see what I’ve been up to!

Lisa Tedder
A California Girl living in North Carolina
Product List

<!——– TAMS End ———-

Christmas Card #13 Still Night

Hey Guys!

The owl in Still Night is one of my favorites.  I love the dies in the bundle because not only does it cut out the owl & branch but it also cuts out pine boughs to make the branch look great!  The set has 4 dies to cut out the boughs so you don’t spend all your time cutting one at a time!

I changed up very little from this idea off Pinterest from Nicole

The specifics for my card:

Supplies

Stamp sets: Still Night Bundle, Merry Christmas to All
Cardstock: Garden Green 8 ½” x 5 ½”, scrap, Silver Glimmer 5 ¼” x 4”, Twinkle Twinkle DSP 5” x 3 ¾”, white 5 ¼” x 4”, 2 ¾” sq, 1 ¼” x 3” (sentiment), 1 ¾” x 2 ½” (owl) Early Espresso 3 ½”sq
Inks: Night of Navy, Gray Granite
Misc: Big Shot, Clear EP, Embossing buddy, heat tool, dimensionals, 2” circle punch, glue dots, fine tip glue pen

I would love to be your demonstrator if you live in the US!  And you are MORE than welcome to join my team: LETs Stamp!

Below are all the supplies in picture form, click on any picture to be taken to my OnLine Store!

Thanks for stopping by, come again to see my next project!

Lisa Tedder
A California Girl living in North Carolina
Product List


Winter Woods from the Holiday Catalog Card #2

Hey Guys!,

Today it’s time for card #2 out of 6.  By this time of year I am excited to do Christmas cards, but by Christmas I am ready to put it aside until July of next year.

Here is a card using the stamp set Winter Woods and Timeless Tidings from Stampin’ Up!

I saw this on Pinterest, changed up the background by stamping the Birch trees in Versamark first.  But the idea came from Linda Vich.  Thank you Linda!

Here is a look at the inside:

Hope you like it as much as I do!  The ingredients for this card are pictured below, click on any of them and you will be taken to my OnLine Store!

Here are the particulars to this card:

Stamps: Winter Woods, Timeless Tidings
Cardstock: Soft Suede 8 ½” x 5 ½”, 4 ¼” x 3 ¼”, scrap, Black
4 3/8” x 3 3/8”,scrap,  Real Red 5 ¼” x 4” (x2)
Ink: Memento Black, Versamark, Dk Black Blend
Misc: Rhinestones, Black 3/8” Glittered Organdy Ribbon
5 ½” (x2),  Tufted Folder, Dimensionals

Thank you for stopping by!

Lisa Tedder
A California girl living in North Carolina
Product List

NEW Technique Tuesday Making a Scene using an Embossing Folder

I love Tuesday’s!  Techniques are my favorite thing about stamping.  I get to use my Stamps in a totally different way!!  The Technique I am using today had me thinking of what I could put BEHIND trees, but still show what I needed it to show.

Here is today’s card:

I made a YouTube video showing this stamping technique.  I love Birch Trees, I also love the Birthday Delivery Stamp set by Stampin’ Up!  I got super excited about being able to use BOTH!  When you go watch the video it will show you exactly how easy this technique is to do!

Stamping directly onto an Embossing Folder isn’t something you think of normally.  Tips:  1. Stamp on the side that has the negative (dipping down) the part you want as your focal in the folder this will be the part that is raised on your card. 2.  Pick images to stamp on that you will see in the lines available that are the flat parts of the folder.  3.  Use colors that will enhance what you are stamping.  4. Use a brayer to lay down a color that will be behind the images (sky), anything you stamp over the brayered color will be at the top of the cardstock.  5. Make sure that you don’t move the folder once you put all the stamping in (I did NOT follow this rule on my video, but I fixed my mistake!)  6.  Remember that it’s ONLY PAPER, and play with it!

I won’t be able to show you here how to do this technique, it would be too confusing, so please go check out my video and see how fun and easy it is.  You will notice that you will look at stamps in a totally new way!

As always, I will have the supplies listed below, just click on any image to be taken to my OnLine Store!

Thanks for stopping by!  Until next time!

Lisa Tedder
TedderBearStamping
A California Girl living in North Carolina

Product List

Technique Tuesday! Add a 3D element to any project!

Today I am going to show you how to make a 3D element using Mod Podge!  If you would like to see this in action, go to my YouTube video where I SHOW you how!

First, you will need to pick a shape you want to transform!  I chose two, the Pansy Punch and the flower from Eastern Medallions Thinlits.  I punched out 3-4 of each image with another one from DSP.  I chose the Eastern Palace since it was so pretty.

Take your Silicone Craft Sheet, a foam brush, Mod Podge and your cut outs.  Starting with the colored images, not your one cut from the DSP, spread a thin layer of ModPodge over entire surface with your Foam brush.  Then lay another layer of the image on top of that and repeat.  You will do this 3 – 4 times ending with the one you cut out of the DSP (do not put ModPodge on top).  Then you can cut into all layers if you want to manipulate the paper more than the design allows.  Keep working at it until you are happy with the shape.  Once done, you will spread Fine Tip Glue over entire surface, set aside to dry.

When dry, put your two pieces together as shown:

This is already attached to my card, but this gives you a close-up of what it looks like when dry.

Here is a picture of the closed card:

In the video I show you how to apply the Flourish Thinlits and how to adhere it to the card!

This is a Fancy Fold card, here it is open:

If you wanted, you could attach the flower on front with a Pin, and then mail it to someone who loves to wear brooches, or use it for a headband!  I have done in the past a 3d Rose, and that was gorgeous!

Please subscribe to my YouTube channel to be informed when a New Technique video is ready!  Tuesday is the day I chose, since Technique Tuesday has a certain ring to it, don’t you think?

And don’t forget to subscribe to my blog so you won’t miss out on anything here.

TOMORROW I have the drawing for this card:

Today is your last chance to either leave me a message on here, or on my YouTube page, if you click on that link you will be taken to the video where I made this card.  You will be AMAZED how much MORE prettier this card is in person!

I am off for now, until next time!!  As always I will have the list of the supplies used (below) for the card today, just click on any of the pictures to be taken to my OnLine Store!

Lisa Tedder
TedderBearStamping
A California Girl living in North Carolina

Product List