
Hey Guys!
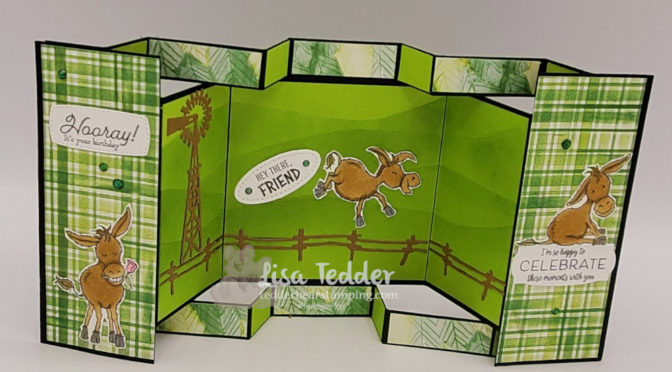
Yesterday I posted a Live YouTube video doing a Fancy Fold using the Darling Donkey stamp set! You can get this set FREE with a $50 purchase! Love, Love, Love this set!! I have been using it a lot ’cause I love it so much! If you missed my last Live you can catch it here! Also, I did a Blog post and that can be found here!

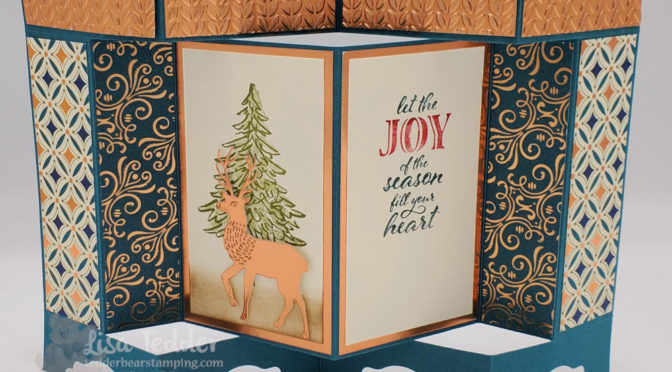
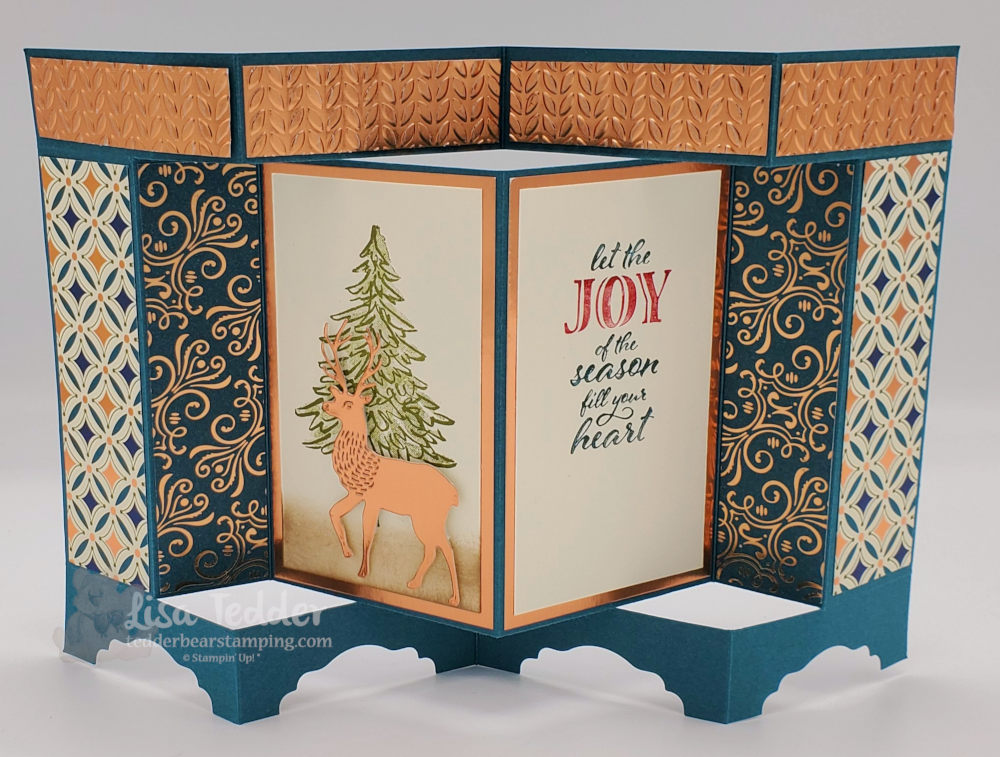
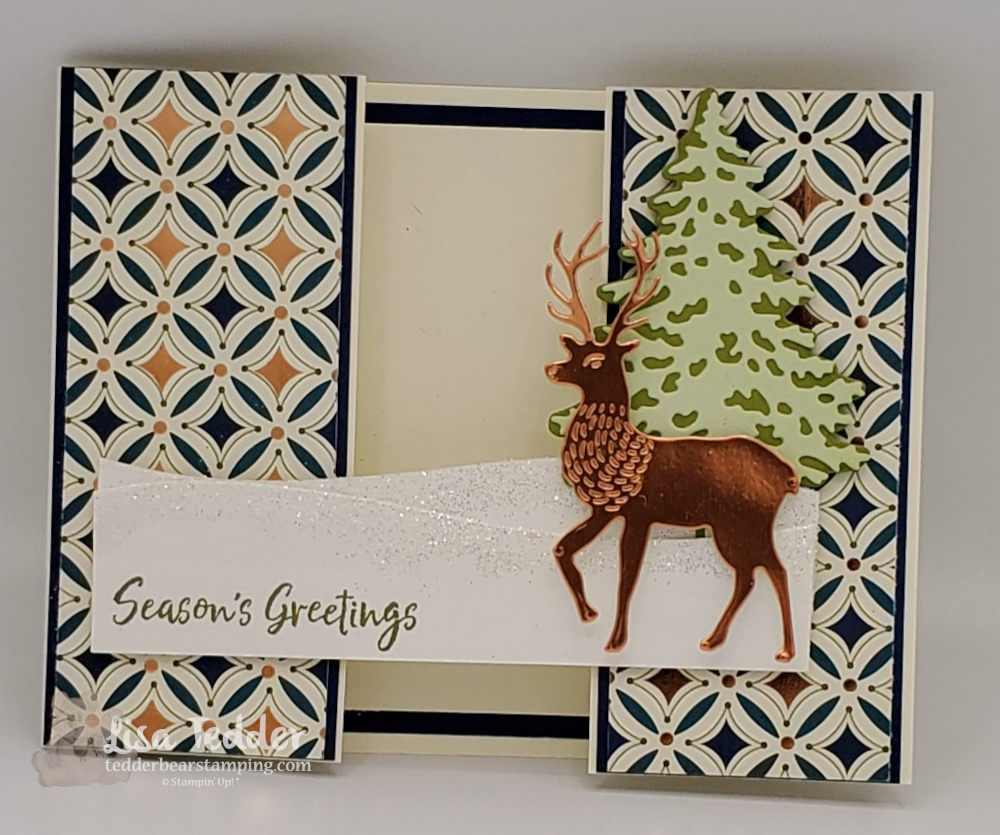
Of course I did a SECOND card for my Mini Class! And I also used the Free Donkey set!
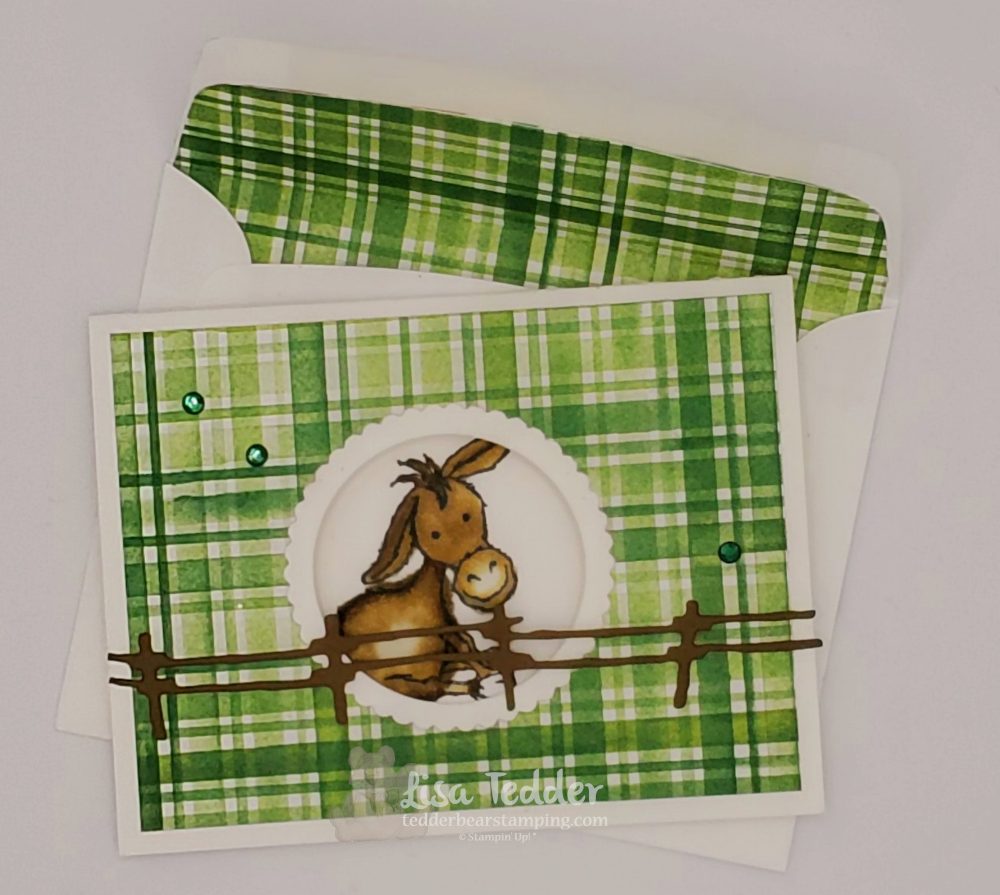
First off, I wanted to tell you that I also used, along with the Donkey, the dies from the Bundle Ride the Range. I will be using this bundle for my next YouTube Live on Thursday January 14th! I hope you can join me. Also, I used some Free Designer Series Paper that comes in the Sale-a-Bration catalog as a bundle itself called Berry Blessings Stamp set + Berry Delightful Stamp set.
Secondly, as usual I am providing all the details needed to make BOTH projects:
- Stamp sets:
- Darling Donkeys
- Many Messages
- Inks:
- Memento Black
- Garden Green
- Granny Apple Green
- Blends:
- Soft Suede
- Smoky Slate
- Color Lifter
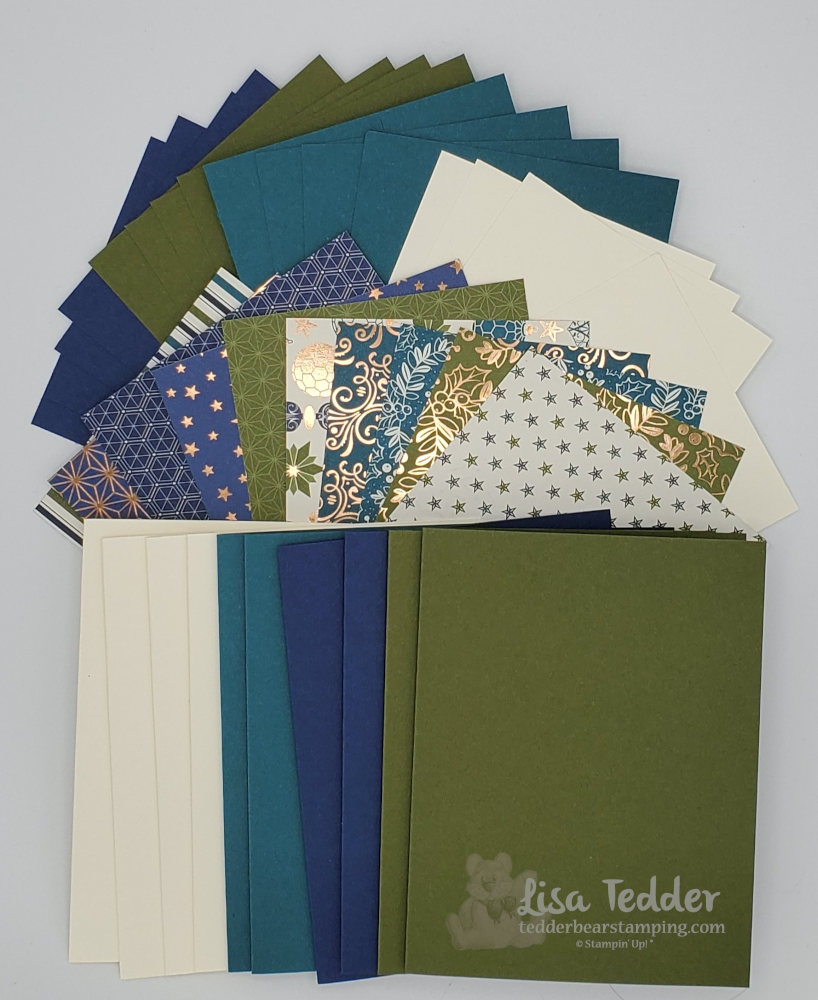
- Paper:
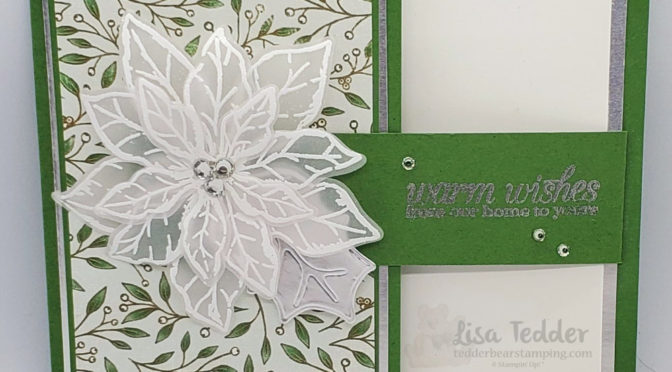
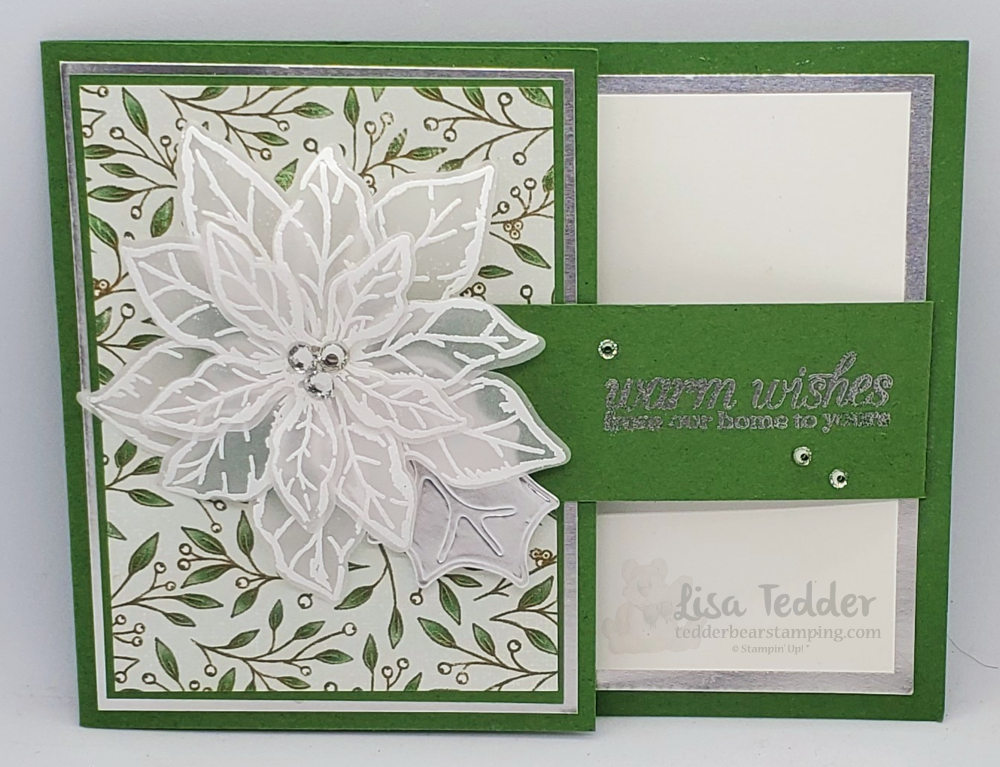
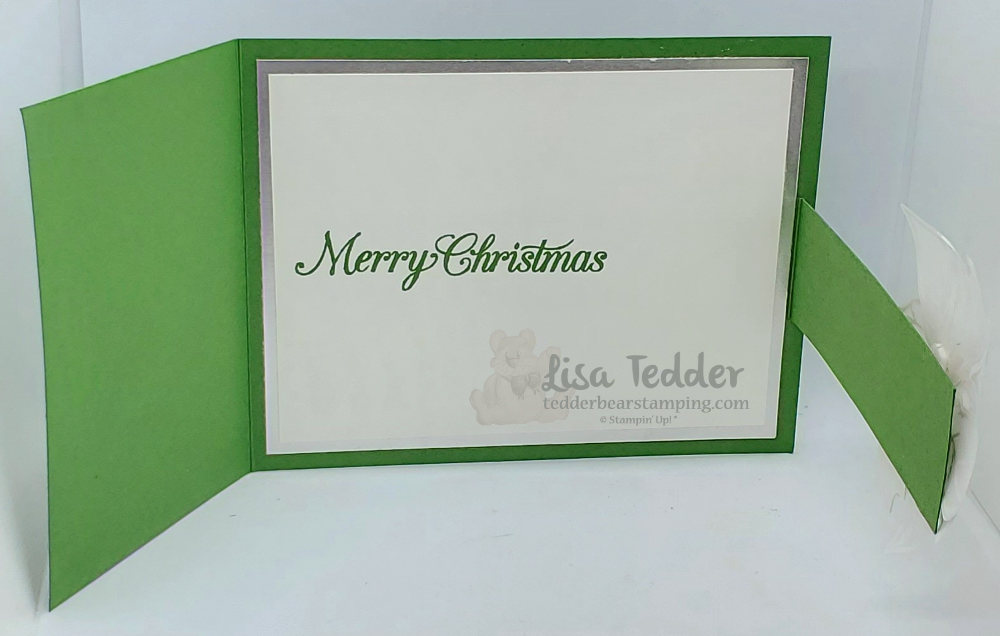
- Basic Black: 12″ x 5 1/2″ (base), 5 1/2″ x 2 18″ (for panels) For Base you will lay it on your cutter/trimmer portrait and place the edge along the 3/4″ line and cut from the 1″ to 5″, pick up cutter and cut from 7″ to 11″, repeat for other side. Then place on trimmer Landscape and you will SCORE only on the outside edge (between the cut and edge), score on 1″, 5″, 7″ & 11″. Keep in Landscape and score ALL THE WAY across on 2″, 4″ 8″ & 10″. You will fold them on the outside edges mountain, valley, mountain valley (this is the same on both sides working towards the middle) Do both top and bottom. Inside flap gets folded mountain, valley, valley, mountain.
- Granny Apple Green: 3 7/8″ sq. (back panel), 8″ x 3 7/8″ for middle scene, 5/8″ x 7/8″ (x8) for bottom and top small edges, 4 1/8″ x 3 1/8″ (for gift card)
- Berry Delightful Designer Series Paper: cut 4″ x 5 3/8″ (turn and cut @ 2″ in half so they will line up), 4″ x 5 3/8″ for front panels when card is closed. 5/8″ x 1 7/8″ for adding to the tip and bottom small panels. And 4 1/4″ x 2″ for envelope flap
- Memories & More Cards & Envelopes: I used a gift card/Envelope for small Donkey card.
- White: 4″ x 3″ inside the Gift card
- Misc:
- Open Range Dies
- Many Messages Dies
- Layering Circle Dies
- Stitched Shapes Dies (for sentiment donkey is kicking)
- Holiday Rhinestones
- Liquid Glue
- Paper Trimmer
As you already know if you follow me and my blog, all the supplies will be listed below, click on any of the pictures and you will be taken to my OnLine Store! For any purchase of $35 or more you will receive from me the class packet for the class I am detailing today, which will include all the cardstock, die cuts (not the sentiments since that is not allowed per SU!) but I can send you the one die cut for the sentiment that the donkey is kicking since that is stamped with the stamp set and not the Many Messages. Also, you will get the Rhinestones and I will pre cut/score for the main card and die cut the circle for the gift card! The one thing I can not do is stamp anything.
BUT the great thing is it’s Sale-a-Bration now and you can get MORE than you would normally! Spend $50 and you can pick out that CUTE Darling Donkey set for FREE! This is while supplies last, so don’t wait! Furthermore, you will get the 16 project ideas in a PDF that has step by step instructions and pictures….hint, my Home decor item is what I made!! So you will have the measurements for that too!
Thank you for all your support! I so appreciate you joining me on my Live classes and for those who can’t watch live I appreciate you watching it later!
If you are in need of a catalog, let me know and I will get one right out to you!
Love ya!
Lisa Tedder
Formerly a CA girl now living in North Carolina
Product List


")


")


 Sheer Ribbon")


")

 Faux Suede Trim")


")


