Tag Archives: crafty

Bumpy Bike ride near the Mountains

Today the mail came and inside was my framelits for Bike Ride from Stampin’ Up!  Of course I had to give it a try!

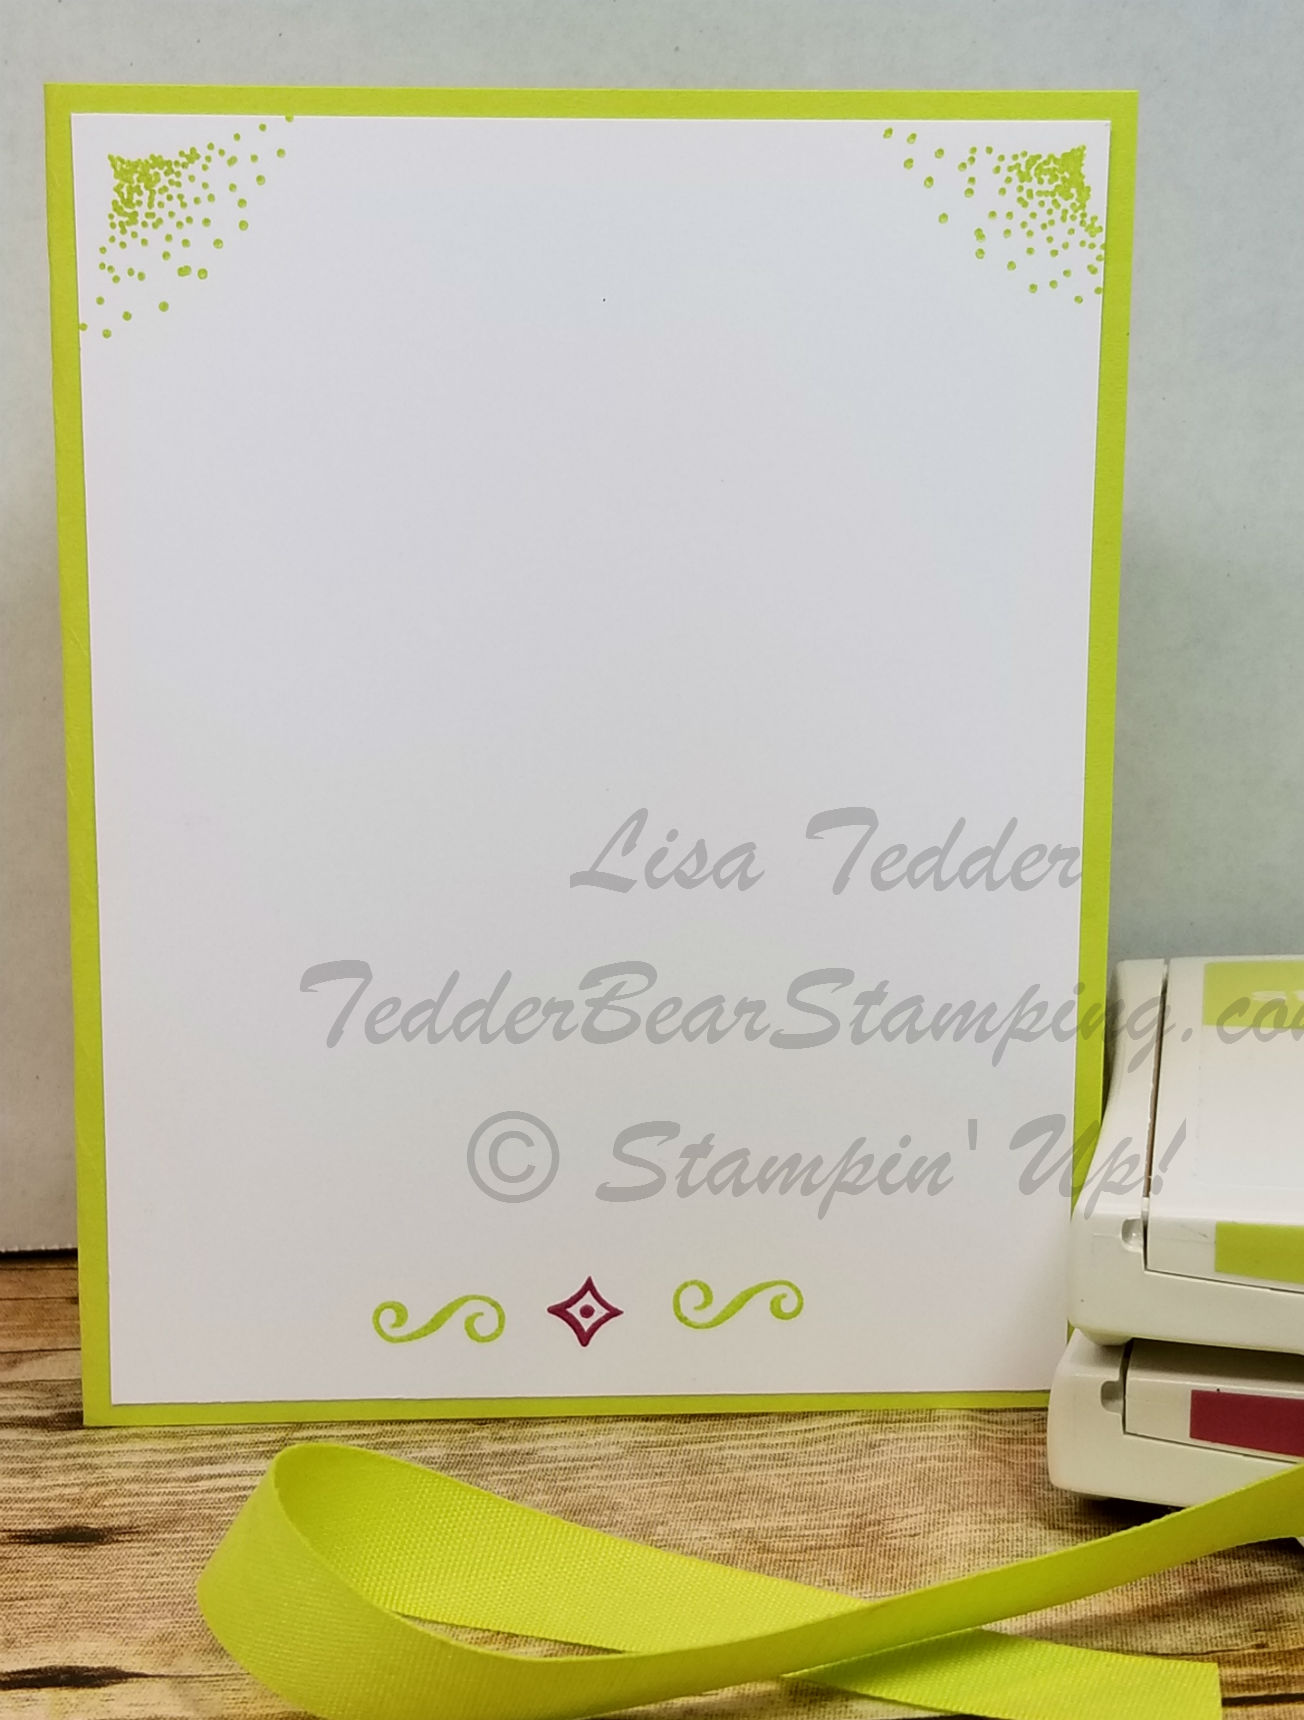
I wanted mountains in my picture so I tore some Post-It notes and stuck them to the top of my card:

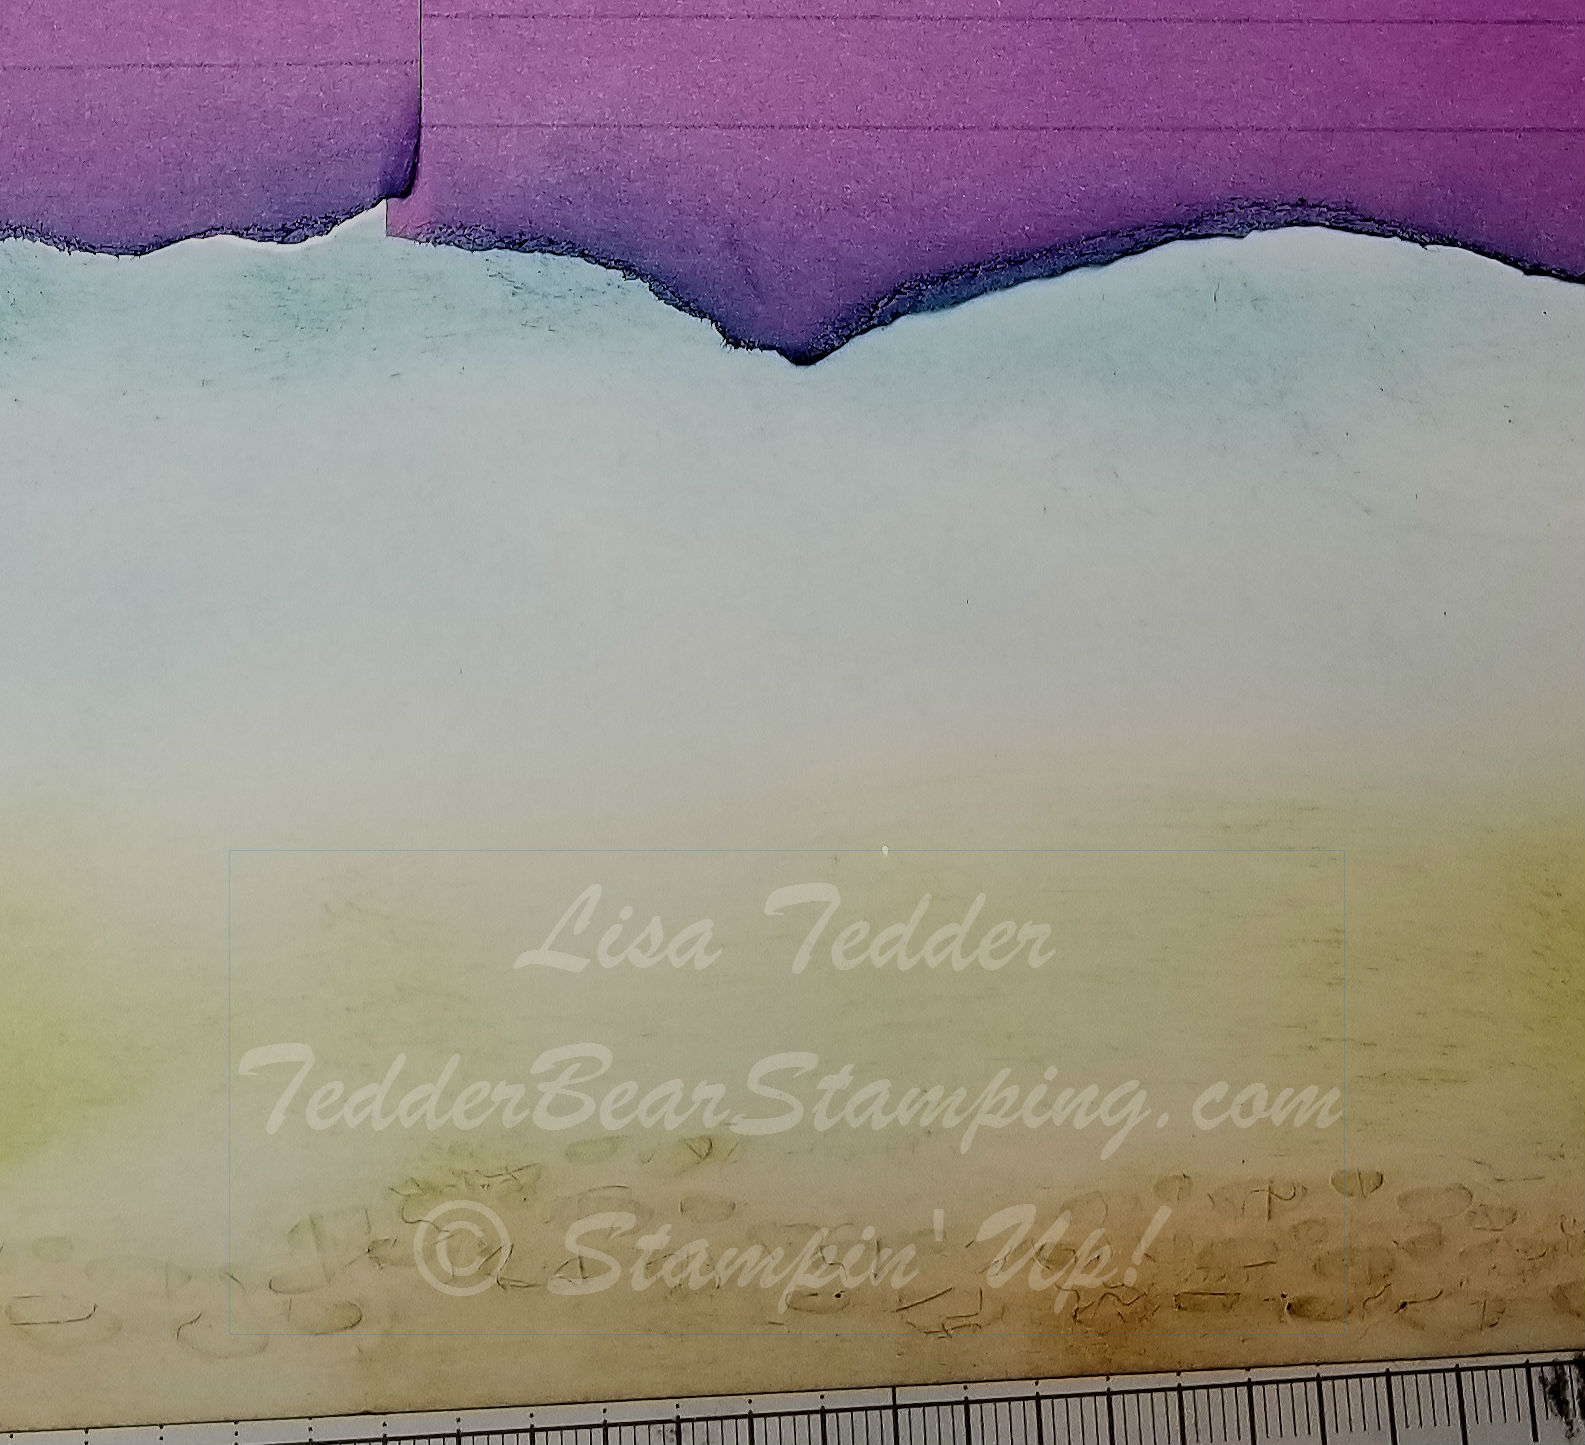
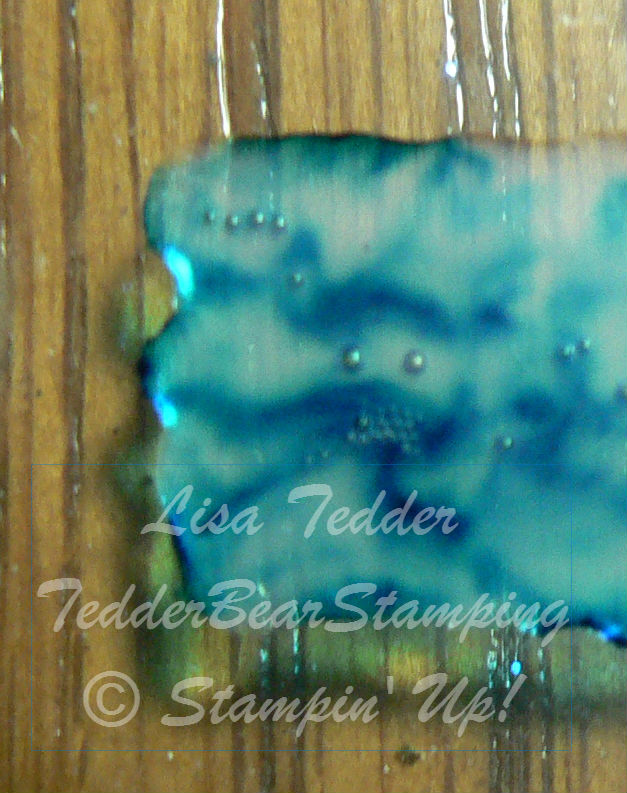
I then sponged lightly Dapper Denim at the top, making the part closer to the Sticky Notes darker, and then fading the color away.

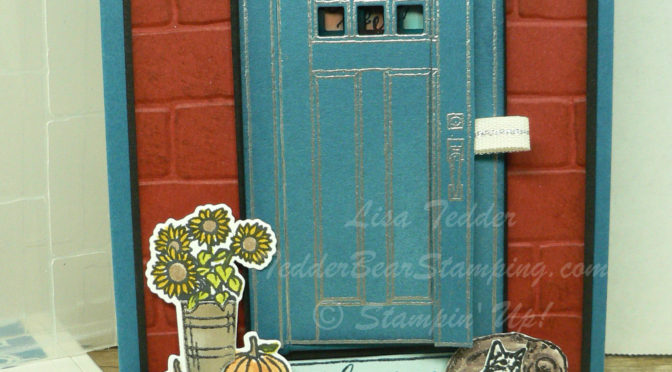
I ran the cardstock that I was using through the Big Shot with the bumpy rock thinlit under the paper, then ran it though.   This gave the Cardstock the bumps!  They look like rocks so I sponged over them using Soft Suede, this highlighted the rocks!  I was so tickled by this! Normally you put your thinlit OVER your cardstock to cut it out, but this time I wanted the impression.  Came out pretty didn’t it!?

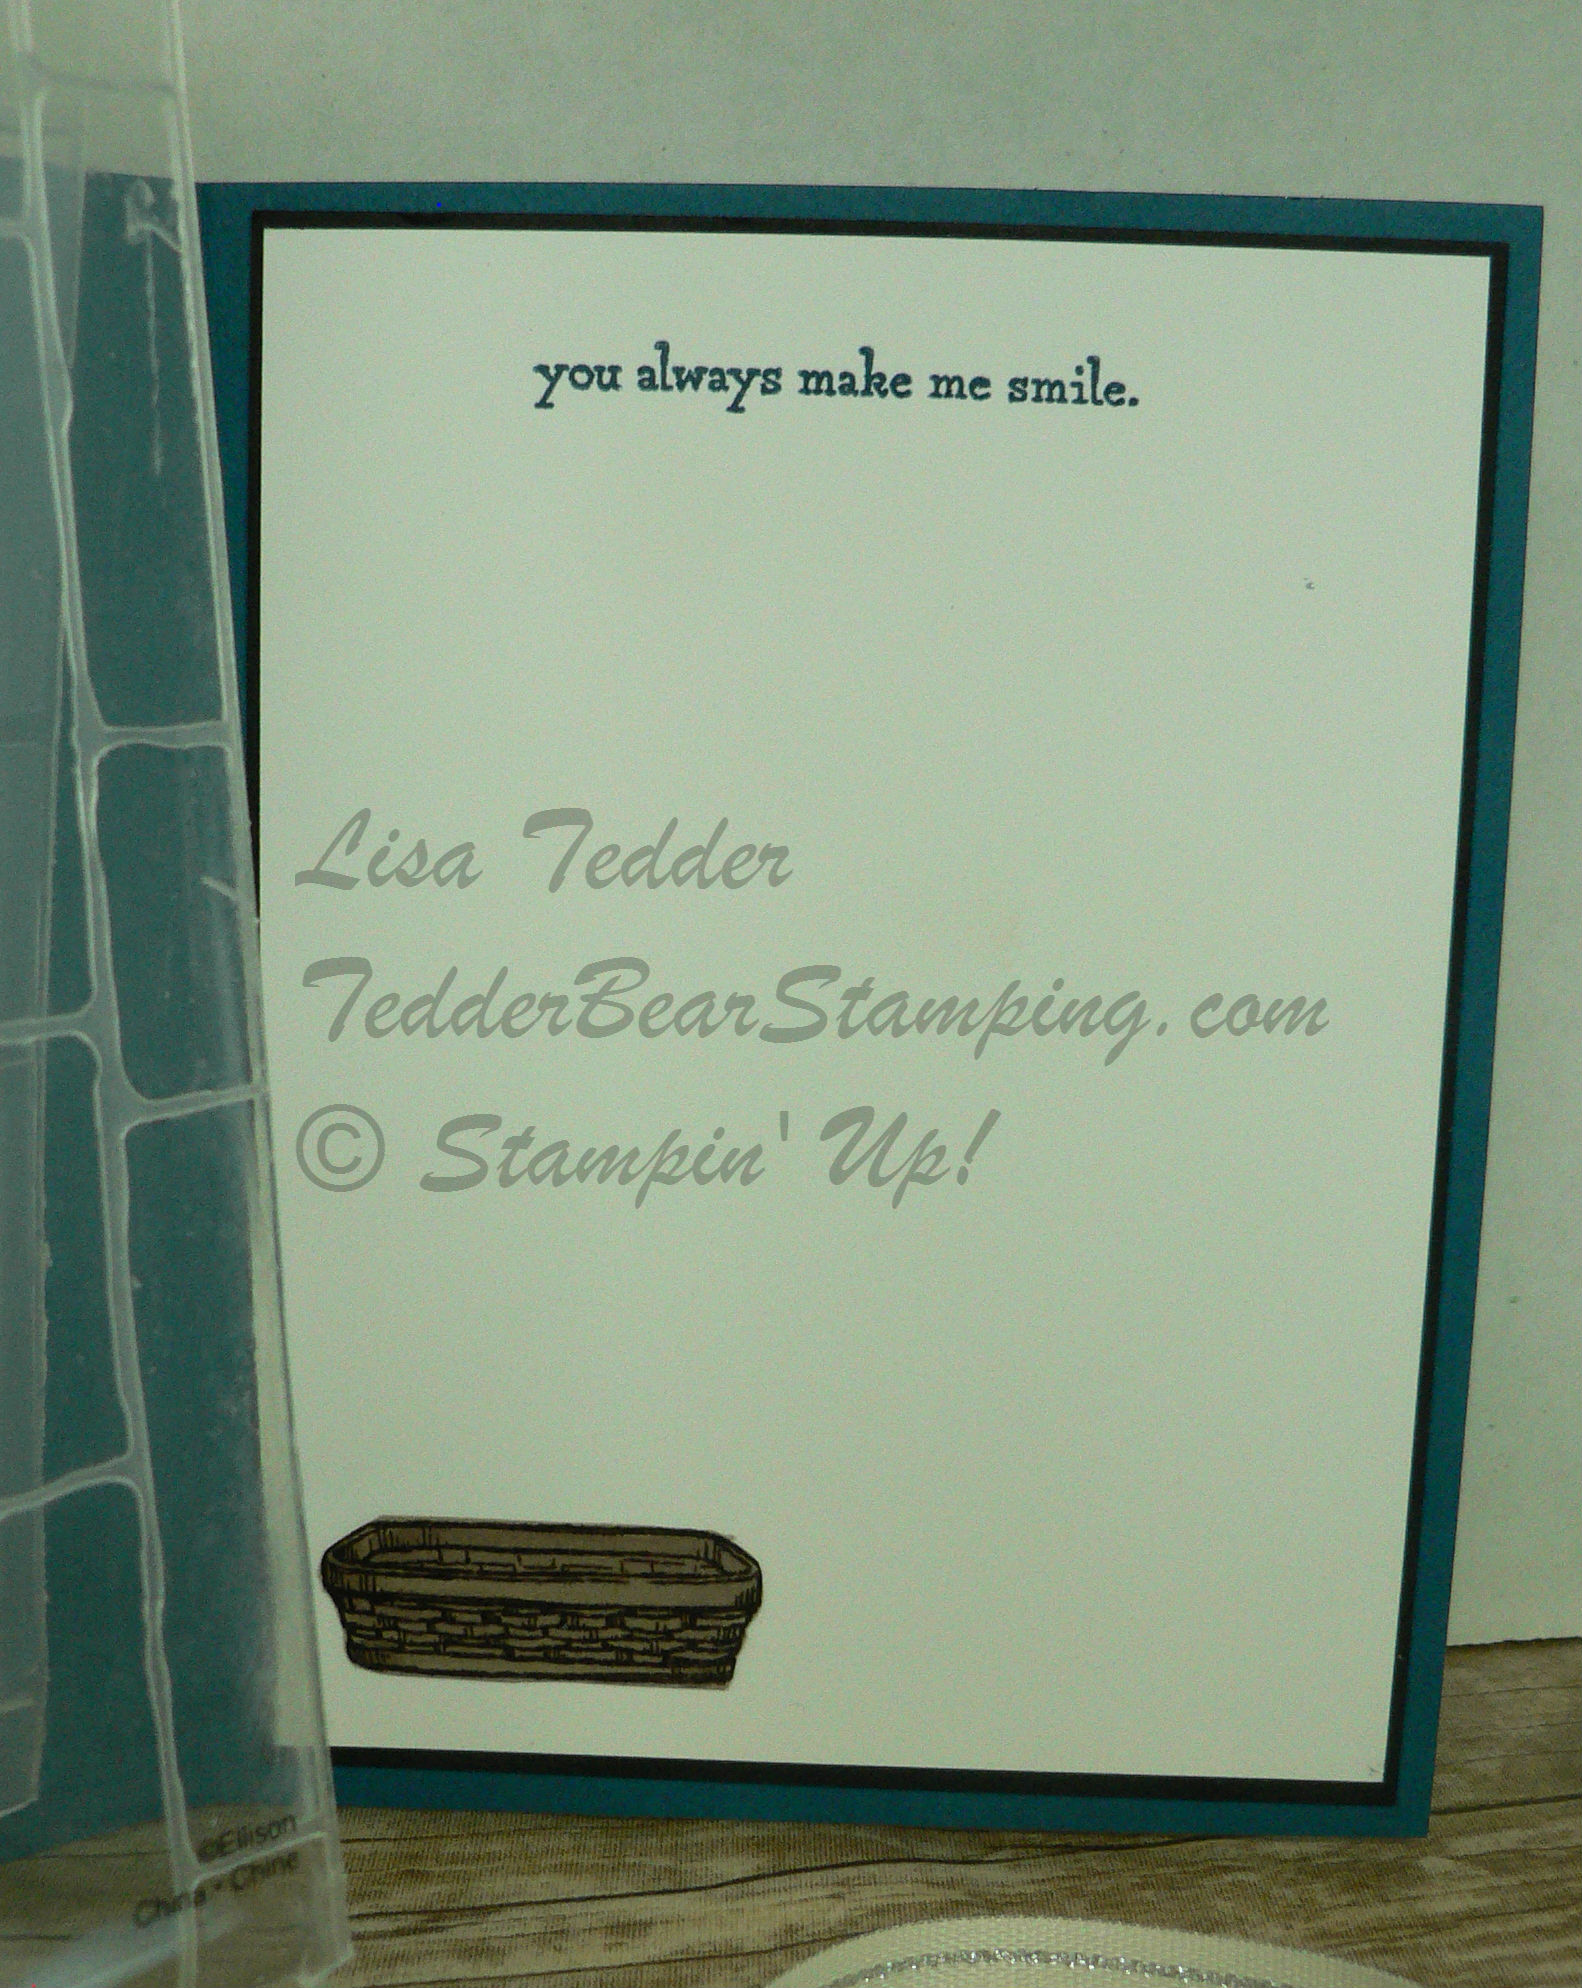
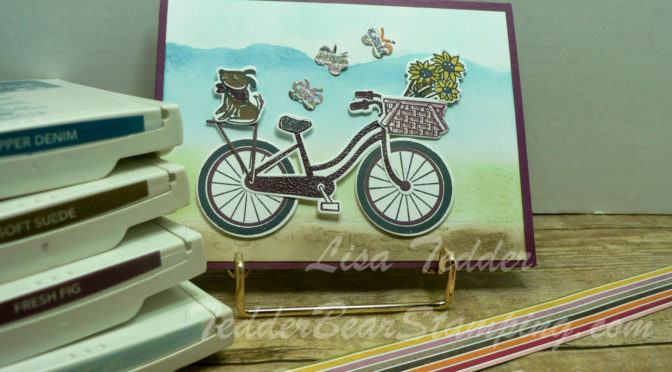
I stamped the Bike in Fresh Fig, SU’s NEW In Color!  I also stamped the basket in it!  The dog’s scarf is Fresh Fig too!
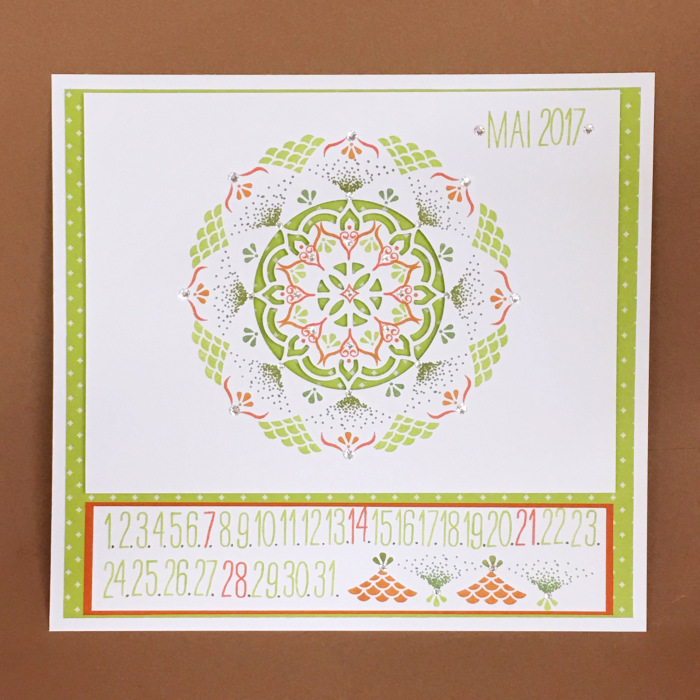
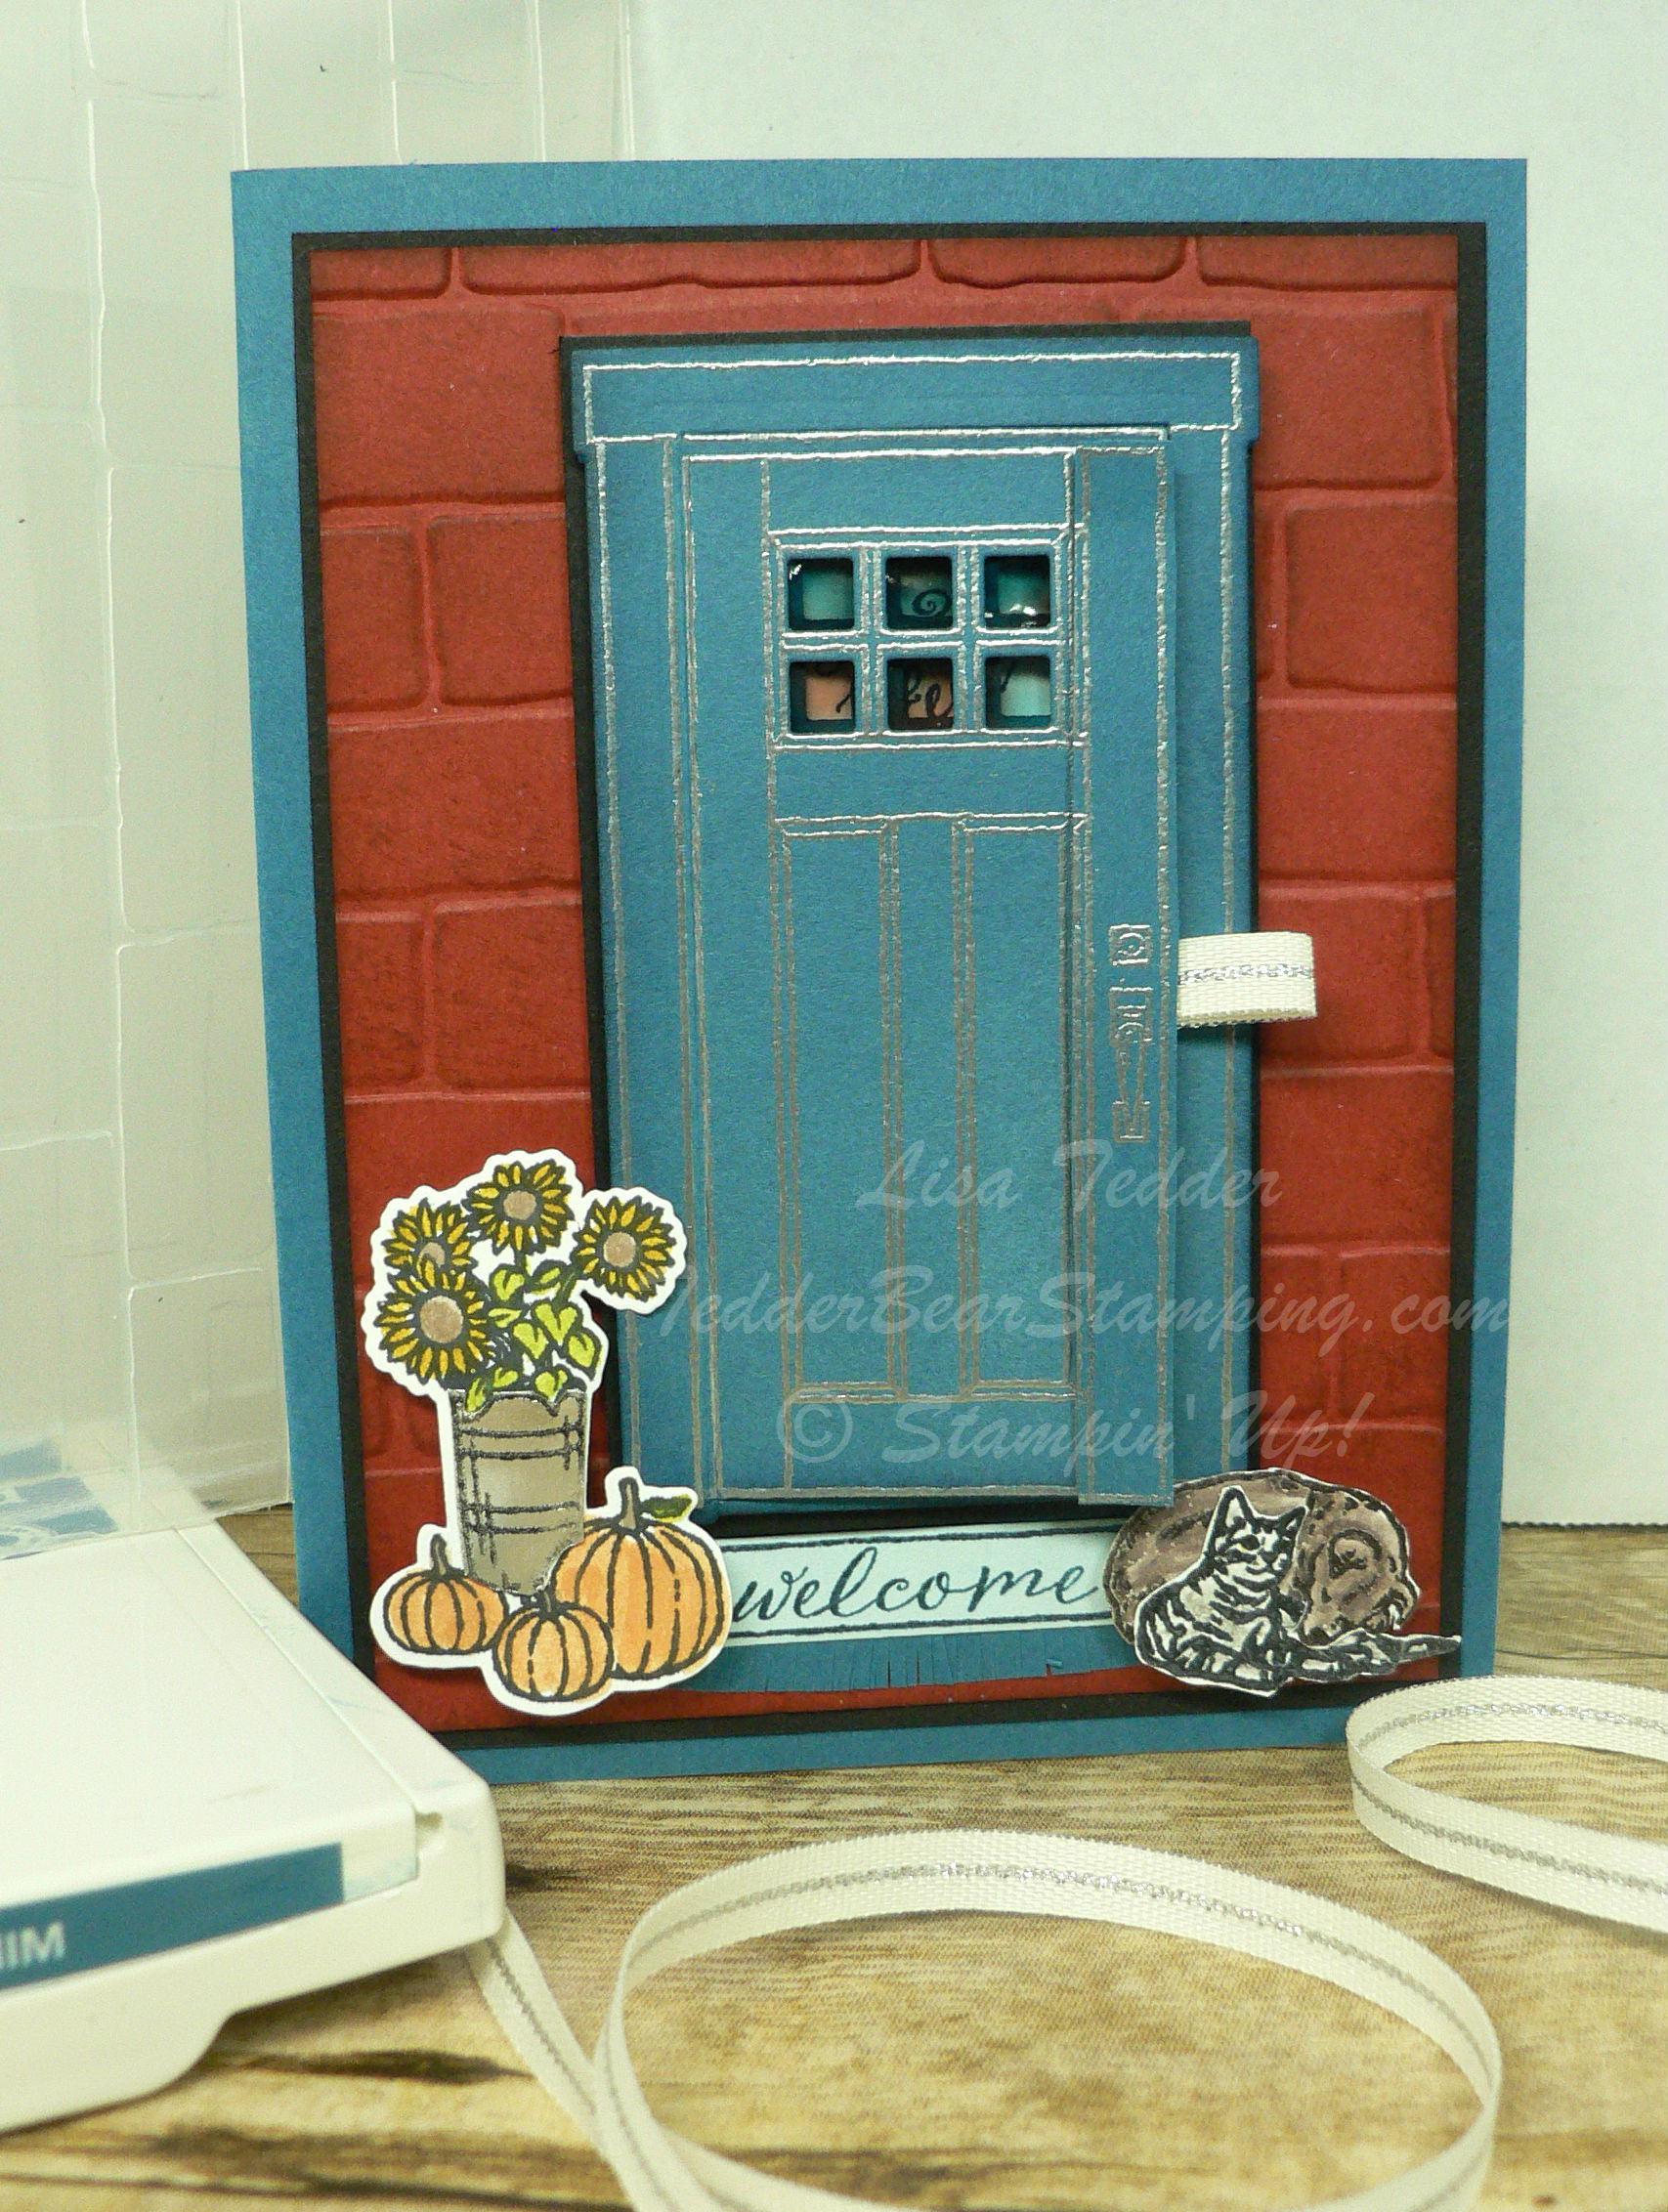
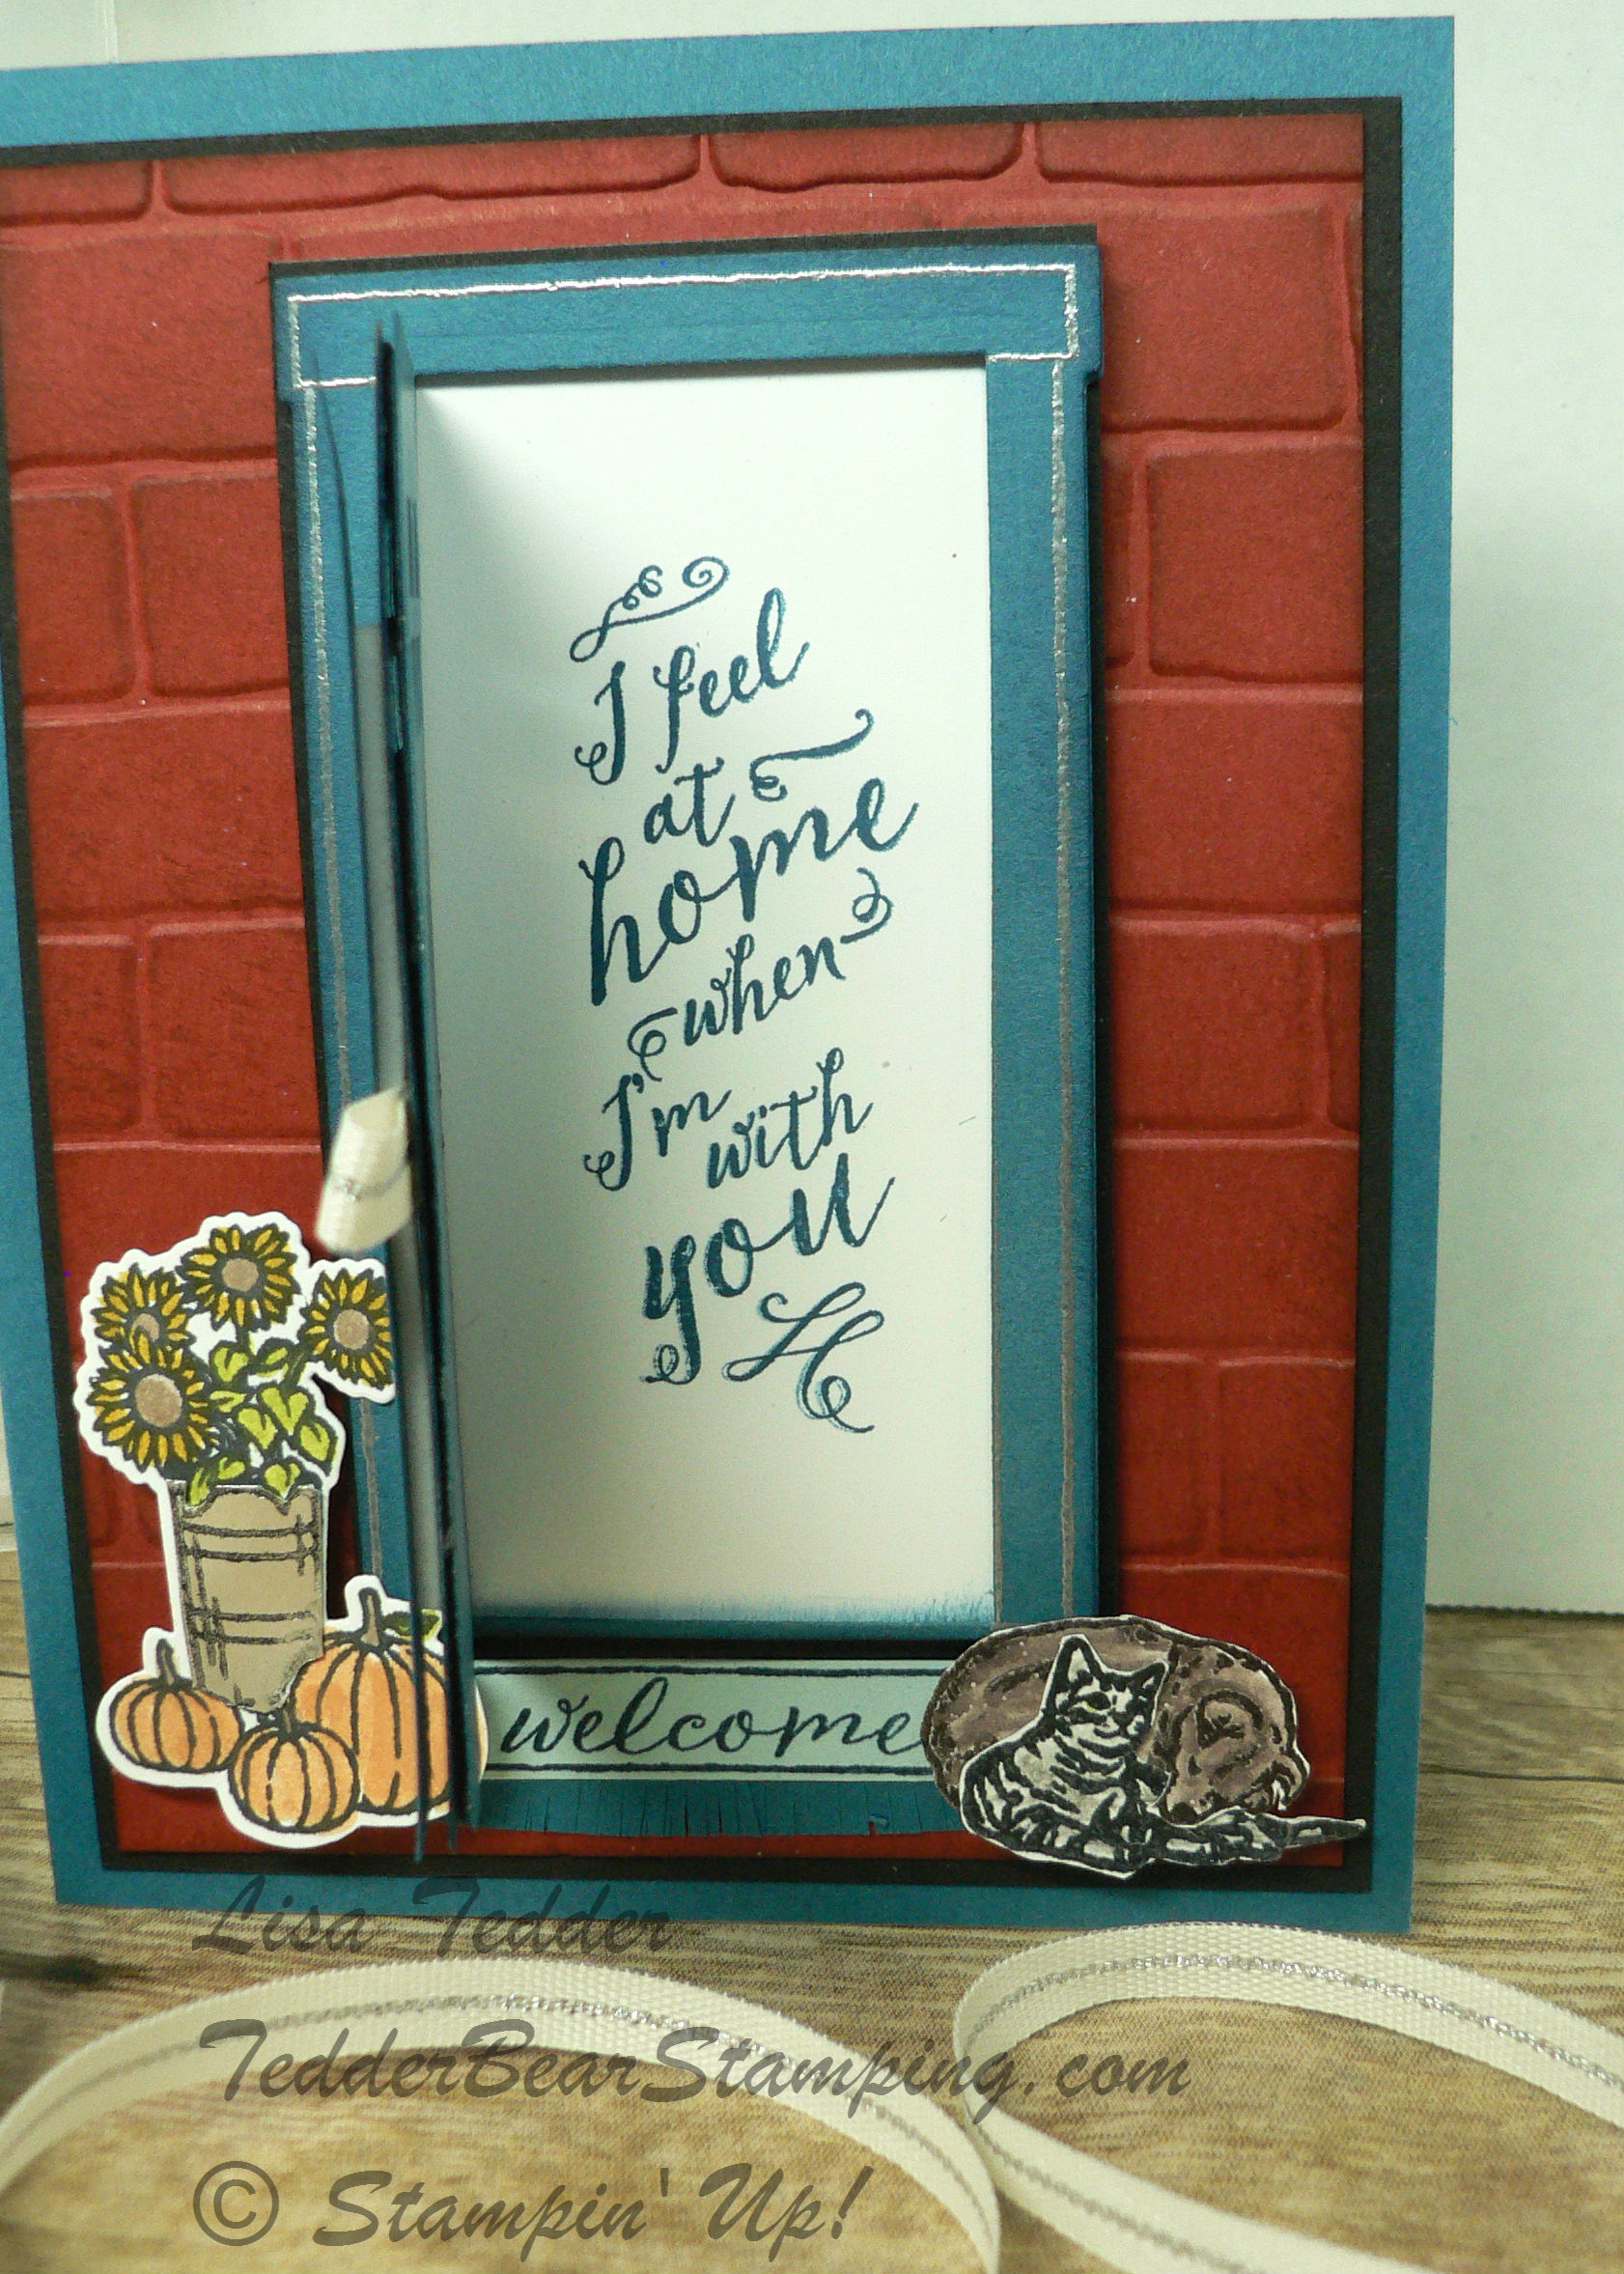
Here is the card:

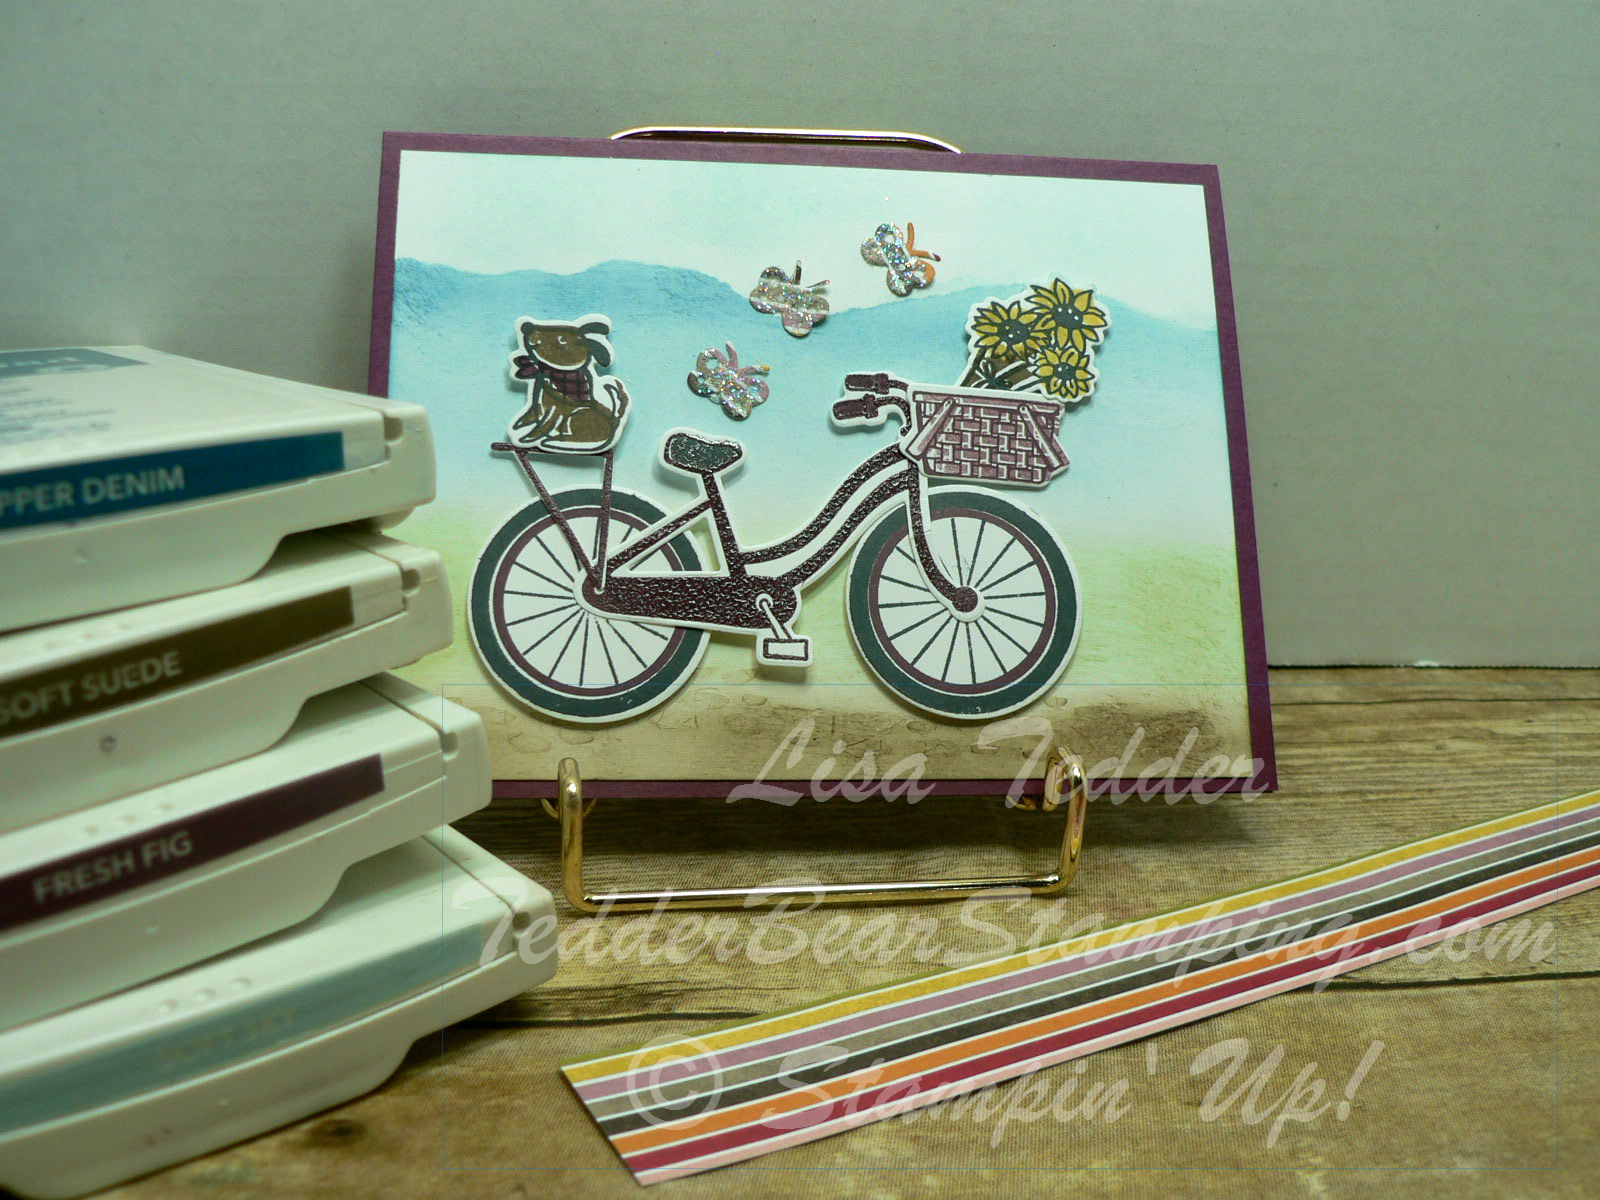
The thinlits I used are the bike frame, dog, basket, flowers and butterflies.  Oh! And my favorite the rocks!

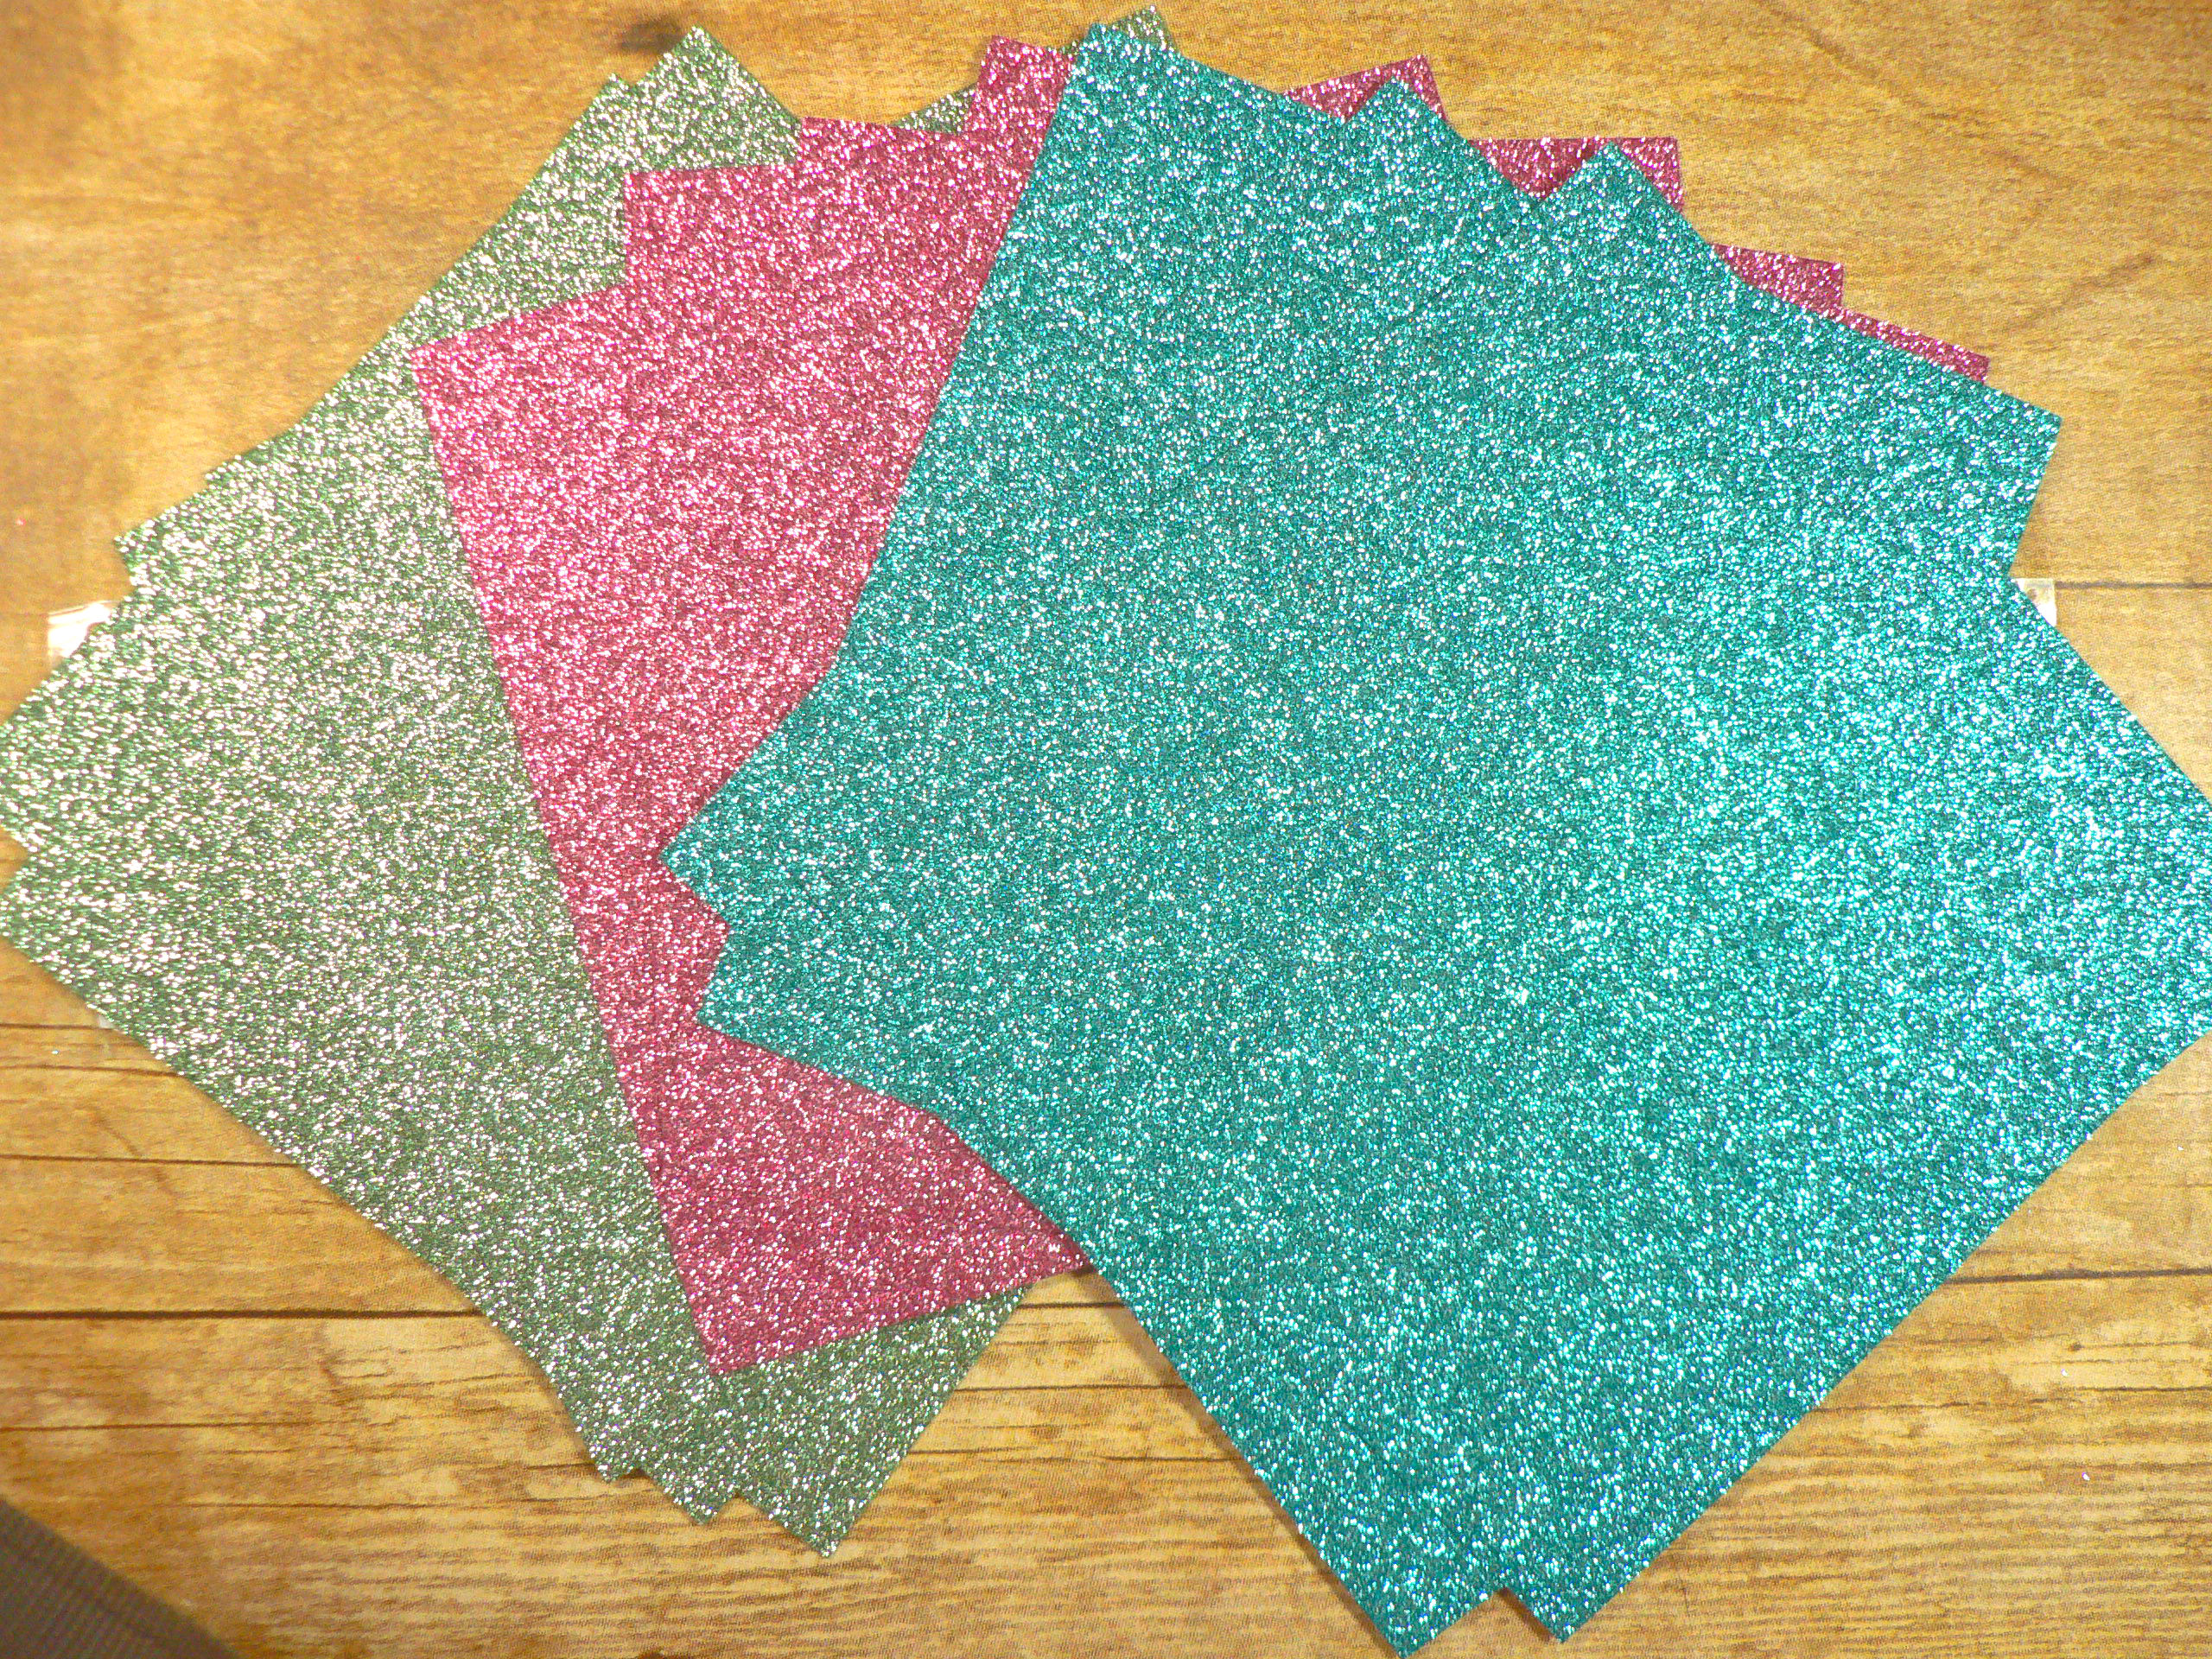
The butterflies are cut out of the Designer Series Paper Birthday Memories:

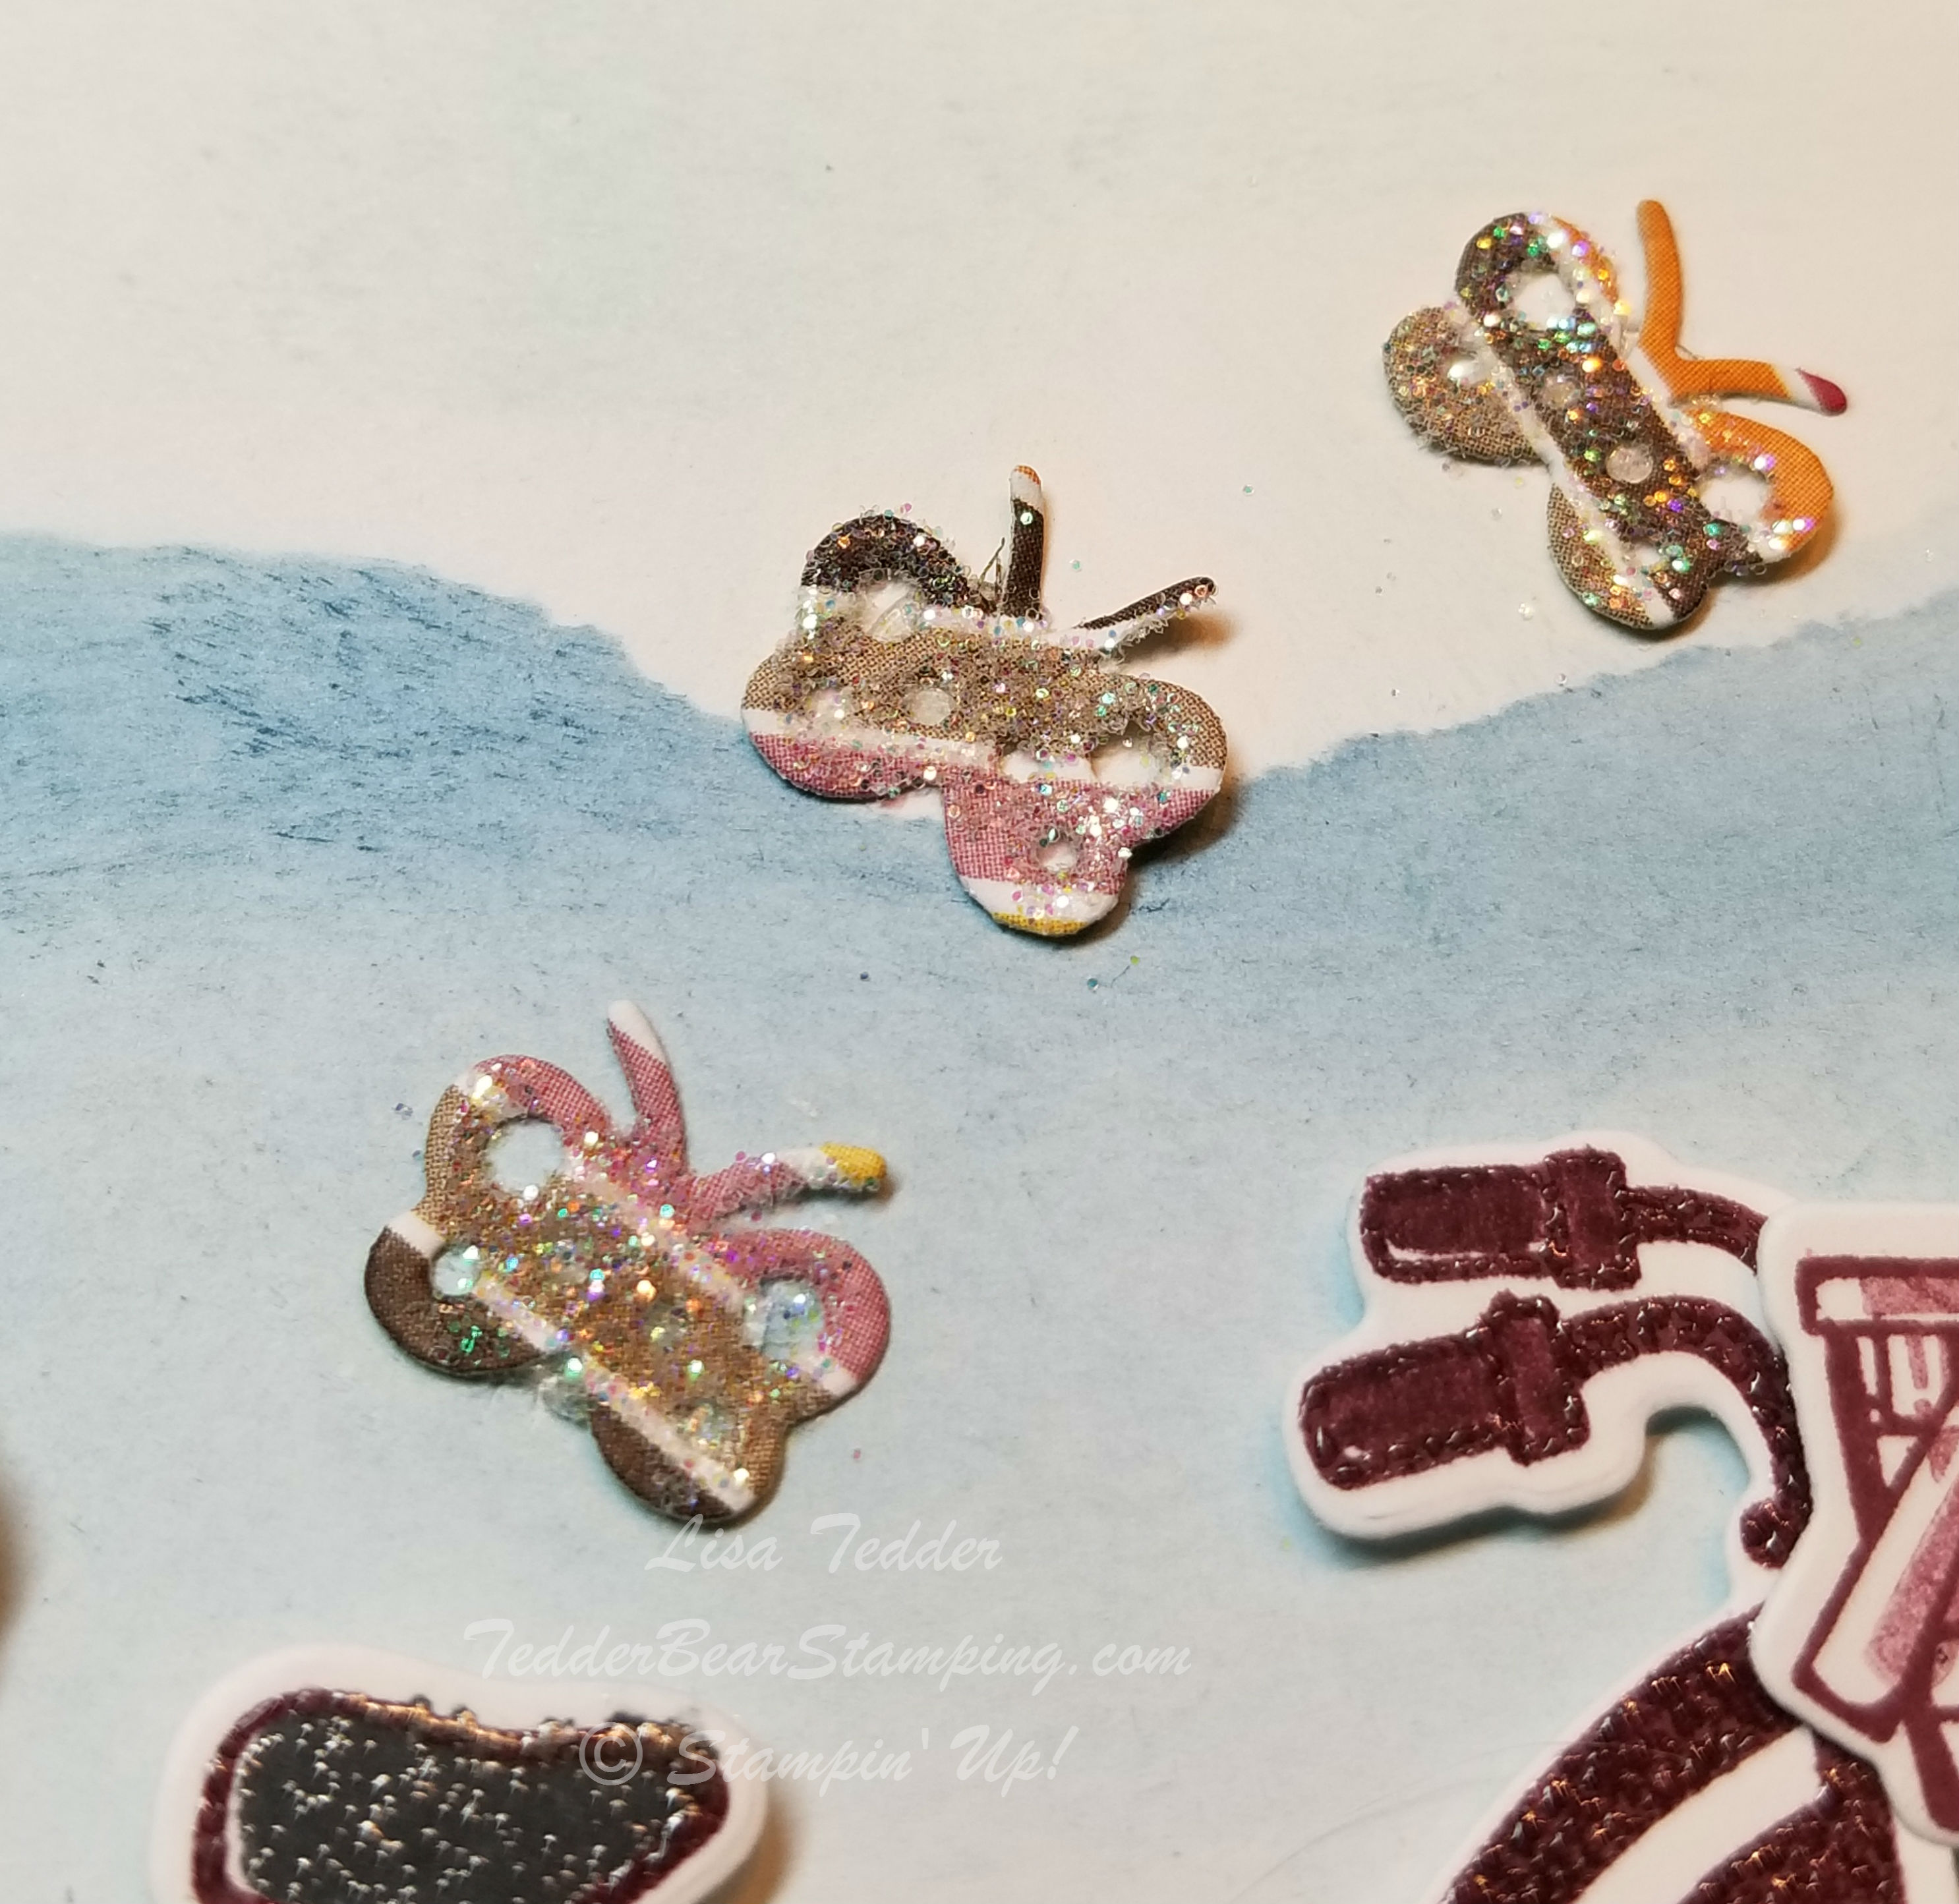
I LOVE this thinlit! Just cut out the butterfly and it has the antenna, wings and ALL!  I HAD to add Dazzling Diamonds to make them look even prettier!

The Measurements are the normal card size with the Base being in Fresh Fig 8 1/2″ x 4 1/4″, scored at the 5 1/2″ line to make the card.
The Whisper White is 4″ x 5 1/4″  And scraps for all the cut outs!  This was a really fun card to make!!  I love how you can make so many different things  be on the bike!  Just change out your background and the stamp set can be for sooooo many different occasions!

I hope you enjoyed your visit today!  I have more Blog Candy to give away  on here tomorrow!!  Be sure and visit so you can be in the drawing to win!

Click on any of the pictures below to be taken to my Online Store! If you purchase goodies from me, I will send you a handmade card and a little gift!  Please use the Hostess Code: C62FFAR3

Lisa Tedder
TedderBearStamping
A California girl living in North Carolina
Product List

Birthday Delivery Fox is Very Sneaky!

Today I am going to share with you a card I am making in this month’s classes!  I just LOOOOOVE this new stamp set Birthday Delivery!  The best part of this set is that the thinlits cut out the stamped image AND the image printed on the DSP!! (Designer Series Paper)

If you are in a hurry and don’t want to stamp and color an image (it doesn’t happen very often!) you can always just take out the DSP and cut your image out of that!  Stampin’ Up! has made it so simple to do a fast and easy card!

Here is the card I am doing in June’s class:

Isn’t he cute!!??  I used the Watercolor Pencils to color him in, and the Blender Pen to smoothe it all out!  This is my new favorite way to color!  No more streaks!  No more worrying about putting too much ink on!  Those pencils makes my job in blending so much easier! You HAVE to try them out!

I used the new punch, Pretty Label to stamp the Surprise! on and it fit perfectly!  I used the Brick Wall embossing folder to make the ‘house’ part of the card and I used the Hearth and Home thinlits to make the window!  Using Window Sheets the same width of the ‘window’ makes this look like a real window!

This is an impressive card, but it really is so easy!  I hope you enjoyed this! Click on any product picture below and you will be taken straight to my online store!!  When you place an order with me, I will send you a handmade card AND a small gift to let you know how much I appreciate you!  Please use this Hostess code when ordering: C62FFAR3

Lisa Tedder
TedderBearStamping
A California Girl living in North Carolina!

Product List

<!——– TAMS End ———

Catalog Launch Prize Give-away using Colorful Seasons, now to make one for me!

Last Friday, I had my Catalog Launch Party and I had two Prizes that those who attended could win!

The first one uses the Birthday Delivery bundle!  LOVE this bundle, it is so much fun to play with!  Did you know that the thinlits not only fit the STAMPED images, but also fits the images on the Designer Series Paper (aka DSP)?!  It’s so versatile and you KNOW I love to get more from my stamping dollars!

I LOVE how the Chef has his can that will spray out the words “It’s your big day!”   Isn’t that so cute!  The balloons are fun to add, I had to ‘fussy cut’ the bear but it was super simple.  I’m sorry to say that I gave this away BEFORE I measured it!  I ‘think’ it was 8″ x 10″.   I made it on Thursday and I had a winner for it on Friday!  For the grass I sponged using Old Olive with a mask giving it that great wavy look!

For my other Prize I did a take on a card I made in another post:

I loved how this came out, and decided to see how it would look framed with all the seasons!  I have to admit I was soooooo excited when I was done, and a little disappointed that I had to GIVE IT AWAY!  LOL  I used Dazzling Diamonds to make the water sparkle, especially on the winter one to make the water look icy!  Here is a closer look at each Season:

The water is icy and the chair is sparkly with Dazzling Diamonds!

The trees are just budding with leaves and the Chair is in Pristine condition!

Summer time!  The sun is shining! The blooms are out!  The chair is a ‘little’ dirty, but we have that iced drink so we don’t care!!

Fall is here!  The leaves are changing!  The chair is almost ready to be cleaned for the end of the season!

Here is the full view!  Notice the Dazzling Diamonds background paper?  The measurements for this beauty is 11″ x 14″………..which is why I had to add the strips of Bermuda Bay.  Can’t have a place that has a seam!  There’s only ONE seam, but for symmetry I put two strips in!

For this Colorful Seasons framed art, I took off with the given name of the set……..Colorful SEASONS!  I chose to make four scenes but having the scene stay the same but change it up to see the Seasons!  I had a blast making this!  I used Lovely as a Tree to be my backdrop, and the best thing is that you can make this stamp set look different just by using markers!

Dimensions:

Dazzling Diamonds Glimmer Paper #135315, 12″ x 11″ and 12″ x 2″
Bermuda Bay ( Brights Cardstock pack) #145409, 1/2″ x 11″ x’s 2
Basic Black #124267, 12″ x 9″
Bermuda Bay (see # above), 11 3/4″ x 8 3/4″
Seasons:
Pool Party (Winter) 4 1/4″ x 5 1/2″
Pink Pirouette (Spring) 4 1/4″ x 5 1/2″
Berry Burst (Summer) 4 1/4″ x 5 1/2″
Cherry Cobbler (Fall) 4 1/4″ x 5 1/2″

All Seasons are on Whisper White cardstock 4″ x 5 1/4″, ‘frame’ is Pool Party 5 1/4″ x 4″ with a 1/2″ cut out on inside all around.

Water is Soft Sky and Bermuda Bay for all seasons except winter which is Soft Sky and Whisper White.

Trees are colored with markers:  Tree trunk is all Early Espresso, Leaves are Old Olive (spring and summer), Fall is Cajun Craze and Crushed Curry.

For the water I used the Fine Tip Glue Pen to make the water sparkle with Dazzling Diamonds on top.

For the winter tree branch thinlit I used the White Gel pen (retired) to make snow on the top, with Dazzling Diamonds over it to make the branches be snowy!

That’s it for the Dimensions!

I hope you like this post!  This took me a couple days to create but only because I had to think it up!  Once started, it took a couple of hours.

I will be making one for myself as soon as I am able!  I will probably take this to the winner on Monday so will have to make one before then, just in case I need a life size reference!!

I have my Blog Candy to give away TOMORROW!!  Wow, that went fast!  You can get in on the drawing by posting comments here on this blog (any post! or multiple posts!) or on my Facebook page and I will put your name down each and every time you comment!

Here is a reminder of what you can win:


These are soooooo pretty!!  Good luck!

I’m off to make some cards for my upcoming classes!  I’m sure I will be sharing them with you as time allows!

Below my name is pictures of what I used to make this project…..you can click on any picture and you will be taken to my online store!  If you place an order with me, I will send you a handmade card and a small token of my appreciation! Please use this Hostess Code for you order:  C62FFAR3

Lisa Tedder
TedderBearStamping
A California girl living in North Carolina!
Product List

Black and Gold meet up with Eastern Elegance, all I can say is WOW!

I had a class yesterday and we made three cards, one of which I am going to share with you today!  I was inspired by Priscilla Ivler.  I LOVE getting ideas from others and tweaking it a bit!

Here is the card we made:

Isn’t it stunning?!!  It’s not a ‘hard’ card, you just have to work on getting the thinlit to let go of the paper without ripping it.  My Die Brush has seen better days and the bristles are falling out!  Yay!  We get a new one in the NEW catalog!!

Here is the inside:

Everyone at class loved it!  And in person it is even prettier than here!  I know it’s hard to believe!

This is going to be a quick post today, if you want the dimensions just let me know and I will send them to you!

Don’t forget about my blog candy!!


The drawing for this Blog Candy is June 6th!  Post here on my blog (on any post, as many as you want!) or on any of my social media posts TedderBearStamping on Facebook, Instagram as TedderBearStamping, or on my Twitter acct as TedderBearStamp!

See?  PLENTY of ways to win free goodies!!  I will be continuing with my blog candy until I feel like you don’t want free stamping supplies!  Think that will ever happen?  Nah!  I wouldn’t think so!

Lisa Tedder
TedderBearStamping
A California Girl living in North Carolina
Product List

Gorgeous Eastern Beauty card!

I was inspired by Daniela Hödl  when I made this card!  She made this stunning card:

Since I had to translate her blog I wasn’t able to see what size the original was.  I didn’t do the entire part that she did, but when I do a scrapbook page this is what I want!!

So, here’s mine:

And the inside:

Ok, I said I was inspired, but I ended up doing it  totally different!  BUT now I have the other one on my computer to do another time!  🙂

I added pearls to some of the front, they are on the outside of the Medallion and in the middle and right smack dab in the center! It’s hard to see in my picture…….

I used 2 of the New In Colors Lemon Lime Twist and Berry Burst.  For the Berry Burst, I stamped on scrap THEN on my card (this is called stamped off), this gives the Berry two different hues!

The ribbon is #144135, so on June 1st you can order it!   Hostess code for this month is:  97H62RVK   IF you order from me, I will send you a NEW Catalog!  Only US citizens can order from me, so if you need a recommendation from me, I know of a few that might be around you!

The stamp set is: Eastern Beauty #143675
And the Thinlits are Eastern Medallions #143725

Again, if you order from me, I will send you a free Catty!  PLUS a special something in the mail!

Oh!  I almost forgot!  Did you forget?!  I have BLOG CANDY!  This is what you can win just be commenting on my blog or Facebook Page-TedderBearStamping :

ONE entire package of this Beautiful Glitter Paper, plus MOST of another one!  And if that’s not enough, I have some cutouts that I am sending plus a card that I made using this!

Hope you enjoyed my post today!!  Subscribe to my blog to be notified when I post again!  Remember, the more you comment, the more your name gets put in for the drawing!  I will be doing the drawing on June 6th!

Hostess code for this month is:  97H62RVK

Lisa Tedder
TedderBearStamping
A California Girl living in North Carolina

Another Stained Glass Card with At Home With You

I posted earlier that I was going to use this stamp set from Stampin’ Up! for Kylie’s International Blog Hop, but I changed my mind!  I didn’t think, when I was finished with it, that it yelled MASCULINE. So I am sharing it with you now!

Yes! This is the one that I told you about with the stained glass that came out even better than how I did it in the past!  I touched the one that was drying before it was ready so I had to start all over.  I don’t want to pray for Patience because I really don’t want to practice it a lot!  🙂  I’m not very good at it!

To start off, I scribbled on a piece of Window Sheet with some of SU!’s markers.  I then placed little circles of the Fine Tip Glue Pen over the scribbles and the colors bled and create a really cool pattern!

I used Cajun Craze and Dapper Denim.  See how it marbles?!!  Once dry it is see through with the colors showing through what looks like an antique stained glass!!

Once it’s dry………..it takes  time, it’s probably a good idea to leave it overnight so you don’t mess with it!  Trust me!

Once the door is cut out with the thinlit, place the Window Sheet down on the back side (the side that opens).

NOT sure why I took this picture of the door UPSIDE down other than to get a better picture!  Can you see the two colors?!!

I have magnet strips on the door between this layer and the next which will sandwich the Window Sheet so you won’t see it.  I placed magnets under the inside of the door (under the saying too), so when the card is standing the door won’t flap open. It makes it snap together.
Here is a picture of the other side of the door attached so the Window Sheet is between them:

It REALLY looks like Antique glass, right?

Here is a pic of the card:

Can you see the dog and the cat cuddling together?!  I put a piece of ribbon between the door and the ‘sandwich’ so it can’t be seen other than the part I want to help open the door.

Here is the door open:

The welcome mat is stamped and then I cut fringes in the layer under it so it looks like a mat!

I would love to hear what you think!  Too much?
Here is a picture of the inside:

I love the dog basket!!

That’s it for today!!  Hope you liked it!  Subscribe to my blog so you don’t miss anything!!

Don’t forget that I have Blog Candy!!  Here is what you can win:

Just leave a comment here or on my Facebook Page TedderBearStamping, I am doing the drawing on the 15th of May!  Only 3 days left!  Each and Every comment you leave (on any post!) will be counted!  Good Luck!!

Lisa Tedder
TedderBearStamping
A California Girl living in North Carolina

New Stamp set from Stampin’ Up! ‘At Home with You’ and Blog Candy

For the last week and a half I have been SICK!  I’m on the mend so thought I would bring you a new Card from the SU! stamp set called At Home With You!  This is another very versatile stamp set!  You can do Birthday’s, thank you, Christmas, Fall and today I am doing a Surprise! Birthday card!

For the windows in the door I wanted to show you a Technique that I came up with!  It was quite by accident, but I will take it!!  I LOVE techniques and am always trying new things!  Sometimes it works, sometimes it doesn’t AND SOMETIMES I get surprised!  LOVE when that happens!

I wanted to try different ways of using the Fine Tip Glue Pen and wanted to see what would happen if I colored on a Window Sheet with a Marker and then laid down a nice shallow layer of glue over it……….and OMGoodness!!  The glue didn’t make the ink from the marker brighter which is what I ‘thought’ it would do, it MARBLED it!  Woot!  Woot!!  I let it dry and it came out so pretty!!  Here is a picture:

Isn’t it pretty!!??  This isn’t the one I used for this post, but I forgot to take a picture of the one I used.  The one above WAS for a project that I will be putting on another blog where I will be competing for the best cards……….I ended up NOT using the one above ’cause gosh darnit, I got impatient (yes!  I know you are surprised!!  NOT!!) and I touched it!  Well, Poo!!  So, I did another one, and used two colors and I put the glue on another way and it came out even better!!!!  So, Now I am not so upset that I got impatient!  LOL  I WILL ‘try’ to be patient with the one that is drying at this moment.  Cross fingers!!

On to the card!!  Squirrel!!   Sheesh!  Reign me in!   I wanted to use Cherry Cobbler because I have neglected that poor color lately and decided that I needed to use it!  I stamped the door image in Versamark and then heat embossed it with Silver Embossing Powder.  Silver goes really well with Cherry Cobbler!

I stamped the plant, welcome mat, wreath and the present in Memento Black and then colored over with my Blender Pens and SU!’s inks!  Once the Memento is dry you can totally color on it and it won’t bleed!!  I also put some Wink of Stella on top to add that bit of sparkly that I HAVE to have on a lot of my cards……who doesn’t like SPARKLE!!??

Can you see the Stained Glass on the Door Window?!!  I used Soft Suede 5″ X 3 3/4″ to put behind the door and ran it through the Big Shot using the Brick Wall Embossing Folder!  Each image:  Door (2 pieces), wreath, matt, present and flower pot has thinlits that fit them!!  Once you color them it’s easy to run right through and they look so pretty!!!

I didn’t want the Stained Glass to show when you opened the door, so I sandwiched the window sheet with the ‘stained glass’ between two pieces of the door.

I REALLY hope you have enjoyed this post, please sign up to be notified when I post again!

Here is the Blog Candy:

Happy Heart Embossing Folder can be yours!!  And the best thing is that it won’t take much effort on your part at all!  Leave a comment here on my blog or on my Facebook Page TedderBearStamping, it can be a comment on MULTIPLE posts, each time you comment you are in the running for the drawing that will be held on the 15th of May!  That’s only 5 days from now!  Eeeck!!  Don’t waste any time!  LOL  I love Embossing Folders, and hope that you do too!!

I’ll be back soon!!  Can’t wait to show you how the Stained Glass window I did for Kylie’s International Blog Highlight May 2017 came out!!  Hopefully it dries the way I want it to, AND that I am patient!!

Lisa Tedder
A California girl living in North Carolina!
TedderBearStamping

Product List

Mother’s Day Meets Paper Pumpkin!

Welcome to the NCDemo Blog Hop!  We do this on the last Sunday of every month, so be sure to come back!  I know you will love all the Mother’s Day ideas we have for you this month!

Mother’s Day is coming and since my Mom is no longer with us, I usually plan for my own day.  I normally just tell my kids what I want and then they get it…….this year I made my OWN Mother’s Day gift!

My story starts with a conversation I had with my 16 y/o daughter.  Me:  I’m tired of emptying the dishwasher, when it’s your chore!?
Her:  I don’t know when it’s clean or dirty!
Me:  Well, how about I make a sign saying whether it’s clean or dirty?
Her:  Yeah, that would work!

So, the very next day I went to work!  I definitely want her to do her chores, and I had an idea in my head already!!
I LOVE Paper Pumpkin!  It’s a cool kit that has everything needed to make something crafty!

Here is a picture of the box for April:


This was what was inside!  Sara gave us a special gift this month…..Watercolor Pencils, with a great brush to use!

Now, here is everything that was in the box!!  Can you believe how much is in that box!!??

Paper Pumpkin comes every month, and it is always a delicious surprise!!  It always comes with an ink spot, stamp set and everything  needed to have a fun filled afternoon!   And if you go to Pinterest you will find TONS of ideas!  Go ahead, do a search for Paper Pumpkin, April 2017.  There are soooooo many ideas, you can pick as many as you want, or you can follow the directions in the Paper Pumpkin box and make what they planned!   Every month it is like getting a Birthday gift in your mailbox!  If you are interested, and don’t have a demonstrator for Stampin’ Up! I would love to be yours! You can order this to come every month, or you can just get one and test it out!  But, if you are like me…..you won’t want to miss even one!

Continuing my story!  I want my daughter to have NO EXCUSES to empty the dishwasher so I made a magnetic sign to put on the front so she will know when it is ready for her to empty it!  Now, this doesn’t mean that I won’t STILL have to remind her, BUT she won’t have any excuses!  heehee

This is what I made:

When the dishes are CLEAN, the clean is on top so you can read it, when it’s dirty, it’s the other way around:

To make this, I stamped  the word Clean from an old alphabet set I have, and stamped it on the Watercolor paper from the kit (totally blank piece) using Versamark and clear Embossing Powder.  You can’t see it since it’s totally clear, but when you go to color over them the Clear EP keeps the color off!  I then used the pencils to scribble across the watercolor paper in stripes, even over the words.  I made sure that I got a good coverage and then went over the pencil with the watercolor brush to make it soft and to have a nice progression between the colors.

I stamped the splotch image all over the Water colored paper, staying away from the ‘Clean’ I stamped.  Then I  used one flap from the envelopes that are inside the kit over the piece I stamped and colored, it’s so pretty with the black splotches on it!  The flowers in the kit are sooooo pretty! They are sparkly on both sides, but one side is smooth, this is the side I placed a dimensional (ALSO in the kit!)  The leaves are in the kit, and go perfect with the flowers!

Have I convinced you yet that Paper Pumpkin is great??!!  My hope is this sign will make my daughter empty the dishwasher!!  LOL  I’m not holding my breath!

I now have this Stinkin’ Cute sign on my dishwasher, and I had fun making it!  Win/Win!

Don’t forget I have Blog Candy!!  Drawing is on May 15th.   Everytime you post a comment on ANY post on my blog or post a comment on my Facebook page, you will be put in a drawing to maybe win this:


I hope you enjoyed my blog post, now onto the next blog!

Tamra Davis
Jo Anne Hewins
Michelle Irinyi
Melissa Kerman
Tracy Evans Langley
Sharon Maranich
Laurie Meier
Lisa Tedder  <———–You Are Here!
Frances Wagner


Lisa Tedder
TedderBearStamping
A California Girl living in North Carolina

Sharing my handmade Birthday cards I got!

Yesterday was Easter AND my Birthday!  Why is that special?  Well, my Maiden name and the one I still use as my middle name is Easterday!  I don’t remember my birthday ever falling on Easter, but I haven’t really googled it.  It was an extra special day because of it!

I received some beautiful Birthday cards, and I wanted to share them with you!

This one is from my good friend Bea Redd.  This is a stamp set from Stampin’ Up!  that brought back some great memories!  It’s retired, but the sayings are so cute!  The inside says “from your 110 pound friend”  Now, this would be extremely funny if I sent this, but I doubt Bea is much more than 110 pounds!   Thanks Bea!

This card is from Kathy VanAntwerp or Twerp as I (and a lot of her friends) call her!  This is stamps also from SU!, but they are still available, but not for long!  They are retiring.  LOVE this card too!  So nice getting Happy Mail!  Thanx Twerp!!

This card is from Debra Byrd.  The balloons are retiring, but the swirly behind the happy bday is still in!  And the Stitched framelits are still in too!  This is a very fun card!  It made me feel happy!!  Thank you Debra!

This handmade card is from a Stampin’ Up! stamp set!  I got this from a GREAT group here in North Carolina that is for Demonstrators.  We get together every 3-4 months and stamp together!  We learn from each other, love each other and support each other!  NCDemo’s is awesome!  Thank you for your card!  They send one out to EACH member!

I hope you enjoyed my Birthday cards as much as I did!  You can always go out and  buy a greeting card for you loved ones, they look at it, say how cute and then they probably toss it!  BUT if you MAKE them a card, they know that you REALLY thought about them, spent time hand making them a card that they will cherish!  My family saves each and every card I make for them!  They are a work of art!  Let me help you learn how to handmake your greeting cards!  I make them for all occasions and enjoy it so much!  I have classes each and every month, AND I also have ‘show me how to make that’ videos on Youtube that you can always check out!!

I thought I didn’t have a crafty bone in my body until I discovered Stampin’ Up!, they make it so easy!  Now, I am tickled that I feel crafty and can make beautiful things that help bring others joy!

Hope you come back soon!  Don’t forget to subscribe to my blog so you won’t miss my next post!  You can also subscribe to my newsletter and get ideas and check out my stamping schedule!

Lisa Tedder
TedderBearStamping
A California Girl living in North Carolina

Experimenting and getting more from my SU! embossing folders!

Do you ever see things and wonder how it would look if you used it OUTSIDE of it’s usual purpose?  I do it all the time!  I LOVE to experiment with my SU! products!  Anything that will make my tools/stamps be used more is sooooo worth trying!   And if you do try something and it works, then you are so excited to share it!  That’s what I am doing today!

I have Mod Podge in my cupboard and I never use it!  I don’t even remember WHY I bought it!  I’m sure I used it for the purpose I bought it for, but I have totally forgotten why!  So, what to do?!  I know!  Try an experiment and see if I can come up with something new so I use it!!

I decided to put it on my Brick Wall Embossing Folder by SU!  Believe me, I was very nervous, but figured that it will wash off, and I might like what I make!  I LOOOOOOVE how it came out!  You’ll have to tell me what you think!

First let me show you a picture of this handmade card that could be used for a masculine card or it could be for your Western loving girl!:

Can you see all the texture?!  It is so shiny and it makes me just want to pick it up and move it in the light to catch the beauty!  You can watch my video on YouTube to see what I am talking about!  It’s called “Experimenting and getting more from my SU! embossing folders!”  I thought I would keep the name the same as the blog name to avoid confusing MYSELF!  It doesn’t take much ya know?

Get a piece of Very Vanilla 5″ x 3 3/4″, and sponge it with Sahara Sand, Crumb Cake, Soft Suede and Cajun Craze.  Just sponge spots around the cardstock and go from lightest to darkest!  Then you can go over all the spots with your Cajun Craze to lighten it up a bit.

I poured a little of Mod Podge onto the Embossing Folder and spread it out using a piece of chipboard I had.  Don’t use a lot, you don’t want it to squeeze out onto the Cutting plates, or not too much anyway!  Place your sponged Very Vanilla face down onto the Mod Podge.   Once you have run it through the Big Shot, you will immediately place your plates and folder into water until you can get to it to wash off.  It came off very easy!  I then heat set the embossed/Mod Podged piece, since I am not a patient person and didn’t want to wait!  Once dry, you can sponge over again with the Cajun Craze just to make sure that it is covered.  Set aside.

Now onto the loverly (NOT a typo, I’m just goofy) Boots from the Country Livin’ stamp set!  Stamp the boots onto Watercolor paper using Early Espresso, then add clear Embossing Powder which will make it to where the color won’t smudge and add texture!!  If you ever come to one of my classes you will see right away I love texture! Once you have it heat set, then take your Aqua Painter and go over the entire piece of Watercolor Paper, so it won’t hold too much color and you have more control.  Keep layering your Crumb Cake ink (which is what you start with) until it’s dark enough, then come in with Soft Suede where the artist has the ‘folds’ designed in.  Color the tabs at the top and the part that buckles with a Marina Mist marker, and the bottom of the boots with black.  Once done, color the background with Soft Sky and underneath the boots with Soft Suede……..this is where you will love that you made the cardstock a little wet, it just comes out looking so soft!

Using your Big Shot, place largest oval from the Stitched Framelits over your scene and cut out.  Sponge edges liberally with Marina Mist and then SOFTLY with the Early Espresso.  You will want to watch the technique video to see how to make this card from the beginning!

I looped 5 strands of Linen Thread and knotted it twice, one on each side that the oval scene will be over.  Then place this piece onto a
5 1/4″ x 4″ piece of Marina Mist, and then place that onto a piece of Soft Suede!  The colors go so well together!!

I hope you enjoyed this post, and hope you go check out my Technique video with a SU! Embossing Folder!  Let me know what you think?  Do you want MORE techniques?

Lisa Tedder
TedderBearStamping.com
A California Girl living in North Carolina
Product List