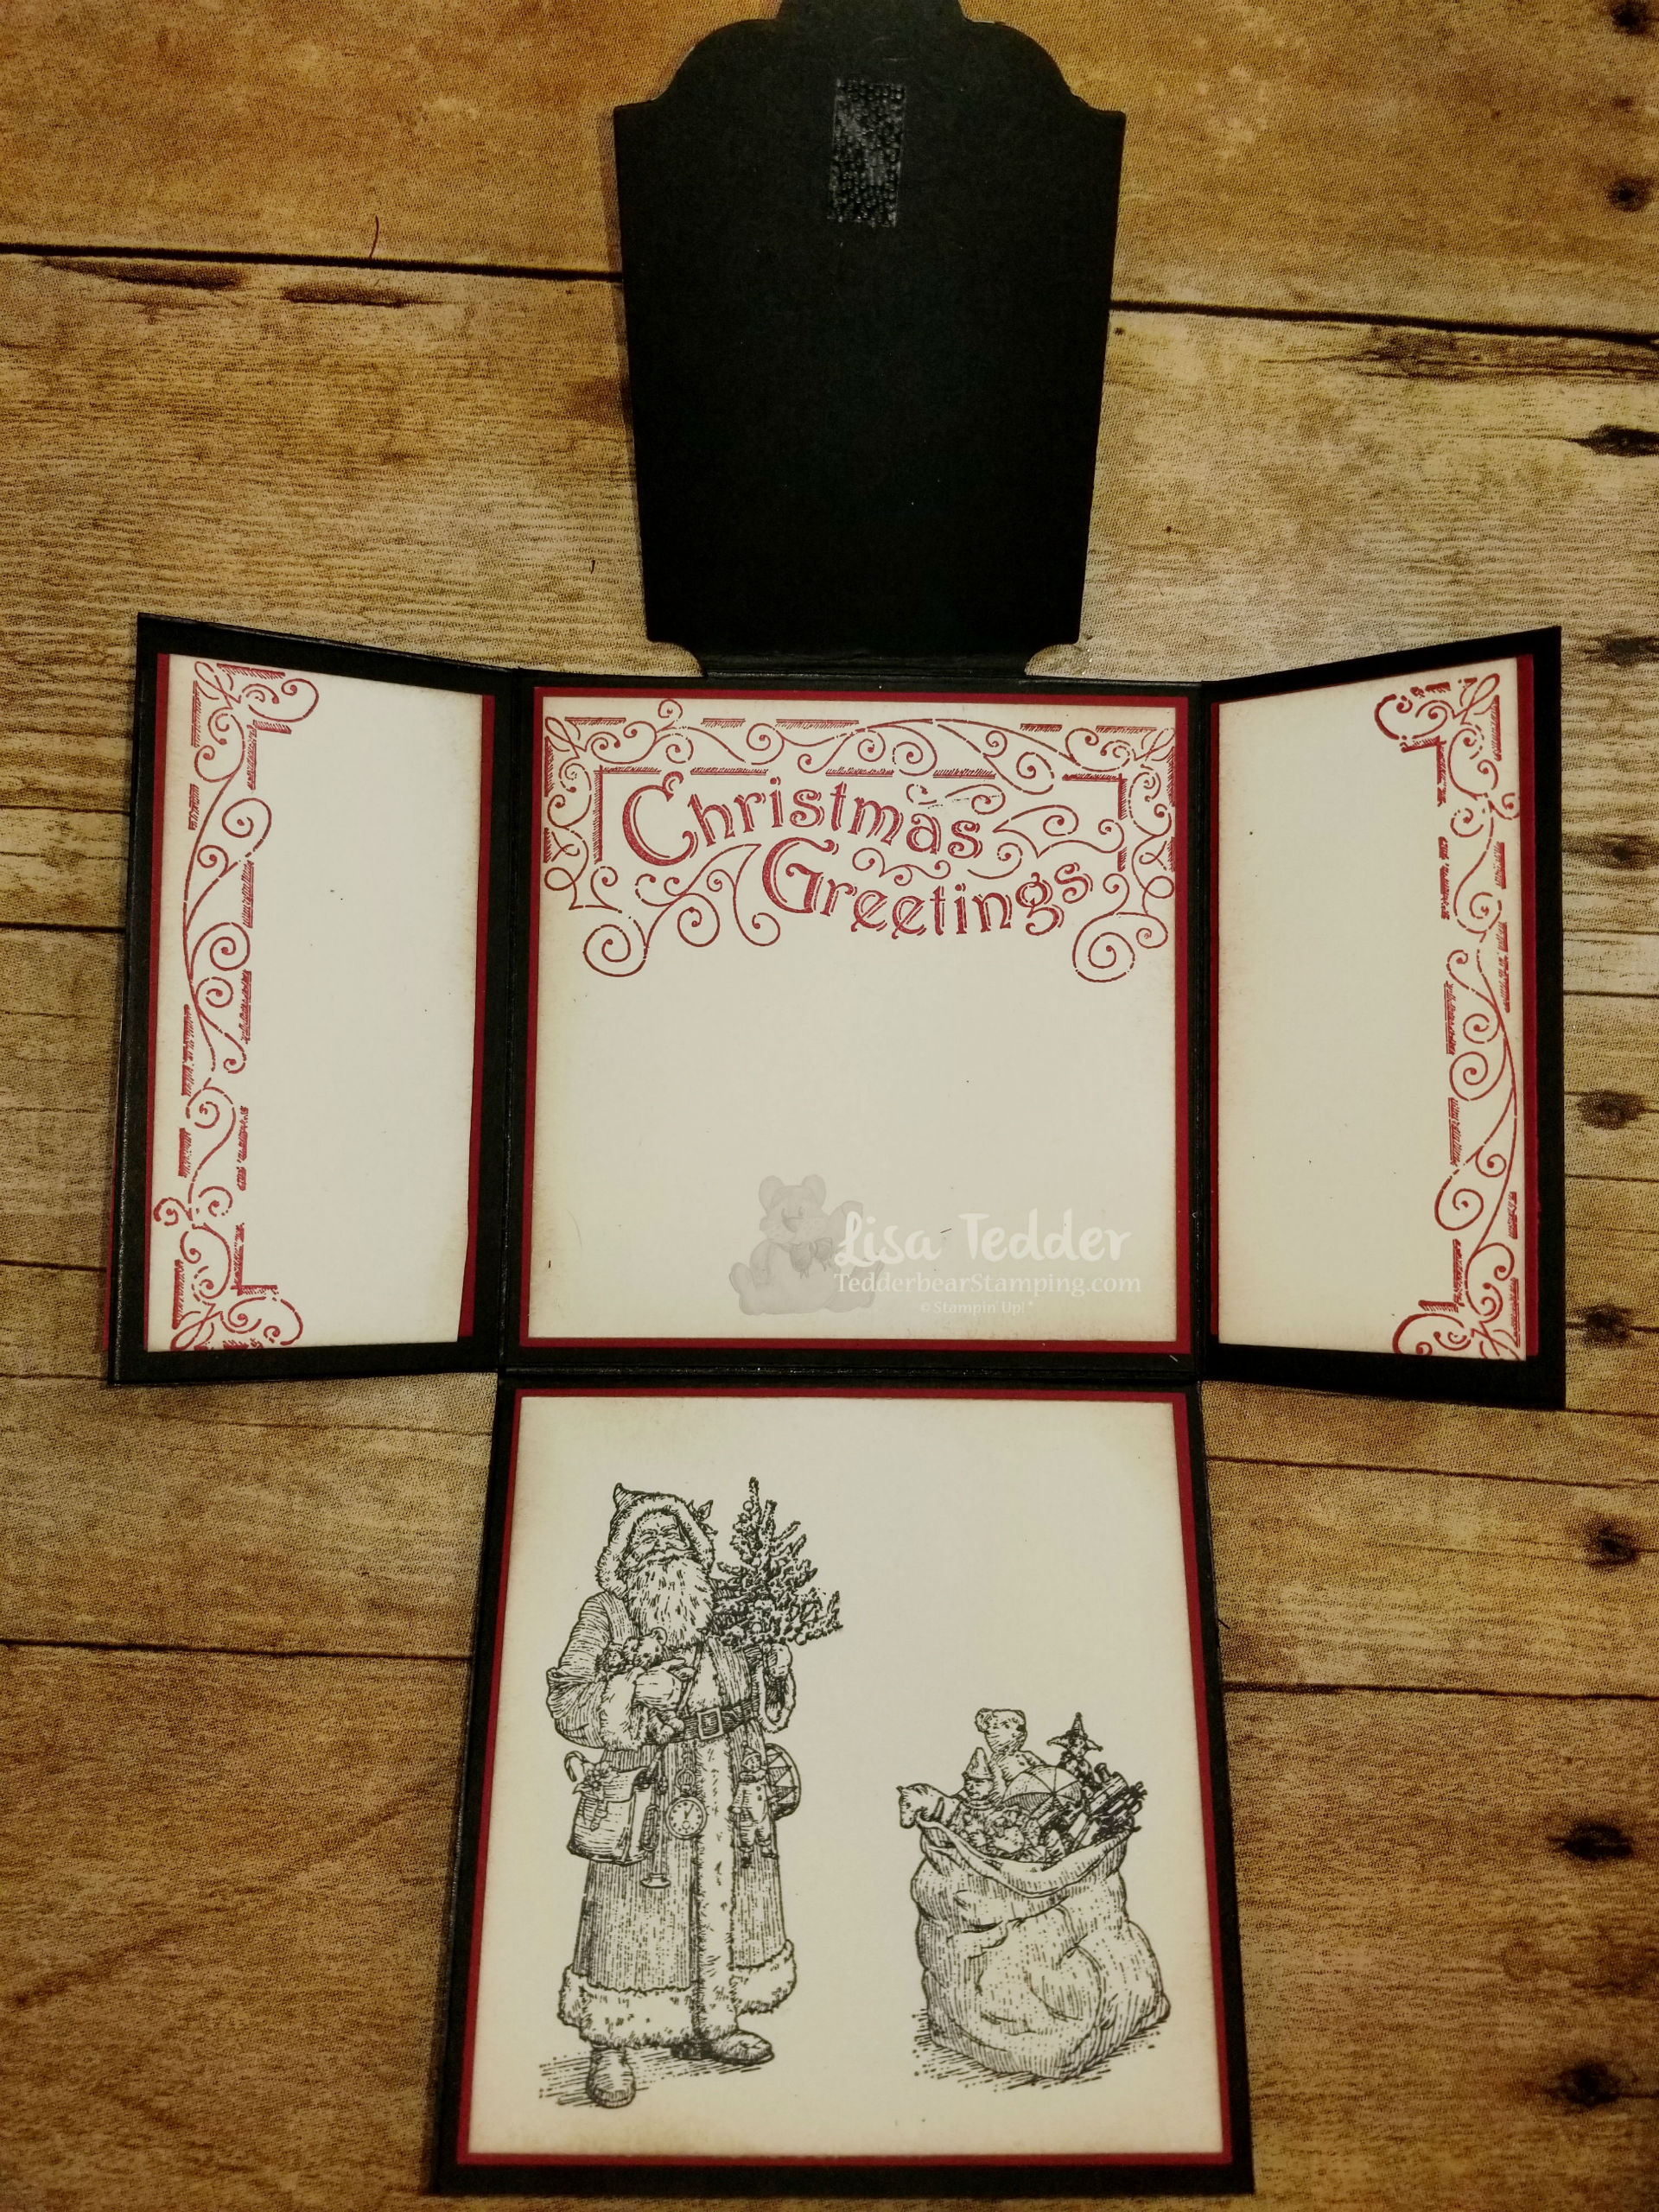
Tag Archives: Basic Black Archival Stampin’ Pad

FUN Swap card using Magical Day

Hey Guys!

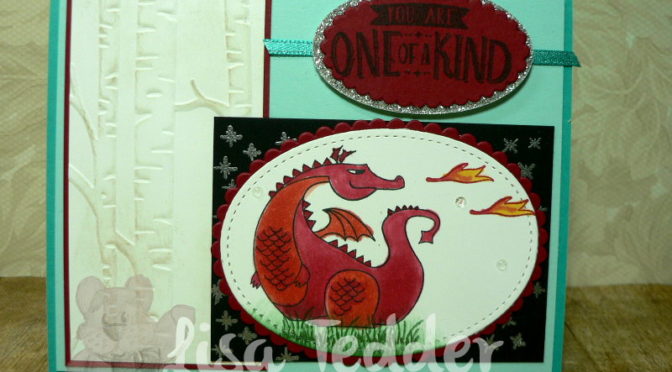
I am sharing with you a card that I made for a swap that I signed up for where I made 20 of these cards (below) and received 20 different swaps back!
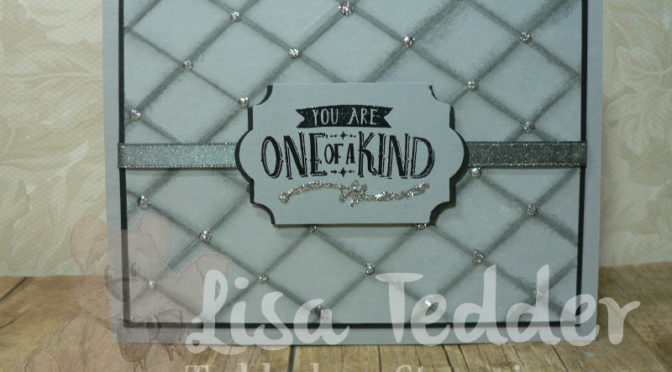
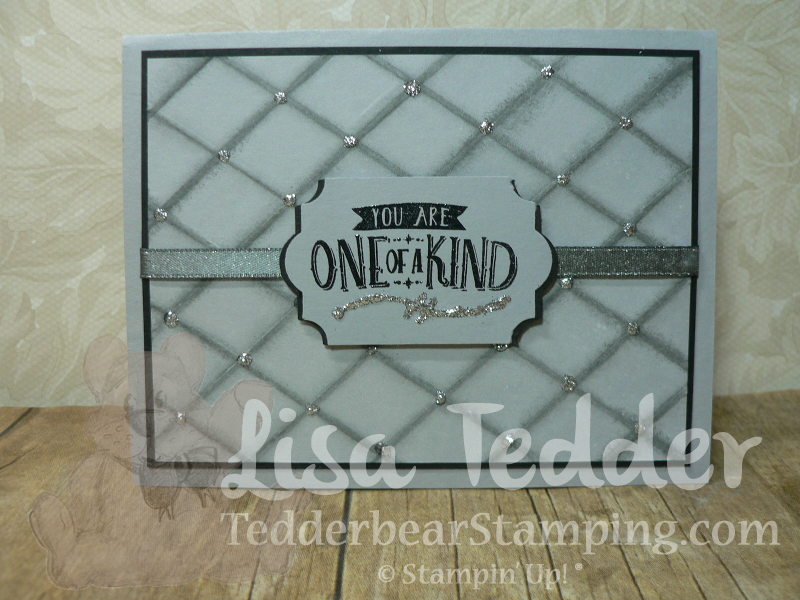
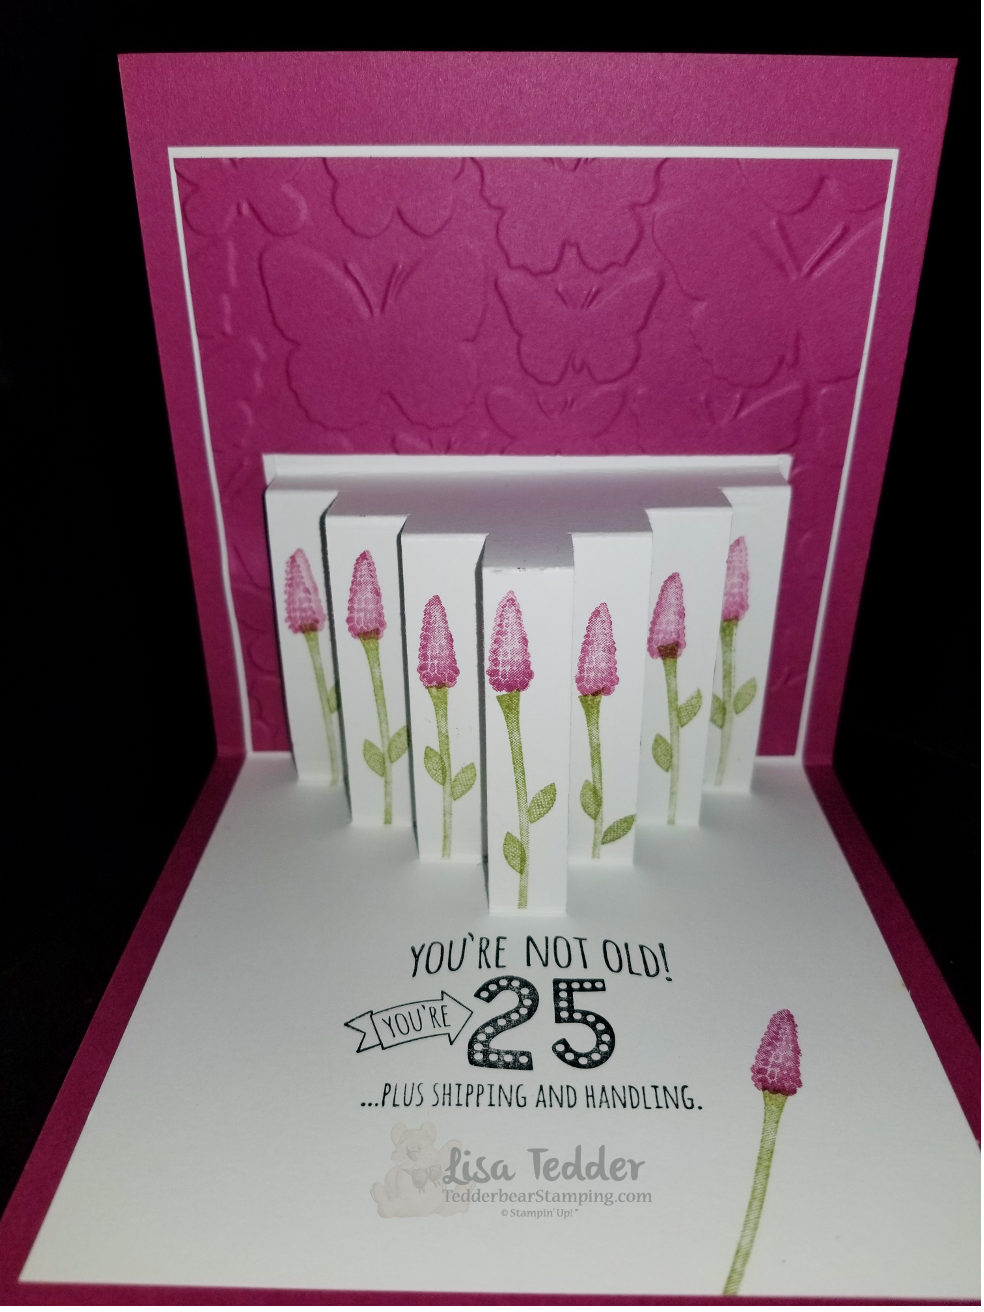
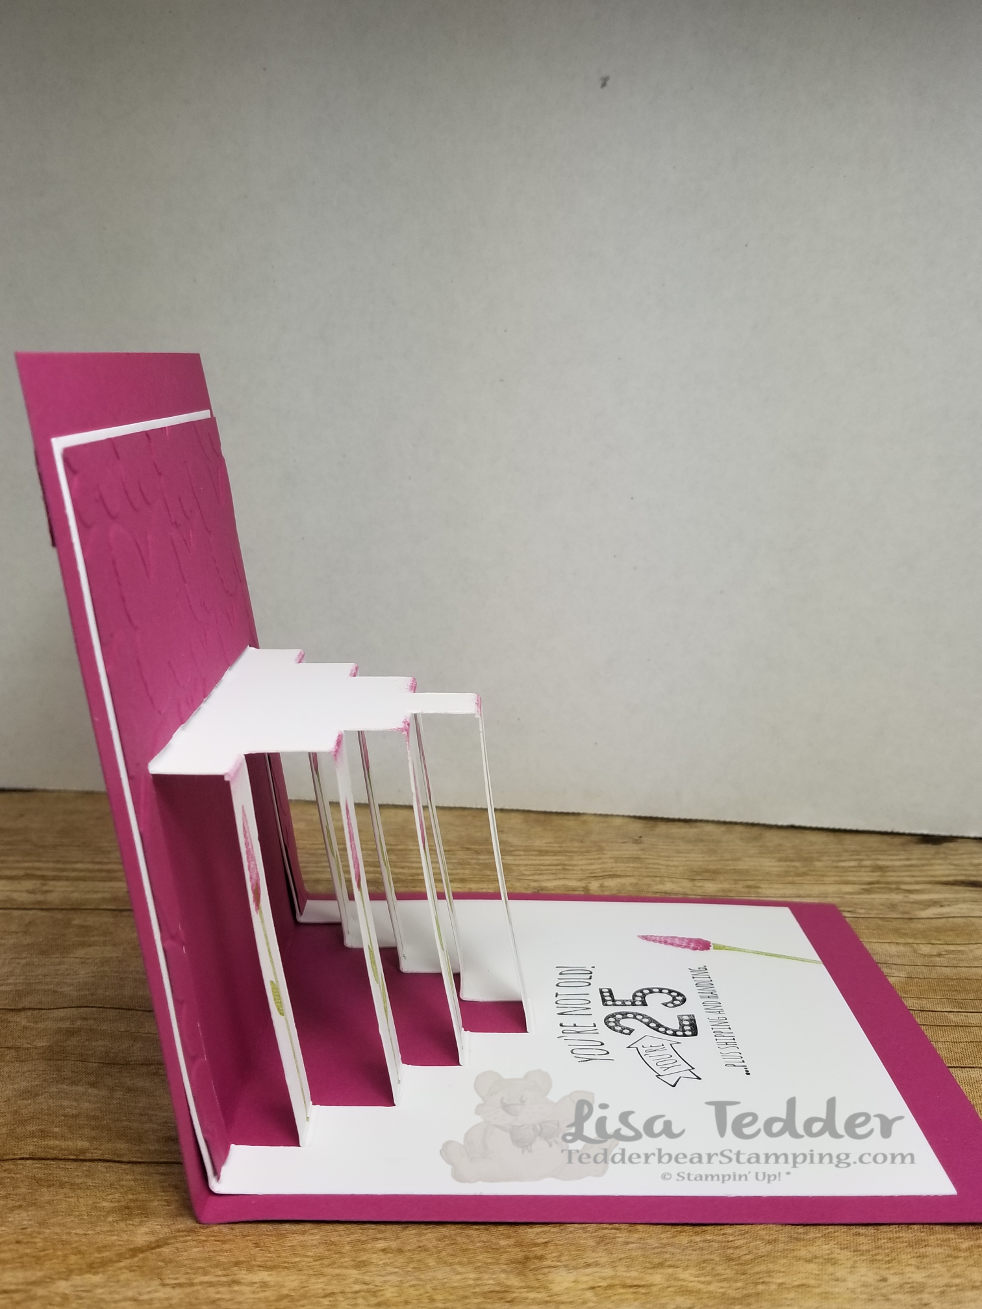
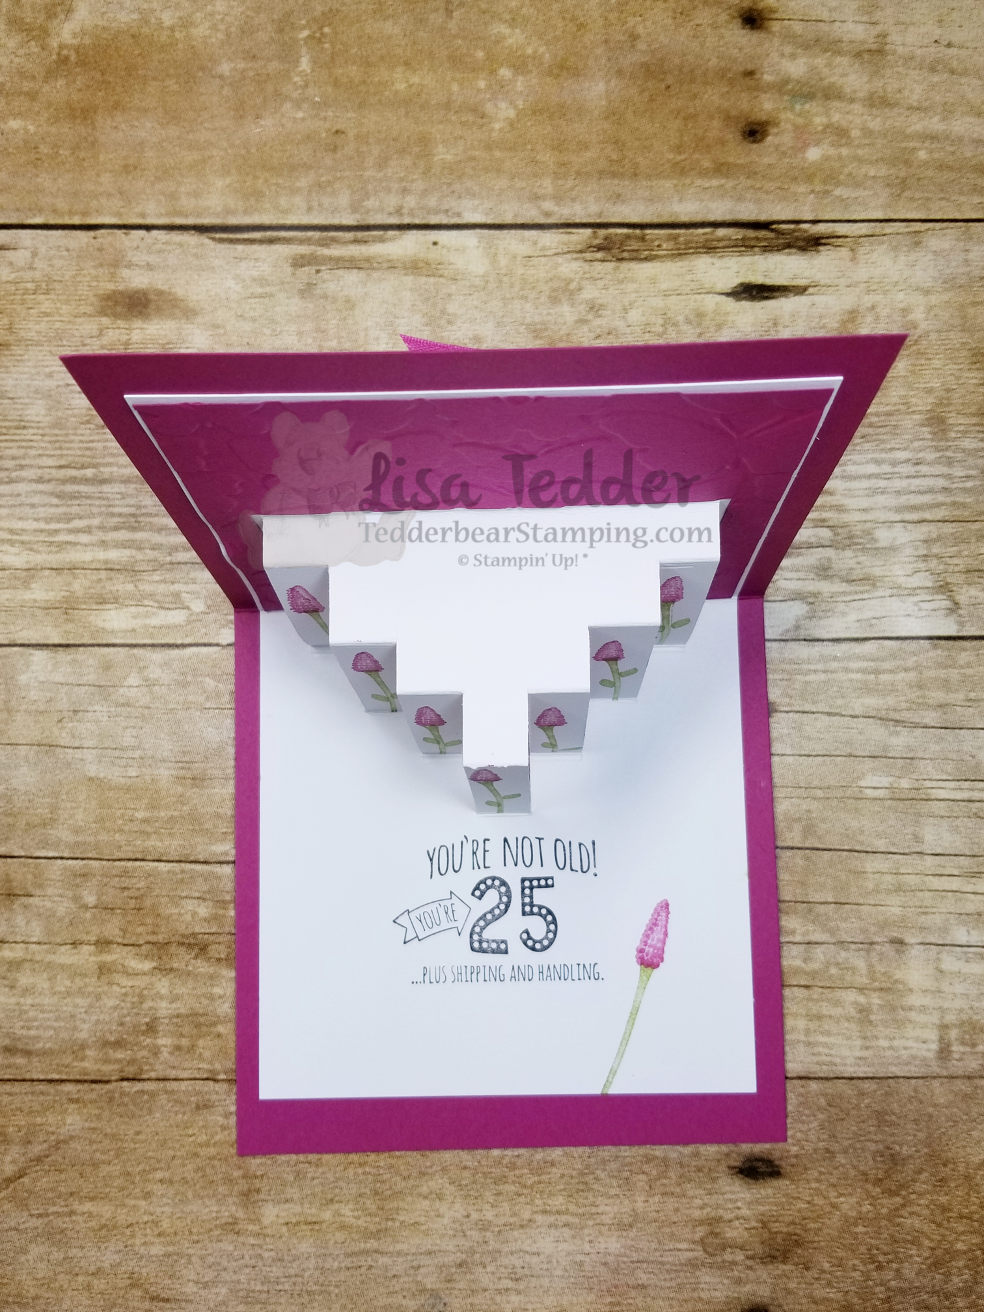
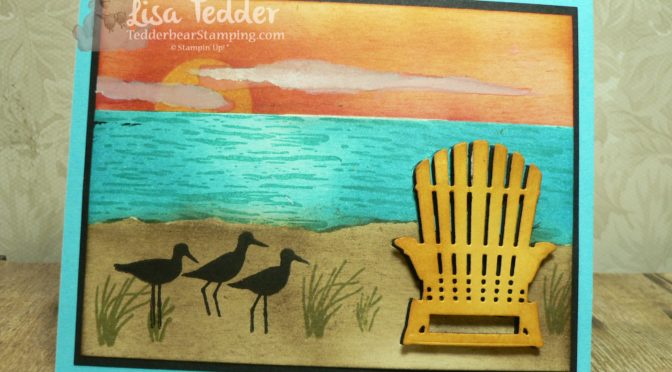
Here is my card:

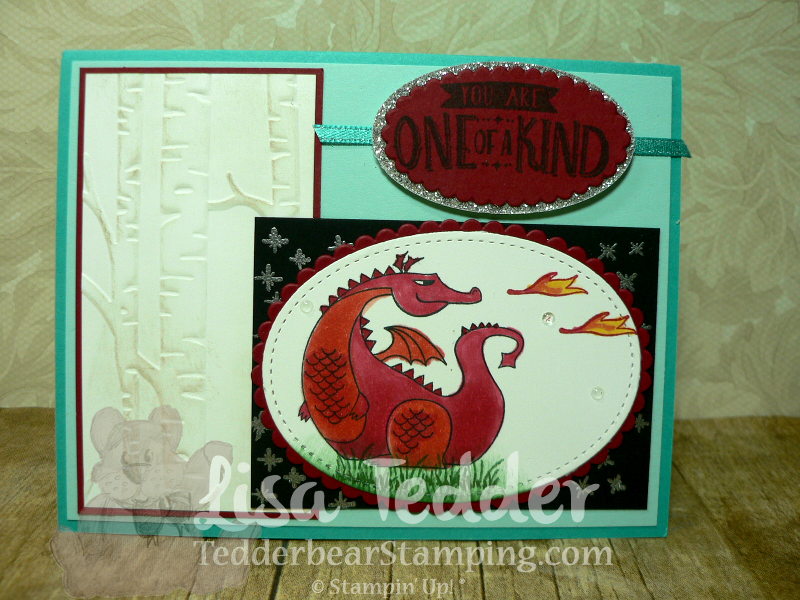
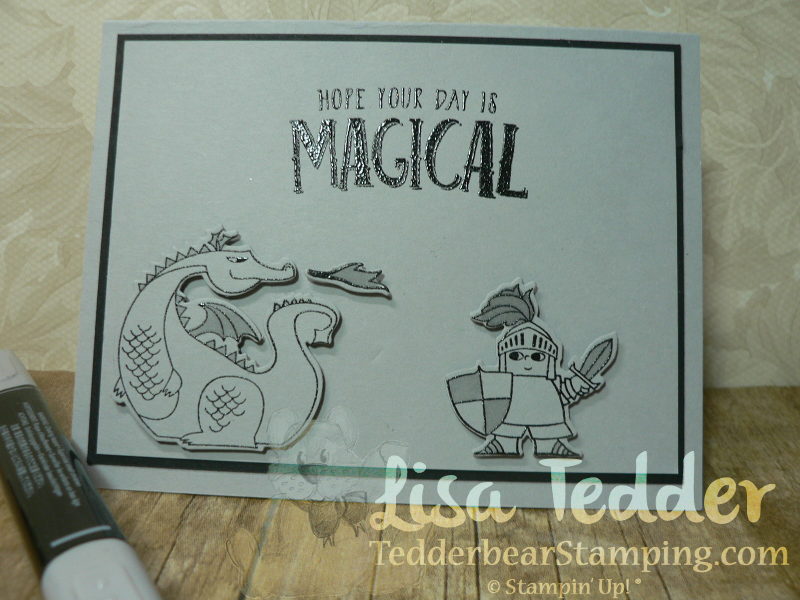
I think I love this stamp set so much because it reminds me of Disney and being a kid.  Below I will have all the supplies listed to make this card, just click on any of the pictures to be taken to my OnLine Store.

I also used the Stamp set In the Trees by Stampin’ Up! for the grass under the dragon.  I stamped the ‘Magic stars’ in Versamark on the Black and then embossed it with Silver Embossing powder.  I thought it added just that right sense of MAGIC!!

The dimensions for this card are as follows:

Bermuda Bay Base: 8 1/2″ x 5 1/2″
Soft Sky: 5 1/4″ x 4″
Cherry Cobbler: 2 1/8″ x 3 7/8″, scrap for scalloped Ovals
Whisper White: 2″ 3 3/4″, scrap for Stitched Shape Oval
Basic Black 2 1/2″ x 3 1/2″
Silver Glimmer Paper: scrap for Oval

I hope this helps you if you want to recreate this card!  I had a lot of fun making it!

Lisa Tedder
A California Girl living in North Carolina
Product List


Technique Tuesday-Making a Diamond pattern background

Today is Tuesday!  That means that I have a video out today showing another Technique!  Today’s Technique is making a Diamond pattern using the Simply Scored and sponging to highlight those scores.  It came out so pretty!  Surprisingly a very easy background!  I used the Fine Tip Glue Pen on each point that intersects and then added Silver Glitter.  You can see the video here!

I also used the FREE ribbon from Sale a Bration that has THREE different ribbons!  If you need one of the catalogs, just let me know and I will get it out to you!  You can also get the new 2018 Occasions catalog!  I send out mailings once a week, so just ask!

The inside is pretty too!  I LOVE the new Stamp set from Stampin’ Up! called Magical Day!  It really brings out my inner child!

Isn’t that Dragon too cute!?  I colored the wings and the parts of the Knight with the light Smoky Slate Blends!

I hope you enjoyed my post today!  Stay tuned, I will be sharing this months cards throughout the month!

Click on any picture of the supplies I used below and you will be taken to my OnLine Store!

Lisa Tedder
A California Girl living in North Carolina
Product List

Technique Tuesday Cascading Steps

YOU are in for a Treat!  Today I am sharing with you my latest Technique!  To see it done, go to this video on YouTube!

The reason I am so excited is because I have only seen this ONCE before about 15 years ago on a tv show and I had to remake the instructions according to what I SAW. There were no instructions anywhere!  So after about a week of trial and error, I remade the design!

Here is another view:

And from the top:

Well?  Do I have reason to be excited??!!

Want to be able to print out your own Cheat Sheet?  Well, I have written it down for you!  Click below to print your own!

cascading steps instructions

I have used this design for Palm Trees, Christmas Stockings, other flowers…….Can you think of a Stampin’ Up! stamp set that would work here?  I would LOVE to get more ideas!

Hope you enjoyed my latest technique!  I am always looking for new ideas, any techniques that you would love for me to make a video of?

Click on any of the pictures below to be taken to my OnLine Store!

Until next time!!

Lisa Tedder
A California Girl living in North Carolina

Product List

Technique Tuesday Eclipse

This week I am doing my first video of a 3 part video series where I will do the front first, the Eclipse technique, next week will be the inside – Cascading Steps, and for the final video I will show how to make an envelope for the card!  Stay tuned for all three!

Here is the front of the card:

I’m going to save the inside for next week, but let me tell you that you WON’T want to miss it!  All the measurements for this card are on the video.  This is a fun and easy technique, I hope you check it out!

Click on any of the supplies below to be taken to my OnLine Store!  If you purchase from me I will send you a very nice thank you gift!

Until next time!

Lisa Tedder
Tedder Bear Stamping
A California Girl living in North Carolina

Product List

Technique Tuesday Triple Flap Fold Christmas Card

I love when a project comes together! Click here for a video to see the process It took to make this beauty!  The great thing about the video is that I tell you the dimensions and supplies!

I was spending time on YouTube the other day and found this great idea from Dawn, which you can see here.  I loved the idea, but didn’t have her Halloween stamps, even though I LOVE Halloween (need to have new ideas every year for scrapbooking!).  So, I DID have the Christmas stamps from Stampin’ Up! called Father Christmas (I used EVERY stamp!, WooHoo) and Nature Sings.  These Stamp sets are PERFECT for my idea!

When do you use every stamp from a stamp set on ONE project?  I did for this one!  Not sure WHY I am proud of this, but I am.  😉

Here is the project closed:

Partially open:

And now all the way open!:

Isn’t this pretty!?  What I love is other than the front where I colored, there isn’t anything else that needs that much attention!  I DID sponge all the Vanilla pieces but I pretty much sponge everything so this wasn’t a big deal to me.

When I showed this around, I got so many Ooooooh’s and Aaaaaaaah’s!  LOVE when that happens!  Now the question: Who do I send this to?

The next question is what will be my technique for NEXT Tuesday?! Any suggestions? I have a great idea, not sure if I will go with that idea or one YOU give me!

You can click on any of the supplies listed below to be taken to my OnLine Store!

I hope you like this technique, I would love to see a ‘story’ you would like to create using this Fancy Fold!

Until next time!

Lisa Tedder
Tedder Bear Stamping
A California Girl living in North Carolina

Product List

Ghosting with a Twist Technique Tuesday

If you like this card, look below and see how you can have me make you one!  Go to this video to see how this card was made!

I see the ‘Ghosting’ Technique all over, and I wanted to do this with a Twist!  I made a Beach landscape card, and wanted my chair to have a shadow, or ghosting effect, BUT I wanted to be able to see the water and sand behind the chair.  The thinlit from SU!’s Seasonal Layers cuts the entire chair out, and that would leave a BIG hole in my beach scene!  :-O  Can’t have that!!  So, I die cut out 2 images of the chair, one in Crushed Curry and one in Black.  Plus, I had to die cut out the chair directly from my scene!

Once the card was made, I cut out the chair which left a BIG hole in my card, so I had to remake my background on scraps of Very Vanilla to match the colors that I already had on my card.  This is much easier than you would think…….just sponge the colors you used onto Very Vanilla and stamp the waves for the water, tape them onto the back of your card.  It’s that easy!!  Then you will still have the outline to place a black chair, and it will be flat to the card, it looks just like a shadow!

Here is the view of the entire front!

Isn’t this pretty!!?  If you want to see this card from start to finish, just visit my YouTube Page to see this awesome Ghosting with a Twist Technique!

As always the supplies are listed below, just click on ANY picture to be taken to my OnLine Store!  IF you purchase from me using this Hostess code: WNUY3EBP, I will make YOU this card and mail it to you!

Be sure and subscribe to my YouTube channel so you won’t miss the next Technique Video!

I’m off for now!!

Lisa Tedder
TedderBearStamping
A California Girl living in North Carolina

 
Product List